What is the technology for manufacturing wooden stairs in an industrial environment? In the article, we explore the order of work and the materials used. It is clear that when building with his own hands, the reader will hardly have the described tools and capabilities; however, this fact will not make our tour of the production less fun.

Wood
To make a wooden staircase, you need to start with the preparation of the material.
What types of wood can be used?
- Spruce, pine and larch - for budget solutions... These rocks have a relatively low mechanical strength; a large amount of resin and not too pronounced texture also do not add points to them.
- Birch, which belongs to semi-hard species, is somewhat more durable: it is from its wood that the handles of hammers, axes, sledgehammers and shovels are often made... However, it is also a budget material with all the ensuing consequences.
In addition: structural elements made of birch are necessarily protected with antiseptic impregnation and varnish. The instruction is due to the fact that birch rots very easily in humid air.
- The most interesting are hardwoods: oak, ash, cedar, beech and maple... The beautiful texture is combined with the highest mechanical strength. It is clear that the price of wood of these species is the maximum (read also the article DIY ash ladder).
- For decoration, types can be used that, with a fairly medium hardness, are distinguished again by the texture or color of the wood: teak, walnut, cherry, cypress.
Bearing elements, steps, fencing, and decorative elements are demanding not only for the species, but also for the quality of the wood. Gnarled and cross-laminated wood is unsuitable for them.
Tools
What tools are needed for making wooden stairs in small series? Recall: we are not talking about handicraft production, so we will forget about a hacksaw and an ax for now.
An important point: the raw materials for the production we are describing are ready-made glued furniture boards. The glued construction is more bending and crack-free. Full-cycle production - from edged boards - is more complicated and requires much more expensive equipment.
To make steps, risers, stringers and bowstrings, you will need:
- Panel saw machine. They cut wood (more precisely, a glued board made of it) into rectilinear blanks.

- The band saw machine allows you to cut curved elements from the shield.
- Milling is necessary for profiling them (for example, for rounding off the edges of a step).
- Drilling and grooving will allow you to drill holes in the steps and select the grooves in the bowstrings.
- A surface grinding machine is needed for finishing the staircase elements.
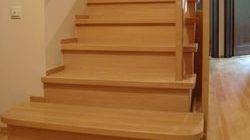
- Making wooden steps for stairs will be more convenient with a grinding and sizing machine.
In order to make curly railings, you need a trimming and four-sided machines.
Balusters and lead posts will require the use of a lathe. On it, you can carve shaped elements that have axial symmetry.
Finally, a paint booth will make it easier to paint your staircase elements.
Technology
What are the steps involved in making a wooden staircase on stringers or bowstrings?
Preparation of raw materials
Listing the necessary equipment, we were cheating a little and mentioned only what is needed to make stairs from a ready-made glued board.
In this section, we will describe its production - a rather curious process.
- Thick edged board in a drying chamber is brought to a moisture content of 1-6%.
- Then it is calibrated in a four-sided machine, acquiring the correct shape with smooth surfaces.

- The workpieces are driven through a thicknessing machine, where with circular saws they are cut into lamellas - thin and narrow strips of wood, which, after gluing, will form a shield.
- The lamellas are sorted; if necessary, the defective areas are cut out manually with a cross-cut saw. At large enterprises, programmable automatic equipment is responsible for troubleshooting. The output is short workpieces without defects.
- Toothed spikes are selected at the ends of the blanks. Then they are coated with glue, after which the blanks are spliced into a long lamella free from defects, butted to size.
- The lamellas are calibrated, after which they are coated with glue and assembled into a shield. After drying under the press, the board is formatted in length and width on a cutting machine.
- The last stage is calibration and final grinding of the finished shield with the given dimensions.
Making ladder blanks
We have already listed the machines necessary for cutting steps, bowstrings and stringers from the finished shield. Balusters and handrail are made of solid timber.
A couple of points are curious:
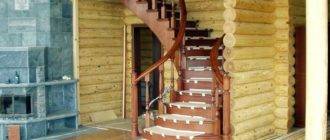
- Bowstrings and stringers are often cut according to a pattern from the board, after which they are jointed and glued under pressure. First of all, this applies to curved products.
- Lathes used to make balusters are complex programmable devices that perform most of the operations in automatic mode. Making fifty identical carved posts by hand ... let's just say it's not easy.

Pre-assembly
Pre-assembly is carried out in the assembly shop at a stand with calibrated dimensions and positions. As practice shows, it is better to make curved elements with correction of size and shape in place.
A completely finished set of elements is kept in a room with constant humidity for 10 days and only then is sanded. Exposure allows you to get rid of the internal stresses of the wood.
Painting
Finished elements are varnished.
The order of work is as follows:
- The wood is tinted with stain.
- Then the surface is covered with two layers of primer with intermediate sanding, removing the raised pile.
- The next stage is the actual varnishing in three layers, again with intermediate sanding.
- The last step after applying the final coat of varnish is re-drying in the chamber at a constant temperature. Thus, the manufacturer is insured against deformation of the parts.
The finished ladder is packed and delivered to the site, where it is assembled within 3-4 days.

As usual, the video presented in this article provides additional information on this topic.
Good luck in your endeavors!