The porch of a log house is not just an entrance with steps, but a whole architectural structure in harmony with the overall structure. Therefore, its construction should be approached at least with an understanding of the general principles of this process. We will consider them in this article.

General Provisions
Let's first figure out why a porch is needed in order to motivate the seriousness of the approach to its installation.
Appointment
- Ease of lifting... This is, of course, the most obvious feature. After all, all properly built houses have an elevation above the ground, and jumping into it is not very convenient, and for some people it is completely impossible. Several convenient steps with handrails will make the ascent easy and safe.

- Preventing street dirt and dust from entering the house... Most of the garbage that can be brought in from the street lingers on the porch, not getting into the living quarters. Closed versions provide even additional protection from wind and cold.
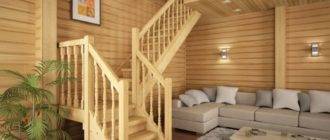
- Completion and accentuation of the architectural style of the entire building... It should be borne in mind that it is the porch that first meets the guests, therefore its aesthetics plays a very important role in the interior of your suburban area.

Views

Several of the most common designs can be distinguished:
| Porch name | Description |
| Simplified | Wooden platform with several steps. The most elementary design for DIY installation. |
| Affiliated | Complemented with railings, awning and balusters. It is the most common option when arranging suburban areas. |
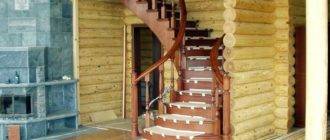
| Built-in | They are designed and erected simultaneously with the house, representing a rather complex version of the structure. |
| Patio | It is a whole veranda, and in some cases even an attached gazebo with all the necessary attributes. There is enough space on such a porch to accommodate chairs and a table, making it possible to spend a good rest. The price of such a building is correspondingly the highest. |

Mounting
Now, directly, let's figure out how to attach a porch to a house from a bar on our own. Let's start with the preparations:
Necessary equipment
You will need the following materials:
- Beam 150x150 mm.

- Floorboard for steps and platforms.
- Visor board.
And the tools:
| Name | Appointment |
| Hammer | Hammering in nails |
| Hacksaw | Cutting boards |
| Shovel | Burying support pillars |
| Nails and screws | Fixing structural elements to each other |
| Spirit level | Controlling the horizontal and vertical of the building |
| Roulette | Taking the necessary measurements |
| Pencil | Applying the required marks |
| Screwdriver | Tightening self-tapping screws |
Tip: An electric jigsaw is recommended for cutting boards. This will greatly speed up and simplify the task.

Foundation
For our case, we will choose the pile type of foundation:
- Near the doorway, we dig two holes about one meter deep at a distance of at least 120 cm from each other, this will be the width of the future porch.
Tip: if you have a drill of a suitable diameter, you can use it. It is much cleaner and faster to work with.

- We process the lower part of the beams with a bituminous solution and wrap it in roofing material. This will avoid premature decay.
- We immerse them in the ground and bury them, compactly tamping the soil.
Tip: It is recommended to pour concrete on the foundations of the beams.
This design will be much more reliable and durable.
- Cut off the upper part at the desired level, controlling the cut with a spirit level.
Bowstring

- We select two identical boards.
- We mark triangles on them, one of the sides of which will be equal to the future tread, which is 270-320 mm, and the other - a riser equal to 150-180 mm.
- Cut out the triangles, and as a result, we get two kind of "half-trees".
- We install each product with the processed side up with one edge on the pile and fix it with nails or self-tapping screws. To increase reliability, you can grab the connection with corners.
Steps and railings

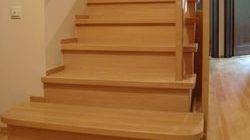
- We take boards corresponding to the intended width of the treads and risers and cut them to the required length.
- We fix them on the bowstrings with nails or self-tapping screws, controlling the process with a spirit level to avoid possible irregularities.
- We install racks under the railing at the top and bottom of the stairs with a height of 70-90 cm, then we attach them from above.
- We treat the resulting structure with antiseptics.
Canopy

The canopy is mounted 30-40 cm higher than the door. The shape and material are usually chosen the same as that of the roof of the house itself, in order to match the same architectural style. Only the slope is made greater in order to avoid the accumulation of atmospheric precipitation.
Output
The porch can have a different design, but in any case it fulfills its main tasks. We've seen how to make a connected wood model in-house. The whole process is quite simple and differs little from the assembly of any other structures from a bar.

The video in this article will provide additional information. Remember, the porch is the face of your home.