It is impossible to imagine any two-storey house without a beautiful and comfortable staircase. Often, there is no money for a professional craftsman or the purchase of a ready-made structure, and then the only option is a staircase in the house with your own hands. In this article, you will find step-by-step instructions for calculating and constructing a convenient ascent to the second floor.

Choosing the type of stairs
A staircase in a private house - made with your own hands, usually of three types:
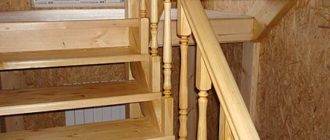
- Marching - the most popular and familiar to everyone design;
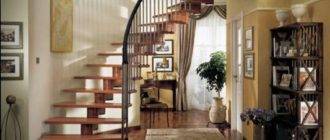
- Screw - takes up little space, but is less convenient;
- On the bolts - fastened to the wall with bolts, therefore requires a solid foundation.
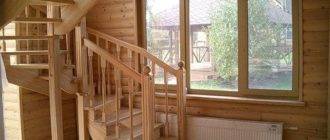
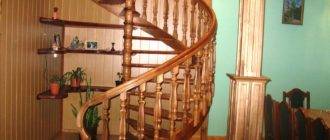
However, they can be made of wood, metal, glass, or a combination of several materials. We will tell you about the simplest and most popular option - a wooden staircase in the house with our own hands, made with a turn in the corner. It is quite convenient, safe, economical, and does not take up much space.

Payment
When designing a staircase for a house with your own hands, you need to decide on the size of the stairs, which should be as convenient and safe as possible to move. The best option is a wide and gentle rise, but it is not always possible to do this in a small house. Therefore, most often, when calculating, you have to proceed from free space.
To find out the main parameters of the future design, you need to find out the following dimensions:
- Ceiling height and slab thickness (from bottom finish to top floor).
- Ceiling height.
- Floor plan of the first floor with dimensions, indicating the beginning and direction of movement. Also, the plan should show possible obstacles: nearby windows, doors, openings.

The width of the tread should be comfortable for resting on it with a full foot, that is, within 20-32 cm. Usually the risers are made 15 cm high, and the width of the tread is 30 cm.If you increase these dimensions too much, then you will lose your usual step, and if you reduce it too much, it will be unsafe and inconvenient to descend.
To calculate the optimal height and width of the steps of the stairs, you need to multiply the estimated height of the riser by two, and then add the width of the step to this figure. The resulting figure should be within 60-64 cm, since this is the average step of a person on a flat road.
The formula for this calculation will look like this:
2a + b = 60-64 cm

Note!
If the size of the room does not allow making a wide tread, then its size can be increased by hanging over the riser.
At the same time, do not forget that you need to leave room for your leg: the tread should not be fixed with an overlap of more than 5 cm, and the distance between the edges of adjacent treads should be more than 10 cm.

The optimum lifting angle is in the range of 24-37 °. Note that the smaller the angle, the more space the structure will take. If the ascent angle is less than 20 °, you can even put a ramp in such a place.
One of the important parameters to consider is clearance. In order not to tilt your head when walking, there should be a distance of 1.9-2 m from the steps to the ceiling.
The width of the march should not be less than the width of the entrance. For a private house, the optimal width is 90-100 cm, in luxury houses it is 125-150 cm.A staircase in a country house with your own hands can be made and less - only 70-80 cm.If you decide to make a spiral staircase, then choose a width of at least 110 cm.
The size of the march should not exceed 18 degrees, if there are more, then it is necessary to provide a site. If the flights are in the opposite direction, leave a gap of at least 10 cm.

Calculation example
Let's say we have 4 m allocated for the stairs, and the ceiling height is 3 m.The height of the risers will be 15 cm. Let's determine the number of steps:
3 / 0.15 = 20 pcs.
Since at the beginning of the second floor the step will not be needed (the overlap will perform its role), we subtract 1 pc. and get 19 pieces.
Now let's determine the estimated tread width:
4/19 = 0.21 cm.
Let's substitute the obtained data into the above-mentioned formula 2a + b = 60-64 cm:
2 * 0.15 + 0.21 = 0.51 m.
As you can see, 51 cm is not included in the range we need, so you need to change the parameters of the steps. Empirically, we select the necessary values:
(3/0,187) — 1 = 15
4/15 = 0,26
2 * 0.187 + 0.26 = 0.634 m.
In total, with 15 steps with a riser height of 18.7 cm and a tread width of 26 cm, we get the optimal value - 63 cm.
Project

After preliminary calculations, you need to draw up a project. It needs to take into account the thickness of the steps, the size and direction of the stringers, their thickness. Decorative elements, posts and balusters can also be drawn for visualization, and the length of the railing and the number of support posts can be calculated.
It is important to make the correct cut of the ladder bowstring under the stringers, otherwise they may just crack if you make them too thin. The photo shows an example of a drawing for cutting a stringer.

The dimensions in the drawing are indicated in the form of coordinates (for example: 105.206), that is, the first digit is set aside from the zero point (0.0 is the lower left corner), and the second is measured from the bottom using a square at an angle of 90 °.
Advice!
When your drawing is ready, make a wallpaper template from it, and attach it to the wall.
Surely you will have small errors in the calculations, so adjust the dimensions in advance, but only by cutting the first (entrance) step, the rest should remain the same height.
Construction of a wooden staircase

Having ready-made drawings in hand, you can estimate how much materials you need. After purchasing them, it is important to wait a couple of days for the tree to adapt to the humidity in the room.
Required tools
To work you will need:
- Level;
- Pencil;
- Square;
- Roulette;
- Ladder;
- Emery;
- Wood glue;
- Jigsaw;
- Milling machine;
- Belt sander.
Also, for easier work, the presence of a circular saw does not hurt. It is not necessary to have all the instruments from the list, you can rent part of it.
Preparation of kosour

- We mark the stringer according to the specified dimensions from its inner side, so that the cut on the front side is clean. A pine board 40 cm wide is well suited for this.
- Next, we cut the kosour with a jigsaw and mill the outer edges along the bottom. We choose the rounding at our discretion.
- Then you need to manually grind the stringer in the places of the cuts, first with sandpaper No. 8, and then No. 4.
- Then you can completely process the steps and kosour with a belt sander, first with a sandpaper with a grit of 100, and then 180.

Ladder installation
We proceed to the installation of stairs in private houses with our own hands:

- We attach the left stringer from the first section to the wall.
- To attach the right stringer, we will install an auxiliary post.
- Now we expose both stringers exactly in level, measure and make a support post with a groove for the stringer thorn.
- Next, we saw off the riser under the lock and fasten the risers to it.
- Then we fix the second section: first, the wall stringer, and then the outer one. At the same time, we trim the opening with furniture boards and fasten the steps.

- The final stage will be the installation of the fence. To increase the durability and preservation of the tree, you need to treat it with varnish, paint or stain.
- All joints are made with a special glue for wood, in our case it is Titebond.

A few useful tips to help you make a staircase in the house with your own hands, you will be shown the video in this article.
Conclusion
It is not so difficult to make stairs for a private house with your own hands, however, in this matter it is important to correctly calculate before the start of construction, so that later there will be no difficulties during installation.