After completing the construction of the house, it remains to complete the tasks that were left to the last stage. One of these is the construction of a porch and the installation of a canopy above it, which is designed to protect the structure from sunlight and precipitation. The visor is made of different materials, but consumers most often prefer the inexpensive, practical and convenient polycarbonate. In the article we will consider how to make it, as well as the work plan itself in more detail.
Characteristics of polycarbonate
Before learning about the rules for erecting a visor over the porch, let's figure out the advantages and negative features of the material:
| Positive properties |
|
| Negative qualities |
|
Features of mounting a canopy
Traditionally, the visor begins to be installed after the completion of the main stages of construction work. It should also be borne in mind that many people prefer to use foam for wall insulation. This will complicate the installation work, because it is rather difficult to fasten the metal supports of the visor structure to such a fragile material.
However, this problem can be solved using a metal mesh. It must be attached to the styrofoam and then a layer of structural plaster is applied on top of it. The surface prepared in this way will become a reliable support for the installation of a polycarbonate canopy, due to the fact that the load is distributed over the plane, and the canopy itself has a relatively small mass.
Visor project
When designing a canopy, one should be guided by the architectural characteristics of the building and the engineering and geological conditions of the site where it is located. It is necessary to take measurements on the wall where the structure is supposed to be installed. It should be noted on the project the nodes of adjacency, binding of systems and conjugation of structures.
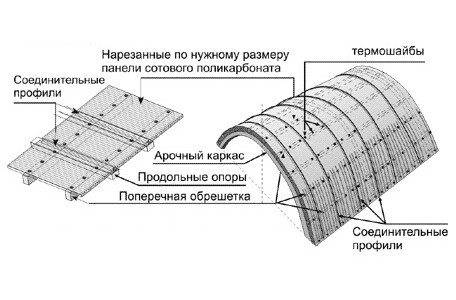
When self-manufacturing, you should consider:
- the amount of annual precipitation, as well as their intensity;
- placement of the structure relative to the sun;
- the strength of the wind.
Tip: Use dual-slope canopies if your area is rainy and there is a lot of snow in winter.
In places where strong winds prevail, it is necessary to use flat canopies with strong fasteners to the wall of the building.
Also, do not forget that the visor must be protected from the effects of harmful UV radiation, which is the cause of the rapid deterioration of the front door.
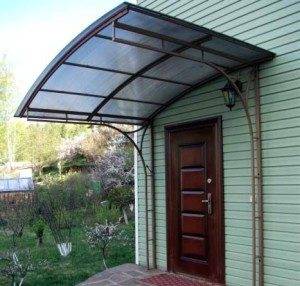
Installation steps
Secure the metal frame to the wall with metal anchors.For a standard design, six pieces are enough; if you decide to make a large design, add more fasteners.
The instructions for installing a canopy made of cellular polycarbonate are as follows:
- Mark the wallto accurately position the canopy on it.
- Attach a wireframe to the markup and determine where to place the anchors.
- Support the structure and fix the frame anchor from above.
- Take a building level and line up, then secure the visor with the second top anchor.
- Drill holes in the places where you want to install the rest of the fasteners and install them directly.
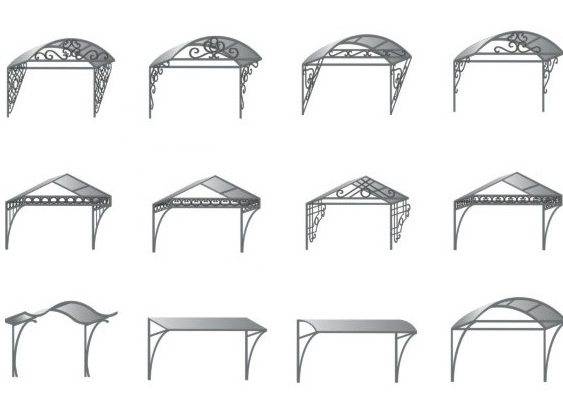
Specialist recommendations
- Install the polycarbonate visor in the direction of the longitudinal stiffeners.
- Install on a slope or vertically, it cannot be done horizontally.
- The length of the pavement can be determined from the longitudinal stiffeners, and the width - from the dimensions of the cross members.
- Transportation and installation of polycarbonate awnings is carried out in compliance with the manufacturer's recommendations.
- It is allowed to transport products only covered with a special protective film.
- The installation of polycarbonate visors must be carried out with tools, fasteners and sealant that are designed specifically for this material.
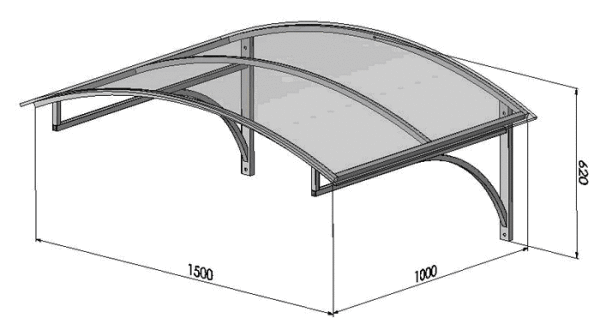
Tip: If you decide not to follow the manufacturer's recommendations, this may cause various product defects.
Output
Installing a polycarbonate visor over the front door of a private house will protect the latter from destruction due to precipitation and sunlight, and will also give a more solid appearance to the structure. You can do the work yourself, using tools appropriate for the material.
Polycarbonate is one of the few materials that is suitable for this type of work. The video in this article will provide an opportunity to find additional information on the above topic.


