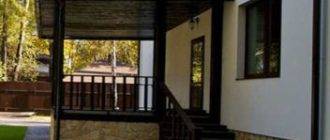
The material for the construction of the site in front of the door to the house must be selected so that the entrance group is not only strong and safe, but also beautiful.A polycarbonate porch in a private house looks very impressive and modern. This option will reliably protect the hall and stairs from precipitation, and will also give the facade lightness and airiness.

Designing the entrance group
The porch is an integral part of any country house or summer cottage. In addition to the functional load, it serves to decorate the home. Entrance groups are made of various materials, but recently polycarbonate is gaining more and more popularity - a two-layer honeycomb plastic, characterized by an excellent appearance, sufficient strength and ease of installation.
Before you start building a porch, you need to decide on a project.
When developing a sketch of this architectural element, pay attention to the following features:
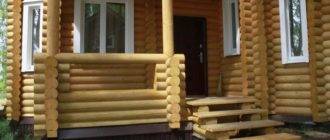
- Despite the seeming lightness of the extension, it must be installed on a high-quality and reliable foundation connected to the base of the house into a single whole in order to avoid subsequent shrinkage.

- The area in front of the entrance should be made secure enough so that, while on it, you can open the door without interference.
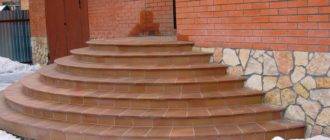
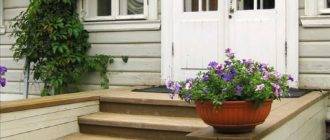
- The ladder must be placed at an angle of no more than 30 degrees, it must have an odd number of steps with a tread width of at least 25 cm.
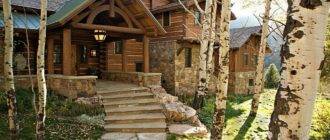
- The dimensions of the visor above the entrance group should be such that the canopy protects the entire structure from rain and snow, and not just the door.

- A fairly strong frame is required. Although polycarbonate is lightweight, the frame must be able to handle the load of the snow on it.
Making a porch
Features of the use of plastic
Consider how to make your own porch from cellular polycarbonate. The classic design, as you already understood, should be equipped with a canopy over the stairs and landing, which ensures the comfort of using the entrance group.
The choice of polycarbonate for the design of the visor over the entrance is due to the following features of this material:
- Due to the special design with stiffening ribs, it bends perfectly without losing its strength characteristics... It is possible to make canopies of complex shapes from it, which allows you to diversify the design of the porches.

- Polycarbonate is very light... This eliminates the need for massive metal structures and pillars supporting the roof. A lightweight frame made of a profiled pipe, fixed directly to the wall, is sufficient.
Note!
Here we are talking only about small canopies above the entrance.
If it is planned to construct a large canopy that protects the terrace or veranda, additional supports cannot be dispensed with.
However, they will not be very massive either.
- Two-layer plastic perfectly tolerates negative environmental influences, including significant temperature fluctuations. Thanks to a special film that traps the rays, it protects from both heavy rain and the scorching sun.
- Polymer installation is as simple as possible... The usual self-tapping screws are used. It is only necessary to install special thermal washers under their caps, which compensate for the thermal fluctuations of the material.

Advice!
The consumer properties of this plastic are so high that it can be used not only for roofing, but also for walls.
So, a closed polycarbonate porch is very popular.
It can play the role of a terrace or veranda.
And thanks to transparency, there is no need to make windows.
When buying, pay attention to quality. There are cheap Chinese counterfeits on sale, the price of which is below the market average. But making a solid porch from such material will not work.
Frame construction
Work should begin with the manufacture of the frame. It is better to make it from a profiled pipe. Individual pieces of rectangular or square cross-section are easier to connect to each other and to attach sheets of transparent plastic to them. Stock up on enough material so that you don't have to arrange for the delivery of additional items later.

In addition, take care of the presence of self-tapping screws with special heads and thermal washers, adhesive tape and an end profile, which are used to shape the edges of polycarbonate sheets after the installation is completed.
You will also need tools:
- Bulgarian;
- welding machine;
- drill or hammer drill;
- screwdriver.
The instructions for making the frame are as follows:
- The lower trim of the visor frame is being made. For this, four parts are taken from a profiled pipe or other suitable rolled metal and welded together in the shape of a rectangle. Its dimensions, as already mentioned, must be selected so that the overhangs of the roof are larger than the area in front of the entrance and the stairs.
- Arcs are made, on which polycarbonate will later be fixed. If you do not have a pipe bending machine, then you can give the parts the required semicircular shape using a grinder.

To do this, on one side of the profile, cuts are made to half the section of the pipe, after which the element is bent. The number of cuts depends on the bend radius. The more - the stronger the bend.
At the end of the work on the places of the cuts, it is necessary to walk through the welding machine.
- The resulting arc elements are welded to the frame. Make sure that the installation is carried out strictly vertically. The usual water level will help you with this.

First, the extreme parts are mounted, and then the intermediate ones. The step is selected based on the size of your future structure. The recommended parameter is 50-60 cm.
- Cross members are mounted. They can be made from the same metal profile or you can take parts with a smaller section.
In this process, it is important to keep the golden mean. If you make a sparse sheathing, the polycarbonate can collapse from the pressure of the snow. And too many installed cross-members will impede the penetration of light, and spoil the appearance of the structure. - After finishing with welding work, all welded seams should be cleaned from scale, and the surface of profiled pipes - from dirt, dust and traces of rust. To speed up the process, you can use a sander with a special attachment.

- The next stage is priming and painting. It is advisable to choose a shade that will reflect the sun's rays and prevent the metal frame from heating up. Ideal is white.

Advice!
If the size of the visor is large, it is recommended to additionally strengthen the frame with corner bevels or kerchiefs.
Installing plastic
Once the frame is finished and the paint has dried on it, the polycarbonate cover can be installed.
There are no particular difficulties here, it is advisable to dwell on only some of the tips:
- The plastic should be positioned so that the internal jumpers are vertical to the ground. This will allow any condensation water to drain off easily.
- When drilling holes for self-tapping screws, use a larger diameter drill bit to compensate for thermal expansion of the material.
- Self-tapping caps must be equipped with special caps and washers.
- The ends of the polycarbonate canopy are decorated with a special strip or adhesive tape to prevent dust, debris and insects from getting inside.
After installing the plastic, all that remains is to fix the visor on the wall or on pre-arranged pillars along the edges of the porch.

Output
Now you know how to make a polycarbonate porch with your own hands. But in order for the quality of the finished structure to be at its best, it will be useful to get acquainted with the secrets of the technology of casting concrete steps and platforms. These are covered in detail in the video in this article.