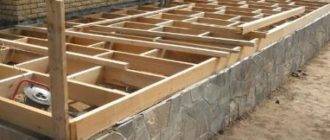
After pouring the concrete porch and drying the concrete, the question arises of how to make a canopy over the porch with your own hands. Without this element, the porch itself looks unfinished, and additional protection of the front door from precipitation will not hurt. The design of such a visor is simple, so anyone can handle the installation.
Visor classification
Depending on the use of materials, such types of canopies over the porch can be distinguished as:
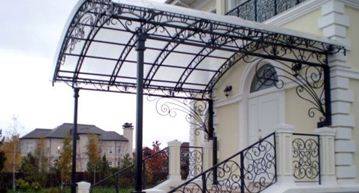
- ready-made polycarbonate models... They are characterized by low weight, high strength and durability, the material is resistant to UV rays. To install such a structure, it is enough to simply fix an elegant metal frame on the wall.
Note!
You can also make a polycarbonate visor with your own hands.
To do this, it is enough to purchase a sheet of polycarbonate, cut it out and bend it according to the desired pattern.
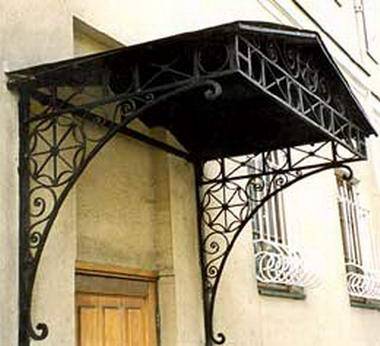
- metal - they are rarely used, because the metal, despite the protection, is still subject to corrosion. In addition, when using sheet metal, the rain noise will be very strong;
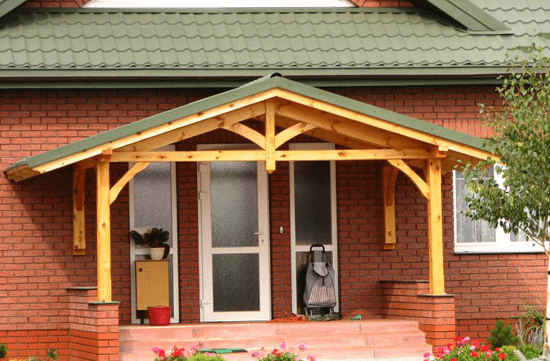
- wooden - the whole structure is made of wood using slate, tiles and other roofing materials. Such a visor looks more solid, you will need to install additional racks, the protection of the porch from the sides will also look appropriate;
- concrete - will require a strong base and concreting of the canopy slab.
You can give a classification in the form:
- single-slope visor - the simplest option, all water is discharged from its surface in one direction;
- gable - the name speaks for itself;
- domed version - this shape will be ideal if the door is located close to the inner corner. The shape of the visor copies the surface of a ball segment and is perfect for installation in the inner corner of a building;
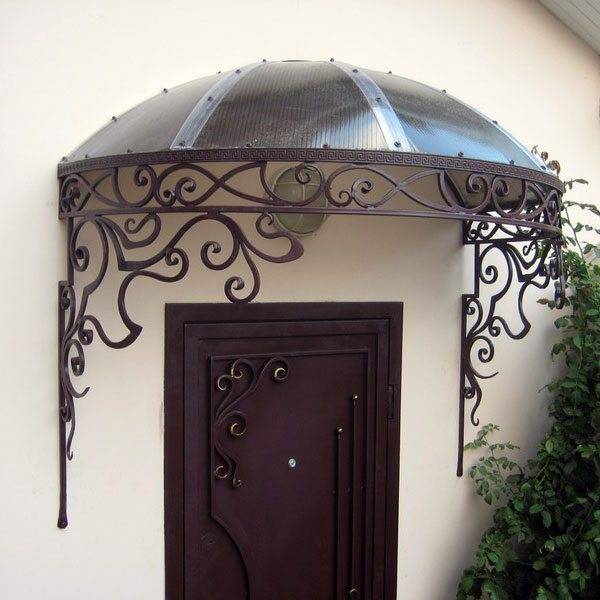
- semicircular and arched version - such forms are used if the material bends easily (polycarbonate, metal).
As for the design, you can highlight:
- homemade structures - both the frame and its sheathing are done on their own;
- modular - a small constructor, everything you need for installation is purchased in the kit (frame elements, sheathing), even the bolts are included. The maximum that is required from a person is to drill holes in the wall and assemble the structure.
Wooden visor from A to Z
For convenience, we will divide the entire process into stages and analyze each of them in more detail.
You can highlight such stages as:
- planning and design;
- preparation of the foundation;
- frame assembly;
- sheathing of the frame with any roofing material or polycarbonate, lightweight plastic.
Design
For some unknown reason, many consider the visor to be a purely decorative element, hence the frankly negligent attitude towards this element, in particular, to its size. Formally, it seems to be installed above the porch, but it cannot protect it from rain or wind, so the value of such a structure is low.

For example, a purchased structure (the cost of a visor above the porch is on average 3000-5000 rubles) has dimensions of about 1.3-1.5 m in width and outreach, that is, the distance from the wall is only 1.5 m.It is clear that it is not protects against streams of slanting rain, wind and sunlight.
Homemade visors are good because they allow you to take into account the design features of a particular house. Its dimensions are usually selected based on the size of the porch itself.You need to proceed from simple logic - the structure should completely protect the front door from rain, and the person on the porch should not huddle against the wall, trying not to get wet in rainy weather.
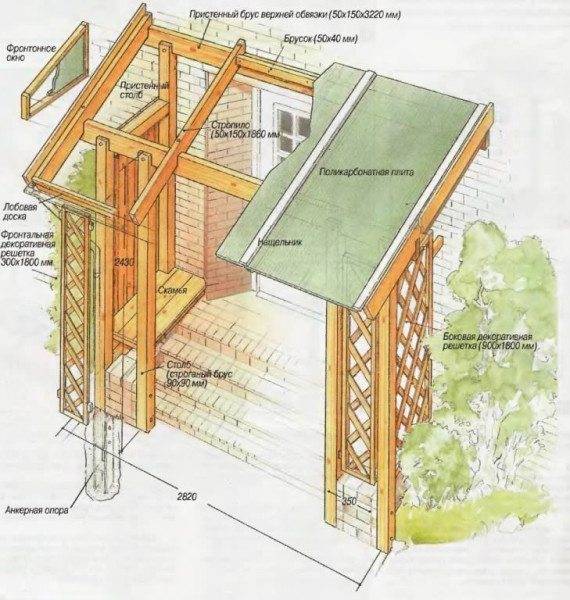
So it is possible to advise making a visor with dimensions exceeding the size of the porch by about 0.5-1.0 m. If the porch is small, then the overlap can be significantly increased. Also, at this stage, it will not be superfluous to draw the contours of the porch on graph paper and experiment with the shape and size of the canopy, it is quite possible that the wooden visor over the porch with your own hands will radically change its shape.
If there are no problems with free space at the house, then it makes sense to think about combining the visor with the veranda. In this case, the canopy also covers several square meters of territory next to the porch, and by arranging a flooring in this place, we will get an excellent place for spending time in the summer. It is also important that the costs will not grow much, the price of roofing materials and sawn timber is not so high.
Preparation of the base
The main difficulty lies in the fact that the tree, despite all the tricks, still rots, and insects should not be discounted.
With regard to the foundation for the frame, 2 approaches can be distinguished:
- just dig the pillars into the ground;
- make a concrete or brick foundation.
You need to understand that racks simply dug into the ground are obviously less durable than those installed on the foundation.
In order to maximize their lifespan, you can advise:
- soak the underground part with any means to protect against decay;
Note!
This part of the rack will not be visible, so any suitable medium can be used, such as used oil, etc.
- it is also possible to wrap the underground part in several layers of thick polyethylene.
The canopy over the porch with your own hands from wood can also be made with a separate foundation for wooden racks. In this case, you can do not even with a strip, but with a columnar foundation - the load from the assembled structure is scanty. In this case, several holes are prepared with a shovel or with the help of an ordinary drill (it is desirable to go below the freezing depth).
Then a sand and gravel cushion is arranged at the bottom. (the thickness of each layer is 10-15 cm). Broken bricks can be used instead of rubble or gravel. These layers are essential for quick drainage of water.

In order for the wooden rack to be protected from moisture, when pouring concrete, the foundation is raised 20-30 centimeters from the ground. And for a reliable connection with the rack, reinforcing outlets with a length of about 10 cm are arranged.
After that, a hole of the corresponding diameter is drilled at the end of the rack, and it is put on the reinforcement, this guarantees the reliability of the connection, you can also fix a metal plate on the top of the foundation and use it to install the rack.

Assembling the frame
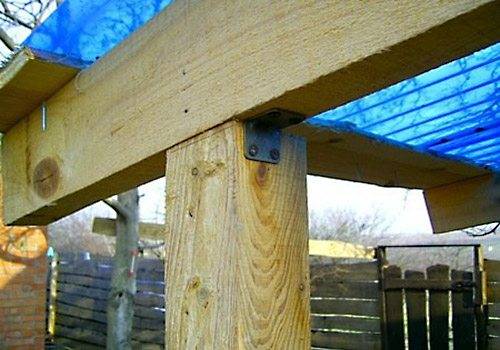
The simplest version of the frame provides for the installation of racks and their combination on top with beams into one whole (in frame construction, the term upper strapping is used). For racks, it is recommended to use beams with a cross section of at least 75x75 mm, and preferably 100x100 mm (the dimensions depend on the size and design of a particular visor).
Note!
In the upper part, it will not be superfluous to strengthen the junction with braces, this will add rigidity to the structure.
In the lower part, you can raise the decorative walls from the same timber or boards by 90 centimeters.
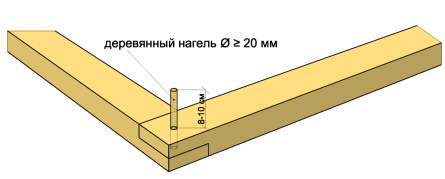
Given that the structure is quite simple and will not carry a large load, the connection of the beams can be done using self-tapping screws and metal corners.You can additionally strengthen the joint with a wooden dowel - this is just a wooden pin that is inserted into the hole drilled in the rack and top harness.
Do-it-yourself gable canopies above the porch must necessarily have a slope from the house to drain rainwater. In order to ensure this slope, a support bar or a sufficiently wide board is attached to the wall and the rafter beams will already rest on it.
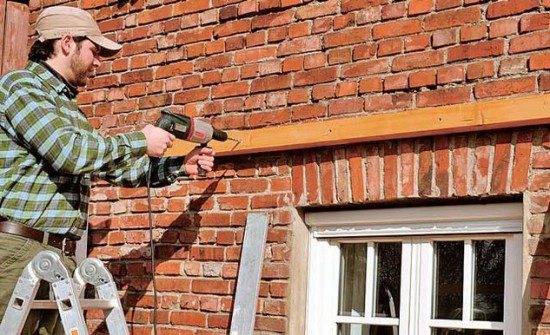
After the installation of the rafter beams, it remains only to sheathe them with crate, after which you can proceed directly to the installation of the roofing material. It makes no sense to lay the lathing planks very often, it is enough to observe a step of 70-90 centimeters.
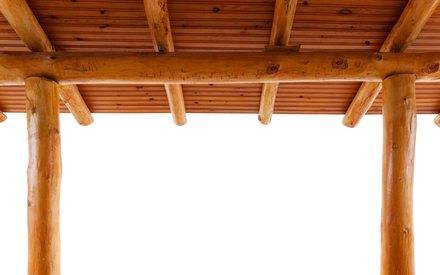
As for gable canopies, such a canopy design over the porch requires the collection of rafter trusses at ground level, which are then lifted up and installed on the frame. In this case, the installation of the support beam on the wall of the house is not necessary.
Canopy sheathing and finishing
Almost any roofing materials can be used for cladding: ordinary slate, bituminous tiles (though you need a solid lathing), polycarbonate, etc. Polycarbonate is good because it skips the sun bill and can be considered an ideal option for a canopy if a veranda is provided next to the porch - there will definitely not be a lack of lighting.
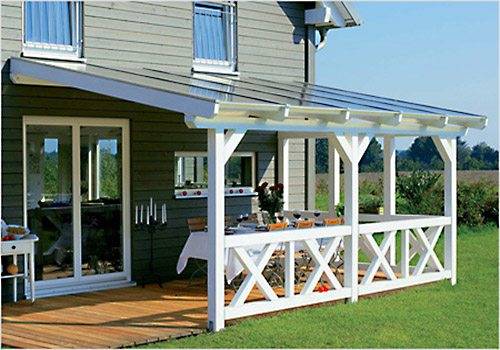
As for the finish, in the case of wood we are talking about a variety of paints and varnishes. The wood is impregnated not only to protect it from the weather, but also to bring out the texture of the wood. If the texture is not amazing, then you can simply paint it in a calm, pacifying color.
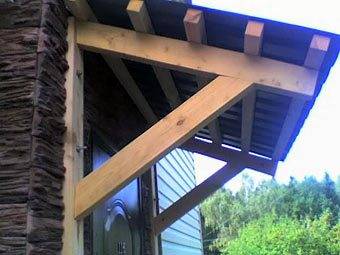
Of course, you can greatly simplify your task and instead of the described design, you can get by with a simple cantilever canopy. This design copies ready-made canopies over the porch - a support part is made, fixed with screws to the wall and sheathed with polycarbonate, corrugated board or any other material.
Summarizing
A wooden porch canopy is a simple but effective way to protect the porch and front door from precipitation, UV radiation and other climatic factors. In addition, this design also looks great, complementing the house as a whole well. The proposed material describes in detail the main nuances of self-installation of the visor.
The video in this article shows the construction of a small wooden shed outside the house.

