Growing gladioli: from planting to leaving
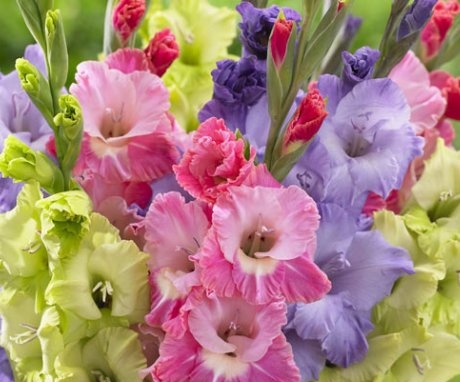
Gladiolus has been known since BC. Then it was used as a talisman bringing good luck. Nowadays gladiolus - one of the five most popular flowers in the world. It amazes the imagination with a variety of shapes and colors.
Content
- Gladioli: description, varieties
- When and where to plant
- Perennial care tips
- Diseases and pests
- Storing gladiolus bulbs
Gladioli: description, varieties
This majestic flower belongs to the iris family. Gladiolus leaves are narrow, long, like swords. This similarity is indicated by the name "gladius", which in translation from Latin means sword.
In Russian, this flower is called "skewer".
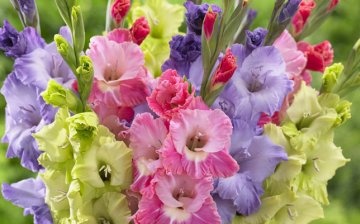
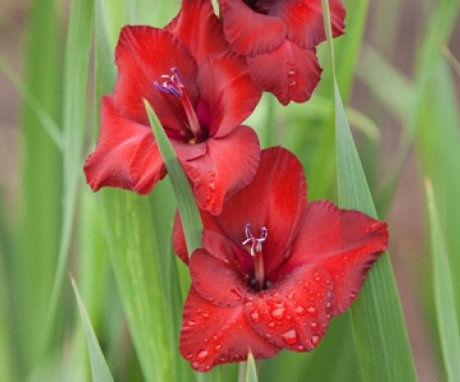
The length of the leaves is from 40 to 80 cm, the color is gray-green. But gladiolus is valued for its flowers. They are located on the stem, forming a spike-shaped inflorescence. One can contain approximately 25 buds. They open gradually, starting from the bottom. Up to 12 funnel-shaped flowers open at the same time.
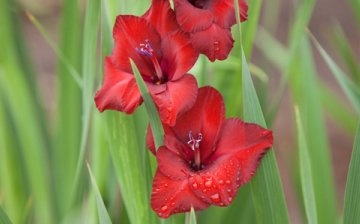
Gladioli grow in the wild. They number 250 species, and there are more than two thousand varieties. There are so many of them that it is quite difficult to distinguish some varieties. Flower gladiolus can be of almost any color except black and blue. Dark red or deep purple are called black. Gladioli bloom for 70 to 120 days.
Indicate one of the main characteristics - the shape of the petals. They may be:
- Simple
- Folded
- Terry
- Dissected
- Corrugated
- Draconic
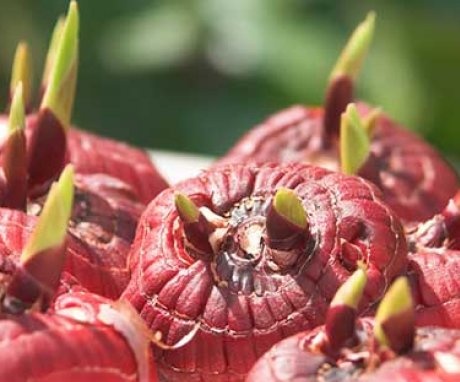
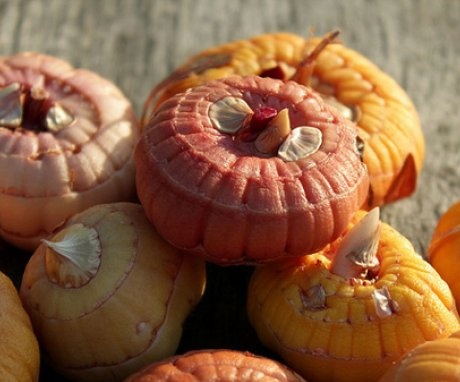
Gladiolus is a perennial plant. But in the fall it needs to be dug out of the ground, otherwise it will freeze from severe frosts. Giving strength to the formation of the stem and flowers, the bulb is renewed every year, growing slightly larger than the previous one. At the same time, it becomes flat. A certain number of tubers ("babies"), small bulbs, are formed below it. Their number depends on the variety of gladiolus. "Babies" are used to get new bulbs.
When and where to plant
For the successful cultivation of gladioli, you need to pay attention to the planting site and the quality of the bulbs. Suitable for them are sunny areas, protected from drafts and strong gusts of wind. Do not plant them on steep slopes. Groundwater should not come close to the roots. An ideal location would be a flat area with natural or artificial drainage. The soil is black earth, loam and sandy loam.
It is better to prepare the soil for gladioli in the fall: make fertilizersdigging up. In the spring, you need to dig up again in order to make the soil lighter. Do not plant bulbs in wet soil. In autumn, fertilize with compost, humus (up to 5 kg / m2), peat compost (10 kg / m2), peat-mineral-ammonia fertilizer (2 kg / m2). You can add 300 g chicken droppings... Superphosphate (60 g / m2) is added in the spring. Fresh organic matter promotes development diseases gladioli.
Prepared for planting and bulbs:
- Two weeks before the expected disembarkation, they are transferred to a room with a temperature of up to 16 degrees.
- Examine, clean from the remnants of scales, remove the affected areas.
- Soak for 30 minutes. in a pink solution of potassium permanganate ("kids" for 15 minutes). It disinfects and stimulates plant growth.You can use an infusion of garlic, which will also protect against parasites. It is good to treat the bulbs with coniferous extract (infusion of needles, filled with boiling water). Stand for 1 hour.
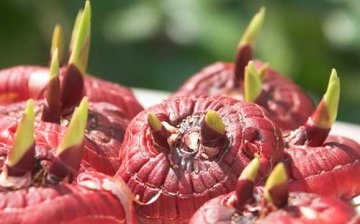
It happens that the early bulbs begin to sprout before planting time. To slow down the process, they are transferred to a room with a temperature of 1 ° C. You can place the sprouted bulb in a peat pot, which will then be planted with the plant. Large bulbs can be cut into parts with a bud and a part of the bottom from which the roots develop.
Gladioli are planted when the soil warms up to 10 ° C.
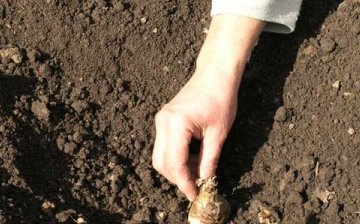
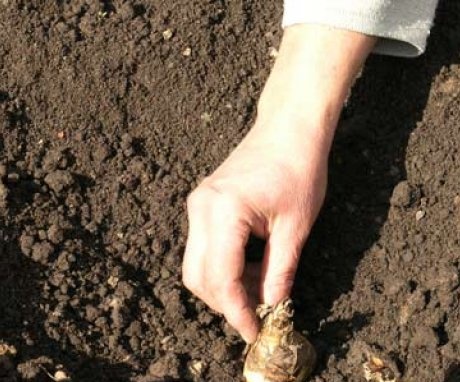
The smaller the bulbs, the sooner you need to do this. The growing season will be longer and they will grow larger. Planting depth depends on bulb size and soil structure. Usually depth landing the bulb is equal to three of its diameters. Large ones are placed at a depth of 12 cm.If the soil is light, then deepened by 15 cm, and on heavy ones, the planting depth decreases to 6 cm.If gladioli are planted in rows, then the distance between the bulbs is 20 cm, between the rows 30 cm.Children are planted much closer to each other. friend.
Gladioli cannot stand transplants... Therefore, they must be planted immediately to a permanent place. After 3-4 years, the bulb degenerates and gives small, ugly flowers. Therefore, it should not be used for disembarkation. Over the years, you need to grow new bulbs from the babies. In order for them to grow faster, after the appearance of the first bud, the peduncle must be removed. When a flower is cut for a bouquet, the bulb also does not waste nutrients on the formation of flowers.
Usually gladioli are grown in order to enjoy their beauty. So that the bulb does not suffer, the peduncle is cut off as soon as the last flower withers. Be sure to leave four sheets. Do not wait for the seed pods to form. After all, gladioli are not grown from seeds, because varietal properties are not preserved. When buying a certain type of onion, it is better to take a not very large one. Pay attention to its shape. Do not take flat bulbs.
Perennial care tips
Watering, especially during the formation of the peduncle (10 l / m2). But they do not allow stagnation of moisture. After it is absorbed, the soil is loosened and the plant is huddled to a height of 10 cm. This will help it to stay upright, withstand strong winds and not break.
You can tie up gladioli, especially tall and large-flowered.
Gladioli need to be fed regularly fertilizers:
- First, nitrogen is used (mullein is diluted with water in a ratio of 1:10).
- Nitrogen in the same concentration, phosphoric (superphosphate 25 g / m2), potassium (potassium sulfate 10 g / m2).
- When buds appear, feed is similar to the second.
- Before fertilizing, gladioli are watered.
A layer of mulch from 3 to 5 cm will help to retain moisture. It will allow air to flow to the roots, and the weeds will not grow. An overdose of nitrogen fertilizers is possible, which increases the risk of bulb rot.
Diseases and pests
Gladioli often get sick:
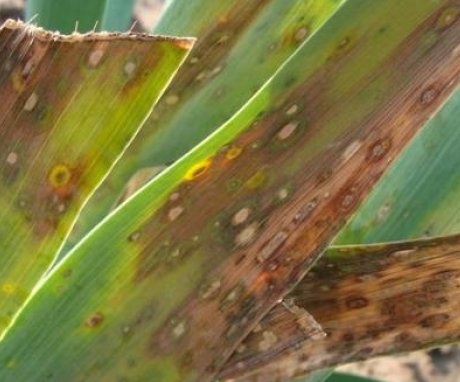
- Fusarium is very dangerous. It is manifested by deformation, yellowing and drying of the leaves. The peduncle becomes soft. Rot spots are visible on the bulb. To prevent fungal diseases, they are treated several times per season. drugscontaining copper, and diseased plants are pulled out and destroyed. The disease is not amenable to treatment with the same means.
- Sclerotinosis is manifested by a change in the appearance of the leaves. They turn brown and dry. The neck rots, then the bulb. For the prevention of fungal diseases, these flowers cannot be planted in one place for several years. It is necessary to improve the structure of the soil. If it is acidic, lime is added.
- The viral mosaic causes the plants to stop growing. The leaves are covered with multi-colored spots, white stripes appear on the flowers. Diseasescaused by viruses are not cured. The diseased flower is burnt by digging it up along with the surrounding ground to prevent the spread of the virus.
- Jaundice is also caused by viruses. Leaves turn yellow, flowers turn green. Sick plants are destroyed.
- Botricosis affects gladioli with high humidity. First all ground parts are covered with spots, and then the bulb. The plant dies from rot. During the rainy season, for prevention, you need to carry out spraying preparations containing copper.
- Bacteriosis manifests itself when preparing bulbs for storage... The disease suggests that the soil was too moist and dense. The sores formed in the lower part are removed with a sharp knife and covered with crushed charcoal.
- Septoria is expressed in the form of red spots with black traces of fungal activity. Watery spots are visible on the bulbs.
If there are signs of a treatable disease, gladioli are dug up as early as possible. The bulbs are dug out one and a half months after the first flower appears. They start with the early ones, then move on to the later ones. Onions that have grown from children are removed last. Trim, leaving 2 cm of stem. Lay out on boards or plywood. Inspect for damage, disease, pests... They are processed in a weak solution of potassium permanganate or chlorophos (20 g per bucket of water).
The main pest of gladioli is thrips. If you notice them, they process:
- Means "Inta-vir" dilute 1 tablet in a bucket of water. The bulbs are processed and dried for a week.
- The water is heated to 60 degrees and the bulbs are placed in it for 10 minutes. then immersed in cold.
- For the prevention of diseases, all the bulbs are kept in a weak solution of potassium permanganate for half an hour.
Storing gladiolus bulbs
Before laying the bulbs for storage, they are dried for at least a month. First, two days at room temperature, then increase it to 35 ° C. Having withstood a week, the temperature is lowered to 20 ° C. The casing is not removed if there is a threat of drying out.
Provide good ventilation in the room.
For storage unripe bulbs use waxing. Dip in hot paraffin for a few seconds, then quickly in cold water. Dried. Gladioli are stored at a temperature of about 10 degrees and a humidity of up to 70%.
Store:
- In a trench 80 cm deep, placing the bulbs in a box and sprinkling them sawdust... Cover with foil and cover with earth.
- In a dry basement with a temperature of 4-7 degrees above zero. Humidity is not higher than 80%. The bulbs are best placed in boxes with holes in the bottom.
- In a glassed-in loggia in an insulated container.
- The apartment is stored in the coolest place. The bulbs are placed in a box, covered with coal, ash or calcined sand. They shouldn't touch each other. By spring, the bulbs dry out a little. Therefore, before planting, they are soaked in a solution of heteroauxin. This is not the best way to store it.
- Onions are placed in the refrigerator, wrapped in paper and placed in a plastic bag with holes for ventilation. They do not hide in the lower section, covered with glass, because there is no ventilation. The condition of the bulbs is checked periodically. If they sprout, they are brought closer to the freezer. The wet paper is changed to dry paper.
More information can be found in the video.


