

How to sprout beans quickly: seed preparation and germination methods


Correct germination beans - the basis for obtaining fast friendly shoots and obtaining a good harvest. The basic rules need to be known both for gardeners planning to grow beans in their summer cottage in the open field, and for those who want to use sprouted sprouts for food as a living source of vitamins. Knowing how to sprout beans quickly, you can get strong sprouts in a few days, which will eventually turn into strong, hardy plants.
Content:
Bean Seed Preparation
Preparation seed beans for germination is quite simple. First of all, you need to carefully sort the seed, removing all shriveled, dry or moldy seeds, as well as removing various debris. After that, you can use one of the germination methods and get strong shoots in a few days.
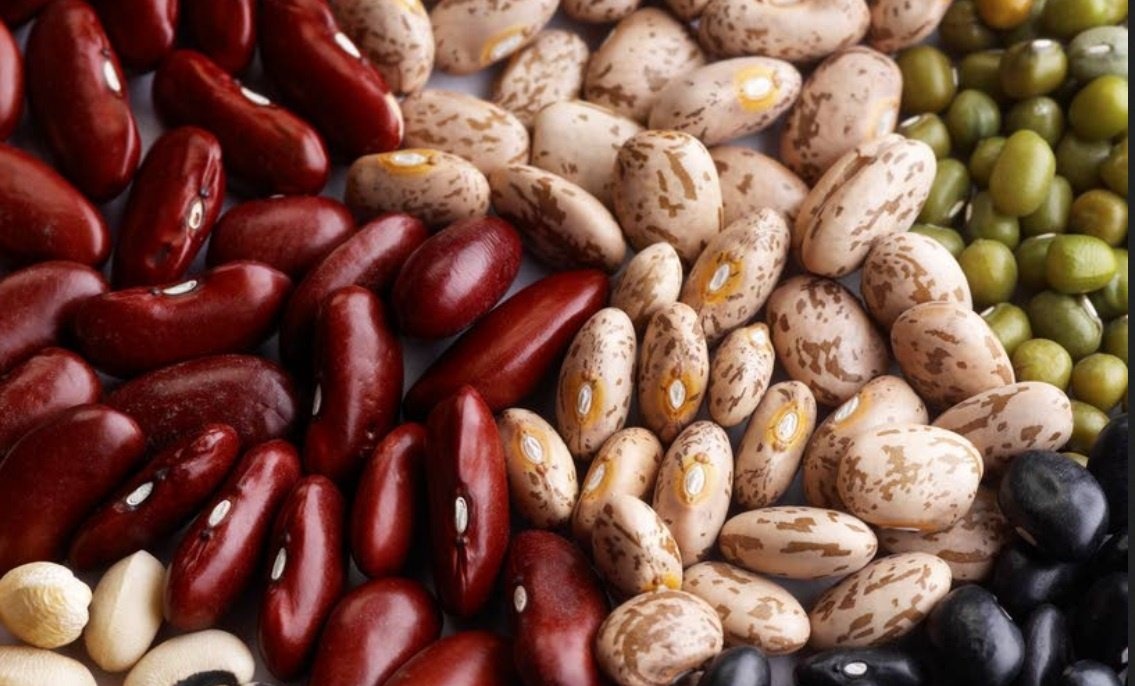
Be aware that not all types of beans are suitable for eating raw, unprocessed. Lovers of raw food and healthy food prefer to sprout Mash beans, as well as Mung beans.
Young sprouts are a real storehouse of vitamins that help improve digestion and strengthen immunity.
However, red should not be consumed raw. beans... It contains toxic proteins, lectins, which can lead to severe poisoning. During heat treatment, they are destroyed, so it becomes completely safe.
The main methods of germination
The methods of sprouting beans are various: but they are all based on one general principle: the grains must be provided with enough moisture and light to soak the hard shell and create conditions for swelling and emergence.
There are several common methods of germination:
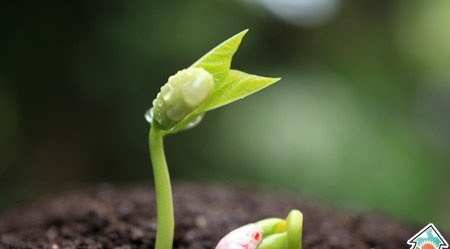
- The beans are placed on a damp cloth or cheesecloth and covered with a second layer of the same cloth. It should remain moist at all times, but the water should not protrude above the surface of the fabric: otherwise, the seeds may begin to rot and will not sprout. To prevent plaque from forming on them, the fabric is periodically washed. Growth stimulants can be added to the water to speed up the cultivation to promote faster sprouting. The first sprouts may appear the very next day after planting, after which they can be planted seedlings into the ground.
- Another easy way for home sprouting beans: The grains are placed in a flat glass container, covered with a damp cloth and placed in a warm place. In this case, there is less risk of allowing excess moisture, and the seeds will not begin to grow moldy due to a violation of air exchange. Sprouts appear on the second or third day, and it will be possible to observe the germination process through the glass. When the size of the sprouts is 2-3 cm, they can be transplant into the soil.
- Growing bean sprouts on cotton balls is a good way to observe how the grain sprouts and how the seedlings begin to develop. To do this, you need to place healthy grains beans on cotton balls, place them in a transparent glass container, moisten with a little water and put in a bright warm place. Within a few hours, the growth process is activated, and the next day the first shoots will appear. It is interesting for both an adult and a child to observe the development of a young plant.
The appearance of a young sprout is always a small miracle that every gardener looks forward to. Observing the germination of beans, you can trace all the basic patterns in the development of a plant. If you want to experiment, you can get the green Mung beans for a first try, which are now sold in any supermarket and are highly regarded by fans of healthy eating.
How to sprout beans for food

Beans are germinated in a special way if you are not going to plant them in the garden, but are going to use them as a useful vitamin supplement to the family table. In this case, you need to get strong healthy shoots, which will become a source of life-giving force.
How to sprout beans for food? The technology is divided into several main stages:
- Germination requires a wide, shallow plastic container with a flat bottom. For example, you can take a container of ice cream or other products. In the bottom it is necessary to make several holes through which the water will drain.
- The container is placed in a deep cup: the bottom of the germination container must not touch the bottom of the cup so that the water can drain freely.
- A thin cloth or gauze is placed at the bottom of the container in several layers, dry beans are poured onto it. First, it must be sorted out so that there is no debris left, and all the grains are healthy.
- The fabric is spilled with water, after which the container is covered with gauze, and it must be placed in a warm, bright place, for example, on a windowsill on the sunny side.
- The grains are watered with warm, but not hot, water several times a day, after which the excess water is drained from the cup.
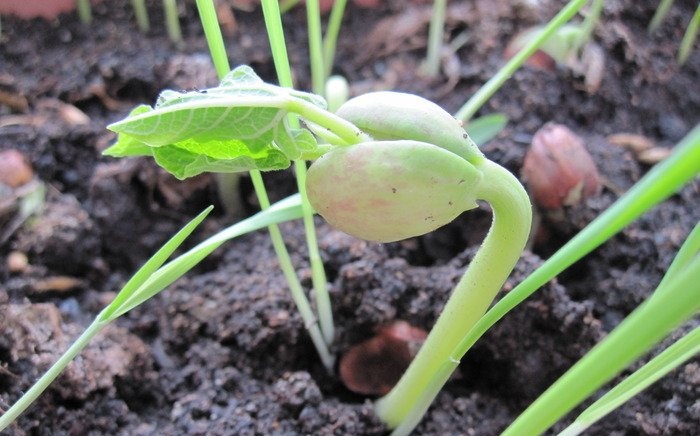
Sprouts appear the very next day after the first glaze, but you need to continue to grow them for a few more days. They are usually ready to eat on day 4-5 when the first green leaves appear.
The skins are removed from the grains and can be eaten raw.
During germination, the reserve nutrients are processed by the grains into useful compounds, which become a source of vitality. They are very useful for humans and are a cure for many diseases.
Bean care rules

Beans - a common garden plant, and many gardeners have worked out the technology of successful cultivation and obtaining a good harvest... If you are going to germinate grains for subsequent planting, you need to familiarize yourself with the basic laws:
- Beans are a thermophilic plant that is very afraid of frost, therefore in open ground at the dacha it is planted not earlier than the beginning of May. She needs to find a bright, open place where the plants will receive enough sunlight.
- Light soil is ideal for beans; it must be thoroughly loosened before planting. Although beans love moisture, water should not stagnate in the soil, you need to take care of the drainage system.
- Seeds are planted to a depth of 5 cm in grooves or pits, a small amount of compost must be placed on the bottom. This will provide the young shoots with the necessary supply of nutrients. Before planting the seeds, the soil is thoroughly spilled with warm water.
- Most of the varieties are climbing plants, so it is imperative to install supports for them. For this, wooden slats are suitable: they are installed at an angle to each other and connected with a transverse crossbar. As soon as the plant reaches two meters in length, the lashes are pinched so that there is enough strength left for the large beans to ripen.
- A month after planting in the ground, the beans need to be fed, for this a complex mineral fertilizer... Its amount is about 40 g per square meter of the garden, fertilizers mixed with soil in the process of loosening the soil. If the weather has been dry, the plants may suffer from nitrogen deficiency. For feeding, in this case, a small amount of bird droppings is used.
- One of the main conditions for obtaining a good harvest is the correct watering... All legumes love water, especially when ripe pods appear. Watering in the beds should be carried out along the aisles: water should not get on the leaves, otherwise the appearance of fungal diseases... It is best to use rainwater for irrigation, and it is advisable to water the plants in the morning. Watering should be infrequent, but abundant: with an average amount of rain, plants are watered once a week.
Growing beans in the country allows you to get a good harvest if you provide the plants with proper care.
In general, this is one of the undemanding crops, and minimal care is enough for it. A large amount of moisture and sunlight is a guarantee of quick ripening of the pods and obtaining a large number of grains.
More information can be found in the video.