Getting to the top floor or attic often requires a lot of effort. This is unpleasant, but it is worth remembering that a comfortable staircase to the attic with your own hands is made in just a few days, and this option will cost less than the one bought in the store. So don't bother with stepladders and side structures, but it's time to get to work!
Today, specialized sites and magazines offer us many projects of attic stairs that you can implement yourself. In our article, we will describe one of the most affordable options that allows you to build a structure in the shortest possible time with minimal skills in working with wood.
We plan work
Stair placement
Before you build a ladder to the attic with your own hands, you need to choose the most convenient place for its installation:
- The best option is when the entrance to the room under the roof is located in a separate room like a small vestibule... This makes it possible not only to equip the stairs with the most convenient dimensions, but also provide thermal insulation. If necessary, the door to the vestibule is simply closed and cold air from the attic or attic does not enter the room.
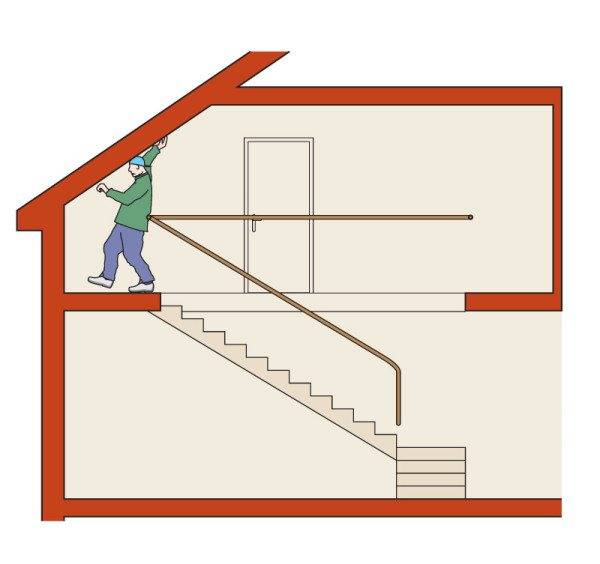
- If there is no vestibule, then the steps should be placed against the far wall of the room.... So they will not interfere when moving around the room, and such an arrangement saves space very significantly.
- If possible, then at the entrance to the room under the roof it is worth making not a millet passage, but a hatch... This detail works in a similar way to a vestibule, minimizing heat loss in the room.
- For most buildings, the best option is to build a single-flight staircase.... If there is absolutely not enough space, then you can equip a helical or two-march structure.
Note!
If you do not plan to use the under-roof space regularly, you can install folding steps that rise to the ceiling and, if necessary, are lowered by means of a special mechanism.
It is quite difficult to make such a system with your own hands, but it practically does not take up space.
Optimal parameters
What requirements should the structure erected by us meet?
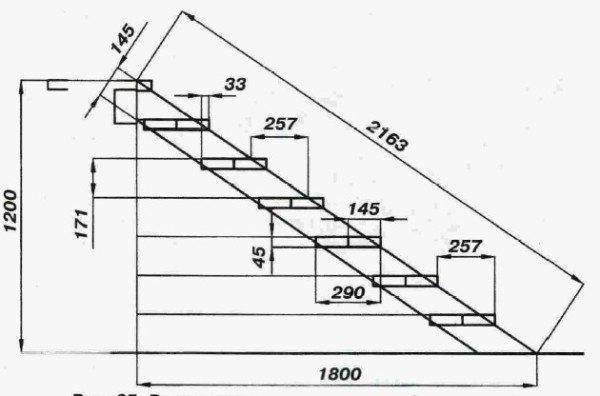
Do-it-yourself typical drawings of stairs to the attic contain the following dimensions:
- The optimum width is from 80 to 100 cm. Handrails must be installed on both sides.
Note!
On one or both sides, instead of handrails, the walls of the room can be located.
In this case, the handrails are not necessary, but their installation will facilitate the ascent and descent.
- We make handrails and railings at a height of about 90 cm.
- The optimal angle of inclination of the lifting part is from 33 to 450.
- The steeper the staircase climbs, the higher the steps should be. The most rational would be to make treads with a width of about 30 cm, and risers - 19-20 cm.
For safety reasons, all open areas must be fenced off. The materials from which the main parts of the staircase and its finishing will be made must be resistant to ignition.
Choosing materials
As a rule, making a ladder to the attic with your own hands involves the use of wood as the main raw material. Metal structures also have a right to exist, however, to implement such a project, you need a welding machine and skills to work with it.
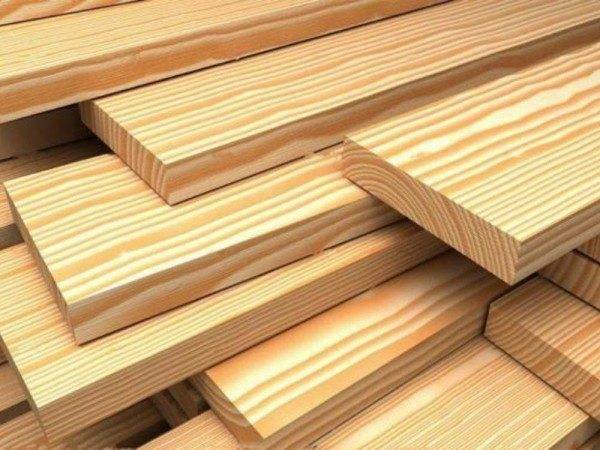
Both coniferous and deciduous species are suitable for the construction of stairs.
Conifers:
- Ideal is larch or cedar.The wood looks great, is easy to process, practically does not rot.
- Slightly worse - spruce. The main difficulty lies in the fact that spruce lumber without knots is practically not found.
- Pine is easy to process, but still its main advantage is its democratic price.
Among hardwoods, oak takes the leading place, followed by beech and ash. (see also Oak stairs - manufacturing and assembly features)
Any wood used for work must be well dried. Before purchasing, check the blanks for cracks, chips, other defects, and also look for signs of damage by woodworms.
Making a ladder
Frame elements
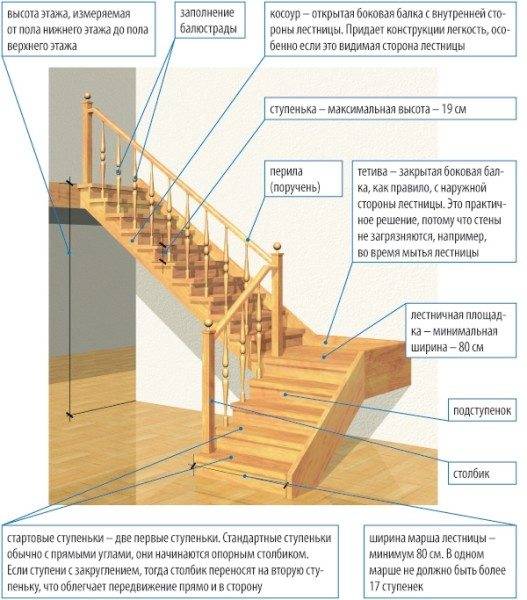
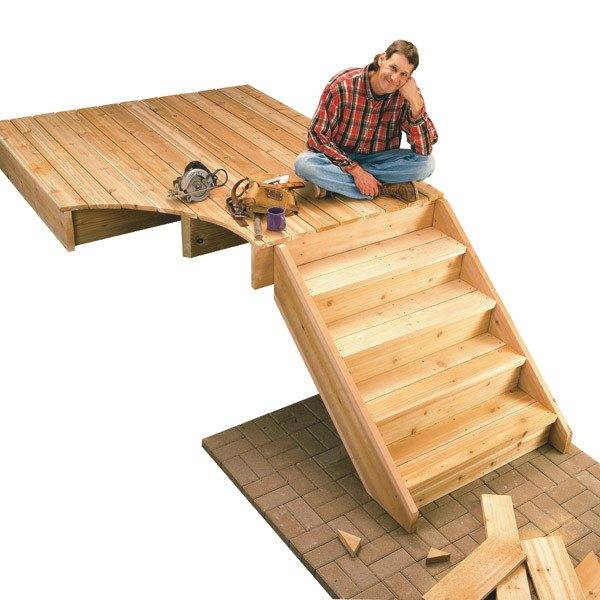
As we noted above, a staircase to the attic floor with your own hands can have a very different design. From the point of view of optimizing labor costs, the easiest way is to install the steps either on stringers with cutouts or on even side bowstrings.
It is these technologies that we will describe in the following sections:
- The kosour (bowstring) is an inclined supporting beam on which the steps are attached. The beam can be either flat or cut for the installation of horizontal parts.
- It is best to put solid boards with a thickness of 50 mm and a width of 250-300 mm on kosoura.
Advice!
A ladder up to 110 cm wide is installed on two kosour, from 120 cm and more - on three.
- We smooth out the workpiece throughout the valley, removing chips and chips. If necessary, use a circular saw or a hacksaw to make cuts for the treads - the horizontal parts of the steps.
- Alternatively, you can propose an option in which grooves are selected in the side surfaces of the support beams, the width of which is equal to the thickness of the step.
- We cut the lower and upper ends of the stringers in such a way as to ensure their installation on the base.
- Risings and treads are cut to size from edged boards up to 25 mm thick. To reduce the risk of injury at the horizontal parts of the steps, we round the corners.
Assembling the structure
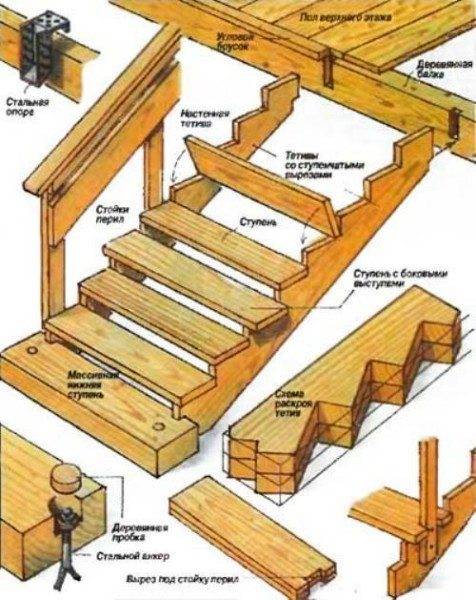
Do-it-yourself mansard stairs are mounted according to the following algorithm:
- First, we put both stringers in the selected opening.
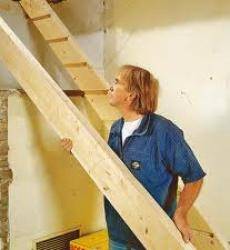
- We fix the lower parts to the rough floor bars. To do this, you may need to dismantle part of the flooring, or equip a small lifting platform.
- For fastening in a rough bar or in a stringer, we make a gash, which will make it possible to rigidly fix the bearing element.
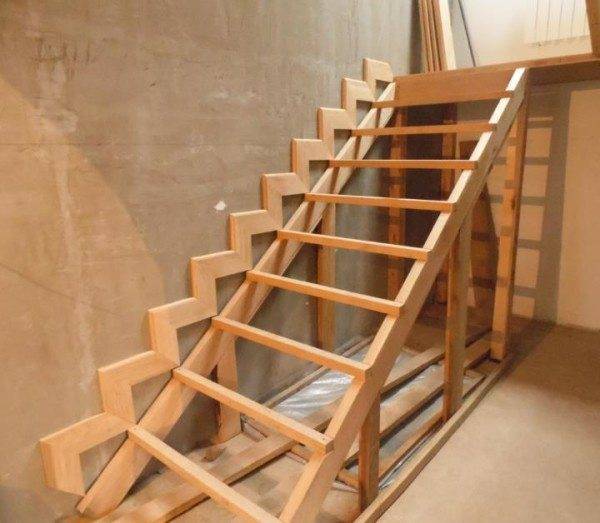
- We attach the upper edges of the beams to the attic floor elements. The mounting pattern is the same as for the bottom edge.
Advice!
When installing the ladder's supporting structure, it is very important to ensure that the cutouts in the beams or the selected grooves are at the same level.
If necessary, the position of the stringers is adjusted using wedges.
We begin to install horizontal treads on the aligned beams:
- If the stringer has curly cutouts, then we simply put the step in place, align and fasten it with a screw "in the secret". We close the screw head with a wood cork, which we then cut flush with the plane of the step.
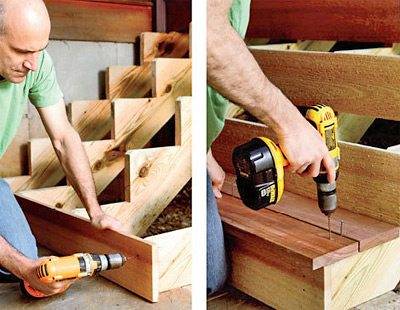
- When mounted on a flat bowstring, the treads are greased with glue and inserted into the grooves. For additional fastening on the side, you can tighten several self-tapping screws.
Some people prefer to leave the attic staircase without risers. In principle, it is a matter of taste, but if you nevertheless decide to complete the cladding, then it is better to fasten the vertical steps of the step from the inside, using special brackets or wooden wedges.
At the final stage, we assemble the railing, if, of course, they are provided for by the structure:
- We mount a fence around the entrance on the attic floor.
- In the upper and lower parts of the span, we fasten sufficiently thick support pillars.
- We lay the railings and fix them, supporting them with balusters installed on the steps.
If the staircase passes near one of the walls, then we simply attach the handrail to it at the selected height.
Finishing
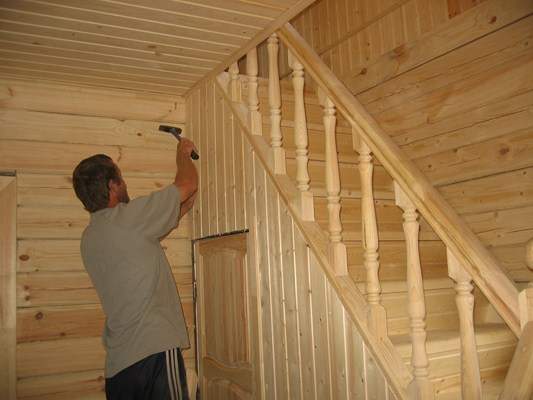
So that we get a beautiful and durable mansard staircase, you should protect it from various influences with your own hands:
- First, we perform a rough grinding of the finished structure.
- Then we fill in all the cracks and irregularities with a putty (if we have not "missed" the dimensions, there should be few of them).
- After waiting for the filler to dry, we perform a fine sanding.
- We remove all shavings and wood dust with a vacuum cleaner.
- We prime all structural elements and, after the primer has dried, either open the wooden staircase with varnish or paint with interior paint.
Output
The question of how to make a staircase to the attic with your own hands has several answers. As part of our article, we have given only the simplest option, but you can choose the design that you like. The work is not very difficult, therefore it should be regarded as an opportunity to acquire new skills. In the video presented in this article, you will find additional information on this topic.

