Vapor-permeable plaster for aerated concrete. Requirements for internal and external concrete plaster
Leading European manufacturers of aerated concrete Masa-Henke, Ytong and Hebel, based on in-depth research, have developed requirements for decorative and protective plaster of aerated concrete walls indoors and outdoors:
- The adhesion of the material to the hydrophobic layer of aerated concrete should be at least 0.2 MPa (the indicator is usually indicated on the packaging of the dry mortar);
- High level of protection against penetration of atmospheric moisture to the base - water absorption of the finishing layer (W) should be less than 0.5 kg / (m2h0.5);
- Vapor-permeable plaster for aerated concrete must have a low vapor-permeability resistance (S) of less than 2.0 m.
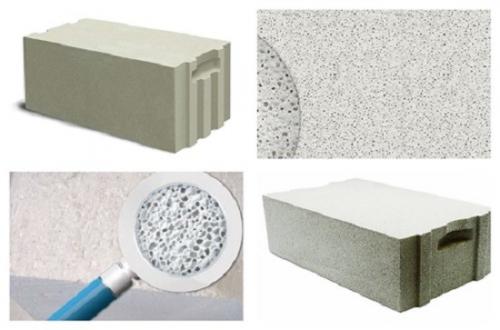
The structure of the foam concrete block
Each subsequent layer must have a higher steam permeability and lower water absorption than the previous one. The coefficient is calculated using the formula:
W × S = 0.2 Kg / (mh0.5) - for interior walls and intermediate coatings;
W × S = 0.1 Kg / (mh0.5) - for building facades.
The sequence of overlaying layers of plaster walls from foam blocks with your own hands,
Internal plasters for aerated concrete
Full alignment of internal walls made of foam concrete and aerated concrete is carried out with cement-lime mortars or polymer-cement mixtures with a large number of plasticizers in the composition. The composition of plaster for indoor foam blocks includes organic plasticizers, which increase the mobility and life span of solutions. For rooms with a humidity not exceeding 60%, finishing mixtures of the following composition are used:
- For the inner surface of external walls made of foam concrete, aerated concrete and for concrete floors - a mixture of lime and Portland cement;
- Aerated concrete plaster for interior work on load-bearing walls, piers or partitions - uses lime as a binder.
Indoor aerated concrete wall plastering technology, video of the sequence of processes:
Important! When self-manufacturing plaster solutions, the compositions for spraying and soil should be sieved through a mesh of no more than 3x3 mm (provided that there are no reinforcing additives), for covering, sieving through a cell of 1.6x1.6 mm is used
External plaster on aerated concrete blocks
Aerated concrete plaster for outdoor use must meet the following requirements:
- The bulk density of the mixture is about 0.8 kg / dm3;
- The size of the filler fractions is 2–4 mm;
- Mobility class of the plaster mixture P1 - the solution is inactive, thick;
- Compression resistance class CS-1 - has significant strength;
- Fire resistance class A1 - non-combustible material;
- Water absorption properties - less than 0.5 kg / m2h0.5;
- Vapor permeability resistance properties - from 10 to 12.
Before purchasing external aerated concrete wall plaster, it is necessary to check the presented figures with the information indicated on the dry mix package.
Self-production
Ready-made specialized dry building mixtures for foam concrete and aerated concrete are quite expensive building materials. You can make an analogue of such mixtures yourself, but in this case, in this case, the base must be reinforced with a metal mesh made of wire rod on dowels or notches are made - strokes 3-5 mm deep with a frequency of 50-70 mm. There should be at least 30 of them per 1 m2 of wall.
The cement-sand mixture is made in a ratio of 1: 3 for outdoor use and 1: 5 for indoor use. As a filler, sifted quartz sand with fractions of 1-2 mm is used, as a binder, Portland cement of at least M400 grade without slag impurities.To increase elasticity, liquid soap is added to the mixture, in a proportion of 25-30 grams. on a bucket of finished composition.
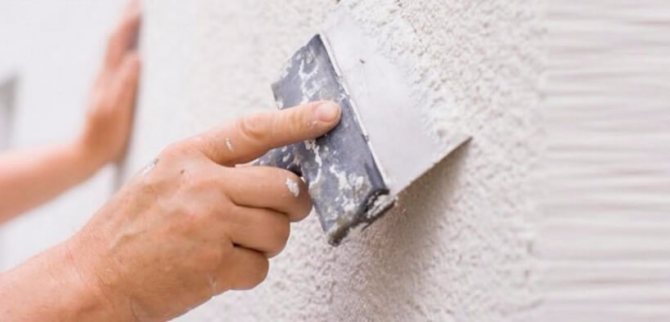
Putty application technology
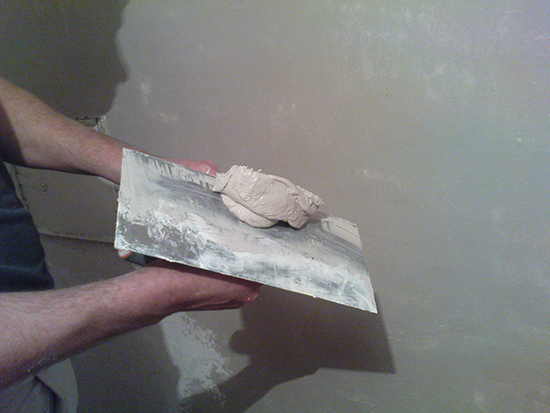
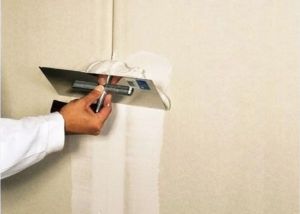 Move the grater with the mixture from bottom to top
It is necessary to putty concrete walls, ceilings and floors in several stages. First of all, you need to prepare the work surface, remove the old coating (peeling paint, plaster, putty), thoroughly clean and degrease oil stains. Cracks in the plane should be widened if necessary.
If it is necessary to close up any defects, we use cement mortar for this and wait until it dries completely. After that, using a construction vacuum cleaner, we remove dust and dirt.
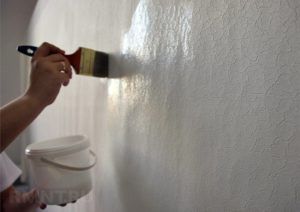 After processing the concrete surface, prime the surface. It is recommended to apply two coats of primer, each layer should dry. It is convenient to apply the primer with a long-haired roller or a wide brush. A spray bottle can be used to simplify the application of the liquid.
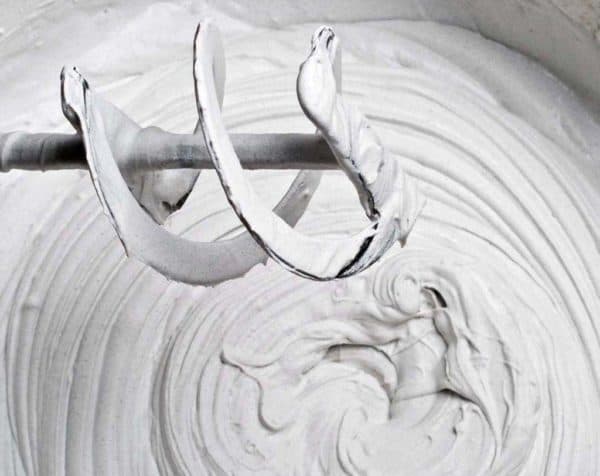
Now you can proceed to the process of mixing the solution. How to make a putty? We take a mixing container (bucket, deep basin), pour water. Usually a proportion of 5 liters of water per 25 kg of putty is taken (1: 5).
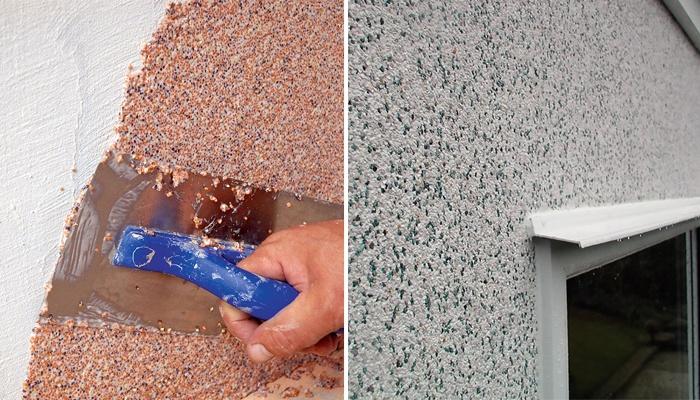
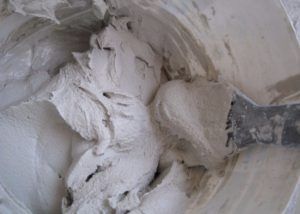 The finished solution is applied by the throwing method
For mixing without lumps, we use an electric drill with a nozzle. We put the mixer in water and start stirring, gradually adding the mixture. The resulting solution must be used within 3 hours after mixing.
The ready-made solution is applied by throwing it onto a plane and further distributing it with a spatula. To make the surface more durable, you can use a reinforcing mesh or fiberglass. After the first layer has dried, apply the second one. In this case, the direction of each subsequent layer changes to perpendicular to the previous one.
Finally, the concrete putty dries up in about a day. At the final stage, we wipe the dried, but not completely dry surface with sandpaper, using a grinder or a special grater. For more information on filling walls, see this video:
All work is recommended to be performed in bright light. This makes it possible to see any irregularities and marks left by a spatula, and to remove defects in time. Only by observing the technologies of working with putties can a perfect surface be achieved. Also, the most important thing is to approach the choice of the material itself with great responsibility, not to miss a single stage in the preparation of the surface and the distribution of the putty itself.
Types of putty
In addition, in this case, small irregularities on the surface can be allowed, but there should not be large flaws that are very noticeable to the eye. Otherwise, the wallpaper will not lay down as beautifully as we would like. And gluing wallpaper on perfectly flat and smooth walls is a pleasure. That is why it is better to try to level the surface as much as possible.
Oil and glue putty
It is a fairly easy-to-use and inexpensive material. It is flexible, dries quickly (24 hours), stays on the walls for a long time. The oil-adhesive composition has long been prepared according to the classic "recipe" based on drying oil, casein glue and chalk. It can be applied to wood, stone and concrete surfaces that have been previously plastered and primed. Perfectly corrects wall defects: cracks, depressions, potholes.
The material is a pasty substance that must be applied in 1-2 layers with a spatula. After a day, the putty surface must be sanded with emery paper to obtain an even and durable coating.
There are different types of oil-glue putty:
- explosion-proof;
- fireproof;
- high-whiteness putty.
The advantages of the material include its hygiene and environmental friendliness. A significant disadvantage of the putty is its poor compatibility with materials that do not contain oil paint or drying oil.Therefore, under the wallpaper, such a putty is not the most suitable option.
Plaster putty
Gypsum plaster is the most suitable material for interior work. It is applied on surfaces made of concrete, brick, gypsum boards, as well as on plastered surfaces. It is used for finishing only dry rooms, as gypsum absorbs moisture well. Various precipitation and excessive moisture have a detrimental effect on the walls filled with this compound.
Find out which is better: to glue the wallpaper or paint the walls here!
Among the advantages of gypsum putty are:
- good adhesion (i.e. adhesion to other material);
- no shrinkage after drying;
- fast drying;
- environmental friendliness and safety;
- reasonable cost and relatively low material consumption.
Cement putty
This material is perfect for finishing damp and cold rooms. After drying, it becomes a tough and hard coating. Leveling, filling cracks on concrete and brick walls - this is its main purpose.
Learn how to apply liquid wallpaper on the wall from this article.
Cement putties are presented in two types:
- rough putty intended for initial work;
- finishing putty used at the final stage;
- decorative putty.
Water-dispersive putty
A worthy place among leveling finishing materials is occupied by water-dispersion putties. They appeared on the domestic market of building materials relatively recently, but, due to their good performance, they began to be in good demand. This type of putty can be applied to concrete, brick, wood, stone surfaces, as well as fiberboard, plastered and painted walls.
When thickening, the putty is diluted with water, dries quickly. It can have improved properties depending on the resins added. For example, putty with synthetic resins is highly durable and dries faster than others.
Acrylic putty
Thanks to the acrylic base, the material is perfectly applied to any surface, making it smooth and even. The putty does not need to be diluted with water, it is sold ready-made and retains its properties for a long time in a plastic container. The paste is easy to apply and spread on the walls. After drying, such a putty does not shrink and crack. Elastic and water resistant, it is able to perfectly align the wall.
What is Liquid Granite?
Polymer putty
One of the newest finishing materials - polymer putty - will help make walls and ceilings perfect for painting, painting under wallpaper, or wallpapering. It is applied at the last stage of rough work before finishing. This type of putty got its name due to the binder, which can be presented in it in the form of latex or acrylic.
As for the material made on the basis of acrylic, it is used only for interior walls and ceilings. Such a putty has a number of excellent properties, among which the main ones are high strength, durability of the surface treated with it. Plus, it is odorless and easy to use.
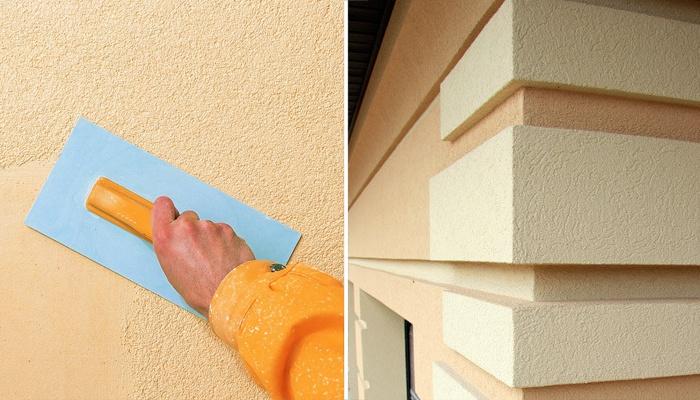
How to properly putty the facade
Let's make a reservation right away, there are two ways to putty the facade: manual and machine. The machine is used to work with large volumes to increase the speed of work. For a private house, of course, this is irrelevant. By the time you get used to the device, the facade will already be finished, and the material will take twice as much as with the manual method.
Therefore, it is advisable to apply the material on your own, using a spatula or a float. Regardless of the method of applying the material, first of all, the base must be prepared: the surface is cleaned of dirt, dust and oil stains, then the priming is performed, which is necessary to ensure the adhesion of the materials.
Ready putty material is mixed before work. If there are significant defects on the surface, they must first be eliminated by filling cracks and cracks with putty. After the patches are completely dry, a continuous layer of material can be applied. Multiple coats should be applied if necessary. It is recommended to sand the finished surface to achieve an excellent result.
Advice. Do not putty the facade in high humidity or in hot weather, when the surface is very hot - this greatly reduces the quality of the finish. Because the putty takes a certain time to dry.
Front putty consumption per 1m2
In order to correctly calculate the consumption of facade putty, you need to decide what composition of funds you are going to purchase. There are two options:
- Starting and finishing putty.
- Universal putty.
Consumption per 1m2 of starting and finishing putty
Starting putty is needed to seal cracks, level out small drops. Its consumption cannot be accurately calculated, since it is necessary to build on the state of the wall. But to grout a medium crack, you will need a layer of approximately 3-4 mm per square meter. Perhaps you won't have to cover all the walls with starting putty, so it makes sense to estimate the area of the putty.
The consumption of the finishing putty per square meter is less than the starting one. Largely due to preliminary priming of the surface. You can navigate by 1 mm.
Consumption per 1 m2 of universal filler
The declared consumption of the universal putty by manufacturers is lower than the combination of the starting and finishing putty separately. Usually, it is 1.5 kg per square meter for a layer of 1 mm. Manufacturers always indicate consumption on the package.
How many mm thick layer you need, everything will depend on the condition of the surface to be coated. Let's focus on the 2mm middle layer.
The universal putty is justified to use on more or less smooth and not prone to cracks surfaces.
Stages of work
It will be impossible to manage with one layer, even a qualified specialist will not be able to cope with such a task. The best temperature for outdoor work is from 9 to 20 ° C, the permissible air humidity should not exceed 80%.
The process of applying the putty is as follows:
The surface is cleaned of excess dirt and old finishes. A primer is placed on the cleaned surface; it must dry before starting the further operation. It is better to prime the surface in two layers. Next, depressions, dents, and cracks are removed. After which the material is allowed to dry out. The putty is applied evenly to the walls, and then gently leveled. As improvised means, it is better to use two metal spatulas of different sizes and a construction float.
Application technique
Process
creating a coating from putty is a simple procedure, so it can
do it yourself. Initially, the preparation of the base is carried out, as well as
a primer is applied. Only then is the putty coating formed.
All the necessary materials and tools are pre-prepared, for which
refers to:
- the right amount of putty;
- primer;
- spatulas, rollers, brushes or spray;
- primer.
At
the choice of tools with which the building mixture will be applied are taken into account
features of the material from which the walls are made, the presence of different transitions and
assigned tasks. If a citizen has enough time to
work, then he can apply the putty with brushes and rollers, which allows
get a thin and even layer.
Preparation
Originally
the walls of the building are checked, and the foundation is prepared. For this
stages are implemented:
- all unnecessary elements are removed;
- the old coating is removed;
- the flatness of the facade is checked;
- walls are cleaned of greasy or oily
stains; - mold or mildew is eliminated when
availability, for which antiseptic solutions are used; - the reliability of the wall is checked, since
if there are crumbling areas, then they will have to be strengthened, and the check is performed
by tapping all the walls with a hammer; - if voids are formed, then they are filled
repair compound or plaster; - leveled surface fanned
brush, and you can also get rid of dust with a construction vacuum cleaner; - as soon as the walls are completely ready
for the upcoming work, it is recommended to apply a primer to the surface.
Primer application
Differently
such a composition is called a primer. It is applied only to well-cleansed
base. The material increases the adhesion of the base to the putty. If the walls
are made of concrete, a deep primer is ideal for them.
penetration. It fills even the smallest pores in the structure of the material.
Primer
applied with brushes or rollers, but the spray gun is considered the most convenient tool,
which forms a reliable and even coating. Work stops until complete
drying of the primer, and the exact time is indicated on the package.
Putty application
After
the drying of the primer begins the process of creating a coating from the putty. For
of this, the following stages are implemented:
- a homogeneous solution is prepared, for which
dry powder is mixed with water in the correct proportions indicated on
packaging; - the mixing process is carried out in a bucket
or other suitable capacity; - stirring the composition is recommended for construction
mixer; - you should get a mixture that, according to
the consistency is similar to thick sour cream; - first, small depressions are filled with mortar
and cracks, if they have not been repaired with plaster; - then the distribution process begins
mixtures over the entire surface of the facade, for which a spatula, rollers or brushes are used; - after creating the first layer, it is done
break until the mixture is completely dry, and the period depends on the characteristics
purchased plaster, for example, the acrylic compound dries for 4 hours, and the
the cement dries up within three days; - the resulting coating is smoothed with sandpaper
and again covered with a primer; - after the primer dries again
a layer of finishing putty is applied; - for the walls of the building it is recommended to do
at least two layers, but if there are irregularities, you can make 3 or 4 layers; - after each layer you need to take a break
for solidification of the product; - at the end, the coating is cleaned and
primed, and then work is done to decorate the facade.
If
competently approach the process of forming the coating, then it is easily created
on their own with minimal expenditure of funds and efforts. After getting even
coating, it can be painted in different shades, for which a special
paint for the facade.
Insulation of walls from the outside with penoplex under plaster - step by step instructions
Having studied all the information, we give a brief description of the sequential stages of work on finishing the building with foam from the outside.
Step 1. Prepare the wall for the installation of insulation. We cut down all influxes and protrusions. We clean the surface. Cracks, gouges are repaired.
Step 2. We prime the porous surface of the walls, apply cement milk to the brick or concrete wall (to increase adhesion). We dry it.
Step 3. We beat off a horizontal line along the bottom of the wall with a blue cord. We mount the stop bar (or profile) on which we will install the sheets.
Step 4. Prepare the glue mixture according to the instructions.
Step 5. Check the evenness of the wall. Before starting the installation of the penoplex, we pull the horizontal cord lying in the vertical plane of the future surface of the polystyrene foam covering. Before installing the sheet, we check whether it is necessary to install the sheet on beacons.With a strong separation of the sheet from the surface, glue pieces of expanded polystyrene of the required height - beacons on the sheet (up to 8 beacons around the perimeter, one in the center).
Step 6. Apply the adhesive composition with a spatula on the back side of the foam sheet or on the beacons, apply the sheet to the wall, press it. It is necessary to ensure that its surface coincides with the vertical plane, while maintaining the horizontal row, and the sheet is tightly docked with the neighboring one. We apply the glue so that it does not get into the seams.
Step 7. Having completed the row, pull the next horizontal cord. If necessary, trim the top of the sheets that break the topline.
Step 8. We cut one sheet of penoplex in half, mount one half at the beginning of the row. So we get a seam shift and a checkerboard order of the sheets. We sheathe the entire wall row by row, observing the staggered order and flatness of the resulting surface.
Step 9. Foam all seams. Cut off the protruding foam with a knife.
Step 10. After the glue has hardened, we fasten the sheets with dowels to the wall. Then we can plaster and finish the resulting warm shell.
Every two rows (to eliminate air convection between the wall and the penoplex), make a continuous line of solution
Gallery of the step-by-step process of plastering on penoplex.
We hope you learned a lot from this article. Including how to plaster penoplex. Now you can easily and successfully cope with this task. Warmth to you, dear readers!
Selection Tips
The sizes of the filler fractions determine the minimum layer thickness of the applied material. During the initial puttying, the presence of particles up to 0.5 mm in size (for example, sand) is allowed in the mixture. It is better to create the final layer with compositions with a filler fraction of up to 0.2 mm (marshalite, microcalcite) and less (thin polymer compositions). Starter cement putties are more adhesive, durable, easy to process, provide a single layer height of up to 2 cm. Finishing ones are always more liquid, applied with a layer of up to 0.4 cm, inferior in strength and adhesion to the starting ones, but easy to grind.
Silicate, acrylo-siloxane mixtures perform well at low temperatures.
The essential difference between ready-to-use products and dry mixes is that they are produced under the conditions of a technical process. The use of such fillers will require strict adherence to the manufacturer's recommendations. In this sense, dry putty products are less demanding. So cement mortars, for example, should not be applied at wall and air temperatures from 0 degrees and below. However, such a dried finish is reliable, resistant to temperature extremes, moisture-proof, and has a certain variety of color shades (yellowish, beige, gray).
This is an inexpensive material
When buying, you should pay attention to the brand of cement and its compressive strength. At the same time, there are disadvantages - the need to mix and quickly develop a ready-made solution (maximum in 1 hour), the possibility of shrinkage and the appearance of cracks
Both cement and polymer bases of filler materials contribute to reliable installation in conditions of high humidity both inside and outside buildings.
At low temperatures, silicate, acrylo-siloxane mixtures show themselves well. Their main advantage is a longer high plasticity (compared to cement-based mixtures), as well as: durability, no shrinkage, strength (in frost and high humidity), environmental friendliness, abrasion resistance, compatibility with finishing materials and quick setting. Such paste-like composite compositions are extremely easy to handle and use, and remain ready for use for a long time. The height of the layer of the applied material should not exceed 3 mm, while the surface must be necessarily primed. Dry acrylic powders are created using cement, polymer and mineral additives, marble "flour".
For application, the consistency of "thick sour cream" is used. The color palette of materials is quite diverse. The disadvantages are the forced need to putty in 2 or more layers (with significant irregularities), the use of respiratory protection when performing grinding work and the relatively high cost. At the same time, when selecting materials, it is never superfluous to study the manufacturer's recommendations on the packaging.
Preparation of the solution
Mortar preparation is the most important part. It is on how to correctly combine the proportions and consistency that will determine how effective the composition will be.
Manufacturers often make products that are ready-made and do not require any action. It may have a slightly damp consistency, which is intended for spot application.
However, there are cases when the manufacturer produces a facade putty in the form of a powder. This is the most common option, since with this form of release, the shelf life and preservation of the material is preserved.
In this case, it must be mixed with water. This should be done as a percentage, 1/3. Where the 3rd third part will be water. It must be gradually poured into the container in which the powder is contained and mixed. It is advisable to do this intensively, best of all with a special attachment, using a drill.
How to make a do-it-yourself cement putty?
Finishing material is purchased at any hardware store. But you can make it yourself. The mixture contains the main components:
- binders - use polymer
materials; - fillers - use means
dividing the putty into plaster, acrylic, cement; - coloring pigments.
Homemade cement putty
conditions, allows you to save your budget. To prepare the mixture, use one
from two proven recipes:
- Washed quarry (river) sand
in the amount of 10 liters is mixed with cement M400-500, PVA glue is added to
quantity of 2 liters. The mixture is poured with 5 liters of water, mixed well
construction mixer. The consistency of the finished mixture should resemble a thick
sour cream. This putty is characterized by increased adhesion. - PVA glue is mixed with water 1: 1,
add a dry mixture of cement M400-500, mixed with alabaster in
a ratio of 1: 1 by weight. The solution is stirred, used immediately after
cooking.
To prepare a quality mixture
it is recommended to follow a few simple rules so that the result later
did not disappoint. To prepare the mixture, use only clean water without
impurities, as well as clean containers. Components choose fine grinding, mix
mix thoroughly until a homogeneous composition is obtained. In the mixing process
respect the proportions. The finished solution is applied immediately after preparation, since
it grasps quickly.
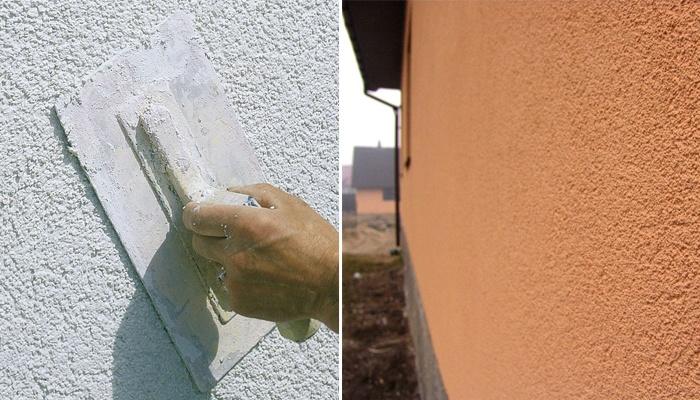
Application technology
Using a spatula, it is necessary to apply the solution to the wall and smooth it in a circular motion in the direction away from you. The walls must be pre-cleaned, degreased and primed. Putting is carried out after the foundation has settled manually and with pressure equipment. The latter method has specific requirements for the density of the solution. The mixture is kneaded enough to work out while it retains its plasticity (from 0.5 hour to 1 day). The optimal conditions for applying the composition are humidity up to 80% (without rain) and a temperature of 5 - 20 degrees.
As a rule, filling is done with a wide and narrow spatula in several layers until it is completely leveled (or according to the rule for beacons). After each layer has dried, the surface is primed again. Deep drops and cracks are leveled with the first pass.
The finishing coat is done in a thin layer (up to 3 mm). Complete uniform drying of each layer is ensured by covering the surface with a polyethylene film.The dry surface of the finishing layer is sanded and primed. Then the surface of the facade can be decorated.
Types of mixtures
A difficult task for beginners is the choice of plaster for the facade.
Here it is required to take into account several nuances in a complex way:
- the operating conditions of the insulation;
- compatibility of base materials, insulation, plaster composition;
- experience of a plasterer (some types of plaster compounds are more difficult to apply);
- the size of the finances intended for work;
- other considerations.
Therefore, you need to know the features of the main plastering materials.
Plaster solutions are:
- leveling (with filler of different sizes of granules) - for puttying (fine-grained), ordinary;
- decorative (used for finishing);
- special (for solving problems of a certain type, for example, sanitizing, acoustic).
By field of application:
- for interior work,
- universal,
- for outdoor conditions - front.
According to the main binder of the base:
- acrylic;
- silicate;
- mineral;
- silicone.
According to the purpose and place of use in the Wet Facade system, specially for plastering expanded polystyrene, the following compositions have been developed:
- adhesive;
- leveling;
- multifunctional (universal).
Multifunctional tools
Compositions of this type are specially designed to perform a complex of works on the construction of a Wet facade, that is, a plaster-adhesive mixture for expanded polystyrene can be used as:
- primer composition;
- mixture for gluing foam sheets to the wall;
- composition for reinforcement (fixing the reinforcing mesh over the expanded polystyrene plates); leveling layer.
This tool is more expensive than adhesives and leveling compounds. But you don't need to look for all these compositions from one manufacturer.
Mineral compositions
Of the mineral mixtures, the most popular are cement and gypsum-based compositions. Other binders for plasters are lime, clay.
Advantages of plaster compounds with a mineral base:
- cheapness;
- environmental friendliness;
- strength;
- vapor permeability;
- fire resistance;
- resistance to UV light and biological damage;
- durability.
Minuses:
- do not tolerate vibrating loads, are prone to the formation of shrinkage cracks during solidification;
- slow set of strength (cement, lime mixtures).
Gypsum compositions are not recommended for use for facades, and simple cement compositions are not recommended for covering sheets of expanded polystyrene.
Acrylic
Acrylic resin coatings have advantages:
- impact resistance;
- elasticity;
- waterproofness;
- easy to lay;
- rich selection of shades;
- environmental friendliness;
- average cost;
- durability.
Minuses:
- flammability;
- vapor permeability;
- tend to accumulate static, attract dust;
- fade in the sun.
Silicone
The basis of the compositions is silicone. Therefore, these are the most elastic compounds, resilient and durable plasters. Breathable, water repellent, durable. The main disadvantage is the high price. These are the most expensive formulations. They are perfect for creating any effects, but the price limits the area of their application.
Silicate composition
Produced on the basis of a liquid glass binder, the compositions adhere well to polystyrene foam surfaces.
They have the following advantages:
- resistant to chemicals;
- easy to wash;
- vapor permeable;
- durable;
- water-repellent;
- expensive;
- durable.
Minuses:
- require a primer and paints on the same basis;
- Set too quickly (not for beginners)
- not applicable indoors.