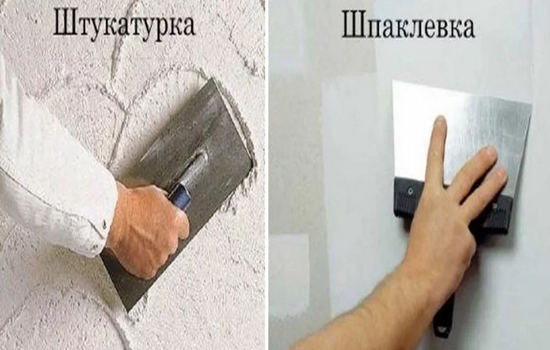
Composition of building mixtures
Both plaster and putty contain natural fillers. In this case, an ordinary sand-cement mixture is used as the base of the plaster, to which polymer plasticizers are added. Due to them, the solution turns out to be more plastic and fits well on the surface to be treated. In addition, this building mixture can be made from gypsum, to which stabilizing substances are also added. Thanks to them, the plaster acquires high plasticity and sets a little slower than pure gypsum.
If necessary, the plaster can be prepared with your own hands. In this case, to give the mixture high adhesion, PVA glue is added to the sand and cement. In the absence of sand, homemade plaster can include cement and lime, clay and lime, clay and gypsum, or clay and cement.
The basis of the putty is also cement and sand with the addition of plasticizers. But if in the first case sand of coarse fractions is used, then only fine-grained sand is suitable for the manufacture of a putty mixture. Thanks to this composition, the material acquires good waterproof properties and is successfully used for exterior wall decoration.
In the case when the putty is made on the basis of gypsum, it is used only for internal work. Gypsum simultaneously plays the role of both a binder and a filler, differing in a much finer grinding than in the manufacture of plaster. In addition, in shopping centers you can find universal putty mixtures, suitable not only for internal, but also for external consumption. They are usually made from acrylic resins, chalk and water.
To work at certain objects, special trains have been created:
- oil - based on natural drying oil;
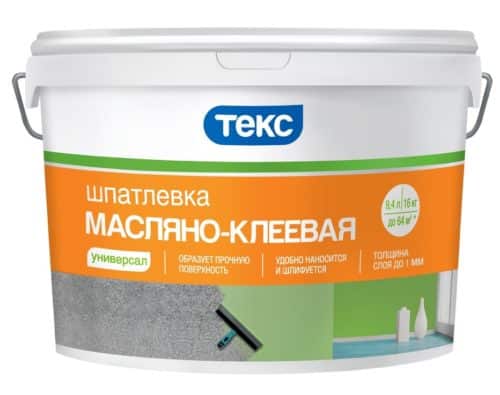
- glue, in which linseed oil and glue are added;
- epoxy - based on epoxy resins;
- latex - with latex as a binder;
- made of polyvinyl acetate adhesive with mineral fillers.
Difference between plaster and putty: classification
Each of the building materials we are considering has several types that differ in composition, therefore, it is possible to talk about the difference between them only taking into account the type used in a particular case.
Plasters are classified as follows:
Cement-sand mixtures. The main components are quite clear from the name, but in addition to the actual cement and sand, the composition includes binding polymer additives that make the solution more plastic and increase adhesion to the base. Often, cement-sand mixtures are made independently, and then PVA glue is used as a plasticizer.
Cement-lime. They are widely used for machine plastering. Sand also acts as a filler in them, and the most mechanically strong product is a product containing a sand component of different grain sizes.
Gypsum mixtures containing substances that slow down the setting process and give plasticity to the composition. Gypsum absorbs moisture well from the environment, thanks to which we obtain a natural regulation of the microclimate in the room. In conditions of high humidity, gypsum plaster dries the air, and in dry times, on the contrary, it gives up the accumulated moisture. Such an effect, convenient for interior work, makes gypsum materials unsuitable for exterior decoration.

It is also worth mentioning the rare varieties in which clay is used as a binder. You will not find such varieties in mass sale, and they are prepared independently.These include clay-gypsum, clay-cement, and clay-lime mortars.
The composition of putties also varies, dividing them into the following groups:
Cement. After drying, it has a rich gray tint that can shine through thin wallpaper. However, due to their water resistance, they do not lose their relevance when leveling slopes, external walls or rooms with constantly high humidity.
Plaster. Due to their elasticity, such putties are easy to use and dry quickly. The downside is their ability to absorb water, so the scope of their application is limited only to indoor areas.
Polymeric. They have no restrictions on use, do not shrink and are practically devoid of disadvantages, surpassing other varieties in durability and elasticity. The only drawback is the cost of polymer putties.
For demanding substrates such as wood or iron, there are epoxy, latex, oily or adhesive putties.

In addition, the putty is subdivided into two groups according to the stages of application:
Start - designed to eliminate irregularities, cracks and chips, sealing gates for communications, joints between floor slabs, sheets of drywall. It is also used if the wall has no blockages or curvatures, but is made of rough materials - brick, concrete or plastered.
Finishing - unable to level the imperfections of the base, but in skillful hands creates a smooth, flawless finish for finishing. This is sort of the finishing touches for the alignment.
The information provided in this section dot the i's in the question of what plaster and putty are for theorists. But for people with a practical mindset, it is easier to navigate the differences based on the area and sequence of application of these building materials, which will be discussed in the next part of the article.
Differences and material differences
Now that it has become clear what putty and plaster are, it is worth paying attention to other differences between the mixtures. What is the difference between these two building materials?
Application area
The area of application of putty or plaster is almost the same. Both materials are used to decorate or level surfaces:
- interior walls;
- the outer facade of the building;
- ceiling;
- corners;
- window frames.
Just because of the same field of application, most non-professionals who have no experience in working with building materials confuse these two concepts and cannot understand whether it is worth plastering or puttingty walls.
It can be assumed that the main difference between plaster and putty is its composition. It is necessary to understand this statement as well.
The composition of the plaster
It will not be difficult even for a novice repairman to prepare plaster at home. To prepare it you will need:
- cement;
- sand;
- various polymer additives;
- water;
- it is possible and even recommended to add PVA glue.
By mixing these ingredients, you can get home plaster of such quality that it will not differ from the purchased one.
If you don't want to mess with the proportions, then it's easy to purchase ready-made powder in the store. Other elements are added to this mixture.
A common type of material that is used for interior work is plaster with the addition of lime. The main advantage of this composition is that lime is a completely safe raw material and does not harm human health. Lime-based plaster is considered cheap and easy to apply.
The putty with the addition of gypsum is not inferior either. The presence of gypsum in the composition makes the plaster plastic due to the fact that such a composition slowly adheres.
Cement and clay are sometimes added to the plaster.
There is a special plaster for the outside of the façade.Such a mixture is frost-resistant, moisture-resistant, prevents the formation of fungus and moss.
Facade plaster is divided into two types:
- Coating room. Used as an intermediate step for leveling the surface.
- Decorative. It does not require further processing and is the last stage.
The composition of the putty

Putty, like plaster, contains various chemical or building elements. During repair and construction, the following types of mixtures are used:
- cement-based putty. The composition of such a solution includes: cement, sand and special plasticizers, which are added to make the solution elastic. Such a mortar, thanks to the cement base, is waterproof, therefore it is also suitable for filling the facades of buildings;
- putty containing polymers. Latex + other chemical elements or acrylic + chalk are used as polymers. When applying a putty with this composition, the walls acquire a glossy sheen;
- plaster based putty. Such a composition is ideal for plastering walls and ceilings indoors and is able to betray their strength. But for outdoor work, such a composition is not suitable. This is due to the fact that gypsum reacts negatively to moisture and quickly begins to deteriorate.
The putty is presented in three types:
- Starting putty. Such a putty is also called leveling, as it has excellent durable qualities. The starting putty is used for intermediate leveling and is applied in a layer of 2 centimeters or more.
- Finishing putty (decorative) - applied immediately before decorating and applied in a very thin layer.
- Universal putty. It is used as both starting and finishing.
An understandable question arises "So what is the difference between plaster and putty in composition"? All putty ingredients are ground to a very fine size. There are no other significant differences between them.
Plaster or putty
To answer the question "Do they putty or plaster the walls first?", Consider the use of building materials on a household example.
The young man started repairs, the walls and ceilings are in a terrible undulating state, the angles are far from 90 degrees, and the question arises before him: how can wallpaper be pasted on such walls?
First you need to purchase plaster and use special devices to level the walls and corners. After the young man has brought the surface to an even state, the question arises before him: how now to glue the wallpaper on such a rough surface? To fix this, you need to purchase a putty.
If the walls are fairly flat, but there are small cracks or other minor flaws, then you can do without the help of plaster. The putty will easily cope with minor wall defects.
No. 7. Major manufacturers of putties
The putty market today is oversaturated - you can find a mixture of any composition, for any type of surface and, most interestingly, at almost any price. We all love to save money, especially when it seems that there is no difference at all between two similar products. When it comes to putties, saving does not seem such a sensible thing, because hardly anyone wants the putty layer to crack and fall off along with the paint after a few months. Trusting the products of large manufacturers is better:
- Knauf is a large German company with factories located all over the world, incl. in Russia, which allows us to buy quality products at more affordable prices. Knauf putties are presented in cement, gypsum and polymer compositions, sold in dry and ready-made form. There are solutions for all areas of use. A special solution of the company is a gypsum plaster with components that protect against X-ray radiation;
- Ceresit is a product of a large concern that is very popular all over the world.Ceresit brand sells cement and polymer putties;
- Tikkurila is another well-known concern that, among other things, produces putties. The company offers acrylic moisture resistant and gypsum compounds. Also in the assortment there is Euro Filler Light putty, which is distinguished by its ease of application and the absence of the need to sand - the surface itself becomes even. The color of the composition can be chosen from 15 offered. The company also offers Spakkeli wood putty, which is suitable for processing doors, furniture and other wooden surfaces indoors;
- Vetonit offers polymeric, cementitious and organic bonded fillers. There is a composition that will not only align the seams on drywall, old painted surfaces and wallpaper, but also allow you to create a textured decorative surface;
- Kreisel is a German company with factories in 20 countries, incl. in Russia. Putties are represented by cement and gypsum compositions;
- "Prospectors" - home-made putties. The quality is not bad, the prices are reasonable. The assortment is represented by gypsum, cement, polymer-cement and polymer compositions, which are suitable for starting and finishing works in dry and wet rooms, as well as for outdoor work;
- Volma is another domestic manufacturer that has proven itself well. The range of compositions is very wide. There are gypsum and polymer putties with different particle sizes. There are solutions for any situation.
You can also recommend the products of "Ural building mixtures", "ARMstrong" and "Eurogypsum".
When buying, do not forget to inspect the integrity of the packaging, pay attention to the expiration date and, if desired, ask for certificates of conformity - any responsible manufacturer and seller should have them
Ceiling filling technology
The whole process can be divided into several stages. In general, the work is reduced to two manipulations: leveling the ceiling with putty using the starting mixture, as well as applying a finishing decorative layer. But, this work has its own subtleties.
Mix preparation
To begin with, consider which putty is best for the ceiling. All compounds can be divided into cement, gypsum and polymer.
Cement protected from moisture and reliable. But such a finishing ceiling putty for painting is not suitable, since the decorative qualities of the products are not the best. For this purpose, the best option is a gypsum-based putty. However, it is afraid of moisture, therefore it is better not to use it for the kitchen and bathroom. The golden mean can be called polymer blends. They are sold ready-made and are easy to work with. And moisture protection is at a high level.
However, the cost of polymers is higher. You do not need to knead such products. But gypsum dry mixes will have to be prepared. This is done using a special mixer. According to the instructions, first, water is drawn into the container. Then the dry mixture is gradually poured into it (not the other way around). The contents are mixed with a mixer to the desired consistency. A quality mixture resembles sour cream. Lumps are not allowed. After kneading, you need to withstand the solution for 10 minutes, then mix again.
Apply the mixture to concrete
The first layer is a leveling layer, a starting putty is used. Using a narrow spatula, the mixture is transferred to a wide one. The bulk of the solution is applied to the edge of the spatula, and not closer to the handle. So it will be convenient to stretch it over the surface. The progressive plastering of the ceiling begins. The tool is applied to the surface at an angle. The ideal option is to move in front of you from left to right. It should turn out exactly. When moving towards or away from yourself, it is difficult to see the thickness of the layer.
Areas with slopes and depressions require a thicker layer. However, if the differences are more than 5 mm, then several layers must be applied.Excess putty is removed with a spatula. Surface defects cannot be avoided, sometimes tool marks may remain. If they are dry and you did not have time to fix everything, you do not need to chisel them with a spatula. Grinding, for which special tools are used, will help. When the entire ceiling is putty, you need to wait until it dries.
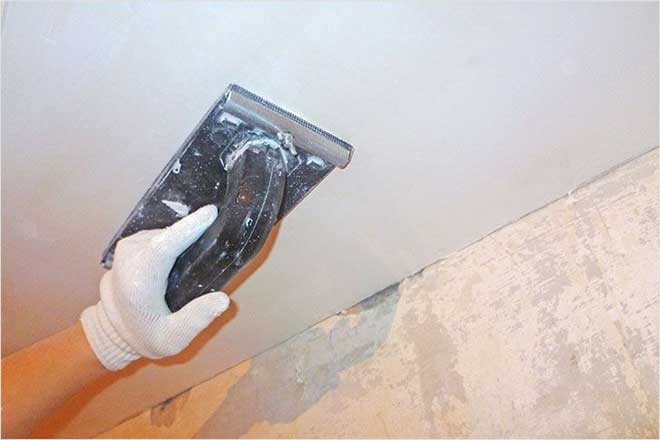
Sanding and finishing putty
How to properly sand the ceiling after the putty has dried? You will need sandpaper or a mesh float. In a circular motion, the protrusions and traces of the trowel are removed from the surface. Additionally, lighting will help you see flaws and eliminate them.
Then the finishing putty is applied. Unlike the first leveling layer, it is thinner and serves for decorative purposes. Therefore, it is applied with greater care and thoroughness. All defects are eliminated immediately. At the end, it remains to sand everything with fine-grained sandpaper.
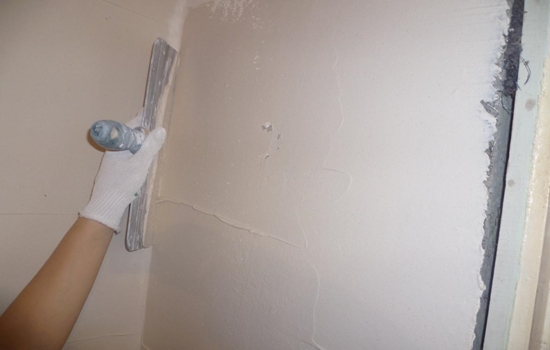
Plasterboard putty
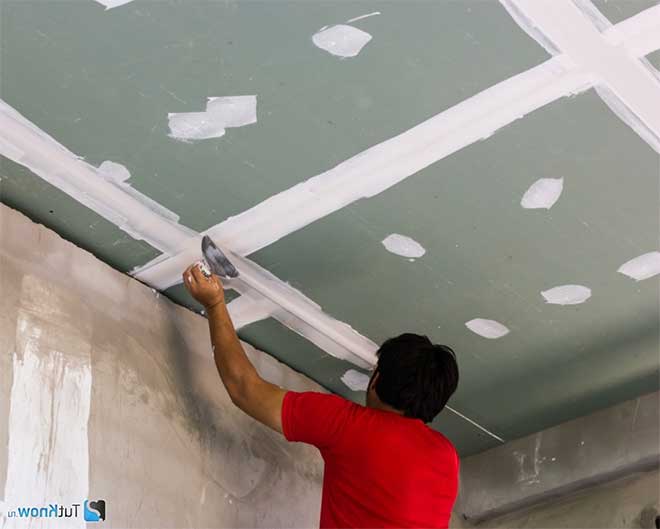
There are some features of plasterboard plastering. It already has a flat and smooth surface. However, the joints between the sheets and the caps from the screws need to be processed. Therefore, before filling the ceiling, all the recesses are filled.
The finishing putty is mixed. For work, you need a medium spatula and a serpyanka mesh. The mortar is drawn on a spatula and the seam is tightly filled. Surplus is removed. Serpyanka mesh is glued on top. It serves as a reinforcing layer that will not allow the layer to crack. The caps of the screws are also smeared over.
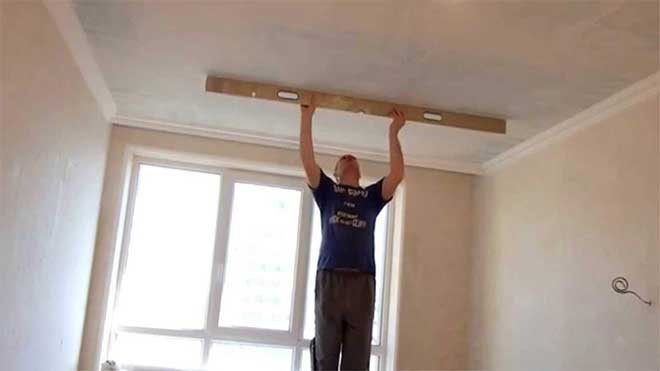
When everything is ready, the main filling is done. Since the surface is flat, a finishing coat is sufficient. But, before that, the surface is primed and after drying, the work continues. Evenness is checked using a level. If there are differences, you need to apply a few more layers.
At this point, the finishing is not yet completed. The final touch will remain - grouting with fine-grained sandpaper. This is where the process ends. Thanks to detailed instructions and a description of the intricacies of the work, everyone will learn how to putty the ceiling with their own hands. Now you can safely move from theory to practice.
Putty properties
It is a prepared fine-grained mass, which is well suited for removing minor defects in the surface of the walls. It easily masks shallow pits and depressions, various scratches and peeled areas:
- on the ceiling;
- on the walls;
- at the junction of building materials of different texture.
The putty creates a perfect surface for walls and ceilings
Some types of mixture are used by builders and as a final finish - on top of coarse-grained plaster, applied to the supporting surface under the mesh. It is produced not only in the form of a ready-made mixture, but also in the form of a dry bulk material. Experts distinguish between leveling putties, universal and specialized - for application on different bases. The finished mass is applied in a small layer, it dries quickly, after which the walls can be painted. Material for various purposes is produced:
- starting;
- finishing.
The starting mixture has a rougher structure, and the finishing mixture gives a perfectly smooth layer under the wallpaper or coloring. This plastic fine-grained mixture is also used for so-called cosmetic repairs, since it fills well in gaps several centimeters deep. It has a moderate viscosity, is easy to apply and fills in any imperfections.
Among the main positive characteristics are also noted:
- the ability to maintain volume after drying;
- does not crack;
- does not exfoliate;
- does not lag behind surfaces.
How to apply?
Any surface finish must be of high quality and, at the end of the work, not only look beautiful, but also hold securely. To improve the performance of the decorative material, it must be applied to a well-prepared substrate.To do this, the coating is carefully leveled and its surface is made smooth with plaster and putty. In the event that the irregularities are less than 5 mm, then use a finishing putty. For huge cracks and pits, it is recommended to use plaster. Each of these products has individual properties, so the process of their application is different.
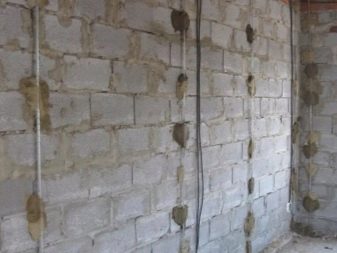
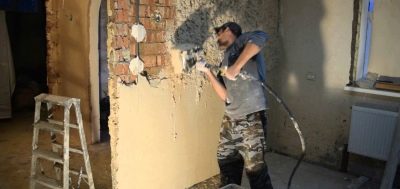
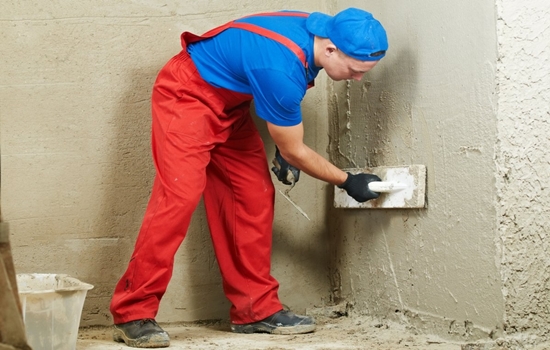
When working with plaster, first remove the remnants of the interbrick mortar that protrude on the walls, then determine the point of the protrusion using a level and calculate the maximum thickness of the mortar layer. After that, surface preparation begins and a primer is made.

The mixture is easy to prepare. The dry powder is poured into a special container and, according to the instructions on the label, is mixed with water until a homogeneous mass is formed. As a rule, it takes no more than half an hour to make a solution, after which it can be used.
The resulting mixture is applied to the surface with a spatula and leveled with the rule
At the same time, it is important to control the horizontal and vertical coverage. The remains of the solution are removed, and then you can proceed to leveling another area

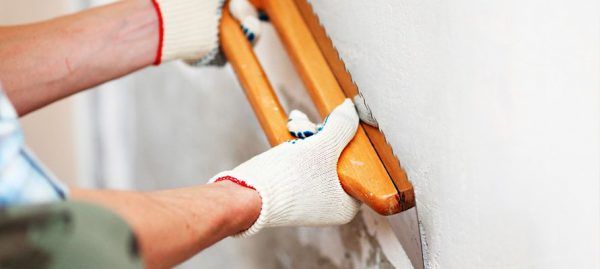
Work with a finishing putty is carried out when the cracks do not exceed 2 mm. The finished mixture is applied to the walls by spraying or with a spatula. Before starting leveling, it is imperative to prime the surface. In order for the putty to be evenly distributed over the base, it is recommended to first hold the spatula at an angle of 60 degrees, and then gradually reduce its slope. It is necessary to cover the walls with putty with horizontal and vertical strokes. The finishing putty dries up within 24 hours, after which it can be sanded and decorative material can be applied over it in the form of paint or wallpaper.
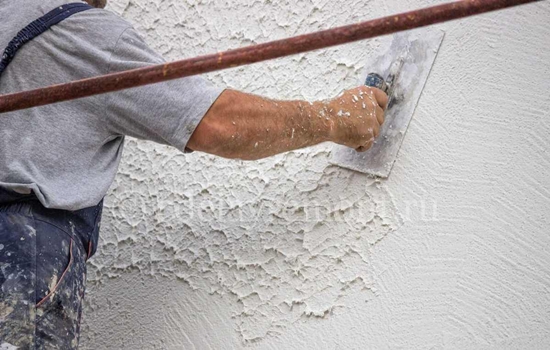
Often, in order for the surface of the walls and ceiling to acquire an attractive appearance, textured plaster is used in their decoration, which, unlike the usual one, gives the coating an unusual decor.
Since plastering is accompanied by dirt and dust, before it starts, you need to remove all furniture from the room and cover things.
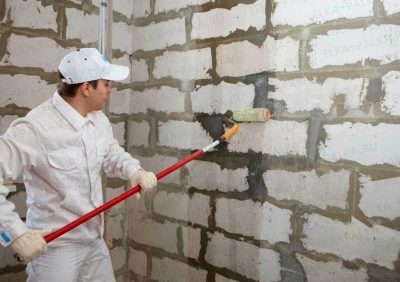
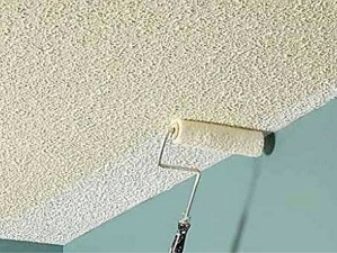
The surface of the ceiling or walls is treated with a primer, which helps not only to conveniently distribute the solution, but also removes minor flaws. Textured compositions can be applied in various ways. The most popular is the texture using a roller. It is not particularly difficult and even a novice master can handle it. The most important thing is to properly prepare the solution and make sure that there are no lumps in it.
In addition, textured finishing can be done using the spray technique. Unlike other methods, spraying is fast and ensures an even coating. One of the difficult types of applying textured putty is considered to be the "Venetian ceiling". This technique is characterized by a complex finish, so it is best to entrust it to professional specialists.
If there is a desire to create an original ceiling in the room, then you can experiment and cover it with a textured print. For work, you need a special machine, it is attached to the handle and gives the surface the desired texture. In this case, the impression must be done well, otherwise the composition will turn out to be indistinct and indistinct.

Each of the above types of application of plaster and putty has its own pros and cons, allows you to create a beautiful design in the premises. Therefore, before starting the design, it is necessary to think over all the nuances of the decor and decide on the necessary building material.
Regardless of what the previous coating was, initially they completely dismantle it, clean the base, cover the walls and ceiling with a primer, and then choose the desired type of plaster and putty.
How to make decorative plaster yourself, see below.
Types of putty compositions
To figure out which filler to choose for the walls under the wallpaper, it is necessary to consider the types of these leveling solutions.
Oil and glue
Suitable for leveling concrete and brick substrates after plastering. Supplied ready-made (pasta in containers of different sizes). Drying time is not less than a day, and the shelf life, after opening the package, is not less than 5 days. The classic mixture is based on drying oil, chalk and casein glue.
In addition to leveling, it is excellent for eliminating minor defects (chips, cracks). Apply once or twice. After the final hardening, the finished part is processed with sandpaper, removing irregularities.
The advantages of this type of putties include environmental friendliness, weak adhesion with compositions in which there is no drying oil or oil paint is distinguished from the disadvantages, as a result of which it is not recommended for wallpaper.
Gypsum based
Gypsum is highly hygroscopic, therefore, finishing materials based on it should not be used in rooms with high humidity (bath, kitchen, toilet). At the base: gypsum, additional dry binder filler and modifiers that regulate the setting process.
Of the pros:
- fast drying;
- lack of shrinkage processes;
- environmental friendliness;
- low price.
Of the negative qualities, we can mention the impossibility of using the material in rooms where the humidity is above normal.
Cement
Unlike the previous type, this material can be used to decorate rooms with high humidity. Also, mixtures with cement can be used to close small cracks, chips and potholes.
Products differ in the degree of grind: a coarser grind is used in the starting layers, and a fine grind is suitable for finishing.
Water-dispersive
Suitable for leveling surfaces of any material. Delivered from the factory ready-made in plastic buckets of various sizes.
The advantages include:
Among the disadvantages is the addition of synthetic resins to the composition, which does not allow achieving complete environmental friendliness of the material.
Acrylic
Pasty material of this type can be purchased ready-made in plastic buckets of various capacities. This type of putty will help level any interior surfaces.
Advantages:
- versatility of application;
- perfect plasticity;
- not pronounced shrinkage;
- water resistance.
Minuses:
price.
Polymer based
If latex is present in the base of the polymer putty, it is used to decorate spaces with any level of humidity. On sale, this type can be found ready-made, packaged in plastic buckets. Recommended for the formation of finishing.
Pros:
- long service life of the finished surface;
- strength;
- versatility;
- lack of smell;
- ease of use.
Minuses:
high price.
What is plaster?
Plaster is considered a universal building mixture, with the help of which any surface is leveled during repairs, no matter whether it is a wall or a ceiling. Plaster is considered a reliable and durable repair assistant.
Strength is achieved due to the large granules included in the mixture.
What is plaster for? Due to its special composition, the plaster performs three functions at once:
- increases sound insulation;
- saves walls from moisture;
- insignificantly insulates the walls.
The layer of applied plaster depends on the existing irregularities. If the deformations are large, it is recommended to use coarse plaster. The layer applied to the wall should be as small as a few centimeters.
Examples of the need to use plaster are large holes in the wall, undulating ceiling surfaces, or curved room corners.
There are only 3 types of plaster on the market. These three types differ only due to the presence of different basic elements: gypsum; cement; lime. It is not difficult to find decorative plaster. This mixture does not need any further cladding.