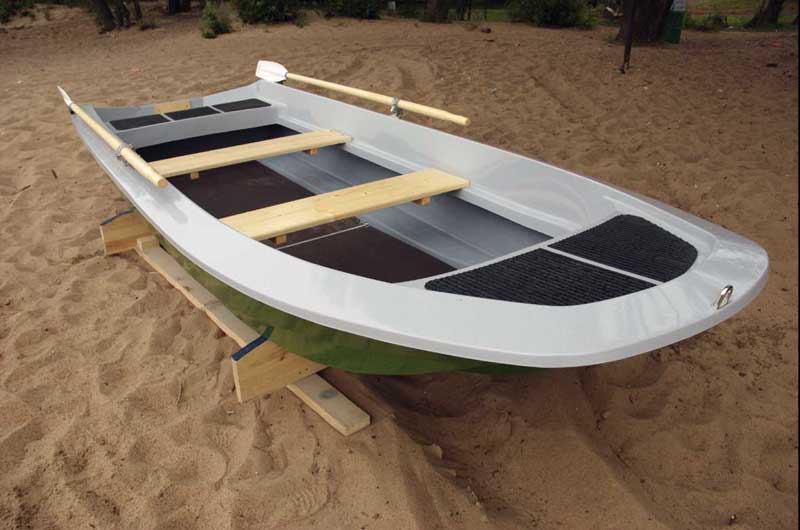
Fiberglass
If you do DIY plastic boat repairs, you will come across a variety of fiberglass on the market.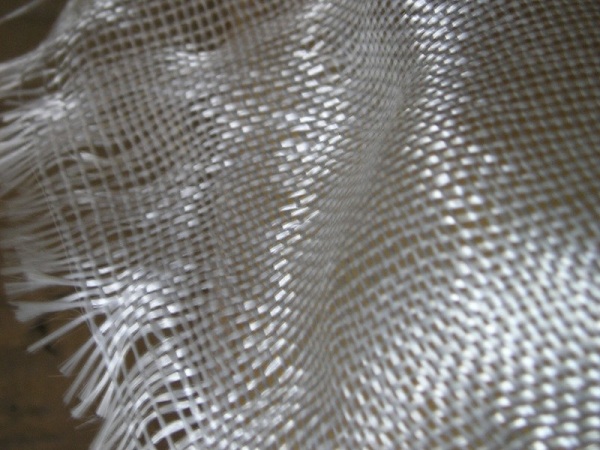
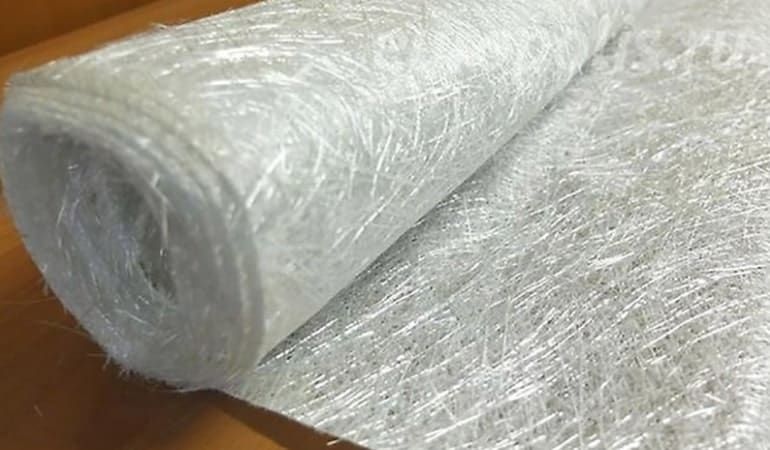
Fiberglass is available in various thicknesses; structural fabrics, such as glass satin, fiberglass mesh, are suitable for repair. There are also glass mats. Glass mat is a non-woven fabric made from chopped fiberglass.
It is advisable to use glass mat for the restoration of large holes or reinforcement of the boat hull. To patch holes or update the case, you will need to take glass mats. Plain fiberglass is used for minor repairs and for reinforcement.
A prerequisite is the cleanliness of the fabric, if moisture, dust or dirt gets in, then there will be bubbles on the boat.
In order for the fiberglass not to come apart ahead of time, it is treated with paraffin, which must be disposed of. There are fabrics without paraffin, it is better to use them.
To remove the paraffin, the fiberglass is heated with a hair dryer.
If a large amount of fabric needs to be removed from paraffin, for example, to strengthen the entire body, then it is better to boil it. You can boil it like this: pour water into a bucket, add soda ash, put glass cloth and lower the boiler. This can be done in the kitchen too. Boil fabric for 20-25 minutes, let cool. The paraffin will float up and harden. Pull the fabric out and dry.
Repair
In the event of more serious damage: deep scratches, torn cracks, holes, plastic boats are repaired using fiberglass, resin, hardener and plasticizer (dibutyl phthalate).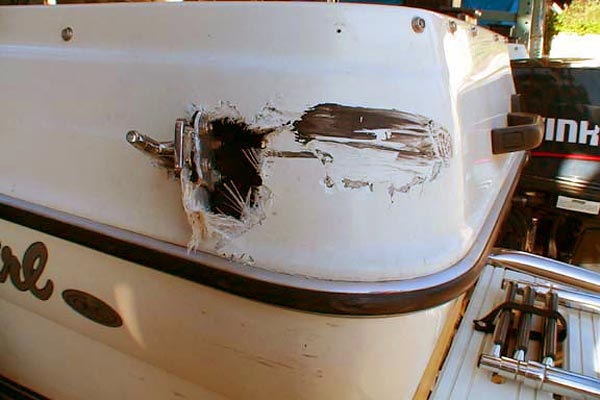
The shaggy edges of the crack do not need to be trimmed, the protruding fibers will help the resin to adhere better to the hull.
Dry the boat hull before repairing it. Although it is said that plastic does not absorb water, it is not.
Since the main condition for high-quality repairs when working with resin is the complete absence of dust and debris, it is better to carry out repair work indoors.
For good hardening of the resin, the temperature regime is important, the optimum temperature for such work is 18-20 degrees. If there is no wind and rain, then it can be repaired outdoors. All work should be carried out with gloves.
To avoid smudges, the surface on which you will glue the fiberglass should be located horizontally.
The process of gluing fiberglass will be as follows:
Sanding the body to an intact fiberglass layer, the trimmed edges do not need to be leveled, the shaggy pieces will provide a more thorough adhesion. Add a hardener to the epoxy. Spread the resulting mixture on the surface that must be pasted over, smear with a brush, do not spare the resin. Apply dry fiberglass and smooth it out so that there are no bubbles and creases
Remove excess resin with a spatula on top of the fabric, it is very important not to allow smudges. After 3 hours, spread another layer so that the surface is perfectly smooth
After complete drying, sand.
Cover the top with a putty for plastic with the obligatory degreasing of all surfaces for better adhesion.
If, nevertheless, air bubbles formed in the process of working with fiberglass, then they must be cut and re-glued.
Fiberglass (fiberglass) for body repair
Today, fiberglass is widely used in various areas of our life. However, this material found its main application precisely in the auto industry. Fiberglass is simply irreplaceable when repairing a car body. This is due to its unique properties such as:
- light weight;
- resistance to environmental influences and fire;
- simplicity and speed of installation;
- long service life - up to 50 years;
- and most importantly, its low cost.
Car repair with fiberglass is an inexpensive and uncomplicated method of restoring the body with your own hands. It is within the power of everyone, even a novice car enthusiast, in garage conditions and with a minimum set of tools.However, it should be borne in mind that restoration of a car body using fiberglass is possible only in the presence of minor damage and in areas that are not load-bearing elements.
Materials and tools
To repair damage at home, you will need a set of mandatory tools included in the repair kit:
- compressor;
- building hair dryer: this will allow you to warm up the work surface so that dents and protruding bumps can be leveled;
- grinder or grinder with a special disc to create a perfectly flat surface;
- spray gun: needed for subsequent final painting.
In addition to a set of tools, materials will be needed for repairs:
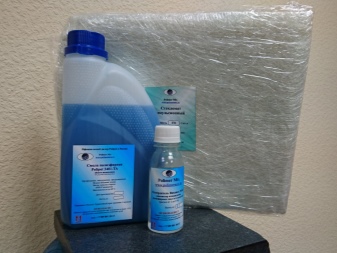
- fiberglass repair kit, which includes fiberglass cloth and epoxy resins;
- several types of putties: automotive and fiberglass compound;
- acrylic solvent and resin remover;
- primer, varnish, small brushes 25-30 mm in size, silicone gloves, tape, respirator;
- it is desirable to have a special composition for removing paint from fiberglass coatings;
- a set of sandpaper with different types of grain;
- fine-mesh metal mesh for surface covering of seams;
- container for mixing epoxy resin, mixing tool, paper for covering non-working surfaces.
Fiberglass laying and resin impregnation
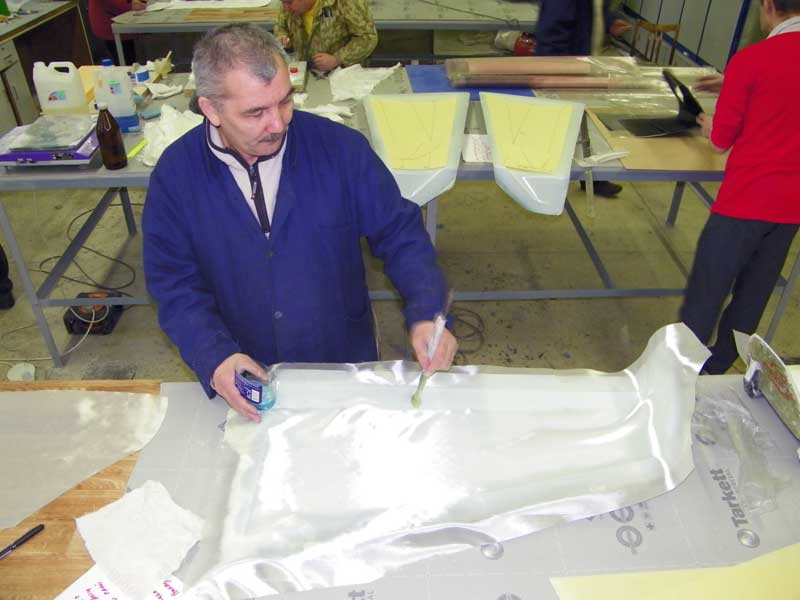
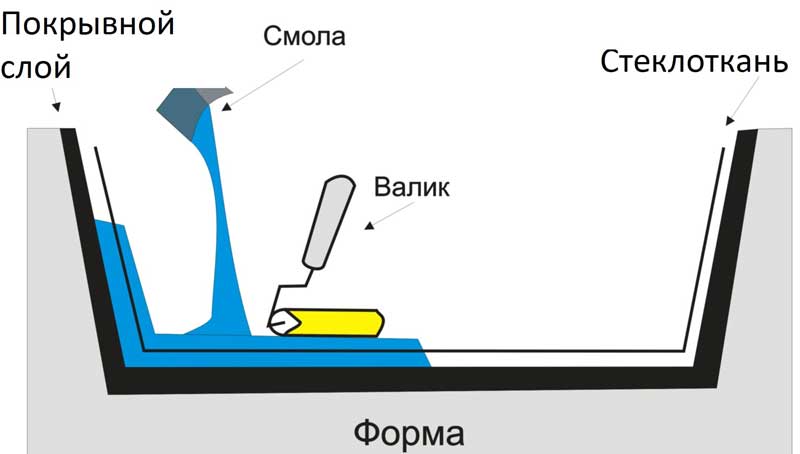
After reaching the required consistency of the covering layer, the cutting of fiberglass is laid in the form of a matrix. The first layer of fiberglass is the thinnest (300 g / m2), which ensures the most smooth surface of the product.
The fiberglass should exactly follow all the bends of the matrix shape without delamination and the formation of air pockets.
After laying, a layer of polymer resin is applied to the fiberglass, and the resulting shape is rolled with a special roller in order to better impregnate and squeeze out air bubbles. The next layer of fiberglass is laid without waiting for the resin to dry. Then the process of preparation and application of the polymer composition is repeated.
Depending on the thickness and required strength of the product, a different number of layers of fiberglass and impregnation is formed. Fiberglass or thin finishing glass fabric is used as the last layer.
Preparatory stage
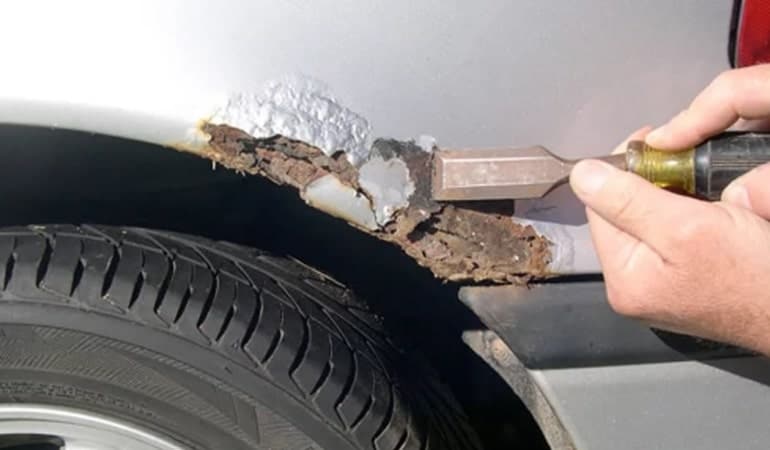
The preparatory work must be carried out with the utmost care. It is necessary to clean the area of the part to be repaired from old paint and corrosion, so that not a drop of rust remains. After that, the surface to be treated should be sanded, dried well and degreased.
Work technology
The most important conditions for work are consistency and slowness. The repair procedure looks like this:
- patches are cut from the material, in shape and size, corresponding to the damaged part of the body;
- in a prepared container, epoxy resin and a hardener are mixed in the proportions indicated in the instructions;
- on the prepared place, the first layer of the resulting mixture is applied;
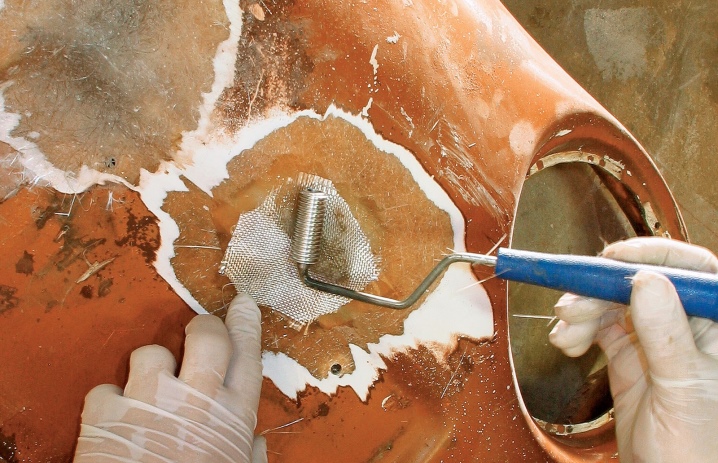
- a prepared piece of fiberglass is laid on top and smoothed with a roller soaked in resin;
- when the resin grasps, sandpaper the surface;
- the next step is applying putty;
- after complete solidification, paint and varnish works are carried out.
Overlay techniques
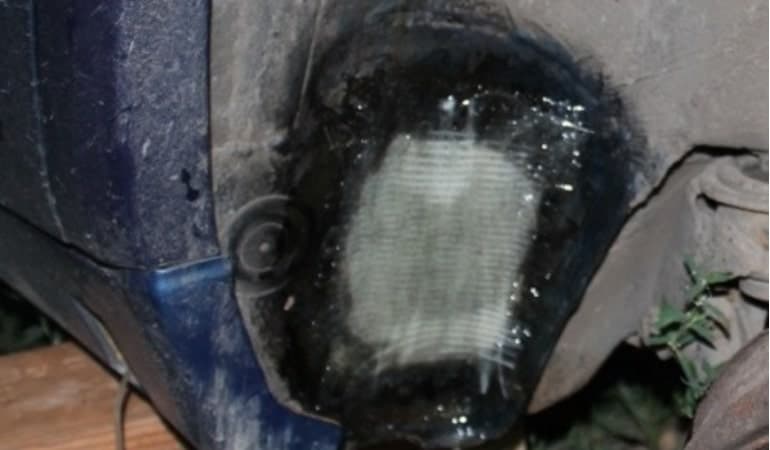
First option
The area to be repaired is covered with polyester resin and the first piece of fiberglass is applied.All formed air bubbles are driven out with a roller, and the remaining ones are pierced with an awl. They are passed over the surface with a roller, if necessary, the layer is compacted with an end brush. After that, the surface is again lubricated with resin, and the next layer of material is applied to it. So, one by one, one by one, all the layers are superimposed.
Second option
The cut out patches are impregnated with resin. The edges are greased with glue. After that, the soaked pieces are applied to the damaged surface. It is necessary to completely close the repaired area. Each new layer should overlap the previous one by at least 20 mm. After the resin has completely hardened, they are passed over the surface with a file and sandpaper. The resulting irregularities are leveled with a putty.
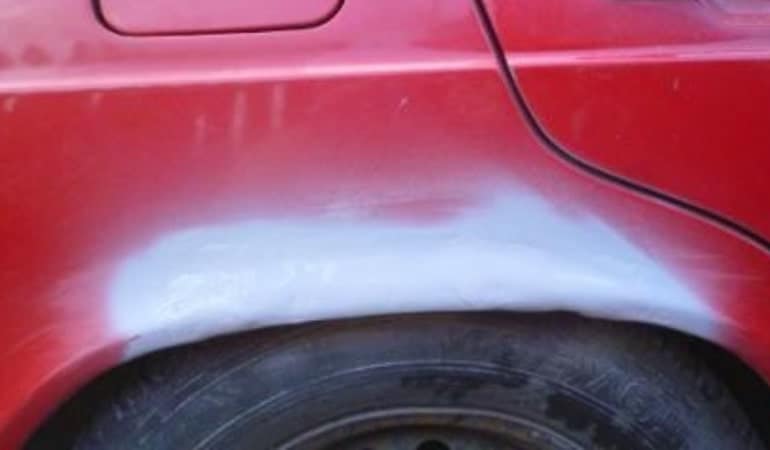
Features when dealing with large diameter damage
When restoring large-diameter holes, a lining is installed on the reverse side of the damaged part - a plywood sheet or a sheet of metal, it is also possible to use thick cardboard. This prevents deformation of the fiberglass patch.
To prevent the lining from sticking, it is covered with polystyrene in acetone or wax mastic. A mastic mixture is prepared from wax and turpentine mixed in a 2 to 1 ratio. This treatment makes it possible to calmly separate the lining from the resin at the final stage of the repair.
If it is difficult to get to the inside and after the end of the work the lining cannot be removed, then it is not installed. In such cases, the damaged area is densely packed with newspapers, in accordance with the body shape. At the very end of the renovation, the newspapers are removed.
Safety measures during work
The main danger during work is the contact of chemicals with human skin. Epoxy resin and hardeners can cause severe skin irritation. Also resins and hardeners can cause allergic reactions. During grinding, dust may enter the respiratory tract. During the repair process, fumes from resin, hardener and sanding dust can irritate the eyes.
How to restore a car body using fiberglass is shown in detail in the video.
Putty
Serious hull cracks usually occur after a significant boat collision. Simple, small cracks, this is most likely damage to the decorative layer.
Damage to the decorative layer, minor scratches and cracks will be enough to putty.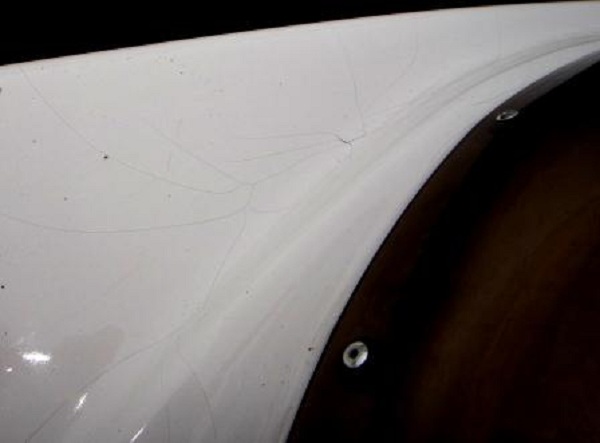
It will be possible to do it better with special putties, which include fiberglass. A distinctive feature of such putties is their increased elasticity, which allows them to be applied neatly. I will give a few examples of such putties:
- BodiFiber.
- NovolFiber.
- International.
Any type of putty is applied to a well-prepared surface, which must be carefully sanded and degreased.
Putty putty is applied in a thin layer, as many times as necessary to achieve the desired result. Each layer must dry, it is sanded, and only then the next layer is applied. After the putty is covered with a primer and painted.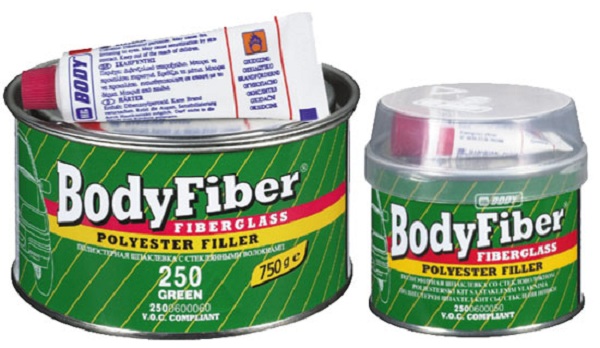
You can also use a one-component nitro-filler type NTs-008. It is intended for wood and metal, as well as for leveling dents along the enamel, for small cracks along the outer layer it is quite suitable.
Hand molding method
In modern industrial production, various technologies for the manufacture of fiberglass are used.
To create parts from fiberglass with your own hands, the most suitable method is hand molding. The production technology does not provide for the use of complex equipment and expensive materials.
In order to make fiberglass with your own hands using the manual molding method, you must sequentially perform the following stages of work:
- choice of materials;
- cutting fiberglass;
- creating a separating layer in the matrix;
- creating a cover layer;
- laying fiberglass into a matrix;
- applying a polymer composition;
- repetition of the previous two steps the required number of times (depending on the thickness of the product);
- drying of the product;
- removing the product from the mold;
- final processing (if necessary).
The main feature of the hand molding method is the high degree of dependence of the quality of the finished part on the skill level of the performer. In order to get the most complete picture of making fiberglass with your own hands, you need to consider each of the stages in detail.
Preparation
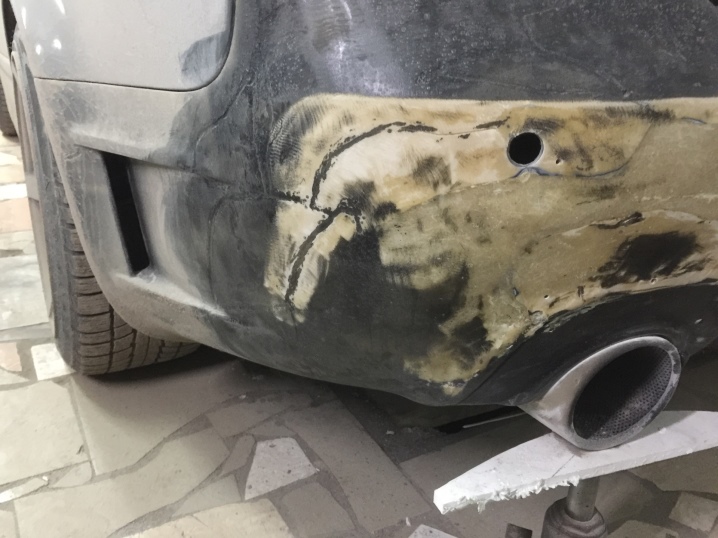
As an example of repairing a fiberglass product, we will give the restoration of a damaged car body or bumper. During work, it must be remembered that repair and haste in this case are inappropriate, since even the slightest flaws will be clearly visible at the end of the work. It is necessary to thoroughly clean the damaged area from rust, corrosion, paint residues.
If the bumper is to be repaired, then it is removed and installed on a horizontal surface. The edge of the break is scraped to remove the remnants of the fiberglass fibers. Then the surface is cleaned at a distance of 10-15 cm around the place of damage. Degrease the treated surface.
Fiberglass laid in several areas at once interferes with high-quality work and looks untidy, this will be especially noticeable at the end of the repair. The processing of one area after another is much more efficient and better.
Fiberglass hood making methods
Let's take a look at how you can make a fiberglass hood. There are only two ways:
- Matrix-free fiberglass and resin bonnet
- Fabricating a fiberglass and resin bonnet using a matrix
Matrix-free fiberglass and resin bonnet
Fiberglass with resin is applied to the outside (face) surface of the original hood. The reinforcements on the back can also be made from resin fiberglass to the pattern of the original bonnet and then glued to the first part. Another option for reinforcement on the inside is to create their shape from any material (polyurethane foam, polystyrene, cardboard) in place, and then apply glass mat with resin over them with an overlap, on the back of the hood. This results in a homogeneous back with fiberglass reinforcements.
The bonnet, made without a matrix, has been reinforced with fiberglass and resin-coated polyurethane foam reinforcements.
Disadvantages:
- The disadvantage is the rough front part, which requires additional leveling (putty and sanding), which will take additional time, make the hood heavier and thicker.
- If the panel is copied directly from the original, without a matrix, then its shape may be slightly distorted during hardening. This will also require additional alignment. Therefore, it is important that curing takes place gradually, without temperature fluctuations.
- The shape (in this case, the hood) made without a matrix turns out to be slightly larger than the original, since it is made on top of it. This may require additional adjustment of the bonnet in place.
A mold (hood) without the use of a matrix can be made when there is no need to make many copies of the original or a high quality of the front side is not required.As stated above, a high quality face can be achieved by additional leveling after the fiberglass hood has completely cured. If you want to use this method, then the principle you can use is the same as when creating a hood from a matrix. It will be described in detail below. The exception is that layers of fiberglass with resin are placed on the original hood (donor), and not inside the matrix, and a layer of gel coat (gelcoat) is not applied, since its meaning is lost.
Fabricating a fiberglass and resin bonnet using a matrix
If you need to make several copies of the original (or the created full-scale model), and also require high quality of the front side of the hood, then before making the hood from fiberglass, you must first make a matrix.
A bonnet made from a matrix will be the most accurate copy of the hood from which this matrix was made. The method of making a fiberglass hood using a matrix can be considered the only correct way to obtain a high quality product. If the matrix was made correctly, then you will receive a hood that does not require additional alignment, it will be exactly the same size as the original (as opposed to a hood made without a matrix).
Disadvantages:
- Manufacturing a bonnet using a matrix requires additional costs for more materials (than making a bonnet without a matrix), and it will also take more time. Again, the excellent quality of the resulting copy using the matrix does not require additional labor and materials for aligning the hood (as is the case with a hood made without the use of a matrix).
- If you only need to make one copy of the hood, then the matrix will have to be thrown away, given or sold to someone, or kept until the moment when it can be useful again.
Large holes
If the crack in the case is deep, then the resin-impregnated fiberglass should be tucked into it as tightly as possible.
If this is a hole, then glue the fiberglass from the inside of the boat's hull, and install the matrix from the outside.
By the matrix is meant a part made of polystyrene, which will repeat the boat's hull from the outside. Since you need to make a fiberglass layer commensurate with the hull of the boat, you need to take thick fiberglass.
The process of patching the hole is the same as applying layers of fabric to small cracks, only there will be more layers and each layer requires sanding.
The repair sequence can be seen in the video:
Previously, the necessary components were not always in the store, now you can buy the entire repair kit. Such a set costs about 4,000 rubles, includes epoxy resin, hardener, fiberglass, plasticizer.
Removal from the mold and finishing
The product must be removed from the matrix after the material has gained strength in order to avoid its deformation and delamination. Under normal conditions, the drying time for fiberglass is 12 to 24 hours. This time can be shortened by heating the matrix with an infrared emitter, or by placing it in a drying chamber.
Finishing includes trimming and sanding the edges of the product.
If necessary, the product can be painted in the desired color with a polyurethane-based paint. Finished materials can be glued to each other using polymer adhesives.
How to glue with your own hands?
There may be several damages, and the repair will depend on the degree of trouble.
Crack
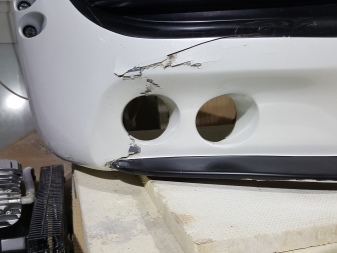
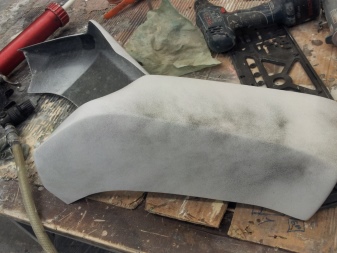
Repair of fiberglass is not particularly difficult if the process technology is followed. After finishing the grinding of the edges, the part is placed on a flat surface, the edges are joined together to be able to obtain the exact size of the patch. Some craftsmen prefer to leave the edges of the edges untreated, believing that the patch will hold on tightly.
If you clean the surface in the direction of damage up to 5 cm, you can get a perfectly flat product. The crack and the adjacent area with a distance of about 10 cm must be repaired with polyester resin. Then the area covered with resin is covered with 300 grade fiberglass. Then wait until the resin is completely dry and apply a layer of putty. After the final drying of all layers, the final cleaning is carried out with an emery cloth or a grinder.
Breach or break
Reconstruction of the resulting hole will take longer than repairing cracks. In this case, a patch is applied, taking into account which it is necessary to immediately prepare more fiberglass and putty. The damaged surface is cleaned in the same way as in the case of a crack. After stripping, adhesive tape is glued to the seamy side, then resin is applied to it and at a distance of 20 cm around.
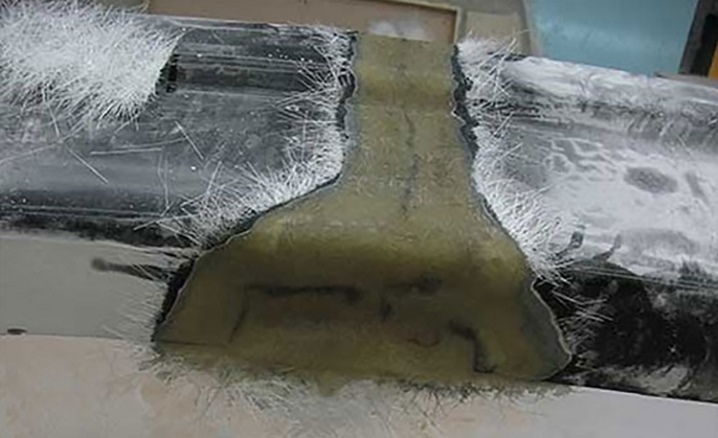
After complete drying, cleaning of the area begins. The protruding layer is removed with sandpaper or a resin roller, then this place is cleaned again. A primer is applied to a flat surface, after which puttying is carried out. A metal mesh is applied over the putty to avoid the appearance of microcracks. The resulting result can be dried with a construction hairdryer, then smoothed out with a grinder.
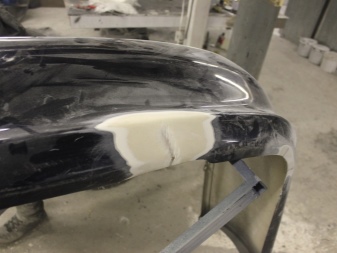
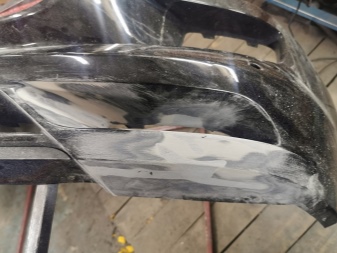
Dents and scratches
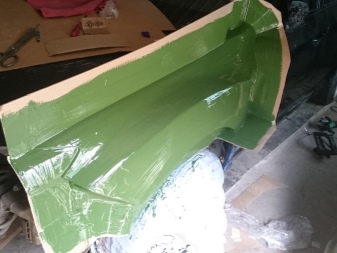
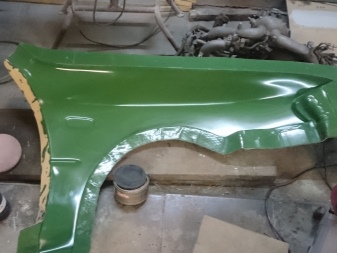
Dent repair depends on its condition. If the dent is large, then you need to glue it like a hole, that is, the fiberglass is cut out and glued. Small deformations are repaired by heating and leveling by hand. Sometimes the protruding part is cut and covered with resin, the depressions are also filled with resin and covered with putty.
Splitting off
In case of spalling, the lost part is restored with the help of fiberglass. The difficulty lies in the fact that it will be necessary to accurately repeat the shape of the spall. The spall edge is cleaned off. The patch is leveled with sandpaper. The joints are filled with resin and covered with fiberglass, reinforced from the inside with additional layers of fiberglass. The final procedures are polishing and painting.
The repair of fiberglass containers and products is carried out using the same technology as the repair of car bodies and bumpers. If there is a need to make a fiberglass item, then you will definitely need a blank. The punch is made of various materials: wood, clay, plastic, sometimes plasticine. If the product is large, then the punch is recommended to be made of foam.
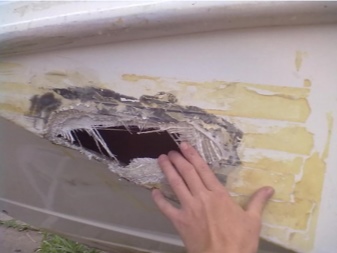
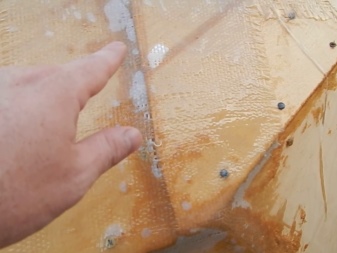
The impregnation of fiberglass with the prepared composition should be uniform, for this it is better to spread it on a glass horizontal surface. When the impregnated fiberglass is applied to the blank, care must be taken to ensure that no air bubbles remain. Layers are stacked in turn, while long breaks should not be allowed, otherwise the previous layer may dry out. It takes about 3-4 days to completely dry the product. The punch can then be carefully removed.
Carefully following a simple technology, you can repair and manufacture fiberglass items at home with your own hands.
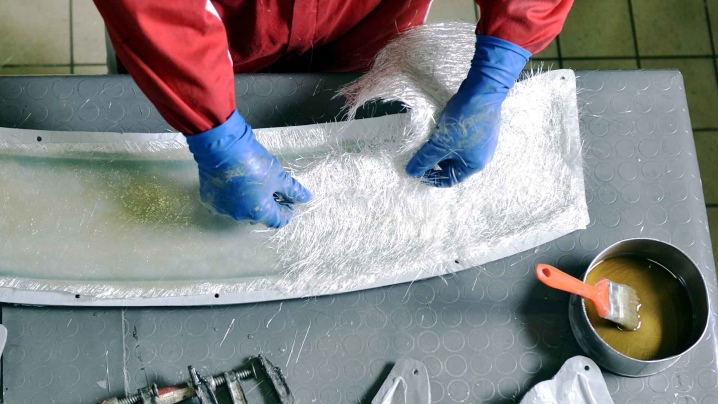
How is the repair of fiberglass, see below.
Choice of materials
The type of matrix material is adopted depending on the number of serially produced parts. For one-time molding, the matrix may be made of plaster. If more than a thousand samples are required, a steel matrix is ordered. At home, a mold from the original model is often used as a matrix.The most convenient way to make an impression is also from fiberglass according to the technology described above.
The choice of the type of fiberglass depends on the requirements for the strength and aesthetic characteristics of the finished product. A fabric with fine fibers will give the surface a smooth, glossy look, while the use of coarse fiberglass will provide high strength values.
The composition of the polymer resin is also determined based on the purpose and operating conditions of the part. Polymer filler is responsible for such technical characteristics of fiberglass as:
- product color;
- the degree of waterproofing;
- Operating temperature range;
- exposure to the influence of chemicals and environments;
- susceptibility to ultraviolet radiation;
- the level of fragility, softness, impact resistance of the product.
