Rules and stages of preparation for putty

A good preparation of the walls for putty should ensure the quality of the putty layer, therefore, several requirements are imposed on the surface at once. The reason must be:
- durable, even without a hint of any delamination;
- clean, without residues of paint, plaster, other finishing materials, without dirt, dust.
Before starting preparatory work, damp walls must be well dried, then also cleaned of any old layers, dirt, dust.
If you divide the whole process into stages, then the preparation of the walls for putty is carried out as follows:
- First, remove the old coating - paint, tiles, wallpaper, etc.
- Using a wide brush, moisten the base with water. The purpose of the work is to remove even the smallest residues of the finishing material in a high-quality manner.
- Eliminate all defects of the wall material - grooves, seams, cracks, irregularities.
First, the gaps are expanded (sewn up) with a hammer and chisel, and the remnants of poorly adhered material are removed. Prepared cracks are removed (with a vacuum cleaner) from dust, dirt, concrete residues, then moistened. Then the prepared, dried space is filled with repair mortar.
Tools
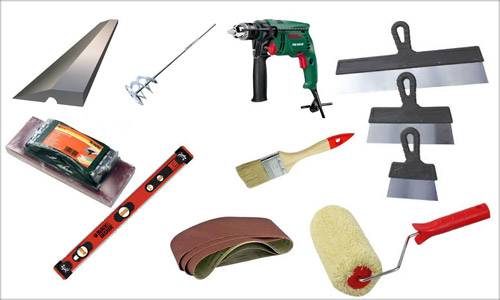
Not a single stage of repair work is complete without tools. To carry out preparatory activities, you also need your own set. It depends on the type of coating to be removed. It may include:
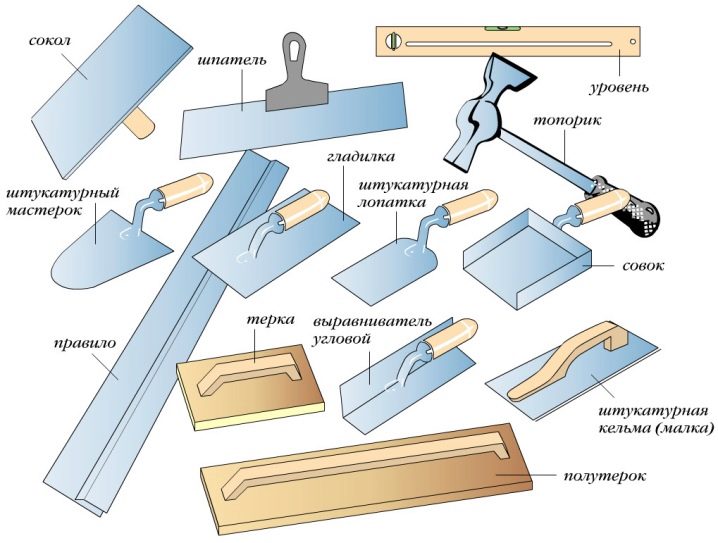
- The aluminum rule used to check the degree of unevenness. There are tools of various lengths, but only two - 1 m and 2 m - will be enough for the walls.
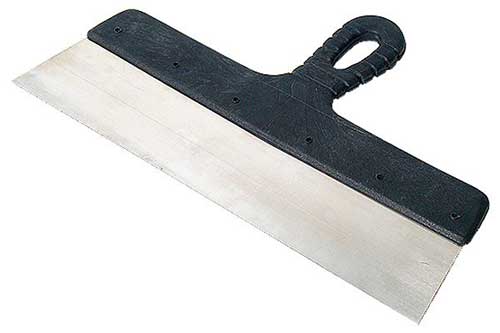
- Trowels for plastering (putty) of the base. They will also need two pieces - one-handed (length - 280 mm) and two-handed (500 mm).
- Spatulas for removing old finishing materials - wide working (400-450 mm) and auxiliary narrow (100 mm).
- Scraper for removing old trim. It differs from a spatula by a very sharp working surface.
- Drill with special grinding attachments.
- Brush for priming.
- Needle roller for wallpaper removal.
- Sponge, roller or spray bottle.
- Small brush.
If there are cracks on the base, then a chisel and a hammer must be attached to this "company". When there is a "battle" with wallpaper, it is better to have an additional assistant at hand - a clerical knife.
Putties
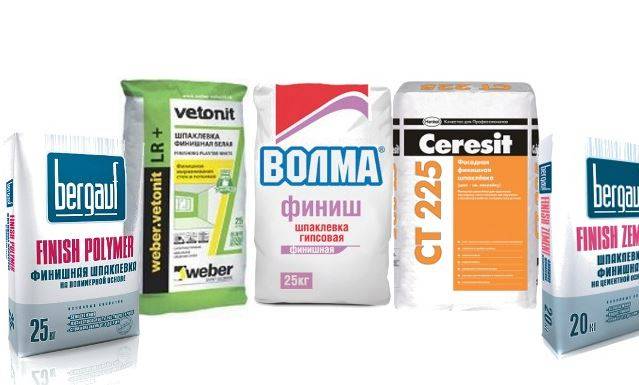
First of all, the required types of putty are determined. Usually, wall treatment involves the participation of a cut of two compositions - for starting and finishing work. For the former, coarse-grained mixtures are optimal, which quickly solidify and do not creep. The maximum layer thickness is 5 mm. For finishing works, finely dispersed putties are good, which are usually applied in a thinner layer - from 0.5 to 2 mm.
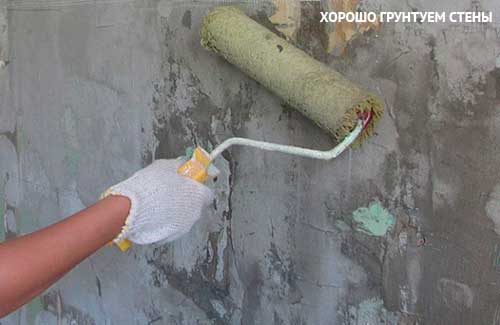
Primer
It is a polymer waterproofing agent that improves the adhesion (adhesion) of dissimilar materials. The best mixture would be a deep penetration primer, it will reduce the level of water absorption of the base. It is recommended to apply the primer not with a roller, but with a brush. After processing, the surfaces are allowed to dry completely, then the walls are checked by hand to make sure that there is no dust left on them.
Degreasers of surfaces may be required, as well as antiseptic impregnations to protect walls from mold. For uneven substrates, gypsum or cement plaster will be needed. The latter mixtures are recommended if the leveling area is large, when a fairly thick layer is required.
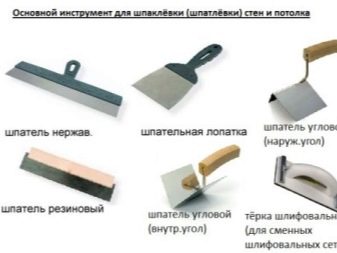
What tool is needed for puttying
To putty the walls yourself, prepare a minimal set of tools. What tools can't you do without?
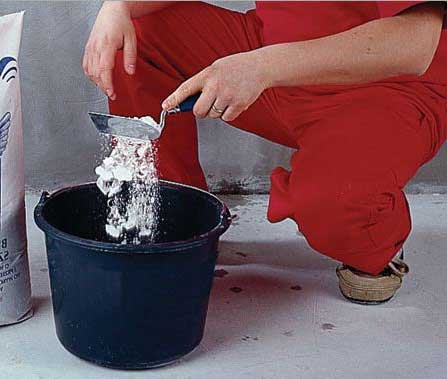
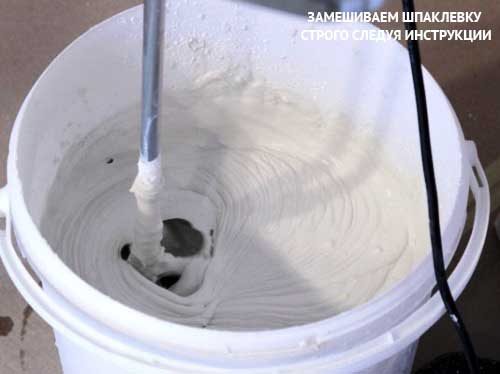
1.A drill equipped with a special attachment - a mixer. Typically, putty is sold as a dry mix. Water is added to such a mixture in a certain proportion. Only with a special mixer you can perfectly stir the putty mixture. The output should be a homogeneous putty without lumps.
2. A set of spatulas. Be sure to choose a trowel of different sizes. In work, you will have to use both large spatulas (40-50 cm) and very small ones. Indeed, in problematic hard-to-reach places, it will not be possible to properly putty the wall with a large spatula. This is exactly what small spatulas are used for.
3. Rollers and brushes for wall priming. It is undesirable to skip the priming stage. After priming, the wall is covered with the thinnest film. This not only further increases its strength, but also provides excellent adhesion of the treated wall to any facing materials (adhesion).
4. Rule. It will be needed in the case of uneven walls when you have to apply the putty in a thick layer. For smoothing thick layers of putty, it is convenient to use a long metal rule.
5. Spirit or laser level. Often the surface of the wall is very uneven. Before starting the starting puttying, check beacons are installed using an alcohol or laser level for checking.
6. Sandpaper. If you want a beautiful surface that is pleasant to look at, use fine skins for mashing. For example, grouting with 240 sandpaper will give you the perfect finish. Use the finest sandpaper only for finishing putty. And at the stage of the starting initial putty, it is correct to rub the wall with a coarse coarse sandpaper.
7. Manual skinner. Grouting with sandpaper will become much more convenient if you use a manual skinner. This is a tool on the handle of which special clamps are installed to secure the skin.
8. And, of course, you cannot do without a container in which the putty is stirred.
A list of tools you may need to putty your walls. Photo - .
Putty work
You need to understand the difference between plaster and putty. The plaster is coarse and is used to level the walls for painting, if the differences are quite large. But the putty allows you to make an optimal surface for painting. It will be smooth due to the small particles used in the composition. The technology of wall puttying implies the application of several layers with a break for drying each.
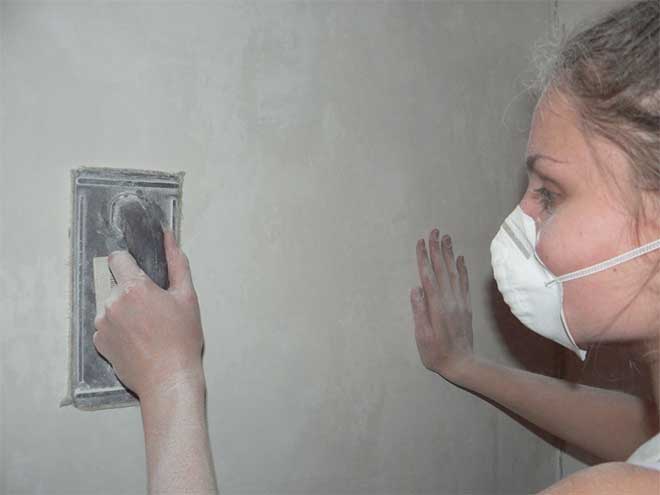
When the layer is dry, it needs to be sanded. This allows you to smooth the surface, remove protrusions and tool marks. The work is done with a grinder or a special float. The whole process takes about a few days.
The main task is to make a perfectly flat surface, without flaws, cracks and protrusions. The grip quality also plays a big role in this. Usually 3 layers are created: starting and two finishing. However, professionals can create more - up to 6 layers.
Choosing tools for the job
Without the right tools, you won't be able to decorate the walls with your own hands with plaster. The good news is that they are simple and affordable, have a low cost and even a beginner can work with them. They are as follows:
- roller and brushes for work;
- construction mixer for mixing the solution;
- a set of spatulas (wide, medium and narrow), fine-grained grater;
- a rule for controlling the evenness of the base;
- mixing container.
The wide one is from 30 to 60 cm wide, it does the main work, the middle one has a width of 20-25 cm, it processes the corners, and the narrow one (from 5 to 10 cm) picks up the mixture. To putty the corners and make them even, an angled trowel is used.

Application of starting putty
We will work with a starting gypsum plaster with additives. The technology of plastering walls for painting is as follows:
- Using a wide trowel, transfer the mixture to the wall.The thickness of the layer depends on the quality of the surface. All irregularities are hidden, most often from 3 to 12 mm is enough. The wider the trowel, the more mix will be applied and the faster the job will be done. But, it is difficult for beginners to work with too wide a tool.
- To save time and effort, further work is not necessary after the first layer has completely dried. It is enough for it to dry out and grab. In this case, you do not need to apply a primer either.
- The surface will dry for about 8 hours, it all depends on the type. After that, you can start sanding with a sander. Alternatively, coarse sandpaper.
Finishing layer
Finishing the stent requires a lot of effort, since any defects will be obvious. In addition, the thickness of the putty layer is small, only 2 mm. Therefore, the application technology has some differences:
- The mortar applied to the wall must be stretched so that a thin layer remains, filling cracks and depressions.
- The number of layers depends on the quality of the base layer. Usually 1-2 is enough. If a beginner works, then the number increases. You can check evenness with a flashlight or lamp.
- After drying, you need to sand it. Only this time you need a fine-grained grater. It is necessary to carefully wipe all the walls, leaving no gaps. It remains to clean off the dust from the surface of the wall and cover it with a primer.
Everything is now ready to paint the surface. We learned how to properly putty the walls for painting. And although at first glance the work may seem simple, it is followed by more than one day of the technological process. It begins with the selection of a suitable mixture, the preparatory stage, which includes cleaning and priming the walls, as well as directly from the putty. It is necessary to apply a starting and finishing layer. And only when it turned out to achieve a flat surface, you can proceed to the simplest type of decorative finish - painting.
Why are the walls plastered?
The putty allows you to hide not only noticeable flaws, but also small cracks and defects, because in comparison with other types of plaster, the mixture has a fine-grained structure.
This material allows you to level the surface to an ideal state, so there will be no problems with gluing the sheets. If you glue the wallpaper directly onto the plaster, you can still see some irregularities.
 The plaster can be too textured, which will be visible through the wallpaper.
If the walls have plasterboard plates on which it is planned to glue the wallpaper, then preliminary putty is also required, despite the fact that the surface seems ideal. However, the difficulty is that if you stick the canvas immediately on the panels, then with their subsequent installation, it is more likely to tear off the top cardboard layer. This, in turn, will require additional repair work, so it is better not to risk it and apply putty.
The process of leveling the floors is divided into the following stages:
- Application of a base mixture that will hide large defects and microscopic cracks on the surface. On average, the thickness of this layer is 4-4.5 millimeters.
- Next, it is necessary to apply a putty to the floors for finishing leveling, which will achieve maximum smoothness. Typically, a layer of this composition is about 1.8 millimeters.
Putty work, priming
After preparing the joints, the drywall should be primed before gluing the wallpaper before the putty. This will improve adhesion. Failure to apply a finishing layer leads to some problems:
- the elevation of the seams above the surface creates irregularities on the canvases after gluing;
- it will not be easy to remove the wallpaper when replacing: it will come off along with pieces of cardboard and plaster;
- the lines of the joints of the drywall sheets are visible through the thin wallpaper.
Puttying is performed in the following sequence:
- a solution is made from the finishing mixture with the expectation of 45 minutes of work, so as not to grab;
- using a wide spatula, apply it evenly to the wall;
- after drying, the applied layer is sanded with emery paper (float) until a smooth surface is obtained.
When the sanded surface is ready, some craftsmen may have a question: is it necessary to prime the drywall before gluing the wallpaper directly? Practice shows that this is necessary, since it prevents the rapid absorption of glue, provides better adhesion of materials (wallpaper to the wall). For information on how to finish the plasterboard base, see this video:
When processing walls, the floor should be covered with polyethylene
To prime a prepared plasterboard surface, it is enough to purchase the composition in a ready-made (cans from 5 to 10 liters) or concentrated (containers 1-3 liters in volume) state.
The first can be used to immediately process the work surface, and the second - after dilution according to the specified recipe. The floor should be covered with plastic wrap to avoid stains.
The fewer defects on the treated surface, the better the wallpaper looks. We must strive for this.
The considered technology of the preparatory work allows you to obtain a decorative coating from wallpaper for many years without repair. A beginner in decoration is also able to cope with all the work.
Make sure the room is well ventilated before starting work. Although acrylic primer is not a highly toxic material, it is still not recommended to breathe its vapors for several hours. If the home craftsman does not have experience in performing this kind of work, the question naturally arises: is it necessary to prime the drywall before puttingty. It will be useful to find out the opinion of professionals about when it is necessary to apply a primer, and in which cases you can skip this procedure.
Of great importance is the color of the primer, which will show through from under the thin wallpaper. For light wallpaper, you need to choose a mixture of only white, for heavy, bright or dark materials with embossing, a composition of any shade is suitable. Drywall is one of the most popular and relatively inexpensive materials for leveling walls, it has many characteristics that are valuable for creating a comfortable environment, including lightness in installation, high speed of work, excellent sound and heat insulation, absence of extraneous odors, fire resistance, environmental friendliness. In the process of DIY repair, the question inevitably arises: is it necessary to prime the drywall before gluing the wallpaper and how to do it correctly.
Finishing the outside corners of the room is the most time consuming. This is primarily due to the low strength of these areas. Further processing of plasterboard walls for wallpaper begins with sealing the seams.
In this process, a reinforcing tape is used, and it boils down to a number of actions: As can be seen from the above technology, the preparation of gypsum plasterboard walls for wallpapering includes a number of procedures, including priming. In this case, the primer is applied before each new layer of finishing: puttying the seams, plastering the walls, between the layers of putty and before sticking the wallpaper.Finally, dust is swept from the walls and impregnated with acrylic primer of deep penetration. It is necessary for better adhesion of wallpaper and saving glue. Serpyanka is a lavs or fiberglass tape with an adhesive applied to its surface.
Outwardly, it looks like an ordinary medical bandage. Serpyanka should be glued as tightly as possible to the joints between the sheets, avoiding the appearance of air cushions. If the serpyanka does not adhere well, you can add a small amount of PVA glue. Preparing drywall for wallpapering begins with a preliminary examination of the walls.The joints of the slabs that require preliminary trimming are determined, the depths of the self-tapping heads are controlled so that they do not interfere with the surface finish.
If necessary, defects are eliminated.
The choice of putty for wallpaper
When purchasing materials for repairs, a number of factors are taken into account.
| Work budget. Unfortunately, for many, this is exactly the first point - after all, high-quality putties from proven manufacturers are quite expensive, and with a modest estimate of repairs, masters often prefer cheaper cement compositions. | Taking into account the cost of finishing compositions, it is advisable to calculate in advance the approximate consumption of the mixture. You can do this in our online calculator |
| Type of material - dry, in the form of a powder prepared for mixing, or a ready-to-use plastic mass. In the latter version, acrylic fillers are more often produced. Gypsum and cement putty is almost always sold as a dry mix | The choice between a dry composition for self-mixing and a ready-made material is made by the master, based on his own preferences. But it is worth noting: ready-made mixtures are more expensive, therefore, with a large amount of work, it is worthwhile to focus on dry materials. |
| Features of the processed surface. The more irregularities, the more complex the wall / ceiling relief, the more often preference is given to starting cement putty, and sometimes plaster. Acrylic mixtures should only be used to close up small defects (for example, near sockets and switches) and to finish the surface before gluing the wallpaper. | In case of significant unevenness of the wall, plaster is first made, and only then the surface is putty. The thinner the wallpaper to be pasted, the lower the height of their relief, the more uniform the color and texture, the better the surface preparation should be. |
| The nature of the operation of the premises. Do not use gypsum filler in a humid environment! After a while, it collapses under the influence of moisture, loses its strength and integrity. Therefore, in kitchens, bathrooms, on balconies and loggias, in damp corridors and rooms, cement and acrylic mixtures are used. It is also desirable that for such premises the putty and primer have antibacterial additives. | For dense colored wallpaper, the choice of gray cement putties is acceptable. For thin and light finishing materials, it is better to choose compositions based on white cement, gypsum or acrylic - they give an even tone, without color drops |
| The composition of the glue and the type of wallpaper. It is necessary to check with the seller and / or manufacturer whether the glue used for the wallpaper is compatible with the putty. If not, unpleasant surprises await the repairman - from peeling corners of panels to completely "fallen" wallpaper. This is especially critical for the ceiling. | Cement and gypsum putties rarely come into conflict with wallpaper adhesives, but it is still worth checking with the manufacturer for compatibility. For acrylic compounds, this item is required. |
Observing these simple rules, it is relatively easy to prepare and level the walls with putty.
Sanding the walls after filling
After finishing filling, the surface is leveled with sandpaper, sponge or float. Sandpaper is chosen based on how smooth the coating should be, and how embossed it is now. For sanding perfectly flat surfaces, use the finest sandpaper. The rest is better to handle with skins of different grain sizes. In this case, you should start with sandpaper with a grain of 60, and finish with option 120. For work on a large area, it is worth using a machine with sandpaper. At the same time, it is better to use it manually in corners, shallow depressions and grooves. To control the situation, the walls are illuminated: you need to move from major flaws to small ones. When grinding, they work first in the corners, and then move to the center.
Alternative wet sanding is also used.Slowly level the wall with a special sponge with a handle and wait for complete drying to repeat the procedure. The result will be of high quality, but it will take a lot of time.

Floor repair sequence - step by step instructions
Step 1. First, you need to enlarge the crack with a percussion tool, and this should be done as deep as possible (to the base). This will cover up the hole so that a crack will no longer form at that location.
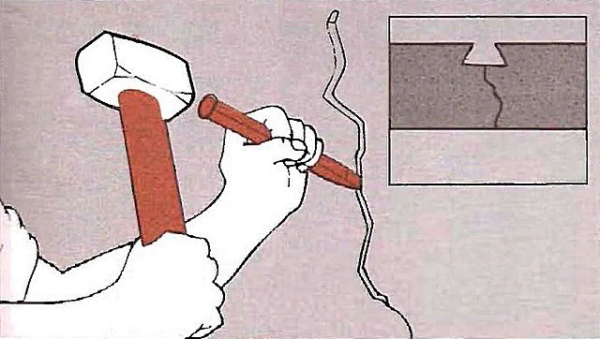 Thus, it is necessary to expand the site of damage.
Step 2. After it turns out to deepen the crack, it is necessary to remove the dirt from the surface. For such purposes, a soft foam sponge moistened with water is suitable.
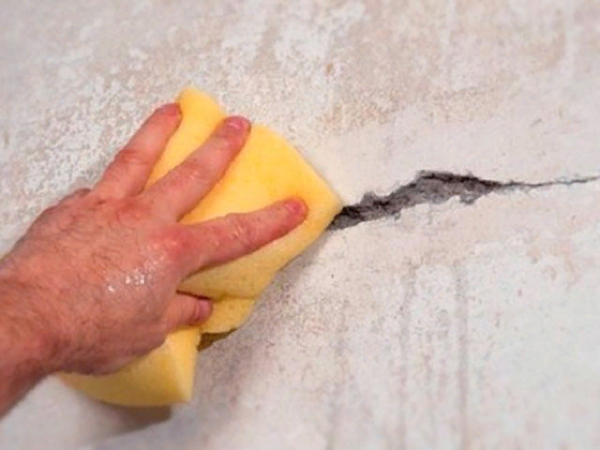 Remove dirt and dust particles from the surface
Step 3. Then the crack must be impregnated to the base with a layer of primer. It is recommended to apply this composition several times and then leave to dry.
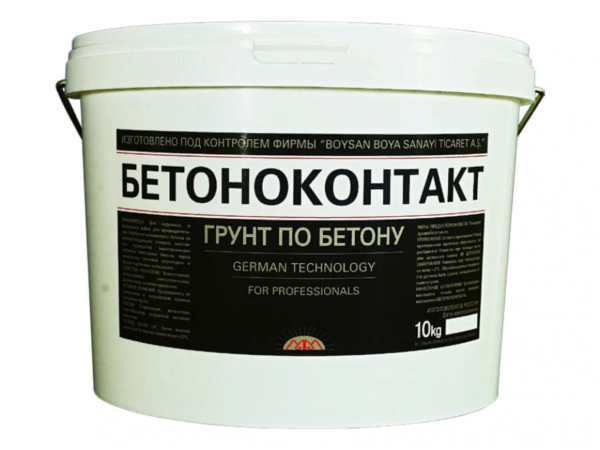 Apply a primer to the damage
Step 4. Then this hole must be filled with putty. In this case, the base composition is suitable, but some masters recommend using a sealant. If the defect is too deep, then it is advisable to fill its inner part with polyurethane foam sealant.
 We putty the defect
Step 5. The polyurethane foam sealant must be cut off after drying so that it does not stand out. It is necessary to walk over the entire surface with coarse-grained sandpaper to remove irregularities.
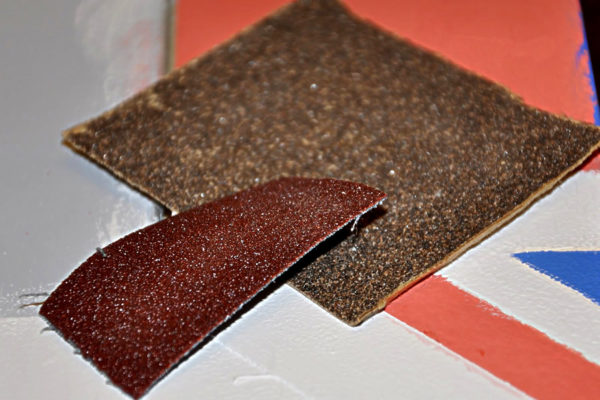 It is better to choose sandpaper of two types: larger and smaller
Step 6. If these are plasterboard walls, then a special mesh with an adhesive base must be applied to the seams, and then the base putty must be applied. In addition, it is necessary to fill the grooves from the fasteners, the fixing points of the self-tapping screws with the solution. Otherwise, the fasteners will rust, and traces will appear through the canvases.
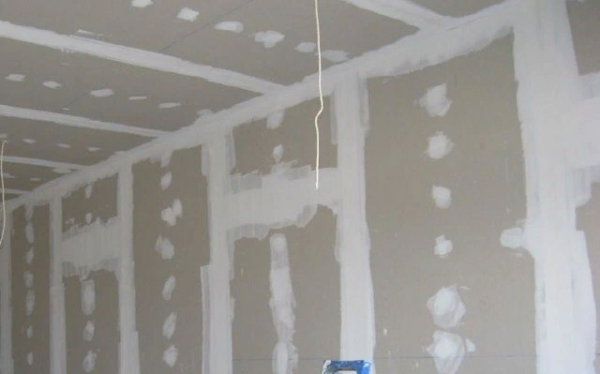 This is how the overlaps should look like after covering with putty.
Step 7. After the layers are thoroughly dry, apply a primer with a disinfectant effect to the surface using a roller. Such processing will increase the life of the wallpaper. In hard-to-reach places (in the corners), you will have to treat the surface with a brush. The main thing is that the composition thoroughly saturates the surface layer of the walls.
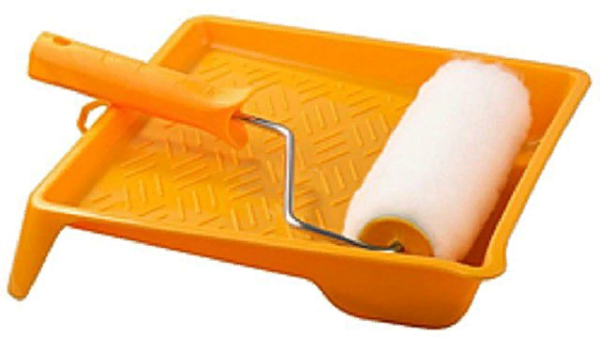 The primer is poured into a paint bath
List of tools for the production of work
We will give a list of the most necessary tools for applying putty on various surfaces.
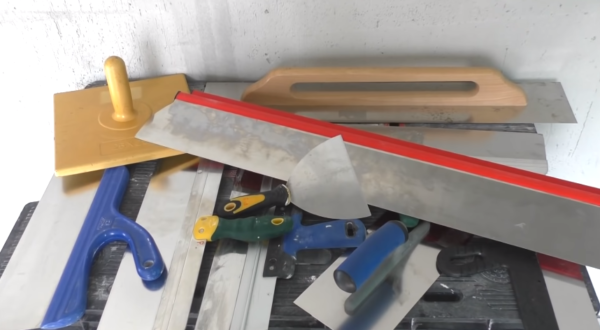 Work tools
The fact is that the higher the quality, the easier it is not only to work, but also to learn. Curved and rough trowels are very difficult to apply, even for experienced professionals, and not even for beginners. The material is constantly glued not to the wall, but to the surface of the trowel, does not flow, the tool leaves behind noticeable traces, etc.
Currently, most craftsmen are switching to polymer putty, it is more expensive than usual, but significantly increases labor productivity. Due to this, the increase in cost has almost no negative impact on the estimate of construction work. What needs to be prepared for puttying?
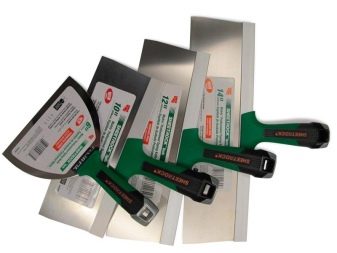
-
Spatulas. There should be at least two: a wide one with a length of 30 cm or more and a narrow one 5-10 cm. The length of a wide spatula can reach 50 cm, it all depends on the skill of the performer and the characteristics of the wall. With a short spatula, the material is applied to the long one, and the last one stretches it along the wall. It is not recommended to buy spatulas with a narrow blade, they hold little material, you have to place it often, and this takes time and extra effort. Spatulas can have straight and curly handles, parallel or semicircular side edges.
-
Ironers. The tools are much more convenient for work, the sizes and shapes of the handles are different. But it is difficult to learn how to work with such tools; you can switch to them with practical experience.You will feel more or less confident after spackling 150-200 m2 of the surface. Instead of a trowel, you can use a spatula for mechanized application, but this is a rather expensive tool.
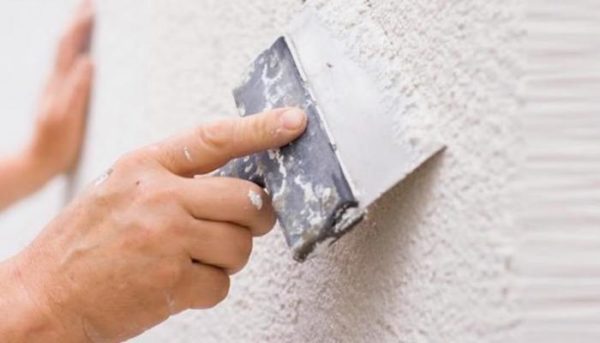
Preparing walls for putty
Old decorative trim from the walls must be carefully removed
A high-quality plaster layer can be left alone (the material does not crumble, does not lag behind the base - booming sounds indicate delamination when gently tapping the surfaces)
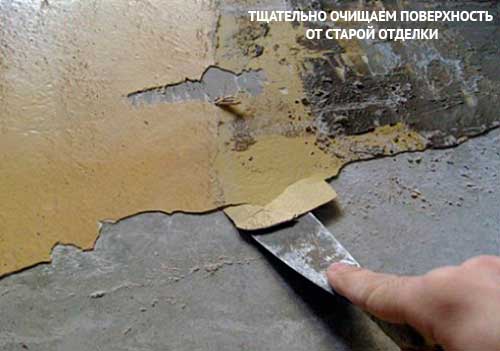
After removing the wallpaper, the walls should be dried. The adhered small debris of the old finish is completely scraped off with a mounting knife or a sharp flexible trowel. Protruding irregularities need to be knocked down, deep depressions should be filled with putty and wait for it to dry. Next, prime the surface of the walls with a composition for deep penetration concrete - for applying a primer, it is convenient to use a paint roller, and treat the corners and hard-to-reach places with a brush.
A working composition is prepared from a dry putty mixture. In order for the material to fit well on the wall and to be polished without difficulty, the mixture should be prepared in strict accordance with the manufacturer's instructions.
Paste a VALID AdSense code in Ads Elite Plugin options before activating it.
It is important to properly prepare the spatulas for work: with the inner fold of a bent piece of fine-grained sandpaper, remove irregularities and burrs from the working edges of the spatulas, carefully wipe the blades with a clean rag - adhering particles will not allow the putty to smooth out without deep scratches. Also clean the mixer and container well before preparing the working mixture.
Reinforcement with tape
When puttying drywall seams, reinforcement is necessarily made using a special material.
After filling the seams, a reinforcing tape is applied to them. It consists of non-woven tape, fiberglass mesh and fiberglass. The tape protects them from cracking. It is evenly distributed over the surface of the joints and, smoothing with a spatula, remove air bubbles.
In the process of reinforcement, paper banding tape is sometimes used. The use of paper tape for reinforcement gives the seams the necessary strength.
After that, you will need to sand the walls using a special tool or sandpaper. The last operations will give a holistic look.
Workshop on processing joints:
Correct execution of the joint putty will help to level the ceiling and get a beautiful interior of the room. Careful adherence to the instructions will allow you to quickly achieve the desired result in the renovation of your premises.
Drywall is increasingly used in finishing works, displacing various types of plaster. In addition to wall mounting, such a finishing material is excellent.
If paint or whitewash is chosen for the treatment of the ceiling, then preparatory work must be done before applying them. Preparation and alignment.
Drywall tape called serpyanka has different sizes. The width of common specimens is 45 and 100 mm. Roll length varies from.
To neatly glue the mesh at a corner, unwind a short piece of tape and place a piece of tape at one corner. Then, gently roll the remainder of the strip onto the other side of the corner and press the strip against the base. Before sticking the serpyanka on the drywall, carefully examine the assembled structure. Check the seams: there should be a distance of about 1-2 mm between the two sheets.
This is necessary so that in the event of surface deformation, the structure does not lose its previous appearance. Corner seams are made in the same way. Here you need to be very careful when working with the solution. You do not need to apply it a lot, then you will have to work for a long time to remove a flat surface.
After the work done with the seams and corners, the entire surface of the plasterboard product is leveled with the finishing putty.
- The room where the work is carried out should have a temperature from +10 to +25, as well as normal humidity.
- It is required to close window openings and doors to avoid air movement.
- Checking drywall products for strength. With “flimsy fastening of sheets, sealing of seams between sheets will be meaningless, since drywall is deformed and this will lead to undesirable consequences.
Instruments
For high-quality filling of walls in a room, you need not only a good putty mixture, but also correctly selected tools.
During the process, you will need:
- Drill or industrial mixer. If dry putty is purchased, then you will have to prepare a solution from it yourself. To get a homogeneous consistency, you need a special mixer or drill with a nozzle.
- The mortar is applied to the walls with a spatula. Usually, a set is purchased, which includes many different shapes of spatulas - one type is needed on a flat surface, and in hard-to-reach places another shape of a spatula is more convenient.
- Rollers and brushes required for priming. It is not recommended to exclude such a procedure, since it has a protective function.
- Level. It is needed to determine how smooth the walls are.
- Sandpaper. If any inaccuracies and irregularities are found on the treated surface, they are eliminated. This requires sandpaper. If the volume of work is large enough, it is recommended to use a manual skinner. When using a starting putty, coarse sandpaper will be more convenient, and if a finishing putty is used, it is more convenient to use fine fine paper.
- Capacity for mixing the solution. Since the portion of the ready-made putty is kneaded by an insignificant due to its rapid drying, you can buy a small container.
Before choosing and buying a spatula, you need to try to apply it. It turns out it's not that easy, especially for beginners. Some people find it more convenient to use a regular roller. But according to builders with extensive experience, it is not very convenient for them to putty the walls, since it is difficult to achieve perfectly flat surfaces.
As for the choice of a spatula, here you should pay attention to the following details:
- the front roller has a considerable width and size of the blade, and the paint roller is smaller with a narrow blade;
- the handle of the spatula must be strong so that after the first use it does not remain in the hands of the master;
- the most comfortable are tools with rubberized handles;
- painting spatulas fail quickly;
- the ideal width of the spatula blade is 50 cm, for hard-to-reach places it is necessary to use spatulas up to 15 cm wide;
- a lamp or small lamp is needed, with the help of which all irregularities and imperfections after filling are determined. It is better to use a halogen lamp for this purpose;
- a construction knife and a stapler should be at hand.