Repair of veneer doors
Restoration of veneer doors depends on the nature of the damage. To repair the door, it is recommended to remove it from its hinges and lay it on a flat surface.
Elimination of minor scuffs and scratches
If shallow scratches and abrasions are found on the door leaf, a wax crayon or liquid wax is required for repair. The restoration process will take place as follows:
- The entire surface of the door must be cleaned of dust and dirt.
- It is very easy and neat to sand the problem areas with fine-grained emery paper so as not to remove the varnish layer.
- If wax is selected for repair, it is heated, after which drops of molten wax are applied along the length of the entire scratch or on the worn area. Remove excess immediately with a soft cloth.
- If the restoration is performed with a wax pencil, you need to break off a small piece from it, warm it up in your hands, knead it well, then spread it over the damaged surface. Remove excess with a cloth.
It is important! After restoration with any form of wax, the surface must not be varnished or painted. Over time, the wax loses strength and crumbles, and the varnished door leaf will be damaged.
There is another interesting way: the drawing is restored with oil paint. The difficulty lies in the exact selection of the desired shade and the need to own a brush. After cleaning, a thin layer of oil paint is applied to the area to be restored and rubbed into the damaged surface. Then you need to draw lines with a thin brush, resembling a veneer drawing. After all defects are masked on the canvas, it is necessary to polish the door with silicone grease so that the surface acquires a uniform shine.
Elimination of large chips and cracks
If deep defects appear on the door leaf that cannot be restored with wax, you can put a patch of veneer with the appropriate color, pattern and texture. The difficulty lies in the selection of a patch pattern that fully corresponds to the area where it will be installed. The process takes place in the following order:
- In the area to be restored, it is necessary to cut out a part of the damaged veneer.
- An element of the future patch is applied to the prepared groove, a position is selected in which the veneer pattern will match, cut to size.
- It is not difficult to glue the patch, for this you can use a paper strip with an adhesive base. You can also use PVA glue.
- Around the perimeter, the patch is masked with a wax pencil.
If the depth of the chip is very large, it is pre-leveled with a putty on the wood. After drying, they are rubbed with sandpaper, primed and only then they begin to apply a patch.
Restoration of a swollen surface
If the veneer is swollen, it will have to be glued. This will require an iron and a damp cloth. The iron is set to medium heat. The door leaf is preliminarily covered with a damp cloth and left for 10 minutes. Then a hot iron is applied to the surface for literally a few seconds.
The previous method is suitable for a slight bump. If it didn't help, there are other ways:
- Introduce PVA glue under the bulge. This can be done with a syringe without a needle or a spatula if the defect is located at the edge. Then we apply a hot iron and control the gluing process every 20 seconds. If necessary, reapply the iron.
- The coating can be restored using the "cold" method.PVA glue is introduced under the veneer layer, after which a weighting agent is placed on the door leaf and left for a day.
There is an option to do without patches and mask the damaged surface with a special putty, which includes wood chips of the same species as the veneer. If you can't find putty on sale, you can find shavings and mix it with glue. The crack must be sanded, covered with putty or adhesive with shavings. After drying, rub again with sandpaper and varnish twice with intermediate sanding.
Painting
Before you start painting veneer products with your own hands, you need to prepare the following list of available tools and materials:
- coarse and fine-grained sandpaper;
- primer;
- spray gun, roller or brush;
- stain (if necessary);
- paint and varnish material (paint, enamel, varnish);
- solvent;
- brush or scraper to remove old paintwork.
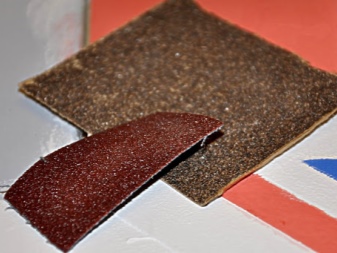

Next, proceed to the direct preparation of the veneer structure itself. At this stage, the existing fittings, decor and removable parts (handles, fasteners, hinges) are dismantled. If for some reason it is impossible to dismantle these elements, they should be wrapped in several layers of plastic cling film.
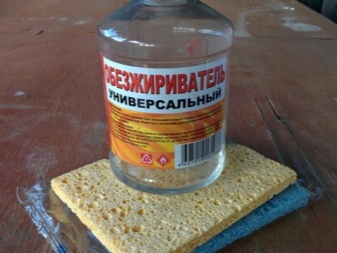
Then the surface of the structure must be thoroughly cleaned of dirt and degreased. For degreasing, universal solvents are most often used. After applying the degreasing agent, wait until the treated surface is completely dry.
Repainting a veneer product in a different color requires thorough removal of the old coating. It is recommended to use a fine grain skin at this stage.
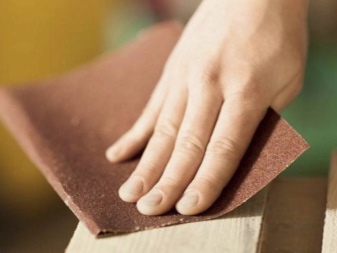
Removing the old coating with a metal scraper or a coarse brush is desirable in extreme cases.
Such manipulations must be performed with utmost care so as not to damage the fragile veneered surface. Minor damage and chips found during work should be primed and leveled using wood putty
After the putty has dried, the damaged area is sanded with sandpaper.
In order to change the color of the veneer (if necessary), it is recommended to use a stain. Before use, it is thoroughly mixed and applied to the veneer surface in two layers. Before processing the veneer with enamel or water-based paints, stain is not used.
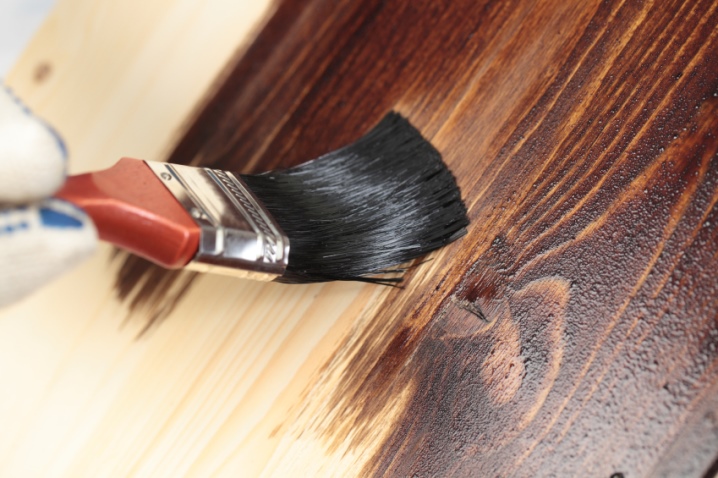
To apply paint to the veneer surface, it is recommended to use a spray gun (paint sprayer). The layers of paint applied with this tool are thin and even. In addition, the use of a spray gun avoids the appearance of drips and the formation of air bubbles. After applying the first coat of paint, wait until it dries completely. Applying a second coat of paint to a wet surface may cause air bubbles and sagging.
In the absence of a spray gun, it is allowed to use foam rollers and brushes with durable bristles. When painting a veneered surface with these tools, one should not rush, making chaotic movements in a random order.


After painting, the veneer structure is left for 48 hours in a dry and well-ventilated room. During the specified time, the painted product must be reliably protected from moisture, dust and dirt. Otherwise, the fresh paintwork could be seriously damaged. After the paint layer has completely dried, the veneer structure can be coated with a layer of varnish, which will give the product an attractive glossy shine.
For information on how to paint veneer, see the next video.
Colors and decor
After the preliminary work is completed, you can start decorating the doors. There are some options for how to decorate the door.These include sanding with staining and further use of varnish, wallpapering, stencil painting, vinyl decals and overlay facades, and canvas reconstruction.
These methods are widely used today. Let's consider them in more detail.
Grinding and painting
This is a great option for which veneered surfaces are suitable. The correctly selected composition of the coloring preparation makes it possible to highlight the wooden pattern on the surface. After preliminary work, the door is painted in the required color. For the highest color saturation, it is possible to apply two or three layers. With the help of paint it is possible to preserve the old door decor. To prevent the development of mold and mildew, cover the surface with stain before applying varnish.
Wallpapering
Restoring a white interior door with wallpaper is an attractive enough option that you can use at least annually. This method is not difficult and not expensive enough.
To refresh the door leaf with wallpaper, first you need to apply the primer in one layer and wait until it dries. Then you need to cut the canvas from the wallpaper.
Pay attention to the size of the cut-out piece of wallpaper matches the size of the door, or cut the canvas a little more for allowances. After that, apply glue to the surface and attach the wallpaper, smoothing and removing excess glue
Stencil drawing
You can also transform old doors using stencils. They can be bought ready-made or made by yourself. To apply a picture, follow these steps: first of all, the prepared surface must be varnished or painted and wait until it dries. A stencil is applied to the dried surface and attached. Then the free space from the inside or outside is painted and the template is removed. Then they wait until the paint dries.
Vinyl stickers
Decorating with vinyl decals is a modern finishing method. Vinyl stickers are moisture, water and sun resistant and can be washed as needed. Sticking them on the door is elementary - you need to lean the sticker and smooth it. Modern sticky drawings can be used several times, they are simply removed from the plane and glued to another place. They are often used to decorate plastic balcony doors.
Overhead facades
Sometimes it is not enough to restore an interior door, but you need to change its facade. Overhead facades, which are made from various materials, will help you with this, but it would be wiser to buy an overlay made of MDF. They do not absorb moisture, keep their shape for a long time, they are simply attached to self-tapping screws or PVA glue, and also have a low price.
Updating the canvas
If you want to increase the number of glasses in the door leaf, or even change their location, you will need to work hard. After you have removed the paint, remove the glass and cover the resulting holes with plywood. Make slits in the right place, then cover the door with varnish or paint and wait for it to dry. Then attach the glass to the glazing beads in a new location. Decorated panels can be attached instead of glass.
Hardware decor
If your door was made many years ago, it is most likely equipped with antique hardware, which is more advisable to restore than to throw away. To do this, sand the object with sandpaper and apply a primer-enamel, which will emphasize all the beauty of the ornament. After the handle is dry, reattach it.
The above methods are acceptable for any kind of door. But some want to see a new façade with a bold pattern on it. In such cases, paint is not suitable and other options can be used.
One of them is wallpapering. This method makes it possible to give the door an original look.Wall murals are distinguished by a variety of images and colors, but with frequent touching and dirt, they lose their previous appearance. Pasting vinyl wallpaper on a door has the same pluses and minuses as photo wallpaper, but stands out in that they cost much less.
Restoration of interior doors with fabrics is a very original and extravagant idea. It is enough to make a composition and glue it to the surface, using not only fabric, but also sheet music, posters, cards and old photographs. This method will delight your guests incredibly.
Veneered doors
For clarity of the picture, we will clarify what veneered doors are. Externally, interior veneered doors can be confused with products made from natural solid wood, although the former are much lighter and more functional. Why? For the answer, you can turn to the peculiarities of the veneer door manufacturing technology.
Veneer is a rather capricious material and is nothing more than the thinnest cut of valuable tree species intended for decorative finishing of the surfaces of the door frame and door leaf. The veneered door conveys the texture and natural shade of natural wood.
Most often, the technique of joining veneer with a panel structure is used. An MDF board (modified wood) is glued to a blank made of wood bars (mainly conifers). Such a frame is responsible for the necessary geometry of the door, making it more resistant to the negative effects of humidity and temperature fluctuations. Following a special technology, a veneer covering is glued to the MDF board. That is, the hot pressing method is used.
The sequence of staining the door leaf.
The adhesion of the finish to the base surface is carried out due to the resins released from the wood when heated. In this case, synthetic agents are not used. To ensure a glossy shine, the structure is coated with the desired shade of varnish in several layers. He is responsible for the final color of the product.
It is important to note that veneered models, as well as from solid wood, within the same delivery from the manufacturer have significant differences in color among themselves
The reason for this lies in the uniqueness of the tree cut pattern, as well as in its ability to refract light. Among other things, the cloth is trimmed with more than one veneer sheet, which complicates the task of harmonizing the pattern from the stripes. Each model is unique and original. You can choose several products that are similar in color, but they will still be different in texture and pattern.
Sometimes the internal space of the structure is filled with cardboard honeycombs, which makes it even lighter. This factor is important for an interior door: there is no need to make efforts when opening and closing.
There are models that are not covered with a cut from a tree, but with films made using a special technology with a 2D effect (artificial veneer), imitating the texture and pattern of wood. Such doors are difficult to distinguish externally from interior veneer doors. Their advantage, in comparison with the latter, lies in their higher moisture resistance.
How to restore a wooden door leaf?
Do-it-yourself restoration of wooden doors consists of three stages:
- Preparation. The sash is removed from the hinges, all fittings are dismantled, the soft upholstery or paint layer is removed.
- Restoration. The product is putty in the places where the gap is formed. The holes are sealed with putty. After hardening, the putty goes through with a grinder. Residual dust is wiped off with a cloth. The prepared surface is painted.
- The final. The sash is hung with hinges on the door frame. Install a handle, lock, latch. If the shank is loosened, reinforcement with anchor bolts is performed. The gaps between the wall and the frame are blown out with polyurethane foam.
There are several options for how to restore a wooden door:
- To restore a varnished product, remove the old varnish layer down to the wood. Grind with fine emery paper in the direction of the grain of the tree. Apply a new varnish with foam rubber or use a flute brush. The first two layers are coated with an interval of 3 hours. The third and fourth staining is performed every other day. A total of 4 layers are applied. After drying, the product is polished with felt.
- Restoration with veneer involves a complete cleaning of the product. The sash surface and veneer are lubricated with contact adhesive. The workpieces are left to dry for at least 1 hour. For reliable gluing, you will need a press, but there is no such equipment at home. The veneer sheets are laid on the sash, quickly, with strong pressure, they begin to rub with a wooden block. For secure adhesion, they pass centimeter by centimeter. You can use an iron heated to 50 ° C instead of a bar, but after this method, veneer swells often appear.
- The old wooden sash is pasted over with laminate or MDF panels. Ironing or rubbing with a bar will not help here. The product is placed under a homemade press.
- When restoring a hollow canvas, it is insulated. After removing the panel, the pockets between the frame elements are filled with sawdust, mineral wool or other insulation.
- The wooden entrance door is restored with artificial leather on the inside. The material is nailed down with furniture nails, forming a pattern on the surface. To obtain bulges and additional insulation, a thin sheet of foam rubber is placed under the skin.
- A heavily cracked sash from the solid wood is restored with clapboard facing. The work requires a precise fit of the workpieces. Finally, the surface is sanded and varnished.
The most common repair method is simple staining.
Removing paintwork
Do not start restoring the door leaf until the old paint has been completely removed. There are three ways:

Mechanical removal. The method involves erasing paint with a grinder, grinder or drill with special grinding attachments.
Chemical cleaning. Remove old paint with reagents in a well-ventilated room or outdoors. During work, use glasses and gloves. Chemical solutions soften the paint, which is then scraped off with a spatula and wiped off with a rag.
Of all the methods, mechanical removal is most often practiced. A chemical solution and a hair dryer, if the cleaning technology is violated, will spoil the wood.
Sanding, filler and primer
After getting rid of the dried paint and varnish layer, the surface is sanded. First, I use coarse sandpaper to remove paint residues, burrs, and bumps. Wipe the sash with a dust cloth. The second sanding pass is done with fine sandpaper. Dust is wiped off the treated canvas, and the surface is degreased with a solvent. White spirit will do.
If grinding does not get rid of cracks, putty made from a mixture of sawdust with PVA glue is stuffed into the deep pits of the door leaf. You can use store formulations. The dried putty is rubbed with sandpaper.
Before painting, the sash surface is primed. The process cannot be neglected, otherwise the coating will be unevenly absorbed into the wood. When using wood stains, the primer is not performed.
Coloration
There is a large selection of paints and varnishes that allow you to get a glossy, matte or semi-glossy surface. For interior door blocks, water-based varnishes and paints are used. The front door is painted with alkyd enamel or nitro paint. Stains help preserve the naturalness of wood.
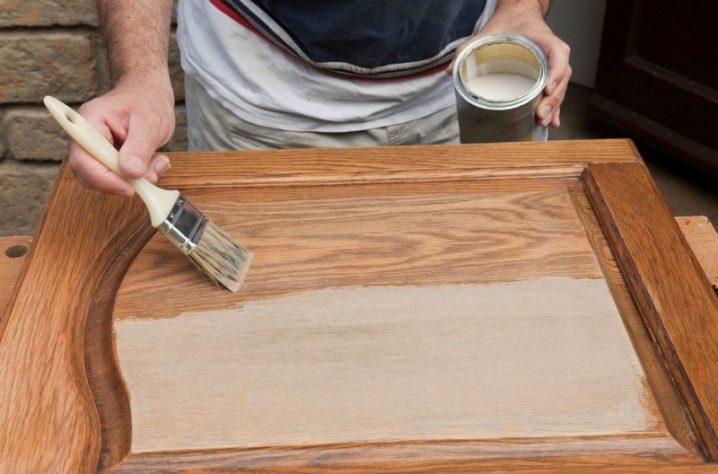
The paint is applied in two layers on a horizontally laid canvas. It is easier to roll a flat surface with a roller. The sash with convex patterns is painted with a brush.
How to varnish or paint a veneer door?

If you want to completely renew the interior veneer doors, you can cover the door leaf and frame with varnish or paint. In the first case, both shellac varnish and cellulose varnish are useful. There are few differences between them. Painting is more suitable for doors covered with natural veneer.
It is carried out according to the following scheme:
- Remove the canvas from the awnings. Before updating a veneered door, you need to prepare paint, brushes for the box and the end of the canvas, as well as a roller for painting the main area. It is better not to use brushes on large surfaces, otherwise stripes will be visible.
- If there are deep scratches on the canvas, then they need to be cleaned and puttyed. If the canvas is repainted in a completely different color, but you need to cover it with a layer of primer. If a primer is not intended, then the surface must be sanded and degreased.
- After the primer has dried, you can start painting. Only nitro paints are not suitable for veneer; from such a composition, the coating turns out to be spotty. Water-dispersed, giftal or polyurethane can be safely used.
- Painting can be done in one or two coats, but the paint must be completely dry. Depending on its composition, this may take from several hours to 2 days. If you paint in two layers, then one of them is performed in the horizontal direction, and the other in the vertical direction. This approach will provide an even coverage without gaps, without sagging.
Only then can the veneered door be hung and used. The finish can be matte or glossy. Coloring is an opportunity to completely renew a completely old, shabby product, transform the interior beyond recognition. The price of restoring veneered interior doors with paint is the most affordable option.
Problems and their elimination
Before proceeding with the restoration of an entrance or interior door covered with veneer obtained from various types of wood: oak, birch, maple, cherry, beech, walnut, wenge, and so on, it is necessary to carefully examine it and establish all defects. Since the repair technology, tools and materials that are required depend on their type. In this regard, when examining a box or canvas, they look at scratches, swellings, cracks and the level of depreciation of the coating.
Severe damage will need to be repaired with a specialized veneer paint. It is most comfortable to repair the door leaf after dismantling it from the sheds. Damage that is not too severe can be removed without removing the door.
Bulging material
Swelling of veneered doors occurs because the sheets of cladding material were unsatisfactorily and illiterately glued.
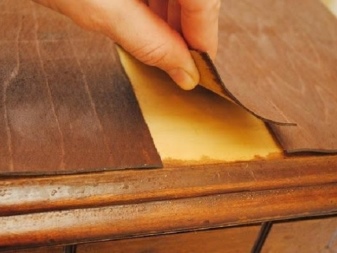
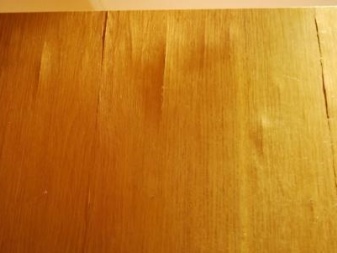
There are 2 productive ways to remove such a flaw.
Ironing. Before starting to restore a veneered door in this way, it is necessary to wet a piece of material, squeeze it out thoroughly and place it on the swollen area for about 10-15 minutes. Moisture will make the veneer layer more pliable. After that, the iron should be heated, but not very much (the lowest or medium temperature). All that remains is to iron the swollen canvas.


Veneer sheets are not very thick, therefore they are glued without problems with PVA glue.
When the veneer has just begun to swell and peel off in the areas where the sheets are joined, it must be fixed immediately with an iron or an adhesive, otherwise the “bubble” will subsequently become even larger.
Minor defects
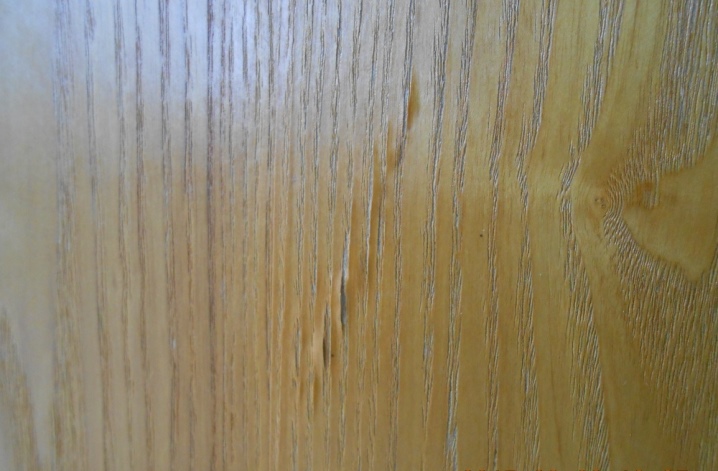
If you notice minor damage to your own door, you really should not be upset. The restoration of veneer with such minor defects as scratches and chips is carried out using such methods.
To apply a special layer of wax coating, you need to clean the small damage.
Only work with tools and materials is required with extreme caution. In the process of eliminating small cracks and abrasions, you can harm the canvas.
It happens that the owners are overly diligent in using sandpaper and the varnished surface becomes unpresentable.
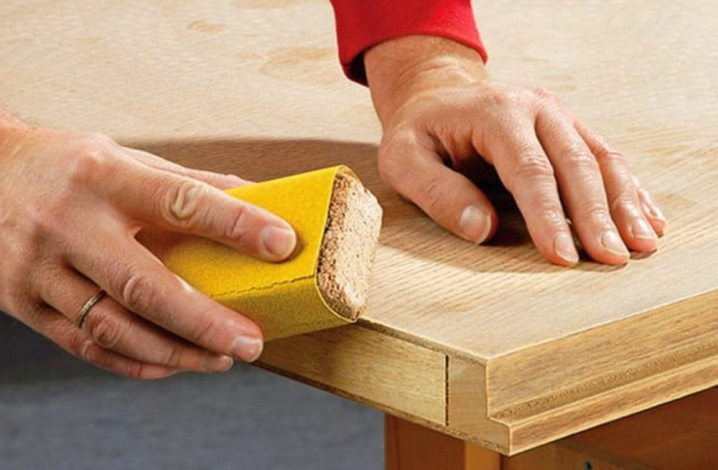
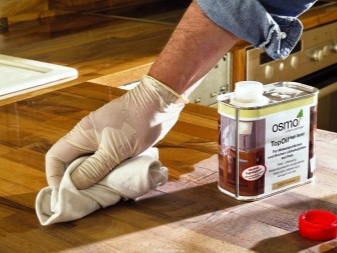
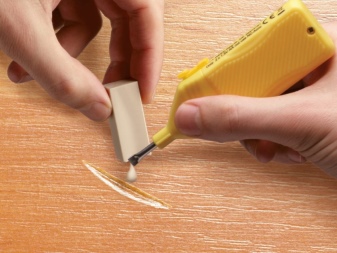
After that, thoroughly clean the door from dirt and dust. Each section of the entire door leaf must be thoroughly degreased. This will allow the wax to be applied at the proper level, and it will hold for quite a long time. It is necessary to heat the wax and carefully repair the scratches with it.

A filling wax stick is also suitable for surface regeneration. It will be possible to update veneered doors with a specialized pencil only if you use very little material. You need to take a small piece of wax and wrinkle it for a while. From heating it will acquire the necessary texture, and you can force it to be absorbed into the surface of the coating by rubbing. Remove excess with a rag.
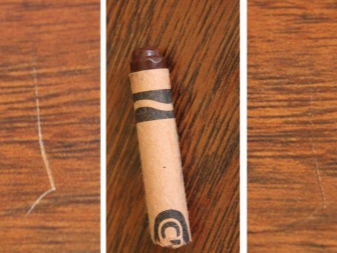
Since the wax will sooner or later begin to crumble, the product takes on a disgusting look.
Serious damage
Restoration of veneer-faced doors, in the presence of strong chips, holes and broken off areas, involves a larger intervention, and sometimes the need to completely change the cladding. In order not to make a complete replacement of the door leaf cover, you can make a patch from a material similar in color. To restore doors with strong dents, the following measures must be taken.
- Measure the defective area. Mark it with a regular rectangle. Record the information received.
- Cut off the cover from the door leaf, clean the base and treat it with special compounds. Fill the groove with wood filler, sand and prime the surface.
- Align the patch with the hole. After a precise fit, spread the two components with adhesive and connect precisely. Fill cracks with extruded glue, remove excess.
- Irregularities at the edges should be smoothed with fine-grain sandpaper. To avoid visible traces of processing, it is necessary to cover the edges with a water-dispersed paint based on polyacrylate. Grab a few centimeters from 2 sides of the joints so that the veneer layer is absolutely even.

Restoration of problematic veneer doors
Bulging material
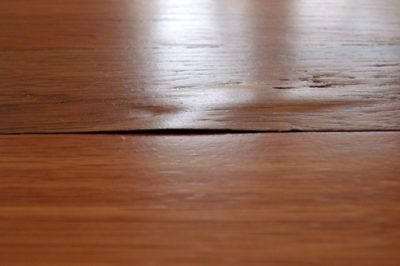
Often the reason that the veneer swells is its initial incorrect pasting. If the veneer material has been overdried, "waves" will appear during installation. If you find such a nuisance, you should act as quickly as possible. If you do not react immediately, then cracks or cracks will appear.
Repair is carried out using a well-heated iron. The iron is heated on medium mode and applied to the surface of the canvas for a while. In addition, the veneer becomes elastic if you use a damp cloth that spreads over the canvas and leaves for 15 minutes.
 Bulging material
Attention! In addition to the above process, such a nuisance is eliminated with glue and a dry rag.
How to update a door in case of serious damage?
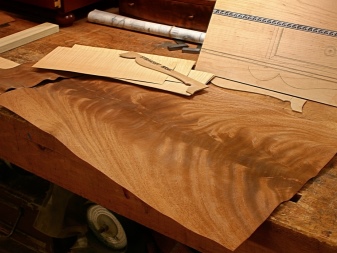
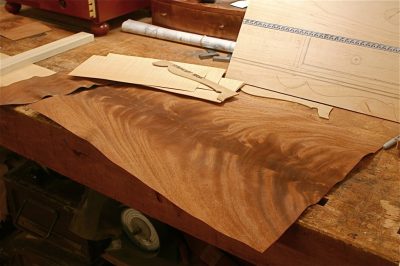
Sometimes, in order for the restoration of the door to proceed correctly and the problem that has arisen to be eliminated, a "patch" is applied to the veneer. It is prepared in advance. Take a piece of veneer that matches the texture of the surface and cut to the required size.
 Making a patch for a damaged door
- On the section of the door where the problem has arisen, one or more holes are cut. Their number depends on how many defects are on the surface;
- A patch is applied to each of the holes, but so that it coincides as much as possible in the edges and in texture with the veneer that is already on the structure;
- The required diameter of the future "patch" is cut out with a scalpel or a construction knife so that the veneered version of the installation does not lose its appearance. It is better if this process occurs across the cross section;
- Each prepared workpiece is glued into the prepared hole;
- Smooth with a mallet at the joints.
If the surface has irregularities or chips, then before gluing the blanks, apply a putty for wood and close up problem areas. After the putty has been applied, wait some time for it to dry, and then the restoration can be continued with sandpaper. After that, "patches" are glued to the door.
How to remove a scratch on a door or other minor defects?
At the moment when even minor scratches are found on the veneered door, you should immediately proceed with the restoration. This can be done in two ways:
- Using liquid wax;
- Applying a wax crayon.
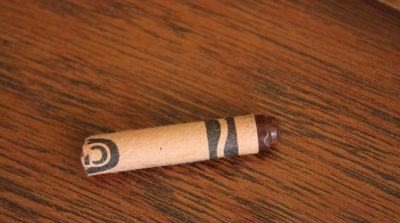 Wax stick for door restoration and removal of scratches
If you use the first version of the material, then the door must be cleaned of dirt and problem areas are treated with fine sandpaper. But you need to be careful when working with such a surface, since you cannot make great efforts in order not to remove the varnish. Then the process provides for the fact that you need to heat the wax and drip it over the scratches. Without waiting for complete drying, wipe the door with a soft cloth.
If the process is carried out using a wax pencil, then break off a piece and crumple it in your hands for a while. After that, the material is distributed over the surface of the door, and the excess is removed with a cloth.
Attention! If the restoration was carried out with wax, then it is impossible to paint the veneered doors or to process it with varnish. And all due to the fact that the wax will begin to crumble over time, and with it the coloring material will crumble, disfiguring the surface of the door
