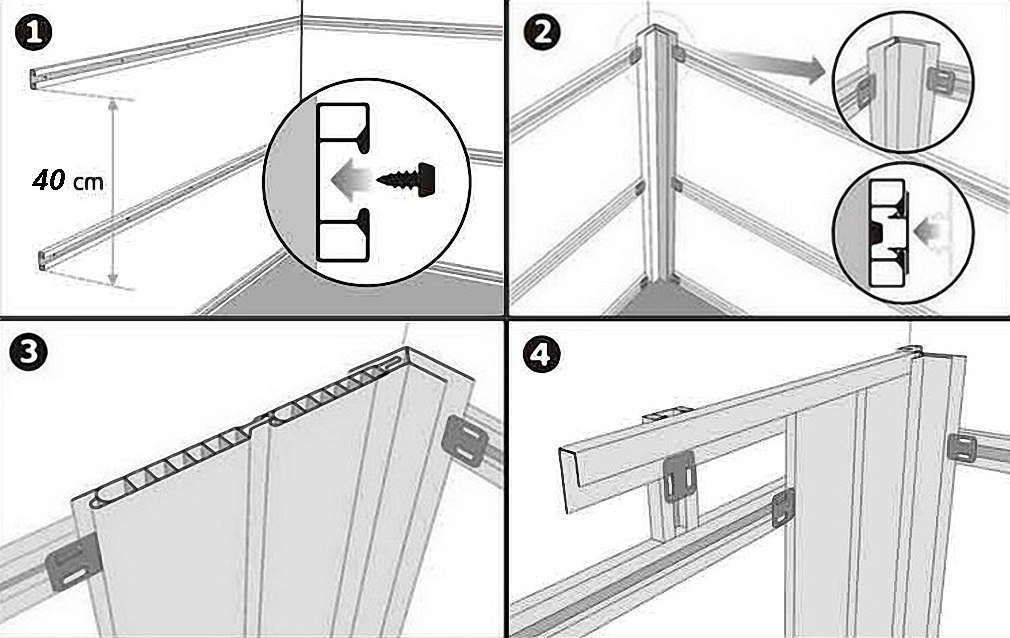
10 We attach PVC to the lathing frame
Before cladding, the wall must be cleaned, but without serious leveling of the surface. Redecorating a bathroom, bathroom or kitchen requires additional treatment of the walls with an antiseptic compound and waterproofing.
In rooms with high humidity, a metal frame is recommended
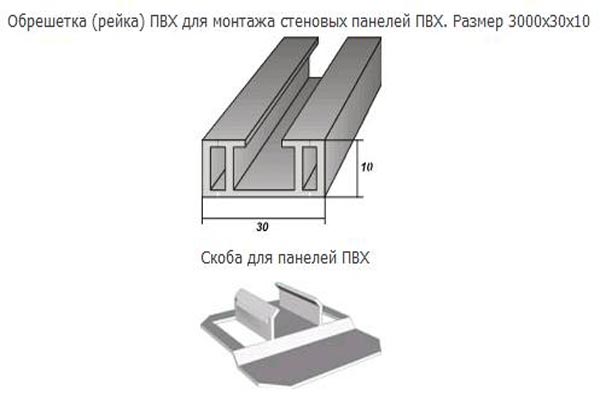
For the manufacture of the lathing, wooden blocks 2x2 cm are taken. For rooms with a high moisture content - bathrooms and showers - metal elements are recommended. Before using wood, the material is thoroughly dried to avoid possible deformation. The bars are treated with an antiseptic. If you decide to use metal, then select the profile element marked UD (main part of the contour) and CD (contour guides).
The erection of the lathing structure must be started with marking. First, we define the lower level - it can be on the floor or higher, depending on the design idea. The baseboard will be installed here. As a guide, take the most protruding section of the wall - it will determine the overall indent of the lathing. When working with wood, add 2-3 mm to the indentation. This must be done because wood deforms even under a slight influence of moisture.
Then the top line of the batten and the side levels are determined. Use a building level to level the top and bottom, and a plumb line for the sides. Fixation is performed on straight suspensions. We place the screws in increments of up to 25 cm for wood and up to 15 cm for metal. We fasten the bars first along the edges, then to the center. This avoids design distortions and inaccuracies.
After fixing the top, bottom and side rails, we proceed to the installation of the inner ones. This is done taking into account the choice of the type of arrangement of the lamellas themselves - vertical or horizontal. Subsequently, the lamellas will be attached perpendicularly to the internal guides.
The pipes must be under the grate frame
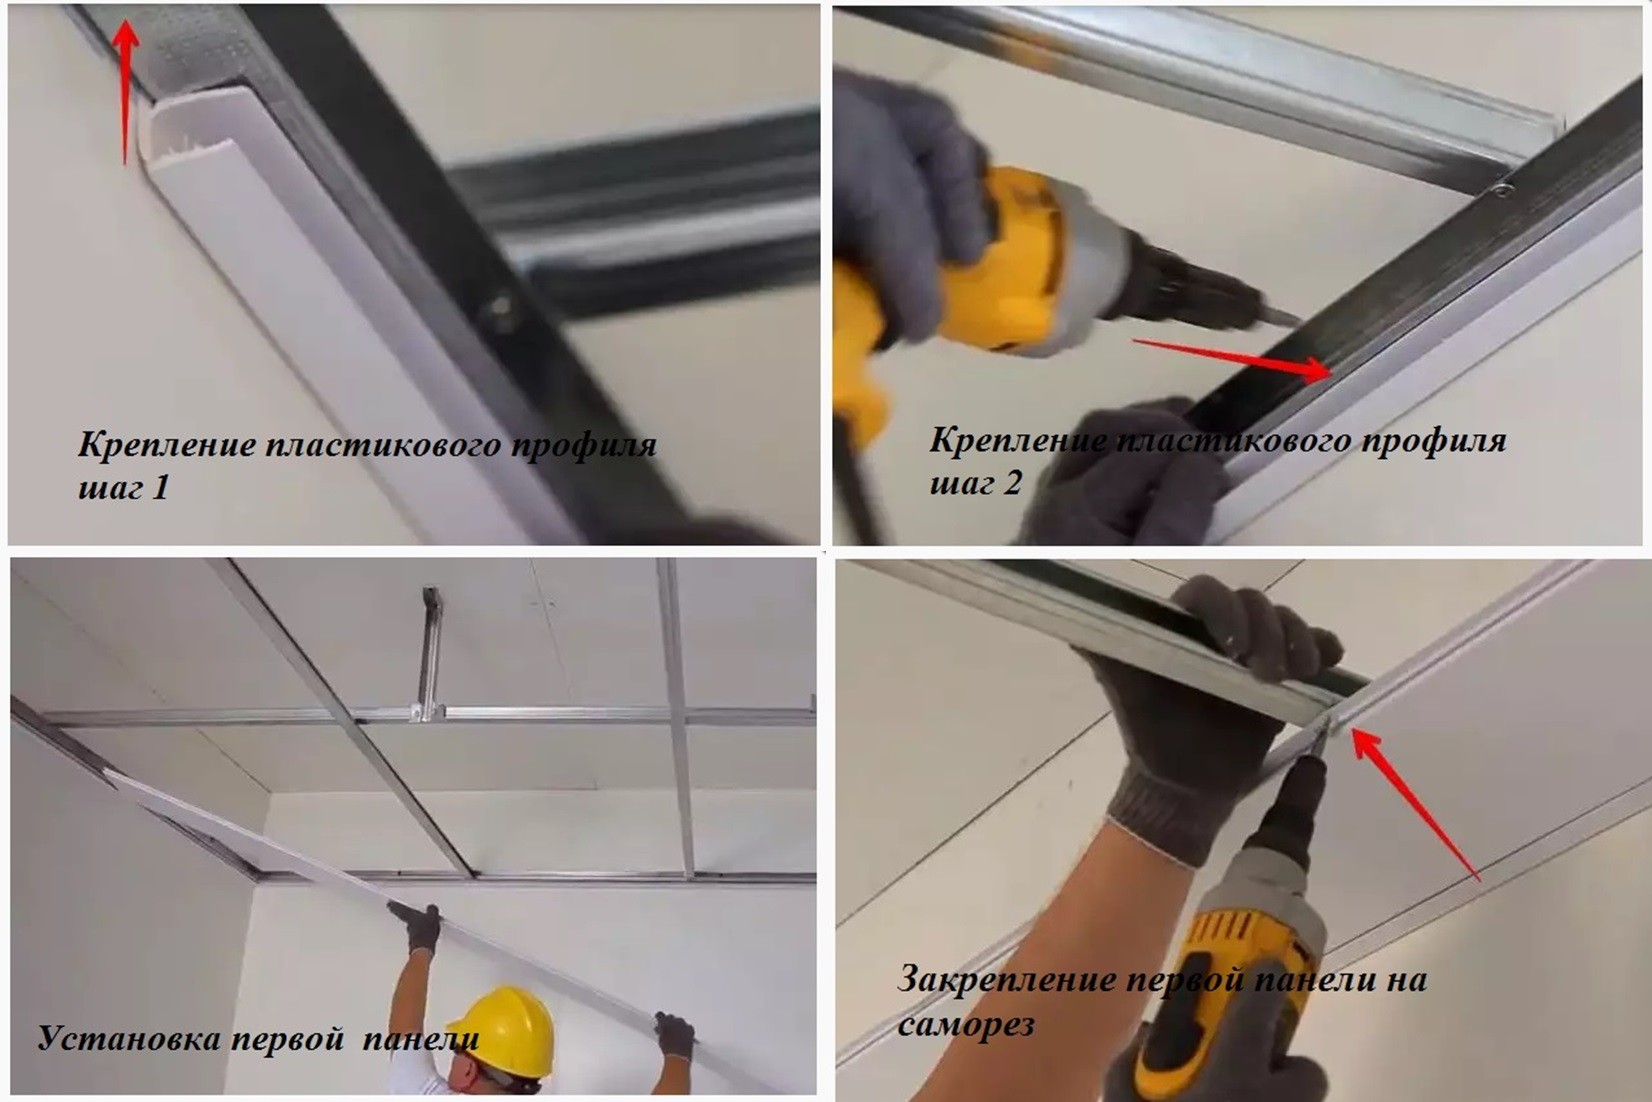
Step-by-step instruction:
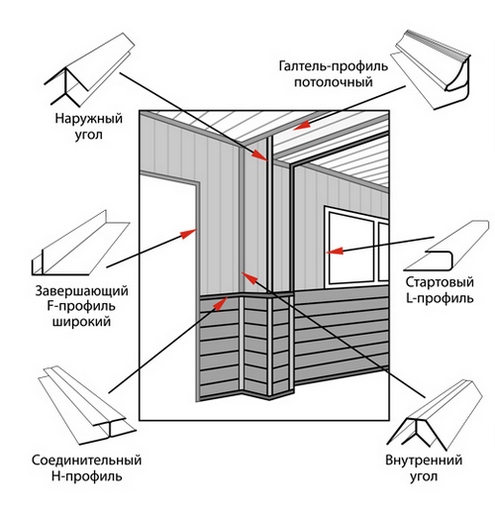
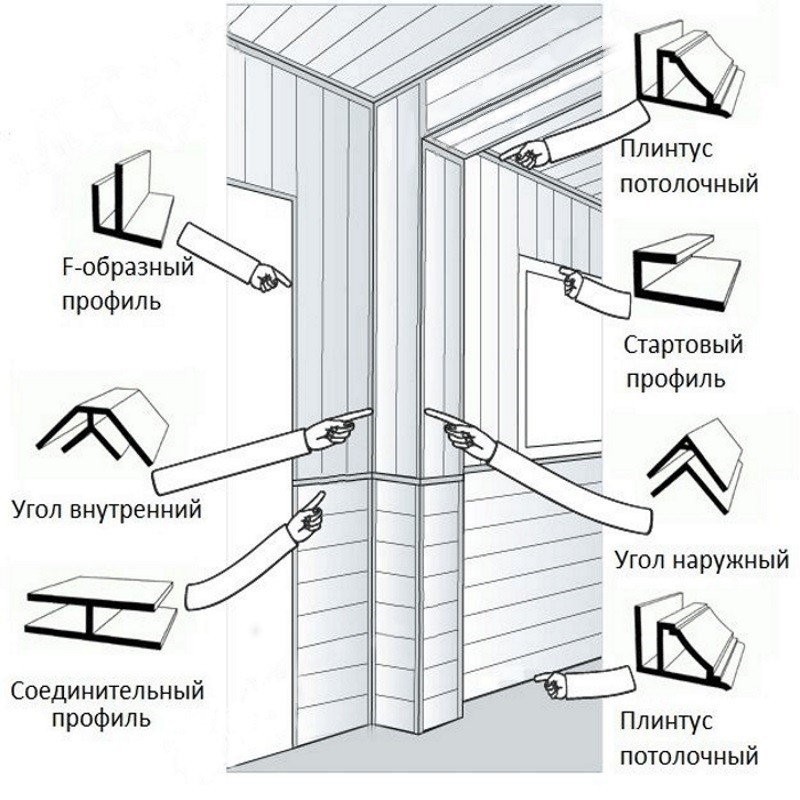
- 1. Install moldings - external, internal (corner, bottom, top);
- 2. Fasten the first panel and fix it with a kleimer (the edges of the lamella enter the upper and lower profile);
- 3. The second panel is inserted into the groove of the first one, it is similarly fixed, and so on;
- 4. Install the material to the end of the wall;
- 5. Fasten the last panel so that it fits tightly all the way into the corner area.
If there are pipes in the room that need to be hidden behind the panels, the crate is formed in such a way that they will be under its frame. Additional angles will be required. Counters, valve taps and other elements to which access must be periodically opened can be hidden behind a decorative door. To do this, the panel must be “planted” to the guide on small hinges.
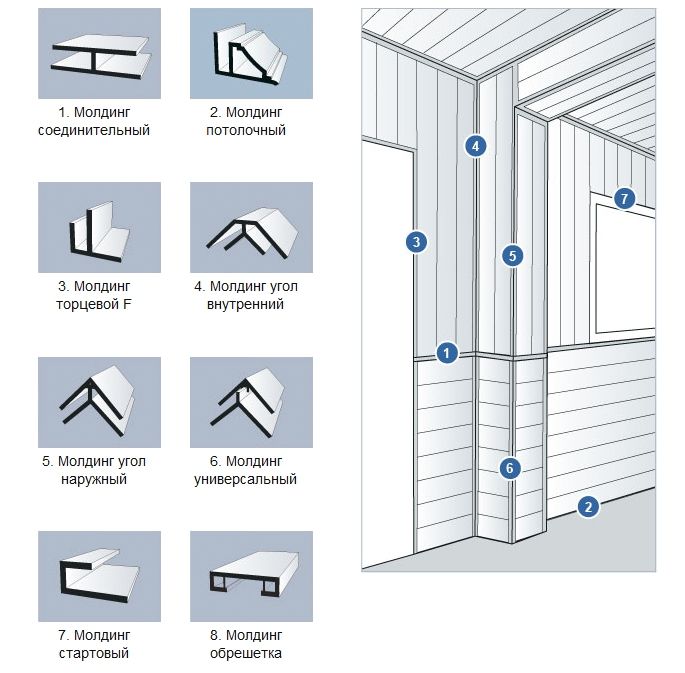
Characteristics and classification of accessories
Among the variety of molded products, there are varieties that allow you to fix panels on the wall and carrying only decorative functions. You can choose the necessary profiles for the installation of plastic panels, based on the task that the owner of the apartment sets for himself.
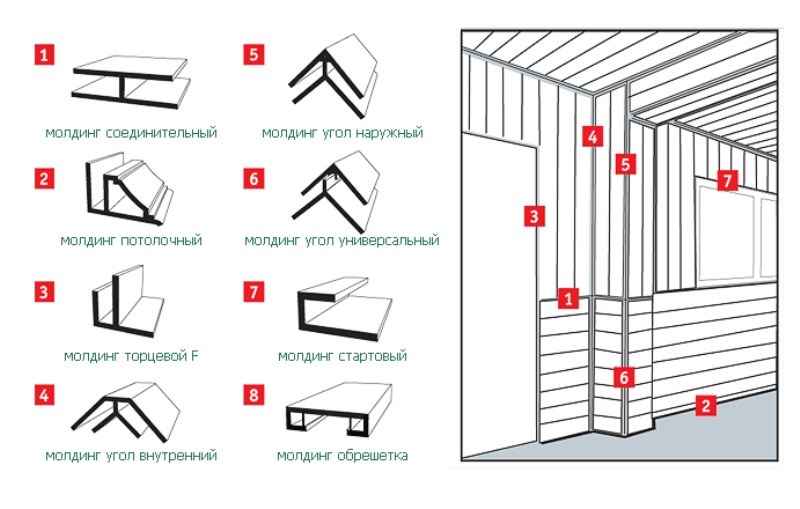
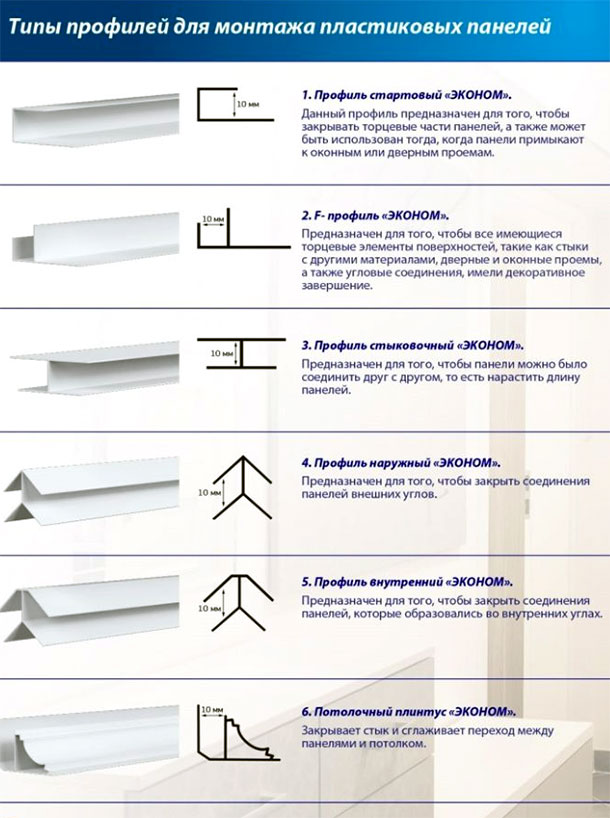
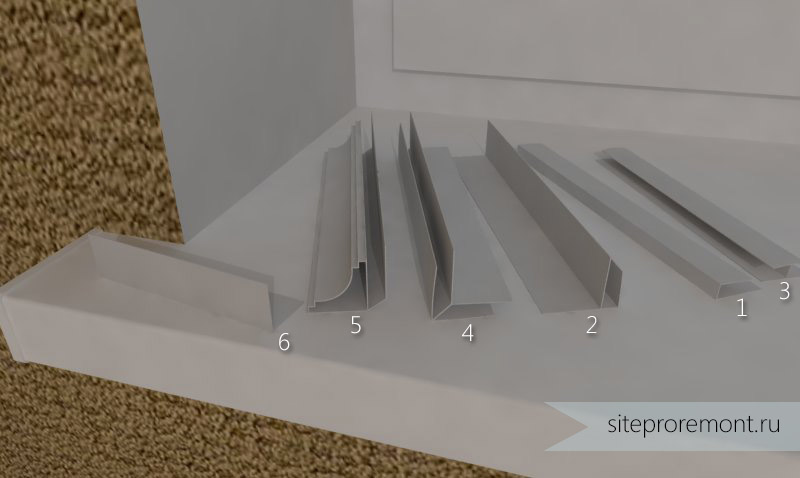
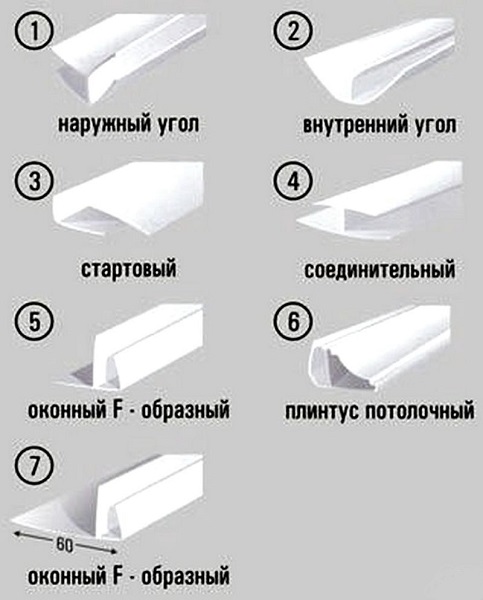
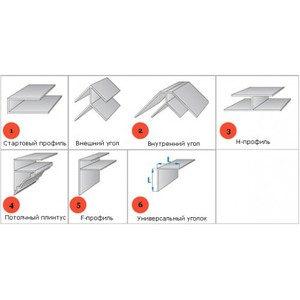
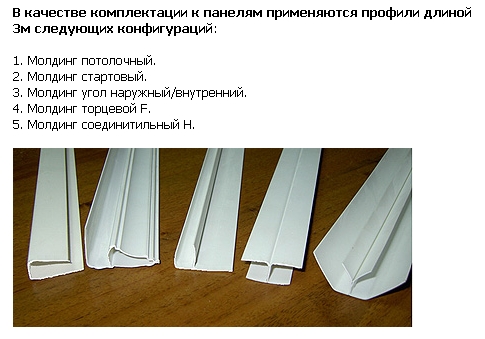
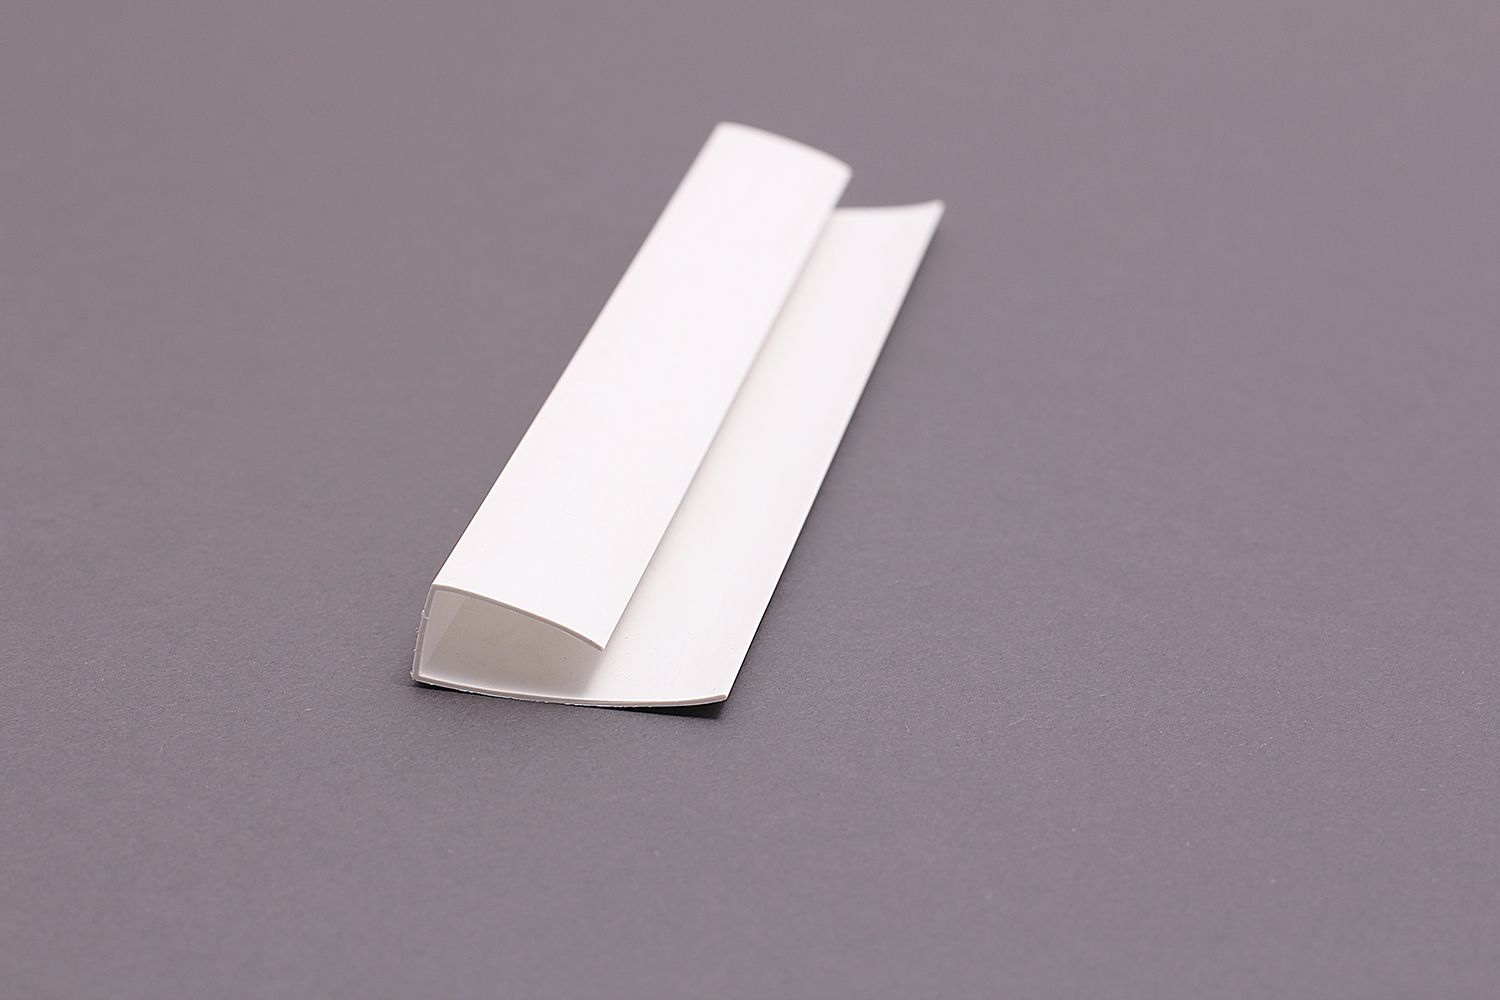
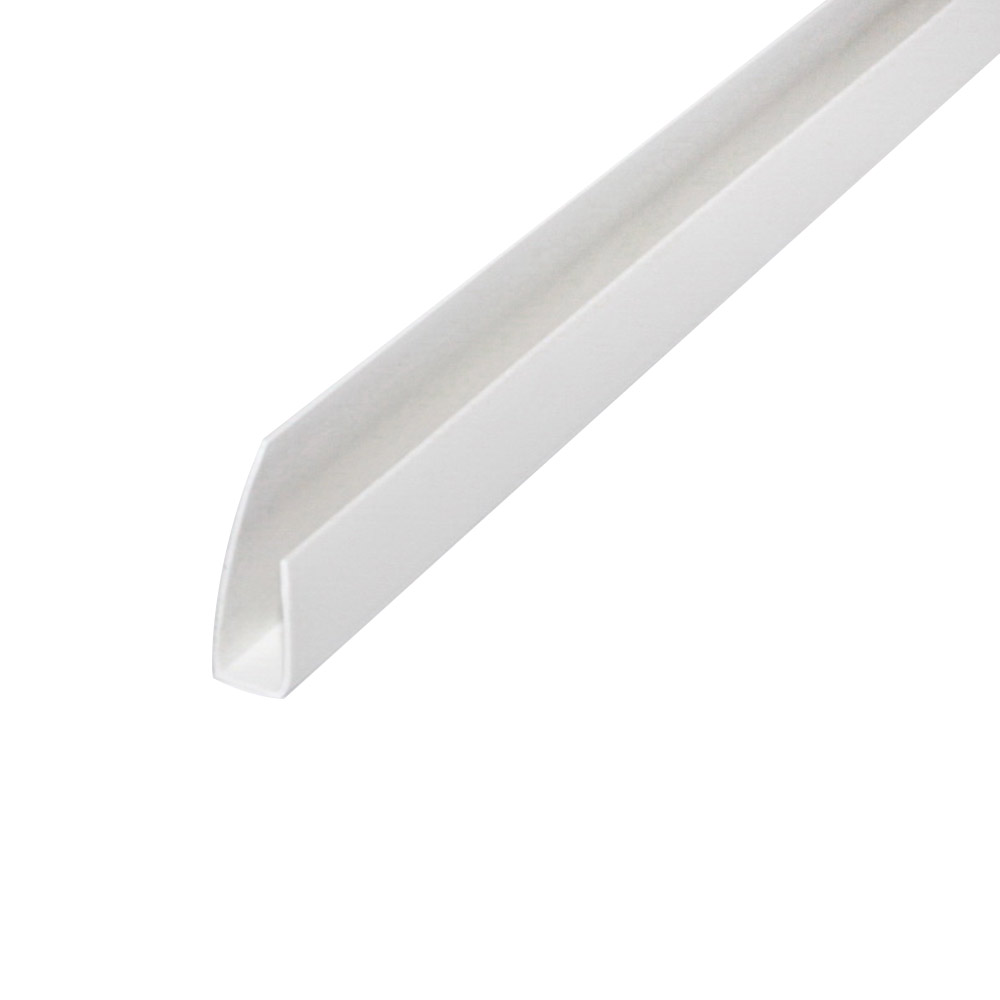
Start profile
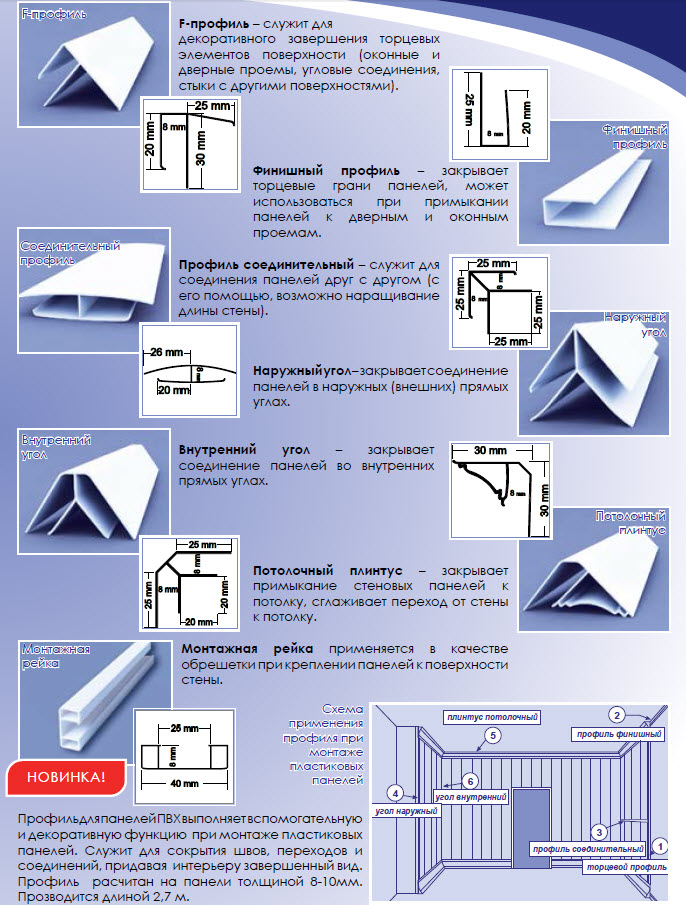
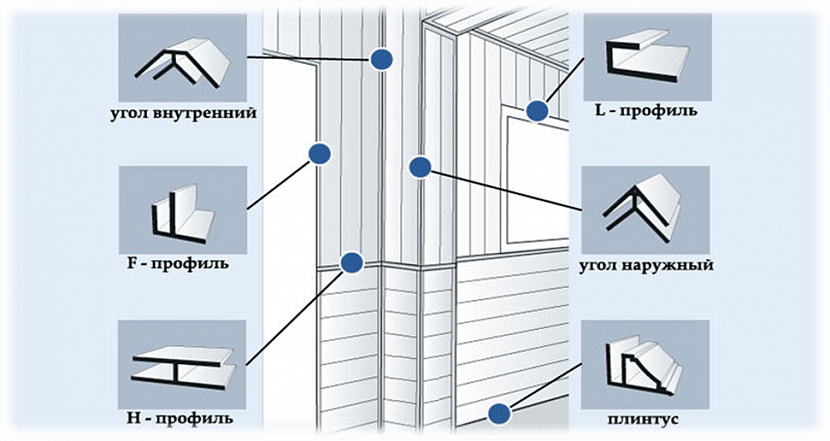
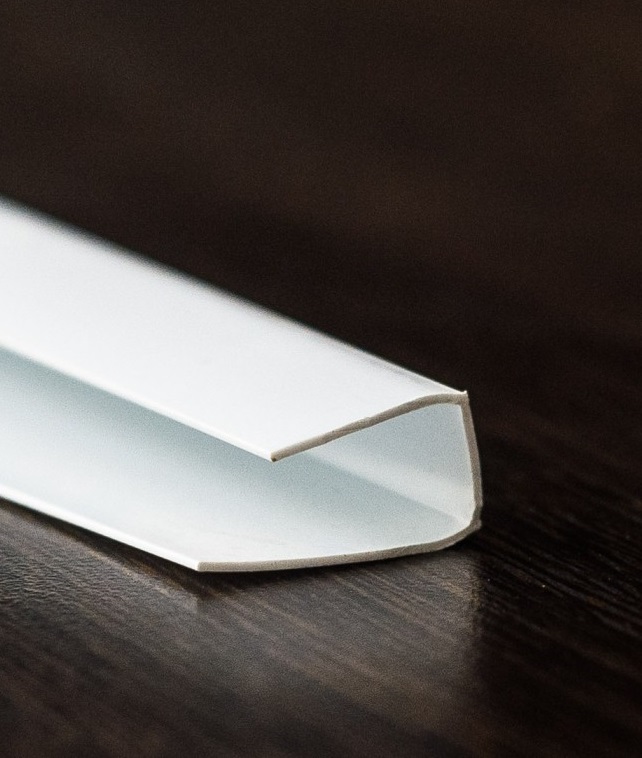
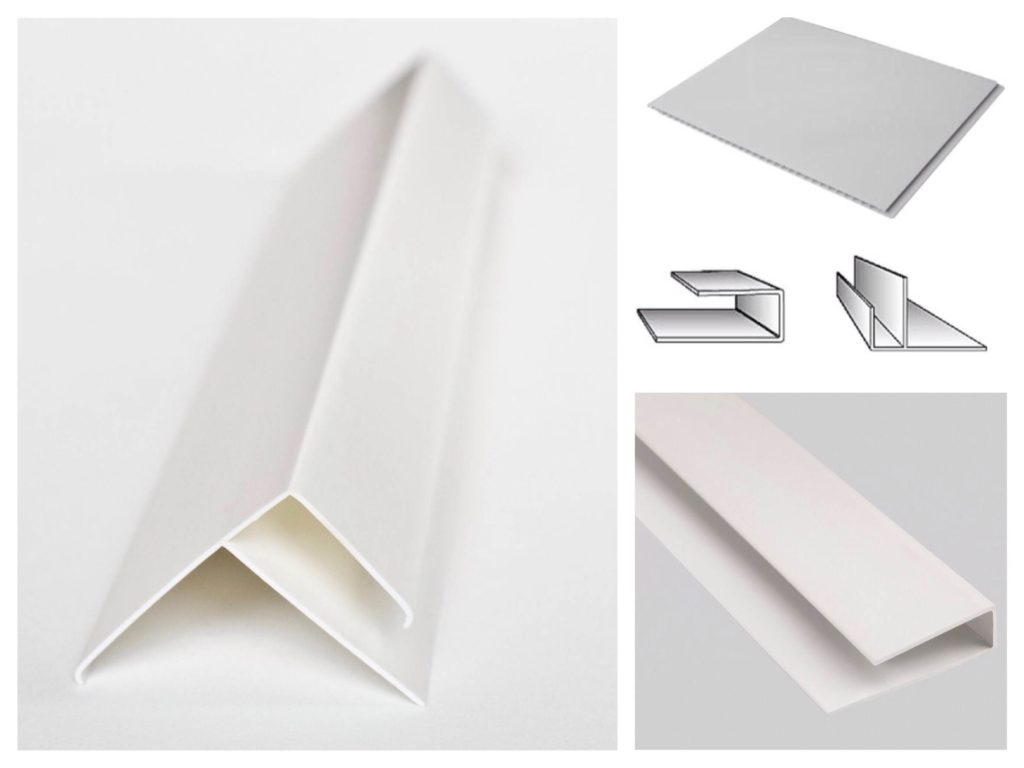
A plastic U-shaped element, or a starting strip for PVC panels, is used to finish all ends of the panels, if they remain open and do not fit with the same material. Starting strips allow you to finish only 1 wall or part of it:
- When installing from corner to corner, the plank is placed on both outer panels of the panels. They allow you to make a neat abutment to the adjacent wall for frame and frameless installation.
- When installing a wall covering without skirting boards, the plank is placed on top or bottom, creating an even joint between the wall and the ceiling or floor.
- When finishing a part of a wall or a window opening, the cross-sections of the boards remain open. The installation of the starting element allows them to give them an aesthetic appearance. It closes the slices to form a thin border. The plank allows you to trim the lower part of the wall with panels, combining it with the painted top, to create a frame for the panel in the opening of wall panels, etc.
Connecting element
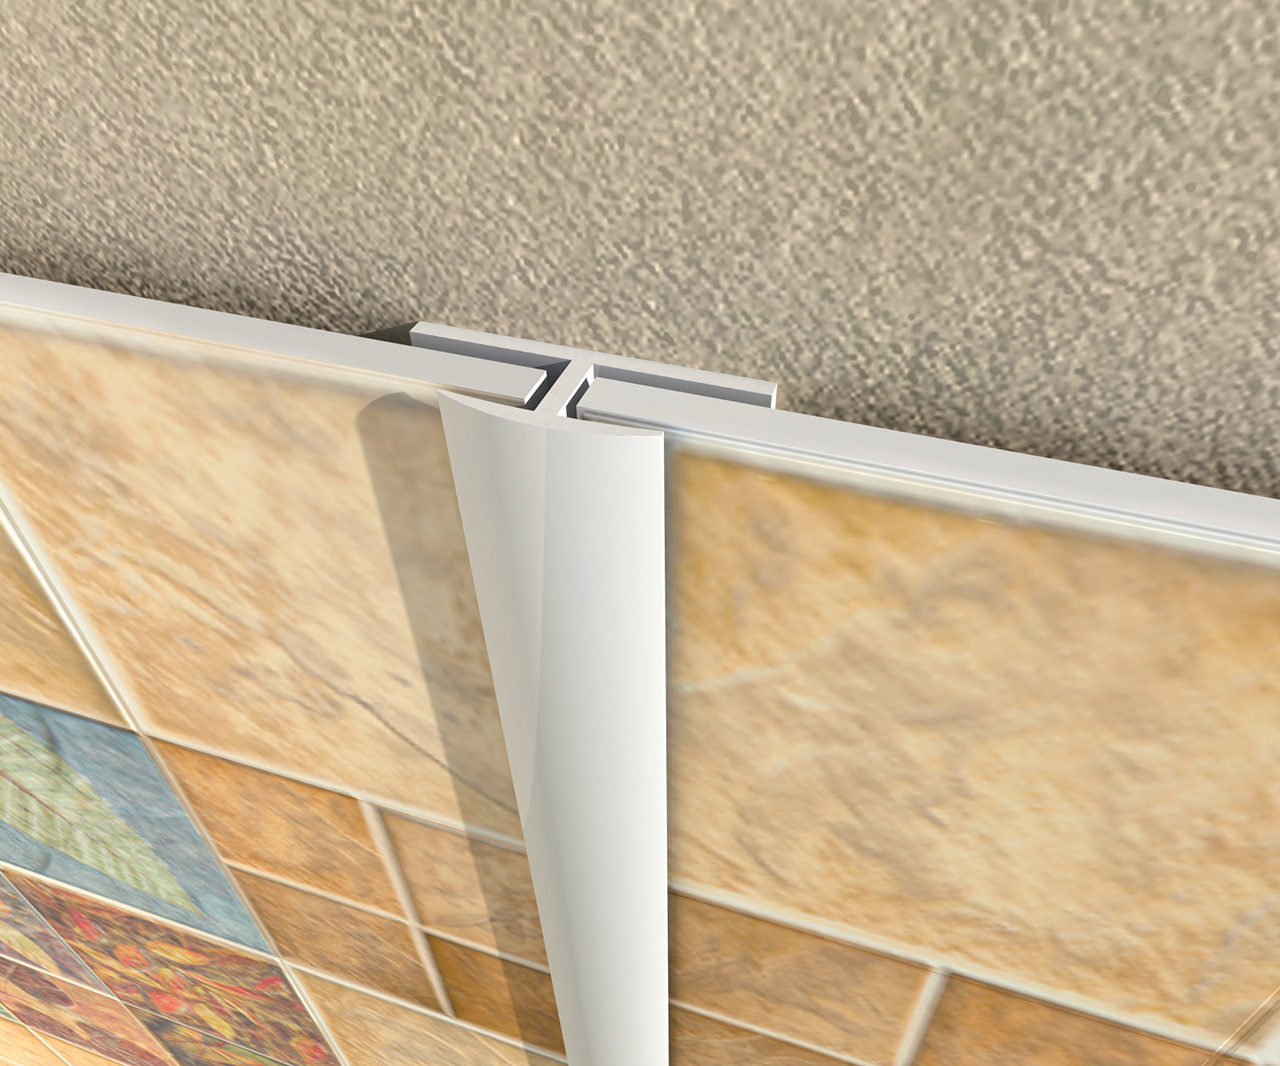
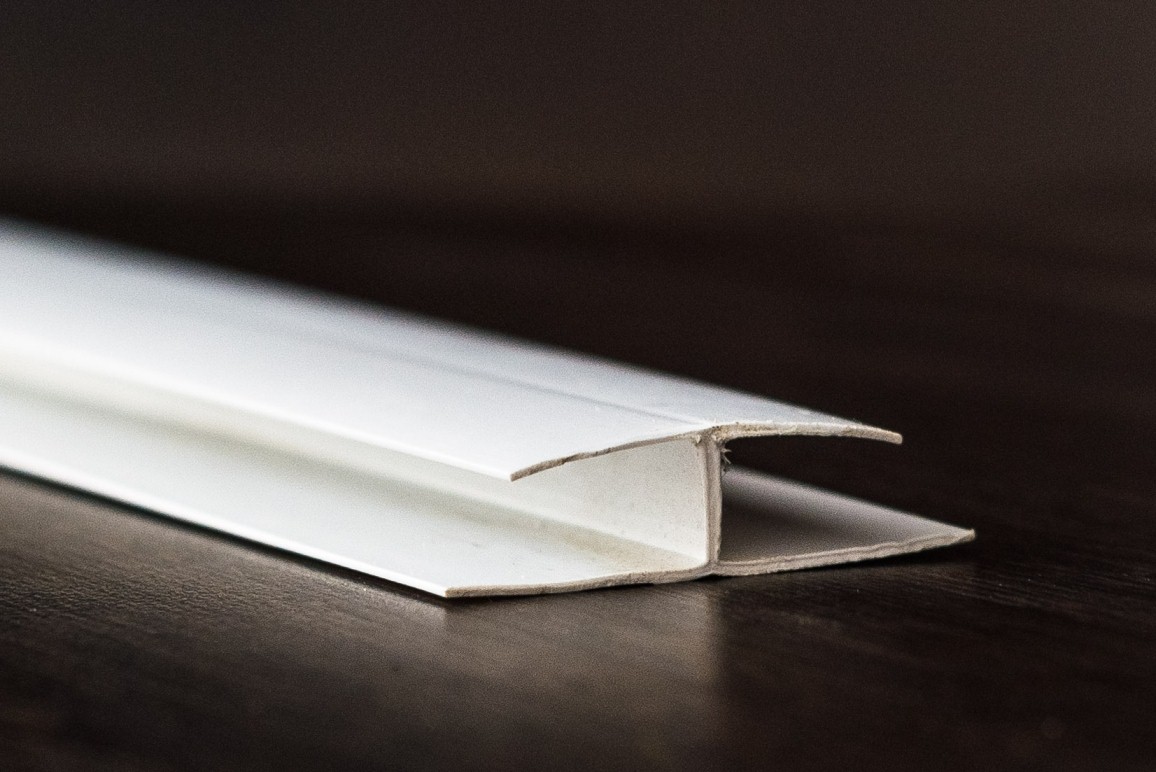
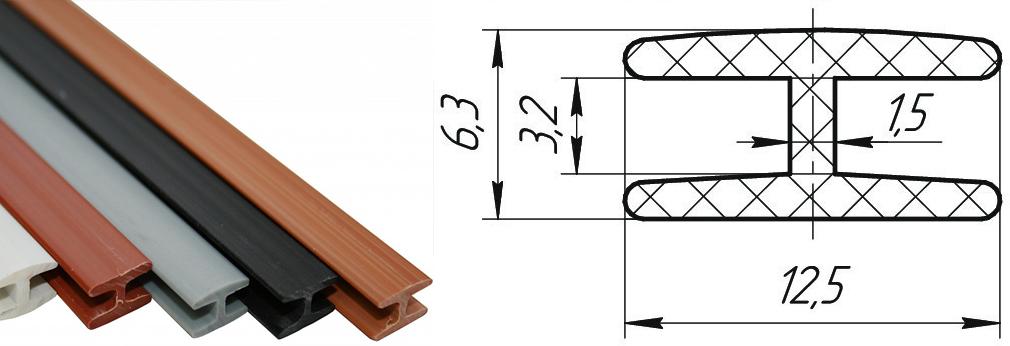
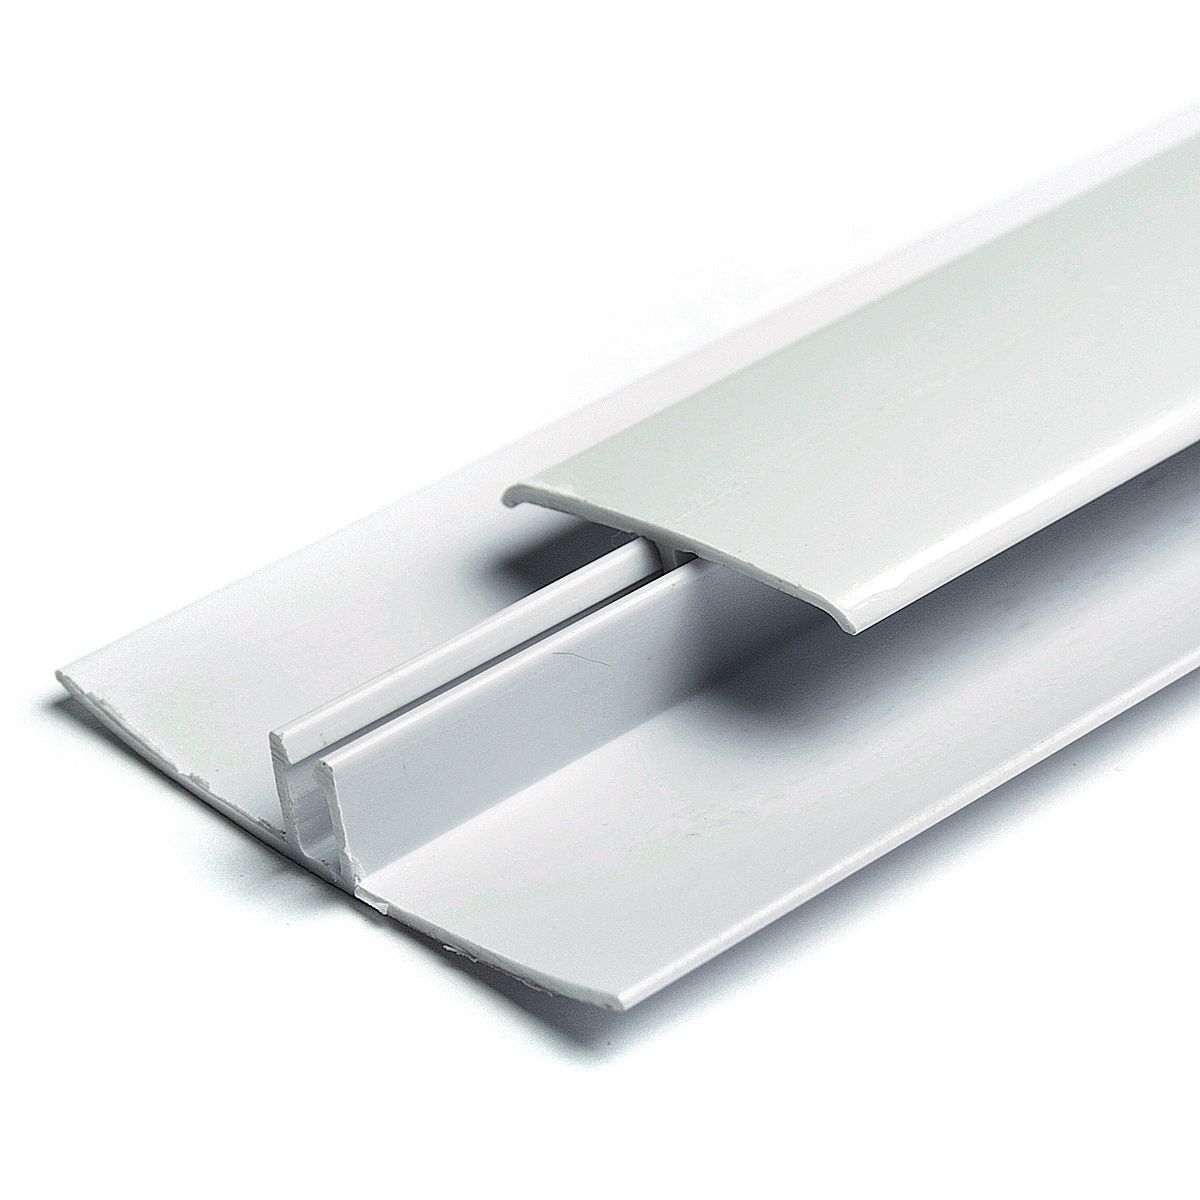
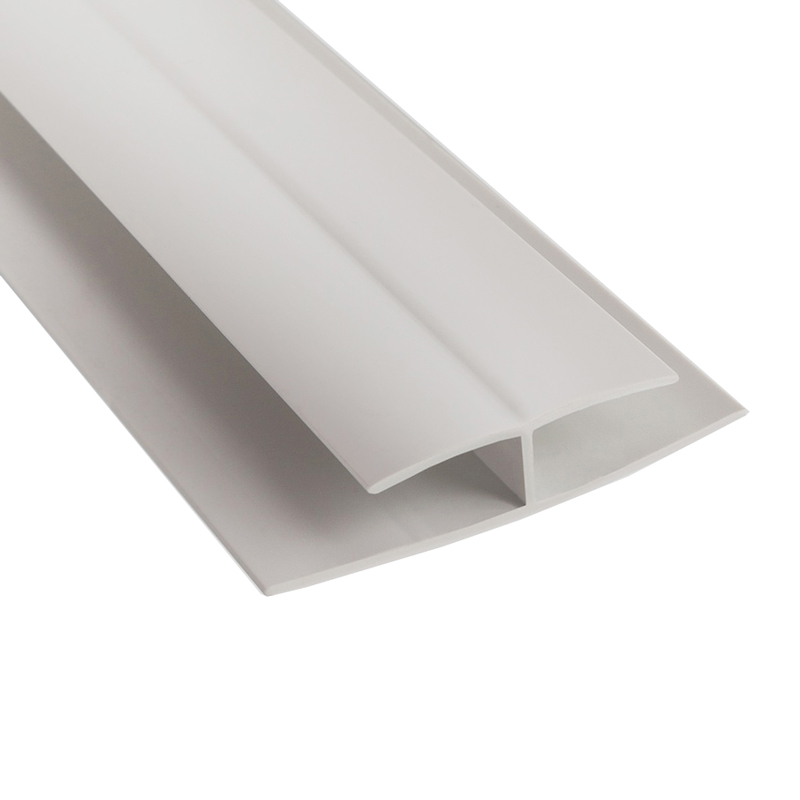
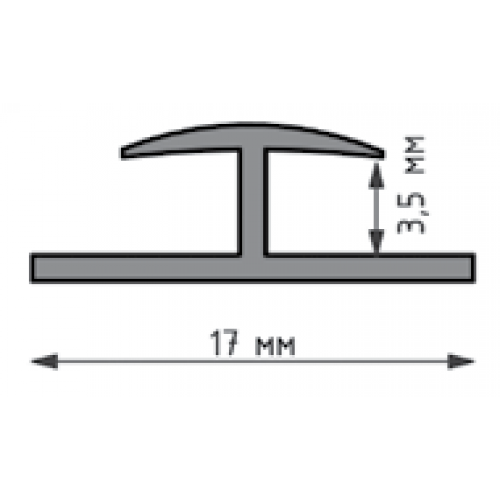
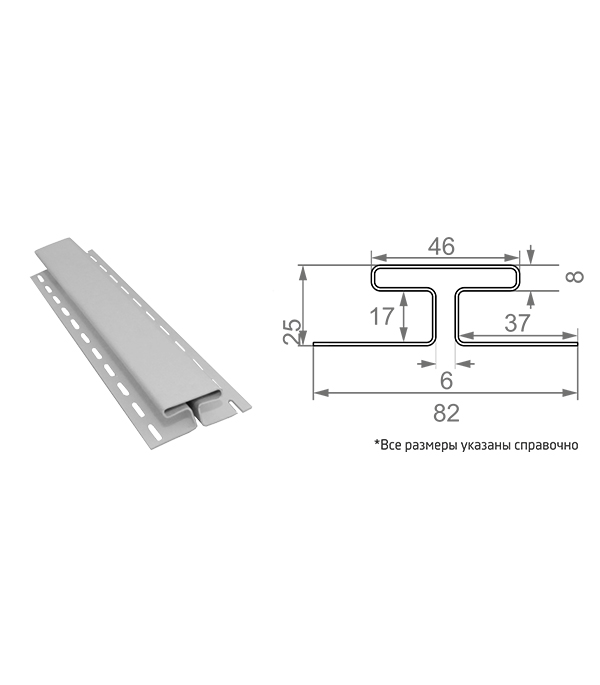
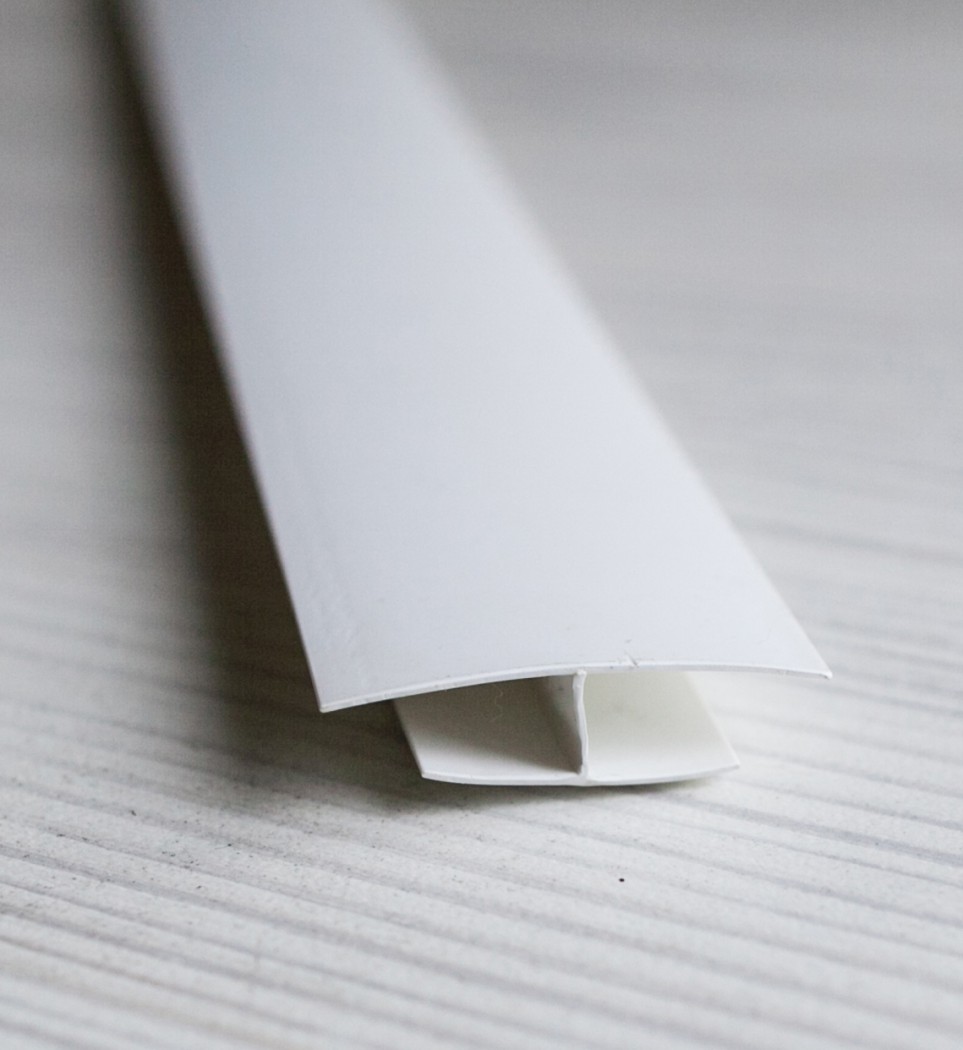
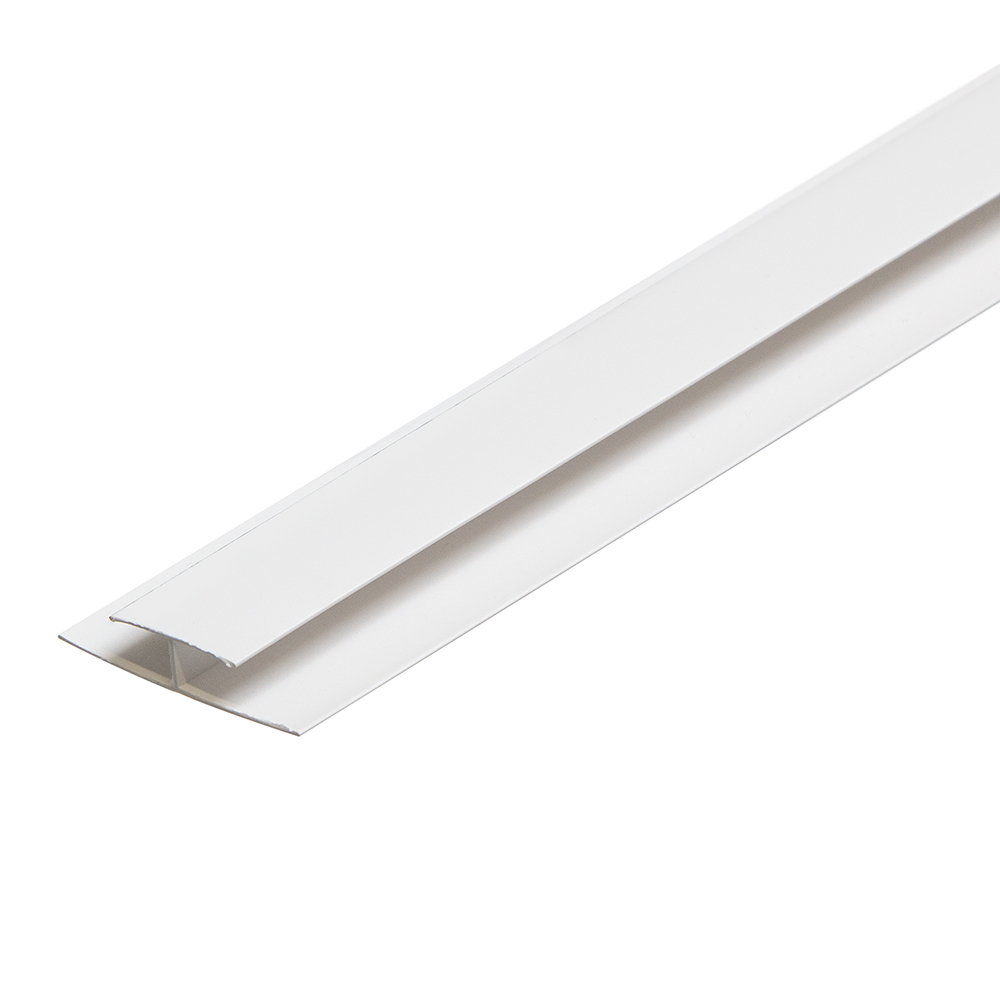
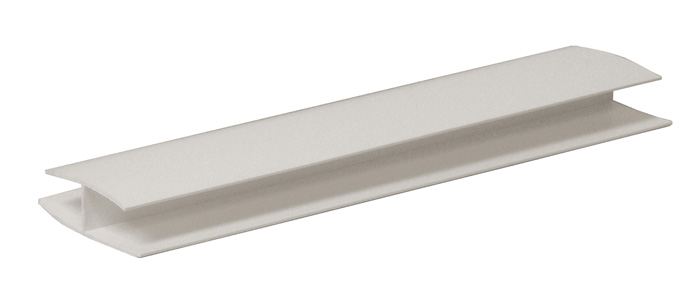
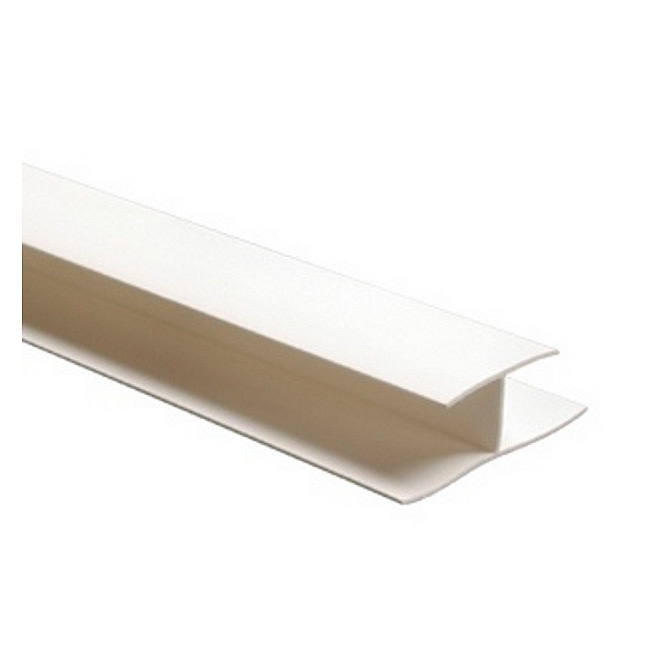
The H-shaped connecting PVC profile is used to decorate the joint between the parts of the same name, which must be lengthened. It is a double U-profile with a common internal partition. On the cut it has the shape of the letter H. The standard length is 3 m. The industry produces connecting strips with a thickness of 5 and 8 mm. When installing, the edges of the segments to be joined are inserted into the grooves of the docking profile.
Profile with corner
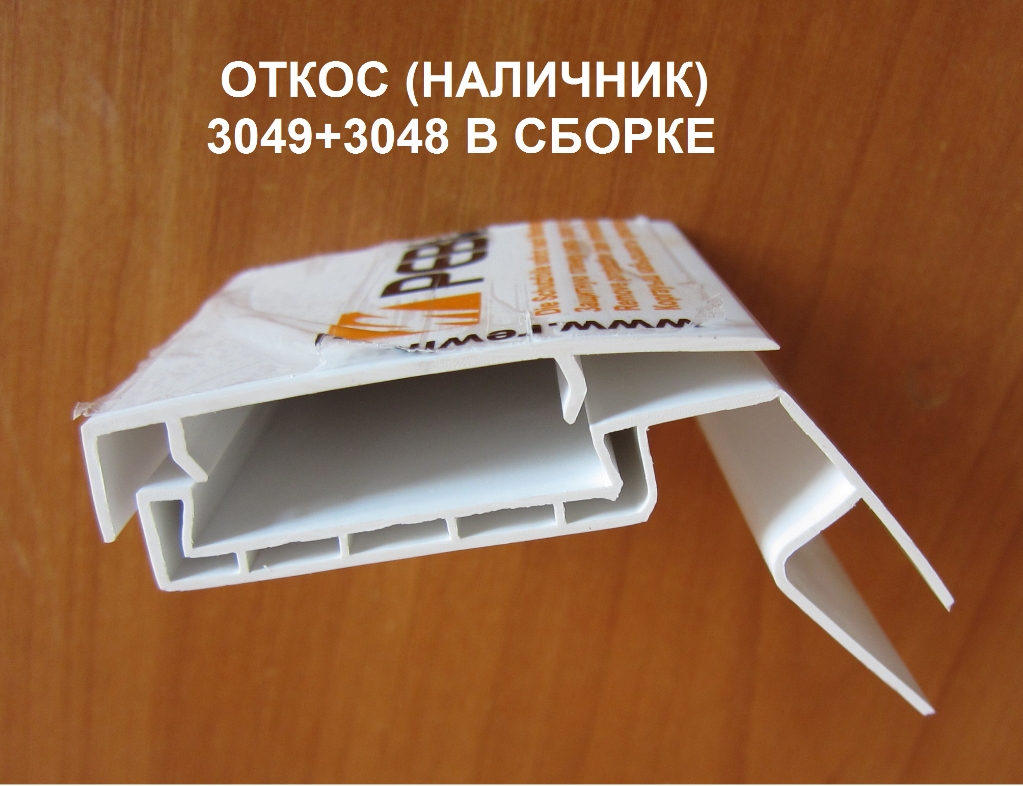
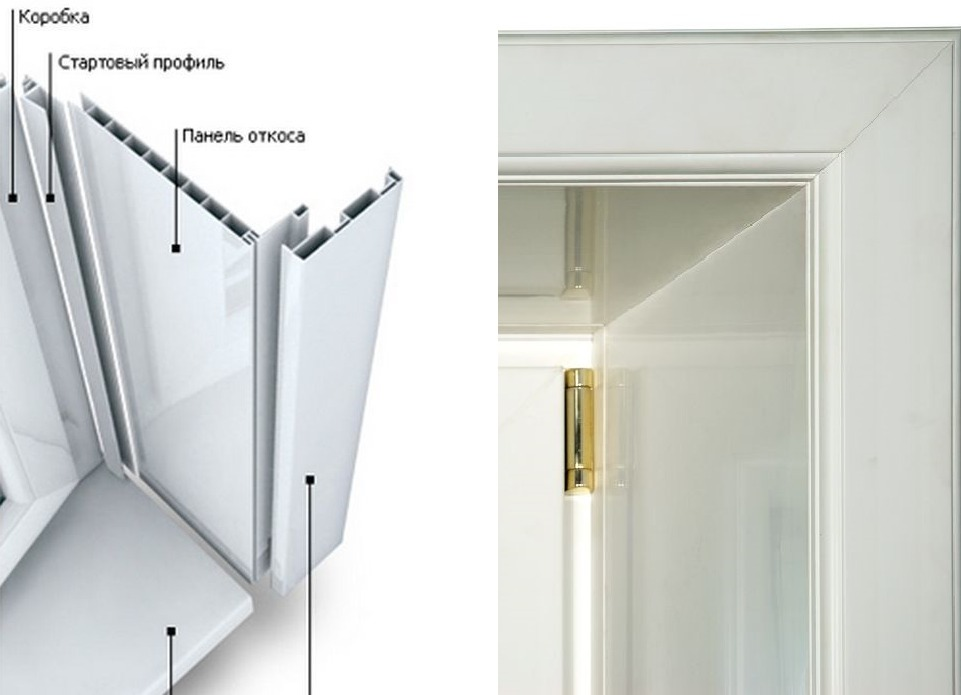
The PVC F-profile is called so because of the corresponding shape. Its purpose is to decorate the ends of the elements at the corners. The need to install it arises when finishing finishing the slopes of a window or door. Its elongated part covers the place of fastening of the sloping panels, and the crossbeams cover the end of the wall panel.
Available in 20x30 and 50x30 mm versions. The standard length of the smaller corner is 3 and 6 m, and the larger one is 1.7-6 m. The product is made of white plastic.
External and internal corners
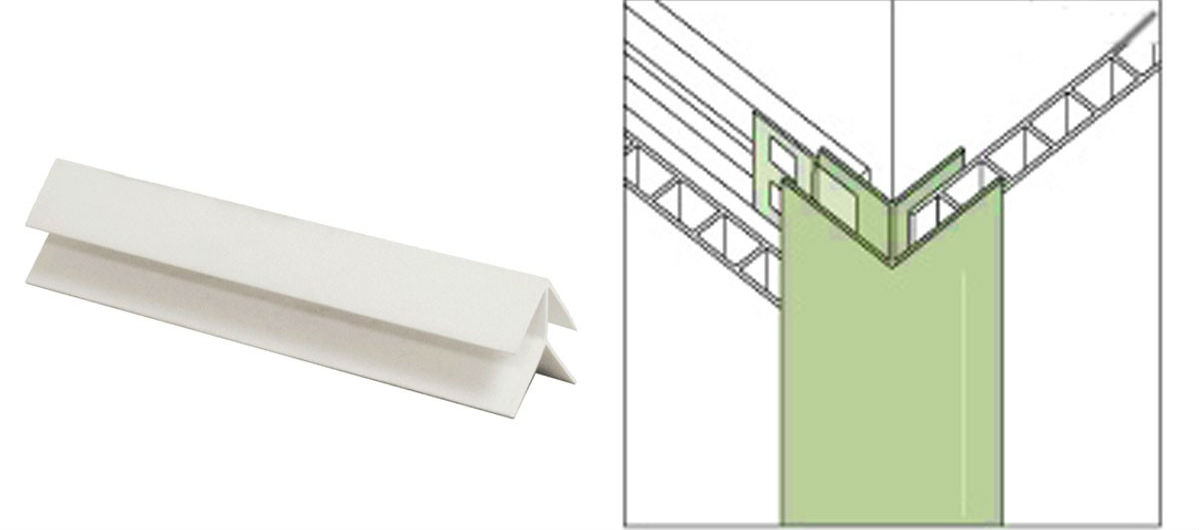
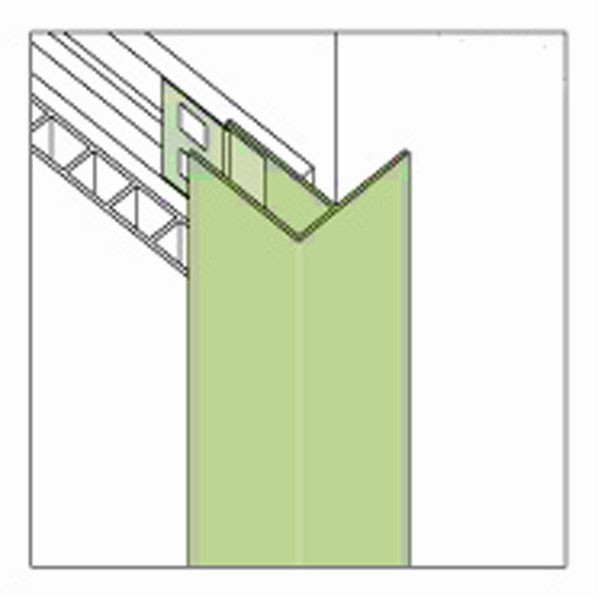
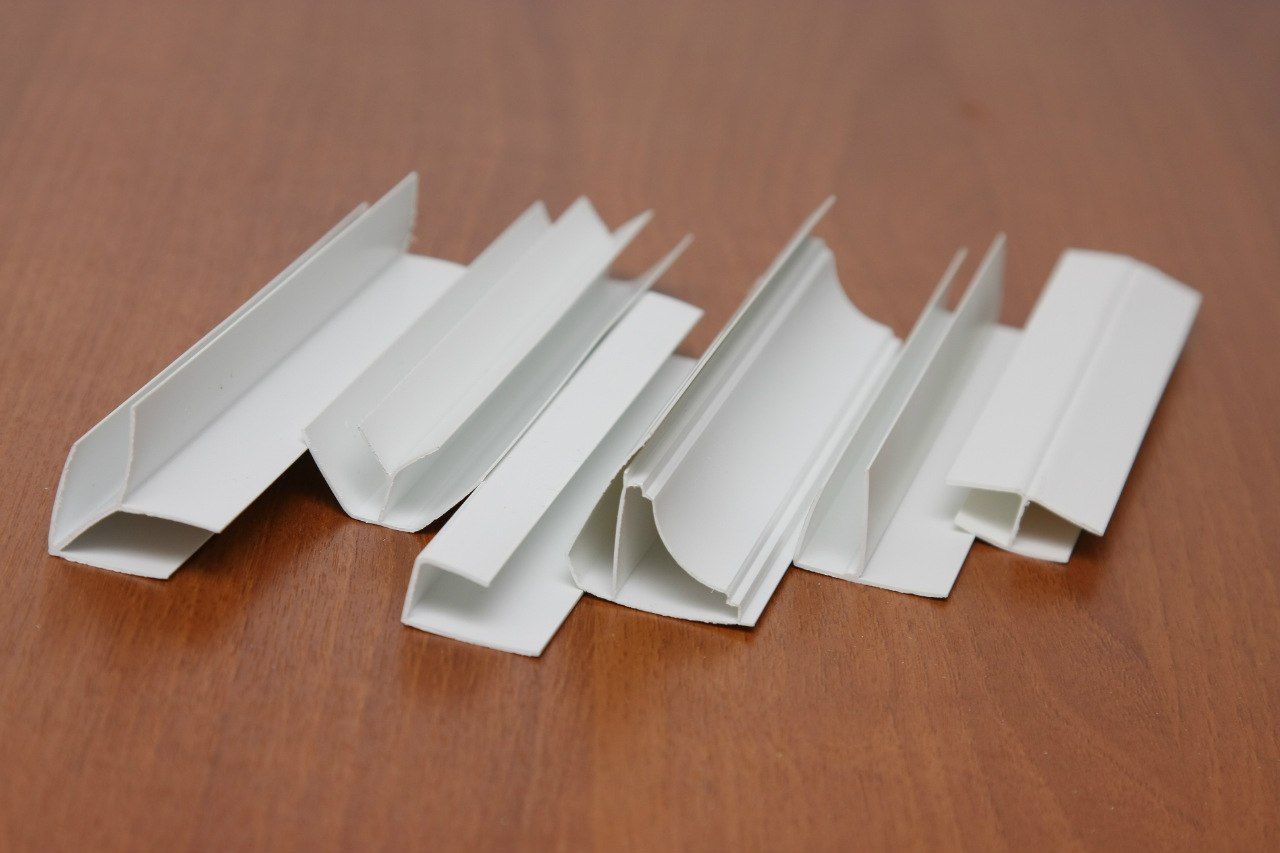
To form neat joints on complex surfaces, an angular profile is produced. These products can be designed for external or internal corners between adjacent walls. On slices, the path looks like a double corner. During installation, plastic panels are inserted into the recesses between the edges of the corners. The details have a distinct purpose: the outer corner looks different from the PVC corner profile for the inner wall connection.
The peculiarity of both models is that they are used only for joints at right angles. If it is necessary to trim an acute or obtuse corner, then use another element.
Rolling and universal corner
Plastic guides in the form of a corner are available in 2 more modifications:
- The rolled corner is used for finishing external wall joints. This inflexible product is incapable of changing shape and is only suitable for right-angle joints.
- Universal corners are capable of changing the configuration and allow you to neatly arrange joints at almost any angle. It is produced in the form of a roll material: a tape with a recess for bending in both directions.
Ceiling skirting board
Ceiling cornice is used to finish the joint between the wall and the ceiling, finished with plastic panels. The notches located at right angles allow it to be attached to the ends of both surfaces, and the decorative molding masks the joint and looks like a thin border element around the perimeter of the room.
The thickness of the products can be 5 and 8 mm, and the length of each is standard - 3 m.
Varieties
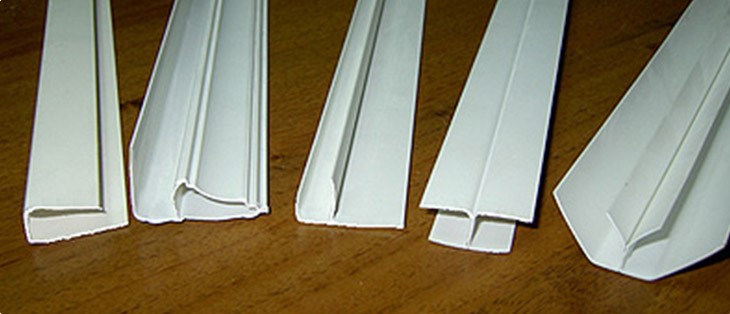
In addition to the starting one, there are other types of moldings. F-shaped is used when it is necessary to beautifully "close" the butt joint. For example, it can be the corners at which two PVC sheets meet, windows or doors, other slopes, or it can be a combination of two different materials, for example, plastic panels and wallpaper. In other words, it is used when moving to another plane. Judging by the name, you can guess that this docking profile is shaped like the letter F.
The next mounting molding - connecting - is chosen in situations where two panels need to be connected together. For example, when it turns out that the height of the panel is much less than the walls, and you have to "grow" it. Such a profile resembles the letter H and therefore is also called H-shaped.
The outer corner, as the name suggests, hides where the panels form outer right angles. The outer corner is the outer corner.The inner corner, in turn, masks the joining of sheets in the inner corners, always straight.
A general-purpose universal corner has approximately the same characteristics as a decorative corner. It is presented on the market in several sizes: its sides can be from 10 to 50 millimeters. It is used to hide the places where the panels are joined at right angles. Such a molding can serve both external and internal corners, thanks to its design, it bends in the right direction.
Fillet, aka ceiling plinth, is used at the joints of the ceiling and the upper edges of PVC panels. It masks this transition and completes the overall picture. This molding can be colored and thus ideally fit into any interior. In addition to fillets, at the top you can also find profiles called outer corners. They are used when peculiar protrusions are created at the top, for example, columns or beams. Finally, the interior corners on the ceiling are mounted where the walls form the interior corner.
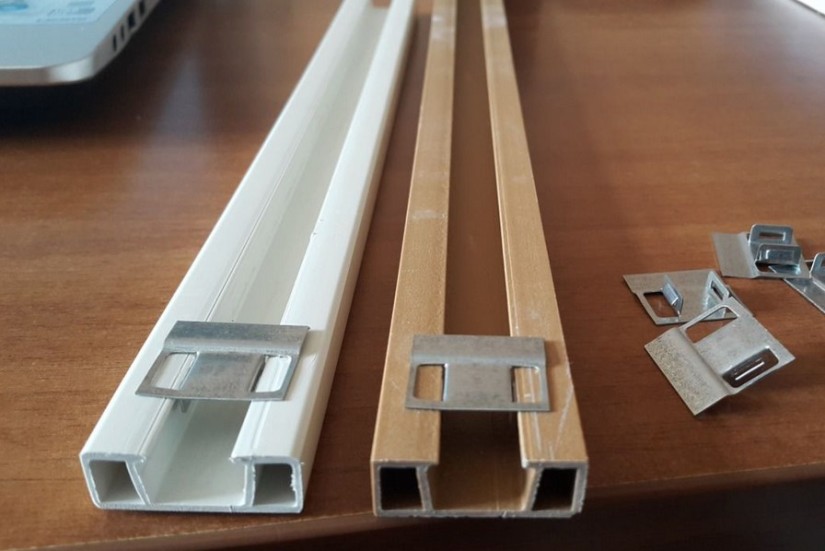
The ceiling plinth can be supplemented with a connecting piece if necessary. This part fixes two skirting boards together when one is simply not enough. It should be noted that the length of a standard skirting board is 3 meters, but in large rooms this may not be enough. Guide rails for lathing, according to some experts, are also considered a type of profile. The purpose of this element is to simplify the installation of PVC panels. If the crate, like the sheets themselves, is made of plastic, then their connection is carried out using special clips.
The finishing molding, as the name suggests, is used to secure the last panel. He "completes" the entire structure.
3 The choice of plastic panels?
The characteristics of PVC depend on the manufacturer. There are panels from Europe and China on the market. In terms of quality, the overwhelming majority of participants in the first group win. The strength of the panel depends on the thickness of the walls and the number of rigid ribs inside. Optimum indicators: the thickness of the front side of the panel is 2-1.5 mm, the number of stiffeners is 20-29, the total weight of the lamella is 2-1.7 kg / m2.
The stores offer a wide range of panels from Europe and China
You shouldn't make a purchase if:
- deformed or damaged stiffeners;
- the lines of the drawing are indistinct, the edges are blurred;
- shades of panels from one stack differ from each other;
- the surface is scratched;
- the sizes of the segments are different (in this case, fastening the plastic panels to the wall will be complicated due to loose fixation).
In order to check how reliable the material is, you need to press on its surface with your finger. The front side should bend and return to its original state. If the panel deforms, it indicates that it has a high chalk content and will have a short life.
Examples of the use of accessories
The picture shows an example of fixing panels with self-tapping screws on the profile guides of the battens. The necessary measurements are made in advance, and holes are made on the rails. In the places of their attachment, points are marked on the wall, holes are drilled, and dowel-nails are inserted. The level determines how smoothly the frame of the slats will be fixed on the wall.
Sliding rail for cladding
Each component has its own functions, properties, purpose.
Start-finish profile
The initial (starting) profile hides the unevenness of the cut of panel products, strengthens the wall structure as a whole. The installation of a plastic wall structure begins with this particular profile, each panel is simply inserted into the corresponding groove. The process resembles assembling models from Lego parts. Sometimes you have to practice trimming the panels, as pipes and concrete ledges need to be bypassed.
Initial profile for wall decoration
The connecting profile, in the form of a beam, joins the panels along a vertical or horizontal axis to each other, provides a strong and airtight fastening, ideally fitting into the design of the room. If not only the walls are finished, but also the ceiling, then the selection of a plastic corner for PVC panels is also carried out.
Internal and external corner
Decorative corners are used to frame the panel surfaces:
- inner corner:
- connects panels in inner corners;
- trims the junction of two surfaces along the front sides of the corners;
- hides the corner from joining panels of two walls.
- outside corner:
- hides the junction of the plastic canvases of the outer corner of the premises;
- protects against light accidental blows;
- completes the decorative finish.
Corners for PVC panels
A variety of accessories allows PVC panels to be used in large and small spaces. For example, the inner f corner fits perfectly for assembling wall structures and creating hidden drawers in hallways. Hidden drawers can be used for:
- viewing readings of hot and cold water meters, apartment electrical panel;
- storage of cleaning products, broom, scoop.
Regardless of the size, bathroom cladding is always a large-scale project. With the help of PVC panels and accessories, you can create a piece of personal space that is unique in every sense, while at the same time meeting the requirements for style and quality.
Important! Outside corner made of plastic compound brings out an even edge for curved edges of panels
Profile for PVC panels
Characteristics of the material and the most effective ways to install it
Plastic panels are a versatile material. They are impervious to moisture, have good frost resistance and are distinguished by a huge range of models. The material has a simple structure and consists of two sheets of plastic, between which are located a kind of partitions, which are also stiffeners. The finished product bends well and is extremely plastic, and the variety of textures and shades allows you to diversify any interior.
 An example of the internal structure of a plastic panel

Plastic panels are rarely used for cladding drywall structures and walls, which are characterized by evenness and solidity. As a rule, fundamentally different finishing materials are used to work with drywall. PVC panels are rather intended for masking defects on the walls or leveling them. However, a combination of these two materials is possible.
The main criterion for installing plastic panels on drywall is considered to be the protection of the material from moisture. It can be considered a budget or temporary alternative to ceramic tiles that provides full surface protection and a more sophisticated appearance. Most often, PVC panels can be found in the bathroom or kitchen. They are practically not used to decorate living rooms.
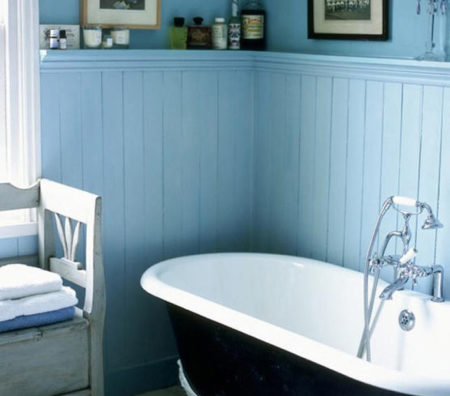 Plastic panels are used for wall decoration in the bathroom
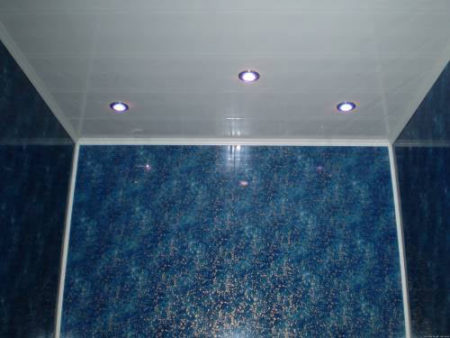 Plasterboard finished walls and ceiling with plastic panels
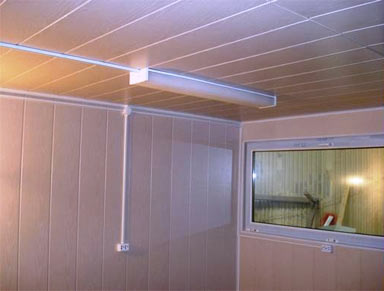 The best quality options for mounting PVC on a plasterboard base are:
- the use of glue;
- the use of fasteners.
These options have the highest efficiency and solve the problem of installing plastic panels. However, the first of them is less practical, since it provides an unnecessarily strong fixation of the material, which complicates its dismantling.
 An example of fastening plastic panels to a wooden frame
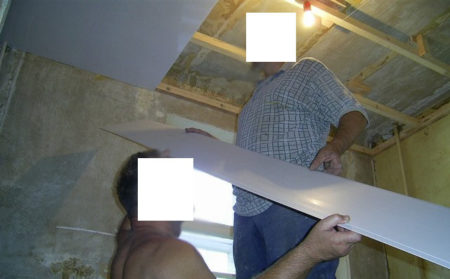 Fastening PVC panels to the ceiling
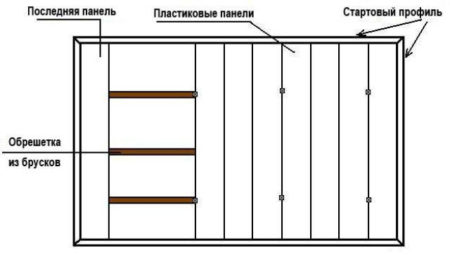 Scheme for attaching a plastic panel to a wood frame
Technology for attaching PVC panels to the wall
Fastening PVC panels to the wall is an actual solution for finishing. This material is popular with consumers.
Fastening with staples or nails
The wall to which the panels are attached with liquid nails or staples must be cleaned, dried, and rough. It is also required to prime the surface. The primer will hold the surface together, remove dust, and provide protection against mildew and mildew. After it dries (after about 8-10 hours), you can start attaching the lamellas.

The finishing material must be removed from the packaging and left in the room for a short time so that it adapts to the humidity and ambient temperature. Next, the tip is cut off on a tube with glue, a cap is installed, it is cut at an angle of 90 degrees and the tube is installed in a construction gun.
Liquid nails should be applied to the wall in zigzags, mesh, or dots. After that, you should take the panel and press it to the required area (it is convenient to use a roller for rolling). It is easy to change the position of the trim at first. The glue will set in 25 minutes, and full cure will occur in 24 hours. After installing all the lamellas, it is required to treat the seams with a sealant.
Fastening panels with clamps

To attach panels using special fasteners - clamps, proceed in the following order:
- Measure the height and width of the working plane and select the material along the length. If the floors and ceilings are without drops, you can immediately cut the elements. If there are significant irregularities, it will be necessary to carry out a fit in place to avoid creating gaps at the junctions to the floor or ceiling.
- Set the first strip of the desired size. Saw off the strips with a hacksaw or an electric jigsaw and fix them in the required place.
- The lining is attached to the wall with clamps. The teeth of the clip are inserted into the groove, then the fasteners are fixed using a drill and short self-tapping screws.
- Thus, the cladding is installed along the entire plane of the wall. The spikes are inserted into the grooves. The last strip may not match in size, then it will have to be cut to length. The last segment is fixed with liquid nails or glue.
Fastening PVC panels with glue

Attaching plastic panels to glue is easy:
- It is necessary to assess the evenness of the walls and prepare them in advance.
- The material should be unpacked: the lamellas should lie outside the package before placing them on the wall for at least 24 hours, they need to be sized to the required size. The side with which the plastic panels will adjoin the wall is degreased.
- Install PVC panels. The first element should be placed in the corner of the room, before installing the corner profile on it. The thorn of the next lamella is inserted into the groove of the first. The assembly is continued in the same way. Having reached the corner of the room, cut off the excess board, fix the corner piece and fix the panel. The finished finish is wiped with a rag to remove dust.
What glue is best for the job, you can find out from this video:
Profile features
Start profile, is,
a design similar to the letter P, with sides unequal in length. Such
the device facilitates the installation of the profile. The entire structure begins to be mounted from its
fastening. Then the panel itself is installed in its grooves. If the ends of the panel are not closed,
or do not join with other panels, then they are framed with a starting bar. At
When installing, the plank is placed on both panels of the panel.
This ensures the correct connection to the
wall during installation. So that the connection of the wall to the ceiling or floor is even, the bar
mounted, respectively, from above or below.
Setting the start profile allows you to hide
the remains of cut boards, and give them an elegant look by making a border. With help
the strips can be trimmed at the bottom of the wall so that it is in harmony with the upper part.
Something similar to the assembly of a children's
constructor. There are times when panels are cut to bypass pipes or
protrusions. The profile is very flexible and this facilitates the connection of the panels, creating
durable fastening.If you need to finish the ceiling, use a corner from
plastic.
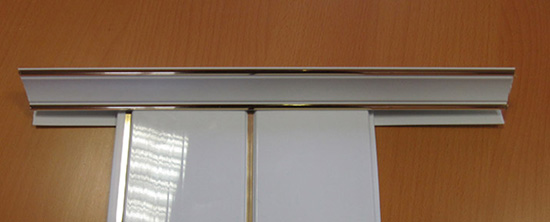
Corner purpose:
- joins panels in corners;
- performs decorative functions
finishes; - gives protection against impacts.
Corners are not only plastic, but also
metal. They are used even when plastering is applied, so that ceilings and
the walls were smooth. Installing corners helps to close the internal
connections, and transitions from one type of finish to another. The PVC corner is very
flexible, resistant to deformation, easily glued. Due to these properties, it
is the most demanded of all types of corners. Corners are produced in different
colors and sizes based on finishing conditions. If for interior work
enough dimensions of 10x10 mm, then for facade work, corners of 50x50 mm are already needed.
profile, PVC panels can be used in rooms of any size.
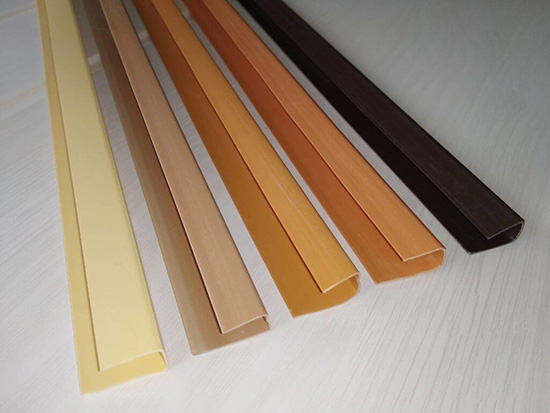
Types of start profiles
Structurally, the installation of plastic slopes is in many ways similar to the assembly of a designer. This is achieved by the maximum unification of all parts, as a result, the whole structure becomes highly technological and functional.
Each of its elements is intended for strictly defined purposes and performs a specific function. To fasten the plastic panels to the supporting base and to join them together, a starting profile for the slopes is used.
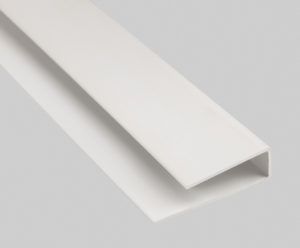
Today there are several types of start profiles, which greatly expands the scope of their use. Depending on their design, they can serve for fastening decorative trim elements in various ways in different places of the opening.
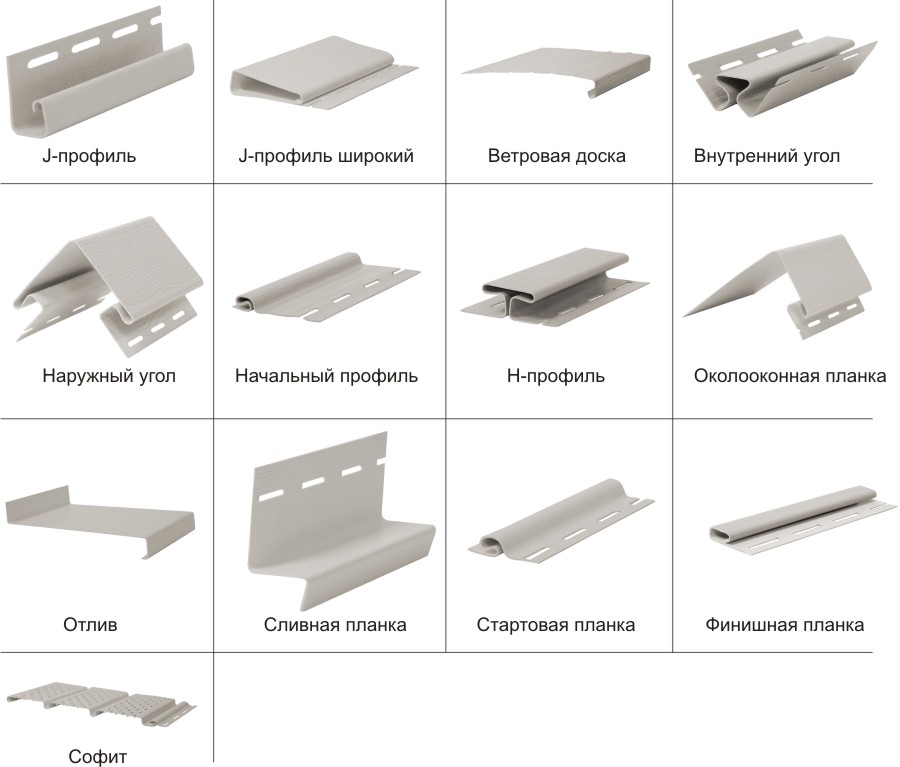
They are classified depending on the shape of their section. Profiles are designated in Latin and Russian letters, with which the drawing of their section is similar. In the modern market of finishing materials, there are the following types of PVC starting profiles:
I-profile
This starter profile has a cross-section in the form of a capital English letter I: one wide central shelf and two short side ones. The I-shaped profile is installed directly on the wall and is intended for attaching plastic or plasterboard slopes to it.

The special shape of the part allows it to be attached to the opening in almost any position. The main condition is that it should be located with a long shelf perpendicular to the bearing surface, that is, it should "stand" on short shelves.
F-profile
One of the most popular types of plastic profiles. This PVC profile is made in the form of the letter F - it has one long shelf and two short ones, adjacent to the long one on one side. With the help of F-profiles, slopes are installed from a wide variety of materials:
- Polyvinyl chloride.
- Sandwich panels.
- Composite materials based on wood (MDF, MDF, laminate, etc.).
- Plasterboard sheet.
Due to its design, the F-shaped profile performs two functions at once - fastening and decorative. The presence of the second narrow shelf allows you to close the joint of the facing panel with the F-profile without using any additional elements in the form of decorative corners or putty.
L-profile
With the help of such a starting profile, standard slopes are installed from plastic or from plasterboard sheets with a thickness of 10 mm. Its cross section consists of three shelves: one wide and two narrow.
An L-shaped profile is attached perpendicular to the plane of the window: the wide shelf adjoins the wall of the opening, the narrow one adjacent to it - to the window frame, and the narrow shelf opposite the long one serves to mask the butt joint in the place where the finishing panel adjoins.
P-profile
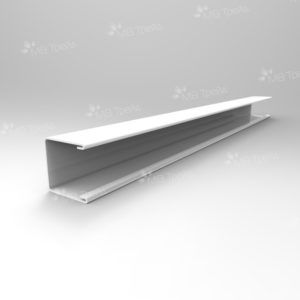
The installation scheme of the U-shaped element is similar to the installation of the L-profile, only the outer plastic plate, designed to hide the junction with the slope, is wider. This makes it possible to close wider or uneven seams.
Methods for finishing slopes

Slopes are internal and external, and both of these types require proper finishing. Of course, their design is aesthetic in nature, because the appearance plays an important role. However, this is necessary not only for beauty. The foam that fills the space between the window and the wall of the house must be protected from adverse conditions. Everyone knows that it is afraid of moisture and tends to absorb it, after which it swells and deforms the plastic window.
There are several ways to refine the look of the window space:
- Plastering is an old finishing method that takes a lot of time and effort. Unfortunately, it does not have the property of heat and sound insulation and, over time, can move away from the surface due to the shrinkage of the house. Since the finishing work takes place in several stages and requires subsequent staining, I decided that I would not bother using this option.
- Plasterboard - this option is better than the first, and if you insulate such slopes, they will last longer and will keep warm in the house. But one significant drawback made me refuse to use drywall - this is the fear of moisture. A prerequisite for a long service life is a dry room, in which there is a low level of humidity. And the installation of such slopes is not far from the plaster, and I already said that I would not want to bother.
- From pvc panels - a simple and affordable way that I immediately liked. Long service life and quick installation prompted me to choose plastic slopes, and most importantly, they are not afraid of moisture.
When I decided which method I would use, all I had to do was get to know the additional accessories for pvc and learn the installation technology.
Types of plastic panels
The building materials market offers a huge selection of plastic panels for interior decoration, which differ in size, color, design features.
According to the area of application, PVC panels are divided for the ceiling and for the walls. Ceiling material is more fragile and lighter than wall material
Therefore, the ceiling of PVC panels should be mounted carefully so as not to damage them accidentally with sharp objects. Wall plastic is stronger and less flexible because it contains more PVC
According to the type of decorative layer, PVC panels are divided into matte and glossy. The surface of a matte canvas is without any coatings, so they are cheaper than glossy ones. Glossy canvases are covered with special varnishes on top, which additionally protect the plastic from the effects of the sun and moisture, so it is much easier to care for them.
What is PVC panel
Plastic panels vary in size: width, height and thickness. Plastic panels with widths of 125 mm and 250 mm are more often used, since they are easier to install. Larger canvases are less flexible and therefore more difficult to assemble a suspended ceiling. The thickness of the wall and ceiling panels is different. So, for the ceiling, panels with a thickness of 6 mm and 8 mm will be the best choice, and for walls - 10 mm and 12 mm. The length of PVC panels is standard - 5.95 mm. On the building materials market, panels are often sold with a length of 3 m, this suggests that they are cut into pieces.

