Features of the use of PVC panels in the bathroom
PVC panels have started to gain their popularity recently. This finishing material has a rectangular shape, and it is made of polyvinyl chloride - a colorless transparent plastic. Photos of decorative panels for the bathroom can be seen below.
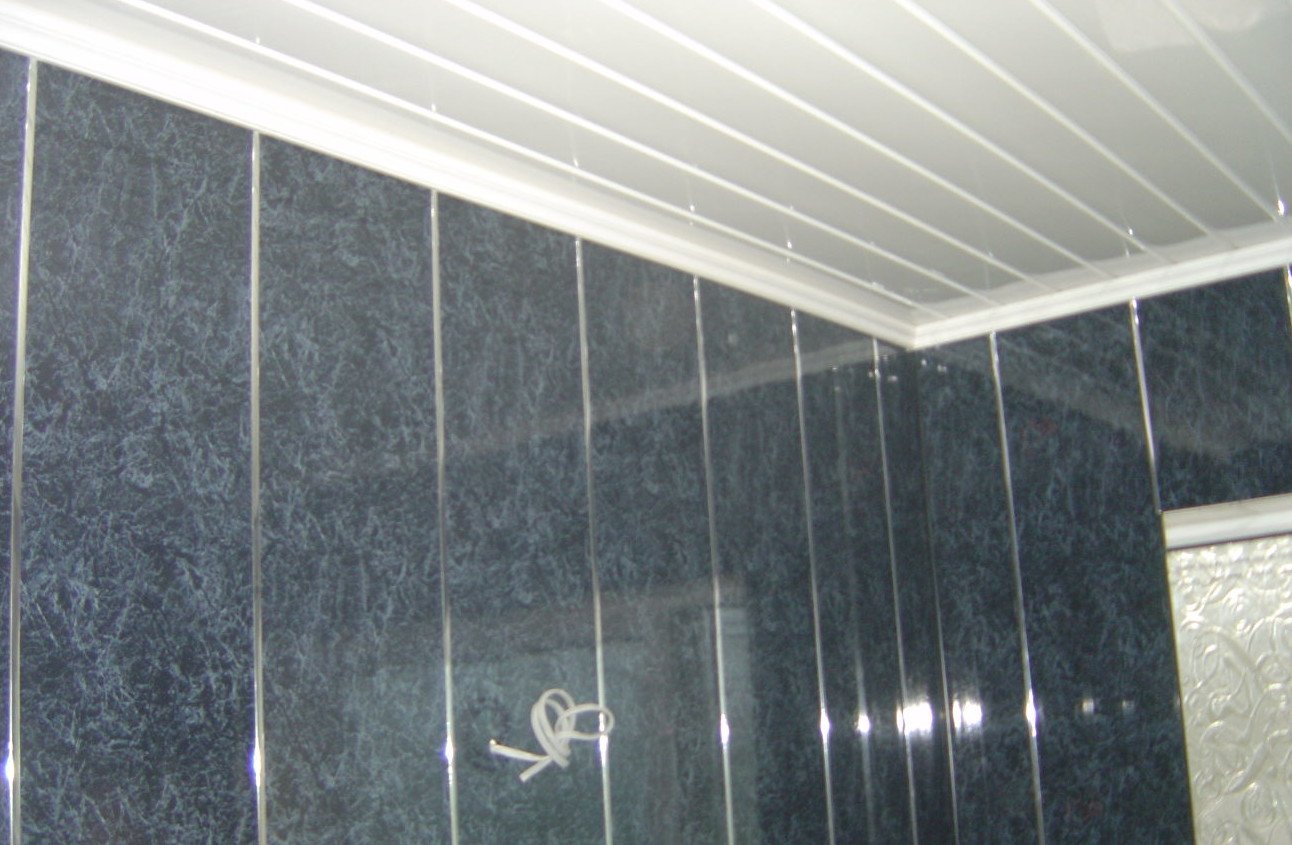
 The chocolate shade of PVC panels makes the interior more elegant, and the way of laying helps to visually expand the space.
Pros of the material
The benefits of a PVC finish include:
- Profitability. The affordable price allows this material to be used even with a limited renovation budget. The cost of the panels depends on the quality of workmanship and decorative elements.
- Compliance with sanitary and hygienic standards. The panels practically do not absorb odors and are easily cleaned of dust and dirt with a damp cloth moistened with soapy water.
- Moisture resistance.
- Ease of assembly and disassembly. The panels are fixed using a screwdriver or a construction stapler. You can install them yourself. The process of decorating a bathroom with plastic panels is shown in the photo.
- The ability to hide communications. Sewerage and water pipes can be hidden under the trim. This option must be thought out even at the planning stage, and then a pipe box must be made.
- Fire safety. A short circuit may occur in a room with high humidity levels. In such a situation, under the influence of fire, the plastic will begin to melt, but the fire will not spread to it.
- High noise and heat insulation properties.
- Large selection of colors, patterns, patterns. The surface of the plastic coating can imitate natural wood, stone, tiles, wallpaper.
 Thanks to plastic panels, you can create a stylish modern interior in the bathroom at a low cost
Cons of plastic finishes
The disadvantages of PVC finishes include:
- Low environmental friendliness.
- Fragility. If you press too hard on the material during installation, cracks may develop on it.
- Harmful effect on the human body. We are talking only about the cheapest models of panels that emit phenol into the air.
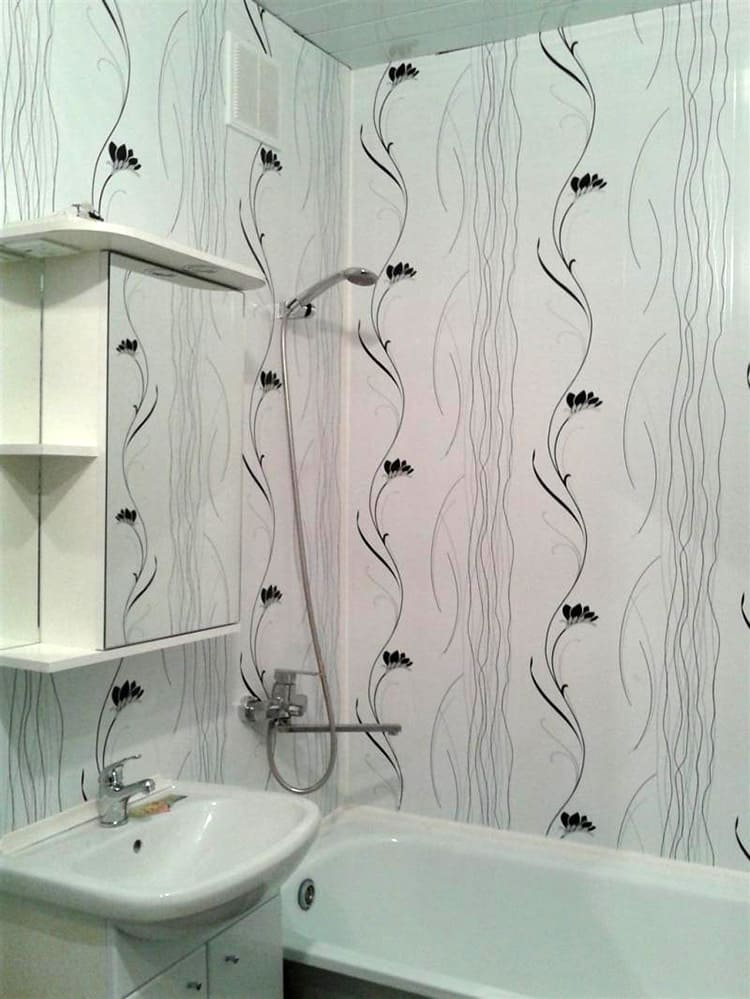
- Simple design. Ceramic tiles look more expensive and more spectacular than most PVC models. Plastic design options for the bathroom can be seen in the photo.
- Reducing the usable area of the bathroom. PVC trim is not recommended in small spaces.
 PVC panels help to visually make ceilings higher
Types and sizes of PVC finishes
The classification and requirements for PVC products for interior cladding are set out in GOST 19111-2001. From the whole variety of manufactured panels, we will single out the main criteria by which the classification of products is carried out.
By appointment:
- Wall. The thickness of the products is from 8 to 12 mm.
- Ceiling. This cladding is available with a thickness of 5 to 8 mm.
Width:
- Rack (lining): strips from 12 to 30 cm wide.
- Sheeting or wide panels: widths from 30 to 50 cm.
By invoice:
- Smooth. As a rule, these are colored products or stripes with a pattern applied using photo printing.
- Embossed or textured. Such cladding imitates various textures, most often tiles or mosaics. Embossed seams allow you to simulate tiling as accurately as possible.
All types of PVC cladding materials have grooves for locking two strips. Depending on the joint formed, the material is divided into three types:
- Seamless connection.
- Chamfered lamellas to highlight the seam.
- Embossed lining, the joint in which is masked when joining.
Finishing a bathroom with PVC panels is considered a cosmetic repair option. But that doesn't mean that cheap finishes can't be attractive. Modern technologies make it possible not only to make plastic of any shade, but also to apply on it almost any drawing or pattern, and even a volumetric image. Therefore, the plastic finish looks very nice, as can be seen from a selection of options for decorating a bathroom with PVC panels.
Where to start repairs
It is best to decide before the repair where the communications will go, after they will hide under the panels and it will be much more difficult to carry out any work. It is also necessary to take care of the expansion of the bathroom, the lathing together with the panels hides part of the space. How to prepare a bathroom for finishing with plastic panels with your own hands can be seen in the training video.
Expanding space
How to start DIY cladding with PVC bathroom panels? Before starting the renovation, it is recommended to remove the old layer of plaster from the walls. This will not add extra centimeters, but it will allow you to even out the ratio of the thickness of the walls - the panels together with the crate will take about the same amount of space as the plaster together with the old finish.

Space saving depends on the thickness of the plaster layer. Taking into account one wall, this seems like too small an achievement, however, when transferred to the entire bathroom area, there may be enough free space for a narrow pencil case or wall shelf. Considering the size of the premises in houses built during the Soviet period, even a few extra centimeters are important.

In Khrushchev, plaster is often made on the basis of sand and lime, so it will be quite easy to remove it from the walls. Dust during the repair process will become a much larger problem, but you can escape from it by using a respirator and goggles. In order not to stain the bathtub, it is better to cover it with a film.

Replacing pipes
Before installing plastic panels in the bathroom, it is better to completely replace the old pipes. Why is it needed:
- Old, corroded piping can leak at any time. If the pipes are hidden behind the panels, in the event of an accident, it is more difficult to fix the problem, you will have to disassemble part of the wall, and this takes time, effort and money.
- It is better to put plastic or metal-plastic pipes in place of the old ones. They don't rust.
- Since the old pipes are already at least a few centimeters away from the walls, the thickness of the sheathing for plastic panels will be larger. As a result, the area of the bathroom will be noticeably reduced, which is unlikely to have a positive effect on comfort.

In addition, new pipes will last much longer than old ones, and modern materials are more durable.
Wiring
In modern bathrooms, you cannot do without sockets, they are necessary for a washing machine, shower cubicles with electronic filling, a hair dryer, an electric shaver, etc. You will also need switches, especially if the lighting is in several levels. Therefore, even before sheathing the bathroom with plastic panels, you need to determine exactly where the wires will come out.

But the process of installing sockets and switches in PVC plates is no different from the same on drywall. To better understand how to distribute the wiring under the plastic panels in the bathroom and install everything you need during the repair, you can watch the video with instructions.
Installation methods
Before you go to the store for finishing material, you need to take measurements. Calculate the total surface area that will be decorated with plastic. Its width is multiplied by its height. The area of doorways and windows, if any, is subtracted from the resulting number. The latter are, of course, a rarity for rooms in Khrushchev, but in a private house a bathroom may even have several of them.It is also worth removing the bath area from the total value if it is adjacent to the wall, and the repair does not imply its dismantling. After the calculations, they go for the material. There are two ways to install PVC panels:
| Adhesive (frameless) | The panels are attached directly to the wall. |
| Wireframe | A special crate is installed under the material. |

In addition to a set of tools for work, you will additionally need:
- Floor and ceiling skirting boards;
- Corners.
These materials serve as a decorative function, but without them, the interior design will seem unfinished.
Required tools
The list of tools for decorating a bathroom with PVC panels includes:
- Drill, hacksaw, screwdriver;
- Building level, tape measure, pencil, square;
- Screws and dowels;
- Construction glue, self-tapping screws or clamps;
- Bars of wood or metal lathing;
- Sealant for processing joints.
The list can be expanded. The set of tools depends on how the panels are fixed to the wall surface.

Frame method
This type of installation is not suitable for small rooms. The frame will inevitably "eat" valuable centimeters. Typically, this method is chosen for ceiling decoration. As mentioned above, the material has a special structure (no pores), so it will not become a breeding ground for harmful organisms. But, if there are voids under the panels, then whole colonies of bacteria and mold can settle in them over time. In addition, the presence of a frame significantly increases the risk of damage to the material, it becomes more fragile, without having a solid surface underneath. Of the obvious advantages, they note the ability of the crate to hide obvious defects in the wall: it can mask their irregularities or curvature.
Finishing work is conventionally divided into several stages:
- Marking and installation of the first battens. The future crate is constructed from wooden or metal bars. For the bathroom, it is better to opt for the latter, since wood is less durable and prone to decay. The main line is drawn horizontally along the entire perimeter of the room. Focusing on it, the first rail is attached using dowels. At the bottom of the floor, the second is installed in a similar way. They will be used as a basis for further work.
- Fastening of additional rails. The optimal distance between them is considered to be a distance of 50 cm. Before installing additional rails, check their "horizontal" level using a level.
- Fasteners for moldings. They are necessary to mask the joints in the area of the corners.

After the work on the frame is completed, they begin to install the plastic panels. The process begins with the wall that is always in sight (distant). The material is attached to the crate with self-tapping screws using a screwdriver. The panels are inserted into the corners (moldings) and screwed to the frame. On the sides of each there are special grooves that allow you to connect them together. To ensure better grip, they are lightly tapped with a hammer.
Adhesive lining method
The glue method is devoid of all the drawbacks of the frame, however, it is coupled with additional finishing work: putty and surface primer. The first is carried out only if necessary, it does not apply to the mandatory preparatory stages. If the walls have obvious irregularities, cracks or damage, then you cannot do without applying a putty. Defects are smoothed out, and the surface is leveled. After the putty has dried, the wall is primed to ensure good adhesion to the adhesive. The panels are cut if necessary before installation.

A layer of glue (the so-called "liquid nails") is dotted on the wall surface. At the same time, they try not to gloss over the places where the panel seams will be located, since the substance can leak through them. As in the glue method, it is necessary to monitor how evenly the material falls on the surface. The process is completed by installing a framing profile.

Completion and additional elements
We will talk below how to calculate the number of panels and additional elements, and now we will tell you what is included in the package of wall decoration with PVC panels. Select the appearance and specific dimensions taking into account the parameters of the panels.
| Name | Brief description and purpose |
|---|---|
|
Universal corner |
It looks like a plate bent at an angle of 90 °. It is used for finishing the interior and exterior corners of the premises. |
|
Ceiling and floor skirting boards |
A complex profile, part is installed under the panels, the outer side hides the unevenness of the cuts or surfaces. |
|
Outdoor corner |
Consists of a corner, the inside is wider than the outside. Conceals irregularities in the outer corner. |
|
Inner corner |
It differs from the outside in the width of the sides. The wide one is installed under the lamellas, the outer narrow one hides the unevenness of the inner corner. |
|
Connecting profile |
Allows you to connect lamellas without a lock, used if the length of the lamellas is insufficient for surface finishing |
|
Start / finish profile |
Installed first and last, sometimes it can be used instead of a universal or special corner. |
|
F-shaped profile |
Installed in the places of abutments, can be used as a platband. |
|
Purlin mounting plate |
The supporting element of the frame can be plastic or metal profile. |
|
Clammer |
Made of metal, presses the panel against the mounting plate. Allows to dismantle panels without loss of factory qualities. |
pvc panels for bathroom
The panels are fixed with self-tapping screws with a press washer, staples with a stapler, clamps or liquid nails. The choice of the method depends on the materials for the manufacture of the supporting frame and the quality of the walls and ceilings.
Methods for mounting PVC panels on walls
Style selection
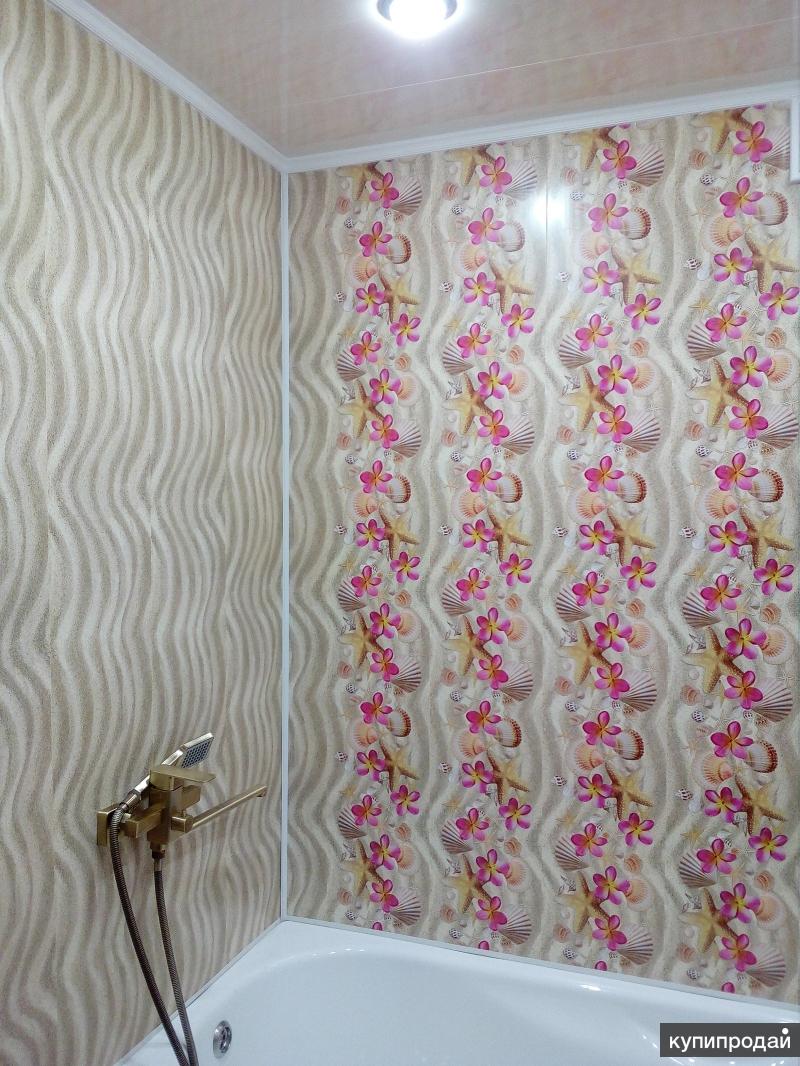
Marine style is considered traditional for the bathroom. It most vividly reflects the functional purpose of the room. In wall decoration, a combination of white and blue is usually used. The texture of the panels can imitate sand, small pebbles or water surface. High-tech prefers imitation steel, and Provence prefers aged wood. In designs with more expensive decor, special panels are purchased that are assembled in the manner of a mosaic. On their surface, a pattern is applied: dolphins, starfish, ice skates, jellyfish and other inhabitants of the depths. For a romantic atmosphere, panels with appropriate images are used: roses, irises, tulips, orchids. In the Japanese style, there are always pagodas and cherry blossom branches. For timeless classics, panels with floral patterns and imitation of stucco molding around the perimeter are chosen. In minimalism, only plain options in calm shades are allowed: white, gray, blue. In small bathrooms, it is better to use light, modern trends, where designers choose functionality at the expense of complexity of finishes. In spacious rooms, you can experiment by dividing them into zones (bath, toilet, washbasin) using different finishing textures.

Ceiling cladding methods
Installation of panels on a rough ceiling
The rough ceiling does not require any special preparation. Laying of finishing elements is performed as follows:
- Treat the surface. Antiseptic compounds are applied to the base, leaving to dry. It is recommended to install a waterproofing material such as plastic sheeting. The joints are glued with tape.
- Measure the distances between the walls located opposite each other. The skirting boards are cut so that when the two parts are combined, an angle of 45 ° is formed. The part is not recommended to be fastened with self-tapping screws. When installed on an uneven surface, the pad will sag. Liquid nails are used for fixation. At this stage, only 3 plinths are installed, the fourth is mounted after laying the cladding.
- The panels are cut. The element enters the skirting board by 2 cm. Having measured the distance between the walls, add 1.5 cm to the obtained value.The remaining 0.5 cm makes installation easier.
- The ceiling is re-measured. If there are minor errors, they are eliminated by changing the size of the gaps between the lamellas. It is recommended to align the panels in hidden places. Open areas should have smooth joints.
- The end of the lamella is wound into one plinth. The element is bent slightly, the other end is inserted into the opposite profile. The long side is inserted into the third skirting board.
- Firmly pressing the lamellas to each other, they are fixed with staples. The tighter the elements are installed, the stronger the connections will be. When fixing on an uneven ceiling, pieces of plastic are placed under the end of the panel. This will help avoid gaps.
- After installing the whole elements, measure the width of the uncovered part of the ceiling. Taking into account the obtained value, the material is cut using the previously selected method.
- The lamella is inserted into 2 baseboards. One face is connected to a lock, the second is fixed separately. The element is fixed with liquid nails or self-tapping screws.
- The fourth plinth is removed from the base. The remaining part is treated with glue and installed on the wall.
Installation of panels to the ceiling on a metal frame
This method is used by independently finishing the uneven ceiling. The work is performed as follows:
- Mark the installation locations of the bearing profiles. Parts are placed with a step of 0.5 m. In the presence of pronounced irregularities, suspensions are used. They are attached in the same way as on the walls.
- 3 skirting boards are glued with liquid nails. In the absence of right angles, the cuts will have to be adjusted. The skirting board is attached both to the wall and to the metal frame. After applying the plastic element, it is removed for 2-3 minutes. After reinstallation, the correct position is checked with a level. The corners are sealed with sealant.
- The ends of the lamella are inserted into the skirting boards. The finishing material is laid along the long side of the ceiling. This reduces the amount of cuts and waste. The plastic sheathing is attached to the profiles with self-tapping screws. So that the screwdriver nozzle that has come off does not damage the finish, a metal spatula is placed on the ceiling when screwing.
- The finish panel is trimmed taking into account the dimensions of the uncovered part of the ceiling. The back side of the fourth plinth is removed. The rest of the parts are greased with glue and pressed against the base. After the glue dries, proceed to the placement of the lighting fixtures.
Fastening of plastic panels to the ceiling in the bath.
How to Install Panels for Diagonal Ceiling Mounts
This idea is difficult to implement. Installing the frame and fitting the cladding elements is a laborious process. The work is performed as follows:
- Determine the base area and the longest lamella length. To do this, you need to measure the diagonal of the ceiling. The volume of waste when using this installation method increases, so the material is bought with a margin.
- 3 skirting boards are installed in the standard way. When the glue dries, the height of the additional elements should not change.
- The end of the panel is cut at an angle of 45 °. The second end of the lamella is cut off under the same slope. This gives the starting element with the smallest length. It is installed in the corner.
- Measure the length of most of the installed part. This is how the length of the smaller side of the second element is determined. Marking is applied to the panel, cuts are made. The remaining parts are cut and fixed in the same way. How the ceiling will look can be seen in the photo.
Construction of a supporting frame for plastic panels
A very important stage in finishing with the use of plastic panels in the bathroom is the construction of a supporting frame - a structural unit designed for fastening materials. After all, the result of all finishing activities largely depends on the quality of its manufacture.
As materials for the manufacture of the supporting frame, both wooden slats and specialized metal profiles can be used.Whereas the choice in favor of the most acceptable option should be based on the individual characteristics of the facility and the actual operating conditions.
Design and decoration with plastic panels video tutorials
The use of wooden blocks as a starting material is a less time-consuming measure, because in this case, the lathing is simply attached to the surface of the enclosing structures using dowels and self-tapping screws. However, such an arrangement can be allowed only if there are perfectly flat walls in the bathroom. And as a building material, use exclusively dry, even, knot-free slats.
If the base foundations have significant deviations from vertical or horizontal planes, then a more acceptable option is to assemble the frame using metal profiles that are attached to the enclosing structures using adjustable suspensions. In addition, such a layout allows you to easily arrange, all kinds of insulators and elements of engineering communications (lighting, piping, ventilation).

Plastic panels in the bathroom interesting photo design ideas
However, regardless of the type of materials used in the process of assembling the supporting frame, it is advisable to comply with certain recommendations:
- The frame elements should be fastened to the base bases using high-quality fasteners, ensuring high rigidity of the system (the spacing of the attachment points should vary in the range from 30 to 50 cm);
- The spacing of the profiles should ensure the subsequent rigidity of the wall modules (the optimal range is from 40 to 60 cm);
- To strengthen the structure, additional lintels from a profile or wooden bars can be used.
Advantages of finishing and repairing a bathroom with plastic panels
The most important advantages of modern plastic cladding panels that are used as a bathroom decoration include:
- high level of moisture resistance;
- the ability to act as a reliable protection for wall and ceiling surfaces of the bathroom;
- increased practicality and suitability for cleaning the facing material with cleaning, non-abrasive agents;
- the ability to perform self-assembly, not accompanied by a large amount of debris;
- democratic cost of finishing material and component parts;
- excellent soundproofing qualities;
- richness of choice of colors and shades;
- the possibility of making matte, glossy or textured veneers.
A fairly rich selection of products that differ not only in design, but also in size, allows you to choose the best option for facing with minimizing waste when cutting the material.
Before purchasing, you need to take into account that plastic is characterized by relative fragility, a low level of resistance to mechanical damage, as well as insufficient environmental friendliness and the presence of toxic components in the composition.
Interesting design ideas
Each owner of an apartment or country house wants his home to have a unique design that will attract attention and surprise guests. To do this, you can familiarize yourself with design examples or ask for help from a professional designer who will offer different options.

Before choosing a design, you should study its features:
Most people think plastic panels are a cheap option that can only come in one color and look boring. However, manufacturers offer original decorative options that are ready to diversify the interior of the room.


You can often find a bathroom lined with plastic panels in a minimalist style. This interior implies a minimum number of items along with free space. It should have clear lines and restrained shades.The addition of metal and glass accessories is recommended to make the interior look complete.


Rustic style and country style look beautiful. The interior assumes that natural elements will be used in it, but plastic allows you to simulate a similar atmosphere. When using PVC panels with wood imitation, you should take a responsible approach to the choice of other elements. Designers recommend choosing simple pieces of wood furniture. Spotlights should be replaced with a matching chandelier.


Provence is considered the spirit of simplicity and comfort. Such an interior is easily created by sheathing with plastic panels. The interior should be created in light pastel colors, furniture should be simple. You can complement the bathroom with ceramic and porcelain décor, as well as floral-themed patterns.
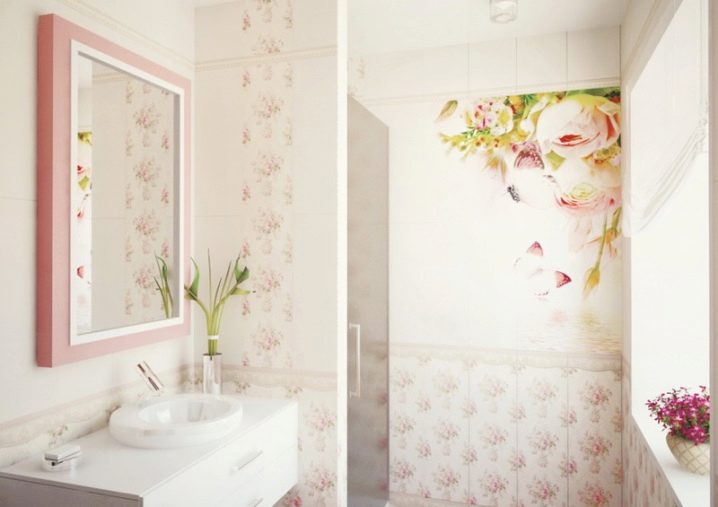
Many home and apartment owners decide to combine a variety of color options. Such a solution allows you to arrange a room in an unusual design. The combination of red and black, blue and pink, white and light green colors will look original. Decorated in this style, "Khrushchev" will look creative and modern.

Since the bathroom is a room in which a person takes water procedures and relaxes, a nautical design will be relevant. On sale there are panels with drawings on a similar theme (ocean, marine life, vegetation, etc.). The floors are also recommended to be decorated in a nautical style.

Modern style involves the choice of glossy white products. The interior, decorated in this style, makes it possible to refresh the bathroom and make it modern. Due to the shiny surface, you can visually enlarge the room and make it lighter. In a large room, glossy panels of other shades can be used. Red, blue or yellow products will look beautiful.
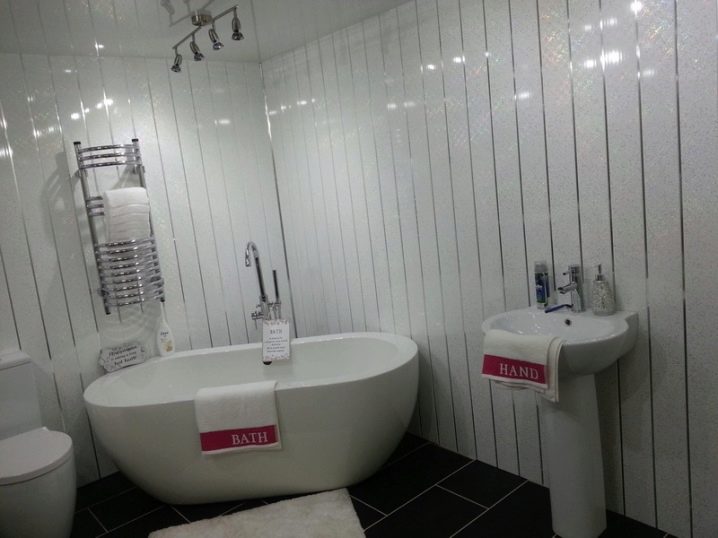
Also, the panels can be combined with different finishing materials. It is often possible to find a bathroom, the lower part of the walls of which is sheathed with clapboard along with the plastered upper part.

You can clad the walls with plastic panels with patterns, which should be combined in a certain order. Such products have an increased cost, but this is justified by the result obtained after sheathing. The room takes on a stylish and modern look. You can use printed panels next to mirrors or in the shower. The rest of the walls should have a solid surface.

The use of panels with different textures is allowed. They should be arranged in stripes, due to which the room acquires an original play of surfaces. Such techniques are relevant for large rooms with low ceilings. Due to such a game, the walls visually become higher, and the proportions of the room look organic.
Some buyers purchase 3D pattern PVC panels
The image will draw attention to itself and transform the room. Due to the "volumetric" panel, you can visually increase the area of the room, adding an additional dimension
However, 3D panels can only be used in spacious bathrooms, since the pattern is adequately perceived from a certain distance.

For information on how to decorate a bathroom with plastic panels, see the next video.
Criterias of choice
When choosing PVC plastic for finishing the interior of a bathroom, you should familiarize yourself with the types of this building material. There are two types of panels - wall and ceiling. They differ in technical characteristics and dimensions. Wall panels have increased impact resistance, bending resistance and strength. These characteristics are provided by the presence of a large number of stiffeners and their thickness - the honeycomb of the inner frame is 1 millimeter thick. Ceiling panels can have a lightweight frame and a thinner outer layer.In this case, the thickness of the wall panels is 8-10 millimeters, and the ceiling panels are 4.5-8 millimeters.
In shape, the products are in the form of lining, panels and sheets. Lining is narrow strips from 10 centimeters wide and up to 6 meters long, equipped with a lock connection. The lock closes the edge of the strip on both sides, an analogy of a surface trimmed with a strip is obtained. PVC sheets have a width from 80 to 200 cm, and a length from 105 to 405 cm. In the production of sheets, foamed PVC technology is used, which gives increased strength and embossed texture. The sheets are attached to the glue, not to the frame, which requires additional leveling of the wall or ceiling surface.
The most demanded type of finishing is panels. It is a lightweight, easy-to-install material with overall dimensions of 30-50 centimeters wide and 260-300 centimeters long. The panels can be equipped with a polyurethane foam insulation layer to increase thermal insulation. The panels can be mounted on a rack frame using nails or screws. The second way - the panels are glued directly to the wall or floor slab.
The new high-performance material is PVC sandwich panel. This material has a slightly different structure. Instead of a honeycomb frame, there is a layer of kraft paper between the two layers of film. The outer coating consists of a decorative layer and an overlay - a protective layer. Bonding takes place by pressing with formaldehyde resins. Metallic matrices with a specific pattern are used to give a relief texture.


PVC panels or lining have seam joints or seamless joints. The lock connection closes the edges of the joints, a surface similar to the wooden lathing is obtained. For the ceiling, lining or panels with a seamless joint are used. It will not be possible to achieve complete resemblance to a stretch ceiling, but the joints of the elements are smoothed and invisible as much as possible. A smooth decorative finish can be obtained on walls or ceilings.


Panels with decorative seams to imitate tiles are produced especially for the decoration of bathrooms. The seamless interlocking joint and characteristic “seams” create an aesthetic tiling for ceramic tiles. The decor of such tile panels imitates the bathroom ceramics collections and is no different from real tiles in terms of the brightness of the colors. To decorate one room, it is better to buy the entire set from one batch, since the pigment of the dye may differ slightly.



It is necessary to pay attention to the density of the stiffeners. The quality of the inner frame can be determined by weight by comparing two panels of the same size.
Higher quality will weigh more. External inspection of the panel for dents and damage will avoid the acquisition of low-quality material.
Manufacturers offer a choice of different types of face layer finishes: smooth or textured. The texture is given at the stage of pressing. The surface can be matte, glossy or semi-glossy, with or without a pattern. The drawing is applied in two ways, thermal transfer or offset printing, and fixed on top with matte or glossy varnish. The second method - lamination, involves the application of a special film with a pattern of the texture of any natural finishing material: wood, stone, brick, metal.


