The nuances of repainting furniture chipboard
Do-it-yourself painting of old furniture is a difficult and risky procedure. The fact is that for the manufacture of interior items (cabinets, chests of drawers, kitchen modules), processed materials with a decorative layer are used. Therefore, it is necessary to correctly determine the type of coverage in order to draw up a work plan.
Chipboards used in furniture production can be of the following types:
- Lacquered. Wardrobes, beds and dressing tables made more than 30 years ago are made of this material. Now this furniture is being produced again. The manufacturing technology consists in the fact that several layers of varnish are applied to the decorative base. Parts processed in this way are used for facades or visible parts of the body. It is very difficult to repaint varnished products; it is much easier to polish if damaged.
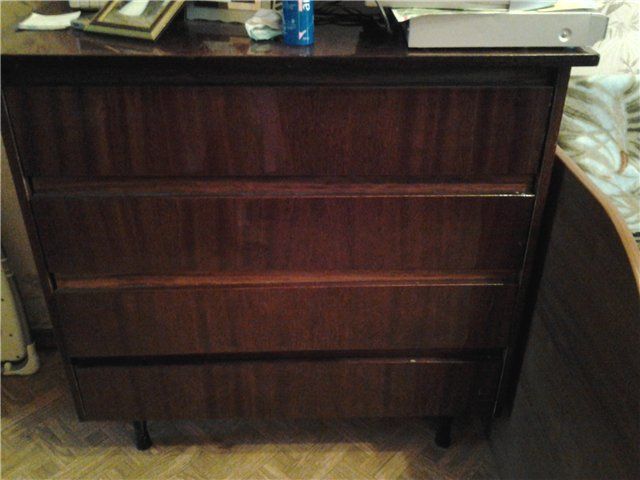 Lacquered products are the hardest to repaint.
Laminated. This is a modern option, which is used everywhere; laminated chipboard furniture is very popular. The principle of obtaining such a surface is that the film is rolled onto a chipboard base and, under the influence of a heat press, creates a reliable and durable layer. It is difficult to repaint such a material due to the fact that it will not be possible to completely remove the coating, because it has adhesion to the base. This must be taken into account in order not to damage the workpieces.
 Laminated boards are coated on top with a polymer that complicates the restoration process
Laminated. Such products are created by gluing decorative paper to a chipboard, so the coating is unreliable. It is recommended that such elements be allowed to be repainted only after the top layer has been removed and a significant part of the glue has been cleaned.
The paper covering is easily peeled off the plate, after which the product is ready for applying a new decor
Veneered. The basis of the material is chipboard, veneer is glued to it under the press. Painting of such interior items is carried out with a limited number of compounds - these are stains and varnish
Prepare the veneer surface carefully so as not to damage the decorative layer
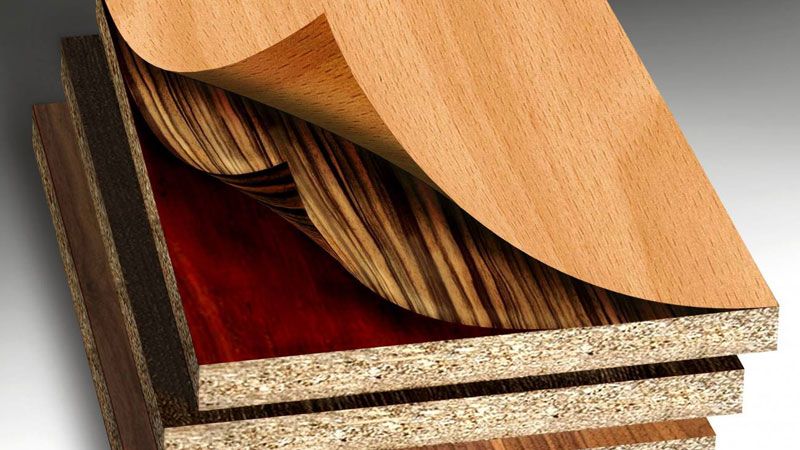 Furniture covered with natural wood veneer belongs to the elite class
There are other types of slabs, but they are not so common.
Work order:


At first I wanted to paint like this, without removing the door, then I realized that it would be inconvenient. So I took a chance. and took it off. It turned out not difficult. True, worries about how to put them back on were present until the last moment. As a result, she also screwed it herself, the patience was not enough to wait for her husband))). She pulled out the built-in lights and hung them with masking tape. With the same tape she protected the walls on the sides of the cabinet, the floor, the mirrors on the doors. Prepared the workplace. I decided to paint. on the bed)))! She covered it carefully with polyethylene. And I never regretted this choice. The bed is large and high, everything fit, there was no need to bend over and crawl on all fours. Prepared approximately equal piles of books, wrapped them in cling film. They are needed as substrates so that the doors can be lifted and painted as if by weight, the painted edges will not come into contact with a flat surface.
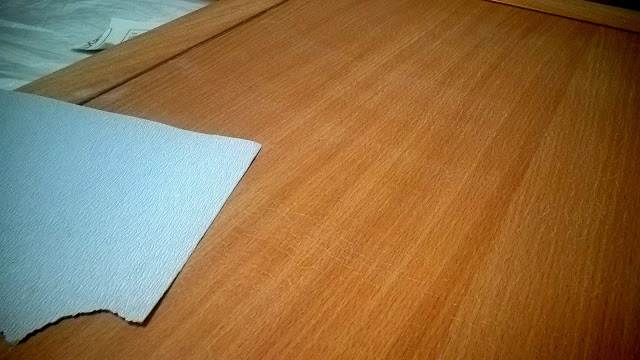
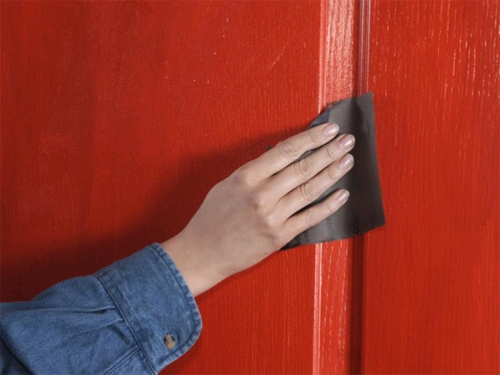
Stage 2. I sanded all surfaces that need to be painted. It is necessary to sand lightly, without fanaticism, with the finest sandpaper. With light circular motions. Purpose: to create a roughness without removing the laminate layer. If there are dents and scratches, then at this stage they need to be putty. After sanding, thoroughly wipe all surfaces with a degreaser.It will remove dirt, grease marks, everything that can break adhesion to the primer and paint.
Stage 3. Primer. Hard-to-reach places were passed with a brush, the rest - with a roller. A thick layer is not needed at all; it is necessary to cover with a primer without drips and in a thin layer. Uneven color is not terrible, but there should be no gaps. I did not prime the rattan inserts, the paint adheres well to them anyway.


It is easy to paint them - just roll them with a roller, it is more difficult not to go over the edges with a brush. Wipe off any blemishes immediately with a rag. Each layer was dried, as the manufacturer recommends, acrylic dries on touch in an hour and, in principle, you can gently turn over and paint the door on the other side.
Stage 5. I collected the closet. I screwed on the doors and handles. She removed the masking tape and cleaned everything up. At first I planned to keep the doors open for two days, I was afraid that they would stick. Nothing of the kind - you can close it right away.

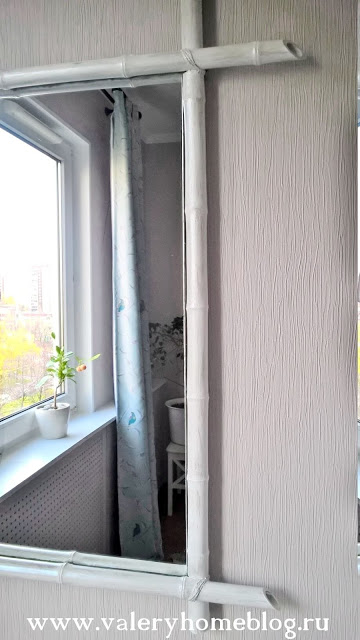
Mirror.
Important! Acrylic paints dry “to touch” rather quickly, but polymerize for at least a month, with a primer the process can take even longer. A painted product can be used almost immediately (and it is better to wait 2 days after all) and even wipe it with a damp cloth
But within a month, the coating remains very vulnerable, it must be handled carefully, not to scratch or rub with effort. If shelves or horizontal surfaces are painted, then it is better not to immediately put things on them that can "stick", wait until the paint "stands up"
Although I immediately put everything I needed on the dresser, nothing stuck).
Well. the work is laborious, but the result pleased me. As a result, the painting looks no worse than the factory one, no brush marks are visible. Holds up well too. I haven’t tried to scratch, I use furniture as usual. And usually I don't scratch it))). Although in a month I will conduct an experiment. The room has been pretty updated)
Alas, the photos after compression leave much to be desired, in fact, the colors are brighter and cleaner, but this is not so important
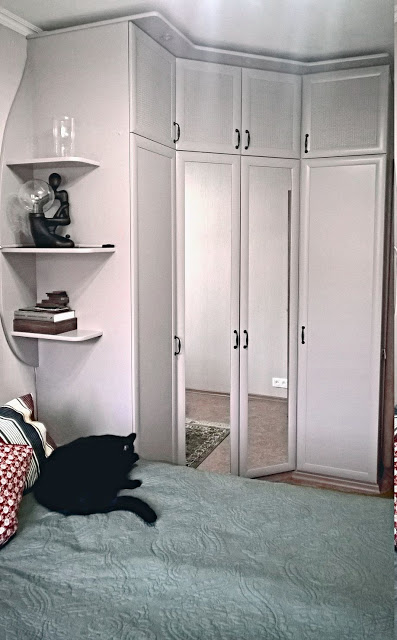


If you also want to remake the furniture and have any questions, write - I will answer. And if such a rework seems difficult to someone, I assure you, it is not so, labor-intensive - yes, but quite doable without any experience. You can just start with the internal, inconspicuous parts, or with small furniture, a chair, for example. In terms of time, the rework took three days. At the same time, I managed to cook and. to have bronchitis + after the cast I still have a slightly lame leg. "Painter-disabled" was able to paint, so you can))).
How to paint plywood and veneer?
Before moving on to dyeing plywood, you should understand what this material is. Plywood is a multi-layer material that consists of veneer, the layers of which are glued together. Veneer is a thin layer of wood, mainly sleepy or birch. Distinguish between sanded and untreated plywood. Depending on the grade, plywood has certain properties. The highest grade is “E” class plywood, which means “elite”. Such plywood is sanded on both sides and is completely free of knots and roughness.
Other types of plywood also have their own designations in the form of Arabic or Roman numerals from 1 to 4. This figure is indicated for both sides of the plywood sheet. For example, the designation 2/4 means that the face often of the sheet (2) is covered with a small number of knots and has minor cracks up to 2 mm. The seamy side (4) has a large number of knots and open cracks up to 1 cm. There may also be voids on this side. Such plywood is mainly used where it will not be visible (for example, for the construction of a sub-floor).
When buying plywood for painting on one side, pay attention to the sheets marked 2/4. If you are going to color the sheet on both sides, it is better to choose 2/2 or 1/1-marking.
If you have a poor quality plywood sheet, it is best to sand it well with sandpaper before painting.
Plywood can be painted with paint or varnish. An ideal option for this material is alkyd-based paints. Plywood can be varnished without preliminary preparation, using a soft brush or roller. When painting plywood with enamel, you must first prepare the sheets. GF-021 soil of brown or gray shade is often used. After the primer has completely dried, paint can be applied
Pay attention to the ends of the plywood: they need to be carefully painted over several times. Similar requirements for painting are put forward for furniture covered with veneer
But veneer is mainly varnished, not painted. Before applying the varnish, the old layer is carefully removed with sandpaper. It is preferable to do this by hand so as not to damage the surface. A water-based stain is the best option. It must be applied in several layers. You can, of course, paint the veneer with alkyd enamel or paint, but they will completely hide its texture and color. Choose a soft roller for staining.
Chipboard is based on compressed wood chips, which are glued together with a special resin. The resin contains formaldehyde, which is harmful to health. To minimize the harm caused by resin vapors, it is recommended to paint the chipboard. Chipboard can be processed not only with paint, but also with natural drying oil on both sides. Don't forget about the ends.
If you are dealing with laminated chipboard (chipboard), then the dyeing technology will be a little more complicated. First you need to take a fine-grained sandpaper and gently clean the surface with it. Then remove the dust thoroughly. Next, the surface is treated with a primer, and then again processed with sandpaper. Chipboard can be painted with alkyd enamel in several layers. It is better to paint chipboard with a soft velor roller, which does not leave streaks.
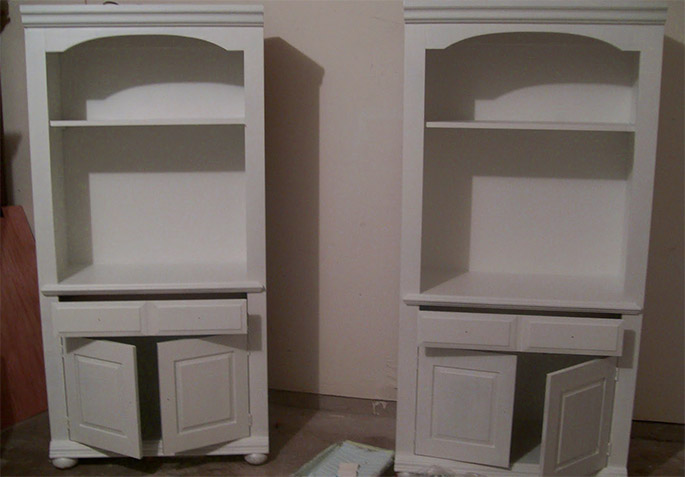
Preparation for painting an interior door
First of all, it is necessary to clean the surface, handles and glass inserts from dust. You should also remove the old paint coat. It is not necessary to remove the door from the hinges, contact with a minimum number of surfaces allows you to get the best quality of staining.
Next, you need to remove the handle and the lock, filling the resulting void with rags or cotton wool. To make it convenient to open and close the doors, stretch a wire instead of the lock. It is better to cover elements that will not be painted with plastic or glue a newspaper with toothpaste.
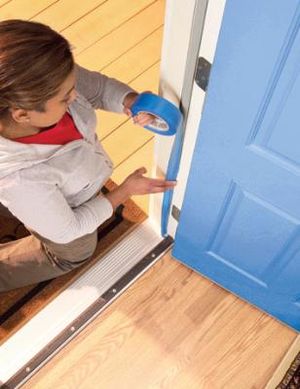
If it is inconvenient for you to paint a door that is in an upright position, then you can remove it and put it on the table.
The choice of paint for an interior door
The main issue when performing these works is the selection of paint, which is carried out based on the material of the door and the nature of the old coating.
The best option would be to use acrylic enamel, often used to paint round logs. Its advantage lies in the presence of a huge selection of colors, giving the surfaces a matte finish. Plus, it practically does not smell. Of course, the cost of such paint will be much higher than usual and additionally requires fixing with varnish or other hardening coating.
Alkyd enamel is characterized by good strength, which is much cheaper than the previous version, but it has a pungent odor, therefore, during the period of work, the room should be isolated from people.
Nitro paint, which is also characterized by an unpleasant odor and toxicity, has even greater strength and long service life.
When working with it, it is important to strictly follow all safety measures and paint when there are no people in the room.
Interior door paint tool
The result of the work depends not only on the choice of paint, but also on the tools used, the choice of which is carried out depending on the material of the door, on the paint used, as well as on the desired result.
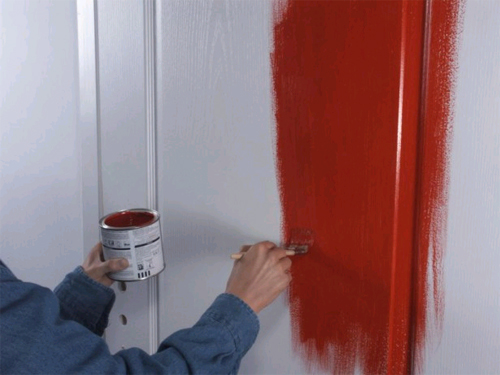
So, when painting an interior door with enamel or varnish, you must use a brush
If it is important to preserve the natural structure of the wood, focusing on patterns, then a rubber trowel or sponge would be the best option.
The roller is used when processing large areas.
The spray gun has found the greatest application when painting metal doors.
Self-painting of an interior door
At the initial stage, you should get rid of the old coating. This can be done by first washing the door with soapy water and then treating it with paint thinner. If necessary, you can use sandpaper.
Then the door is covered with putty, which can be purchased ready-made or prepared independently by mixing wood sawdust with PVA glue. After drying, you should go over the surface with sandpaper.
It is better to start painting the door from the panel, making even strokes along the grain with a brush. Then proceed to the processing of the grooves. The ends are painted last.

Coloring the door alone will not give the desired result, as the coating appears unevenly applied. Therefore, you need to go over the surface again with sandpaper and apply a second layer of paint.
To paint the door frame, the walls adjacent to it must be sealed with masking tape, otherwise it may be necessary to re-paste the wallpaper. They paint, first, the vertical strips, then the upper and platbands.
- l shaped kitchen wall cabinet
- solution for installing beacons
- how to sheathe a staircase photo
- How to putty slopes?
Today, there is probably no apartment in which there would be no veneered furniture. However, sometimes it loses its appearance and then it can be painted.
Veneer is the thinnest cut of valuable wood intended for finishing furniture surfaces. Veneer retains the texture and visual of natural wood and allows you to create furniture that does not differ in any way from its solid wood counterparts, but is lighter and more functional.
Veneer differs into the following types, depending on the manufacturing technology:
- sawn;
- planed;
- shelled.
Veneer is widely used in the furniture industry, but it cannot be called too durable. The veneer plates themselves are very thin and at the slightest wrong movement they can leave scratches, dents, etc. In some cases, repainting of veneer furniture is required. usually this is due to the restoration work.
Color selection
Choosing the color of the doors will help it become a bright accent of the room or, on the contrary, merge with the interior.
It is important to achieve harmony with the general appearance of the apartment. The shade of the canvas should correspond to the furniture and wall decoration:
- For an interior in warm colors with wooden furniture and parquet, doors made of solid wood or with imitation of natural wood are suitable.
- For rooms in cold colors - plain, one-color options.
- The white door fits perfectly into any room, as this color goes well with any others. This statement is true if the color of the door matches the shade of the ceiling finish and the color of the window frames.
- If the room has linoleum or carpet, the door leaf should be combined with the floor covering.
- You can create a successful ensemble by painting the door block in colors that match the textiles on the windows or upholstery.
- The dark door leaf will become a contrasting element of the interior, decorated in light colors.
- For bedrooms and children's rooms, pastel shades are recommended for painting. The color of the doors should be different from the wallpaper, be darker or lighter.
- If there are antiques in the house, the ideal solution would be a door painted "antique" with a patina effect.
You can apply patina with the following compositions:
- acrylic - the richest range of colors;
- bituminous, giving a dark brown tint;
- wax, performed in natural colors - brown or bluish green;
- shellac - a palette ranging from gold to red.
Self-painting stages
Door painting should be carried out according to an algorithm that includes several stages:
Removing old varnish or previous coatings by treating the door with soapy water and paint thinner. If necessary, it is possible to use sandpaper (it is possible to do without removing the base layer if the coated sheet is not damaged).

Filling with a special solution, which can be made independently by mixing sawdust in PVA glue. After drying, you need to clean the surface with sandpaper.

They begin painting from the panel, carrying out even brush strokes along the fibers, after which the grooves and ends are processed.

After the first painting of the interior door in the apartment, the coating will seem to be applied unevenly, therefore, a secondary paint application is used after passing through the first layer with sandpaper.

Before painting the door frame, masking tape is glued to the wallpaper adjacent to it to protect their surface.
Self-painting work is best done with the canvas removed from the hinges. Before starting, you need to inspect it for irregularities, which are sealed with a special primer.
In most cases, veneered doors have a certain pattern, so painting with a spray gun is quite difficult and should be done by professionals. The choice of paint is determined by the old coating and the available funds. The best option is to use acrylic enamel, which gives a matte finish to the surfaces. But she's dear. When using it, it should be taken into account that it must be fixed with a reinforcing coating.

When painting doors made of artificial materials, it is better to contact professionals, because due to the dripping of paint from the canvas, poor-quality painting is possible.
Actions in the event of minor errors in work
Minor scratches or chips can be repaired by yourself. A transparent furniture varnish or wax furniture polish is selected. With a small area of damage, only this surface is painted over. If the area with chips or scratches is visible at a distance of 1 m, then you need to paint the entire canvas to eliminate the shine.

Small nuances of the process
To paint a veneer door, you need to take a not very concentrated paint, because the higher its concentration, the more the pattern will be hidden. When painting, adhere to the following rules:
- to preserve the texture and pattern, colored varnishes are used (you can choose a varnish taking into account the required mattness);
- to give brightness and saturation to the canvas, you need to use a stain, which is better applied with a spray bottle, but you can use a sponge or a brush;
- surface treatment is performed in a horizontal plane;
- it is better to paint it in different shades.

When using a brush, it can leave streaks and streaks, so you need to fluff it up, remove loose and loose hairs. To smooth out irregularities, it is necessary to draw with a brush along and across the canvas.

When painting a door white, it must be cleaned so that no dust or dirt remains. The question often arises of what to do with the attachment points of the door handles. They need to be removed, since it is necessary to prime and saturate the places under them.
Our advantages:
It often happens that when buying a second home, you have to do general repairs. This includes the creative process of painting veneer interior doors. It does not require special construction skills from the owners, but at the same time, they need to be extremely careful and have certain knowledge.
Veneer types
Manufacturers currently offer three types of veneer:
- natural;
- fine-line;
- multi-veneer.
Natural and artificial veneer
Natural veneer is a thin sheet that is removed from the solid wood by sawing, peeling, chipping or planing. This veneer is called natural because the unique texture of the wood is fully preserved during the production process.
Artificial veneer is a plastic film that in appearance imitates the structure and color of natural wood. Artificial veneer is widely used in decorating JSM surfaces.
Fine-line veneer
Fine-line veneer is a reconstructed veneer made using a special technology from natural wood with the ability to imitate various types of wood with certain sizes and different shades. Wood of fast-growing tree species is used as the main raw material in the manufacture of veneer using fine-line technology.
"Fine-line" veneer is produced from rotary cut veneer, by forming it into blocks, from which veneer of various colors, patterns and sizes is then obtained. The technology for manufacturing this type of veneer was developed in accordance with modern environmental requirements and the need to obtain a new texture.
Fine-line veneer does not repeat any of the existing types of wood and has a unique, clearly defined structure, pattern and color that meets modern trends in the production of slopes, arches, portals, doors, panels, furniture, etc.
Fine-line veneer reconstructed veneer made using a special technology from natural wood with the ability to imitate various types of wood
During production, wood goes through the following stages of processing:
- peeling: the logs are dissolved into a tape of a certain thickness, which is then cut into veneer sheets of a certain size;
- drying the obtained veneer sheets and sorting them by color;
- through staining: sorted veneer is immersed in a container with a dyeing solution;
- gluing and pressing: colored sheets are collected in bundles with the same fiber direction and sandwiched with a binder. The adhesive not only binds the veneer layers to each other, but also creates an additional decorative effect by adding dye. The created pack is pressed under high pressure;
- planing: from the resulting block, sliced veneer sheets with a certain predetermined texture and structure are obtained.
Composition: 92 - 94% - natural wood, 7 - 8% binder (glue), 0.3 - 0.5% - dye.
Advantages: the material has a uniform predetermined pattern and color, there are no defects typical for natural wood - knots, knots and cavities.
Disadvantages: the material turns out to be brittle, as well as porous and requires a lot of glue when veneering.
Multi-veneer
Multi-veneer is a specially reconstructed natural wood veneer. This type of veneer can be called the most "decorative", because its appearance is often the least reminiscent of patterns of natural wood. The main color motifs of multi-veneer are geometric patterns, often combining different color shades. Products made from this type of veneer look modern and fit perfectly into any Art Nouveau interior.
The main advantages of veneered products are:
- environmental friendliness (natural natural material);
- perfection of appearance (rich assortment, the ability to remove defects inherent in solid wood);
- the duration of operation (products lined with veneer do not dry out, like products made of solid wood, they are not afraid of humidity and temperature).
Painting of doors "Canadian"
These doors are best painted with a spray gun.
If this is not possible, then you can use a roller or brush. Now to the question "how to paint the Canadian door"?
Usually, it is delivered immediately primed
, but if you bought another option, then it must be primed before painting.
If no primer is available, use thinned paint. After priming, sand the surface thoroughly.
It needs to be done in two or three layers on wet, of course, if you use a spray gun; otherwise, you need to wait for drying.
Use alkyd enamel, as it does not fade in the sun and is quite durable.
Installation of the "Canadian" door should be carried out only after its preliminary painting.
As you can see, there are a lot of color options for doors made of various materials. In this case, you need to be especially careful and follow all of the above rules, and only then you will get an excellent result.
Veneer is a thin cut of valuable wood that is used for finishing the surface of an interior door and frame. In this case, it becomes possible to preserve the texture and color of natural wood. A layman cannot distinguish between doors covered with veneer and natural products. The similarity is one hundred percent. And the answer why this happens, you will find out after studying the technology of creating such a door.
Veneer interior door
It is easy to paint the surface of a veneer door, but in this case it is important to choose the correct composition for painting. So, you can use the following building materials:
- polyurethane paints;
- water-based formulations that are practical;
- glyphthalic substances, which are usually used for painting interior veneer doors in a room with high humidity;
- other compounds, of which there are a lot on the building materials market today.
And whatever you decide to paint the interior veneered door, the main thing is that these works are done correctly.
Painting
Before dyeing products made of do it yourself veneer, it is necessary to prepare the following list of available tools and materials:
- coarse and fine-grained sandpaper;
- primer;
- spray gun, roller or brush;
- stain (if necessary);
- paint and varnish material (paint, enamel, varnish);
- solvent;
- brush or scraper to remove old paintwork.
Next, proceed to the direct preparation of the veneer structure itself. At this stage, the existing fittings, decor and removable parts (handles, fasteners, hinges) are dismantled. If for some reason it is impossible to dismantle these elements, they should be wrapped in several layers of plastic cling film.
Then the surface of the structure must be thoroughly cleaned from dirt and degreased. For degreasing, universal solvents are most often used. After applying the degreasing agent, wait until the treated surface is completely dry.
Repainting a veneer product in a different color requires thorough removal of the old coating. It is recommended to use a fine-grained skin at this stage.
Removing the old coating with a metal scraper or a coarse brush is desirable in extreme cases.
Such manipulations must be performed with utmost care so as not to damage the fragile veneered surface. Minor damage and chips found during work should be primed and leveled using wood putty
After the putty has dried, the damaged area is sanded with sandpaper.
In order to change the color of the veneer (if necessary), it is recommended to use a stain. Before use, it is thoroughly mixed and applied to the veneer surface in two layers. Before processing the veneer with enamel or water-based paints, stain is not used.
To apply paint to the veneered surface, it is recommended to use a spray gun (paint sprayer). The paint layers applied with this tool are thin and even. In addition, the use of a spray gun avoids the appearance of drips and the formation of air bubbles. After applying the first coat of paint, wait until it is completely dry.Applying a second coat of paint to a wet surface may cause air bubbles and sagging.
In the absence of a spray gun, it is allowed to use foam rollers and brushes with durable bristles. When painting a veneered surface with these tools, one should not rush, making chaotic movements in a random order.
After painting, the veneer structure is left for 48 hours in a dry and well-ventilated room. During the specified time, the painted product must be reliably protected from moisture, dust and dirt. Otherwise, the fresh paintwork could be seriously damaged. After the paint layer has completely dried, the veneer structure can be coated with a layer of varnish, which will give the product an attractive glossy shine.
For information on how to paint veneer, see the next video.
October 22, 2018
How to repaint furniture made of chipboard and MDF. Master Class.

This article is a continuation of the post on DIY room renovation. In the first part, I told how to make cosmetic repairs with my own hands and without experience. In particular, I was able to recolor regular vinyl wallpaper. You can read about it here.
Background: There will be several objects for repainting.
- A huge corner wardrobe, this was our first family purchase of furniture. Now I would never have bought such a chipboard-shny))). While the wardrobe is certainly very practical, it essentially replaces a small dressing room. But. he is 15 years old, he is absolutely outdated in appearance, and since this cabinet will not be antiques, old age is not good for him. And most importantly, I'm so tired that I don't want to look at him.
- Dresser. The chest of drawers is veneered and has already been altered once (more on that here), but the change of textiles and color of the walls made it not very suitable for the interior. I would also like to make friends with the closet.
- Mirror, homemade, with bamboo frame. Expensive as a memory. This is the first thing my husband and I did together. It was with him that my apartment needlework began. It has also been repainted and is also not friendly with the current interior, so I will change the color.
According to my preliminary calculations, the cost of these alterations will be somewhere around 4000 rubles. Agree, this is negligible compared to buying new furniture.
What I needed:
- Soft brush with artificial bristles. 2-3 pieces.
- Small fur roller 10-15 cm. 2-3 pieces. You can take one attachment handle and three replaceable rollers.
- Roller tray. Also small, should fit the roller.
- Masking tape.
- Spray acrylic paint (black).
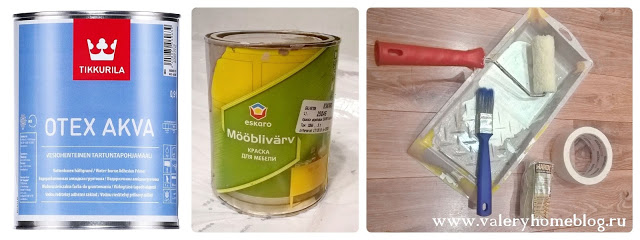
- Adhesive primer OTEX Akva (Tikkurila). 1 can. This primer is water based, therefore odorless. It is used for difficult surfaces on which the paint does not lie down and does not stick. It is she who must firmly bind the chipboard and paint.
- Acrylic paint or enamel. 2 banks. I chose ESCARO (acrylic paint for furniture, made in Estonia). At first I wanted HELMI (Tikkurila), but I had to go far to get it. Alkyd enamel may also work, but it smells on a solvent, and painting is not quick. In general, any not the cheapest, high-quality acrylic paint. My Estonian was explicitly stated "for furniture." I liked it, I can safely recommend it.
- New furniture handles. I ordered 80 rubles for Aliexpress. thing.
- Sandpaper (sandpaper), with a grain of 320. very small. 3-4 sheets.
- Rags.
- Degreaser. Convenient with a spray nozzle. You can, of course, walk with ordinary white spirit, but the smell is deadly. The degreaser smells much less. The leftovers can also come in handy: it will perfectly remove the labels, wash the mirror or glass, which nothing takes and the stains stubbornly remain))).
- Polyethylene to protect the floor and paint area.
- Screwdriwer set.
