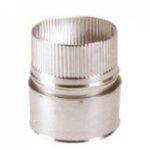
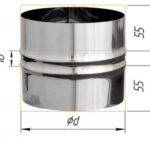
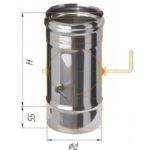
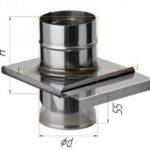
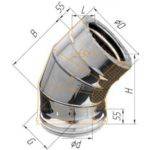
Single-walled steel chimneys
Steel single-circuit chimneys can be used for plugging brick chimneys. This design can withstand up to 1100 degrees, has good heat saving rates. The chimney can be made of mirror stainless steel, alloy steel with enamel coating (painted), galvanized steel. Some accessories can be made of brass. The best material for the manufacture of chimneys is stainless mirror steel for its high performance and decorative properties.
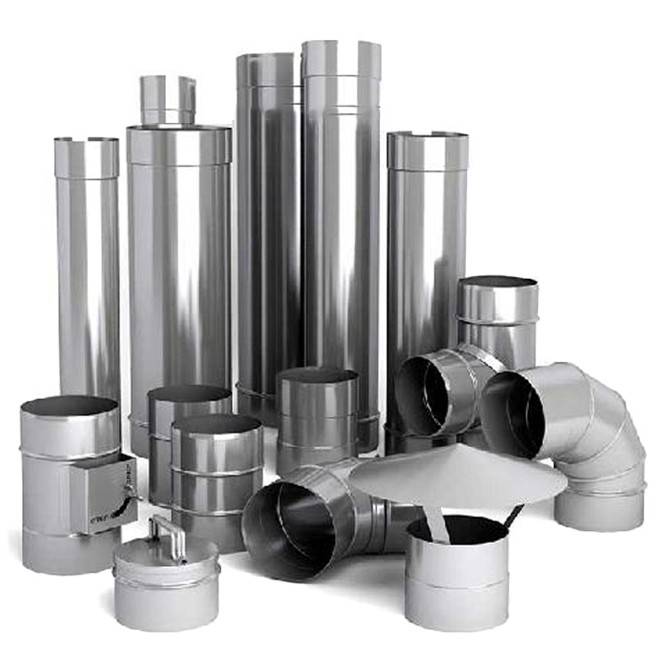
Steel chimneys have many advantages:
- easy installation;
- no need to build a separate foundation;
- acceptable cost;
- the ability to replace any elements of the smoke exhaust system;
- easy care. Less soot and condensation settle on smooth inner walls, cleaning can be done quite rarely (compared to brick chimneys);
- installation can be carried out in any climatic zone, the temperature regime does not affect the operating conditions of the steel chimney.
The disadvantage is the possibility of corrosion and burnout of the walls due to prolonged exposure to very high temperatures. To avoid such troubles, it is important to purchase a chimney made of steel with a chrome content of at least 17% (ask the seller for data on the steel grade and spectral analysis) and a wall thickness of 0.6 to 1.5 mm
Table. Steel grades for chimneys
| Brand | Analogue | Specifications |
|---|---|---|
| AISI 310S, AISI 310 | 20X23H18, 10X23H18 | High content of chromium and nickel. Withstands temperatures up to 1050 degrees. Plastic. Weld seams require descaling and passivation. |
| AISI 316Ti | 03Х17Н14М3, 10Х17Н13М2Т | Versatile stainless steel containing titanium, chromium, nickel and molybdenum. Melting point 1400 degrees. Recommended operating temperature - 450 - 850 ° С. |
Diameters of steel chimneys: from 80 to 300 m.

Table. Chimney elements, purpose
| Chimney element | Purpose, description |
| Transition
|
It is used when it is necessary to change the diameter of the chimney |
| MM adapter
|
When assembling the chimney "by condensate", this element serves as an adapter between the stove and the chimney. Installed on a branch pipe of a smaller diameter using a non-combustible insulation (seal) |
| PP adapter
|
It is used to connect the outlet of the furnace and the chimney. For condensate assembly "or as a transitional element from smoke assembly to condensate assembly |
| Chimney. Stainless steel pipe
|
Each next pipe is inserted inside the previous one. The assembly is carried out from the bottom up using a heat-resistant sealant (up to 1000 degrees). Additionally, the chimney at the joints is fixed with clamps, and every 2 meters of length it is attached to the walls with brackets. It is important that the smoke channel is located strictly vertically and has a length regulated by SP 7.13130.2009, as well as SNiP 41-01-2003 |
| Rotary gate (damper)
Gate valve (sliding gate)
|
Needed for traction control capability. Elements are produced in different diameters for all types of chimneys. Installed similarly to the chimney pipe up to the ceiling cut |
| Chimney convector
|
An alternative name is economizer. Installed on the chimney to reduce heat loss and retain heat inside the room due to the constant circulation of air flows through the convector circuits. Fastened through an adapter to the furnace outlet. The element can be covered with a protective decorative cover made of stainless steel or supplemented with a grid for laying stones |
| Knee, 90 degrees
|
If it is necessary to change the direction of movement of combustion products or in cases where the installation of a strictly vertical chimney is not possible, an adapter "elbow" is used |
| Knee, 135 degrees
|
Same as 90 degree knee |
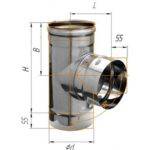
| Tee 90 degree
135 Degree Tee
|
Tees are necessary to organize the outlet of the chimney through the wall. The tee can be supplemented with a "glass" that allows you to inspect the condition of the inner walls of the chimney and facilitate cleaning, removal of debris from the inside |
| Plug with hole
|
Designed to collect condensate and soot. Diameter is selected based on the nominal D of the tee |
| Blind plug, "on the water"
|
For the organization of chimney maintenance, it is attached to the bottom of the tee |
| Single-wall condensate drain plug
|
For draining condensate. Attaches to the tee. A threaded branch pipe is required for connection to the sewage system. For inspection and maintenance, the plug is removed from the tee |
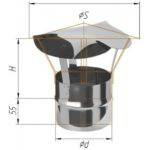
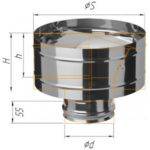
| Fungus
|
Improves traction by 20%. Protects against precipitation, dust entering the chimney |


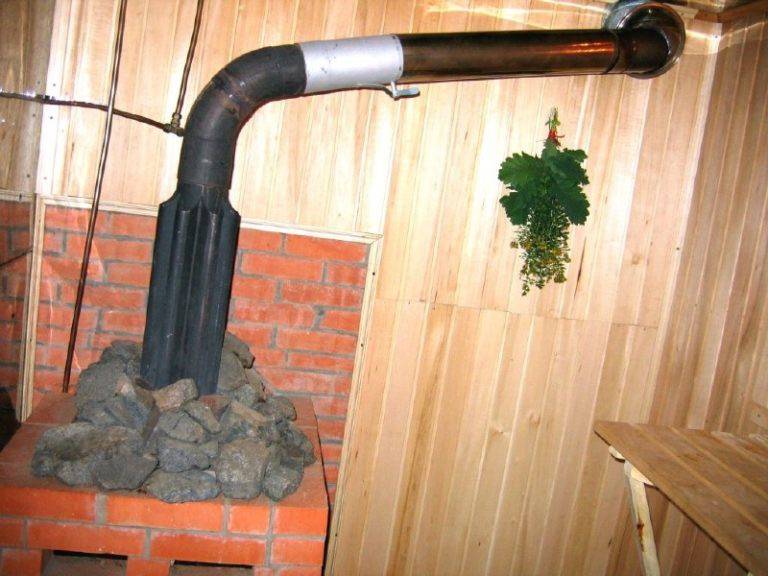
How to put the stove in the bath, at what distance from the wall
To completely prevent the likelihood of fire or less dangerous, but also negative consequences from contact with hot metal, the furnace should be located at a distance of 1 m from other objects. But in practice, this is almost unrealistic, because there is simply not so much free space in the steam room or adjacent rooms.
Therefore, wood and other potentially combustible surfaces are clad with heat-resistant materials (fired clay, brick). There is an alternative - laying the site - but it is not in all cases convenient and worthy of implementation. But for the implementation of thermal insulation, the minimum distance will be reduced from one meter to 80 cm. The distance of partitions and shelves from the heat source will remain at least 110 cm.
An example of a vertical chimney sandwich for a Russian bath
Below are images with a chimney in a Russian log sauna. For clarity, a wood-burning stove from the Finnish manufacturer of bath equipment and accessories "Harvia" is shown. The stove is serviced outside the steam room, for example, in the dressing room, and a stainless steel tank is installed on the pipe to obtain hot water. To adjust the draft, a rotary gate is mounted above the tank.
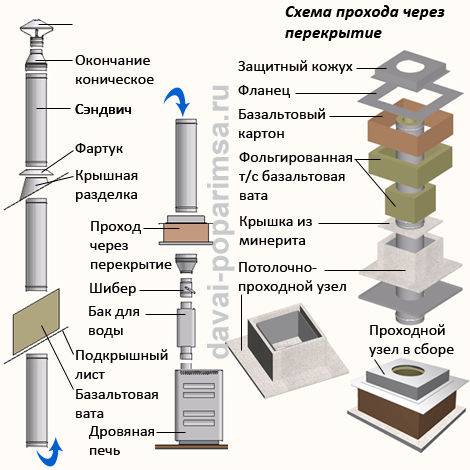
Chimney passage through a wooden floor
As the main element, a ceiling-throughput unit (PPU) is used, which has an air gap between the steel casing and the minerite thermal insulator. This design allows you to reduce the size of the groove of the ceiling without loss of insulation properties.
This sketch shows the design of the PPU, as well as the procedure for laying thermal insulation in the passage through the ceiling.

Heat-resistant basalt wool is placed in the gap between the pipe and the inner wall of the polyurethane foam, and an air space remains between its outer surface and the minerite, which is an additional natural heat insulator.
Basalt wool is also laid along the outer contour of the polyurethane foam, which in turn adjoins the basalt cardboard. Cardboard additionally insulates wooden floor elements from heat.
From the side of the steam room, the PPU is closed with a steel box casing with a hole for a sandwich, and in the attic with sheet minerite. The entire cutting in the attic is first closed with a sheet flange, and then with a steel casing, which is fixed to it with self-tapping screws for metal.
Chimney passage through a roof with a roof made of combustible materials
The main work on cutting the roof is as follows:
- Marking and cutting of the roof, taking into account that from the outer surface of the chimney to the edge of the opening there is a gap of at least 130 mm.This is necessary to ensure fire safety.
- A steel under-roof sheet with an oval hole is put on the next sandwich, the upper part of the sandwich is inserted into the opening, and the lower part is connected to the previously assembled chimney. Remember that the docking joint should not be in the plane of the opening.
- From the top of the roof, a lead base with an angle of 30˚ is put on a sandwich (or, in other words, a corner roof cut). The lead base allows it to be tapped tightly to the roof surface.
- From the side of the attic, the cut-out opening is first sealed with basalt cardboard, and then with heat-resistant basalt wool, and all this is closed with a roof sheet using wood screws.
- To ensure a sufficient seal against atmospheric precipitation, a rubber-based bitumen roofing sealant, for example, "Casco Roofseal" or similar, is applied to the entire contour of the lead base. The same must be done from the side of the attic.
How to calculate the parameters and device of the chimney for a stove in a bath
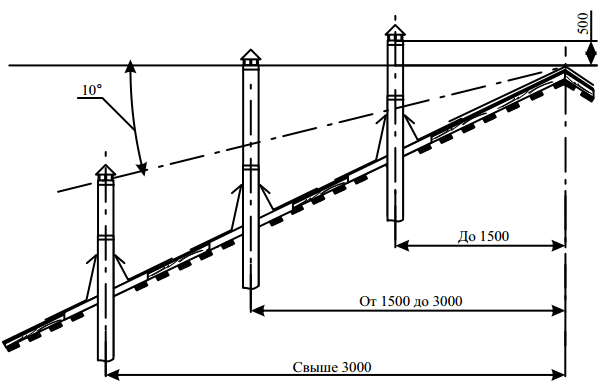
As for the size and height, the most important point is the degree of elevation of the room itself. When the pipe appears half a meter above the ridge, the distance will be up to one and a half meters from the ridge. If the product is located at an interval of about 1, 5 - 3 meters, then the pipe can be placed on one straight line or even higher. When the device exits through the ceiling, the unit must be erected more than one meter.

When self-mounting, it is advisable to take into account the material:
- A brick chimney can be connected to any heating system, regardless of height. In addition, vertical deviation can be allowed, the main thing is insignificant. So, if you need a simple product, then the option will suit you, moreover, it is highly resistant to stressful situations.
- Metal. The outlet is carried out both through the roof and through the wall. If it is necessary to install without a foundation, it is better to choose the presented unit, since it has a low weight.
After careful selection of the chimney according to the described parameters, you can safely proceed to its construction or purchase.
Heating the furnace before installation
It is carried out on the street, as the increased formation of corrosive gas is possible. First, you need to treat the heating unit with an anti-corrosion agent, and at the same time carefully inspect for cracks, chips and other defects on the grill, door, heat exchanger, and also make sure that there are no cracks and gaps. Then:
- Place the equipment on a flat and heat-resistant base, connect a temporary chimney (longer than 200 cm).
- Load the wood to half the volume of the furnace and set it on fire (with the door not closed tightly), maintaining the flame for an hour.
- Wait until the fire goes out (do not extinguish it).
Due to this, the inner coating of the heat generator will finally harden, and it will be possible to switch to permanent operation.
Chimney sandwich installation rules

Here are the general rules for self-assembly:
- The chimney is installed less than 1.5 m from the ridge of a nearby building. In cases where it is higher than the roof level, additional installation clamps must be used.
- The elevation of the smoke exhaust structure above the flat roof must be at least 0.5 m.
- The total length of the flue gas system is at least 5 m. If this is not possible, the evacuation pumps are used to remove the flue gases.
- The minimum allowable distance to the ceiling in a wooden bath is 0.38 m.

The answer to the question of what should be the chimney pipe for the stove in the bathhouse is - a set of stainless steel. To select high-quality elements for flue gas discharge, check the steel grade with a chromium content of more than 13%, the thickness of the products (optimally 0.8 mm), the best in tightness and durability of the welded seams - after laser welding. Recommended socket joint system which is cold formed. All these criteria are met by Ferrum products.
Where to install the stove in the bath
When choosing a point for installation, it is necessary to be guided by the current SNiP and take into account how and where the external tanks and external heat exchangers, connecting pipes, and mesh-casings are located. You also need to comply with the following requirements:
- the heating unit must not be placed in a niche;
- the distance to unshielded wooden interior items must exceed 1 m;
- the distance to the heat-insulated and plastered ceiling must be at least 0.8 m, to the unprotected fire-resistant coating - at least 1.2 m;
- from the firebox door to the opposite wall - at least 1.25 m, from the red-hot body - 0.5 m;
- the partition for the outlet of the channel-sleeve is made of fire-resistant material (it is possible not completely, but from the beginning of the floor and, continuously, up to a level 0.25 m above the boiler).
How to calculate the diameter of the chimney
There are two calculation options: complex and simplified, but they all take into account the amount of oxygen required to ensure combustion of the fuel. Optimum chimney performance
Optimum chimney performance
| Parameter | Meaning |
|---|---|
| Temperature of gases at the outlet of the chimney | + 120 ° C |
| Minimum gas velocity | Not less than 2 m / s |
| Recommended chimney height | 5 meters |
| The amount of combustible fuel in one tab of the furnace | 10 kg / hour |
Based on these characteristics, you can calculate the diameter of the chimney using the formula

- D is the diameter of the chimney;
- Vr is the volume of air.
You can calculate the height of the chimney depending on the geometry of the section using the graph.
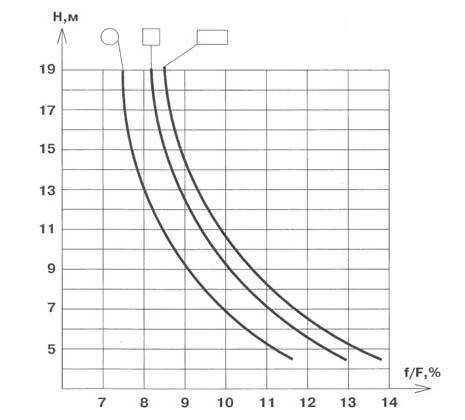
To calculate, you need to know the area of the furnace (F) and the area of the chimney f, divide the first value by the second and determine the percentage. For example, the ratio of the chimney section to the furnace section is 10%. This means that the minimum height of a round chimney is 7 meters, a square one is 9 meters, and a rectangular one is 11 meters. The difference in height compensates for the vortex resistance created by each type of chimney.
You should understand that these values only take place with a straight pipe, which is difficult to achieve in a bath. For the most part, chimneys have different turns, this negatively affects draft. To accurately calculate a specific chimney with different curvatures, you will have to invite a "professor", and we advise you to slightly increase the resulting diameter. All calculations were made with a large margin, plus some increase - this is quite enough for a solid fuel furnace.
Some more practical chimney tips
| Advice | Illustration |
|---|---|
| If a residential building is heated with wood, then the rules recommend that you check the draft every year before the start of the heating season. |  How to check cravings How to check cravings |
| The chimney is cleaned if necessary. In practice, cleaning is done no more than once every 10-15 years. Baths are heated mainly once a week. Accordingly, chimneys need to be cleaned many times less often. Conclusion - there is no need to make special complex structures for cleaning. |  Bath chimney brush Bath chimney brush |
| The main "enemy" of the chimney is damp firewood. During combustion, they evaporate a lot of water, the temperature of the gases drops significantly. Condensation is constantly present inside the chimney, to which soot adheres. In such conditions, the chimney may not last even one season. Conclusion - use only dry wood. |  Dry birch firewood Dry birch firewood |
| To increase the temperature in the bath, a metal chimney pipe can be attached to several elbows - the heat transfer area is significantly increased, the bath heats up faster. | 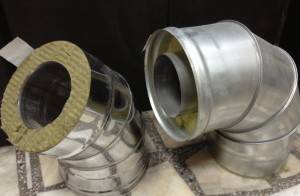 Knee sandwich chimney Knee sandwich chimney |
| Try not to lead the chimney through the roof, it is much easier to place it at the end of the bath. Thus, it will be possible not only to reduce the installation time, but also to eliminate the risks of leaks on the roof of the roof. | Chimney outlet through the wall |
Chimneys can be brick, ceramic or sandwich pipes (double). Consider the installation of each of these types.
Varieties of chimneys in a wood-burning stove for a bath
- Indigenous. A special feature is a special structure. They are installed separately, but very close to the oven.They are connected by a special-purpose branch pipe - it is he who branches the smoke into the main channel. During the construction of this type, it is possible to use it for several furnaces at once, respectively, if the pipes are at different heights and with different diameters.
- Nasadny. This model is more interesting: it is installed directly on the furnace nozzle. Therefore, the environment of the builders of the bath is in demand. The chimney is led out of the room through the roof.

- Outdoor. From the name it is clear that their main part is located on the street. Themselves are fixed inside the house to the wall. In which case it will not be difficult to repair it.
- Internal. Provides more traction than other varieties due to its upright position. With its help, the room is perfectly heated.
Materials for making
The most popular materials for the chimney of a wood-burning stove in a bath are bricks and metal.
Brick structures
This is the most common and at the same time laborious version of the chimney for a stove in a bath. The structure turns out to be strong, durable and has high thermal insulation properties. A bathhouse with a brick chimney is most protected from fires. The only drawback of the brick system is its rough inner surface, due to which it becomes necessary to clean it frequently.
Sauna chimney made of metal
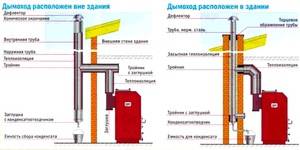
It is easier to install a metal structure on a wood-burning stove and take it out of the room. The disadvantage of metal pipes is the need to create high-quality thermal insulation and the formation of condensate on the inner walls.
When installing a metal chimney, the following nuances of material selection should be taken into account:
- The cross-section of the pipes is selected taking into account the power of the wood-burning stove. For a bath, a product with an inner diameter of 15–20 cm is usually chosen. A pipe with a small diameter will not be able to create a draft to remove smoke, and a large section will not retain heat in the stove.
- In order for the structure to serve for a long time, the metal pipe must have a thickness of at least 1 mm.
- The height of the overall metal system depends on the location of the pipe on the roof. The chimney located in the middle of the slope must be raised about one and a half meters above the level of the ridge. In any case, the total height of the structure should not be less than five meters. The quality of traction depends on this parameter.
- The waterproofing device is made using a special rubber seal, which is put on the pipe, and glue sealant.
- When installing a bath chimney structure, you will need two metal sheets. Holes are cut in them in diameter equal to the diameter of the pipe. The sheets will be fixed on the floor of the attic and the ceiling of the bath.
- When installing a chimney, it is necessary to use a heat-resistant material. It is mounted around the pipe in the attic floor and protects flammable materials from fire.
- When installed in the structure of the water tank, the container is welded to the chimney and works according to the "samovar" system.
Ceramic chimneys
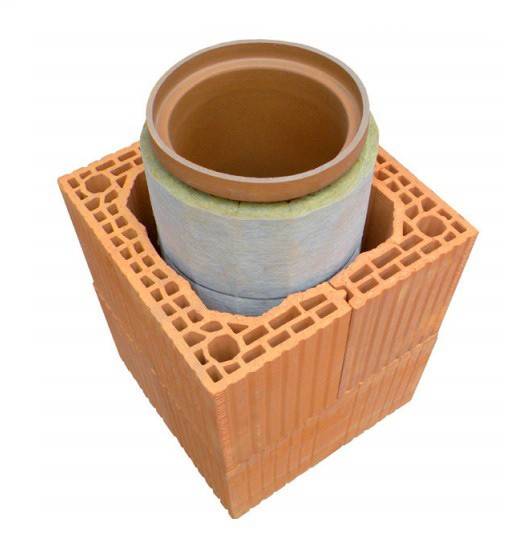

Do not require additional protection of wooden architectural elements. The disadvantage is that they can only be upright. We will consider the easiest way to install these types of chimneys in a bath.
Step 1. Prepare the installation site, it should be level. Chimneys can be installed on the hotel foundation near the stove or on the upper surface of the stove, it all depends on the characteristics of the bath. For masonry, you need to use special glue, the solution does not provide sufficient strength.
Prepare metal reinforcement ≈ 1 meter long, the diameter of the reinforcement is within. 5 ÷ 10 mm. With its help, we will additionally fix the structure, this will make it possible to completely eliminate violations of the integrity of the chimney. Make holes in the ceiling and roof, there is no need to give a stock in size, the ceramic chimney will perfectly protect the wooden elements from high temperatures.
Step 2. Install the first two halves of the ceramic, grease the lock with glue, check the position of the halves, align them if necessary. Insert metal reinforcement about one meter high into the side holes. The gaps between the reinforcement and the ceramics must be filled with glue. It is not necessary to achieve full filling of the hole, it is enough for the glue to connect the reinforcement and ceramics in several places.
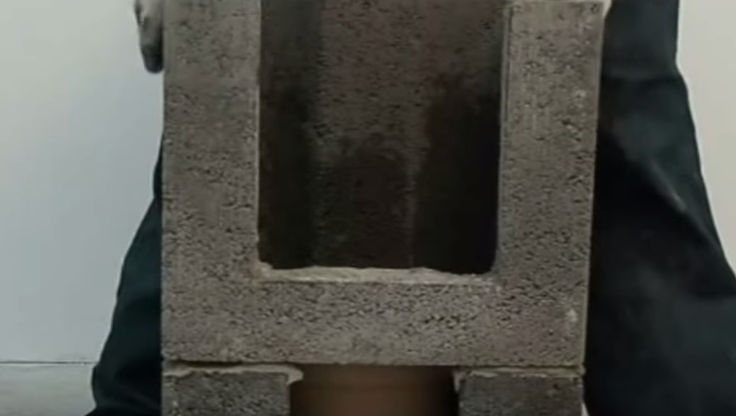

Step 3. Wrap thermal insulation on the ceramic pipe, pull it slightly to the pipe with metal wire or a special clamp. Do not tighten tightly, do not compress the heat insulator. As a rule, a layer of pressed mineral wool is used as a thermal insulator.
Step 4. Insert the pipe into the hole in the ceramic, check its position. To speed up the process, you can immediately wrap all ceramic pipes with insulation, the number of pipes must correspond to the height of the chimney.
Step 5. Place the second ceramic on the glue, check the position again. Now we need to insert another pipe. It is put into the socket first on the glue. It is difficult to get to the lower bell, you need to make an elementary adaptation. Take a small thick plastic bag, cut off one corner. It should look like a bag used by women while spreading cream on cakes. Through the cut corner, the glue will fit exactly into the socket of the pipe. Remove the remnants of glue from the inner plane of the pipe immediately, do not allow the appearance of various drips. They swirl air currents and significantly impair chimney draft.
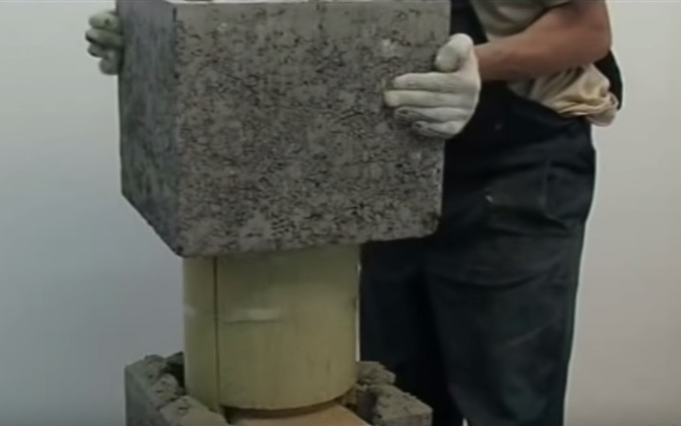

Step 6. Repeat the described operations, constantly monitor the position of the chimney. If the length of the protruding reinforcement becomes less than the height of one block, insert new rods into the holes. Take the chimney to the attic of the bathhouse.

Step 7. Carefully seal the gaps between the chimney and ceiling coverings. For these purposes, you can use ordinary wooden skirting boards or decorative moldings.
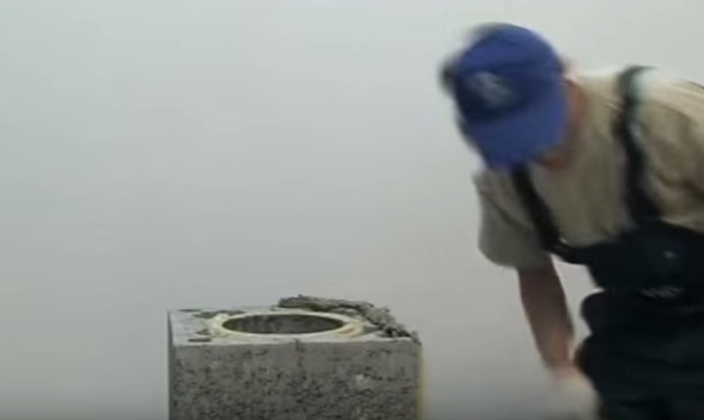
Step 8. Reinforce the chimney in the attic. Cut the boards to fit the hole, lay them around the chimney and nail them firmly to the attic. If the height of the attic does not exceed one and a half meters, then such a fixation is sufficient. If the height is greater, you will have to make another structure to fix the vertical position of the chimney. Secondary fixation is made to the rafter legs as high as possible. You can make wood stops or use metal corners. Choose a specific design taking into account the place where the chimney exits and the features of the truss system of the bath.
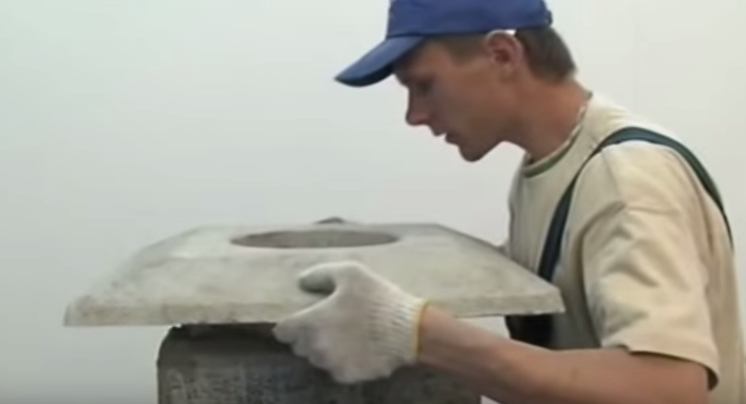
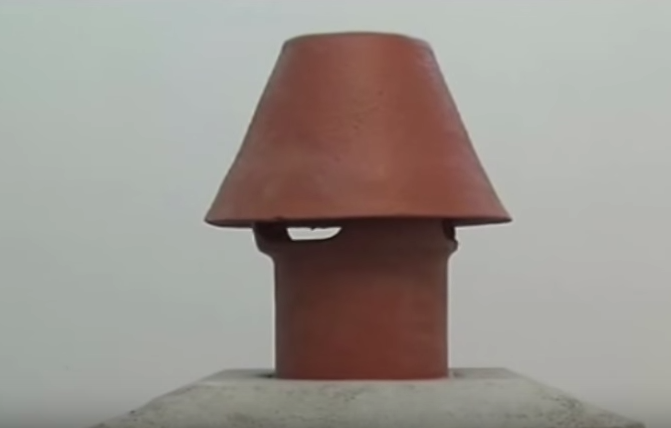
Step 9. Seal the roof at the chimney outlet. Select the sealing method and materials depending on the characteristics of the roofing. These works in and of themselves do not require great skill, they only require attention and strict performance of all technological operations. For sealing, you can purchase factory fittings or make them yourself. We recommend choosing the first option, the roof is not the place to experiment. All leaks inevitably cause big problems.

Double-walled chimney, or sandwich, stainless steel
Such chimneys are very popular due to the high resistance of the structure to acids and atmospheric influences, high temperatures.
The chimney is easy to assemble even without helpers, but it is important to carry out the installation strictly according to the instructions, otherwise the insulation between the walls will absorb condensate, which will lead to many negative consequences.

If we compare a classic steel chimney and a sandwich, then the latter is much more reliable and durable.
When buying a chimney, pay attention to the diameter of the elements (and it should not be less than the outlet of the sauna stove), the steel grade and the quality of the insulation. The best options are Rockwool or Isotherm stone wool
The recommended density of the filler is 120 kg / m3. Insulation thickness is not less than 40 mm.
All products must be individually packed and transported in an upright position.
Important! Purchase pipes for an external chimney with an assembly "for smoke", for an internal - "for condensate".
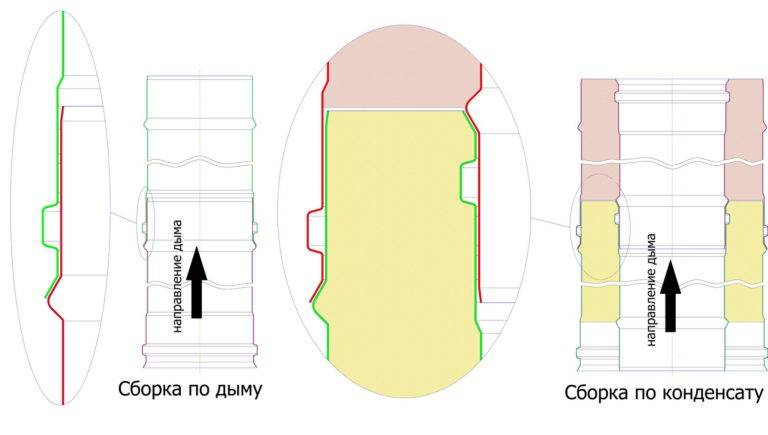
Table. Chimney elements sandwich
| Element | Description |
|---|---|
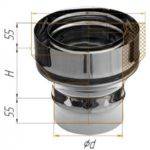
| Sandwich adapter
|
Sandwich chimneys are never installed directly on the furnace outlet. A single-walled steel pipe must always go from this branch pipe, to which a double-walled insulated chimney is connected through an adapter. It can be used as an adapter from a single-wall heat exchanger or economizer to a sandwich. The diameter of the adapter is selected in accordance with the diameters of the chimney pipes |
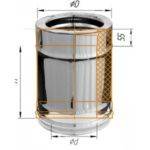
| Double-walled chimney
Double-walled chimney, water-based assembly
|
The main element for the removal of combustion products. It can be assembled "by smoke" or "by water", that is, "by condensate"; for this, pipes of the required length and with the appropriate design of corrugated sockets are purchased in advance. The pipes are straight, sealed, there is a pressed insulation between the walls. The assembly is carried out in the same way as for single-walled chimneys, i.e. using sealant, clamps and brackets |
| Knee, 90 degrees, water sandwich
|
The adapter is similar to a single-walled elbow, but differs in the presence of an insulating insulating layer. The diameter and type of elbow is selected according to the type of chimney assembly ("smoke" or "water") |
| Knee, 135 degrees, water sandwich
|
Similar to the previous |
| Sandwich Tee 90 Degree
Sandwich Tee 135 Degree
|
Purpose is similar to single-wall tees |
| Plug with hole
|
The plug is installed at the bottom of the tee. Performs the function of protecting insulation, collecting condensate, soot and debris. Installation is carried out without sealant, so that, if necessary, the plug can be removed, condensate and soot removed, and then return the element to its place.
The diameter of the plug is selected based on the outer diameter of the tee |
| Double-walled plug with condensate drain
|
For visual inspection and maintenance of the chimney, collection and drainage of condensate |
| Cone
|
Mounted on a sandwich chimney, protects the thermal insulation layer. It can be used as a finishing element of a chimney or as an adapter between a sandwich chimney and a single-wall chimney |
| Umbrella
|
Serves as the end of the pipe. Protects from precipitation, wind, increases traction if a side wind blows. |
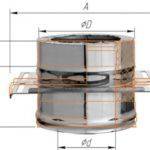
| Installation platform
Brackets for fixing the chimney mounting plate to the wall
|
For external chimneys. Attaches to the console (brackets). Withstands the weight of five meters of sandwich chimney. If you plan to install a longer chimney, it is recommended to install two installation sites at a distance of 4 meters between the elements |
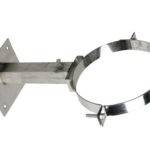
| Support-wall bracket
|
Fixing elements for the internal chimney. Installed at intervals of 2 meters, attached to the walls of the bath |
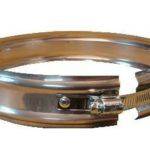
| Clamp
|
For fastening the joints of adjacent elements. It is forbidden to make chimney joints inside the ceiling. |
| Clamp stretching
|
For fixing the chimney pipe if it is 1.2 m higher than the roof |
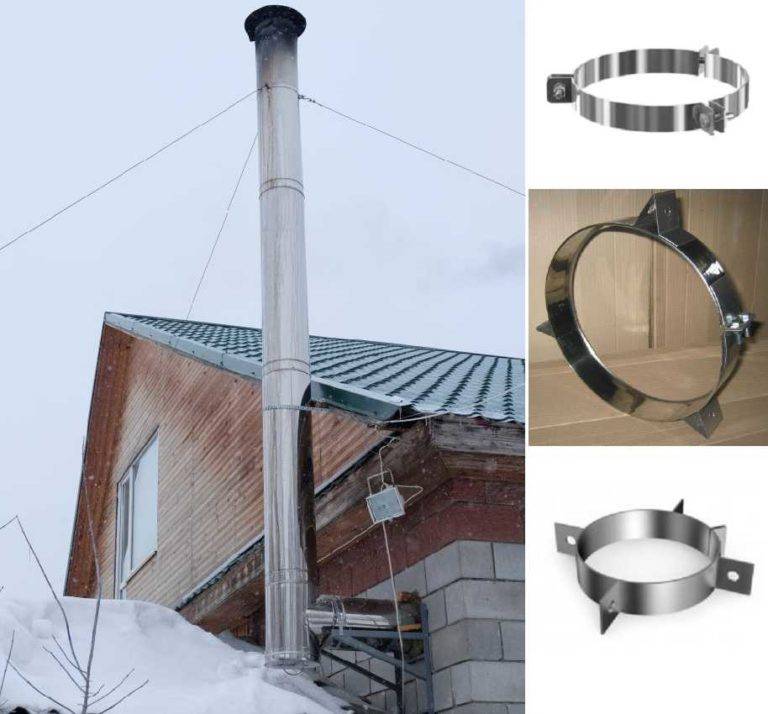
It is important to consider - you cannot lay the chimney horizontally for more than 1 m and install 3 or more chimney turns. The total height of the flue duct must be> five meters (otherwise there will be poor draft). An exception is saunas without attic rooms, in which a chimney with a height of less than 5 meters can be installed, provided that a stable draft is provided.
Installation instructions for a steel insulated chimney
Important! It is forbidden to carry out installation work using tools without insulated rubberized surfaces.
Permissible distances for all types of chimneys
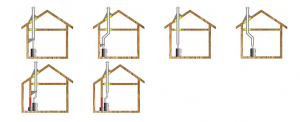
For safety reasons, calculate the location of your chimney in advance. Observe the following rules:
- it is impossible for the chimney to come into contact with any pieces of furniture, wallpaper, communications, for example, electrical wiring or gas pipes;
- between the battens or floor joists, it is necessary to leave at least 300 mm for uninsulated chimneys and at least 150 mm for insulated ones. Direct contact between the chimney and wood is unacceptable;
- if the chimney passes through an unheated attic, then heat insulation of this room should be made in advance to avoid condensation;
- the chimney must not be located near combustible surfaces, incl. close to the wood paneling of the walls.
When calculating the number of chimney elements, consider how much the chimney should rise above the roof of the bath.
Installation of an external chimney
Step 1. Remove the packaging from the chimney elements. We check the presence of all elements, their integrity.
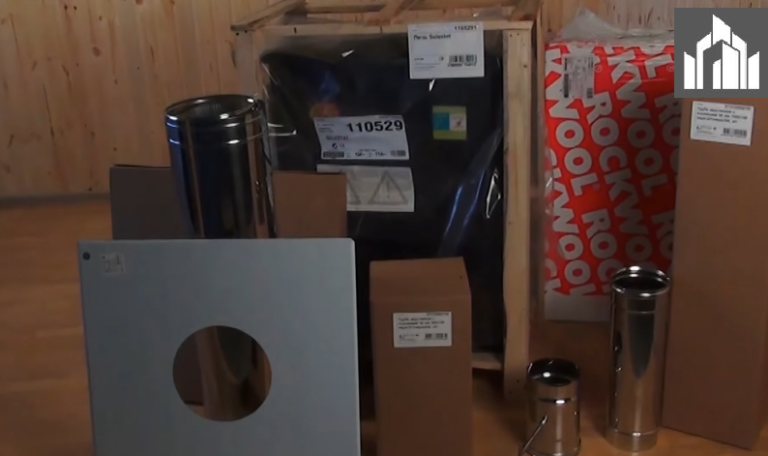

Step 2. Preparing the tools:
- square;
- jigsaw;
- edging machine;
- screwdriver;
- roulette;
- hammer;
- marker;
- level.
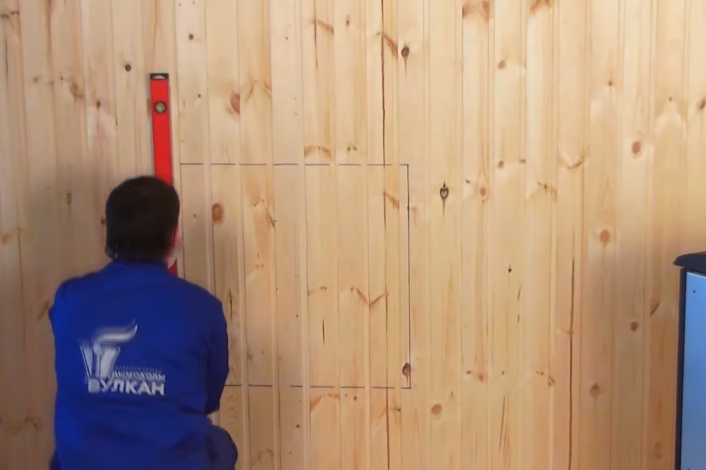
Step 3. Markup. Determine the distance from the bottom of the furnace to the center of the flue pipe. We mark this distance on the wall at the location of the oven.
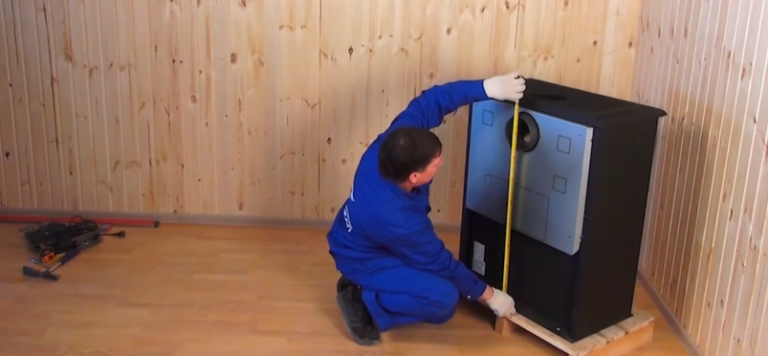
Next, on the wall, set aside the width of the stove and the axis of the flue pipe in relation to the dimensions of the stove.
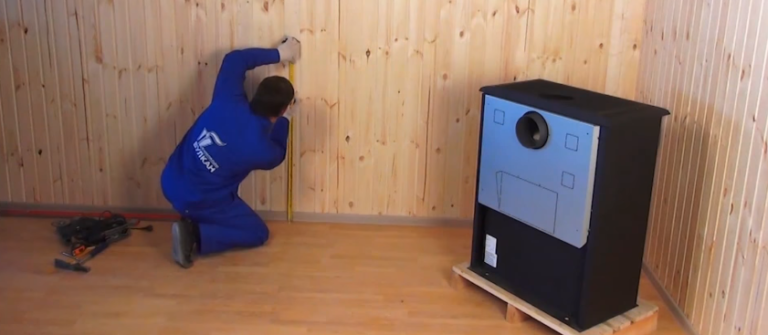
On the wall, mark the contours of the material to be removed, taking into account the fire-prevention distances. We draw a square using a level, tape measure and marker.
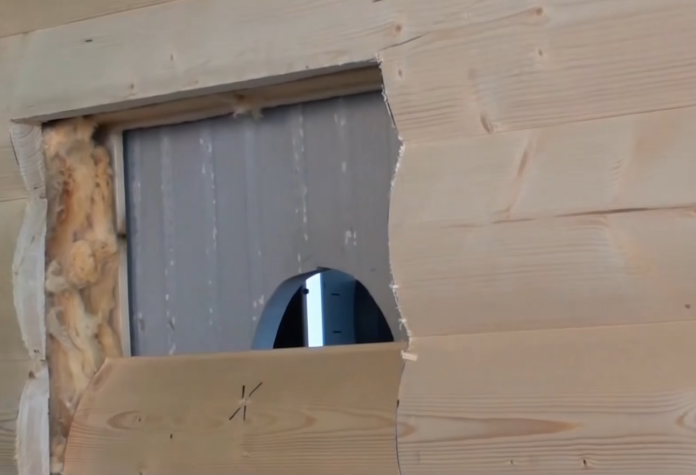
Step 4. Remove the wall fragment. Drill holes in the wood paneling with a drill in the corners and in the center. We cut it with a jigsaw. We insert the cutting blade into the drilled hole and make a cut according to the drawn markings. We remove the sawn-off part.
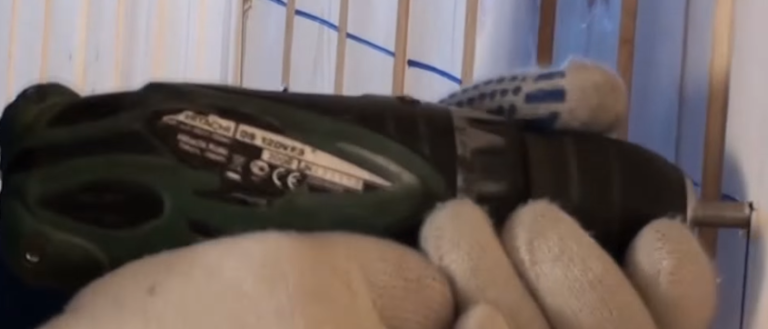
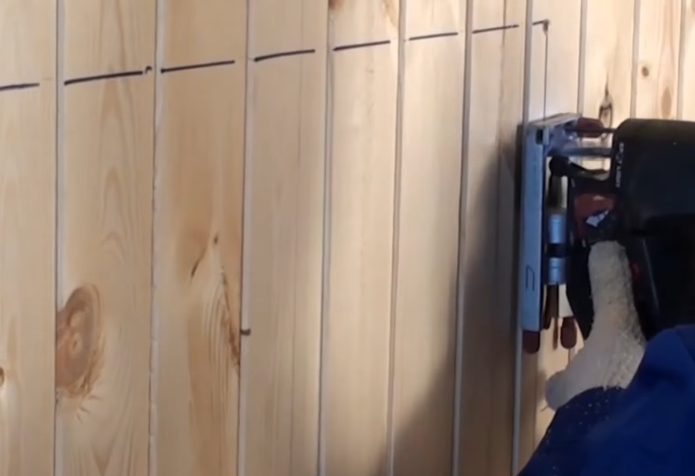
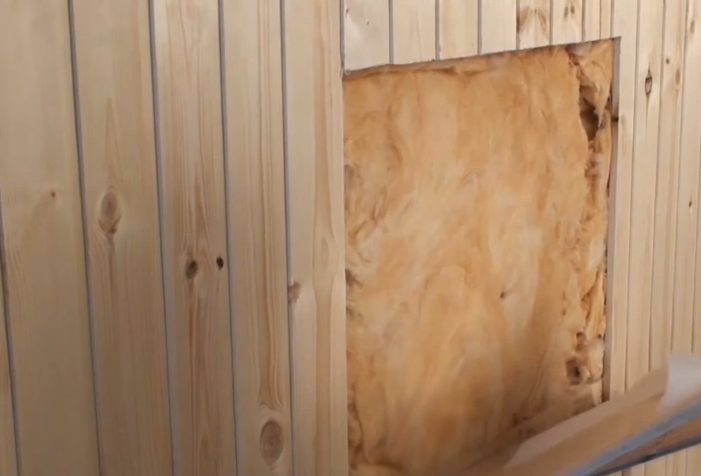
We cut the insulation material with a construction knife and remove it from the wall.

Step 5. The wooden wall must be insulated from heat. For insulation we use non-combustible SuperIsol boards with a thickness of more than 30 mm. On the sheet, we determine and mark the place of passage of the chimney. On the sheet, you will need to cut out a round hole to output the pipe. To make the hole even, use a flange (decorative overlay) like a template. Cut a hole with a jigsaw.
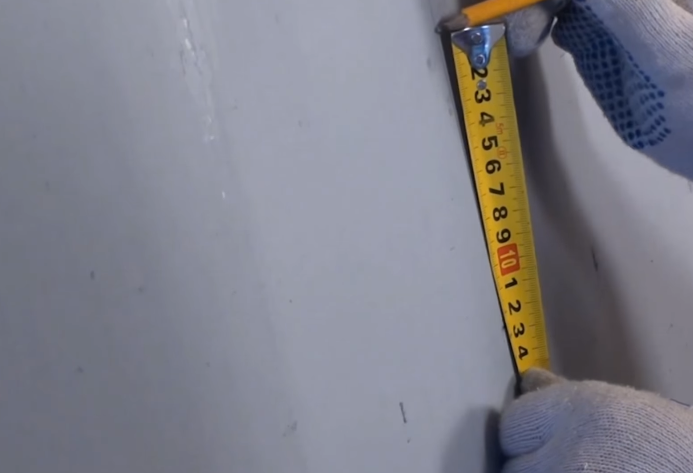

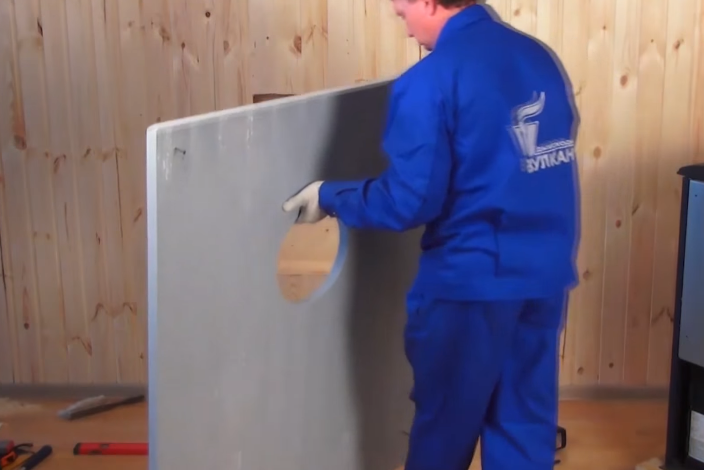
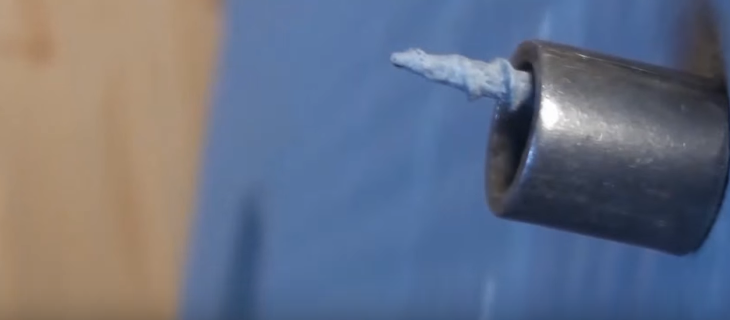
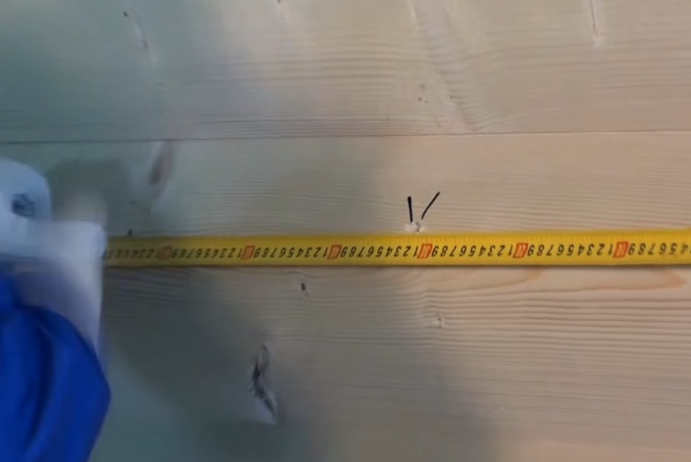
We fix the protective sheet with self-tapping screws on the wall of the bath. We drill 4 holes in the corners for self-tapping screws, attach the sheet to the wall, install bushings between the sheet and the wall, through which we screw in the self-tapping screws.
We put a steel protective screen on the floor. It is necessary to protect the floor covering from possible ingress of coals, sparks, overheating.

Step 6. We begin work from the outside of the bath. We mark the material to be removed on the wall from the street side. We remove part of the wall using an electric drill and a jigsaw.

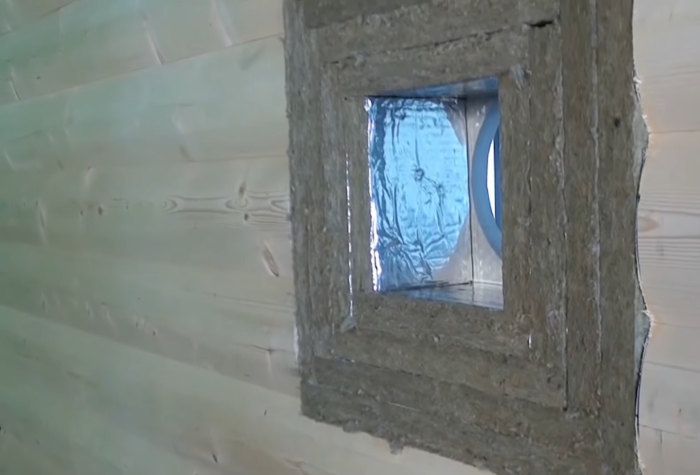
Step 7. Install thermal insulation in the place where the chimney passes through the wall. It is necessary to determine the volume of insulating material that will be laid between the chimney pipe and the cut-out opening.
We measure the thickness of the wall, after which we cut the mats of foil-clad basalt wool into strips with a width equal to the thickness of the wall. We use a construction knife and gloves for work.


We install strips of foil mineral wool along the contour of the cut-out foil opening towards the chimney (inward).
We continue cutting and laying the mineral wool in the same way along the contour, trying to leave minimal gaps between the strips of insulation. We lay the mineral wool until there is a hole equal to the diameter of the chimney pipe.

Step 8. We take out the elements of the chimney from the packaging. It is convenient to install the chimney in small areas.
We start the assembly with a wall mounting bracket, a tee and a horizontal section coming from the oven itself. We fix the chimney sections with clamps, tightening the bolts with a screwdriver or screwdriver. The bolted connection of the clamps should be directed towards the wall of the bath. The elements are installed in series, and the corrugated part of the connections should be directed downward. All connections are coated with high-temperature sealant.
We take out the support-wall bracket from the package.
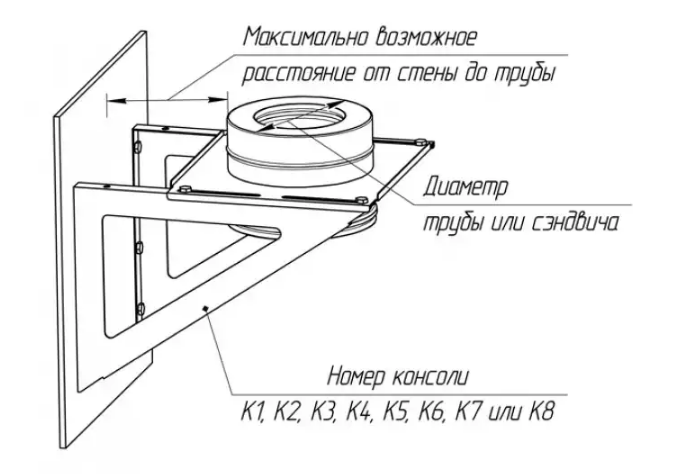
We place it horizontally on the floor. We put on the collar and tighten it directly next to the square steel platform. We turn the element over, placing it vertically on the floor, with the corrugated side up, a short straight element of the chimney pipe (adapter). We fix the connection with a clamp. We take out two triangular brackets from the package, bolt them to the ends of the support platform.

We take out the cover (plug) with a drip from the box and install it on the lower part of the tee, without using a sealant. We fix the cover with a clamp.

We attach a straight section of the chimney to the tee. This section will go through the wall. We fix it with a clamp.
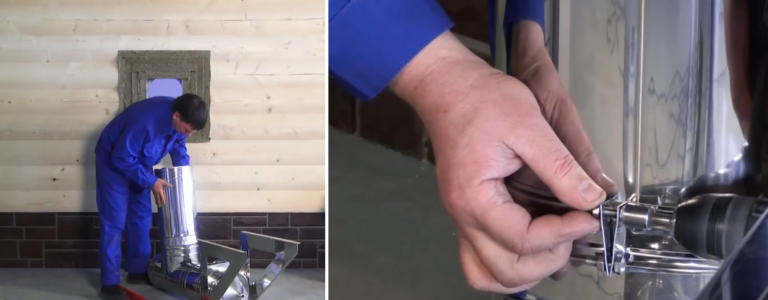
On a pipe that runs horizontally, we put on a flange (square insulating steel sheet with a round hole in the center). We do not fix the insulation. We insert the chimney into the hole prepared in the wall.


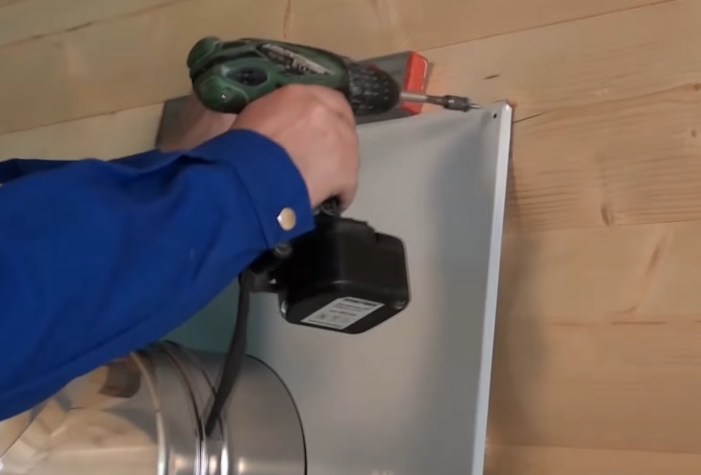
We check the verticality of the brackets and the chimney with a level. We twist the self-tapping screws into the holes of the triangular wall brackets (consoles).

We fix the flange with self-tapping screws, tightening them with a screwdriver. If the bath is made of round logs, place self-tapping screws at the points of contact of the flange with the wood. If the bath is made of timber, then screw the hardware in the corners of the flange.
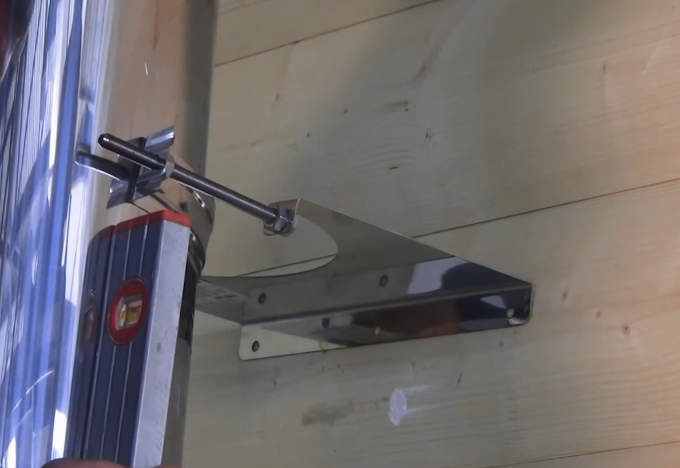
Step 9. We continue assembling the chimney. We build up the chimney upward, fastening all the elements together with clamps and sealant. Every 2 meters we install elements of fastening to the wall. We tighten the nuts tightly, because the chimney will be exposed to wind loads on a daily basis.



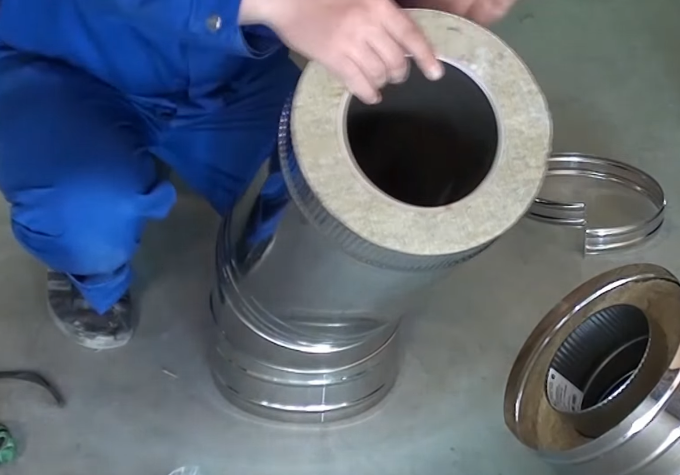
Step 10. We proceed to the installation of the roof overhang bending section. We use two elbows with an angle of 135 degrees or other bends, depending on the configuration of the roof. It is more convenient to assemble this part of the chimney on the ground, since the pipes are of small diameter and weight. We collect 3 elements and install them on a straight section of the chimney. We fix the upper knee with a wall bracket.
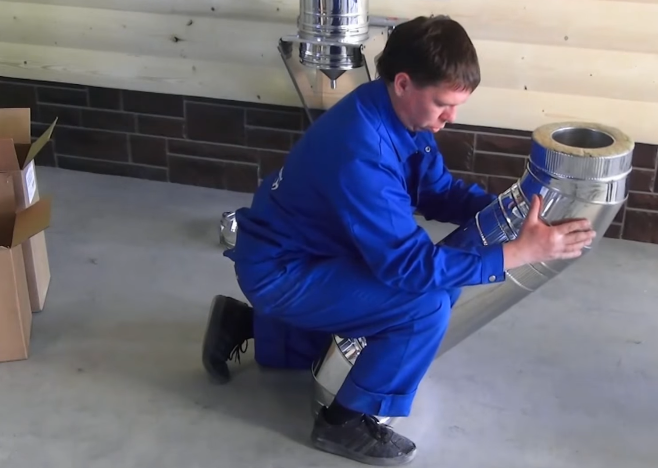


Step 11. On the knee we put on a straight section of the chimney, and then the cone and deflector. Do not forget about the height of the pipe above the roof. These elements, like all others, are fixed with clamps.
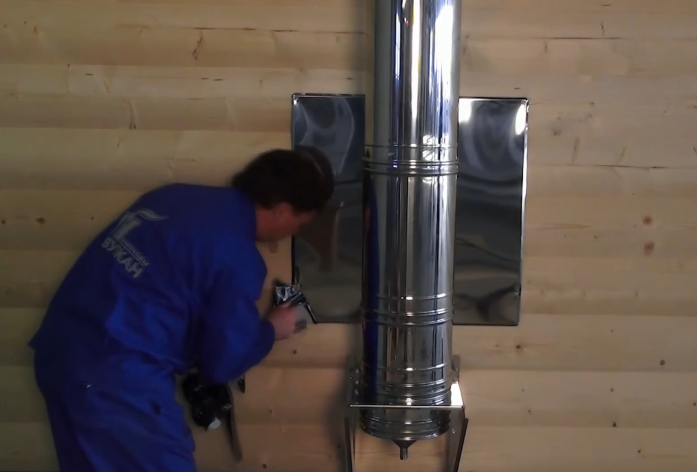
Step 12. We return to the inner room of the bath and continue the installation.
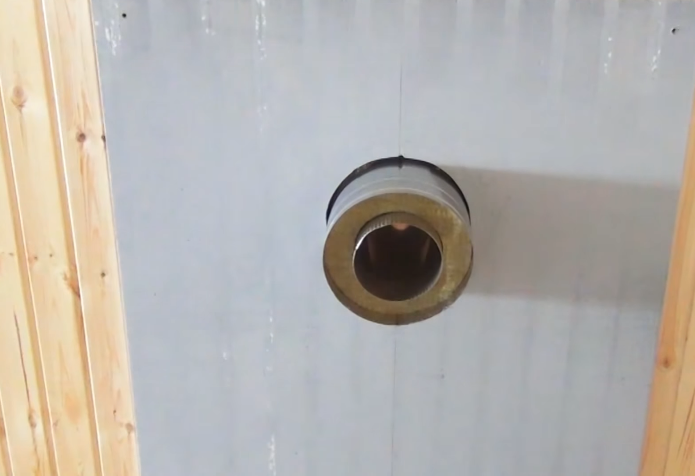
To the part of the pipe that comes out of the wall, we attach a mono adapter (from a sandwich to a single-wall chimney). If necessary, install another adapter between the "mono" element and the branch pipe of the furnace itself.
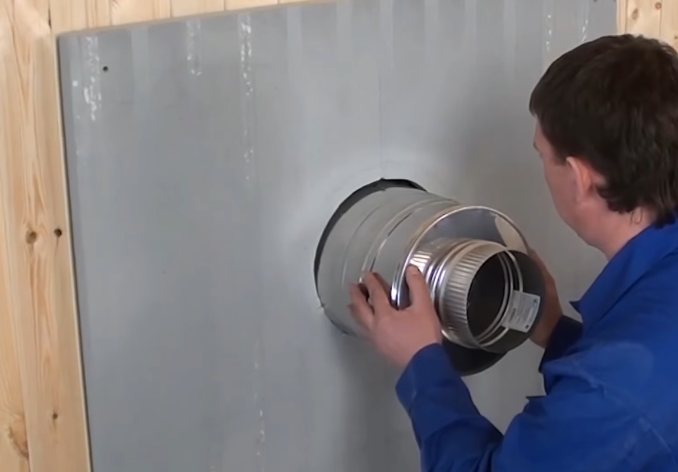
Step 13.We install a gate - a single-wall pipe with a gate valve.
Step 14. We move the oven and connect its outlet to the gate.

Taking the chimney into operation
Step 1. Inspect the chimney. Check the quality, tightness of joining elements.
Step 2. Clean the chimney with a dry cloth.
Step 3. Remove all foreign objects from the area of the chimney and the firebox of the stove.
Step 4. Carry out a test lightning with a little fuel. Do not use chemicals, briquettes or other fuels that are not approved for use in the sauna.
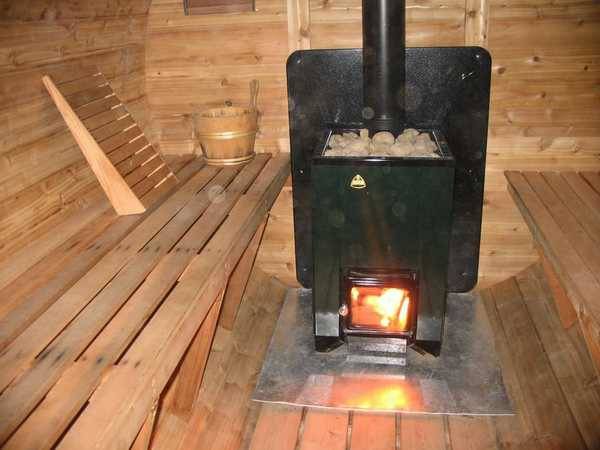
During the test kindling, pay attention to the quality of the draft, the appearance of smoke from the joints, the furnace. A small amount of smoke can only be emitted due to heating and combustion of oil residues on metal surfaces.
Important! Never fill fire with water!
Step 5. After a trial kindling, ventilate the bath, and after 2-3 hours carry out a full heating of the sauna stove. Remember - excess fuel can lead to damage to the chimney and fire.
Important! Make sure that next to the chimney all combustible partitions are insulated or the distance between them and the chimney is more than 50 cm.
Preventive examination and cleaning are performed once every 6 months.

