Methods for lining the stove in a bath
The hearth is heated to a high temperature during the furnace, which is accompanied by its thermal expansion. All this must be taken into account when choosing a facing material and the method of its application. In this case, it is necessary to plan the decoration of not only the walls, but also the pipes.
You can cover the oven with the following materials:
- An ordinary red baked clay brick. It is better to choose solid blocks that conduct well and keep heat longer.
- Monolithic ceramic brick. An excellent material with medium thermal conductivity, strength and resistance to sudden changes in temperature.
- Fireclay refractory stone. It is used for laying the firebox, it absorbs heat well, and therefore, is not suitable for external decoration.
There are such options for covering the hearth, regardless of its location:
- Solid cladding. This is the easiest way to finish the boiler. It is similar to laying tiles on the floor and walls of rooms. Only here there are some nuances. The first is choosing the right cladding. It is necessary to take tiles that are resistant to high temperatures and have the same coefficient of thermal expansion as metal. Another condition is the preparation of a solution with the desired composition. A mixture of clay, sand and cement works best. Seams must be trowelled with a special waterproof grout.
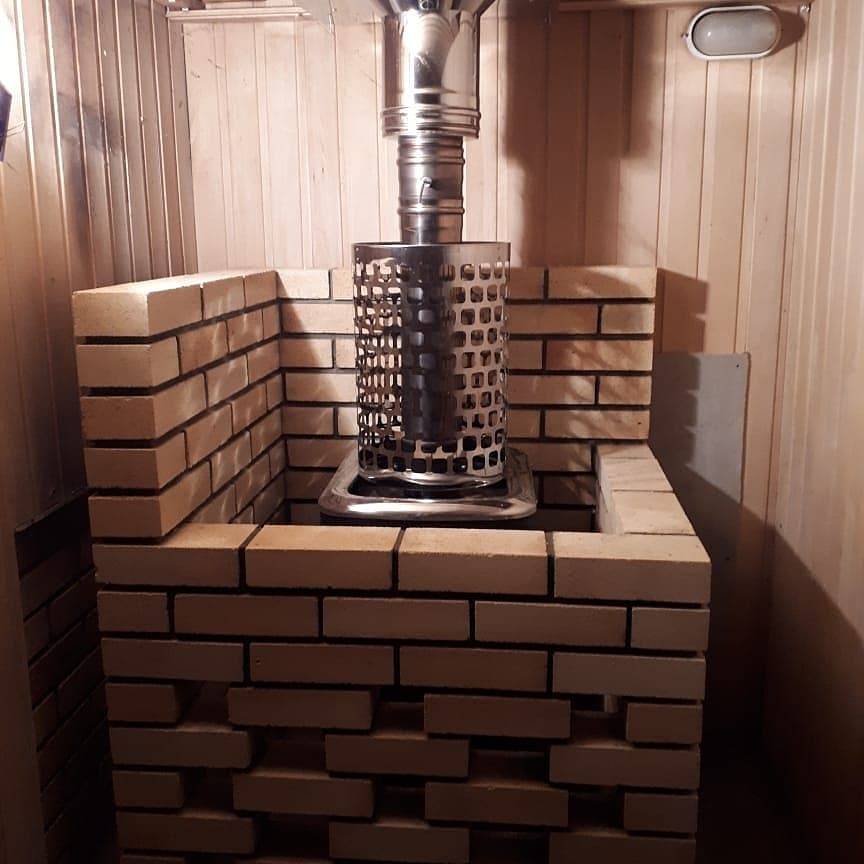
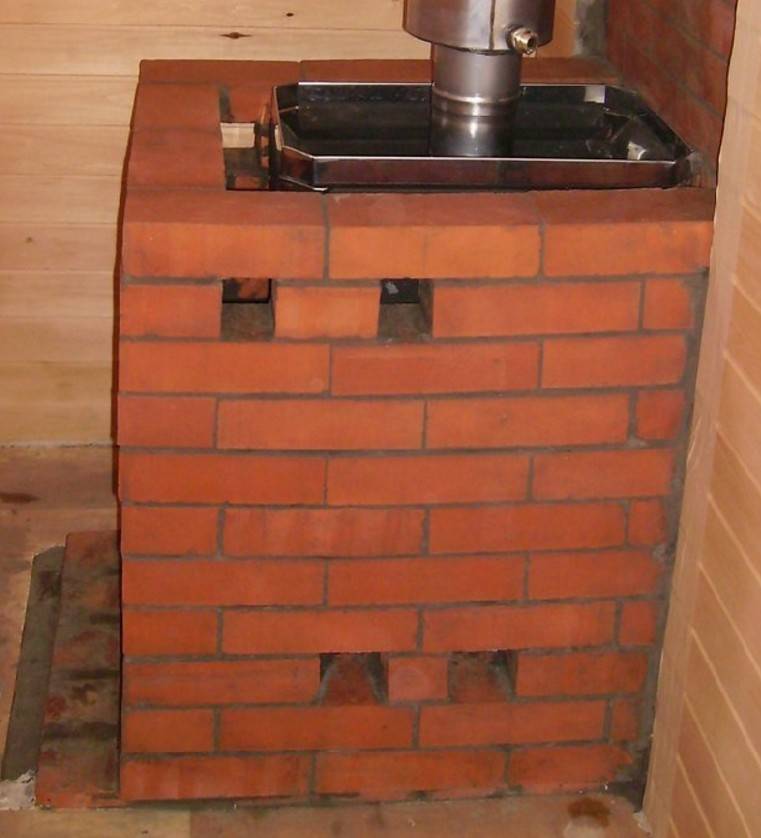
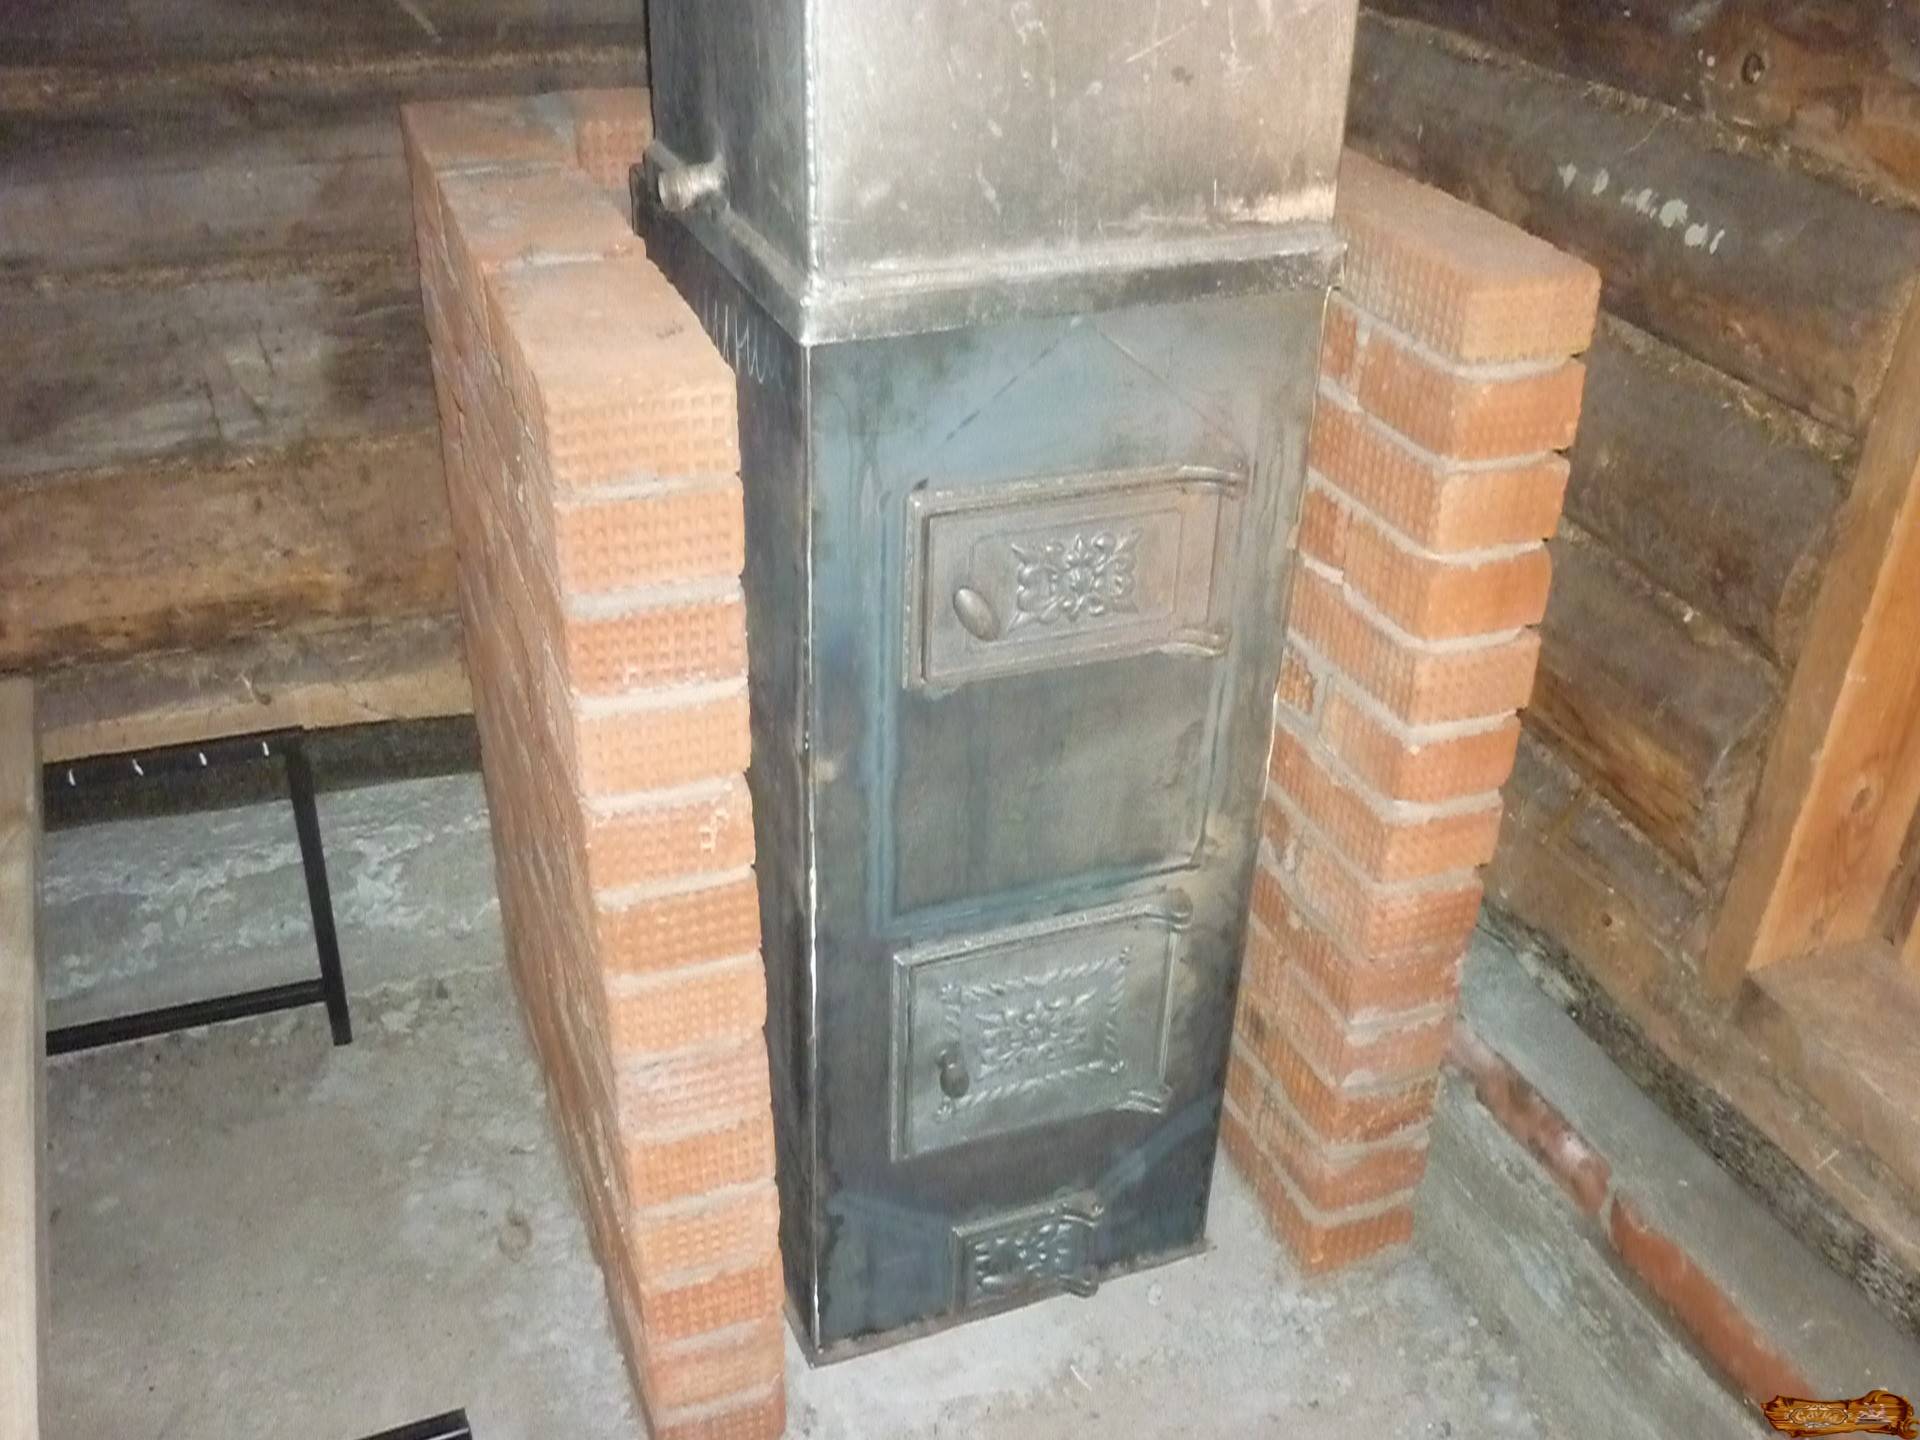
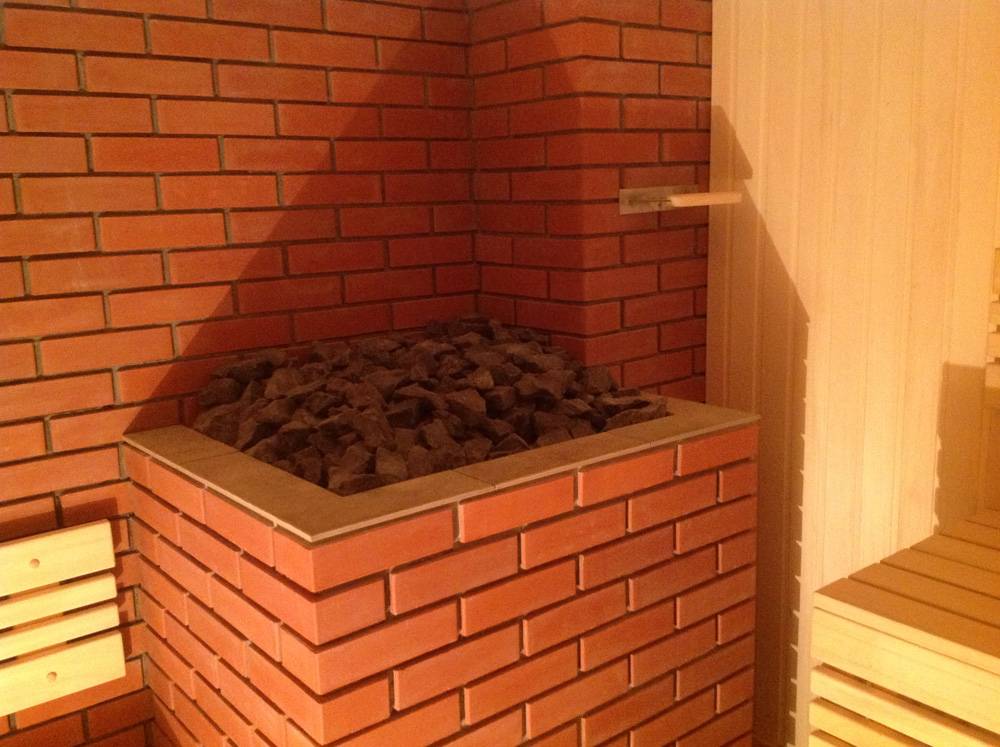
- Heat shield. This structure is a blank brick wall, laid out at a distance of 2-3 cm from the outer surface of the boiler. The advantages of this design are that the heat is transferred to the stone, thereby ensuring good heating of the room, while preventing the likelihood of fire and burns. In addition, the absence of contact between the metal and the brick excludes the appearance of cracks in case of uneven thermal expansion of materials.
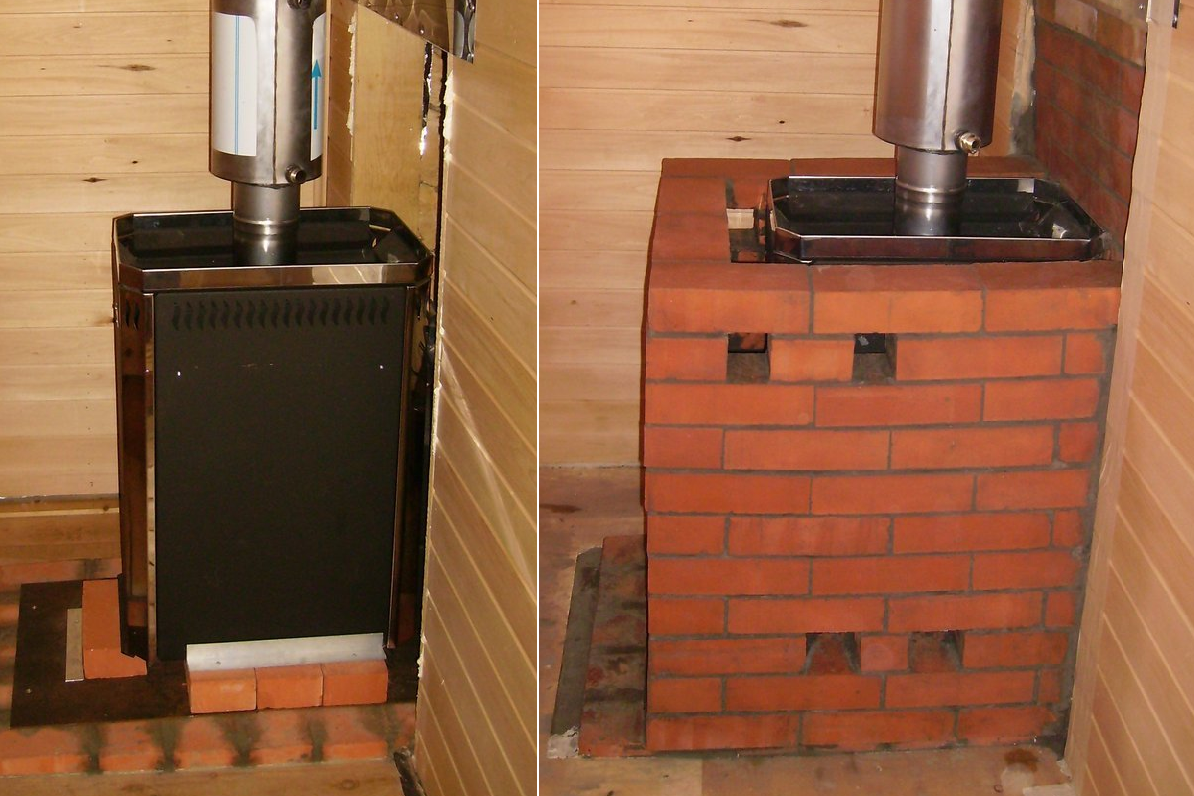
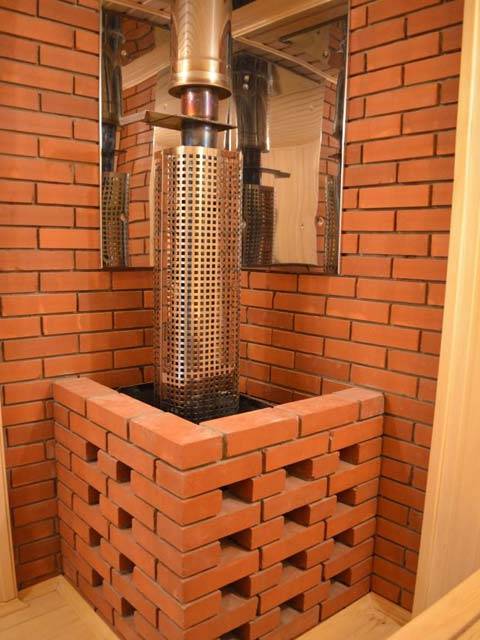
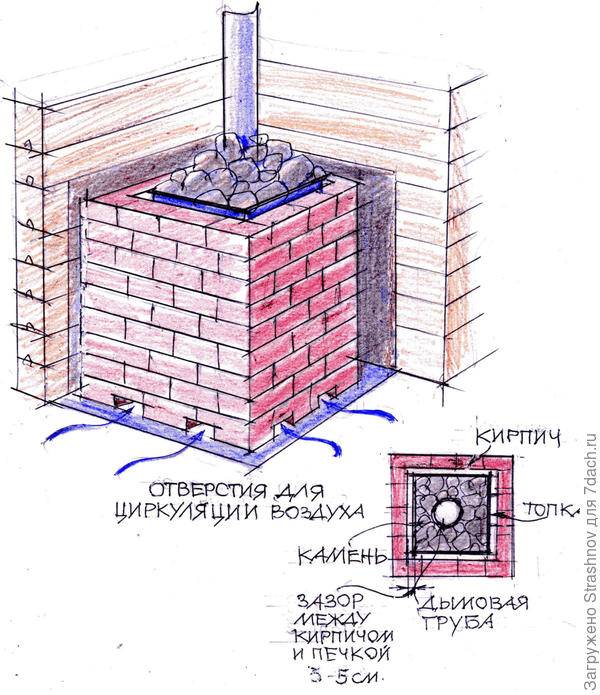
- Facing convector with air vents. Such structures are used for cladding high-power hearths, which are developed by pyrolysis installations or long-burning boilers. A vertical wall in half a brick is laid out 4-5 cm from the stove. In the lower and upper parts, air vents are left through which air circulates under the influence of differences in height and air temperature. Such a system works efficiently, evenly distributing heat throughout the entire volume of the steam room.
Oven screen options
It is recommended to cover the bath stove in half a brick, this is the best option. If the screen is made as thick as a brick, then it will heat up for a long time. In addition, for such a masonry, it will be necessary to equip the foundation without fail. If you resort to a quarter-brick construction, then the bath room will warm up quickly, but the radiation will be different in rigidity. Regardless of the thickness of the masonry, the distance between the surface of the metal furnace and the wall varies up to 10 cm.
Screens can be a solid structure with ventilation windows, while the chimney is often made of brick as well. Another solution is possible: to impose only certain elements of the furnace.
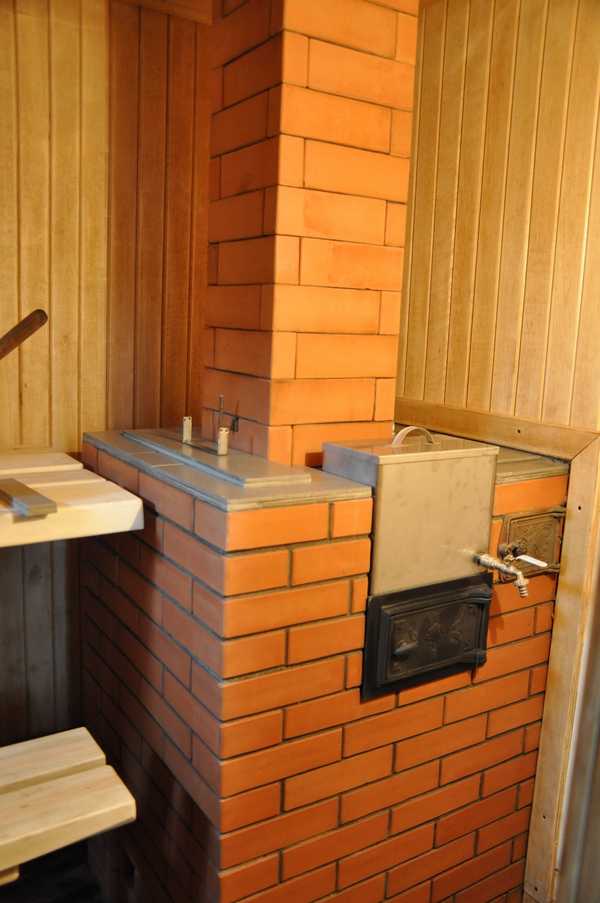
As for the decor, there are many different options. By itself, neatly executed masonry looks pretty beautiful. The color of red brick contributes to the design of the stove structure. At the request of the owner, the sauna stove can be faced with porcelain stoneware, decorative brick, natural stone, tiles. The choice is a matter of taste and the planned costs for these purposes.
Material and tools
Before starting finishing work, you need to prepare tools, consumables:
- reinforcing mesh;
- roofing material;
- crushed stone, sand, cement, clay;
- heat-resistant mortar for brickwork;
- boards, bars, slats for formwork;
- bayonet, shovel;
- trowel, trowel;
- building level, tape measure;
- knitting mesh, reinforcement.
Many are interested in what kind of brick to lay over the iron stove in the bath.You cannot use standard building bricks for this. For this it is better to use:
- refractory brick (fireclay);
- clinker brick.
Silicate blocks are not suitable for lining ovens because of the large amount of lime used in their manufacture. Because of it, bricks are destroyed by prolonged exposure to high temperatures.
Bricks can have flat or patterned surfaces. The latter are more suitable for decorating bath rooms.
Clinker brick
When deciding how to properly impose a brick on an iron stove, first of all you need to decide on the materials suitable for this. They must have special characteristics.
Brick
The main material for facing must be of high quality: no voids, with high heat resistance and fire resistance.
There are two options to choose which brick to lay over the iron stove in the bath:
Clay brick. It is used for cladding the body, masonry of the firebox and chimney of a wood-burning stove. It happens as an ordinary, front, with a decorative front surface.
Fireclay brick With such a laying, the brick is placed on a spoon - a narrow long part
Solution
The ideal masonry mortar is made of clay and sand in specific proportions, depending on the quality of the clay. Without experience, it is very difficult to do it. Therefore, it is best to buy a ready-made refractory mixture based on red clay.
Before you impose a brick on the cast-iron firebox, you just need to dilute it with water, as required by the instructions on the package.
Heat-resistant mixture Terracotta
In addition to brick and masonry mix, masonry mesh and refractory sheeting may be needed to create a protective shield for wood surfaces. And also roofing material as waterproofing.
Instruments
Tools to do this work will require the following:
- Solution container;
- A trowel for his set;
- Hammer for adjusting bricks;
- Pickaxe for dividing them into parts;
- Joints for seams;
- Ordering - a rail with divisions applied to it, the distance between which is equal to the height of one or more rows, taking into account the thickness of the seam;
- Building level and plumb line for level control;
- Cord to control the evenness of horizontal rows.
Necessary tool for masonry
Also, a sponge or rag and a bucket of clean water will not interfere to remove the solution from the front surface of the masonry.
Masonry materials
To erect a partition around an iron stove, you will need the following set of building materials:
- clay (ceramic) brick without voids;
- ready-made masonry mixture for stoves and fireplaces;
- metal corners with a shelf width of 35-45 mm;
- steel wire;
- stove fittings - doors, latches;
- water.

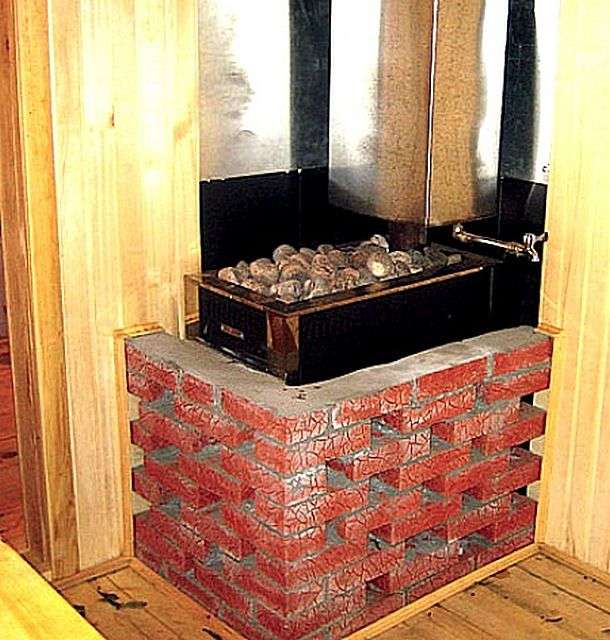
If you put a stone on the edge, you will save materials, but the heat capacity of the fence will decrease
In order for the screen near the stove to perform its function and to save heat for a long time, the red brick must be full-bodied. Hollow grades are also permissible for use, but their massiveness and heat capacity are significantly lower. Another option is natural stone (marble, granite), but it will be more expensive and much more difficult to lay.
A few words about which solution is best to use to cover the stove in the steam room. If you are far from stove business, then do not hesitate to buy ready-made clay-sand mixture in the store. When this is not possible, prepare a solution from pure natural clay without impurities according to this recipe:
- Take a large container and soak the clay in it for 1 day. The consistency is thick, in the form of a slurry.
- Pass the mixture through a coarse sieve to grind the lumps and separate the solids.
- Mix 1 bucket of slurry with 2.5 buckets of sand.

Just before laying, you can add a little cement for strength to the mortar (no more than 200 grams per bucket) and mix thoroughly.
Step-by-step instruction
We form the base
In order for a brick-lined sauna stove to be strong and reliable, it is important to lay the foundation correctly. The strip foundation is considered the easiest to install and install.
For its arrangement, wooden floor elements in the house are preliminarily dismantled, after which a trench is dug, the bottom of which is covered with a sand-gravel mixture. Everything is well compacted and watered with water. The next stage is the concreting of the foundation. For the strength and reliability of the structure, it is recommended to additionally lay a reinforcing mesh before pouring it into the foundation. After the solution is left to dry. Until the base is completely dry, further work is not recommended.
Preparation
It is recommended to soak the cladding brick for 12 hours before building the protective apron. For this, the required amount of material is separated, if necessary, cleaned and placed in cold water. This event is necessary so that the blocks do not absorb moisture from the solution during the formation of the order.
How to prepare a brick mortar?
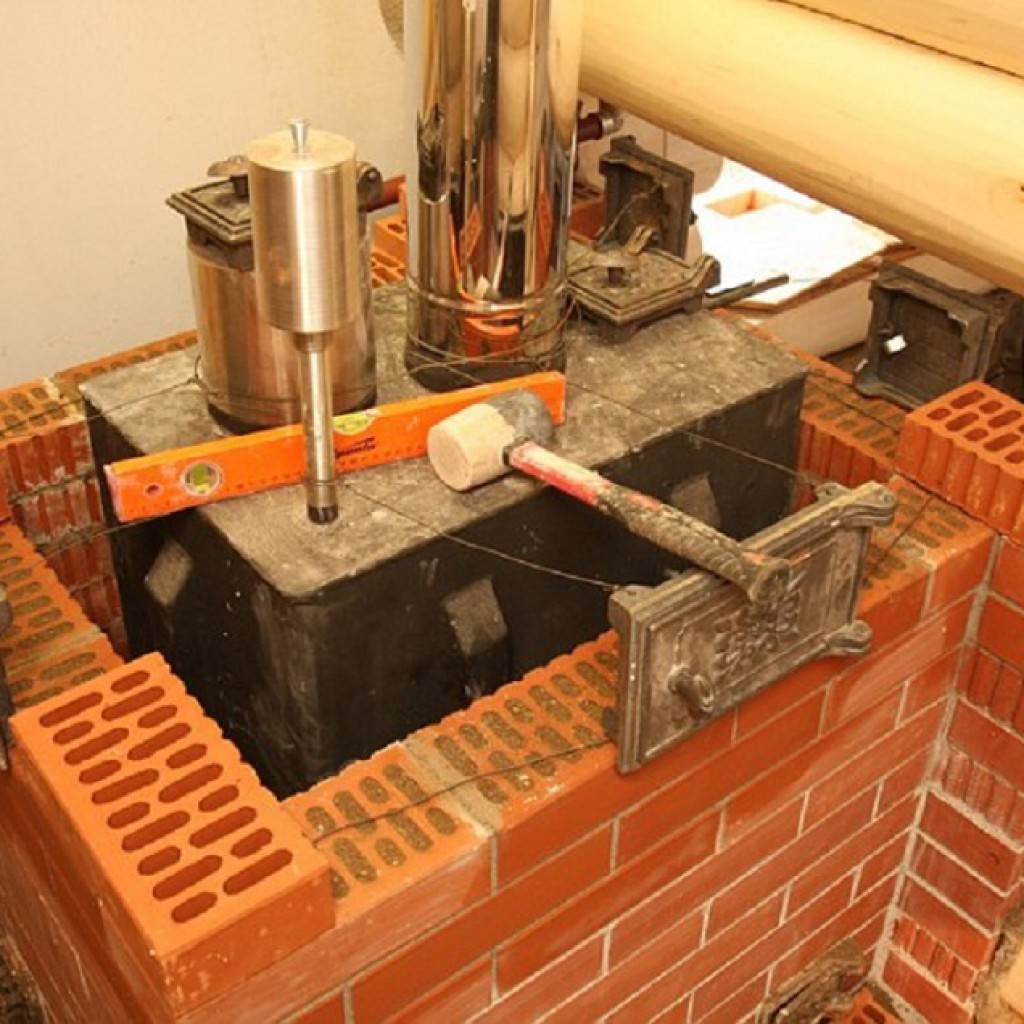
The ordering of a metal furnace will be reliable if a cement-clay mixture is used as a masonry mortar. Both components are taken in equal proportions and diluted with water to obtain a creamy consistency. To mix the mortar well and get a homogeneous mass, it is recommended to use a construction mixer. After mixing, you need to allow the masonry mixture to thicken, and then proceed directly to the masonry.
Bricklaying
In order for the apron to be reliable, it is important to correctly calculate the permissible distance between the brick wall and the iron body, because if the gap is small, the masonry will quickly crack and you will have to redo it all over again. On average, it will take up to 15 orders to form the screen.
It is recommended to divide the work into 2 stages: on the first day, form half of the rows, then leave the structure to dry until morning. Then the rest of the laying is done, the optimal thickness of the row is half a brick. The ordering scheme is presented in the table:
| Row | Description of work |
| 1 | The perimeter is completely laid with bricks, the row is carried out from the corner, with strict adherence to the evenness of the laying |
| 2 | The wall is built up, reinforcement is carried out, air gaps are formed |
| 3 | Laid out like the 1st |
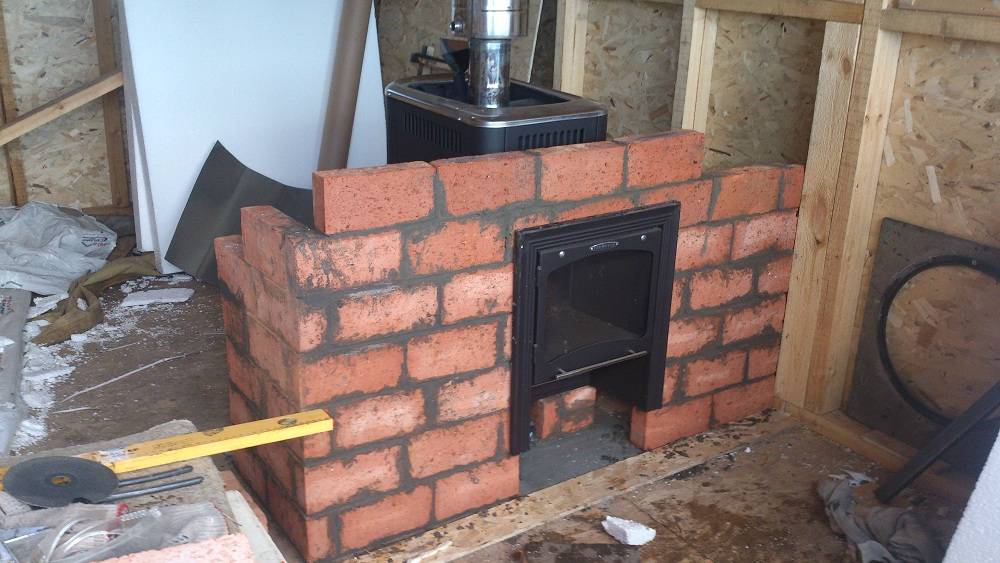
| 4—5 | A portal is formed for the firebox door and blower, |
| 6—8 | A metal corner is laid over the base of the portal |
| 9 | Stacked arbitrarily |

Depending on personal preference, you can arrange the order with an arch at the level of the slab, where the coals are located. Thus, embers will be in sight, and you can admire them for a long time. You can also finish the order by installing a round pipe in the bath, through which smoke will come out. In none of the selected options, the step-by-step instructions for forming the order do not change.
First fire
When the brick finish is dry, and this lasts on average up to 2 weeks, it is important to put the device into operation correctly. For this, 2-3 test furnaces are performed, during which a minimum of firewood is used
This will prevent overheating and cracking of the structure. In this way, it will also be possible to safely dry wet areas, thanks to which the oven will serve reliably and for a long time.
Fire safety requirements
When installing any sauna stove, it is necessary to strictly observe fire safety requirements, since the walls of the device during its operation are heated to sufficiently high temperatures.In order to ensure maximum safety and not have problems with regulatory organizations, it is recommended to install the furnace, guided by the provisions prescribed in SNiP 41-01-2003 (chapter 6.6).
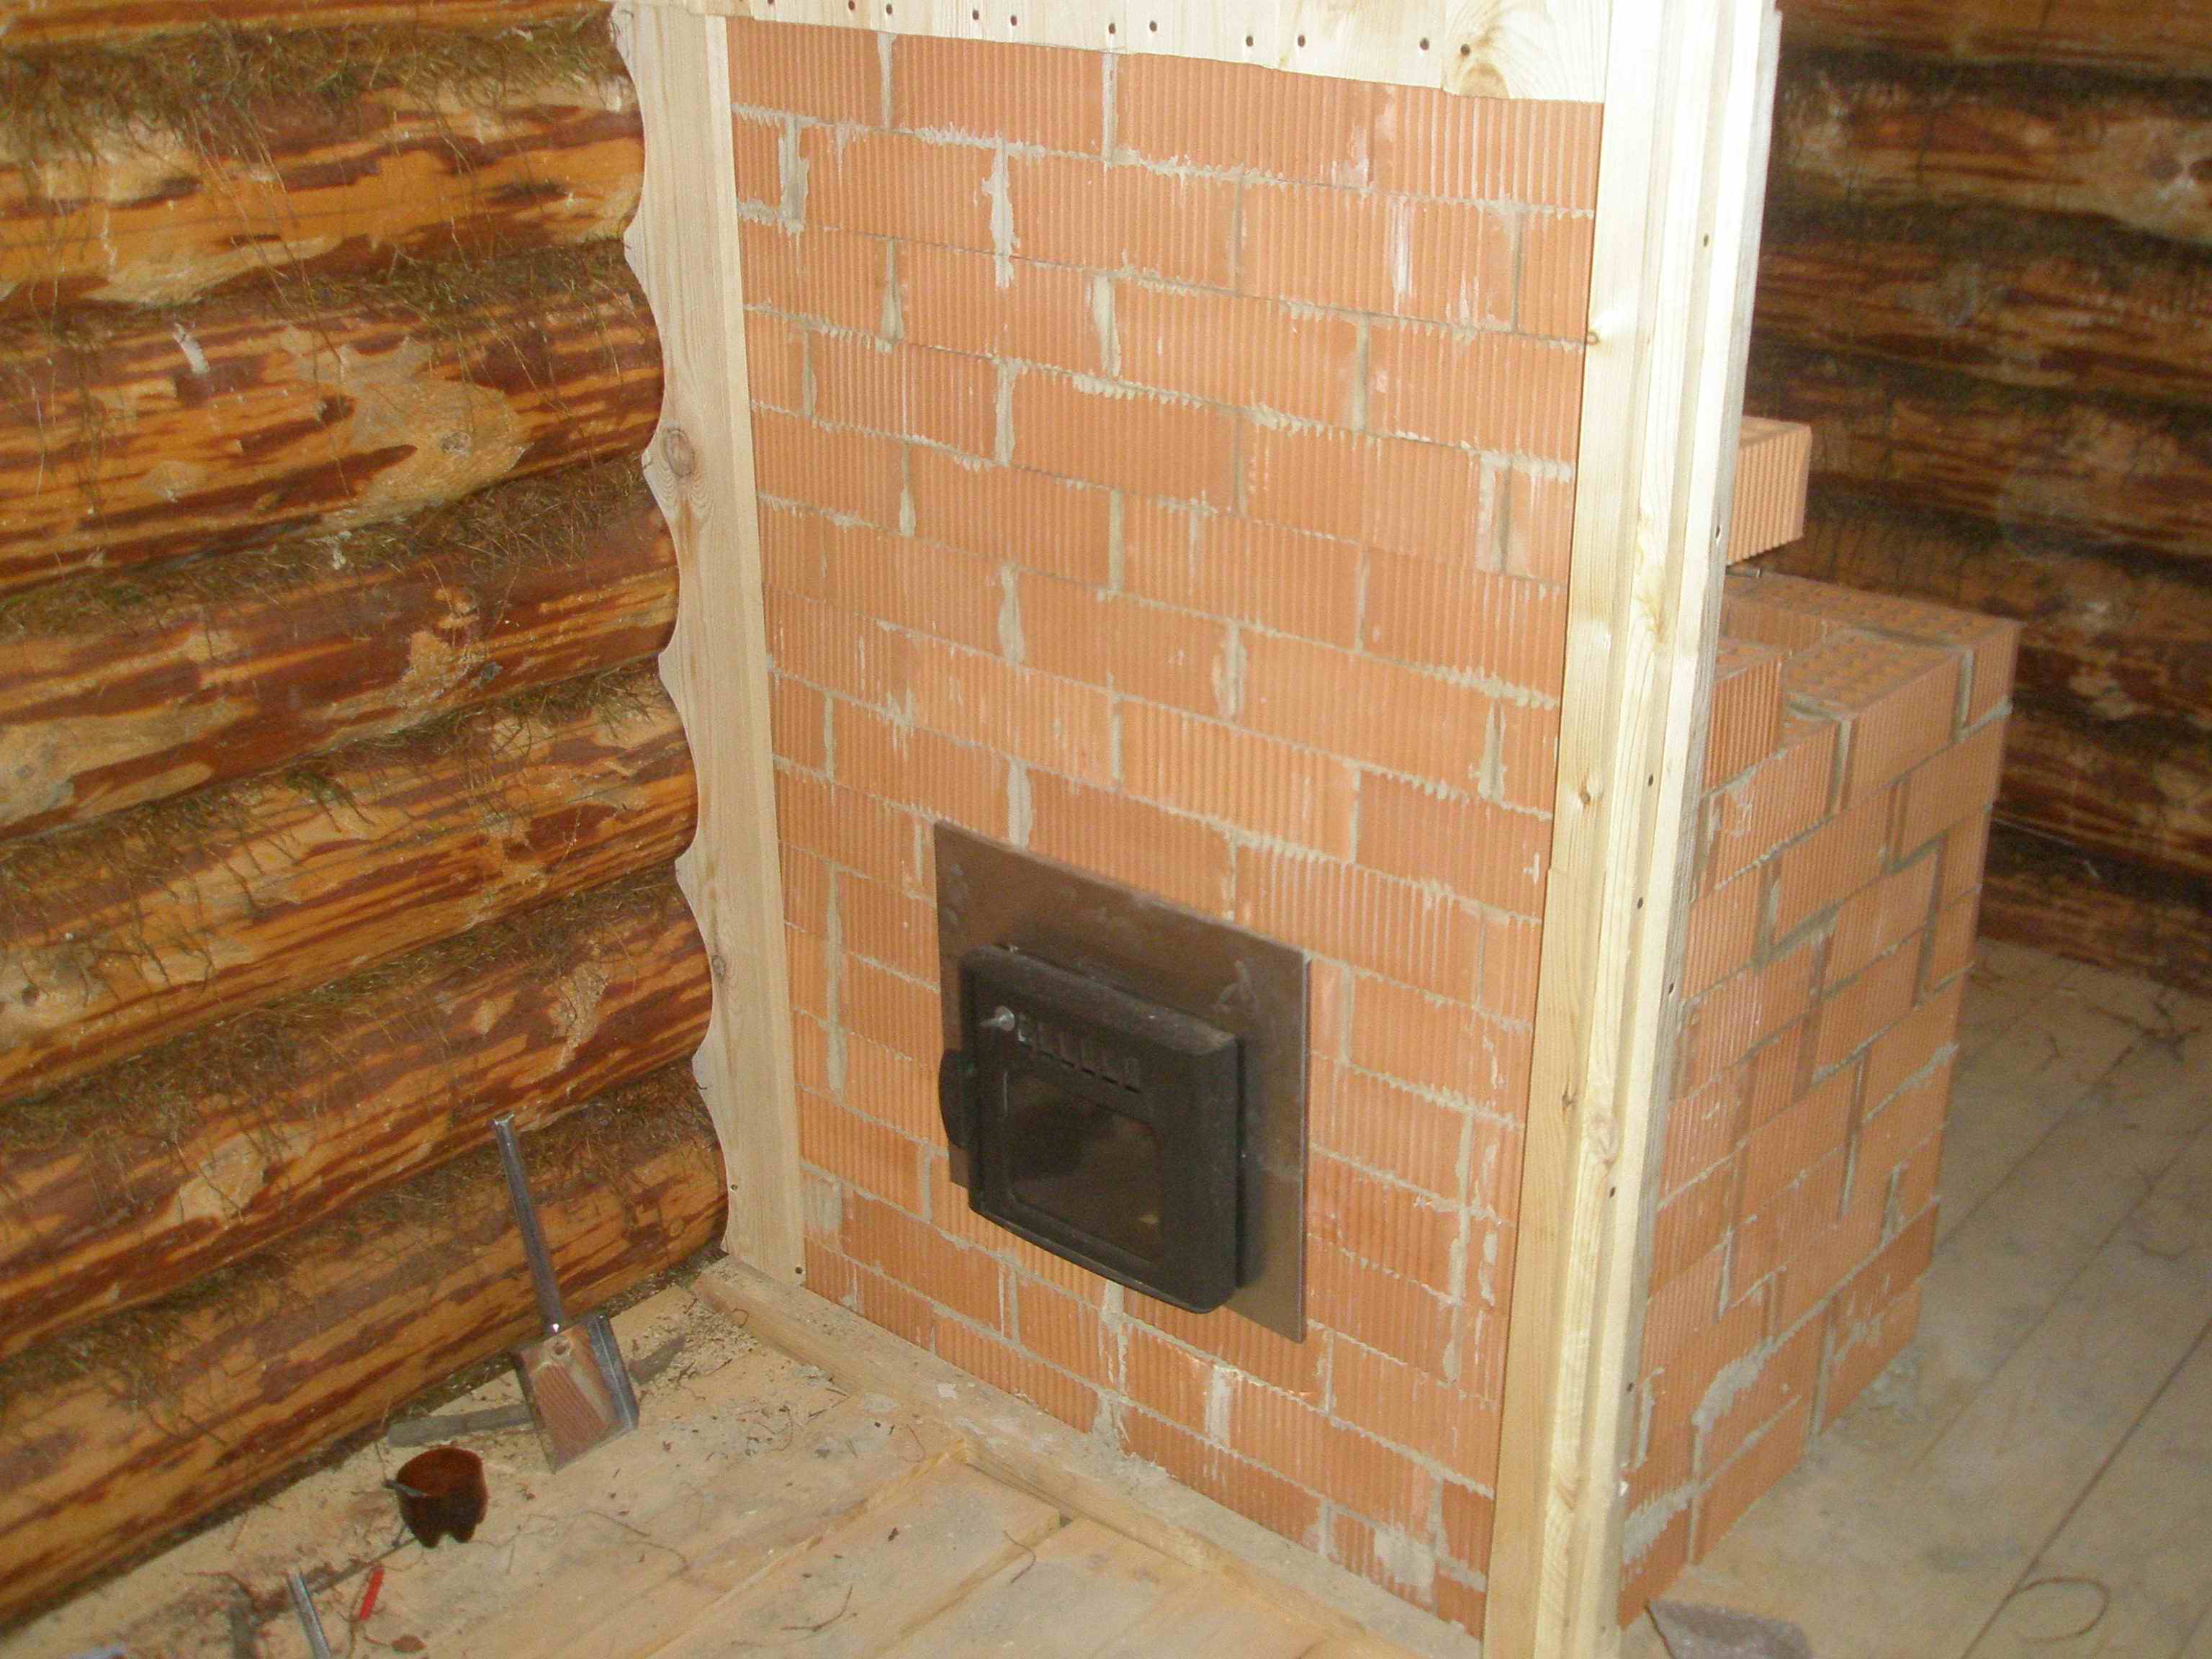
- The first thing that needs to be done is to equip a reliable foundation for the main structure of the furnace, which will adjoin the wall dividing the room. The foundation must be covered with a heat-resistant material and then a sheet of metal. Asbestos sheets were previously used as heat-resistant insulation. Today on sale you can find pressed mineral wool panels, which are less hazardous from an environmental point of view, sheets of foam glass or EZHKAKH (heat-resistant structural mica).
- It is also necessary to provide a metal floor in front of the fire door, which will prevent the wood floor from burning and simplify garbage collection. The size of the pre-furnace plate must be at least 400 × 800 mm.
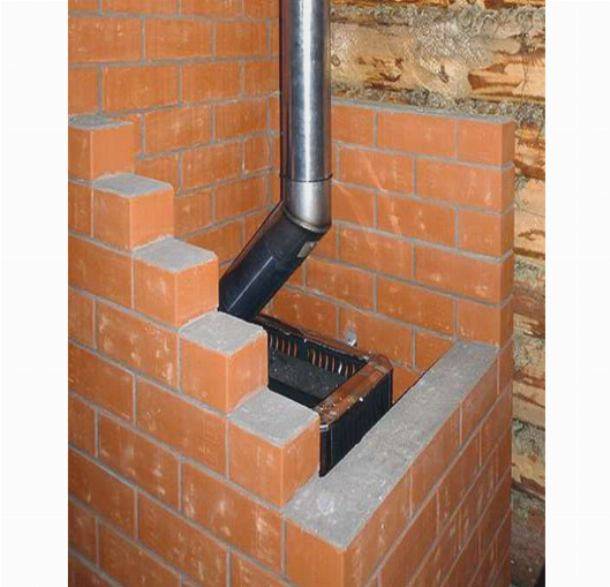
- If the partition between the steam room and the dressing room is wooden, then the opening through which the fuel channel will pass must be separated from the wood with brick or masonry. The distance between the stove and wooden walls should be 400 ÷ 450 mm.
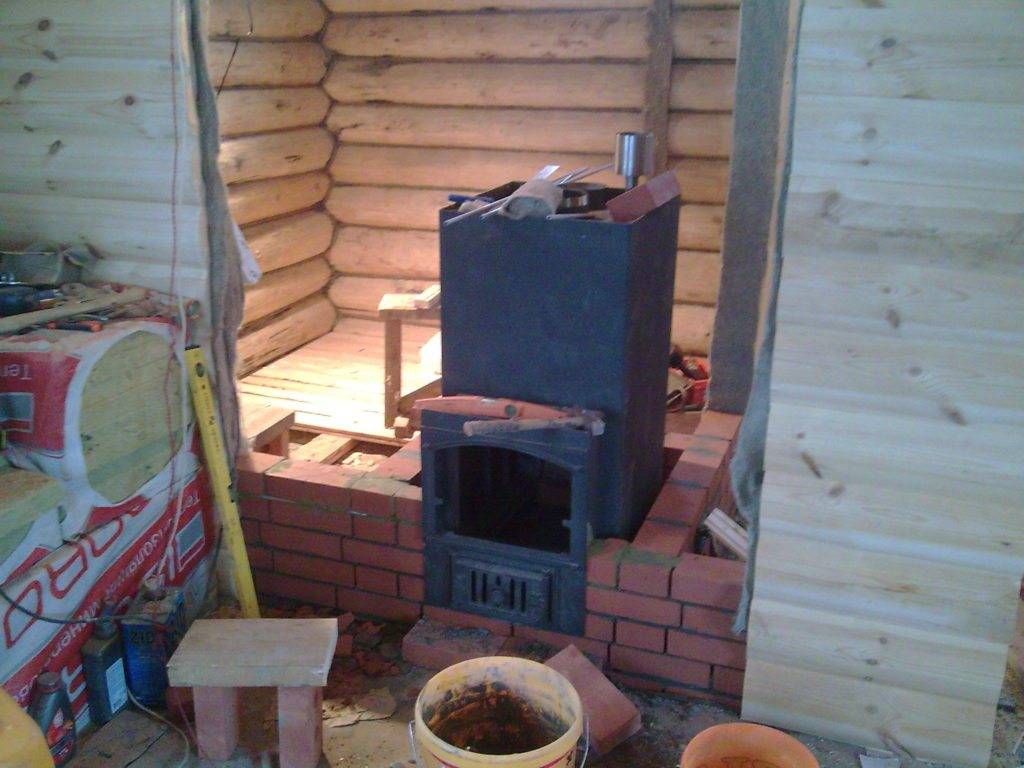
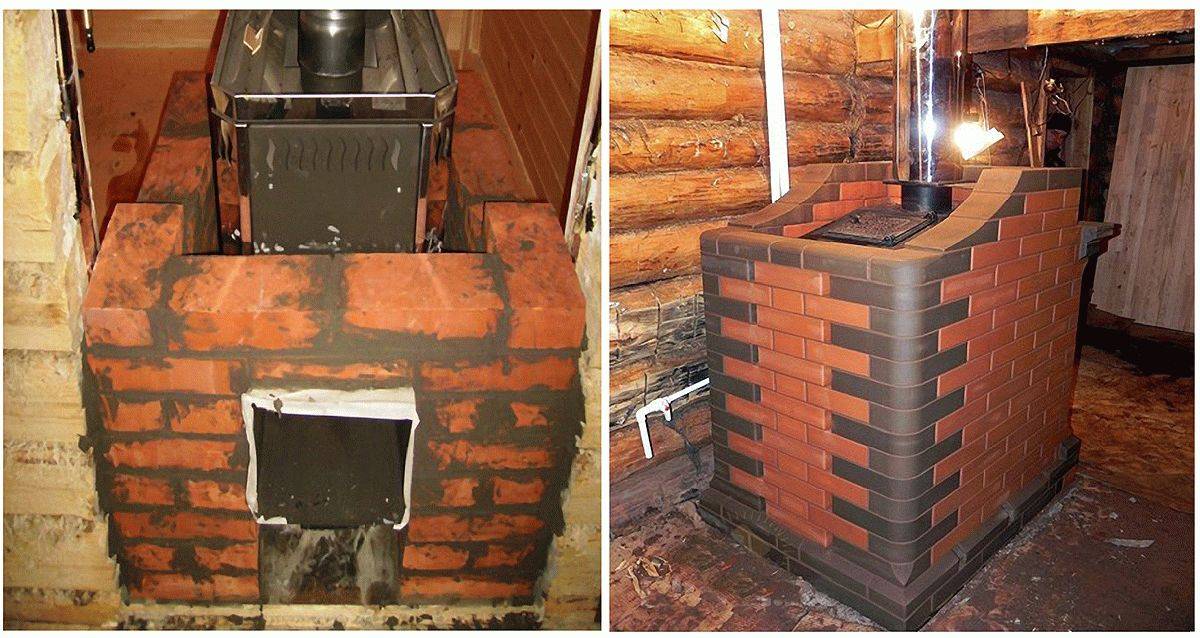
In the shown version, the owner chose to lay the opening with a brick
- Provided that on the end part of the wall of the opening through which the combustion channel will pass, gaskets made of heat-insulating material (mineral basalt wool or cement fiber sheet) with a thickness of 40 ÷ 50 mm, the distance between the part of the wall erected from combustible material and the outer wall ovens can be cut up to 250 mm. If a thicker thermal insulation material is installed, the safety distance can be 125 mm.
- The distance between the ceiling of the bath and the surface of the stove should not be less than 1200 mm.
- The distance from the edge of the combustion door to the nearest door must be at least 1250 mm.
- If a non-factory-made stove was purchased, or the device is independently made of sheet metal, then it is best to cover it with a brick. Thus, it is possible to protect the structure of the bath from fire, and people taking water procedures - from burns. Factory products, as a rule, are made with double walls, between which thermal insulation material is laid or convection channels pass.
Base device
Before laying a brick on the unit, you need to well prepare and strengthen the base under it. Since metal structures are lightweight, they do not need a separate foundation for the furnace, but brick cladding will have an additional load equal to tens of kilograms.
Not every floor covering can support this mass. For this reason, before laying a brick on the boiler, it is imperative to disassemble the floor and equip a separate foundation - columnar or monolithic.
Most often, a monolithic base is made. To do this, they dismantle the floor under the stove. The parameters of the foundations should be such that a gap of 10 to 15 centimeters remains between the future brick cladding and the metal body of the unit.
First, a hole is dug about 30 centimeters deep, crushed stone and sand are poured onto the bottom, tamped, reinforcement installed and poured with concrete. The foundation will harden for about 2 weeks.
For arranging a columnar foundation, pillars are installed at the corners of the facing box and in places of the highest load. The advantage of this base is that no drainage or waterproofing is required.
The sequence of actions during the construction of a columnar foundation is as follows:
- Markings are made at the corners of the oven for mounting pillars.
- Dig holes located strictly vertically, having a depth of about 50 centimeters.
- A 10-centimeter layer of sand is poured onto the bottom of all the pits and tamped down.
- A mortar is prepared from cement and sand in a ratio of 1: 2, it should have the consistency of thick sour cream.
- The solution is poured over the sand layer in a 10 cm layer. Crushed stone or brick chips are added to it.
- After hardening, brick pillars are laid out so that they rise 7-10 centimeters above the floor.
- Install a bar of the lower strapping. The most reliable way will be to lay the channel around the perimeter and weld the edge.
The use of concrete posts is allowed. You can make sure they are vertical with the help of a building level.
The way the foundation is arranged depends on whether it already exists and what it is. And also on whether you are covering an already connected and working oven or performing its installation and cladding at the same time.
If you already have a solid concrete foundation with a thickness of 20 cm or more, it will surely withstand the expected load. In this case, it is possible to impose a brick on the iron stove immediately, without preparatory work.
In the absence of a foundation for the furnace, it is recommended to fill in a solid reinforced concrete base. Its area should be larger than the area of the cladding. When calculating it, keep in mind that the distance from the metal case to the brick walls is taken to be 8-10 cm.
The foundation is being prepared in stages:
First, you need to dig a hole 30 cm deep in the ground, fill it with sand, rubble, broken brick and tamp this pillow;
Arrangement of crushed stone cushion under the base
- Then, along the perimeter of the pit, formwork is built up to the level of the floor in the furnace room;
- A concrete mixture is poured into it, which is reinforced with a metal mesh or rods;
Cast base for oven and cladding
- The concrete base must be allowed to dry for 2-3 weeks;
- After that, it is covered with roofing material and a brick platform with a height of one or two rows is laid on top of it.
A brick base is laid on a layer of waterproofing A common picture - it is required to brick an already operating furnace
This is possible if the wood flooring is able to withstand the additional load from the brickwork. To make sure of this, the floor must be disassembled and the logs inspected. For this, the stove will still have to be temporarily dismantled by disconnecting it from the chimney.
Having opened the floors, inspect the logs.
They must be dry, without traces of damage and rot, and the distance between them should not exceed 60-80 cm. If it is more, another support with a cross section of at least 10-15 cm must be laid at the place of installation of the stove.
The distance between the lags and their cross section must be such as to withstand the load from the furnace
The floorboards themselves should be dry and strong, and their thickness should not be less than 30-40 mm.
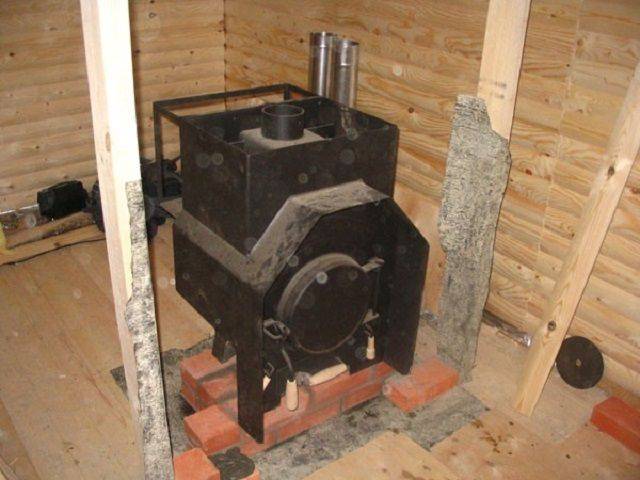
After the revision and reconstruction of the wooden base, first a metal sheet, and then a refractory material such as asbestos board, is laid on the floor according to the markings and fastened with self-tapping screws. And a brick base is already being laid on it.
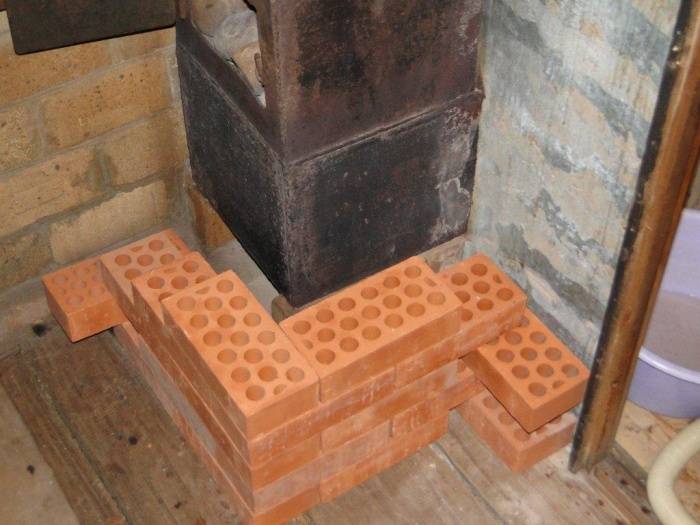
Part of the furnace and brick walls will rest on a wooden floor - we cover it with refractory material
Technologies
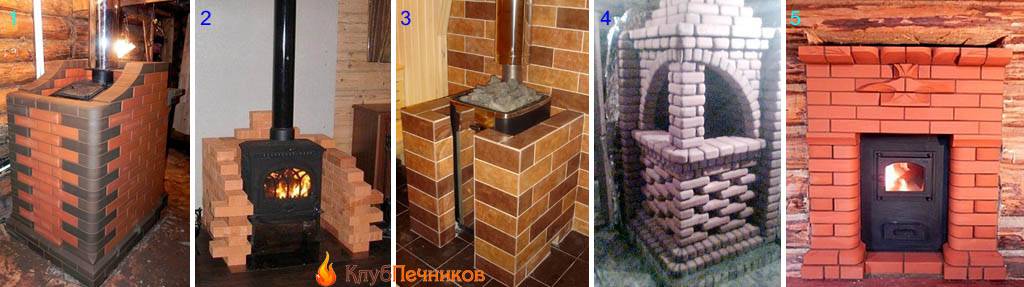
There are several proven technologies for masonry around metal stove equipment:
- Heat shield. A brick fence that does not exceed the height of the furnace. Promotes better heat dissipation.
- Solid cladding. It quickly gives off heat to the surrounding space, which increases the cost of heating the premises. This technology is used when it is necessary to create a beautiful decoration, sacrificing the performance of the furnace equipment.
- Convector masonry, which has air vents. Suitable for metal heating units. In this case, the size of the steam room is not important.
Cast iron furnace lining
The advantages of such a solution
The metal oven heats up very quickly, but no less quickly and cools down. In order for the temperature in the bath to be comfortable, it must be constantly heated during washing. And this is an extra consumption of firewood or other fuel.
In addition, the heat from the hot metal is too dry, and it is easy to burn on its surface and cause serious injury.
Hot metal walls are a common cause of burns
But if the iron stove is overlaid with bricks, these disadvantages disappear, but significant advantages appear.
Namely:
- Long and uniform heat release, as the heated brick cools slowly;
- Reducing fuel costs, the price of which is of particular importance if the stove heats the house and is heated daily;
- The heat from such a furnace is not sharp and scalding, but soft and pleasant;
- It is much safer to be around her;
- Lined potbelly stove looks much more aesthetically pleasing;
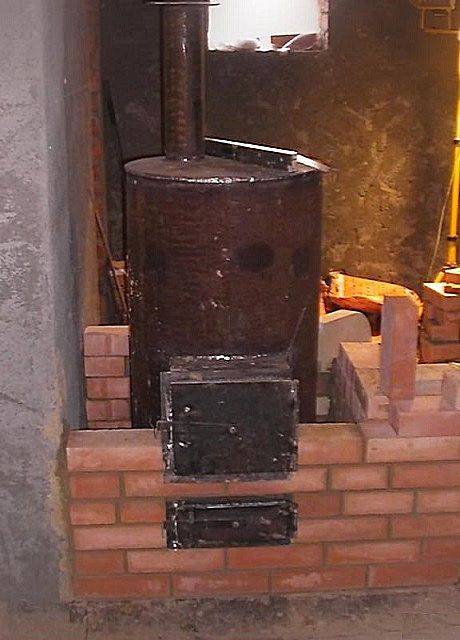
Homemade stove stoves made of ferrous metal are especially in need of finishing
It is much easier to brick a metal stove than to fold a fireplace with a chimney, and it will cost less.
Today the metal stove in the bath is already a standard set, without which it is difficult to imagine the wellness procedure loved by many. Compared to other types of ovens, it has a number of advantages:
- Ease of installation. It is easy to make it yourself.
- Easy and simple operation.
- It melts quickly.
- Has good traction.
- High performance.
- It is economical in fuel consumption and affordable in price.
But in order to really appreciate all these advantages as much as possible, you need to learn how to use it correctly!
The stove in the steam room
No one, of course, would argue that a stone stove is ideal for a bath. But it needs to be melted for at least 5 hours so that it really begins to give off its heat, imagine how much wood will go away during this time. And this, in turn, does not suit everyone. And the price of a brick structure will be several times higher than that of a metal furnace lined with stone.
The scheme of movement of air masses
In addition, in order to fold a brick stove for a bath, you need to have the initial skills and knowledge of a stove-maker, since in this design you need to take into account many nuances that are invisible, but play decisive roles!
Brick oven
A metal stove can be bought ready-made, and the lining will not entail large financial costs.
Metal stove without brick lining
What are the necessary parameters for a metal sauna stove?
- It should be small so as not to clutter up the space.
- You should not choose too much power, since the bath room is usually small. It will be difficult to control the optimal temperature regime.
- The characteristics of the furnace must clearly comply with the fire safety rules.
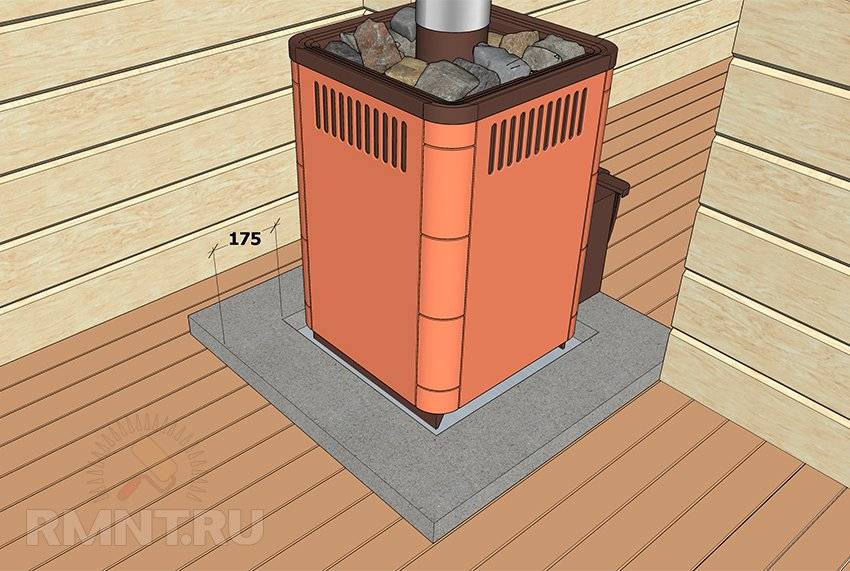
In addition, it is necessary to take into account the place where the oven is located. According to SNiP, the metal unit must be located at a distance of at least 15 cm from wooden floors.
Sauna stove
Isolation methods
There are several techniques to reliably isolate wooden structures from the heat of the stove. Some of them involve a fairly large amount of work, while others are much simpler.
- Creation of a protective box made of brick or stone.
- Installation of a special industrial screen.
- Creating a protective structure with your own hands from non-combustible materials.
The most time-consuming construction will require the construction of a box made of brick or stone - it will be necessary to lay out several walls that will protect the tree from heating. In addition, this protection option assumes a gap between the tree and the brickwork from 5 to 15 centimeters. About 10 centimeters should remain between the casing to be erected and the walls of the stove. All of this eats up useful space and requires some skill of a bricklayer to work.
Factory screens are easy to install and are not that expensive. They could be an ideal solution if they did not require even larger technological gaps between different surfaces. Therefore, such a wall decoration near the stove is possible only in a fairly spacious bath. If you need to save space, it is better to look for another solution that allows you to reduce all the indents from the wooden partitions.
The third option allows you to reduce the distance to 15 centimeters, which is already more acceptable
At the same time, this method allows you to create the most beautiful design, which is important. However, there will be a lot of work and the costs in this option may be much higher than in the previous ones. In addition, this method of isolation requires more detailed consideration due to the peculiarities of the assembled structure.
In addition, this method of isolation requires more detailed consideration due to the peculiarities of the assembled structure.

The advantages of such a solution
Below is a list of the advantages that such a design has:
- Even distribution of heat. This is due to the fact that the brick first accumulates energy, then gives it to space.
- Pleasant warmth instead of scalding heat. Humid air is constantly present in the room due to the rapid and efficient heating of the stones.
- Long-term retention of high temperature. Brick is a natural natural accumulator of thermal energy. That is why you can heat the bath well and steam there for several hours, without thinking about an additional increase in temperature or the next fuel filling.
- Ensuring safety while in the steam room. Hot metal poses a certain danger: the possibility of accidental burns when in contact with the walls of the tank. The lining of the sauna stove with bars acts as a barrier that protects against extreme heat and sudden injury.
What kind of brick is better to overlay the stove
As always, the start of work is preceded by the selection of a suitable material. I must say that when erecting such small structures, homeowners tend to use the materials available on the farm or their remnants from previous construction. This desire is quite understandable, so we will approach the selection of bricks from the same point of view. So, in the household there may be remnants of bricks:
- silicate;
- refractory (chamotte);
- red hollow;
- red ceramic corpulent.
Let's go in order. Silicate brick based on a slaked lime binder is very durable and tolerates various environmental conditions well, which is why it perfectly serves as a facing material for the house. But covering a metal stove with a lime-based brick is a useless option.
Lime material is not suitable for the temperature range at which the sauna stove functions, and there is still high humidity in the room. Silicate brick in such conditions will begin to collapse quickly enough. In addition, it is heavier than red brick and requires obligatory cladding, since its original appearance will not fit into any interior.
Fireclay stone is suitable in all respects for the construction of a heat shield. He is not afraid of temperature changes, the weight and heat capacity of a brick is almost the same as that of a red stove. With the appearance, the situation is worse; not every homeowner will like it inside the house or bath. But the way out here is simple: the facing of the stove is made of porcelain stoneware or other material.
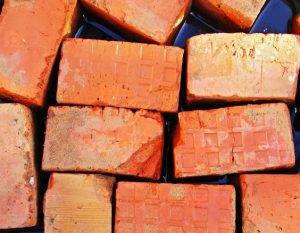
If you take any red brick, then this is what you need for a heat shield. Of course, the best option is a solid stone, but a hollow one will also work fine. True, it will not keep warm for a long time, since it does not have such massiveness and heat capacity as a solid stone.
I must say that brick lining of a metal furnace allows the use of both a standard stone size of 250 x 120 x 65 mm and a thick one 250 x 120 x 88 mm.The amount depends on the height of the heater and the type of masonry, as a rule, it is carried out in the usual way, in half a brick. You can put the partition in a quarter of the stone, but then you will need to take additional measures to strengthen and bandage it, which complicates the process.
The advantages of using a metal stove in a bath
The metal stove is easy to install, quickly heats up the steam room
Metal furnaces are highly popular due to their numerous advantages over their counterparts made from other materials.
Iron foci have the following advantages:
Affordable cost. Thanks to the well-established production technology, the production of products is carried out in a semi-automatic mode with minimal human participation.
Easy and quick installation. If you even have basic skills in working with metal, you can make a furnace yourself.
Sophisticated and efficient design. When developing various models, such nuances as the configuration of the furnace, air supply, removal of combustion products and regulation of flame intensity are taken into account.
Fast heating. Iron has excellent thermal conductivity. Energy is not wasted, but is spent on heating the product body.
Profitability. The firebox consumes little fuel compared to classic models. Products with an overhead blower can operate on one filling up to 10 hours.
Versatility. Steel stoves with cast iron grates are capable of burning wood, briquettes, pellets and even coal.
Compactness
This quality is important for small steam rooms, where every centimeter counts.
However, the iron hearth also has some drawbacks that contribute to the decision to brick the iron stove in the bath.