Types of stoves for gazebos
There are many options for stoves that can be installed in summer cottages. It is better, of course, to order the construction of complex and large structures from specialists. Simple ovens can be made with your own hands. They can be stationary or portable, have several functions and consist of two or three components.

A number of requirements are put forward for stoves for gazebos:
- Increased resistance to temperature extremes.
- Convenience and ease of use.
- Nice appearance.
Choose a cooking device in accordance with your capabilities, preferences, required functions and style of the site. Some of them can be used not only for cooking, but also for heating. It is worth considering the features of the most popular options.
Did you know? For the first time the word "barbacoa" (barbecue) occurs in the history of the conquest of Peru by the Spanish conquistadors, which is described in 1553 in the book "Chronicles of Peru" by a native of Spain, priest and historian Cieza de Leon.
Russian stove
Such a structure takes up a lot of space, so a spacious gazebo will be required to install it. It is intended for heating and cooking food in special dishes. If the building for recreation is small, then it is worth considering the option of installing a mini-oven that imitates the Russian version. We are talking about a barbecue or grill. They can even be done with a grill spit.

Braziers
Small and simple design. It can be installed in an open or closed building. But at the same time, you should take care of fire safety. The brazier can be made of various metals: steel, iron, mixtures of different types. It will require the construction of a foundation. Grilling meat, sausages and vegetables on the grill is carried out on wood or charcoal. Food is fried on skewers.

B-B-Q
A compact version of the stove, which is suitable for installation in any building for rest and eating. It should be placed in the center of the gazebo. In this case, the area should be divided into 2 zones intended for the preparation of dishes and for their use.
Read about the use of various small architectural forms in site landscaping.
This is one of the simplest options that you can do with your own hands. In addition, it is easy to use, and the dishes on it turn out to be very tasty and aromatic. In appearance, a barbecue oven is similar to a barbecue oven, but the cooking process in it is carried out not on a skewer, but on a wire rack.

Smokehouse
A small complex can be installed in the gazebo, which will include a brazier and a smokehouse. In this case, it will be possible to feast on charcoal-fried meat and smoke-cooked dishes. When installing a smokehouse, it is required to equip a resting area with a powerful hood. This structure is usually made of brick and metal.

44 Drawings of brick braziers with dimensions and diagrams
More than 44 drawings, diagrams and layouts of both barbecues and barbecue complexes made of bricks are collected here, i.e. with a stove, a smokehouse, a stove under a cauldron and with all sorts of other bells and whistles.
Mangali made of bricks with a metal frame
Brazier made of brick and metal - portable.
This simple brazier made by hand by the author of iron and brick. The frame is welded from metal, refractory bricks are inserted into the working area of the "shashlik".
Although it is made of brick, but still portable (about 50 kg.) Two people can transfer it to the garage for the winter.
Depth - 20 cm. Comment of the author: (20 cm is the most optimal; deeper holes are needed, less meat burns)
Profile - broken edge Painted with thermal paint People advise that if the brick is refractory, then the coals should not be poured with water, otherwise the brick will collapse faster from the temperature drop
Tip: if you have an ordinary high metal brazier, then put a refractory brick on the bottom, then the height will decrease to the recommended one and the bottom will not fade, which will increase the service life
Brazier made of bricks + do-it-yourself oven under the cauldron
This is a brazier and a stove on which to put a cauldron or a frying pan, the author made himself with his own hands. The stove is separated from the barbecue by a metal partition, when the coals in the stove ripen, they are raked into the barbecue (removing the partition). You can put it on the oven. In addition, the author claims that it is also tandoor light ", having raked out all the coal, it is quite possible to put a small pot with potatoes and meat for a couple of hours."
The author wanted to make the entire brazier out of metal, but making them bricks turned out to be more profitable: a metal frame, a lower strapping and vertical beams from a 40x40 pipe. A table was welded, a metal mesh was laid on it (for better adhesion of clay), bricks were laid on the table. In order for the height of the walls to be 16 cm (as is recommended for frying kebabs), the author decided to put the professional pipe on the first row of bricks so as not to cut the bricks for the second row. It turned out 120 mm (brick) + 40 mm (pipe) = 160 mm or 16 cm.
On top of the stove is a cast-iron burner for a cauldron or frying pan. Pipe - galvanized pipe for drain
Step by step photos:
Construction
The dimensions of the stationary stove are small, so the amount of material for manufacturing will require little.
You can use the standard scheme:
- ordinary brick - 360 pieces;
- fireclay bricks - 120 pieces;
In addition, you will need a solution of clay and sand.
At the same time, it is important to know a nuance: the mortar intended for brickwork must necessarily be of such a consistency that it will exclude its sticking to the tool, but at the same time will not allow spreading over the surface of the brickwork. Construction stages are directly related to the type of selected structure
Foundation
With the simultaneous construction of a stove and a gazebo, the base under these two structures can be the same. When installing the stove in a finished gazebo, you need to choose the right place. The principles of arrangement are usually common with the arrangement of a fireplace.
For example, draft-free and safety is important.
A pit is dug under the base, the depth of which should be 50-60 cm. Gravel is laid at the bottom of the pit and tamped. The next stage is reinforcement, you need to make a wire mesh, and install formwork around the edges. Next, fill the hole with concrete to a level below 5 cm from the floor.
Leave to cure, depending on weather conditions, for about 20-25 days. To prevent the appearance of chips, it is recommended to wet the hardened concrete with water. After the curing period has expired, install a waterproofing material (for example, roofing material). The next mandatory step is the construction of the stand.
Erection
The stand is stacked taking into account the ordering drawing. Hollow brick is suitable as a material. If the work is done by hand, the dressing should be taken into account, specifying the evenness of the rows and corners with a level
Pay special attention to the first six rows of the order. They will be a place for shelves under the countertop.
7th row - overlap of the hearth, 8th row - dressing of the overlap and the beginning of the bottom of the furnace.
Firebox
Performing the 9th row, you can use chamotte
When lining, the main attention should be paid to the thickness of the mortar: it should not be more than 3 mm. To ensure the thermal expansion of this type of brick, the transition between the two types must be at least 20 mm
If there is no transition, chamotte will crack during use, and the firebox will deform.
The temperature range is laid out with a basalt cord. It is non-combustible and has thermal insulation properties. The 10th row is a continuation of the furnace with a simultaneous narrowing. 11th row - completion of the firebox laying. Here you can already install the grate (grate).
Brazier
The brazier is formed starting from the 12th row (from a ledge of one brick for a skewer). The brazier space should be laid out from rows 13 to 16. The formation of the walls ends on the 17th row.
Vault
If the experience in arranging stoves is not great, then it is better to form the vault according to a template prepared from cardboard. The template must be drawn on bricks, marking the points with a marker. The brick is subsequently cut off according to the marked marks, forming a vault. For better stability, the mandrel can be made of solid wood. You can remove it after the solution has completely dried.
Next, a chimney is erected. Consider the insulation of the structure at the point of contact with the roof of the gazebo. Insulate the floor near the stove, insulate the walls and ceiling. The stage of installing the hood and chimney can be simplified, since the components can be purchased ready-made. Instead of bricks, sheet metal can be used at this stage.
As soon as the masonry is formed, you can arrange a cutting table. The countertop should be sized to match the size of the brickwork. Wood, stone slab, plywood and cast iron can be used as materials for the countertop. The latter option can act as a built-in hob on which you can cook food.
DIY square gazebo
Here are detailed instructions for building a square gazebo.
The simple design and construction of this gazebo might interest you. The dimensions in the drawings are in inches and feet (1 inch - 2.54 cm, 1 foot - 30.48 cm), you can of course set your dimensions while maintaining the proportions. Construction begins with markings, measure the diagonals so that they are exactly the same.
- Dig holes for the posts and place the molds in the holes.
- Fill the pipe molds with concrete and let dry for a few days.
- Install the horizontal beams and screw to the posts. Use a spirit level to make sure the beams are perfectly horizontal.
- Next, you need to install the middle joists to the floor of the gazebo.
- Align the edges and make sure the corners are square.
- Then install the intermediate beams on the floor of the gazebo. Lay the floor by fixing the boards with screws.
- Using a level, install the top beams.
- Align the edges and use the corner connectors to secure the top comb.
- Do not leave any gaps between parts.
- To protect the gazebo from dampness and improve its appearance, varnish or paint it.
Step-by-step instructions in the diagrams for creating a gable roof for a square gazebo.
- The first stage of the project is the manufacture of rafters. Cut both ends at a 60 degree angle as shown in the plans. Make grooves at the bottom of the rafters to fit into the support beams. Mark the lines and cut with a circular saw. Sand the edges.
- Install the rafters at the top of the gazebo. Make sure they are evenly spaced. Make holes and insert screws to secure the rafters to the frame.
- To assemble the gables, cut the plywood sheets to shape and size and sand the edges. Place the sheets on the gable ends of the gazebo. Align the edges and nail in without leaving any gaps between the sheets.
- When installing the roofing sheets, attach the plywood sheets to the rafters using the template shown in the diagram. Drill the pilot holes and insert the screws along the rafters, leaving no gap.
- Cover the roof with roofing felt, making sure the strips overlap by at least 5 cm. Fasten the roofing felt to the plywood sheets with roof brackets. You also need to cut a piece for the top comb.
- Attach the lug balusters, making sure you place them the same distance.Drill holes and fix the balusters to the rails with screws.
- Lastly, attach the handrails to the top of the components. Drill the holes and insert the screws to hold the lamella in place. Fill the holes with wood putty and smooth the surface with sandpaper.
- Cover the wood with paint or stain to protect it from damage and improve the look of the gazebo. The necessary materials for construction are not indicated here, there are a lot of them, if you are interested, look at the site, the link is under the gallery.
We build a stove in a gazebo with our own hands
List of required materials and laying the foundation Technology for erecting a furnace for a gazebo
A gazebo with a built-in stove allows you to cook barbecue (and not only) at any time of the year and bad weather. No rain gets in the way of spending time with family or friends in the fresh air, away from the city's smog and noise. Contemplation of the stove flame helps to relax and gives an atmosphere of warmth and comfort. A stove for a gazebo can be ordered today from a construction company, but building it yourself will cost a lot less. It is enough to purchase the necessary materials and have a desire to build it. And, of course, follow the clear building instructions.
The barbecue gazebo creates a feeling of home coziness, comfort and tranquility. Such a gazebo may well become a summer kitchen and dining room for family teas and celebrations.
A gazebo oven must meet many safety requirements.

Firstly, it cannot be erected close to the wall of the gazebo, since even the refractory brick heats up strongly. Secondly, it is necessary to cut the lower branches of the trees (and, if possible, not to place the stove in close proximity to them) in order to exclude the possibility of fire.
Even before construction, you need to think over the design of the stove and its location: you need to build the gazebo so that smoke does not go to the house, and even more so to people resting in the gazebo. With your own hands, you can build both a traditional design oven and a modern oven. It all depends on your taste preferences and the general landscape of the adjacent territory. Also, stoves are simple (fireplace stove) and complex (with hood and blower) designs. Again, it all depends on the taste of the owners and the amount of material costs that will be needed to purchase the necessary materials. List of required materials and foundation laying
If you decide to build a stove with your own hands, then you will need the following materials:
refractory bricks;
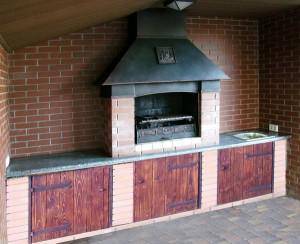
ordinary facing brick; roofing material; formwork boards; boards for countertops; cement mortar; any scraps of metal (pieces of reinforcement, wire, pieces of a channel are suitable); metal pipe; mixer and sink (if provided); water hoses.
This list is not exhaustive; some other materials will be used at your discretion.
So that in the future the structure is not skewed, you need to approach the construction of the foundation with your own hands responsibly. Work is being carried out on its construction in stages:
Remove the floor covering of the gazebo in the selected area for construction and mark it out with pegs and rope. Dig a hole for the foundation (usually 30 cm is sufficient) and make a carefully tamped cushion of slag. The depth of the pit along the entire perimeter must be exactly the same. Install a formwork made of uncut wooden boards (about 30 cm thick) around the entire perimeter of the pit and fill it with reinforcement. The pit is poured with cement mortar of the M100 brand so that pieces of metal do not stick out, and the surface is absolutely flat. The cement mortar is poured at a time: this ensures the high strength of the monolithic foundation. After the concrete screed has dried, which is 3-4 days, it is covered with roofing material.
As mentioned above, you can build both simple stoves and complex ones with your own hands. The simplest design has a furnace with the letter "P". It is erected on a concrete foundation made of refractory bricks, which is fastened with a mortar of clay and cement in a ratio of 1: 3. Water is added to the solution until it resembles thick sour cream in consistency. The optimum height of such a furnace is m. When laying the walls, metal nets are mounted between two parallel walls, at a distance of about 25 cm from each other. A chimney is installed above the gratings. Thus, a fire burns on the lower part, and food is prepared on the upper part. Since the oven is small, you can build it with your own hands in a few days.

The second version of the stove is much more complicated. Its design resembles the letter "E". The lower masonry is made of gas silicate bricks, and it serves as a raspberry. The upper part is built only from refractory bricks, it is the furnace part. If a sink and a mixer, a countertop and a built-in storage space for dishes are provided, then you should think about their placement even before the start of construction: it is very difficult to make any amendments during the work.
It is better to build a stove for a gazebo with your own hands according to diagrams and drawings, and if you wish, you can develop your own unique design.
Technically correct and neatly executed, the stove in the gazebo will become a favorite place for the owners and their guests to relax.
Summer kitchen with polycarbonate roof.
This is certainly not a gazebo, but here we want to draw your attention to the roof. This idea can serve as a writing for your future plans for the manufacture of gazebos.
Note that now they are making such a polycarbonate that can withstand the blow of a sledgehammer (this is said for skeptics).
Brazier made of bricks in the gazebo. Master Class
Brick volume = "three fields"
This is a simple model of a small barbecue grill for a summer residence. The author got tired of frying meat on the courts, and he decided to raise the level of the barbecue so that he could fry while standing. In fact, it turned out a beautiful brick stand for a metal brazier with a chic chimney. As you can see, the grill is installed on a solid foundation and the whole structure is made very aesthetically To save money, I added tile adhesive for underfloor heating just above the firebox. "
Tests have shown that the grill receives enough air, despite the closed structure. The brick is ordinary, facing.
The chimney cross-section for good draft should be 250mm x380mm, then there will be no smoke in the eyes.
Read also the article about "Brick Mangals"
Brazier with an arched roof in a gazebo with your own hands
Step by step instructions - master class
The author decided to make a brazier, drew up a project for a gazebo with a brazier (see the gallery), counted the materials, went to the store, where he liked the shop made of natural stone. He asked me to make the legs 75 cm high and she served as the basis for the whole structure for me. On which he put all the bricks. As you can see in the first photos from the back side, he made a wall of bricks to support the slab, so that it could accurately withstand the weight of the bricks.
By the way, in the photo in the gallery you will see two options for the roof of this model, it's just that the author did not like the first option and he remade it.
Please note that the pipe is lined with decorative bricks, which are made of compressed sand, which almost does not conduct heat. Which reduces the risk of fire
The foundation under the stove is tape with fittings for the entire gazebo.
Pergola table made of solid chestnut to order, beech chairs
Budget: 130 refractory bricks, 60 p 250 each, decorative 27 p 200 tiles, 22 p stone each 12 tr three bags of suffix 1500 hours 3500 rub
Project of a wooden gazebo with a brick barbecue. + Photo
This is a project of a wooden gazebo with a brick barbecue, which you can do yourself. The project was done in Google SketchUp 8.
There is a concrete pedestal under each post, 8 pedestals in total. And under the barbecue there is its own foundation, two fbs 50/200/50, and on top another 20 cm. Concrete is poured with reinforcement. So the load is different everywhere.
Characteristics of materials for a gazebo with barbecue Size 6 to 4. Roof one slope 7 * 3. Filled 8 pedestals under the barbecue put two fbski. 25 pieces of timber 150 * 150 * 6, board 150 * 50 * 6 40pcs (rafters) and 60pcs floor, board 150 * 30 * 4 65pcs crate. Profiled sheet 13 sheets 3 * 1.25. Brick: 600 pieces (red Stalinist used) Mangalnaya will be finished with wild stone, and the table top will be furniture like White marble Inside there will be an iron barbecue
Photographer's comment: "The fever lasts well and for a very long time."
The gazebo will be glazed from the wind
And another useful commentary by the author: “The damper so that when the firewood burns out and only coals remain, it does not close completely so as not to burn out and the heat is as strong as possible so that the cauldron warms up. Cement and clay are not compatible concepts. The mortar is cement and sand. In general, home stoves are made from a mixture of sand and clay. As for the pipe, it must be accurate above the ridge, you can build up a metal one. "
Gazebo project and the process of its construction
Photo about grill
How do you like such a compact four-sided complex ???
Do-it-yourself wooden gazebos 300 photos, drawings, diagrams
Here is a small gallery of handmade wooden arbors. Of course, you can collect more photos, because there are millions of options. Each gazebo, made not according to a template, but with your own hands, even according to standard drawings, is still a work of art. Here are collected relatively simple designs that are within the power of any master who does not have much experience. There are, of course, examples of industrial products, which may come in handy.
Square gazebo drawings
Square gazebos 150 photos
Drawings of hexagonal arbors
DIY hexagonal gazebo 50 photos
Drawings of octagonal arbors
Do-it-yourself octagonal gazebo 100 photos
Roofing system installation
When starting work on the installation of rafters, it is very important to correctly determine their size. Determine how far they should be from each other
With a length of 3 meters, a section of 50x150 mm will be the most acceptable option.
The installation itself is carried out in stages. This will help the drawing drawn up earlier. The rafter frame is initially installed. It will be advisable to collect it below. To make the work faster and easier, a template is initially prepared. Subsequently, the finished frame rises upward, is attached to the Mauerlat.
Then proceed to the installation of the lathing. It can be either solid or sparse. It is rational to use a continuous one in the case of a soft roof. The use of sheet materials involves the use of a sparse crate.
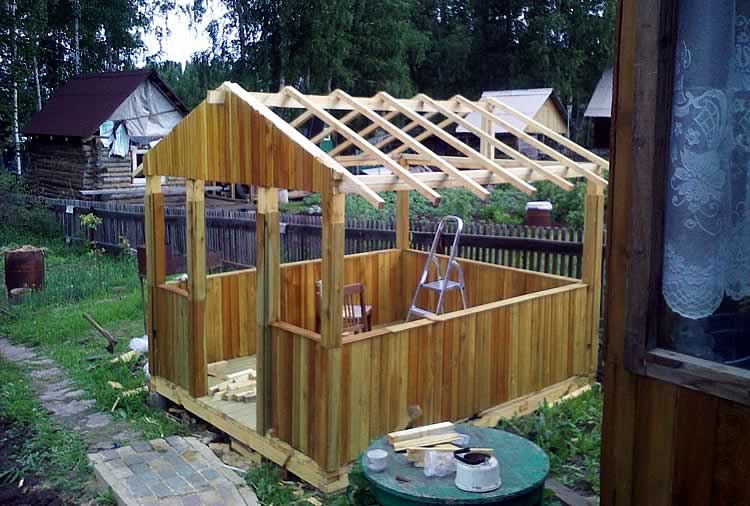
Installing the roof truss system
The next stage is the arrangement of the lining carpet. With a soft roof, moisture-resistant plywood can serve as the material. At this stage, the cornice strips are attached.
The finishing coat is equipped according to the instructions of its manufacturer. The order and rules of work may differ. It depends on the type of roofing you choose.
The final stage is the installation of the ridge and end strips. These elements are easy to make with your own hands. After that, it is advisable to treat the entire shelter frame with a tinted protective impregnation. Its color can be chosen, taking into account the design features.
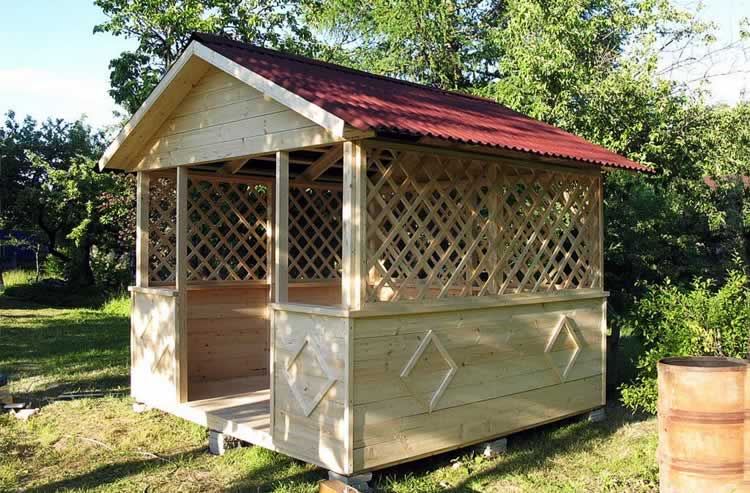
A gazebo made in this way for a summer residence will delight the owners and their guests with warm summer evenings for many years.
The gazebo is actually a very useful structure. Here you can enjoy your vacation alone, arrange family gatherings, receive guests and even fry delicious kebabs. Being engaged in drawing up a project of this structure, first of all, you need to decide on it.
The correct choice of these parameters will determine how much, as well as the convenience of using it. We will talk about the advantages of courtyard structures of a particular design later in the article.
Types of summer cottages in shape
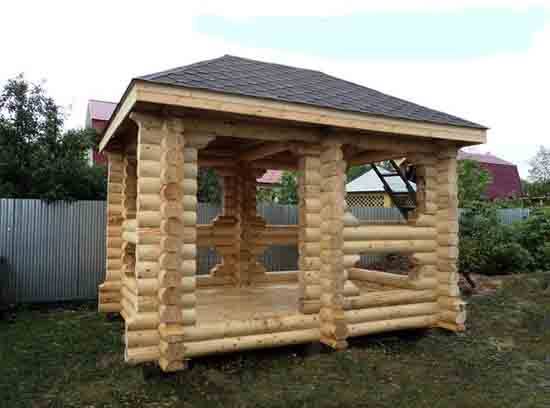
Construction 3x4m - the project is spacious enough and practical
Tent gazebos covered with awnings are very economical, beautiful and quite comfortable options. In summer cottages, you can often see inexpensive structures of 3x3 and 3x4m covered with a mosquito net.
Structures 6 by 6 m
A large gazebo 6x6m can be installed in the courtyard of the cottage. This is a fairly expensive typical project, but at the same time the most convenient one. In the event that you like to arrange all kinds of celebrations and receptions, you should definitely choose this option.
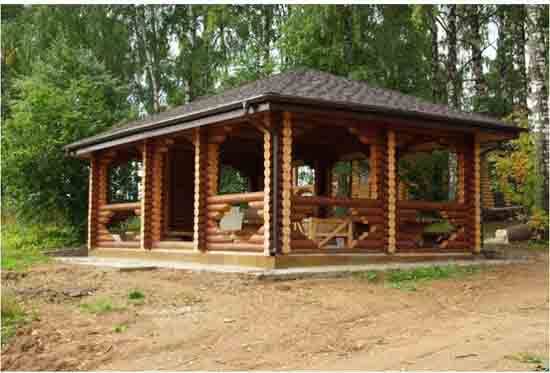
A 6x6 m building can accommodate a lot of guests
Of course, such structures are most often installed in the courtyards of large cottages. If desired, a 6x6 gazebo can be made for winter, put a brazier here, or even combine a recreation room with a kitchen when drawing up a project.
Where, after a hard day spent at your summer cottage, you can relax and unwind or hide from the rain and wind in unpredictable spring weather? Where can you meet your family and friends on a warm summer evening over a delicious drink? According to him, this place will be a cozy gazebo.
You can build a multifunctional, beautiful and cozy gazebo relying only on your own strength, and ready-made gazebo projects will definitely help you do it quickly and correctly. The construction of the building is quite simple, work on the construction of the gazebo does not require special knowledge and conditions.

Before starting construction work and preparing the necessary tools, you need to decide on the type of building and materials. To make it easier to make a choice and understand what kind of gazebo you want, you can see the projects of gazebos for summer cottages in advance. Ready-made projects are good in that all design features are clearly visible in them, the necessary materials are calculated. After studying such a plan, the ultimate goal will be clearly clear, you can also determine the amount of material costs and draw up a very specific schedule of work and purchases.

