Determination of the volume of the fuel bookmark
For efficient operation of the stove, it is important to load the optimal amount of fuel into it, and for each type of fuel it is necessary to find its own indicator. If you overload the furnace, there will be too many combustion products and they will block the circulation; if underload, there will be few of them, which also makes circulation impossible
The volume of the bookmark is selected as follows:
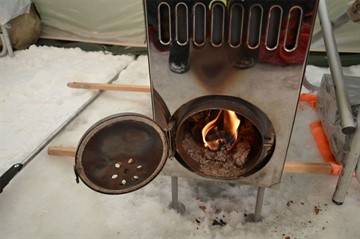
- fuel is collected in a bucket;
- they take a handful from the bucket and, putting it in the firebox, set it on fire;
- add fuel in small portions until the initial section of the hog is hot to a cherry color. Now they estimate how much fuel is taken from the bucket - this is the minimum volume of the bookmark;
- continue to add fuel (portions must be increased) until the dimensions of the hot section reach 80% -85% of the length of the hog. At this moment, the volume of fuel taken from the bucket will correspond to the maximum fuel level.
The test is carried out in moderate light: if during the day, then in cloudy weather (in winter); if it's clear on the street - towards evening. When loading high-calorific fuel (pellets, anthracite), the hot area sometimes looks like a ring with different widths, occupying different positions along the length of the hog.
Then the volume of the bookmark is determined as follows:
- maximum: the part of the hog farthest from the furnace is reddened by 1/3 of its length;
- minimal: the hot zone is located in the middle and has a length of 3-4 palms.
Potbelly stove on propane
The ideal stove is a handmade gas stove. It does not need a chimney, because no smoke is emitted during gas combustion. Its analogue is a room gas stove with an oven.
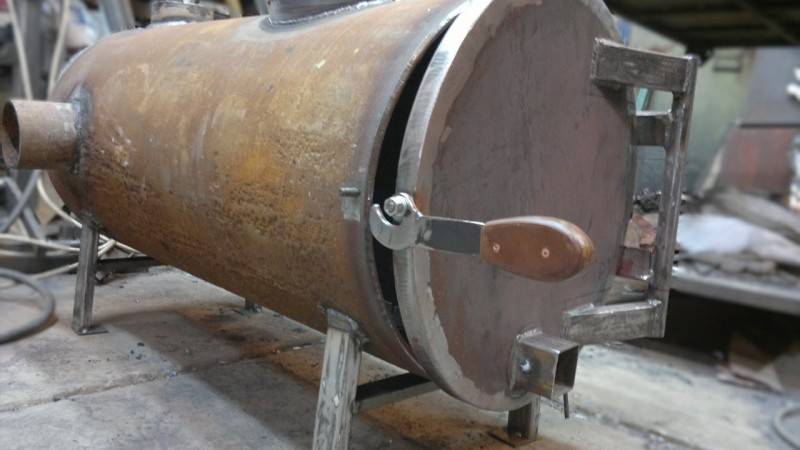
It is not difficult to make - take ... a finished potbelly stove, enter into it a steel pipeline with a nozzle from an old gas stove. Connect it to a standard gas hose with a reducer from a household gas cylinder.

There is no exact expense for a potbelly stove, you can navigate by a 4-burner stove. The capacity of a cylinder (50 liters) with 21 kg of propane-butane is enough for 34 hours of operation of such a stove.
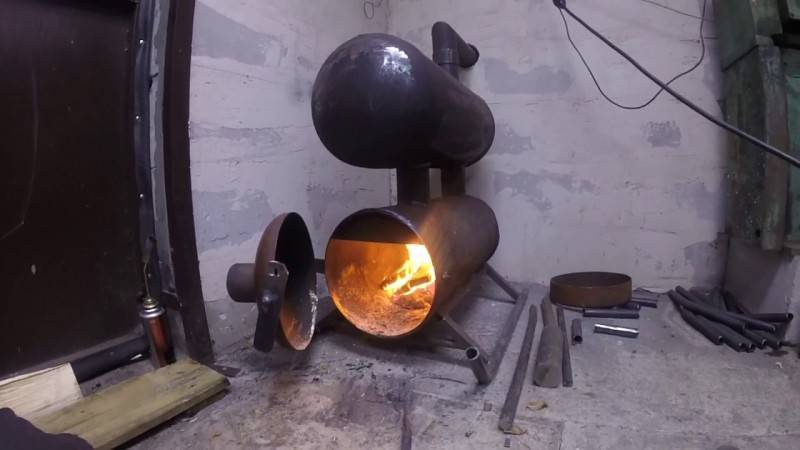
If something is not clear from our recommendations, watch the video of making a potbelly stove with your own hands.

We increase the efficiency of the furnace
door to the firebox and blewit is desirable to provide a damperside metal screens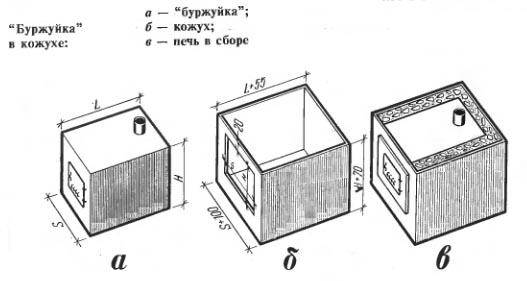 Potbelly stove in a casing
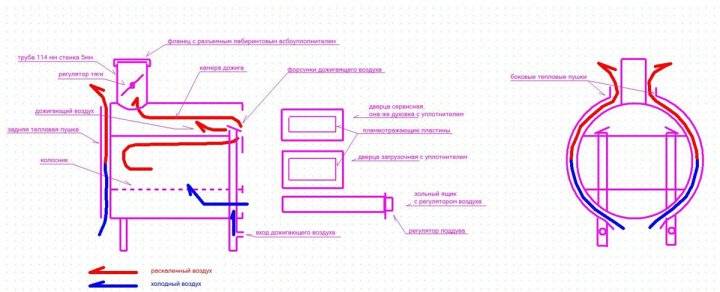 Round furnace with afterburner and casing with heat gun
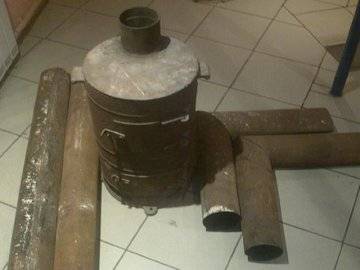
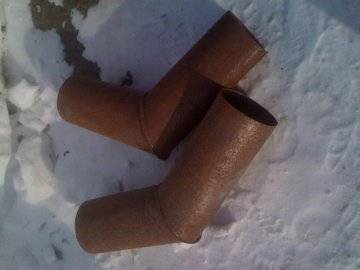 Stove with chimney elbowschimney throughputchimney blowing with a fanfirewood in the ovenslots and latchmetal stripesbuckets or metal box with sandsand filling or heat accumulator made of stones
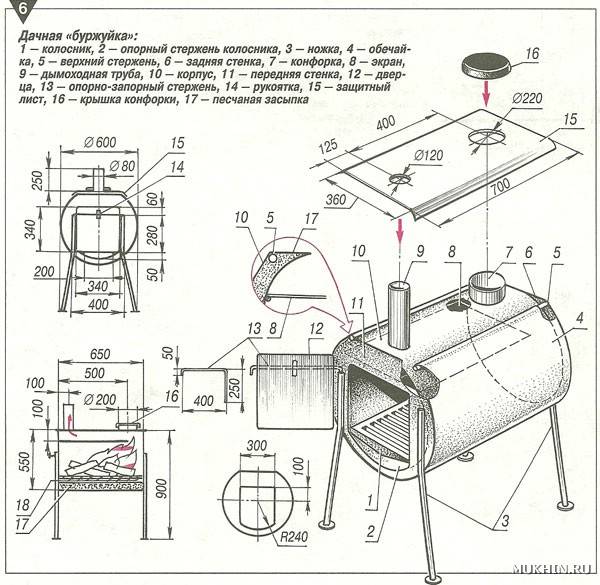 The scheme of a potbelly stove with a sand backfill, the furnace is made of a pipe with a diameter of 500 mm, its length is 650 mmlined with 1-2 layers of brick
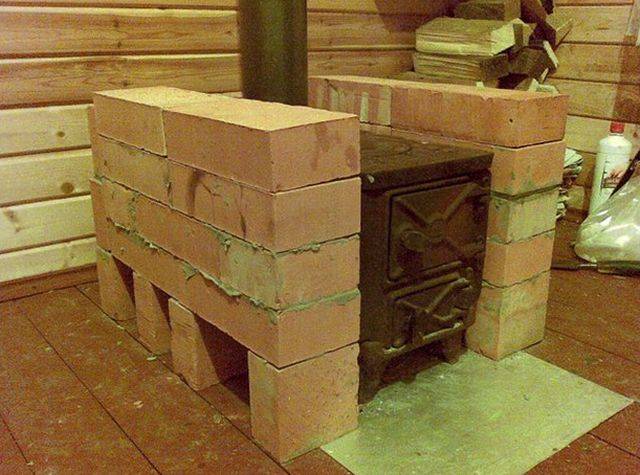 Brick screenthe area of its wallsbricks or sheet metalRelated video: Do-it-yourself stove stove
The choice of form and components
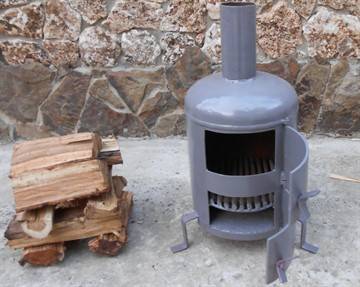 Potbelly stove is usually made of steel sheets in the form of a rectangular box. You can use a gas cylinder, but not a narrow industrial one, but a wide household one. The cylinder should be placed vertically, since the stove is designed for flat vaults and under.
In a horizontal orientation, rounded surfaces will collect flue gases into a bundle, for the afterburning of which the length of the "hog" (see below) will have to be increased to 12 m.
In addition, to ensure the normal operation of the stove, you will need a chimney and a screen.
Chimney
The throughput is slightly less than the combustion product performance of the furnace. Due to this, gases are retained, circulating in the firebox.
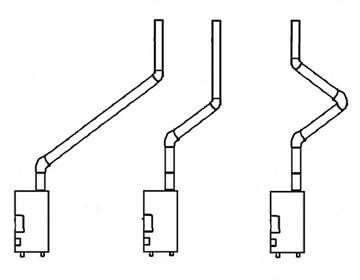 The effect is double:
- combustion products give off more heat;
- due to their circulation, air is sucked in and this ensures complete combustion of the fuel.
To comply with this condition, the pipe diameter is calculated by the formula D = (2.5 ... 3) V, where:
- D is the pipe diameter in mm;
- V is the volume of the furnace in liters.
Ideal ratio: D = 2.7 V.
In constructions with a grate and horizontal partitions in the upper part (smoke channels), the distance from the beginning of the grate to the lower partition is taken as the height of the furnace.
Screen
To increase the efficiency of the stove, it is required to provide:
- partial pyrolysis (decomposition of solid fuel into gaseous substances);
- afterburning of flue and pyrolysis gases circulating in the furnace.
These processes take place at a high temperature, for which the potbelly stove is surrounded by a screen on the back and sides. It returns infrared (IR) rays emitted from the enclosure, preventing gases from cooling quickly. Along the way, it solves safety issues: it makes the stove less traumatic and reduces the risk of fire (the screen temperature is lower in comparison with the body).
The screen should enclose 50% of the oven surface (a very important indicator). The width of the gap between it and the body is 50-70 mm. In addition, the screen increases the efficiency of the furnace when firing up: air moves in the gap along the entire body, taking maximum heat. In the considered version, the role of the screen is played by a container for heating water.
Design advantages
Despite the emergence of more and more economical wood-burning stoves and boilers, an old potbelly stove remains quite in demand, this is due to its advantages:
- simple device. There are no high-tech units in the furnace, so anyone can make it on their own;
- low cost. This "plus" comes from the previous merit;
- simplicity in operation. It is extremely simple to heat a potbelly stove, you do not need to know any subtleties. It is only required to choose the correct volume of the bookmark;
- omnivorous. The heater operates on any fuel, including used engine oil;
- multifunctionality. The potbelly stove can be equipped with a hob and a water circuit, which significantly increases its value for a living space;
- multimode. In addition to the usual functionality with direct combustion, a properly designed stove is capable of operating in the smoldering mode (the heating duration increases on one tab);
- efficiency. With all these advantages, there is also a good efficiency of 60%, if the assembly is performed in compliance with the rules set out below.
Diy potbelly stove with a water circuit
Do-it-yourself potbelly stove with a water circuit is done in several steps.
Forming furnace
First, a sketch is worked out, which indicates all the main dimensions of the future structure. For work you will need:
- hammer;
- Bulgarian;
- welding machine;
- pliers;
- overalls.
When drawing up a project, it is very important to take into account how thick the details of the future product will be. Having made the cutting of the metal, the bottom is connected to the walls, excluding the front side
Parts must be welded at 90 degrees
Having made the cutting of the metal, the bottom is connected to the walls, excluding the front side. Parts should be welded at 90 degrees.
The bottom of the stove should be installed 25-30 centimeters from the floor surface. After installing the legs, the floor covering will not get too hot.
A partition with holes is installed in the free space formed between the firebox and the blower to remove ash.
The blowing hole is made 3 centimeters smaller than the blower itself.
On the front wall, openings are made where the doors will be installed. The front part is equipped with canopies on which the doors are installed.
The chimney is welded to the top of the stove.
When the work is finished, a weld check is performed. Defects are not allowed. If everything is in order, add a water circuit.
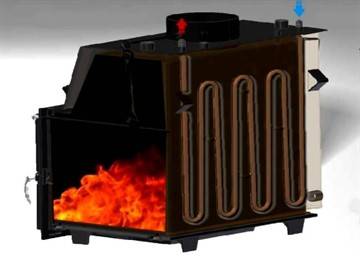
 The main part of such a stove is a heat exchanger. It can be made from sheet steel or use hollow metal pipes. In addition, such a "potbelly stove" includes:
- frame;
- radiators;
- pipes;
- steel sheets.
System installation
To create free circulation of water, two holes are made on the upper surface of the stove. Through one, water is supplied, through the other it returns back.
Any leftover material can be used to create the water tank. Buck usually takes up the most space... Before installing it behind the firebox, holes are made in it, where the pipes will be supplied. A metal sheet is installed between the firebox and the tank.
Then the piping is created. It can be of several types:
- two-pipe;
- collector.
A two-pipe design is considered more preferable. It makes it possible to change the temperature value using special taps. The room warms up evenly.
Collector wiring is very difficult to create with your own hands.
After installing the wiring, all pipes are connected to the radiators installed in the house.
It is advisable to install batteries under a windowsill. This will help increase the thermal conductivity of the potbelly stove.
The created water circuit is thoroughly checked. There should be no leaks anywhere.
The supply line is equipped with an expansion tank. It will prevent cold water from entering the system. Tank dimensions are calculated according to the volume of water in the system. The capacity of the tank must exceed this value by 20%. If everything is correctly installed, uniform heating of water in the heat exchanger will occur. The liquid will begin to move and enter the radiator. After cooling down, it will return to the heat exchanger again.
The created stove can be painted, if desired, you can overlay it with bricks. It all depends on the imagination of its owner.
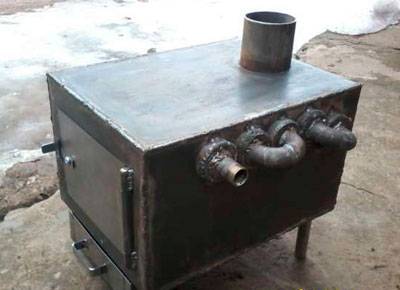
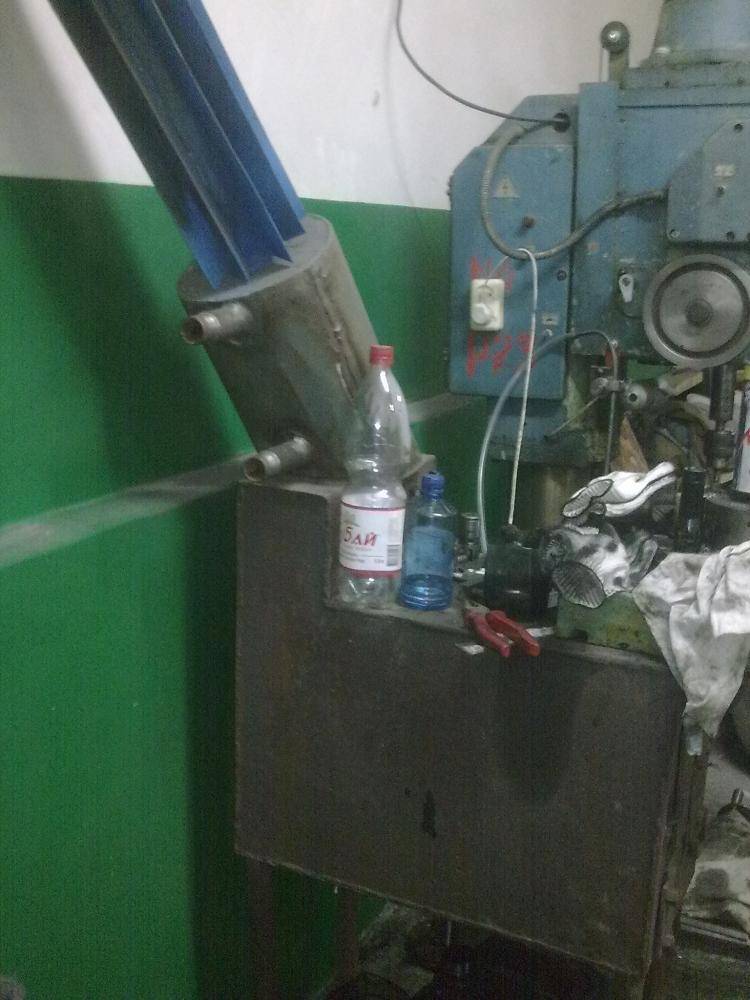
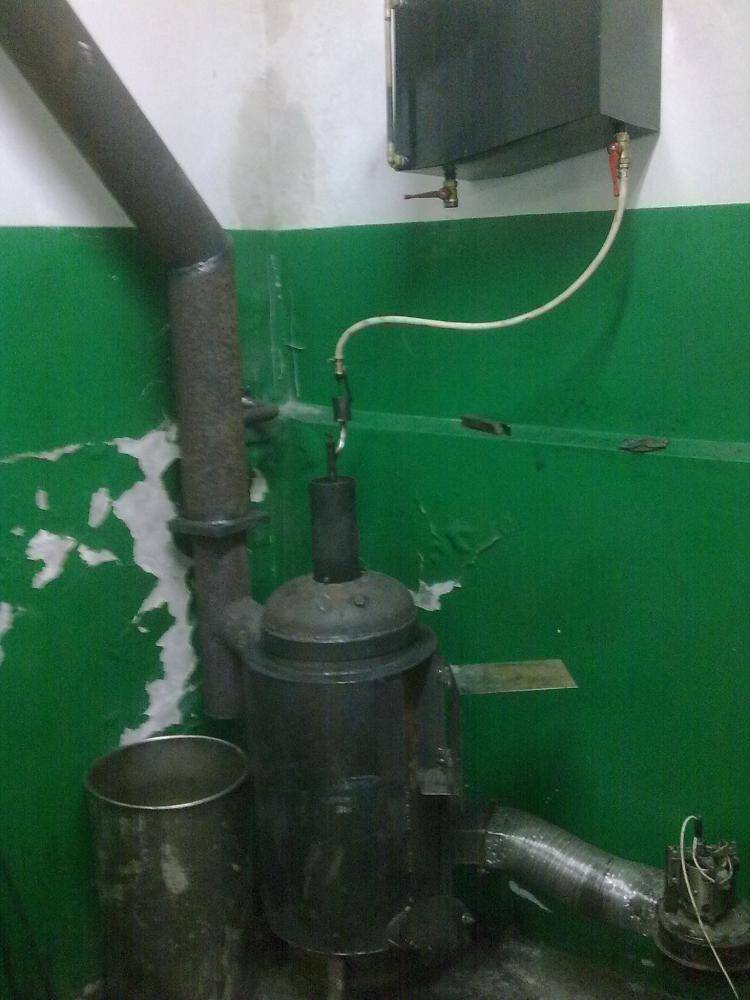

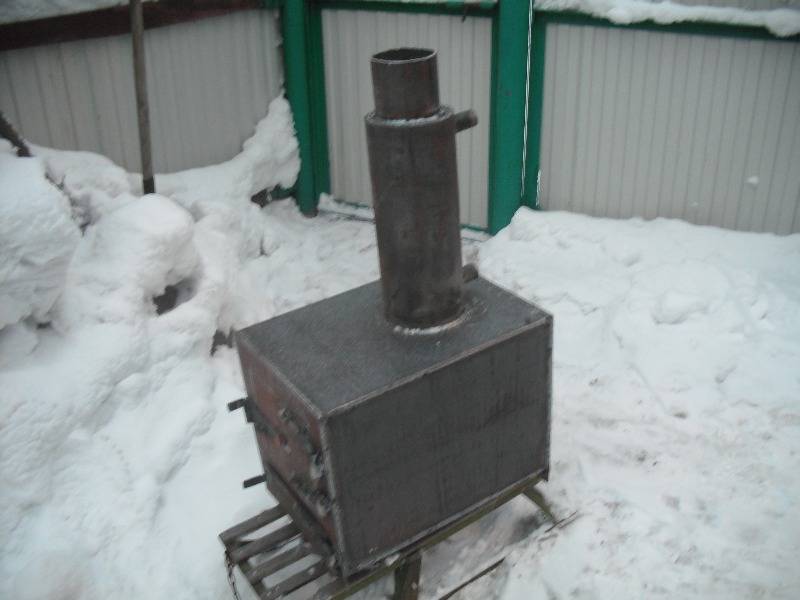
What is attractive about a potbelly stove?
Although, in this case, half of the thermal energy evaporates through the straight-through pipe. But no one writes off even a heating source that has rusted from time to time.
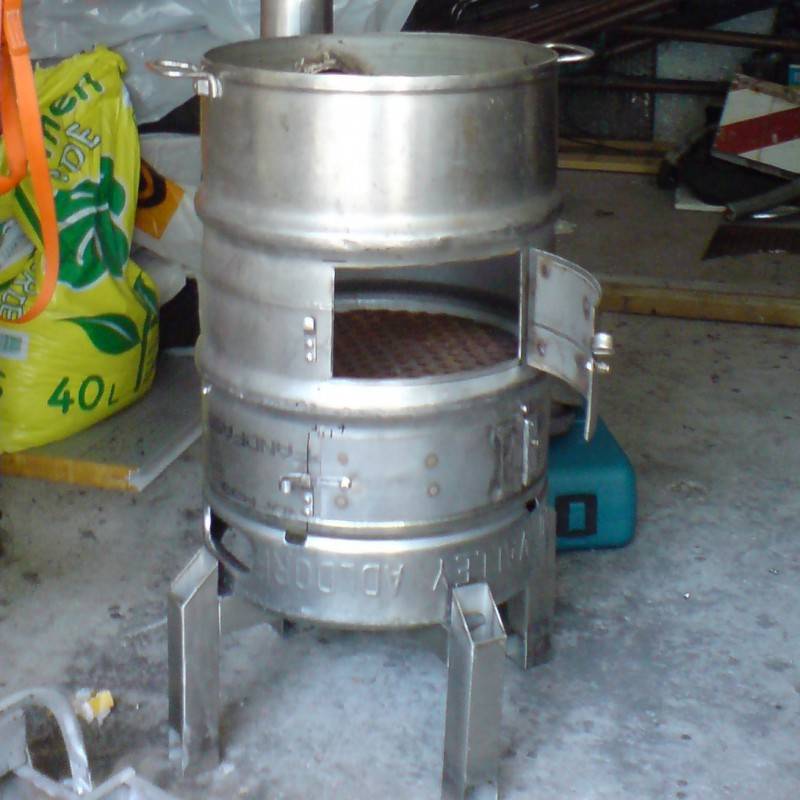
It is easy to make such a temporary stove in a day or two. But first draw up the drawings of the potbelly stove with your own hands. Much of what is stored in the closets of rural houses and summer cottages is used. These are milk and water metal (only not duralumin) cans, barrels for diesel fuel, vegetable oils, pipes, boxes, corners.
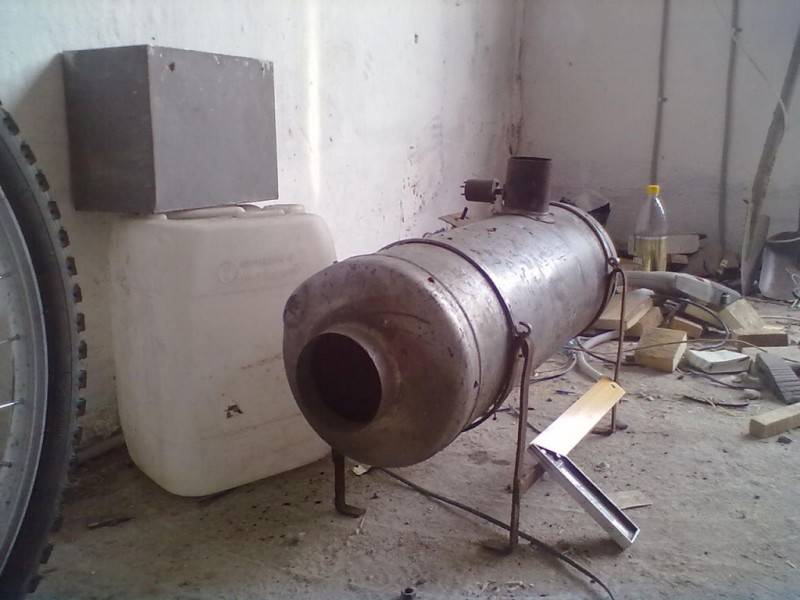
Nothing expensive, including a tool - every owner has it at hand in the villages. High-quality assembly using gas or electric welding.
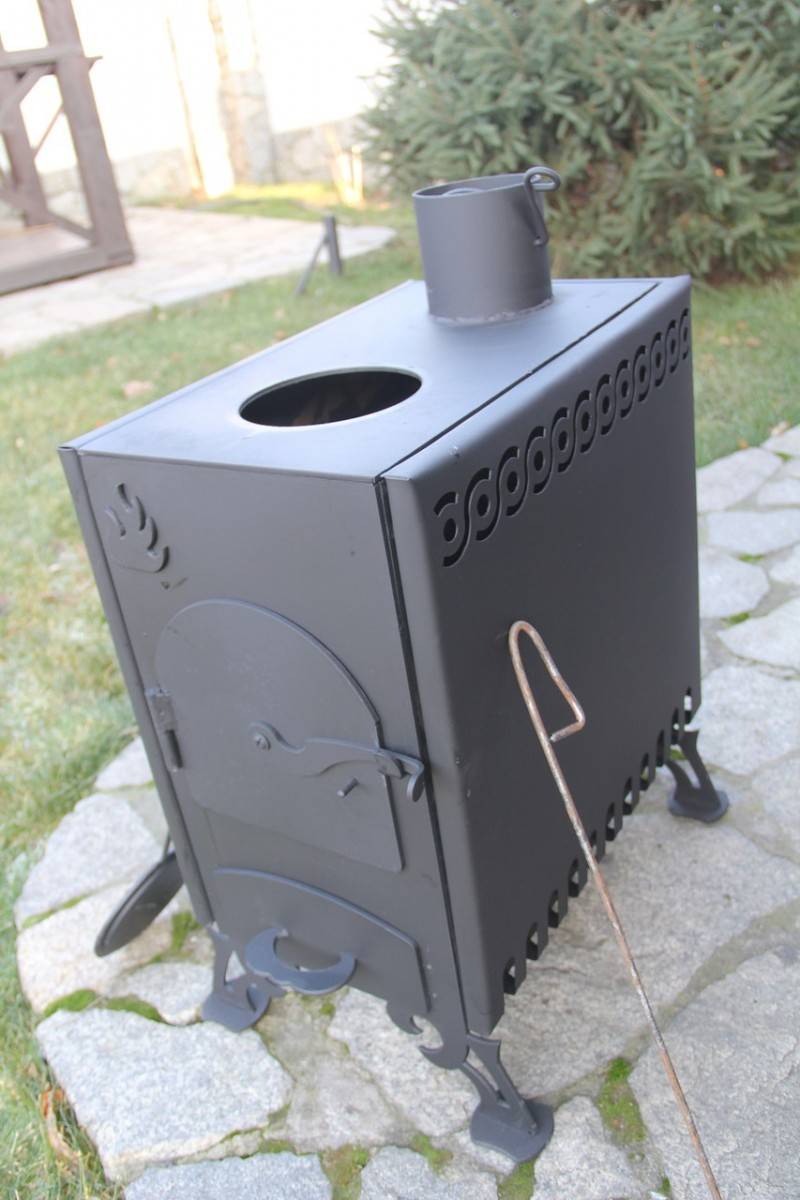
But neighbors who have units will help with this. Welding machines provide high reliability and rigidity of the assembly. About,how to make a potbelly stove with your own hands, step by step instructions below.

DIY potbelly stove with a water circuit
When installing this type of heating system, you can both build a water boiler into a potbelly stove, and create the furnace itself from scratch. Therefore, the process can be conditionally divided into two stages.
We also recommend that you study the article: Water heating from the stove on our website!
Formation of a stove-stove
Before starting work, drawings are drawn up, including all dimensions of the furnace, and the main materials for working with metal are prepared: a welding machine, a hammer, a grinder, as well as pliers and overalls.
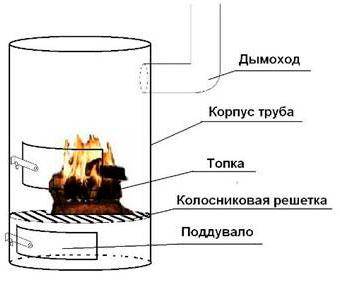
When making a diagram of a potbelly stove with a water jacket with your own hands, it is important to take into account the thickness of the elements of the future unit. After the metal has been cut out, you can proceed to further steps:
After the metal has been cut out, you can proceed to further steps:
Connect the bottom to the walls, excluding the front. All elements should be welded at right angles.
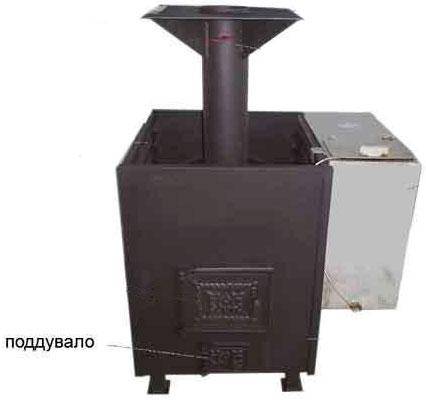
The blower opening should be up to 3 cm smaller than the blower itself.
- On the front wall, openings are made for the doors. Then it can be installed to the basic structure;
- On the sides of the front part, awnings are added, doors are placed;
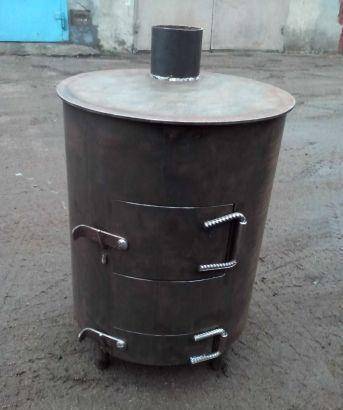
It is better to equip all doors with a deadbolt.
A chimney is welded to the top of the stove. Upon completion of the work, it is necessary to check all parts for defects in the seams. If none are found, you can proceed to the next step - adding a water circuit.
Adding a water circuit to a potbelly stove
The basis of this type of furnace is a heat exchanger, which can be constructed from different materials, for example, hollow steel pipes or steel sheets. In addition to a heat exchanger, to create a potbelly stove with a water circuit, you will need:
- Finished furnace body.
- Radiators.
- Pipes.
- Metal sheets.
We advise you to read about water heating from the stove on our website.
The installation of the system is carried out as follows:
In the upper part of the potbelly stove base, two holes are made for supplying and returning water.

To simplify the work will help drawing up a drawing of a future potbelly stove with a water circuit, created independently.
- A water tank is formed from metal or from other suitable unused materials; the largest space should be allocated for it in comparison with the firebox and ash pan. Holes are made in the tank for nozzles, then it is installed behind the firebox. The space is separated by a sheet of metal.
- Next, the piping is installed. It can be one-, two-pipe and collector.
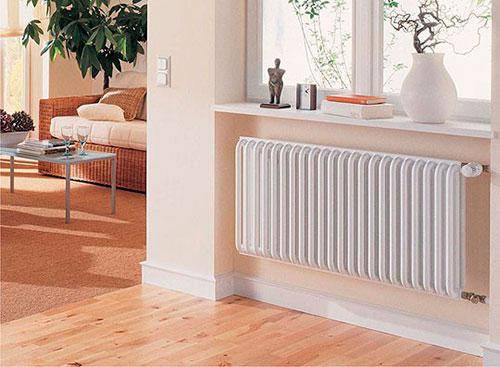
It is recommended to install radiators under windows. This will increase the thermal conductivity of the potbelly stove. The design of a potbelly stove with a water circuit is checked for holes where water can flow out through the circuit.
An expansion tank is installed to the supply line, which will exclude the supply of cold water. Its size is selected based on the volume of water that will be in the entire system - the tank should be made 20% larger.
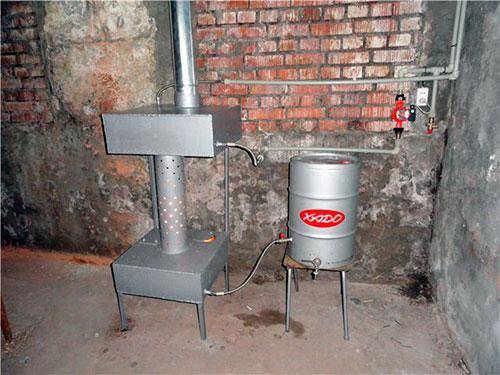
An example of a potbelly stove with an expansion tank
With proper erection, the water will heat up in the heat exchanger, pass through the pipes to the radiators, cool down and return to the heat exchanger again.
We advise you to read in more detail about the types of heat exchangers in addition to this material.
The finished structure can be painted or bricked, depending on which appearance is preferable for the owner.
Video: project of a potbelly stove with a water circuit
With the help of a do-it-yourself stove with a water jacket, you can significantly save on heating a country house. Such a structure can provide any room with the required amount of heat.
The principle of operation and operation of the stove
The principle of operation of a solid fuel potbelly stove is to burn fuel and maximize the use of thermal energy released as a result of combustion. To increase the efficiency, it is necessary to force the warm flows to stay as long as possible in the firebox. For this, the diameter of the chimney is made according to a certain formula. Due to the correct calculation, warm smoke does not immediately fly into the chimney, but makes several turns in the firebox, giving off all the heat.
How to properly heat a potbelly stove with wood? To begin with, a bookmark is made and set on fire. The first time, until the flame flares up sufficiently and does not cover most of the firewood, the blower opens to the maximum. Then the air supply is almost completely shut off so that the fuel begins to smolder.
It is not necessary to count on the afterburning of gases released as a result of pyrolysis, since the scheme of a wood-fired stove does not provide for a second afterburner. At the same time, the time between inserts will increase significantly and the furnace will operate in the mode of maintaining the temperature. If we are talking about a potbelly stove on waste oil, then the opposite is true. Most of the heat is generated by the combustion of gases released from the oil.
Exploitation
The potbelly stove is used taking into account some features:
- The chimney duct must be brought out into the street - through the ceiling or wall. It is forbidden to connect the pipe to ventilation. Crossing areas must be securely insulated with non-combustible materials.
- Modern designs of metal stoves, when properly assembled, can qualitatively heat one room with an area of up to 30 square meters. But at the same time, the garage must be well insulated.
- If the heating area is more than 30 m2, the organization of the circuit is mandatory.
- When there is a potbelly stove with a contour in the room, you must always have a box of sand and a container of water ready.
- It is necessary to equip a separate place for storing firewood to the stove, since their consumption will be rather big.
- Compliance with all operating and fire safety installations will keep the property intact.
Care rules
The stove will serve for a long time, provided that the owners follow the rules for caring for the equipment. These include:
Opening the condensate trap daily to drain water
It is placed on the chimney.
Before starting the heating season, the chimney is well cleaned of the soot that has settled in it with the help of special tools.
During operation, the stove body and chimney are regularly inspected to prevent exhaust smoke from entering the garage.
It is important to constantly monitor the condition of the hood and supply ventilation .. Recommendations for the maintenance of the structure
 Recommendations for the care of the structure
Self-construction of a metal wood stove is not only effective. With the right approach, such a stove becomes a real decoration of the room. But the main thing is to follow all the rules of construction, maintenance and operation.
Potbelly stove device
Storing your car in a warm garage during the winter avoids many problems. Correct start of the engine, clean glass, ease of repair, maintenance - all this significantly increases the operating time of the machine, preserving health, including the owner. In a warm room, the body is reliably protected from corrosion. Those who like to repair and improve their car themselves know that rubber and metal become brittle on frosty days, and repairs are complicated by constant breakage of bolts, bursting of plastic parts. A comfortable temperature helps to avoid these problems.
They make it like this:
- holes are cut in the steel barrel;
- pipes and fittings are attached to the holes by welding.
 The device of a modern potbelly stove
For these structures, it is easy to equip the body, the main thing is the organization of the modifications.
Heating with a potbelly stove is allowed - it heats up quickly, gives off heat. It is quite possible to construct a stove for heating the garage independently, subject to the availability of a small welding machine.
Sometimes brick stoves are built in garage rooms, but they will take up a lot of space, they will not be able to heat the room faster than a stove. The name of the device is arbitrary, because in fact, any fuel material can be placed in the structure.
Preparatory work before assembling the heater
The potbelly stove is a source of increased fire hazard. Therefore, placing it in the corner of a room or near a wall, it is necessary:
- Hang protective screens on the oven.
-
Raise it from the floor, and protect the floor under it near the firebox and ash pan doors with tiles or asbestos slabs.
The walls and floor in the place where the stove is installed must be protected with fireproof materials, and the stove itself must be raised on a heat-insulating base
- Mark the chimney hole in the wall. Outline its attachment to the outer walls.
- Mark the location of the expansion tank.
- Lay the lines with water.
- Select the boiler model.
To make a temporary stove, you will need the following tools and materials:
- Bulgarian.
- Electric or gas welding.
- Electric drill and drill.
- Locksmith tools: pliers, hammer, file, sanding paper, ruler, tap.
- Plumbing: American fittings, nuts for fittings, articulated taps, adapters.
- Sealant or silicone for fittings.
- Alloy steel sheet metal.
The following can be used as a basis for the manufacture of a furnace:
- Metal barrels with a volume of 20 to 200 liters.
- Car disks from 2 pcs.
- Propane or carbon dioxide cylinders.
- Thick-walled metal pipes with a diameter of 150 to 350 mm.
-
Metal flasks for water for 20, 30 or 40 liters.
One of the most popular solutions for making a potbelly stove with your own hands is the alteration of an old gas cylinder.
If these materials are at hand, then 2/3 of the design of the future stove is ready. It remains only to collect everything into a single device.
We select the available material for the manufacture of the device. We take into account that for an aluminum recuperator, the material needs twice as much as for a copper one due to the properties of thermal conductivity.
- Copper or aluminum tube with a diameter of 16 mm and a length of 50 m.
- Gas cylinder or compressed gas cylinder.
- Chimney pipe with a diameter of 150–210 mm.
Step-by-step instructions for making a temporary house with a boiler:
-
We cut off the gas cylinder. We weld the legs.
First, the upper part of the gas cylinder must be cut off.
- We cut out a hole for the chimney with a diameter of 150–210 mm.
-
We make holes for the grate with a diameter of 30 mm (24–25 pcs.) In the lower part of the cylinder. The air flow through the combustion chamber must correspond to the diameter of the chimney.
Holes are made at the bottom of the cylinder to remove ash and create traction
-
We bend the metal sheet and weld it to the bottom or to the legs. This is how we form the ash pan. If the room allows, you can make a box for collecting ash and put it under a stove.
To the surface where the holes are drilled, we weld the metal box for the ash pan
-
We make the stove door. We solder the handle to the lid. We fix the canopy. We attach the cover to the firebox. There is no need for an additional air duct, there is enough air flow through the openings of the grate.
For fuel combustion, there is enough air that will flow through the openings of the grate
- We carefully wind the heat exchanger tube (copper or aluminum) onto the chimney pipe. So that it does not spring, it should be soldered through one turn to the chimney. For this we will use welding.
- After completing the assembly of the heat exchanger, we attach adapters with taps at the ends of the tubes using fittings. On the lower branch pipe, we install a tee with a hinged valve for draining and filling water into the heat exchanger.
- We carry out hydraulic tests. Water should be taken into the resulting system and tested under pressure of 4–6 atmospheres. Excessive pressure allows you to test the strength of all units, connections and check the tightness.
What is a potbelly stove with a water circuit: the advantages and disadvantages of a popular stove
A brick stove with water heating heats up the premises both due to the hot structure (like a conventional stove) and the coolant circulating in the system. Water is usually used as a heat carrier.
A metal element is provided in the design of the furnace for heating the coolant. In fact, it is a heating boiler to which pipes are connected. The boiler is installed at the firebox.
Such ovens are virtually universal; they are suitable for outbuildings and multi-storey country houses.
You can make a fireplace stove with water heating by simply installing a glass door. Such a stove will become not only an important functional element, but also a stylish part of the interior of the house.
But, when working with such a furnace, a number of requirements must be observed:
- the operation of the furnace must be constantly monitored, firewood and (or) coal must be laid on time, the ash pan must be cleaned;
- it is advisable to use the stove only in winter. It is not worth using it for cooking in summer, since a lot of energy will go to the heating system, which is not needed in warm weather;
- you need to regularly check the condition of the chimneys;
- due to the high temperature, the heat exchanger may burn out over time; to replace it, partial disassembly of the furnace will be required.
For the manufacture of the simplest heat exchanger, sheet steel can be used. Such a heat exchanger can be easily cleaned of ash, but is not capable of heating large areas. Tubular models have higher efficiency and are suitable for large buildings.
In the photo of stoves with water heating, you can visually familiarize yourself with the various design options for heat exchangers.
Where to use a homemade furnace for mining
Since in the process of combustion, engine oil, especially used oil, does not emit the most pleasant smell, and from the point of view of health it is not very useful, it is better not to use this kind of stove in living quarters. If there is no other way out, a high-quality removal of combustion products is required.
Usually, stoves are mounted in non-residential premises - utility rooms, garages, sheds, workshops, and so on - where constant heating is not required, but only heating the air for a relatively short time.
Due to the fact that even the simplest designs of such a "garage potbelly stove" make it possible to regulate the intensity of fuel combustion, it is possible to provide either an economical mode of its use and gradual heating of the premises, or increased consumption with very rapid heating of the air volume.
