The style of modern tiled fireplaces
The native style of stoves with tiles is ethnic Russian. However, the harmonious design, good quality materials, thoughtful design of the heater itself allow you to create amazing design installations of a wide variety of stylistic trends.
Especially popular stylistic concepts:
- Baroque;
- Modern;
- Panel compositions;
- Eastern motives;
- Art Nouveau;
- Ecological loft;
- European country.
The stylistic presentation is largely influenced by the "homeland" of the finishing material. Tiles from the town of Delph are traditionally decorated with cobalt painting. The Flemish school is characterized by the use of blue and chocolate ornaments on white or ivory canvas.

Dutch graphics, which were complemented by interesting French motifs, were distinguished by especially elegant and sophisticated Provencal watercolors. English fireplaces were lined only with the original British symbols. And today these motives can be freely used these attributes, creating an aristocratic "purely British" interior.
What are tiles?
The meaning of the word (etymology) is interpreted by many in different ways, but it came from the old word "to reflect", that is. cut. In essence, tiles are baked clay tiles (ceramics), which differ from others in their configuration, namely, the presence of a rump.
Rumpa, what is it and why is it needed?
The tile rump (see fig.) Is a box-shaped protrusion on the back (back) side of the tile. Rump gives strength to the tiles and increases the heat capacity of the oven. In size, it is slightly smaller than the area of the product.

It is this key feature that makes ceramic tiles the ideal cladding material for home stoves and fireplaces.
The same hollow structure is characteristic of decorative tiles for walls, facades, fireplaces and stoves.
Advantages of tiles over tiles
- strength and rigidity. Achieved due to the thickness of the product - the tile is 2 times thicker than the ceramic tile;
- the ability to withstand any temperature;
- resistance to temperature extremes;
- heat accumulation. A well-heated stove is capable of giving off heat during the day;
- environmental friendliness. It is achieved due to the fact that clay is used in production, as well as due to the fact that dust does not linger on the surface of the tiles (in particular glazed ones). It does not burn and does not emit substances harmful to users;
- ease of care;
- fuel economy. The headroom chamber retains heat for a long time, due to this, fuel consumption is reduced and the heating duration is increased;
- exclusion of the possibility of getting burned in contact with the surface of the furnace. Due to the inner chamber, the temperature of the tiled stove (outer walls) is not high;
- low rate of moisture absorption;
- the heat generated by a tiled stove is comparable to that of the sun;
- long service life, confirmed by practice;
- historical value. The old tiles are well preserved in the estates of the Russian nobility. And today, many users are striving to make housing in a traditional style.
Of course, the aesthetic properties of tiles are beyond competition. Due to the variety of their types, any design project can be realized. The tiled stove will perfectly fit into any design - from classic to modern. Even laconic high-tech could not resist the charm of stove tiles.
Tiled stove in the interior - photo


Choice of tiles for cladding
Tile masters have created many different tile configurations to create a beautiful and functional tile stove. So, for example, even tiles are used when finishing planes; for facing corners, corner tiles with a head of the corresponding configuration are provided. Bends and decor are made with shaped parts (curb, straight and corner cornice, grate, embossed inserts, cover shelf, firebox framing).
Not only the types of tiles can be different, but also the way of making the front surface. Here they distinguish relief, smooth, with or without a pattern, glazed and terracotta surfaces. Whole schools of ceramists determined the method of drawing and its color scheme. Popularity was gained by Dutch, Spanish, Russian tiles.
But the sizes of the tiles, on the contrary, are unified and regulated by the provisions of GOST 3742-47. The document contains information on tile geometry and permissible deviations from the norm. The latter are no more than 1 mm. Standardization made it possible to avoid long-term adjustment of tiles to each other, which significantly reduces the time of facing.
How to check the quality of a tile
When buying a tile, you need to be guided not only by its aesthetic properties, but also pay attention to such indicators as:
- raw materials. Craftsmen claim that a durable tile can only be made from white clay. Colored clays contain various impurities that affect the quality;
- the presence and size of pores. You don't need to break the product to see the pores. They are clearly visible at the ends of the tile. The larger the pore size, the more moisture the product can absorb. The percentage of moisture absorption determines the resistance of the tile to temperature extremes and mechanical damage. Accordingly, the larger and larger the pores, the lower the product quality;
- the method of making the tile. In industrial volumes, tiles are made in two ways: punching, pressing and casting. In the first case, wet clay is used, which simplifies the production process, but increases the drying time of the product. In addition, during the drying process, a wet product can lead to a violation of the specified dimensions. The second option is more laborious, but the finished product is more durable and has identical dimensions. The third method is used to obtain "tiles for tiles";
- number (quantity) of firing. They can be identified by the quality of the front surface. If it is slightly cracked and has a dull shine, it means that the tile was burned once.
Types of tiles for stove and fireplace
By form
The tile on the stove can only be installed intact, otherwise its unique heat storage properties will be reduced to zero. Therefore, from the point of view of the form for tiles, there are three main elements:
- flat (frontal). Designed for facing flat surfaces;
- corner. Accordingly, for facing corners;
- shaped. They allow you to veneer protruding parts (for example, cornices) and highlight areas. They are mainly used as decorative tiles.
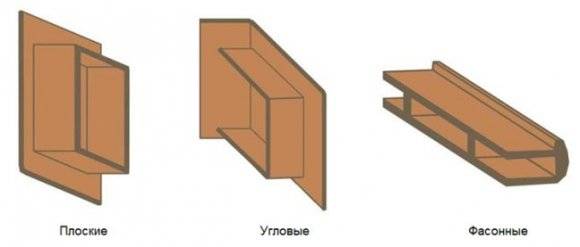
The variety of tile shapes is not limited to standard elements, there are different options (as in the picture)
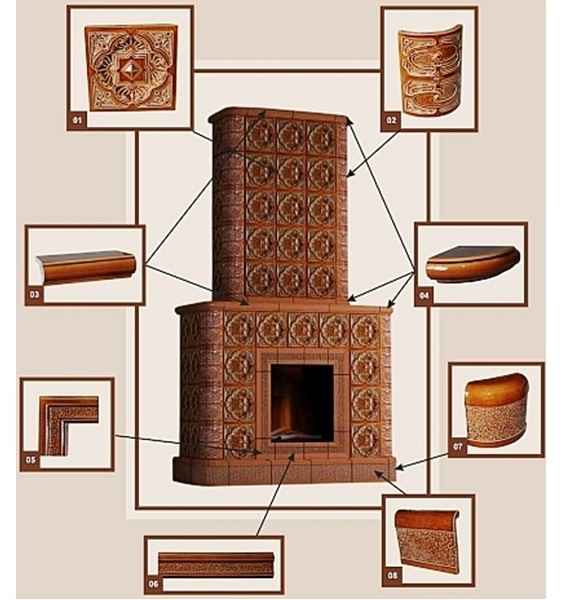
By surface type
- glazed (glossy);
- not glazed (matte, terracotta). This type is distinguished by a lower price in comparison with glazed products.
By the style of the ornament
The theme of the drawings and the colors of the tiles convey the spirit of the country in which they were created.
- Dutch tiles... They have a characteristic blue color scheme on a snow-white background. Of the motives, sea, steppe landscapes, ships, mills, shepherdesses, etc., prevail.
- Spanish tiles... The influence of oriental arts is felt in them. Intricate ornaments reflect the lifestyle of the East.
- German tiles... They are distinguished by the clarity of the lines and the laconicism of the drawing. Tiles made in Germany have the greatest dimensional constancy and practically do not need additional processing before facing.
- Russian tiles... They amaze with a riot of paint and a variety of ornaments and patterns. Different regions have their own styles of drawing and relief on tiles.
- Yaroslavl tiles... One of the brightest representatives of Russian ceramics. Their difference is in a complex pattern and muted colors.
To size
It should be noted that the size of the tiles for each manufacturer may vary. This is due to the production technology. Nevertheless, the tiled tiles correspond to the dimensions:
- tile thickness 45-50 mm;
- dimensions of a square tile (length-width) 200x200, 220x220, rectangular 205x130 mm.
These indicators are regulated by GOST 3742-47.
By the type of rump
- simple... Rump has an inclined cut;
- with side... The presence of the side makes the fasteners more convenient (due to the presence of fastening holes in them) and reliable.
There are rumpers with a more complex configuration of the side and the presence of several cameras.
The most popular type of product among users today is considered to be a glazed tile with a printed pattern.
Facing the finished oven with tiles
Now, let's talk about the second option - facing the old (already operating, working) stove with tiles.
In this case, ceramic tiles are laid according to the following scheme:
- holes are drilled in the brickwork of the working oven for a bundle of masonry and tiles;
- self-tapping screws with wire are inserted into the holes made. They will be the bonding element that holds the tiles on the surface of the stove or fireplace;
Note. To fix the wire in the masonry, use short self-tapping screws with glue applied to them. At the same time, they need to be wound up not by a shock method, but by screwing them in.
- fastening steel pins to the wire;
- installation of the tile on the pin and subsequent bending of the upper edge of the pin;
- filling the space between the tiles with dry mortar.
Note. The construction market offers modern solutions for gluing tiles to brick surfaces. Such an adhesive can withstand significant temperatures and is able to hold the tile finish without deformation, taking into account the significant weight of the tile.
How to fix the tiles to the stove (finished) is shown in the video:
Tiles for fireplaces and stoves can retain their charm for a long time with proper care. It consists in the timely wiping of tiles from dust, soot, and replacement (restoration) of damaged elements.
Facing the stove with tiles - step by step instructions
The tile finishing technology, like any construction process, is consistent, starting with the formation of the first row.
The first row of tiles or the so-called "hooves" set the tone for the entire building. Their correct laying is the key to fast and high-quality further installation.
Installing the first row
- selected and numbered tiles are immersed in water. This will avoid a situation where the clay of the tile will draw moisture out of the solution;
- after removing, the tiller of each tile is half filled with clay. Filling the tiller increases the heat transfer of the furnace;
- then a filler is stuffed into the clay. As such, brick, gravel, pebbles can act;
- the resulting voids are filled with clay;
Note. Many craftsmen use a ready-made mixture to fill the rump. The composition of the mixture: clay, quartz sand and brick in a ratio (ratio) of 1: 2: 2.
- the laying of tiles begins with the installation of corner elements;
- installation of central tiles. After the first row is laid out, it is necessary to pull the tiles together with a steel pin. To prevent the tiles from slipping, it is recommended to bend the pin from above. The bottom edge will rest against the tiller;
- tiles in vertical and horizontal rows are joined together using steel brackets. a soft wire attached to a pin will connect a row of tiles to a row of oven bricks.The wire is tied to the pin. At its end, a loop is formed, which is wound into the brickwork. For a reliable bond, two loop wires should be tied to each pin.
Note. Loops for connecting with the kiln masonry are installed during the construction of the kiln. Pre-installed, they will interfere with work.
After the first row is laid, you need to clear the seams. In the future, this will help to more accurately apply the grout. And also clean the tiled surface from rinsing.
Laying subsequent rows of tiles
After the first row has been laid, another one is exhibited in the same way. After this, the masonry of the stove or fireplace itself is performed. After several rows of bricks have been laid, the space between them and the tiles is also filled with clay.
Cleaning the oven and grouting the tiles
The cladding of the tiled stove is completed by cleaning the surface. For this, use a soft cloth or paper. The final touch is the sealing of the joints (grouting), if such are allowed during the work. For grouting the joints between the tiles, use a liquid gypsum dough, which is used to lubricate the seam intervals. After 10-15 minutes. after the dough has dried, remove its remnants with a soft cloth.
Note. No matter how much you would like to heat the built and lined stove, you should not do this earlier than a week after the completion of all work. And even then, the trial firebox lasts no more than an hour. A full check can be performed after the clay mortar is completely dry - after 3-4 weeks.
Which tiles are suitable for decorating a fireplace
Basic selection parameters:
- impact resistance, wear resistance - directly affect the durability of the coating;
- design - the appearance of the fireplace should correspond to the style of the room;
- moisture resistance - if there is water in the room (sauna, bath);
- resistance to temperature extremes - it is very important if the hearth is the only source of heating the room;
- thickness - the more, the better, an option not thinner than eight mm is recommended;
- porosity - it is advisable to use low porosity, as it is more durable;
- tile marking - the use of category "A" is more acceptable, since the dimensions of the product are as accurate as possible, the pattern is clear, which is very important when laying out complex patterns.

There are many types of finishing materials based on ceramic tiles:
- terracotta is a strong and durable material, frost-resistant and vapor-proof. The tile does not crack upon impact, practically does not scratch, is suitable for damp, heated and unheated rooms, can be attached to any surface. A fireplace, decorated with terracotta tiles, heats longer than others, the coating tolerates sharp temperature changes well;
- tiles - are used for highly artistic decoration of stoves, most often they are covered with glaze, almost any pattern is applied. The heat transfer of the product is high, it is easy to take care of it, but the cost of the material is high;
- porcelain stoneware - combines the best properties of granite and ceramics, resistant to temperature extremes, does not crack, does not mold, does not fade in the sun, is offered in various colors;
- clinker tiles - made from several types of clay, with the addition of chamotte powder. The thickness of the material is 9-13 mm, it is easily mounted using hot melt glue, but when decorating a summer kitchen, the latter is chosen to be frost-resistant. Clinker tiles are low-porous, wear-resistant, shock-resistant;
- majolica - has been used since ancient times, in terms of its composition it is an improved terracotta, with a pattern applied to it, covered with a transparent glaze. The price of the material is high,
- the tile is heat-resistant, tolerates temperature changes well, but in the cold the material quickly deteriorates, crumbles. For fireplaces matte options are preferable - they do not crack. Laying is carried out using heat-resistant compounds or without glue - in a metal frame;
- fireclay tile - made of stone flour and refractory clay, has acid resistance, fire resistance, perfectly tolerates ultra-low temperatures, does not wear off.
DIY tile installation technology
For self-laying, a special composition is purchased - tile glue. On the seamy side of the tiles, there are usually special notches that increase the adhesion of the parts to the base. It is recommended to reinforce the structure with a coarse-mesh reinforcing mesh fixed on self-tapping screws or nails. Next, the mesh is covered with a mixture of sand, clay, high-grade cement, with the addition of polymers. The seams are made out with grout so that they are even, special plastic crosses are used when laying. The evenness of the coating is checked with a level and a plumb line.
Required properties
Let's dwell on the stage of choosing a tile
It is very important to immediately make sure that she:
- Resistant to high temperatures.
- It can increase the efficiency of the fireplace by giving off heat well.
- Wear-resistant. No one wants to constantly see how the tile, which was supposed to delight for many years, scratches or peels off, for this it is important to make sure that it is strong enough and that no scratches are afraid of it.
- Made from a material with low porosity, as high porosity reduces strength.
Does not absorb much moisture. With a large coefficient of moisture absorption, the material becomes more brittle and easily destroyed. - Eco-friendly. When heated, the facing material can emit substances that are harmful to health, therefore, it is necessary to make sure that the composition is safe.
And, of course, it looks good.

To partially ensure compliance with all parameters, you just need to pay attention to the following qualities:
- The same size. To determine this, you need to attach the cladding materials to each other and make sure they match and fit snugly. Unevenness can cause it to lie down incorrectly, and this will reduce the quality of the finish.
- The same thickness of all elements.
- The color of all elements must be the same.
- There should be no cracks or chips. Their presence will indicate fragility and that the material may burst at the first heating.

Drawing (painting tiles, engobing)
Like almost all ceramics, tiles can be painted using the following methods:
Cold painting
The drawing is created with ordinary oil paints. Before covering, the tile must be covered with natural linseed oil, dried for 1-2 days, and then painted.
After the paints have dried, to obtain a more beautiful surface and give the paint durability, the tile can be coated with oil varnish. The good thing about this method is that it does not require additional firing.
For those who make do-it-yourself stove tiles, this is the least labor-intensive option. At the same time, different parts of the pattern can be applied to different tiles. When laying out the tiles, you will get a large pattern on the entire surface of the stove.
Painting with colored engobes (engobing)
An engobe is a decorative coating made of liquid clay (clay slurry), which is applied to ceramic and pottery products before firing to obtain a smooth surface or to give the desired color.
An engobe for painting tiles can be obtained in two ways.
First, choose different types of clay. Secondly, tint the white clay with coloring pigments. This drawing technique is divided into two subspecies:
- applying clay, brought to the consistency of thick sour cream;
- dipping the tile into water and then into a white engobe. After the white background dries out (but does not dry completely), a drawing is applied to it with colored engobes.
Tiles engobing - video
Note. If further glazing of the tile is not planned, the craftsmen recommend adding 10-20% flux to the engobe. Flux is a silicate glass that imparts gloss to paints. Glass powder is made independently by pounding glass in a container.To prevent the spraying of particles, work is performed with glasses, gloves, and a container with a pestle is placed in a strong transparent plastic bag. Large particles are removed by sieving the powder through a sieve. A nylon stocking pulled over a base, for example, on an embroidery hoop, is good for these purposes.
The drawing will give a smooth or embossed tile a unique beauty. As a theme when choosing a picture, you can use motives that are conveyed by Dutch, Spanish or Russian tiles.
To fix the applied pattern, the tile must be re-fired.
Making a template for a tile
To make a plaster cast for future tiles, you must first make a template. Its manufacture consists in the fact that on a clay layer with a thickness of 20-30 mm. a drawing is applied, which is supposed to be obtained on the front of the product.
Different types of tiles are known: smooth, embossed. On smooth tiles, you can apply a drawing, embossed tiles can be painted. Consider this when forming a template. The figure shows the process of making a square template.
Note. The size and shape of the tile should be selected based on the ease of installation and the dimensions of the kiln for firing.
Forming a tile pattern If the pattern is simple, for example, geometric, it can be formed with your fingers (sculpted). For a more complex pattern, you need to use a stack (tool).
The rollers are formed by laying a collar around the edges of the workpiece.
Note. When forming a pattern from clay, you need to remember that the finished product should easily get rid of the template, so it is better not to make too small details or right angles. Deepening when removing clay and sculpting a pattern must be done so that an open cone is obtained in the section. For clarity, look at the baby bead, it is made in this way.
The final preparation of the template consists in selecting excess clay or adding the missing one (in case of accidental cut, sometimes it is necessary to add clay so that the pattern does not suffer) and making the surface smooth. To do this, use a damp, soft cloth.
Professionals can make templates for each individual tile. And when put in place, they will form a large pattern on the stove.
Due to the complexity of manual work, tile stove tiles are very expensive.
Stone cladding
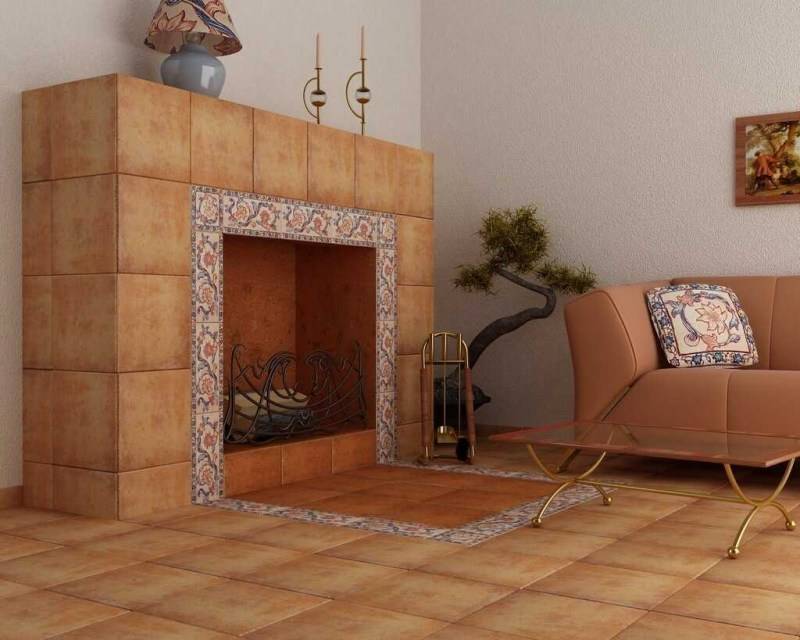
The use of natural or artificial stone, as can be seen in the photo of the fireplace finish, will create a very durable coating. Along with this advantage, the simplicity of the masonry should also be noted. After all, the master will not be required to create perfectly even seams. On the contrary, some carelessness can become a highlight of the decoration.

Among the most commonly used materials are:
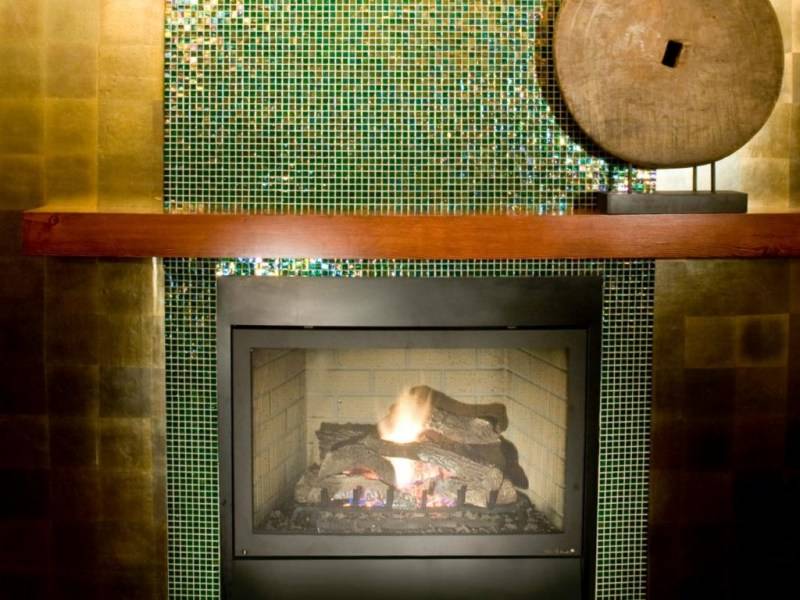

Limestone with sandstone allows you to choose any style of decoration, but their strength is low, they strongly absorb soot.
Granite - can be used both unprocessed and after polishing. The color palette is varied. The stone is durable, resistant to detergents.
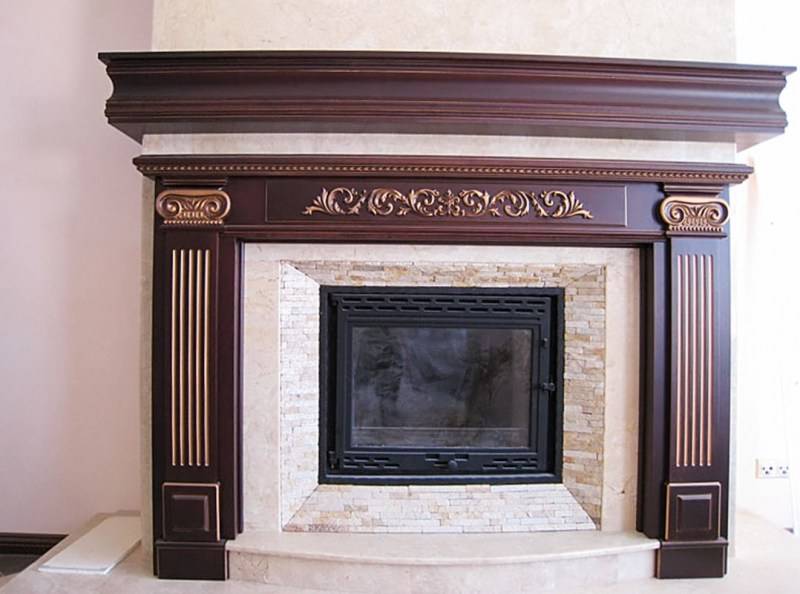
Slate is an aesthetic and durable material, but picky about the right choice of style.
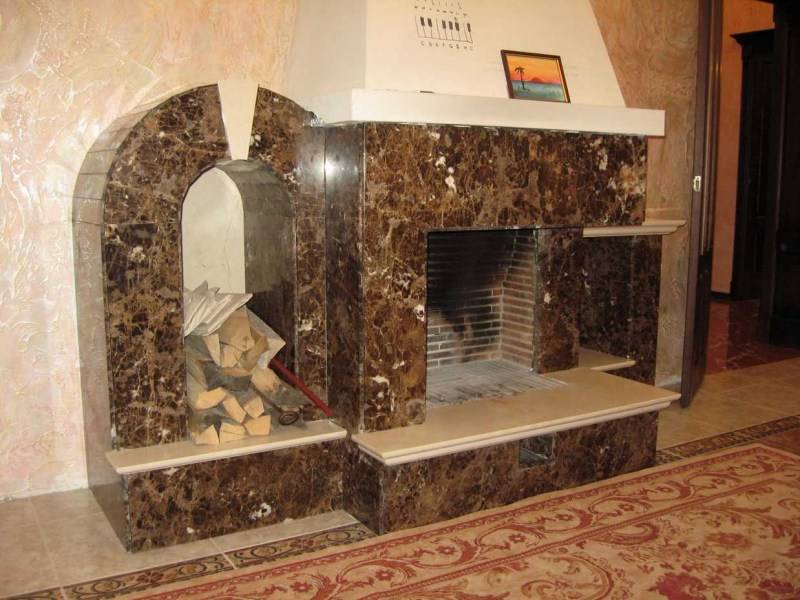
Marble is distinguished by its decorative variety and the possibility of decorating a fireplace in interiors decorated in many styles.

Manufacturing technology
The production of tiles that you see in stores is established in factories - glaze is applied to standard forms by machine in the form of a print. Such modern products can be called imitation tiles, since the tiles were originally made by hand. Now you can also buy handmade models, but they will cost more.
The technology for the production of tiles is relatively simple, although it is a laborious process:
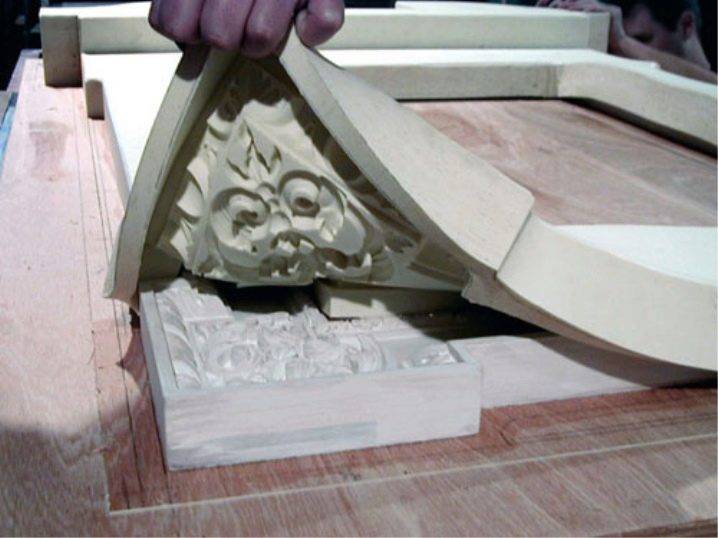
- First you need to sculpt the product with the desired relief. For this, ordinary sculptural plasticine may be suitable - if you wanted to make the tiles yourself, this material is the most affordable.
- The plasticine mold should be placed in a larger container or box. The front side of the tile should face outward.
- Gypsum must be carefully poured into the container and allowed to harden.
- After that, the gypsum blank is turned over, and the plasticine is removed - it is no longer required.
- Clay is laid out in the workpiece and fired. At home, the required temperature for firing cannot be achieved, however, some workshops offer the service of using their furnaces.
- After firing, the tile is covered with glaze, you can draw any patterns on it.
- Then, together with the glaze, the tiles are fired again, and the product is ready. Many typical tiles can be made with one plaster mold.
Design
Now tiles are used to decorate stoves in private houses or in the country, as well as decorative electric fireplaces in apartments.
It is very important that the tiles fit harmoniously into the design of the entire room. The easiest way to do this is if you equip a new house and think over the entire design project.
If you have already finished and furnished the room, and then decided to cover the fireplace with tiles, it will be more difficult to choose the appropriate options.
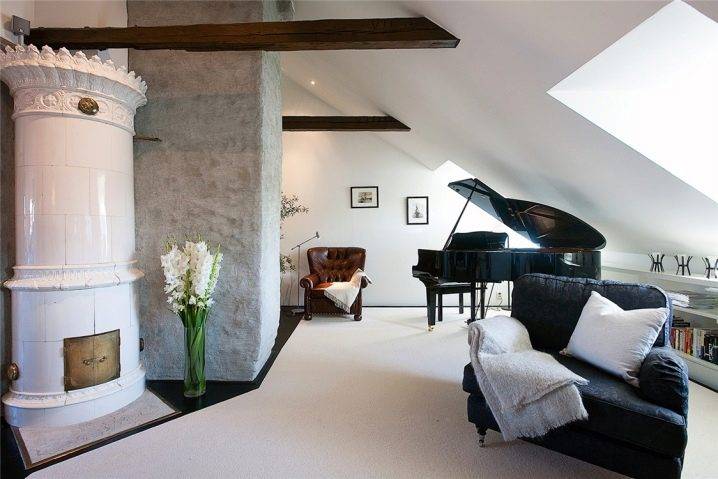
Sometimes private houses have several rooms, and sometimes they are open spaces without physical boundaries, divided only visually. One way or another, the size of the room in which your stove or fireplace is located is very important. If the room is small, it is recommended to mainly choose light tiles that differ slightly in tone.
If the room is spacious, you can also choose dark and bright options or play on contrasts, combining several saturated shades.
Whatever decoration you do in your home, room or apartment, it is important to remember that decoration is the base of your interior design, and the stove is the most prominent detail. In the event that you have picked up a simple finish, for example, painting walls or brickwork, almost any tiles will organically look like a lining of a stove due to the presence of painting
If your wallpaper is bright and interesting, the tiles should contrast with them and stand out against their background.


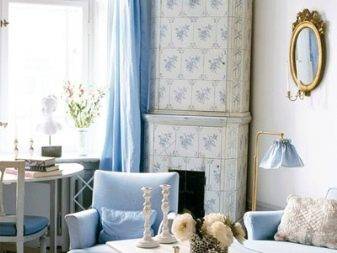
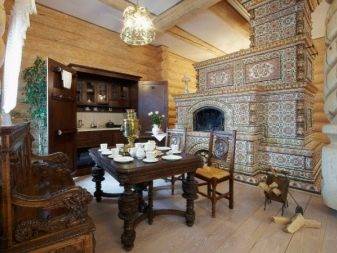
Speaking of different materials, decorative ceramic tiles covered with glossy glaze are perfect for almost any other texture. In the interior, together with them, you can use a wide variety of natural, painted or varnished wood, brick and stone, metal coatings, glass, textiles and plastic. However, you shouldn't combine all of these materials at once, especially if you have a small space. It is better to choose two or three materials as the main options.
Also, keep in mind that if you choose colorful, noticeable tiles, you should not combine them with stained glass windows or carved wood. Furniture and decoration should be discreet enough not to compete with the decor of the stove, but only to accentuate it.

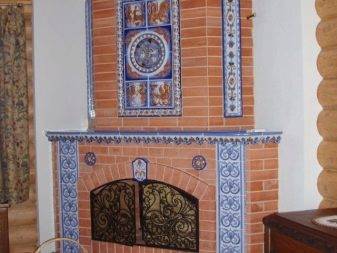
For example, you can place several tiles on a window or in a kitchen area. This will bring a single ensemble into the whole room. In addition, you can diversify the interior with other accessories, for example, place ceramic vases on open shelves or utensils to match the color of your decorative tiles on the stove.
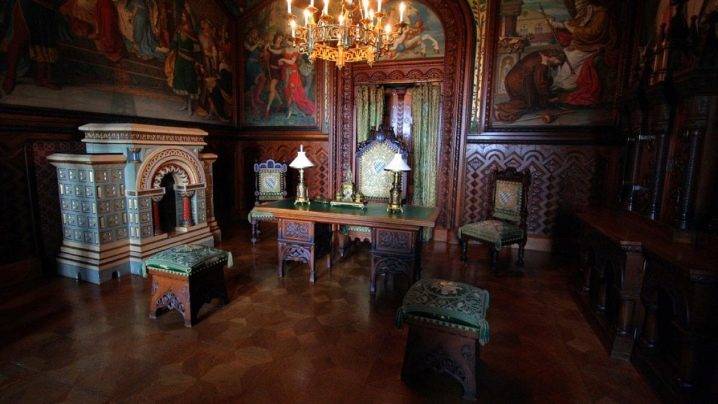
Finishing options for false fireplaces
Not in every private mansion it will be possible to equip a real fireplace; in a city apartment for its installation, you will have to visit several instances, draw up a project, and with a high degree of probability it will be refused. Therefore, where it is impossible to arrange a real hearth, they create a portal of a false one. The fire in it is painted or made of cloth, set in motion with the help of air, which is sometimes accompanied by the sound of crackling wood.
Artificial fireplaces are made one-sided, three-sided, less often - viewed from all four sides. They are distinguished by type of wall, angular (convex and concave), island pseudo-foci, in shape - square, cylindrical, "pyramids", etc.
The finishing of this design is simpler than the real one - the false fireplace does not heat up, it is completely fireproof, therefore the requirements for finishing concern, first of all, the appearance of the product. The portal is decorated with plasterboard, wood, different types of ceramics, and stone.
Varieties
Considering that the decorative element in question is a handmade product, there can be a huge variety of its varieties, because a person's imagination is limitless. Fireplaces in the interior are decorated with slabs with a smooth or embossed surface, painted in one tone or painted in several colors.
The most common types of front side of tiles are as follows:
- Terracotta tiles with an imitation of an untreated surface.
- Majolica tiles with an imitation of a glazed surface.
- Faience or porcelain tiles covered with glaze.

Beautiful painted stove
If you stop the choice on painted products, then you need to be prepared for their high cost. In the process of making, masters manually apply drawings in the most popular painting styles, including:
- Dutch;
- Suzdal;
- Kaluga.
To create an overall holistic picture and ease of choice, the stores present whole sets of tiles, which include all the necessary masonry elements:
- cornices;
- plinths;
- styles;
- corners;
- ranks.
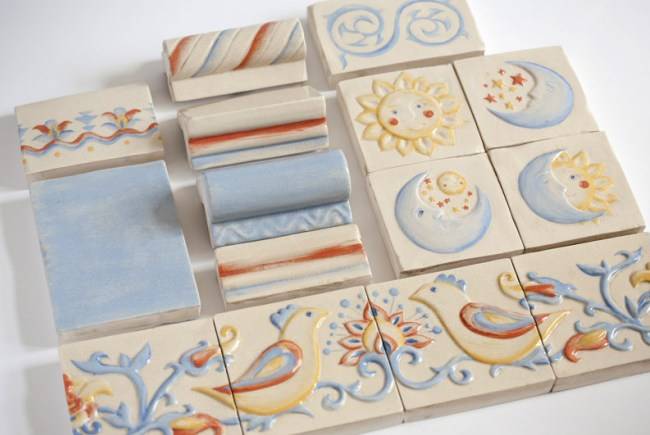
Finishing kit
Thanks to their skillful combination, a real masterpiece is created, a completely finished and thoughtful architectural creation that you want to enjoy for as long as possible. Depending on the design of the fireplace or stove, the choice of tiles can be expanded or narrow, therefore, even before the construction of an integral structure, it is worth considering everything in detail.
What it is?
Tiles are the traditional decorative tiles made from clay that were used to decorate stoves. Ancient art made it possible to create unique colored tiles with a special technology that allows you to evenly distribute the heat of the stove and slow down the rate of its cooling. Most often, the tiles are painted and embossed, however, you can find smooth models only with painting or monochromatic models with a relief.

Tiles can be used to cover the entire stove or combine them with ordinary ceramic tiles and bricks. The use of tiles in decor has the following advantages:
Such decoration will give your stove or fireplace a beautiful, distinctive look, and will diversify the interior. If it seems to you that the decor in the house is too simple and boring, decorative tiles will help to significantly diversify it.
Usually it is the stove that is the semantic center of the room.
In an interior design project, the semantic center should immediately stand out and attract attention. It is this effect that bright tiles will allow to achieve.
Most of these tiles are coated with glossy enamels or varnish.
This is a very durable coating that will last a really long time.
The glossy surface of the tiles will make it easier to clean the room: dust practically does not accumulate on such tiles, unlike brick, artificial stone or matte ceramic tiles.
Tiles are made using a special technology, thanks to which they keep the heat of the stove longer.
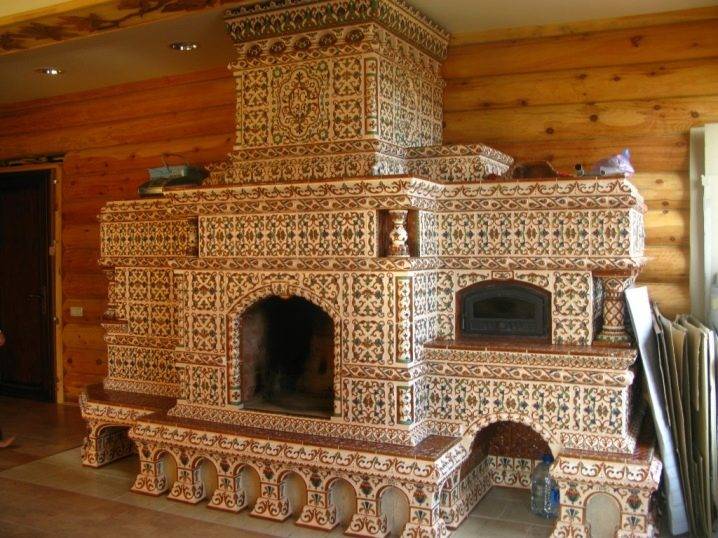
DIY cladding
Oddly enough, but there are those who want not only to make a fireplace with their own hands, but also not to look for the cladding material for it in the store, but also to do it themselves. Such people will be pleased to hear that clinker or gypsum tiles are very easy to make on their own.
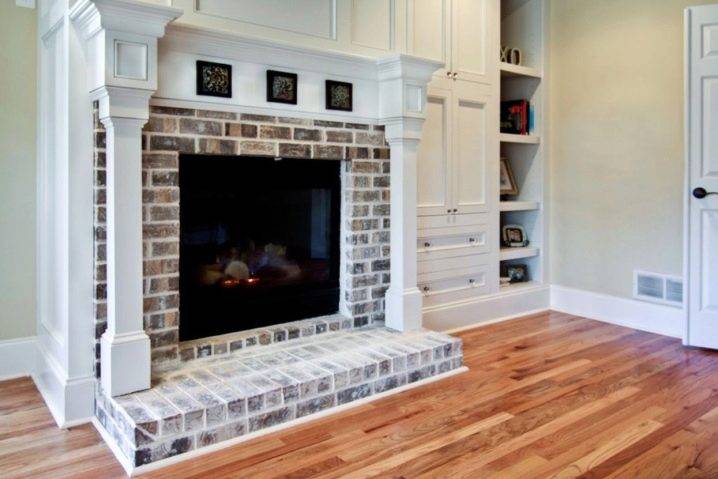
For clinker you will need: silicone mold, gypsum, sand and cement. All the necessary "ingredients" are mixed and poured into the mold. After 15 minutes, everything is ready, you just need to dry and cover with a primer so that nothing crumbles.
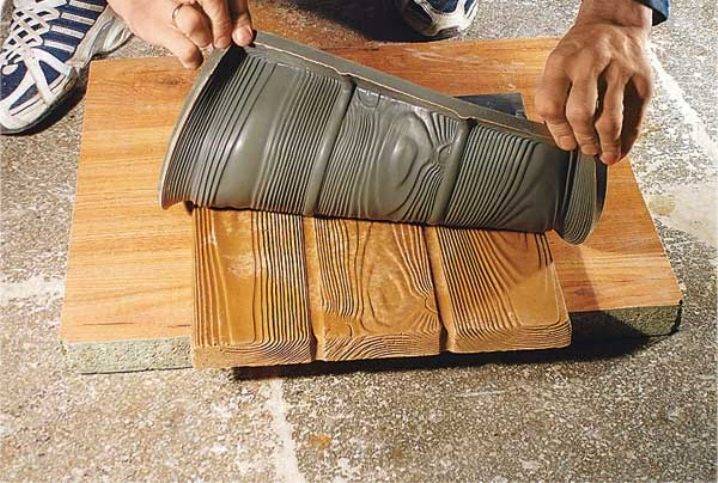
For the manufacture of gypsum tiles, you will need: a silicone mold, gypsum, slaked lime, water.Everything is mixed and poured into the mold, but it must be done quickly, otherwise the gypsum will begin to solidify at the worst possible moment. After 15-20 minutes, the material can be taken out of the mold and left to dry further, this must be done carefully, because the structure is still very fragile.
