Fuels and stove types
The stove in the bath is divided into 2 main groups, these are: metal (cast iron) and brick options. Brick sauna stoves are heat-intensive, they heat up longer, but also cool down for a long time. The iron stove is an economy type heating item, due to the multitasking, simplicity and convenience of the equipment. When choosing a stove or fireplace, it is necessary to look not only at the design of the heat source, but also at the type of fuel. Different fuels, when burned with the same mass, will emit different amounts of heat. There are many variations of the energy carrier.
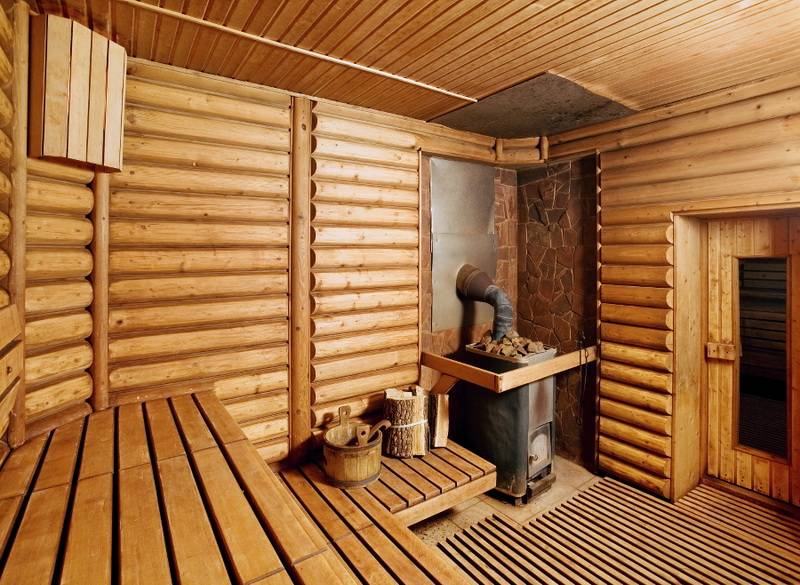
According to the aggregate presence and type of fuel, all fuel groups are divided into solid, liquid and gaseous fuels. Solid is a common class of fuel, it includes: coal, peat, briquettes, firewood, pallets. They are used only in ordinary ovens as they burn out rapidly. Liquid type of fuel is kerosene, fuel oil, diesel, boiler room, coke-chemical liquid.

They have a significant heating value. The first type of gaseous fuel is natural gas obtained from gas deposits, or associated gas from the extraction of naphtha. It has a good calorific value.

General rules for the construction of chimneys
For all types of brick chimneys, there are several general provisions that must be followed.

Exit to the roof of a classic chimney
Height above the roof covering. It is regulated taking into account the angle of inclination of the slopes, must ensure fire safety and exclude the blowing of the draft by air turbulence from the ridge. If the roof covering is made of non-combustible materials, then the requirements for fire height can be ignored, but the chimney should be warned against turbulence. The recommended height values can be seen in the photo.
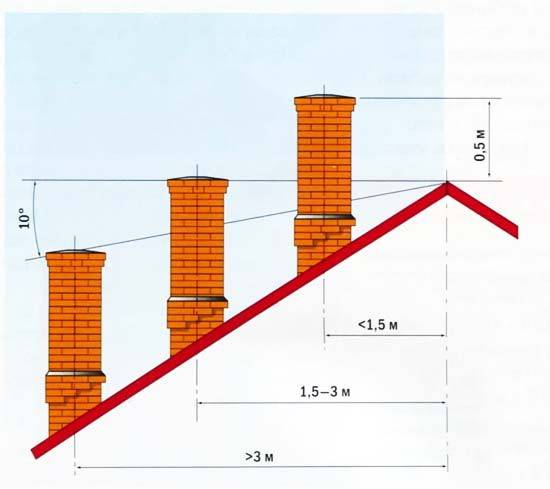
Chimney height
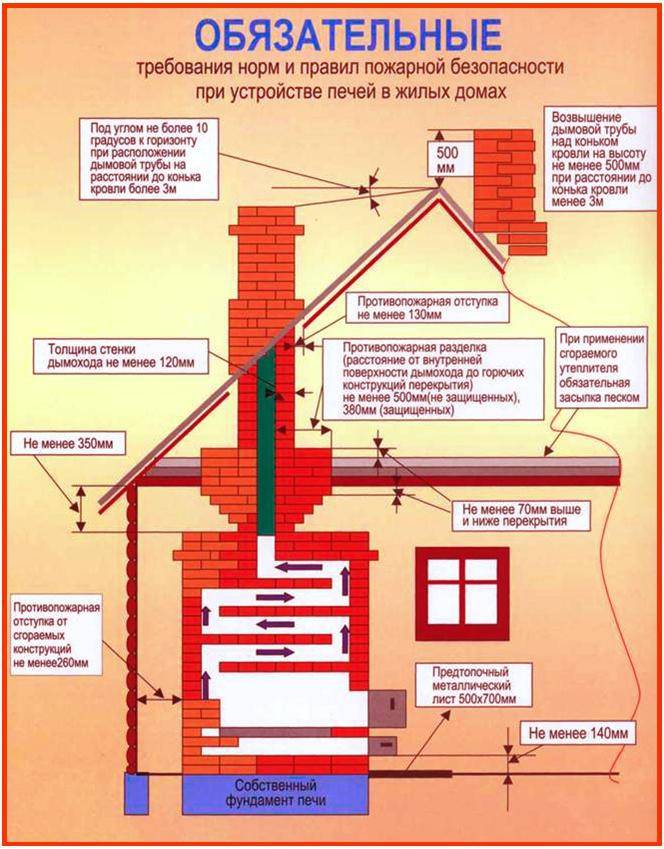
Fire safety requirements
Manufacturing material. For most chimneys, ordinary red brick can be used. If you wish, buy a fireproof one, but it costs much more, and you should not expect a large positive effect from its use.
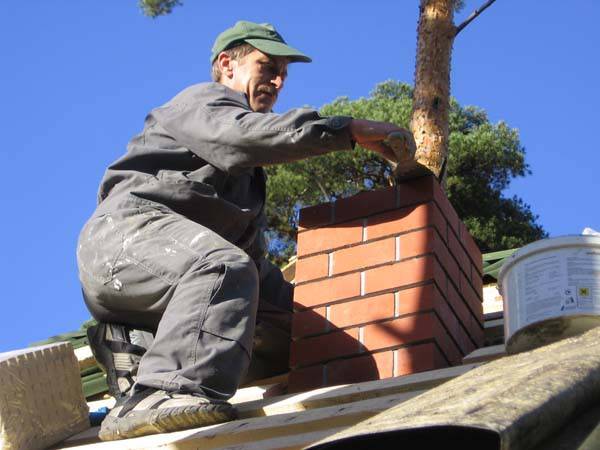
Red brick chimney masonry
We recommend using refractory bricks only for laying the overhead pipe, in this place the highest gas temperature. The fact is that red brick can withstand temperatures up to + 800 ° C without problems, and the temperature of the gases in the chimney is much lower. It is strictly forbidden to use silicate brick - during heating, it releases toxic chemical compounds into the air. Such a brick can only be used for external wall decoration.
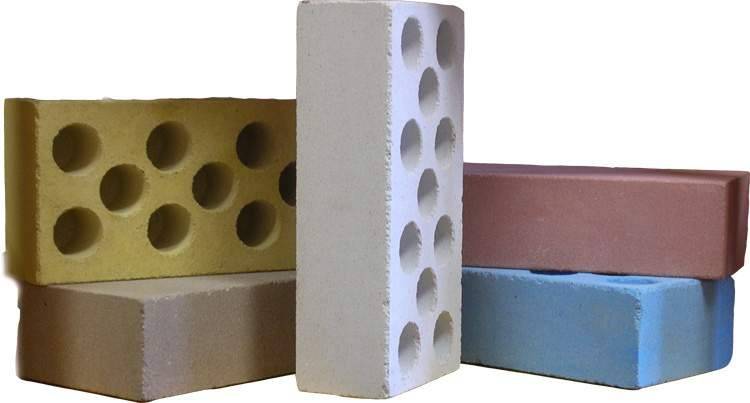
It is forbidden to use silicate brick
Refractory brick prices
refractory brick
Masonry mortar. There are two options. Some stove-makers use only clay mortar, others add a little cement to it. We are in favor of the second option, cement significantly increases the strength of the structure. But you choose, both types of solutions do a good job with their tasks.
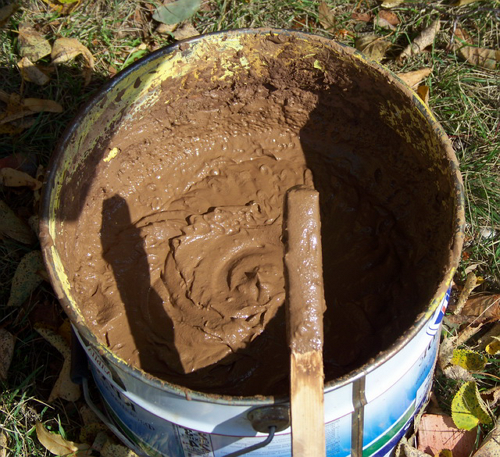
Ready-made clay mortar for brickwork
What is the difference between sauna stoves and sauna stoves
The differences between these ovens are significant. For example, a sauna should have a temperature above 85 degrees Celsius. Humidity no more than 15%. The bath usually has a temperature of up to 65 degrees, and the humidity is up to 60%.

In order to create the right conditions in the room, it is necessary to use different ovens. The approaches to their installation also differ. For example, to equip a sauna, it is necessary to observe the maximum contact area of the furnace body and air.

Thus, the necessary environment for the circulation of air flows will be created. This is necessary so that the air in the sauna heats up quickly in a short period of time.


To do this, it is enough to put a small open stove, which will be placed above the firebox.It will be enough to warm the stones up to 250 degrees.


If necessary, the furnace can be lined. This is covering the inside of the firebox with refractory bricks or installing a brick screen near the stove. this can be seen in the photo of a handmade sauna stove.

A preliminary acquaintance with the drawings, diagrams and photographs will give you an idea of how to correctly make such designs.

How to determine the required heat output of a sauna stove?
The power of heating devices is measured in kilowatts. However, manufacturers of bath stoves practice a different approach - they indicate how much steam room this model will be guaranteed to be able to heat up to a level corresponding to the required microclimate in the steam room. Naturally, on condition of high-quality thermal insulation of the latter.
This is usually indicated in passports - for premises, for example, from 10 to 16 m³.
It would seem that everything is very simple. Determining the size of the steam room is not difficult, and it will be just as easy to choose a model. However, the features of the bath arrangement can make their own adjustments.
Below is a calculator that will calculate, so to speak, the conditional or reduced "volume" of your steam room, that is, taking into account all the necessary amendments. Based on this value, it will be possible to more accurately select the optimal oven.
For example, if a result is obtained that an 11 m³ furnace is needed, then they try to choose so that this value is approximately in the middle of the range of capabilities of the purchased model. That is, say, a stove designed for heating from 8 to 14 m³.
Several explanations for the calculation.
- It is clear that, first of all, the real volume of the steam room is taken into account. To do this, you must specify its linear dimensions: length, width, height.
- Sauna stoves are designed for use in high-quality insulated rooms. But in practice, it happens that a log or log-built bathhouse is not insulated from the inside. In this case, a fairly significant part of the heat will be spent on heating the walls, which have a considerable heat capacity. Therefore, an amendment is needed.
- If the stove is located entirely in the steam room, then all the generated heat remains inside this room. But if the firebox is made external (just on the topic of this publication), then part of the heat energy will inadvertently be wasted on heating the dressing room and the entire structure of the “insert” of the furnace into the wall. That is, it will also be appropriate to adjust the result.
- The quality of the door leading to the steam room is of great importance. If this is a soundly insulated door with a good fit, then significant heat losses through it are not expected. But quite often ordinary panel doors are installed, as well as glass doors that are becoming fashionable. Of course, their thermal insulation qualities are much lower, and this will also be taken into account when carrying out calculations.
- A window to the street is not an obligatory element of the interior of the steam room, but it is still often available. That is, there is another loophole for heat leakage. Here, both the quality of the window and its area matter. If the window is taken into account, then additional fields for entering these data will appear in the calculator.
- Plots in the steam room (on its walls or floor), faced with ceramic tiles, brick, stone, can also play a role. Heating up such heat-consuming surfaces will require additional furnace power.
- The result will be shown in conditional cubic meters, which should be guided by when choosing the optimal model of a sauna stove.
Requirements for the chimney device
The task of the chimney is to give good draft, remove gases after fuel combustion. The following requirements are put forward for the smoke exhaust system:
- good aerodynamic design, providing high thrust, allowing good removal of combustion products, ensuring the flow of air into the furnace chamber, the combustion process itself;
- the inner surface of the chimney has a smooth, anti-corrosive coating, on which soot does not adhere well;
- at the exit, the system has a chimney, a spark arrester is made for the chimney for a bath;
- perform thermal insulation of the walls of the outlet channel, which protects the bath from fire.

When making a chimney with your own hands, follow the rules:
- With a flat roof, the height of the chimney above the roof surface is at least 50 cm.
- If the roof is pitched, the distance to its ridge is 1.5 m at a height of more than 0.5 m in relation to the enclosing parapet. Necessarily rises above the level of the ridge.
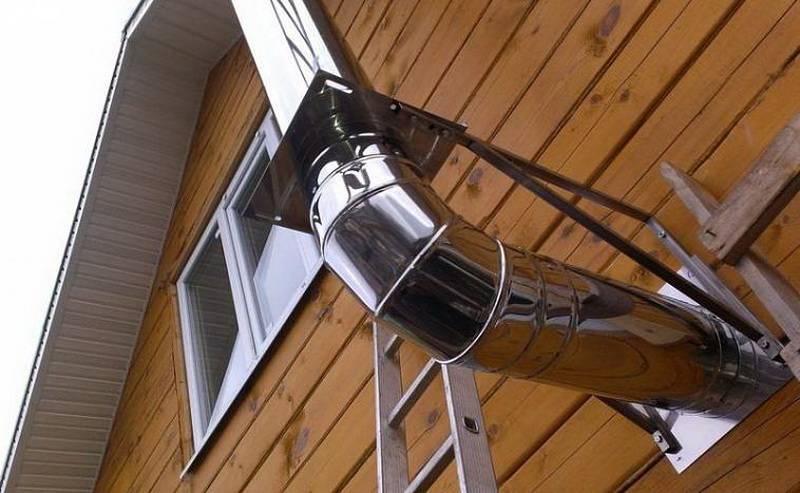
Materials used for making smoke evacuation systems for a bath:
- brick;
- ceramic pipes;
- stainless steel, most often a sandwich - a double-walled pipe with a heat-insulating material laid between the walls.
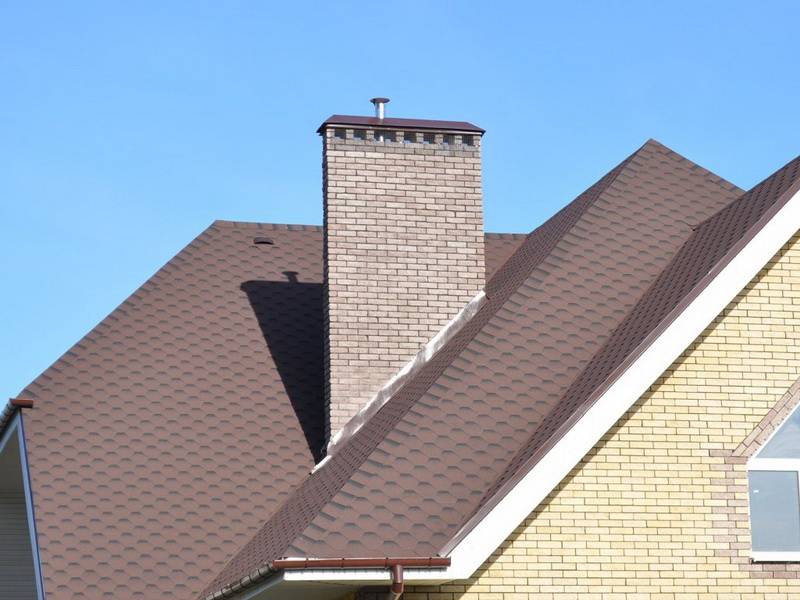
When building a bath, the channels for removing combustion products from the furnace are carried out:
- Through the wall, the advantage is minimal smoke, increased traction by increasing, lowering the height of the outlet.
- Through the roof, plus structures - high stability, flue gases are not overcooled. However, there is a great danger of not noticing the smoke under the roof when smoke passes through.
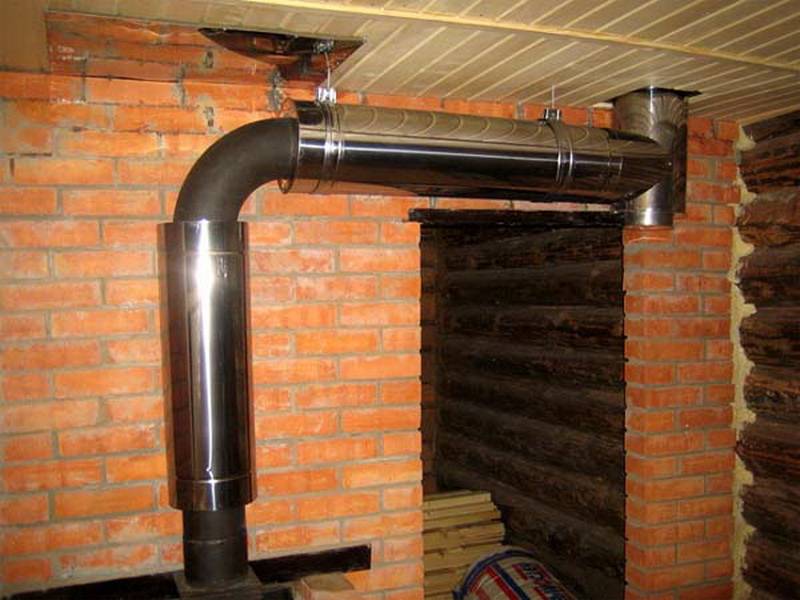
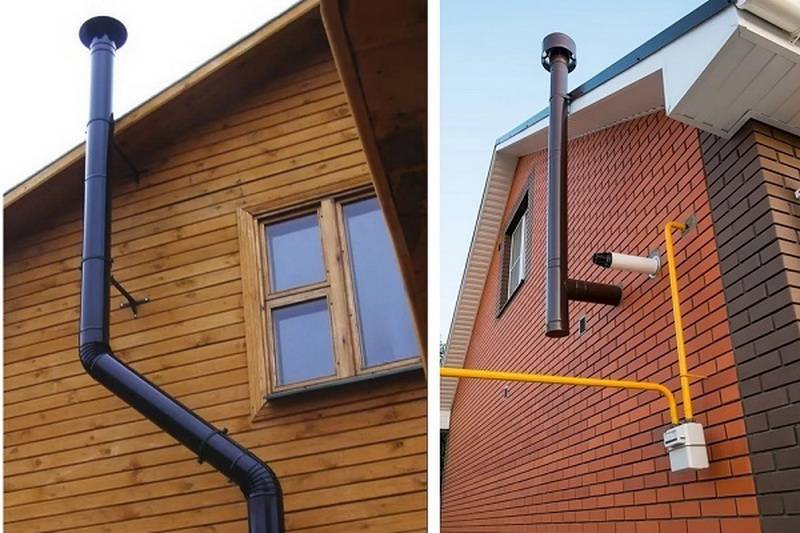
There are nozzle, root, wall (external) chimneys. The first ones are put on the stove pipe, the second ones are located separately, adjacent to the stove. Walls are performed in the wall of the building or outside behind it.
Practical advice
Otter laying and fluffing can be simplified by using metal plates or rods. Use them to tie the rows together, just do not let the bars get into the working channels.
You can find advice not to plaster low-quality bricks, but to cover them with special ceramic tiles. We advise against doing this for several reasons.
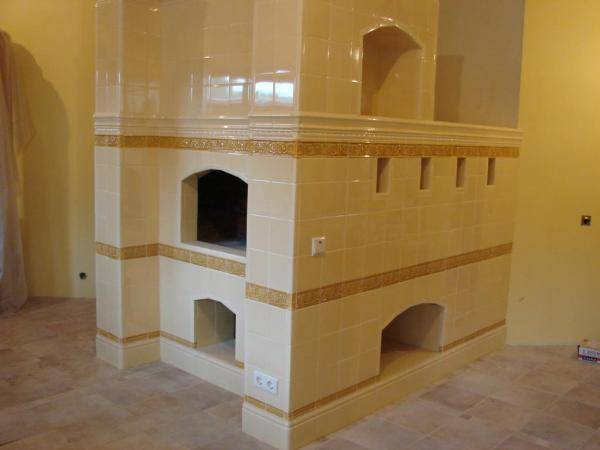
Ceramic tiles for the stove - an example

Facing the stove and chimney with ceramic tiles
- Firstly, there is a high probability that the tile will fall off, constant cyclical changes in the linear dimensions of the chimney have an extremely negative effect on the adhesion of the tile.
- Secondly, before facing uneven surfaces, in any case, you will have to trim them. Why then do double work for triple money?
But this is where problems arise. To reach such a temperature of the exit smoke, the stove must be heated strongly, and this is not always possible and advisable. In addition, most modern factory furnaces have a fairly high efficiency, the heat of combustion of the fuel is given off in the combustion chamber, and relatively cold gases enter the chimney. This means that condensation is inevitable. By the way, condensation not only negatively affects the strength of the brick. A lot of soot sticks to the wet walls of the channel; the chimney will have to be cleaned almost in a year.

Condensation in the chimney
There are two ways out of this situation.
- The first is to heat the stove strongly.
- The second is to insert a thin-walled alloy steel pipe into the chimney channel.
Choose which of the methods we offer suits you best.
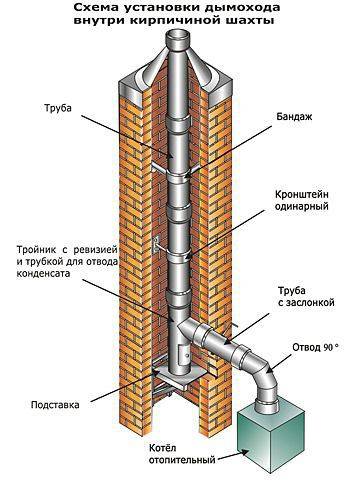
Brick chimney with steel shaft
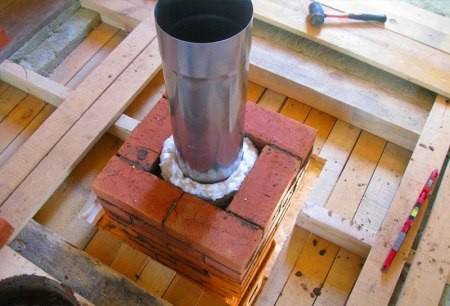
Steel pipe inside a brick chimney

Liner of a brick chimney
Varieties of ovens
The unit must warm up the entire steam room with high quality, but at the same time not interfere and not pose a danger to visitors
It is worth paying attention to the design of the oven that you plan to install in the steam room. If you classify products by the location of the fuel door, then the following options can be distinguished:
-
the firebox door opens directly from the steam room. This is the most common option.Firewood is loaded from the steam room. It is very convenient to regulate the draft by opening the door slightly. If the door is equipped with tempered glass, then the opportunity to admire the flames while soaring is added. However, it is worth remembering that when loading firewood, dirt remains on the floor, and oxygen in a small room is burned out too quickly;
-
the firebox door opens into the dressing room or the rest room. Fuel is being loaded from the same room. This option is considered the best and safer, because oxygen in the steam room is not burned out by the flame, it is easier to maintain cleanliness, space in the steam room is saved, and it is not necessary to install a separate heating system in the rest room. If, during the construction of the walls, a technological hole was not provided in advance for an elongated (remote) fuel channel, then you will have to partially break the partition;
-
the firebox door faces the street. Perhaps an acceptable option only for the smallest or seasonal baths. Loading and reloading fuel, traction control will have to be carried out, constantly running out into the street, which will cause discomfort.
The furnaces themselves, by their design, can be vertical, horizontal, in the form of a barrel and other shapes. A stone net and a hot water tank may be present. Chimneys from metal stoves are led out through the ceiling or wall.
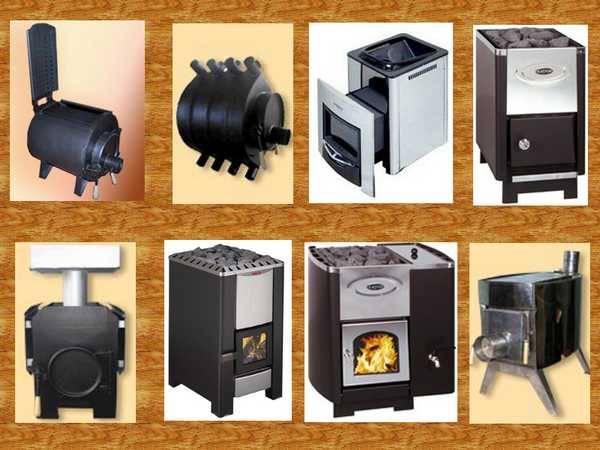
Metal wood stoves for a bath
How to plaster the top of a brick chimney
There are two options:
- buy special metal corners in the store;
- make your own universal fixture.
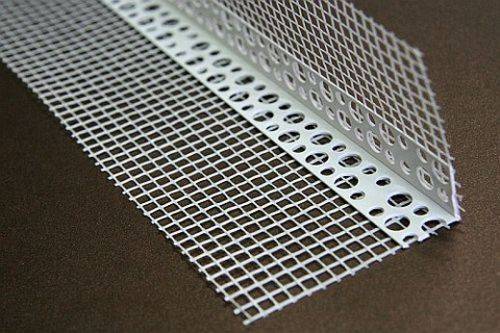
Plaster profile
We believe that making a universal device is much more profitable.
- First, it is much cheaper.
- Secondly, it can be used when plastering door and window openings, outer corners of walls, etc. This means that such devices will always come in handy at the construction site.
- Thirdly, you can independently adjust the thickness of the plaster layer, depending on the condition of the surfaces.
Corner rail
The device is made from pieces of wire rod or construction reinforcement Ø 6 ÷ 8 mm. The length of the fittings depends on the width of the chimney or walls. The bar must be bent with the letter V, the center of the bend is in the middle. The ends are bent again at an angle of approximately 90 °. How to use the device?
Step 1. Select even wooden slats, the length of the slats should be equal to the length of the surface. Maybe shorter, but then you have to plaster in two steps.
Step 2. Install the slats at the corners of the chimney (or opening) and fix them with two pre-made clamps. The clamps should hold the rails securely in position.
Step 3. Depending on the condition of the chimney surface, select the thickness of the plaster layer. Try not to exceed 1.5 cm, if there are large protrusions, then remove them.
Step 4. Using a spirit level, set the rails in a vertical position. There should be two slats on one side of the chimney. Repeat the same operations on the opposite wall.
Step 5. Start plastering the surfaces, remove the excess mass as a rule and level it along the installed battens. Repeat on the opposite side of the chimney.
The next day, carefully remove the clamps and slats. The flat corners of the plaster will now serve as guidelines for the rule while plastering the two remaining chimney planes. Simple, fast, cheap and beautiful. Do not discard the clamps, they can be used to process all external corners in buildings.

Example of a plastered pipe
Simplified chimney masonry
We hope that you have carefully read our tips and already have an understanding of the laying of a traditional chimney. In this case, the simplified version will not create big problems. Let's dwell on its differences and technological features.
Video - Simplified chimney
The chimney does not have fluff and otter. The fluff serves as a fixing element, since it is not there, you need to fix the structure in a different way. We recommend making a frame around the perimeter of the chimney from the corner, using threaded connections to attach the frame to the chimney at the ceiling level. Next, it must be fixed to the ceiling beams. You can fix it with metal plates or construction fittings, it doesn't matter. The main thing is that the chimney does not stagger.
The otter was needed to seal the chimney outlet above the roof covering. It does not mutilate - do the sealing yourself. Use metal sheets for this, the specific sealing technology depends on the type of roof. We will only point out the main general points.
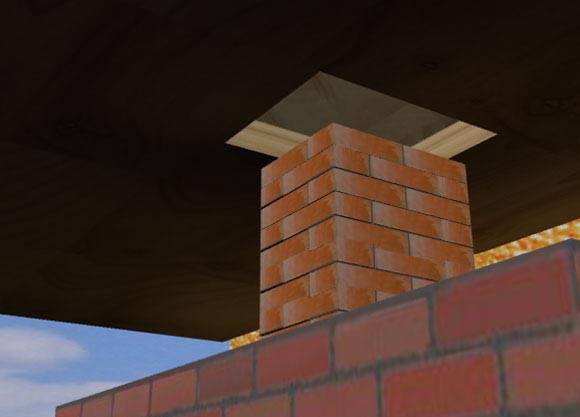
Laying a simple brick chimney

Brick chimney passage through the ceiling

Exiting the pipe through the roof
- Protective aprons must be bent and inserted into the groove cut in the chimney planes.
- To completely exclude the ingress of moisture, it is highly desirable to treat all contact points with any sealant.
- There is a possibility - during the arrangement of the roofing, purchase factory systems for sealing the chimney outlet.
If the brick used for laying the chimney was already in use, then the inner channel must also be plastered. Special angles and straightness should not be observed, the main thing is that the surfaces are as smooth as possible.
How to calculate the diameter of the flue duct
You can find statements that the height of the chimney cannot be less than five meters. This is not the case, ignore such statements. Just imagine a bathhouse about two meters high with a three meters high chimney sticking out above it.
Accurate calculations are quite complex, you need to know many formulas and take into account a large number of factors: the temperature of the gases at the entrance to the chimney, the speed of the air flow, the height, the rate of combustion and the type of fuel, the wind rose, etc. You should not engage in such complex calculations, we advise use the Swedish method. It takes into account the main indicators, based on them calculations are made and a schedule is drawn up. As initial data, you only need to know the area of the furnace (F), chimney (f) and its height (H). Having two parameters, you can always find out the unknown third.

Schedule for determining the parameters of the chimney
For example, you know the dimensions of the firebox and chimney, you need to know its height depending on the profile configuration. Find the percentage of these parameters and use the graph to find out the minimum height. Or vice versa, the height of the chimney and the area of the firebox are known, but you need to find out the size of the chimney channel. Again, using the simplest arithmetic operations on the graph, you will find out the dimensions of the channel, taking into account the configuration of the section.

Chimney calculation
Furnace from old wheel rims
Furnace from old wheel rims
For the manufacture of such a furnace, wheel rims are used. The rims from the ZIL-130 car and similar vehicles are ideal in size.
You need to prepare two rims with a bottom and the same number of products without a bottom. Additionally prepare pipes, valves, the required number of bricks, etc.
Furnace from old wheel rims
First step. Lay the combustion chamber out of fired ceramic bricks. The optimal dimensions of the combustion chamber are 620x620 mm. Lay the firebox in half a brick using traditional clay mortar.
Second step. Install a welded structure of two rims on the furnace firebox. In this case, one rim should be with a bottom, and the other without it. Weld the rims along the outer edge with a continuous seam.
Third step. Weld the pipe to the center above the installed rim. Weld the holes around the rim with metal inserts.
Fourth step. Weld a steel disc to the rim below. It will act as a reflector. Use metal rods to secure the disc more conveniently. The disc itself should have a thickness of 0.5 cm, and its diameter should be 12 cm inferior to the inner diameter of the installed rim. It is best if the reflector is concave.
Stove from old wheel rims, door
Fifth step. Weld 4 metal bars along the perimeter of the bottom of the 3rd rim. In assembly, these rods will abut against the 2nd rim. Weld the holes of the 3rd rim, except for the central one, with iron inserts. Weld the casing to the center hole.
Sixth step. Fill the empty space with an asbestos cord.
Furnace from old wheel rims, do it yourself
Seventh step. Craft a Steel Divider. Install the splitter with 3cm clearance from the rim.
Eighth step. Make a water tank based on the fourth rim. The optimal tank capacity is 30-40 liters.
Prices for sauna stoves Teplodar
Sauna stoves Teplodar
Cut a hole in the center of the bottom of the boiler and weld the pipe to it. Attach a metal platform to the top of this pipe for the base of the flue pipe. Install the finished water tank on the 3rd rim, having previously equipped a gasket of asbestos cord and clay.
For convenience, a hot water tap is mounted on the side
Ninth step. Weld a pipe with a faucet to the bottom of the water boiler. Close the boiler with a suitable removable cover.
Tenth step. Install the flue pipe.
Chimney
How to make a brick chimney with ventilation ducts
The presence of effective ventilation in the steam room and shower is one of the important conditions for the comfort of taking water procedures. In addition, it helps to quickly dry out rooms and increase the life of all timber structures.
How to make a brick chimney with ventilation ducts

Chimney diagram
It is impractical to install a brick chimney just for the smoke from the stove. In this case, you will have to make ventilation ducts in the walls. We strongly recommend making ventilation ducts right in the chimney. If the stove and chimney are placed correctly, then it becomes possible to equip ventilation not only in the steam room, but also in the shower room. For other rooms of the bath, ventilation can be omitted at all.
Installation of electric fans (forced ventilation) or decorative grilles with adjustable blinds or dampers is allowed in the ducts.
How are ventilation ducts laying work carried out?
Step 1. On the ground made of bricks, make a preliminary layout of the chimney, provide in it one channel for smoke and two for ventilation. In order to save money, lay the pipe from the stove with aerated concrete blocks, they are much cheaper, use bricks only for the smoke channel. The entire chimney made of bricks should be laid only from the place where the ventilation ducts are opened (under the ceiling of the steam room and shower room). After opening the channels, the chimney is made only of ceramic bricks.
Prices for aerated concrete blocks
aerated concrete block
Step 2. Place the bricks with bandaging, the dimensions of the ventilation holes are enough to make around the perimeter ≈ 12 cm, which is one width and two thicknesses of a standard red solid brick.
Step 3. If, for technological reasons, the ventilation duct has to be made in the corner of the chimney, then cut the bricks with a grinder to give them the desired geometric shape. Close the seams carefully, do not leave gaps. Violation of the tightness of the seams significantly reduces the efficiency of ventilation of the premises.
Step 4. Recommended wall thickness between half-brick channels, but you can change it depending on the required distance between ventilation and smoke channels.Tie each new row with the old minimum of half a brick. Keep in mind that the dimensions of the chimney with ventilation ducts increase, wind sail loads increase, therefore, its stability needs to be increased.
Step 5. Continue laying along the entire length of the chimney using the same algorithm. To speed up work between the extreme corners, pull the rope and control the position of the bricks along it. It does not hurt to check the verticality of the structure from time to time. The head is made in the usual way - with a third of the brick overhanging through the row.

Laying of chimneys and ventilation ducts: a) in walls 1.5 bricks thick; b) in walls 2 bricks thick
Simple chimney layout for smoke and gas removal, as well as for ventilation
Chimney with ventilation ducts
Video - Laying a chimney with ventilation ducts
Otter and fluff in such chimneys should not be done, attach the chimney to the beams and rafters using metal corners and plates.
Where to install the oven
You can't just put the stove in the middle of the steam room, it is important to take into account the location of the air ducts, correctly calculate the distances from the walls, think over the protection of the walls of the bath from heat. If you look at the "Supplement to SNiP 41-01-2003", you can find lines where it is clearly stated that if the walls of the bath are not combustible, that is, they have a fire resistance limit of 60 minutes or more, then a metal stove is allowed to be installed at any distance, but it is better when there is more than 380 mm of free space between the steel furnace and the wall
If you look at the "Supplement to SNiP 41-01-2003", you can find lines where it is clearly stated that if the walls of the bath are not combustible, that is, they have a fire resistance limit of 60 minutes or more, then a metal stove is allowed to be installed at any distance, but it is better when there is more than 380 mm of free space between the steel furnace and the wall.
It is quite difficult to find completely brick or concrete walls in a bath without cladding, often the decoration is performed with an easily combustible wooden clapboard.
It's another matter if the material of the walls is wood. In this case, you should adhere to these rules:
- when purchasing a factory oven, ask for instructions for it and carry out the installation strictly according to the manufacturer's diagrams. This rule is spelled out in SNiP 41-01-2010, namely in paragraph 6.6.2.19 (Individual stove heating);
- from the hot walls of the unit to the walls not protected by screens, there should be more than half a meter;
- the wall or partition through which the fuel channel is discharged must be made of non-combustible material from the floor itself and up to a mark of 25 centimeters above the fire door;
- the thickness of the non-combustible wall through which the fuel channel is discharged should be 12.5 cm;
- if the ceiling in the steam room is thermally insulated and protected with plaster on a metal mesh or similar, then the distance from the top of the metal stove to the ceiling should be more than 80 cm;
- in the case when the ceiling is not protected by refractory materials, the distance from it to the furnace must be more than 1.2 m;
- from the furnace door to the opposite wall should be more than 125 centimeters;
- leave 3 cm between the wall and the front wall of the remote stove.
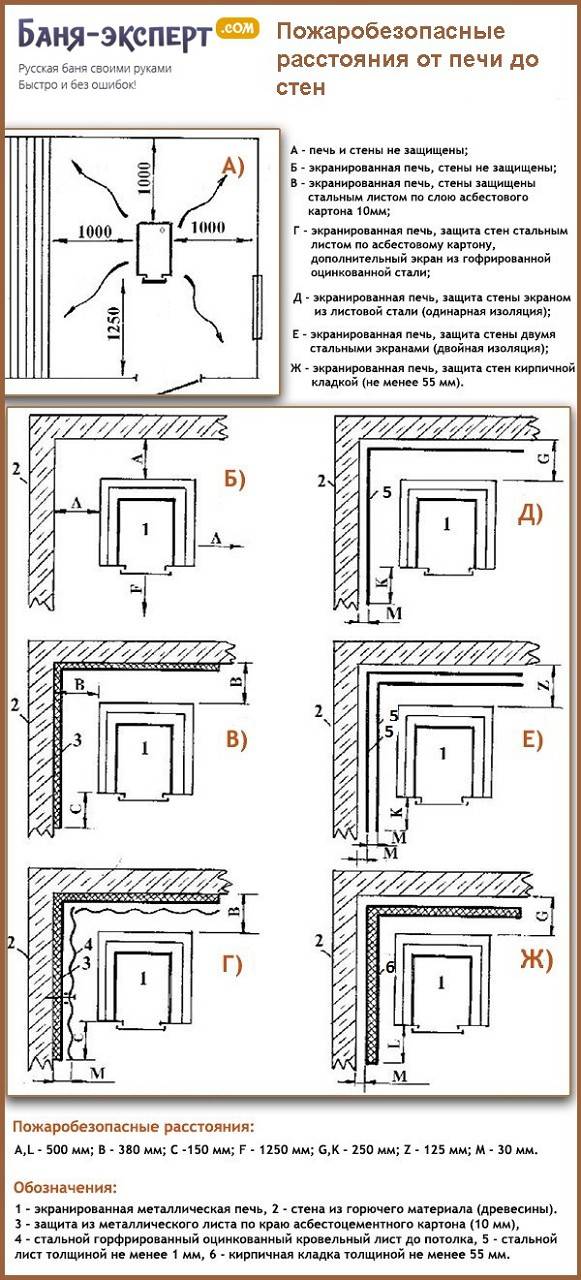
Fireproof distances from the oven to the walls
When choosing the best location for your own stove, take into account the location of such elements as external heat exchangers, hanging mesh heaters, hot water tanks, piping for outboard tanks. These elements must be freely accessible for repair and maintenance.
Stages of building a classic chimney
The presence of a brick chimney should be provided even during the design of the bath. The stove must be made of brick and must be on a separate concrete foundation.
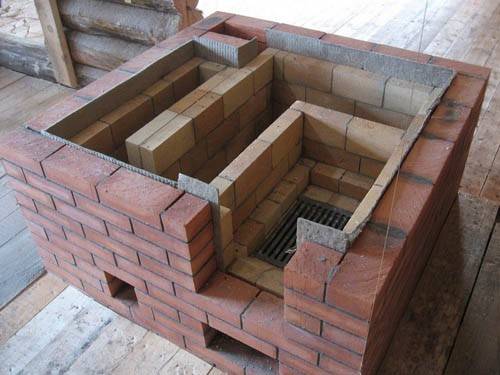
Sauna stove at the stage of construction of the firebox
For most sauna stoves, a 250 × 120 mm channel is sufficient, these are the standard sizes of red bricks. For laying the chimney, you will need special bricks in half the standard, they can be bought ready-made or well-cut with a grinder with a diamond disc.
The thickness of the solution is not more than 1 cm, the thicker the solution, the greater the risk of cracking it during thermal expansion. We do not recommend making such a complex chimney for a metal stove, it is enough to install a pipe for it.
Step 1. Prepare bricks, tools and mortar. Take measurements to the gate and fluff.
Step 2. Start laying from the bottom of the chimney from the stove, check each row with a level on all four planes. After three to four rows, clean the channel from excess solution.
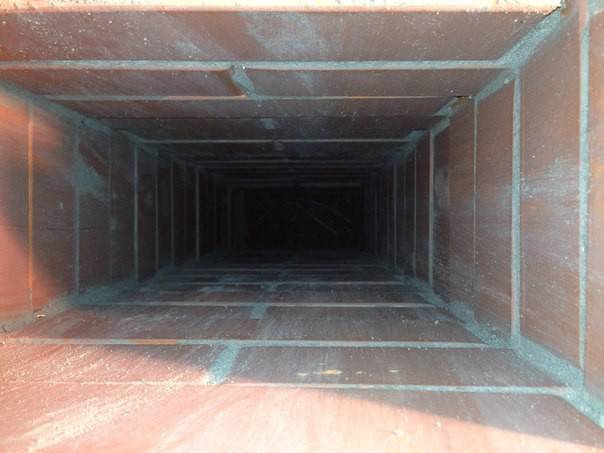
Channel view
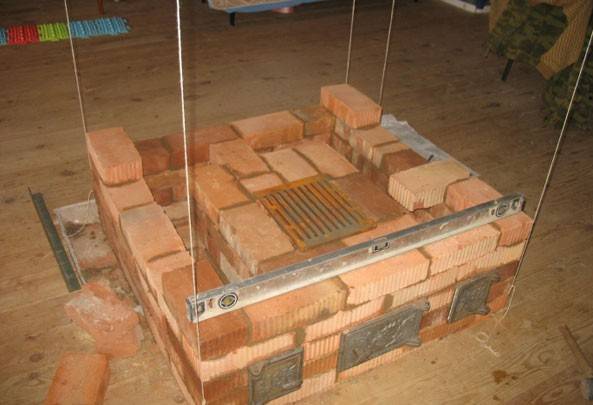
Verticality control
Step 3. In the place of installation of the gate, fix the frame. The installation of the frame should not violate the position of the upper plane of the bricks, for this you need to select a recess in them according to the dimensions of the gate frame.
Step 4. Continue laying until the beginning of the fluffing device. Count the number of rows that will have to be laid before the fluff reaches the desired size. At the same time, keep in mind that in one row, the perimeter of the chimney increases by a quarter of the width of the brick. The fluff should fit snugly against the ceiling beams. If they are located at a great distance from the chimney, it is necessary to make special persistent frame structures.

Fluff
Step 5. Lay out the fluff according to the scheme. Keep in mind that this is only a schematic diagram, the specific number of rows of bricks to reach the maximum width of the fluff depends on the design of the bath. It is not necessary to fluff a square profile, you can lay out a rectangular one.
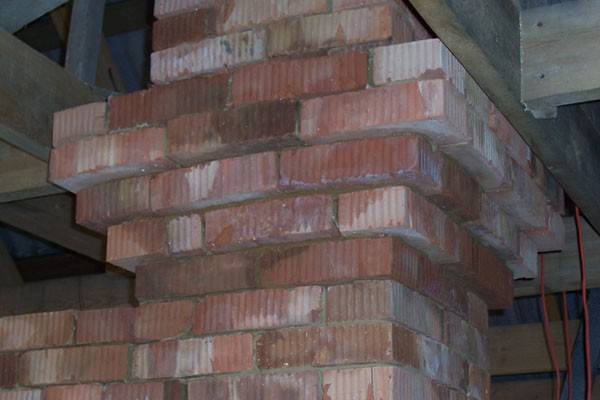
In the photo - fluff
Step 6. Gradually, for the same number of rows, move from the fluff to the dimensions of the chimney, pull it to the roof.
Step 7. At the bottom level of the roof, start laying the otter. This element of the chimney is more complicated than fluffing, the increase in the width of the chimney should occur gradually, taking into account the slope of the slopes. We strongly recommend that to increase the stability of the structure during masonry, metal plates are embedded in the otter and attached to the rafter system.
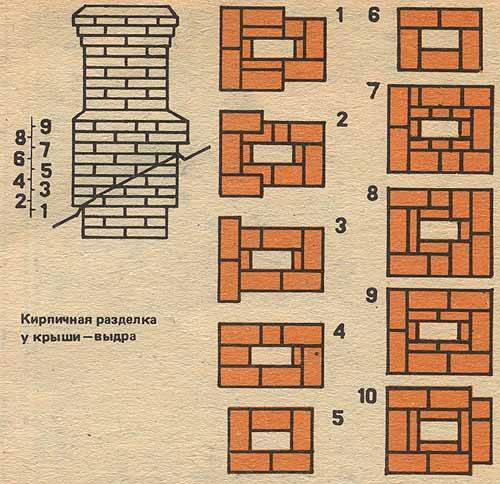
Otter
The ends of the bricks need to be trimmed to reduce the gap between the roofing and the otter. If you don't want to cut it, we advise you to install metal sheets between the bottom of the otter and the roof covering to prevent precipitation from entering the rafter system and the attic.

Paving the passage of a brick pipe. Fluff

Pipe through the ceiling
Step 8. Laying the head. A purely decorative element, increase the outer perimeter of the chimney by a quarter of a brick. The head is one row and immediately after it is the finishing one. We recommend embedding a metal bird net into the finish row. Fasten the protective cap on top of the chimney with dowels.

Pipe head
Allow two to three days to dry, and then start the first heating of the oven. Do not be alarmed if at the beginning of the heating the thrust is small or absent altogether, over time everything will fall into place.
Conclusion
Without a stove, the bath becomes incomplete and meaningless. Only thanks to a properly installed metal sauna stove can you quickly warm up the steam room and create high-quality steam, which is so necessary for a wonderful time in the bath and improving the physical condition of a person.
There is no need to purchase metal structures from specialized stores. With a little experience, having acquired the necessary materials and tools, you can make a high-quality iron bath stove with your own hands, which, in terms of its characteristics and aesthetic qualities, will not be inferior to foreign counterparts.
