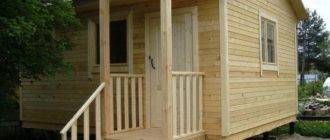
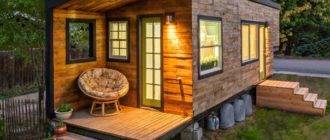
Do you want to have a cozy gazebo in the garden, but too high a price frightens off? We suggest building it yourself. The main thing is to prepare all the tools and material in advance. Something, for sure, you already have and has been lying around for a long time in the barn, something, of course, will have to be bought, but it will still come out several times cheaper than the ready-made version.

Part 1 - building walls
- Making the base. You will need four strong beams for supporting corners 245 cm high. We place them at the same distance from each other. Choose the width yourself. If there is no quicksand on the site, and the soil is dry and stable, then you can take narrower beams. Determine the four corners of your future gazebo, at the head of them you should dig holes at least 30 cm deep. You can put some rubble and sand in them, set up beams, level them in height, then fill the hole with cement. It should fill at least ⅔ of the holes around the post and the remainder may be covered with earth after it has set.
- We mount the fixing beams. Use 6 more beams to anchor the 3 “closed” sides of the gazebo. The beams should be located perpendicular to the uprights, 2 on each side, adjust the distance from above and below depending on whether windows will be mounted on the walls. If not, place the beams at the same distance above and below. Fasten them with two large bolts, connecting them to the support-holders. This is a job for two or three people, so prepare assistants in advance. At least one person will need to hold the beam while the other attaches the bolts. You may need to pre-drill the bolt holes to make it easier to work with.
- Add windows. Old small wooden or plastic windows can be used. Place them in the center of each of the three walls and mark their widths. Then create a window frame using additional beams. The height must match the window and the distance between the fixing beams (taking into account the width of the frame itself). Put the frame back in place, insert the window and secure it in place with nails or polyurethane foam.
- We complete the upper edge of the structure. You will need four more beams to complete the top of the structure. Their size coincides with the distance between the beams and is 245 cm. A square is cut from one end of each of them. Use these cuts to connect the beams together like a puzzle by inserting them into each other's grooves.
- We attach the top beams. Glue them together and then connect them to the top of the posts using one or two bolts drilled through the top beam to the base beam.

Part 2 - building the roof
- You will need 5 more beams. Four x 185 cm long and one x 245 cm. Cut a 45 ° corner at one of the edges of each beam.
- Screw the flat side of the beams (185 cm) to the top of the gazebo, and connect them together at the top with a long beam passing between them. Make sure you maintain a 45 ° tilt.
- Attach the roof joists. While holding the roof in place, screw it to the corner posts at each end. Make sure your bolts are not too long, otherwise they will not only go into the beam. But they will also come out on the opposite side.
- Insert windows. You can also add windows to the resulting wireframes (triangles). This is done in exactly the same way as with the walls, but first you will need to add the top border. Measure the height of the wooden window frame, first make sure it fits into the triangle. Then measure and cut a piece of the beam to match that height and screw it into place. Once this is done, the window can be inserted.

Part 3 - adding the finishing touches
- Paint the surface. You can paint the entire structure any color you like. Make sure the paint you are using is suitable for outdoor use.It will help to further protect the tree, extending the life of your structure.
- Add roof cladding. The roof can be covered with a piece of iron, polycarbonate or soft tiles - the choice is yours. Do not forget to move its edges at least 10 cm away from the walls so that rain does not fall inside.
- Make the floor. The floor in the gazebo can be made of garden tiles, granite chips, rubble or a special coating that simulates a lawn
- Cover the walls (optional). This work will increase the cost of the structure, but will make it suitable for gatherings in windy and rainy weather. The walls can be finished with plastic panels, sheets of special moisture-resistant plywood, polycarbonate or any other material of your choice. You can leave the gazebo open on all sides if there are no windows in it.
- Add some decor. Hang flower pots at the front of the gazebo. Decorate with light bulbs around the perimeter, put a table and a rocking chair inside.