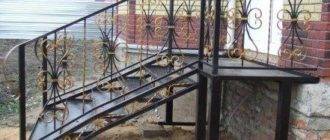
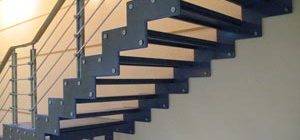
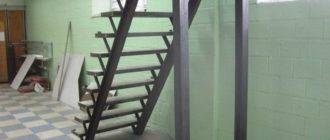
You have built a coveted home! During the construction process, a solid metal staircase was welded. In view of its strength, it served faithfully. But the construction is over, the dirty facing work has been completed and something needs to be done with the exterior of the staircase. You can't glue it over with wallpaper or PVC, just painting is also not an option. In addition, an all-welded metal staircase in a residential building is quite traumatic. The best way out is wood sheathing of metal stairs.

Natural wood suits almost any design style. It will add warmth and comfort to the house.
Thanks to the metal frame, the stairs can be made in any shape and this gives great opportunities for the flight of design ideas. The strength of such ladders is incomparably higher than that of wooden ones, and by weight they are much lighter than forged or concrete ones. And against this background, if you correctly approach the issue of sheathing, you yourself will be quite within the power to make such a masterpiece.
Pay attention to the photo:

Preparation for work
First, collect the tool. For sheathing metal stairs you will need:
- Drill with drills for metal and wood.
- Screwdriver and a set of bits for it.
- Roulette.
- Hacksaw.
- Construction pencil.
- A set of bolts, nuts and screws for wood and metal.
- Level.
- Plumb line.
- A set of carpentry tools.
Selection of material
- Next, let's deal with the material. First of all, of course, herself wood.
- For the upper linings of stair steps, it is better to use hardwood - this is oak, hornbeam, ash, cherry or beech. It is not worth saving on the main linings, because they will have the greatest load.
- For vertical interstage gaps, ideally it is better to take the same material, but if you cover the stairs with a carpet or are simply constrained in funds, then you can get by with inexpensive coniferous wood. The same applies to the side skirts.
- Pick up the balustrade. It is better to buy balusters racks and railings ready-made and preferably the same type of wood as the lining, so that your staircase does not look like a traffic light. It is not recommended to make them yourself, since you will probably not be able to do it beautifully, you will spend a lot of time, and the price will not differ much from the factory one.
- Be sure to take care of the backing. No matter how good it is ladder welded, there will still be minor distortions. To smooth them out, a substrate is used, as a rule, it is ordinary plywood.
An important point: so that later your wooden structures are not led, pay attention to the moisture content of the wood. Freshly sawn timber cannot be used. Its humidity ranges from 35 to 100%. The optimum humidity is 12%.
Algorithm of work execution
- First, decide on the look of your metal and wood staircase.
Whether you will sheat only the steps or completely all elements, including risers and side part.

- Carefully measure the steps and cut the size at the beginning of the backing oneach step, and then lining and risers. To avoid smallsize discrepancies, please number each detail.
An important point: the size of the substrate should be strictly the size of the metal part of the step, and the wooden strip itself should protrude slightly beyond the cut of the metal. Projection in the region of 20 mm. The optimum thickness of the overlay is approx. 30 mm.

- Drill two rows of holes in the metal from the back at 150-200 mm intervals. The distance from the edge is about 20 mm. Since the thickness of the metal,As a rule, it is 5-7 mm., initially it is recommended to drill a hole with a smaller diameter, and only later drill it with a larger drill. Moreover, the drill will be very hot and so that it does not sit down, periodically cool it in pre-prepared water. The holes are drilled for “sweep” and used to compensate for the load when attaching the washer.
- Next, attach the finished substrate to the metal surface andpad. With a pencil, mark the location of the holes. After, with a drillsmall diameter we drill holes for self-tapping screws.
- We fix the substrate. To do this, we put it on a special assembly glue (choose glue with a filling effect). Some masters advise using silicone, of course, it is good, but it was originally intended for other purposes, so use mounting glue. In no case do not use polyurethane foam, it will dry out over time, squeeze through and the steps will creak strongly.
- Then, after gluing the substrate, fix the patch itself, fix it whenusing two clamps and pull it from below with self-tapping screws for wood. If access to the ladder is limited from below, attach the overlay from above.
Then the instruction and the algorithm of actions are somewhat different.
- Drill through the pad and backing to a hole in the metal.
- Next, use a wood drill the size of a screw head and then expand the finished hole in order to drown the screw head. Subsequently, this recess is closed with special wooden furniture plugs and sanded. Self-tapping screws, when fastened from above, are taken from metal.
Note: fasten with self-tapping screws quickly and reliably, but if working with them is problematic for you, you can fasten with bolts, also sinking them into the cover plate and closing with plugs. Moreover, if there is access from the bottom, fasten it with a nut, if not, you will have to cut the thread.
- The next step is to attach the lining to the vertical opening.between the steps. We fix it by analogy with the main overlay, the only thingwhat - do not put the substrate.
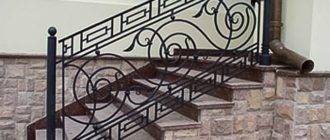
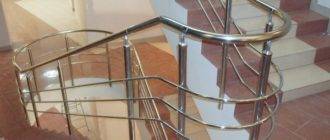
- Next, we start working with the balustrade. Ladder made of metal and wood withoutfencing not only loses in design, but is also dangerous. Since the railing existsdifferent sizes, initially choose the most convenient one, just for you.

- We start by marking the places for the posts, on the steps stepping back 50-100 mm from the edge, with a step in the region of 600 mm we make pits up to 12-15 mm, the diameter of the pit is 16 mm. We mount the anchors in them and fasten the racks.
- The two extreme ones are attached first, then we pull the cord between them and fasten the rest.
- There are 3 main spacing of balusters, the most common and convenient 130 mm, there are also 220 and 90.
- We complete the installation of the balustrade by attaching the railing.
For clarity, we provide a video in this article, how the railings are attached:
The method described above is convenient, reliable, but not always practical. It is well suited for wide flights of stairs, but if the staircase is already narrow, and even the railing will be eaten up to 100-150 mm, it will be extremely inconvenient to walk.
In this case, with narrow stairs, the fence is attached to the side, at the end of the stairs, with anchors. The racks are attached with two anchors, and under the balusters, the holder is attached with one anchor, and the baluster is mounted in it.
- The main work is done, it remains to sew up the side of the stairs. When youdid all of the above with their own hands, it will not be difficult for you to fixsidebar, since everything is the same here.
- The wood sheathed metal staircase will be unfinished if you do notclose the back. No matter how you try to neatly do, unclosedthe back side will spoil the view. There are several ways, you cansew it up with drywall or chipboard, some are impressed by the lining. If there ispossibility, you can simply mount a built-in wardrobe under the stairs.

I would also like to say about wood processing. The fact is that it is better to round off all sharp corners on wooden parts, and the main rounding work should be done even before the parts are installed.After installation, you will slightly touch up with sandpaper and the staircase will take on a finished look.
Upon completion of all installation work, you should go through the stain to improve the appearance of the wood texture and open it with several layers of varnish.
Modular stairs
Our story will be incomplete if we do not mention modular assembly. Metal-wooden stairs can be not only all-welded. Some types of design emphasize lightness, airiness of the concept, and here modular assembly comes to the rescue.
All the details of such a staircase are made in the form of separate, already finished modules. You can arrange them as you like. Such a staircase is good if you are refurbishing a country house and you do not want to fiddle with a capital staircase, and there is no way to hire specialists. Then this option is for you.
Pay attention to the photo:


looks gorgeous, but can an ordinary person sheathe a staircase with high quality? I doubt very much ... although my husband was tanned by this idea. tell us about the features of the staircase sheathing