Roof options
For the roof truss system, the same materials are used as for the frame. The lathing is made from an inch board. It is necessary to ensure that there is no wane, otherwise the tree will quickly rot.
Most often, the barn is blocked:
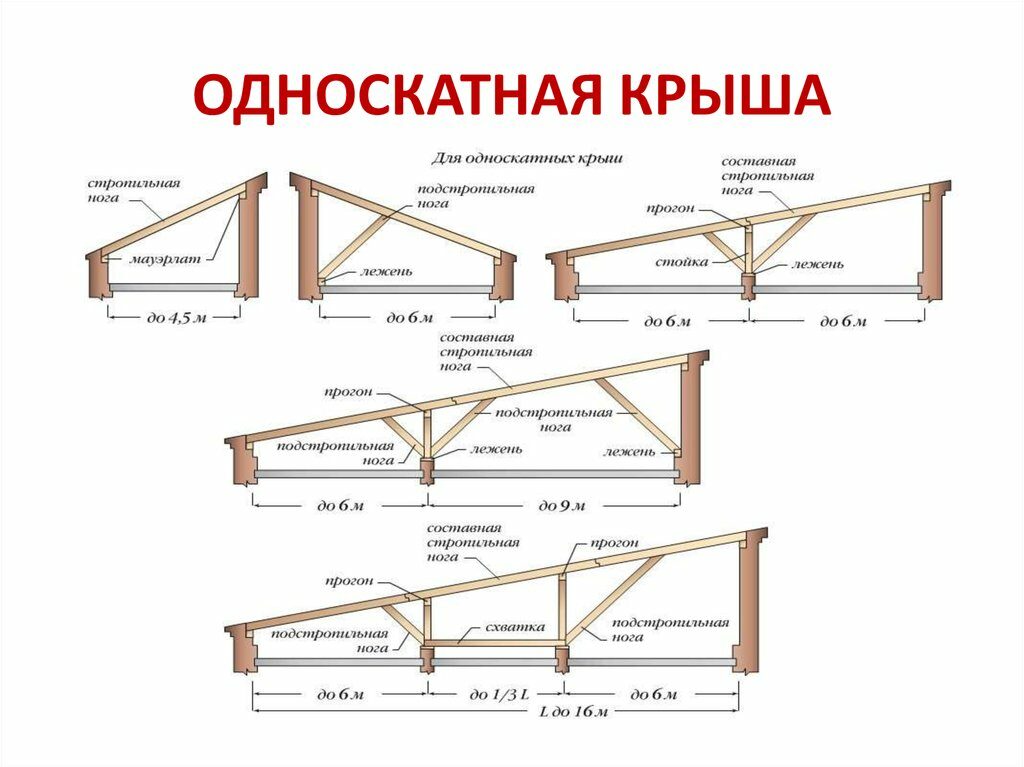
- A pitched roof, where it is provided for the support of the slope on opposite walls of different heights. It is used with a span of up to 6 m.

A gable, in which the walls are the same in height, and the slopes are mated at the top point - the ridge. Span width from 6 m.
The angle of inclination of the roof depends on the intensity of wind and snow loads:
- the stronger the wind in the region, the smaller the angle of inclination should be;
- for snow loads, the dependence is inverse - for a quick descent of a large mass of snow, the slope must be made more.
In addition to the loads, the recommendations of the manufacturer of the roofing material are taken into account, which determine the angle of inclination and the pitch of the sheathing for a particular type.
Shed with a pitched roof
As a rule, in sheds, the span is small, therefore a lean-to design is the most rational. When installing the frame, you must ensure the minimum permissible angle of inclination for the purchased roofing material:
slate 20-35 °;
soft roof 5 °;
corrugated board 8 °;
piece material, metal tile 25 °.
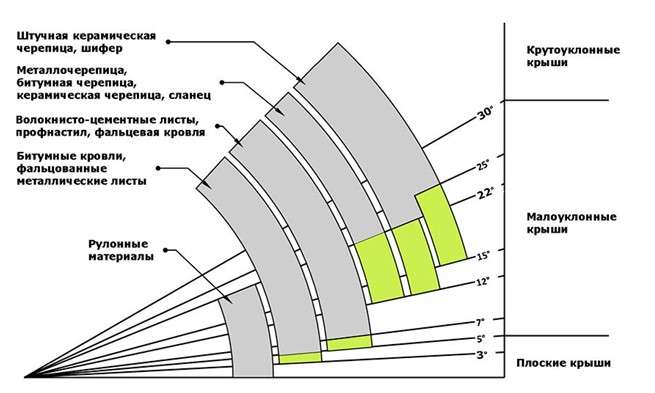
To support the rafters in block buildings, a support bar is installed on opposite walls - a Mauerlat. In frame buildings, the role of the Mauerlat is played by the upper strapping beam.

Starting from opposite walls, rafter boards are laid on the edge. The step depends on the section of the lumber and its length. To increase the bearing capacity, the elements are connected in pairs. Fastened to the support bar with a tie-in and metal pads.
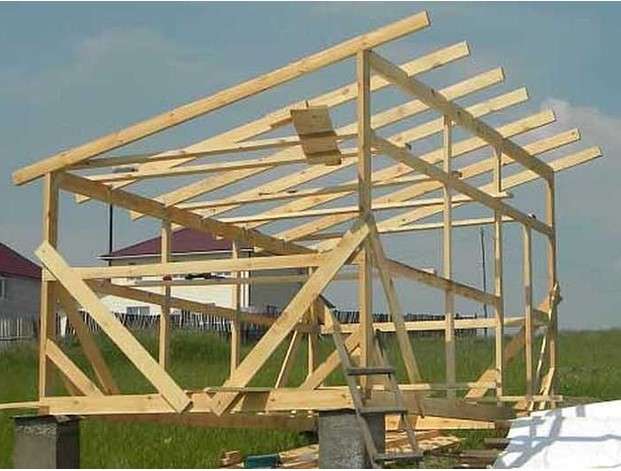
If insulation is not expected, vapor-waterproofing is not used, since its function is to protect the insulation from condensation from the lower surface of the roofing sheet. On the rafters, a crate is placed from an inch board with a step of 30-50 cm (follow the manufacturer's recommendations). Nailed to the rafters with nails or screwed with self-tapping screws.
The last stage in the construction of a do-it-yourself shed shed is the installation of roofing material:
- The slate is fastened with nails in the upper wave, the metal tile - with roofing screws in the lower one.
- To seal the joints, EPDM rubber gaskets are used.
- Sheets are laid with a longitudinal and transverse overlap.
- The minimum overhang of the roof for thin sheet materials is 100 mm, for slate 50 mm.

Gable roof barn
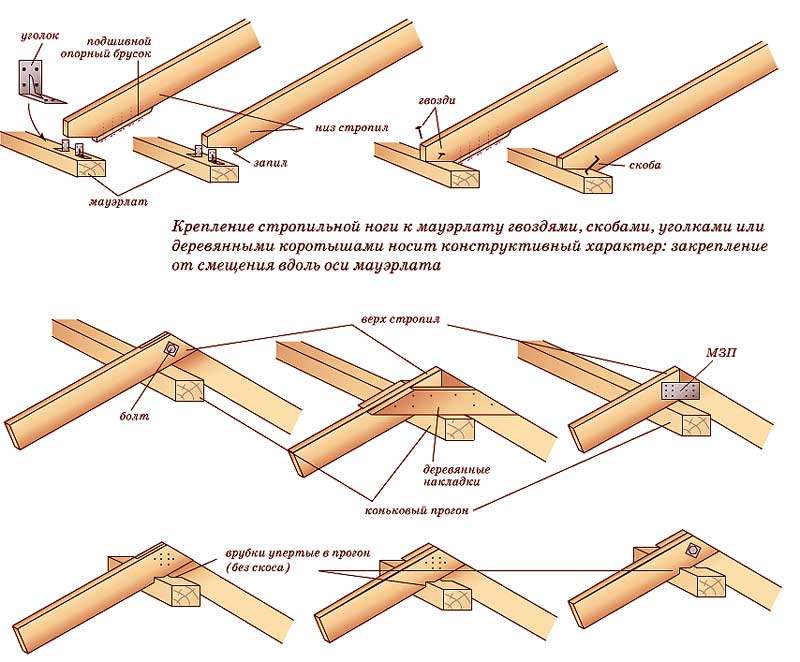
Installation of a rafter system of 2 slopes involves the device of a ridge assembly. It is performed in various ways:
- with overlay at the top of the corner;

with escutcheon and spacer bar;
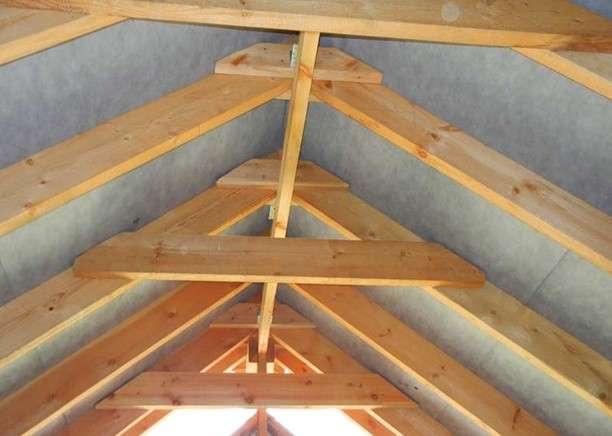
- with the support of the rafters on the ridge girder;
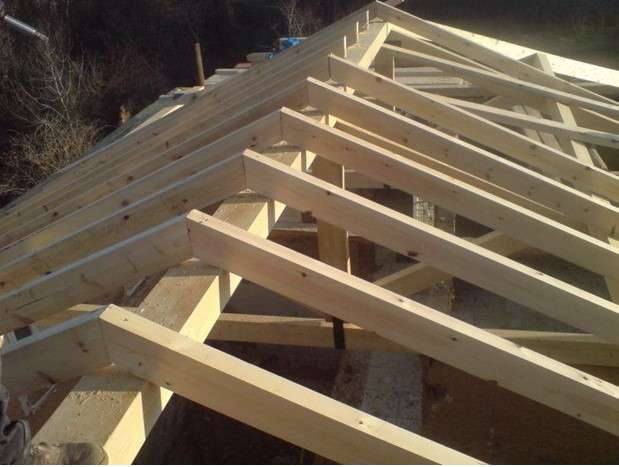
with adjoining to the ridge bar.

Roofing materials in the ridge do not fit tightly. The gap is necessary for air circulation in the under-roof space. To prevent precipitation from penetrating into the gap, metal ridge elements are installed.
A gable roof is more difficult to install, but it resists wind loads better. Another plus is the ability to use the space under the roof for various needs.
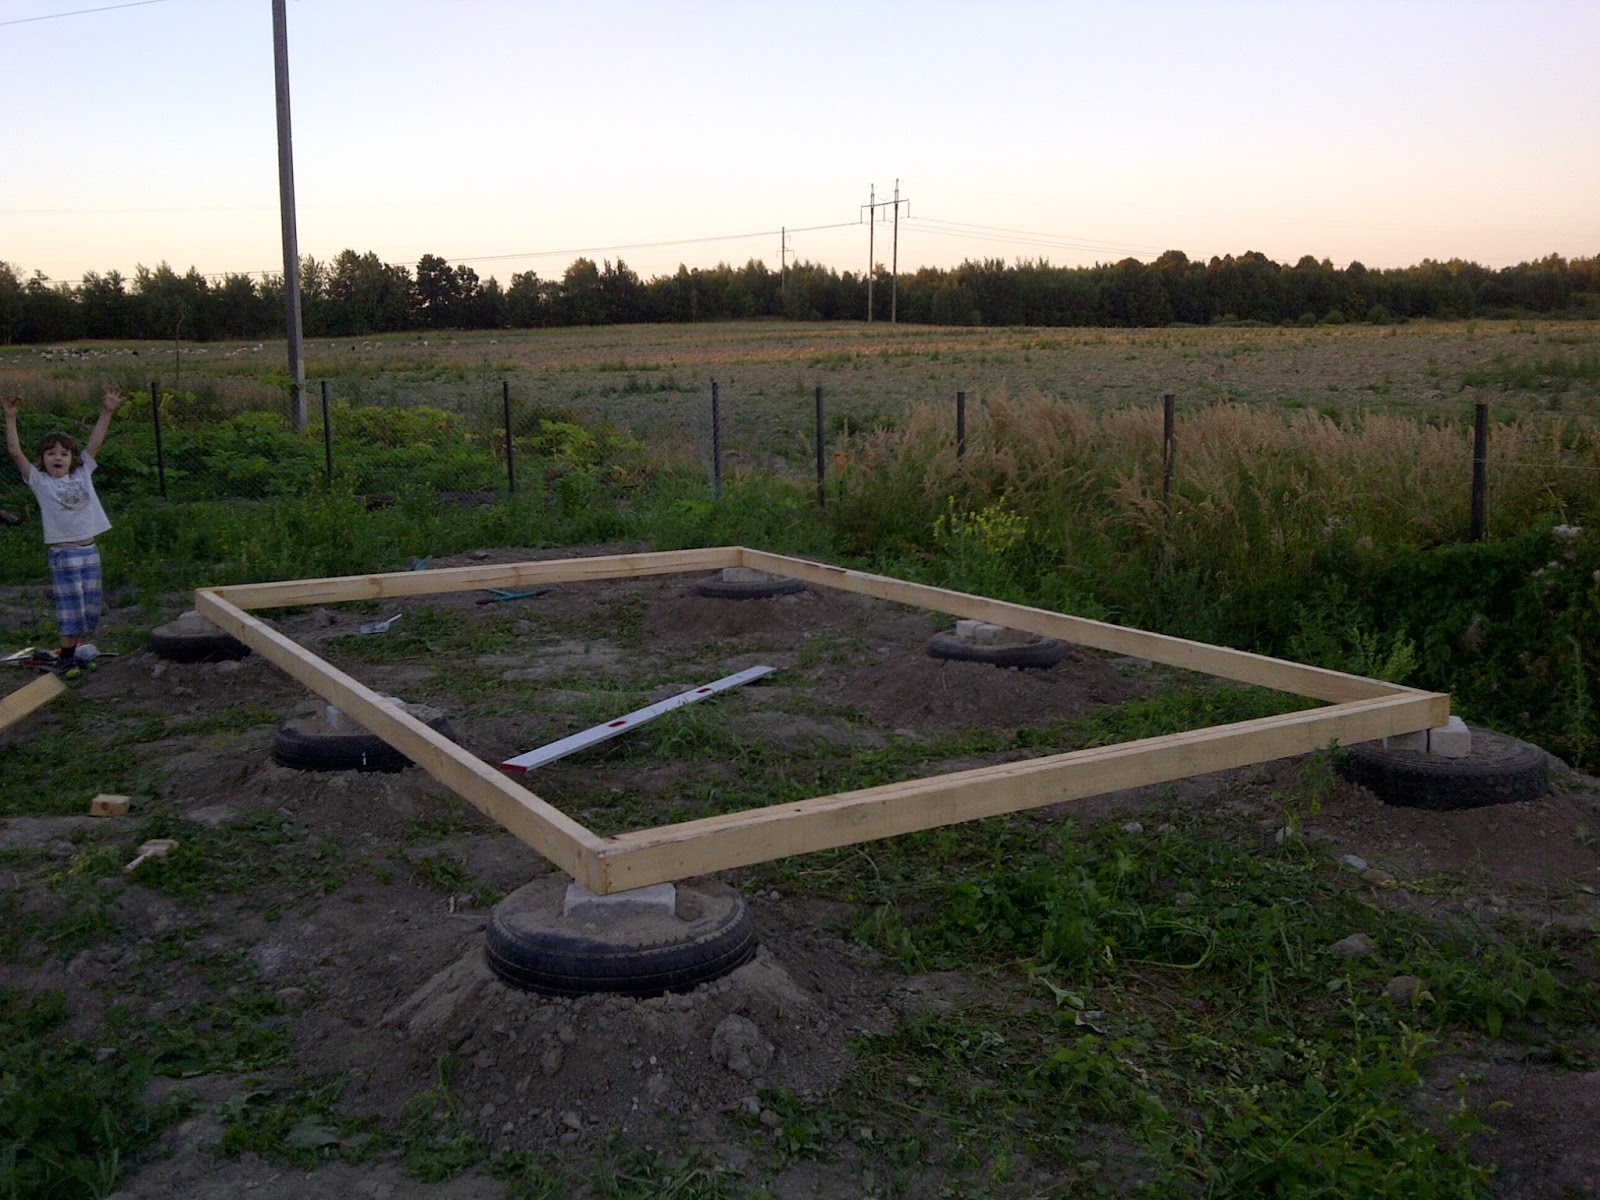
Tire foundation
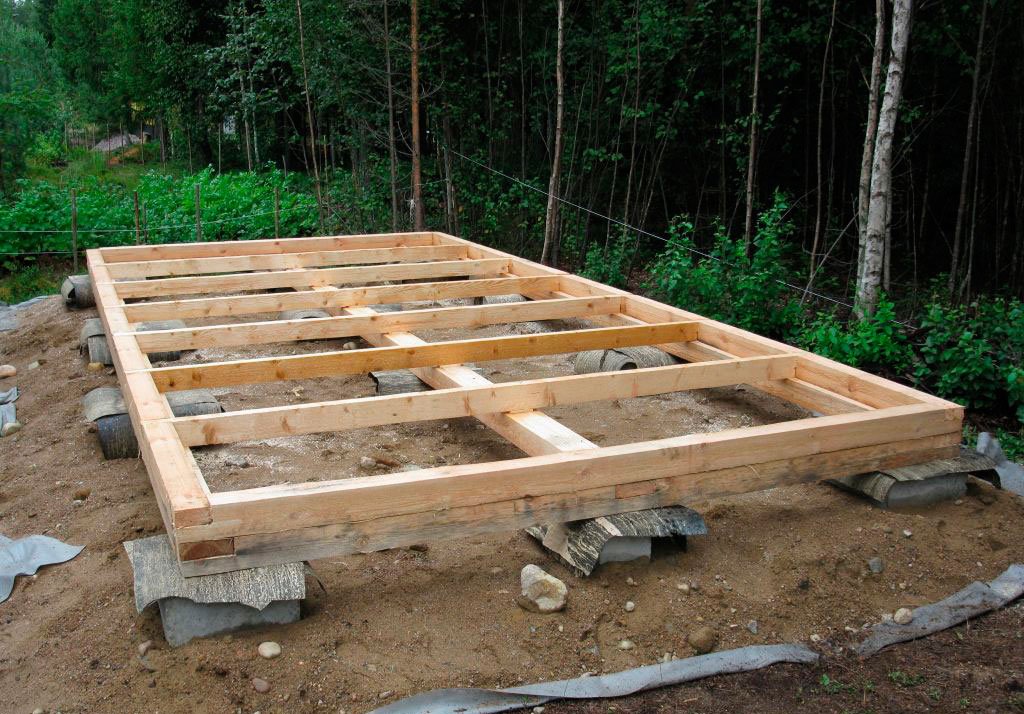
Recently, summer residents have widespread foundations erected from used material. For this, sleepers or tires can be used.
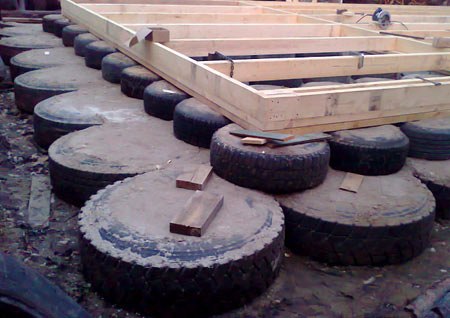
Barn Tire Foundation Example
Advantages of a tire foundation:
- Saving on materials;
- Rubber provides excellent waterproofing;
- Tires - strong and durable material;
- Tires can serve as a "cushion" in areas of seismic activity;
- Easy to manufacture.
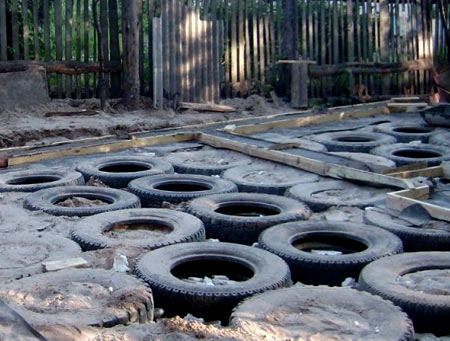
An important nuance is that the tires must be on the same level so that there is no distortion.The foundation of the tires can be erected as a tape or columnar type. To build it, you need to clear the area, level the ground, put the tires in two layers - the best would be to use truck tires. Then, 80% of the tire volume is filled with soil inside the column.
Roofing material must be laid on top to ensure a flat surface and waterproofing. Then concrete can be poured. To increase the strength of the structure, concrete can be used instead of backfilled soil.
Types of sheds and soils
Before considering the types of foundations for a barn, you should decide on the type of this structure itself. There are the following types of summer cottages:
- With a pitched roof. The roof is entirely flat and slopes slightly in relation to the rear wall. It is for this reason that when building such a shed, the area is somewhat limited. Most of such a building has one window and doors. For this type of sheds, a shallow strip-type foundation is suitable.
- With a gable roof. One of the most popular types of construction among summer residents. The floor is made of grooved boards, and the door hangs on three hinges. There can be one or several windows. For such a building, absolutely any type of foundation is suitable.
- Chest. Very lightweight and squat. It is usually used to store garden equipment. The area of such a room is minimal. The foundations for such buildings are being erected the most common and simple.
- Combined greenhouse. It is built exclusively in the case when the territory for the shed may simply not be enough. Such rooms are perfect for germinating seeds of all kinds of plants and for planting indoor plants in pots. Here you can apply a strip or columnar foundation.
- The tempest. In fact, this is a full-fledged housing with virtually no amenities. In winter, garden tools and tools or other equipment are often stored here. In summer, the hut is, in principle, suitable for living. For greater comfort, there is an outdoor shower, electricity and other benefits of civilization. The best type of foundation for a makeshift is a tape foundation.
The type of foundation being erected directly depends not only on the strength of the future building, but also on the type of soil on which it is being built.
- In the case of sandy soil, which can float in wet conditions, does not shrink and freezes by half a meter, a screw, monolithic or strip foundation is suitable.
- On sandy and loamy soil, freezing up to two meters and below, prone to quicksand, only a strip base is erected. It is also suitable for clay soil, which can exert high pressure on the foundation.
- Gravel soil is not eroded or compressed, its freezing is no more than half a meter. The simplest and most inexpensive in this case will be the installation of a columnar base.
- It is best to have rocky soil available for building. It is devoid of all of the above disadvantages, but it has its own: firmness. It can work with any type of foundation, excluding the screw one.
Consider the types of foundations for a barn that you can build with your own hands.
Sleeper foundation
The sleepers foundation is a strong and durable structure. Sleepers are usually made of high quality reinforced concrete and can be replaced in the event of a malfunction.
The disadvantages include:
- Size limitation. The sleepers have a standard size of 2.7 meters, so the foundation will be assembled from similar segments.
- Inaccessibility of used sleepers. It is difficult to find a sufficient number of them on sale.
- The smell of sleepers is specific, it will not disappear for a long time.
- Transportation problems.
- The material is not environmentally friendly.
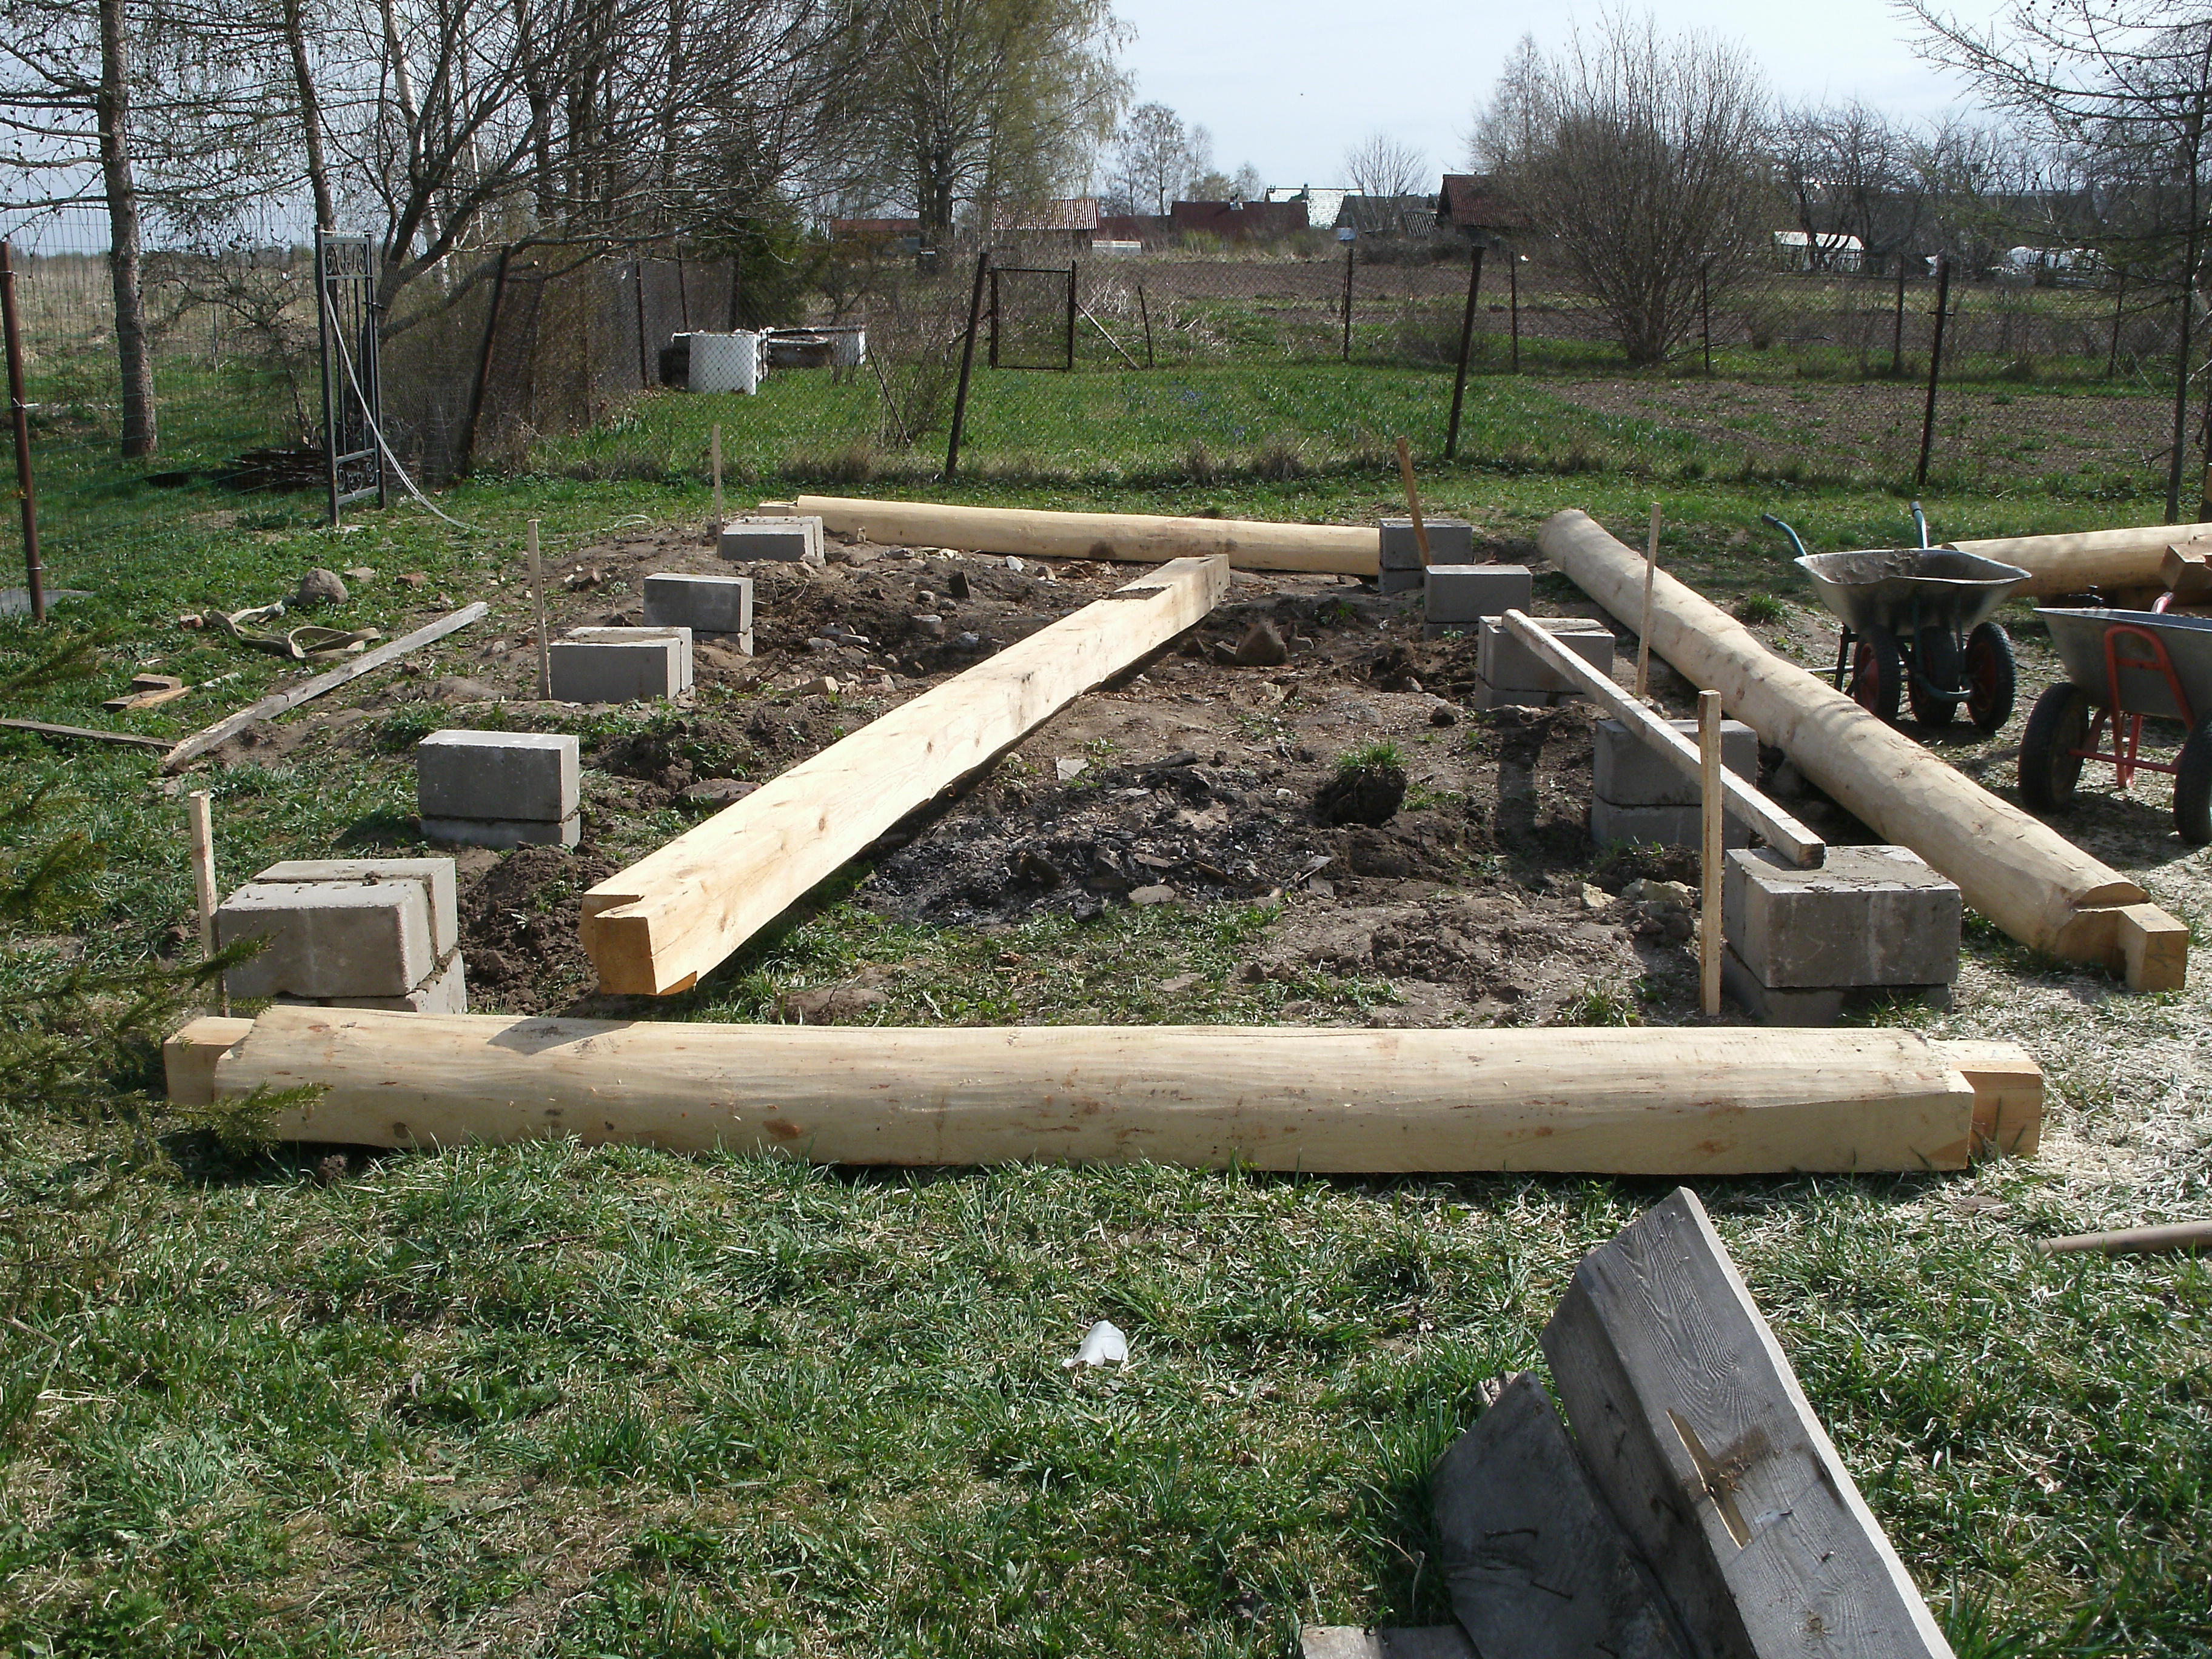
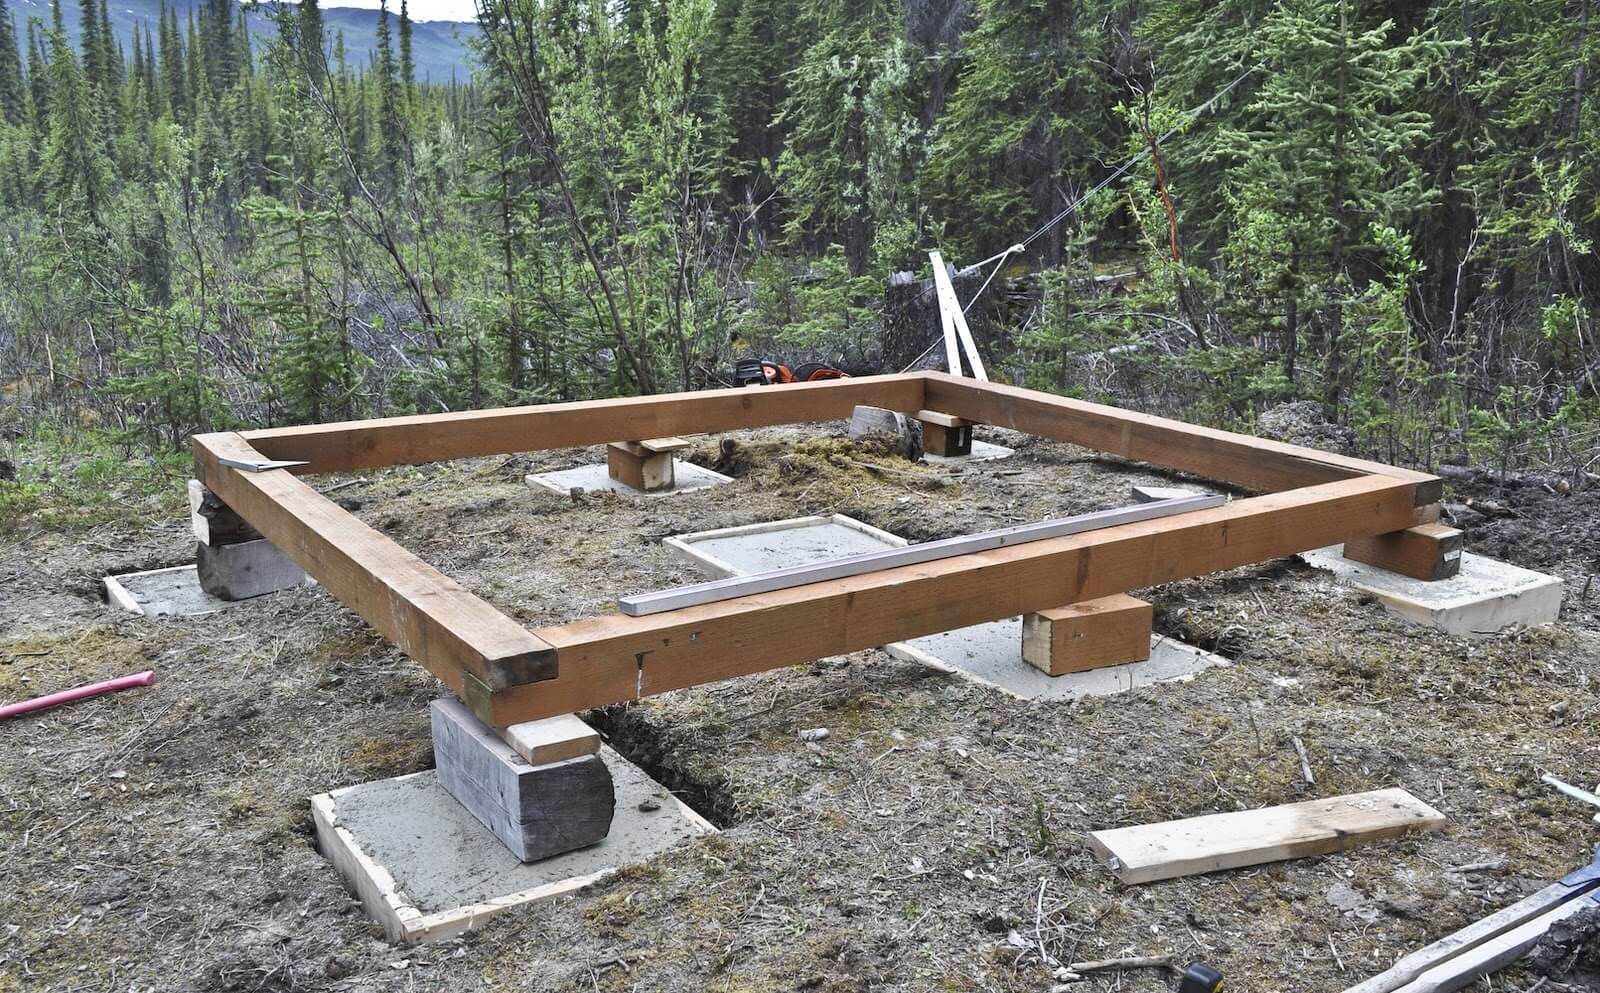
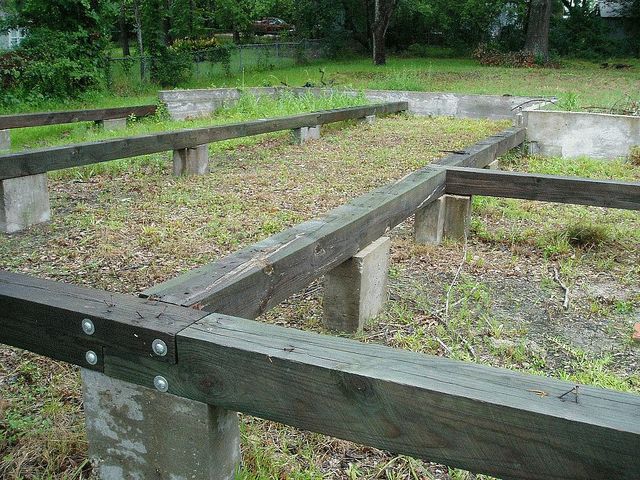
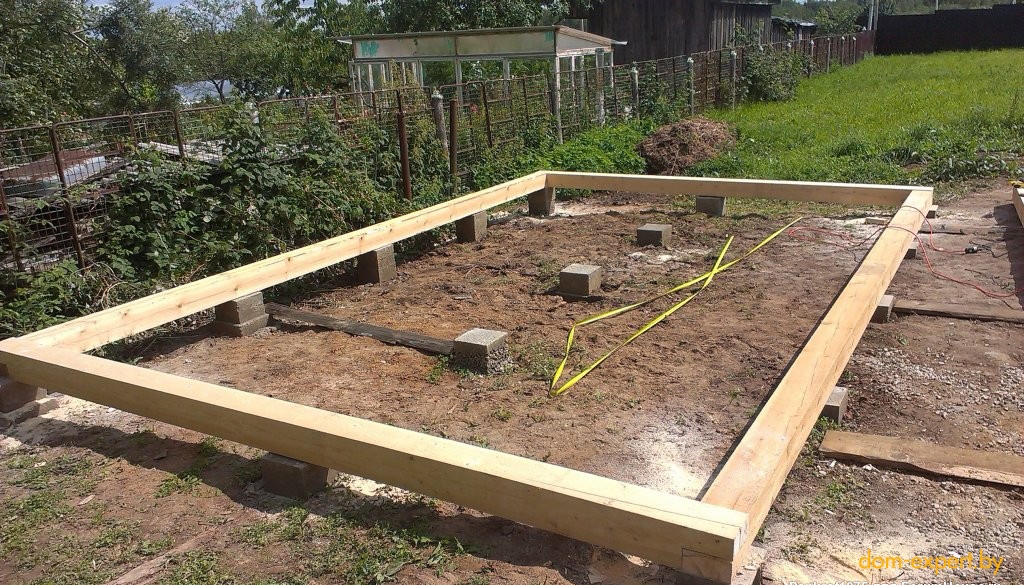
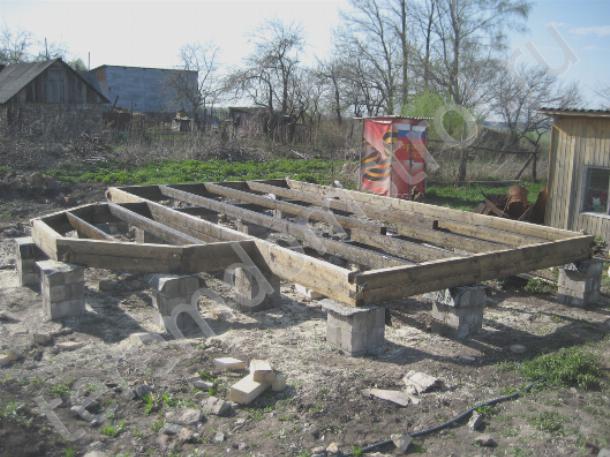
When building a base from sleepers, they are used as a material for a grillage. When the supports for the base are ready and completely dry, the ends of the sleepers are laid on them. For the construction of a shed, it is better to use a step of 135 cm, then one sleeper rests on three supports.

An example of a foundation from sleepers for a barn
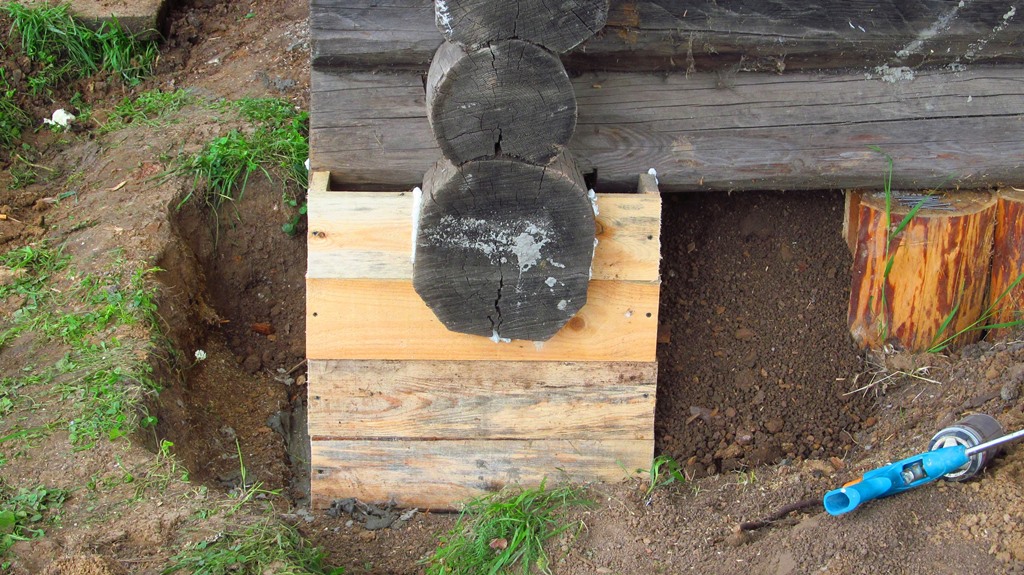
The foundation grillage can be assembled using wooden sleepers. If you use sleepers under the base for a structure that will be erected from bricks or blocks, you can perform work not only on the technologies of installing a grillage from sleepers on filling posts, but also a slightly different construction option, which involves the construction of a complete strip foundation.
The stages of this process are as follows:
At the construction site, a ditch is dug for the installation of a strip foundation, the width of which must be made equal to twice the width of the sleepers.
After the end of the excavation work, a cushion of a 10-cm layer of gravel and a 30-cm layer of sand is poured onto the bottom of the ditch. After that, the depth of the ditch should be half a meter: this is quite enough for arranging a three- or two-layer laying of sleepers.
The bottom and walls of the ditch are lined with a film for waterproofing, on top of it the sleepers are stacked one on top of the other
Important! When laying sleepers, one must not forget to do the strapping. It is carried out by placing the tie, located in the upper row, on a pair of lower adjacent elements (the tie must cover the lumen of the vertical butt joint).
After the end of the laying of the sleepers, a cement-sand mixture is poured into the resulting empty space.
In such cases, the part of the foundation intended for the basement (basement) floor is made of brick or concrete blocks. This technology allows the use of exclusively reinforced concrete sleepers for laying. Wooden products in this version are allowed for the construction of walls or installation of the ceiling of the basement.
Direct construction progress
And now, your attention is provided with step-by-step instructions for the construction of a columnar foundation itself.
- In all places that were marked earlier, an embankment should be made from a mixture of sand and gravel, which should not exceed 15 cm in height - this embankment must be thoroughly moistened and tamped.
- A self-made columnar foundation is being erected, oddly enough and paradoxically it looked, with bricks (preferably fired, red - they are of better quality) or concrete blocks, which are also carefully laid on cement.
- If there is already a very strong and irresistible desire to install a monolithic base of a columnar foundation, then you can do it differently: first, the formwork is placed, where the frame from the reinforcement is introduced. The formwork itself is made from ordinary wooden boards or slabs - but if you wish, you can also purchase a special ready-made formwork with insulation. In any case, they must be strong and dense, so that there are no gaps in them, and there are no gaps between the installed boards. Otherwise, the concrete will flow out, which will lead to the inevitable weakening of the entire structure. The weakening of the foundation leads to the weakening and unreliability of the building itself, no matter how light or temporary it may be.
- It is also necessary to choose the right fittings themselves: it is necessary to purchase a special one, the diameter of which does not exceed 7 mm.
Before soldering the reinforcement cage, it is necessary for reliability to tightly tie it with wire, although in principle, you can do with one thing. Soldering takes place in 10 cm increments
It is also important that there must be a certain distance between the reinforcement frame itself and the walls of the formwork, at least 5 cm, which is poured with concrete and forms a kind of protective layer that prevents corrosion and rust formation on the reinforcement.
It is important to note that all this complex reinforcing structure should not move or displace from its place, therefore, at the time of concreting, it can and even need to be balanced with concrete, brick or even ordinary foam.
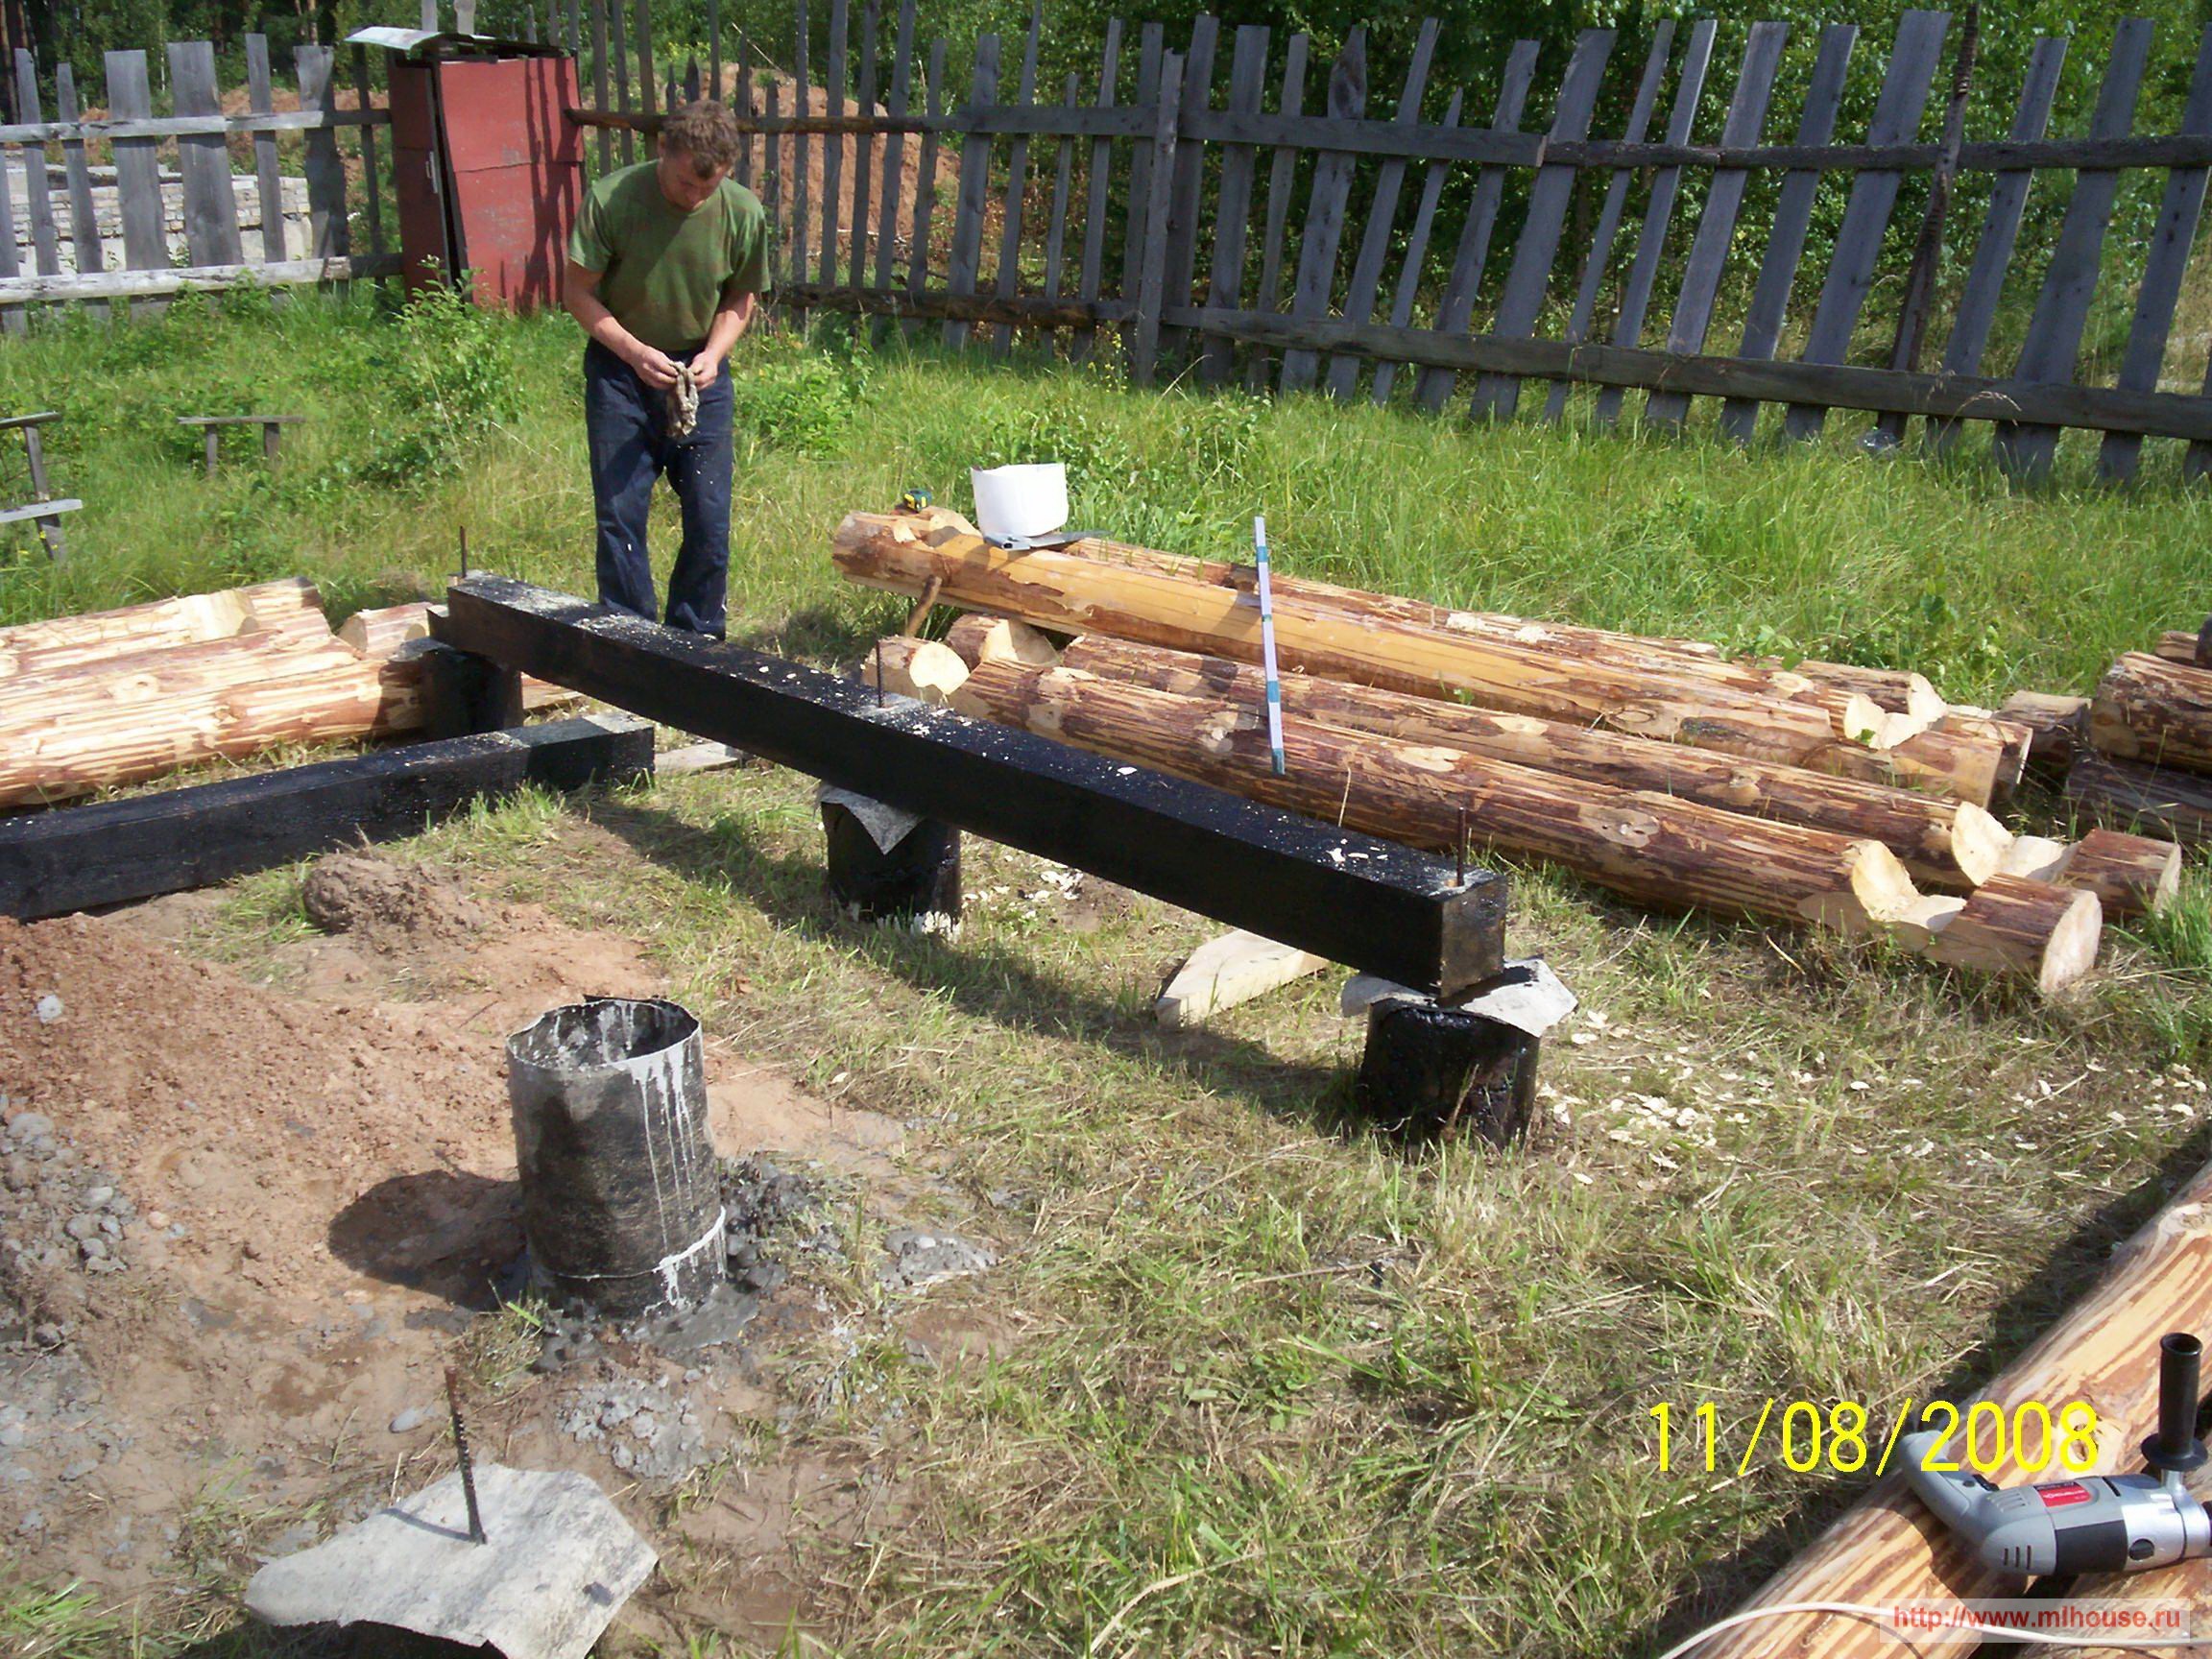
It doesn't matter what the foundation will be made of: from blocks, from bricks or from a monolithic base made of reinforced concrete, it is imperative to carry out additional waterproofing upon completion of the installation of the main structures: special pieces of roofing material are placed on top of the base, on which a layer of bonded beams is already laid ...
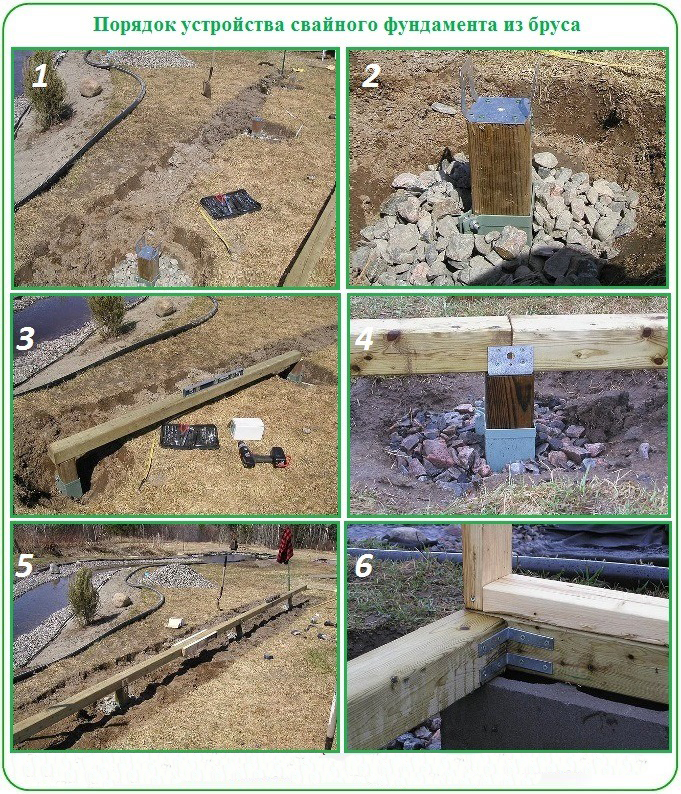
These beams hold together certain corners that are used in construction when it comes to timber structures. Usually such corners are metal, and they are much more reliable than any cuttings and notches in the boards themselves.
After all this, the bars must be covered with a layer of a special solution that will prevent rotting
Plus, it can also be treated with a solution that will prevent the formation of various colonies of microorganisms or parasites that live in wooden structures there.
Do it yourself
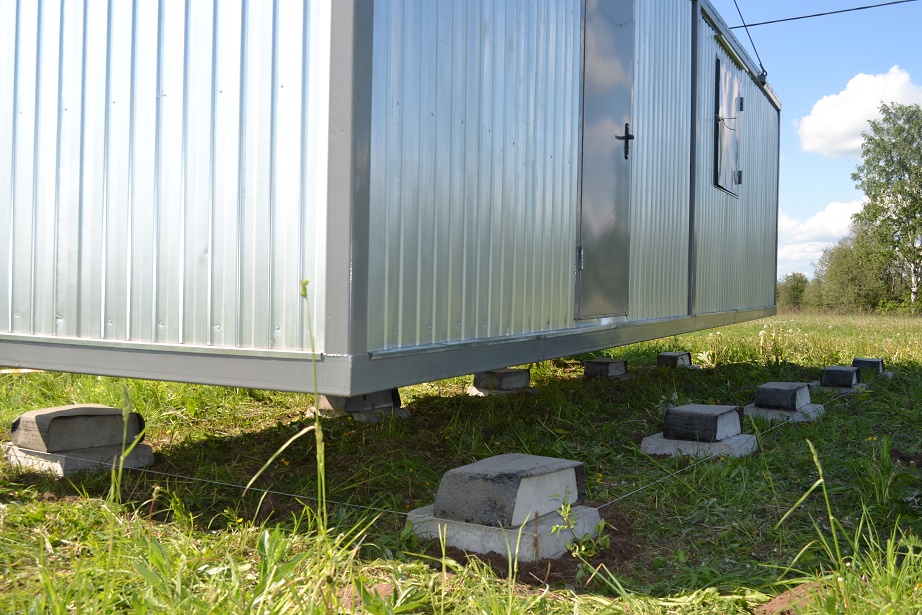
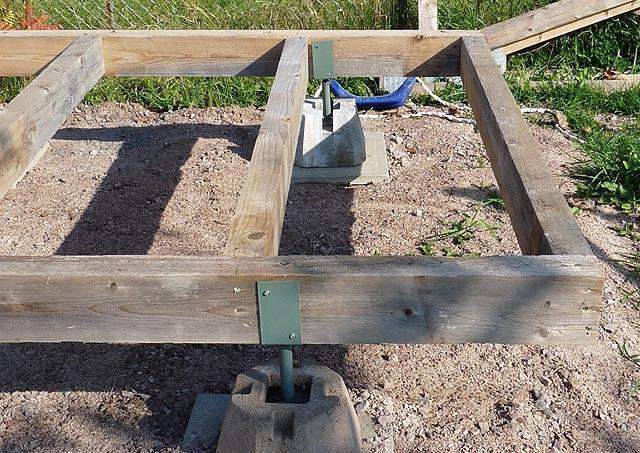
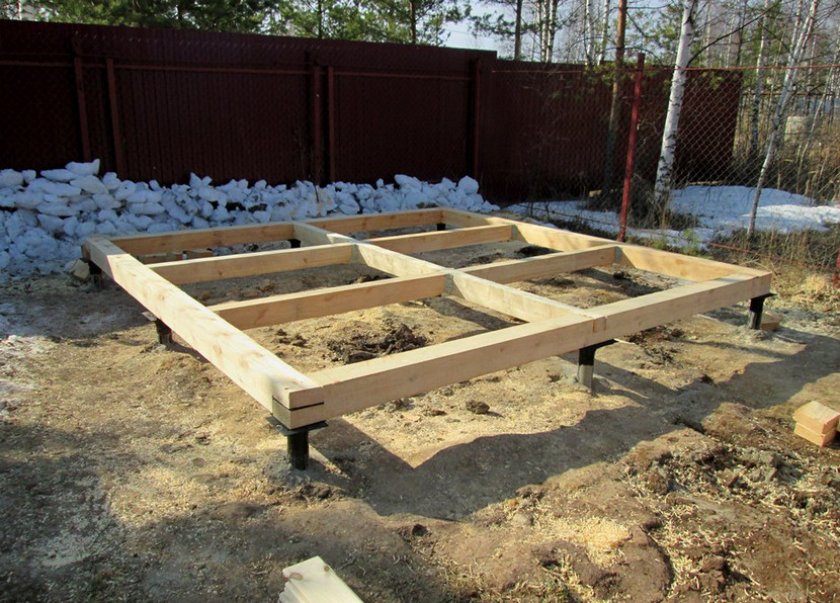
The shed itself is a light construction, because it is most often cocked according to the type of frame structure, which means that it does not carry large loads on the foundation. A frame shed is four load-bearing beams, vertically installed at the corners of the building, tied with a bar at the top and bottom. This means that it is better to build a columnar foundation for such a structure, but screw piles can also be used.
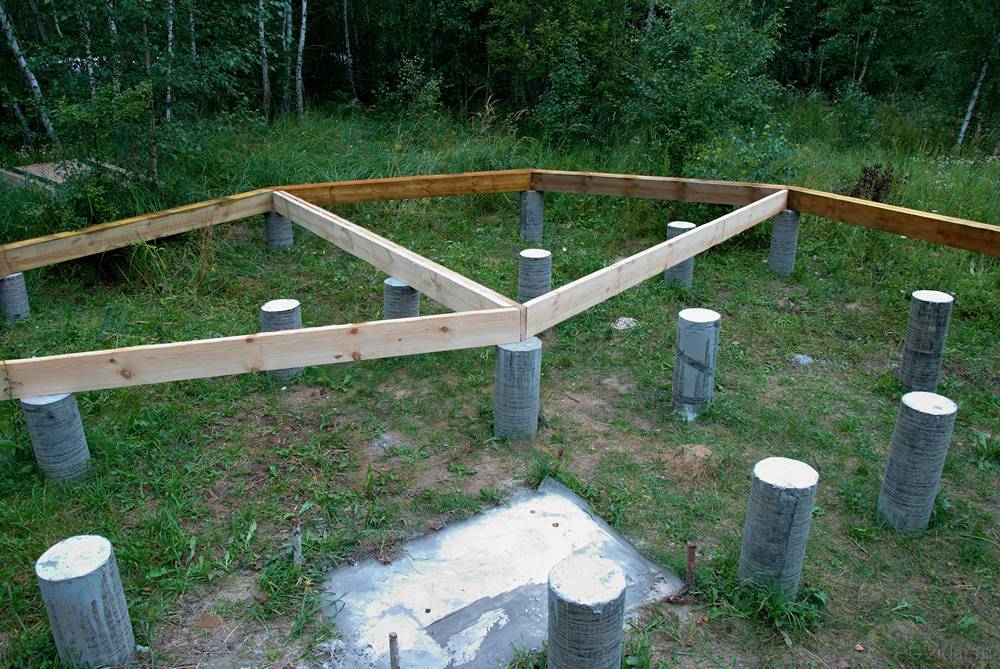
In this case, the pillars are erected precisely at the corners of the building. If you need to build a house with large dimensions, then, based on the length of the span of the walls between the corner support foundations, intermediate pillars are poured in increments of 2 - 3 m.By the way, the fastest way to build foundation pillars is to use ready-made concrete blocks rather than concrete mortar.
The construction of the foundation for a shed made of blocks in terms of bearing capacity will not be inferior to either metal piles or a monolith
In this case, it is important what size the blocks are acquired. Their main purpose is to create a solid and reliable support, therefore the main thing in this matter is to determine exactly the size of the foundation pillars, both in height and in cross-sectional size.
From which it follows that first of all it is necessary to determine the pressure that will act on the foundation from the side of the building.
Prevention of possible errors
Very often, when self-building foundations, inexperienced builders make a number of mistakes, which are very difficult to correct later, and sometimes even impossible.
The most common ones are described below:
- An incompletely selected vegetative layer of soil from under the sole of the future foundation threatens with an uneven subsidence of the latter. The roots and stems of plants, dying off, will create additional pores in the soil, the location of which will be random and unequal.
- The sand cushion is insufficiently compacted, which also threatens with uneven settlement of the foundation.
- Formwork is not properly secured. It can fall apart under the pressure of the concrete mix.
- The fittings in the corners are connected "crosswise", not providing sufficient contact between the rods. In the case of high tensile stresses, the foundation in the corners may break, and vertical cracks will appear.
- Concrete protective layer not provided. The armature, interacting with air, begins to rust. Corrosion, spreading inward along the rod, destroys it and reduces its strength.
- The concrete being poured is too thin. Often, when preparing water on your own, more than the prescribed rate is added to improve the workability of the mixture. As a result, the concrete exfoliates - the coarse aggregate settles down, the fine aggregate "floats" up. It is necessary to carefully tamp the concrete mixture poured into the formwork.
- It is not allowed to "dry" the concrete for the fastest hardening. It will dry out to dry, but from this it will lose a significant part of its strength. On hot days, the concrete is covered with foil, tarpaulin or other similar materials. If necessary, water the structure with water to create the required temperature and humidity conditions.
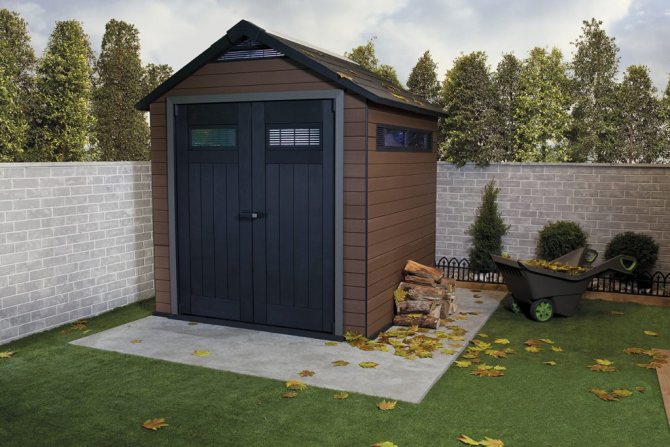
Shed in the country
Auxiliary buildings and structures on the site, as a rule, are built with their own hands. This does not require knowledge of the same level as for the construction of a residential building with utilities and communications. Therefore, it is quite justified to do the foundation on your own, without resorting to the services of third-party organizations. This will help reduce the cost of landscaping the site, and self-made buildings are easier to operate and maintain.
Varieties of sheds
Depending on the period of use of the barn, construction of capital or temporary objects is practiced at summer cottages.
The capital shed is designed for intensive use for many years and requires the construction of a solid, reliable foundation. For the construction of a capital shed, it is best to choose materials whose installation is very simple. Most often, foam blocks, a bar or board, brick, stone, metal or plastic are used for these purposes.
Temporary buildings are most often installed for a short period of use and are assembled from any available materials.

A temporary barn can be made for you from scrap materials left over from the construction site
Site selection and site planning
The building can be interlocked with an existing sauna or garage, or it can be installed separately. Basic requirements when choosing a place on the site:
- the structure should be conveniently located in relation to the house and other outbuildings;
- do not occupy the area for the allotted garden plantings;
- blend harmoniously into the complex of surrounding outbuildings;
- comply with fire and sanitary safety standards.
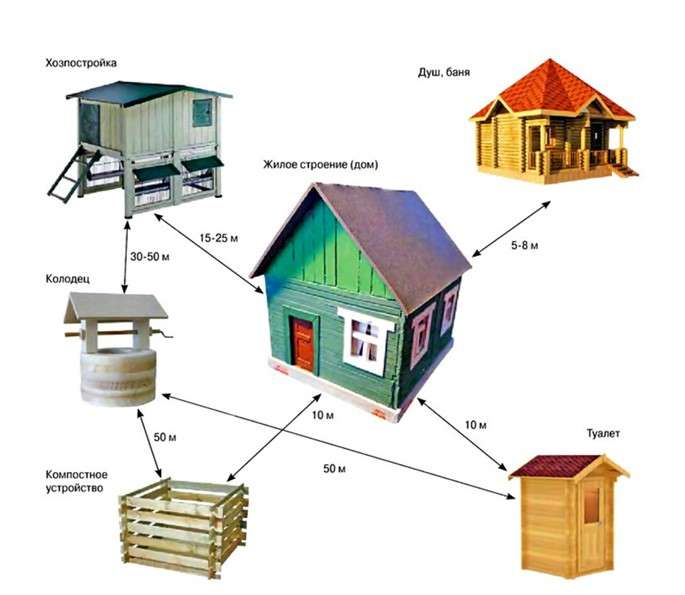
The owner can solve the first 3 points on his own. But there are certain restrictions on the requirements of urban planning and sanitary standards. If you intend to keep a bird or small pets in the barn, you need to retreat:
- from a neighboring property at least 4 m;
- from a residential building at a distance of 15 m;
- from a well for drinking water 30-50 m.
The place should be elevated enough not to be flooded by melt or rainwater. To protect the site from the winds, you can position the shed on the windward side.
The structure should not interfere with neighbors and block the access of sunlight to their site. Otherwise, they can file a complaint, and the court will force the building to be demolished or moved to another location.
Plate
So, let's look at how to properly fill the slab for building a barn. Usually it is erected on moving soils with minimal immersion in the soil.
Moreover, such a foundation can be laid under a shed made of blocks, bricks, under a frame structure, and so on.
In this regard, there are no restrictions, because the bearing capacity of the structure will mainly depend on the thickness of the poured slab foundation. Therefore, under not heavy structures, you can pour concrete mortar 20 cm thick, under heavy ones at least 30 cm.
- A pit is dug up to a depth of 30 cm exactly according to the linear dimensions of the future barn.
- A 15 cm thick crushed stone pillow is poured into it. It is leveled and tamped.
- A layer of sand is poured to the level of the soil surface. It is also rammed with watering and leveled.
- If the depth of the pit allows, that is, the pillow was not filled up to the edges, and besides, the soil in the area is clay, then the reinforcing frame is laid in the pit on supports. If the pit was not dug deep, then a formwork of boards with a height of no more than 15 cm is installed around the perimeter of the shed. It is at this level that the frame is installed. It can be assembled from steel reinforcement, or it can be a mesh, for example, a chain-link.
- The concrete solution is poured with the removal of air from its mass with a vibrator or improvised materials.
As for the bearing capacity, it all depends on the thickness of the poured concrete and the number of levels of reinforcing meshes.For example, if the foundation is poured under the shed from foam blocks, and this is a small load, then the thickness of the poured layer can be a maximum of 20 cm, one lattice of the reinforcing frame is placed in it.
If a shed is being built from a cinder block, concrete block or brick, then the thickness of the screed should not be less than 30 cm, and a reinforced frame of two or more gratings installed one above the other must be placed in it.
The slab is considered the most costly options for the foundation structure, so it is very rarely used for sheds. The main reason for the construction is mobile, heaving soils, which make, for example, columnar options unsuitable.
Which foundation should you choose?
In total, there are several types of foundations, the installation of which depends directly on the climatic conditions of the area, the quality and physical characteristics of the soil, the depth of its freezing and the level of groundwater. An important factor is the weight of the structure itself. So, the foundation is divided into four types:
- monolithic;
- tape;
- columnar;
- pile.
 The advantages of a columnar foundation are that:
- to make it extremely simple and independently;
- one of the cheapest options for installing a foundation;
- easy to dismantle if necessary.
Indeed, the mass of the change house is several times less than the mass of any residential building, therefore, the distribution of weight and optimal adhesion to the soil can also be provided by such a simple type of foundation. And besides, do not forget that the change house is still a temporary structure, which, after the completion of the main construction work, should be dismantled and disassembled - and getting rid of the pillars is much easier than somehow digging a monolithic reinforced concrete base.
Plus to everything, although this building will be used for some time and it is desirable to make staying in it comfortable (this is, after all, not an iron barrack of settlers), but you should not overdo it and spend too much money and effort on it, which should be directed to the main construction process.
The foundation for the change house is not always installed: sometimes it is enough just to erect a timber frame, which in the process is finished with boards or tiles, after which this entire structure is also covered with special roofing materials - and this is where it all ends, such a simplified model
But in this case, it is important not to forget to fill the lower part with sand, slag or gravel, and also to install the frame on concrete blocks or bricks - in principle, the same analogue of a full-fledged foundation
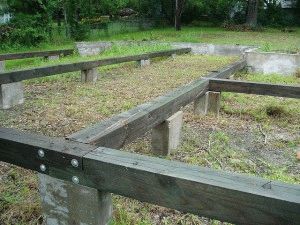
But what is the use of half measures when you can make a normal columnar foundation for a change house with your own hands? This type of structure is usually left very low, no more than 0.4 m above ground level - this is done so that in winter it would be possible to throw snow and thereby insulate the entire structure. If we are to stay in the shed for the winter, then we must not forget about the temporary stove or heater - of course, there is no need to carry out central heating.
How to make a foundation for a barn with your own hands
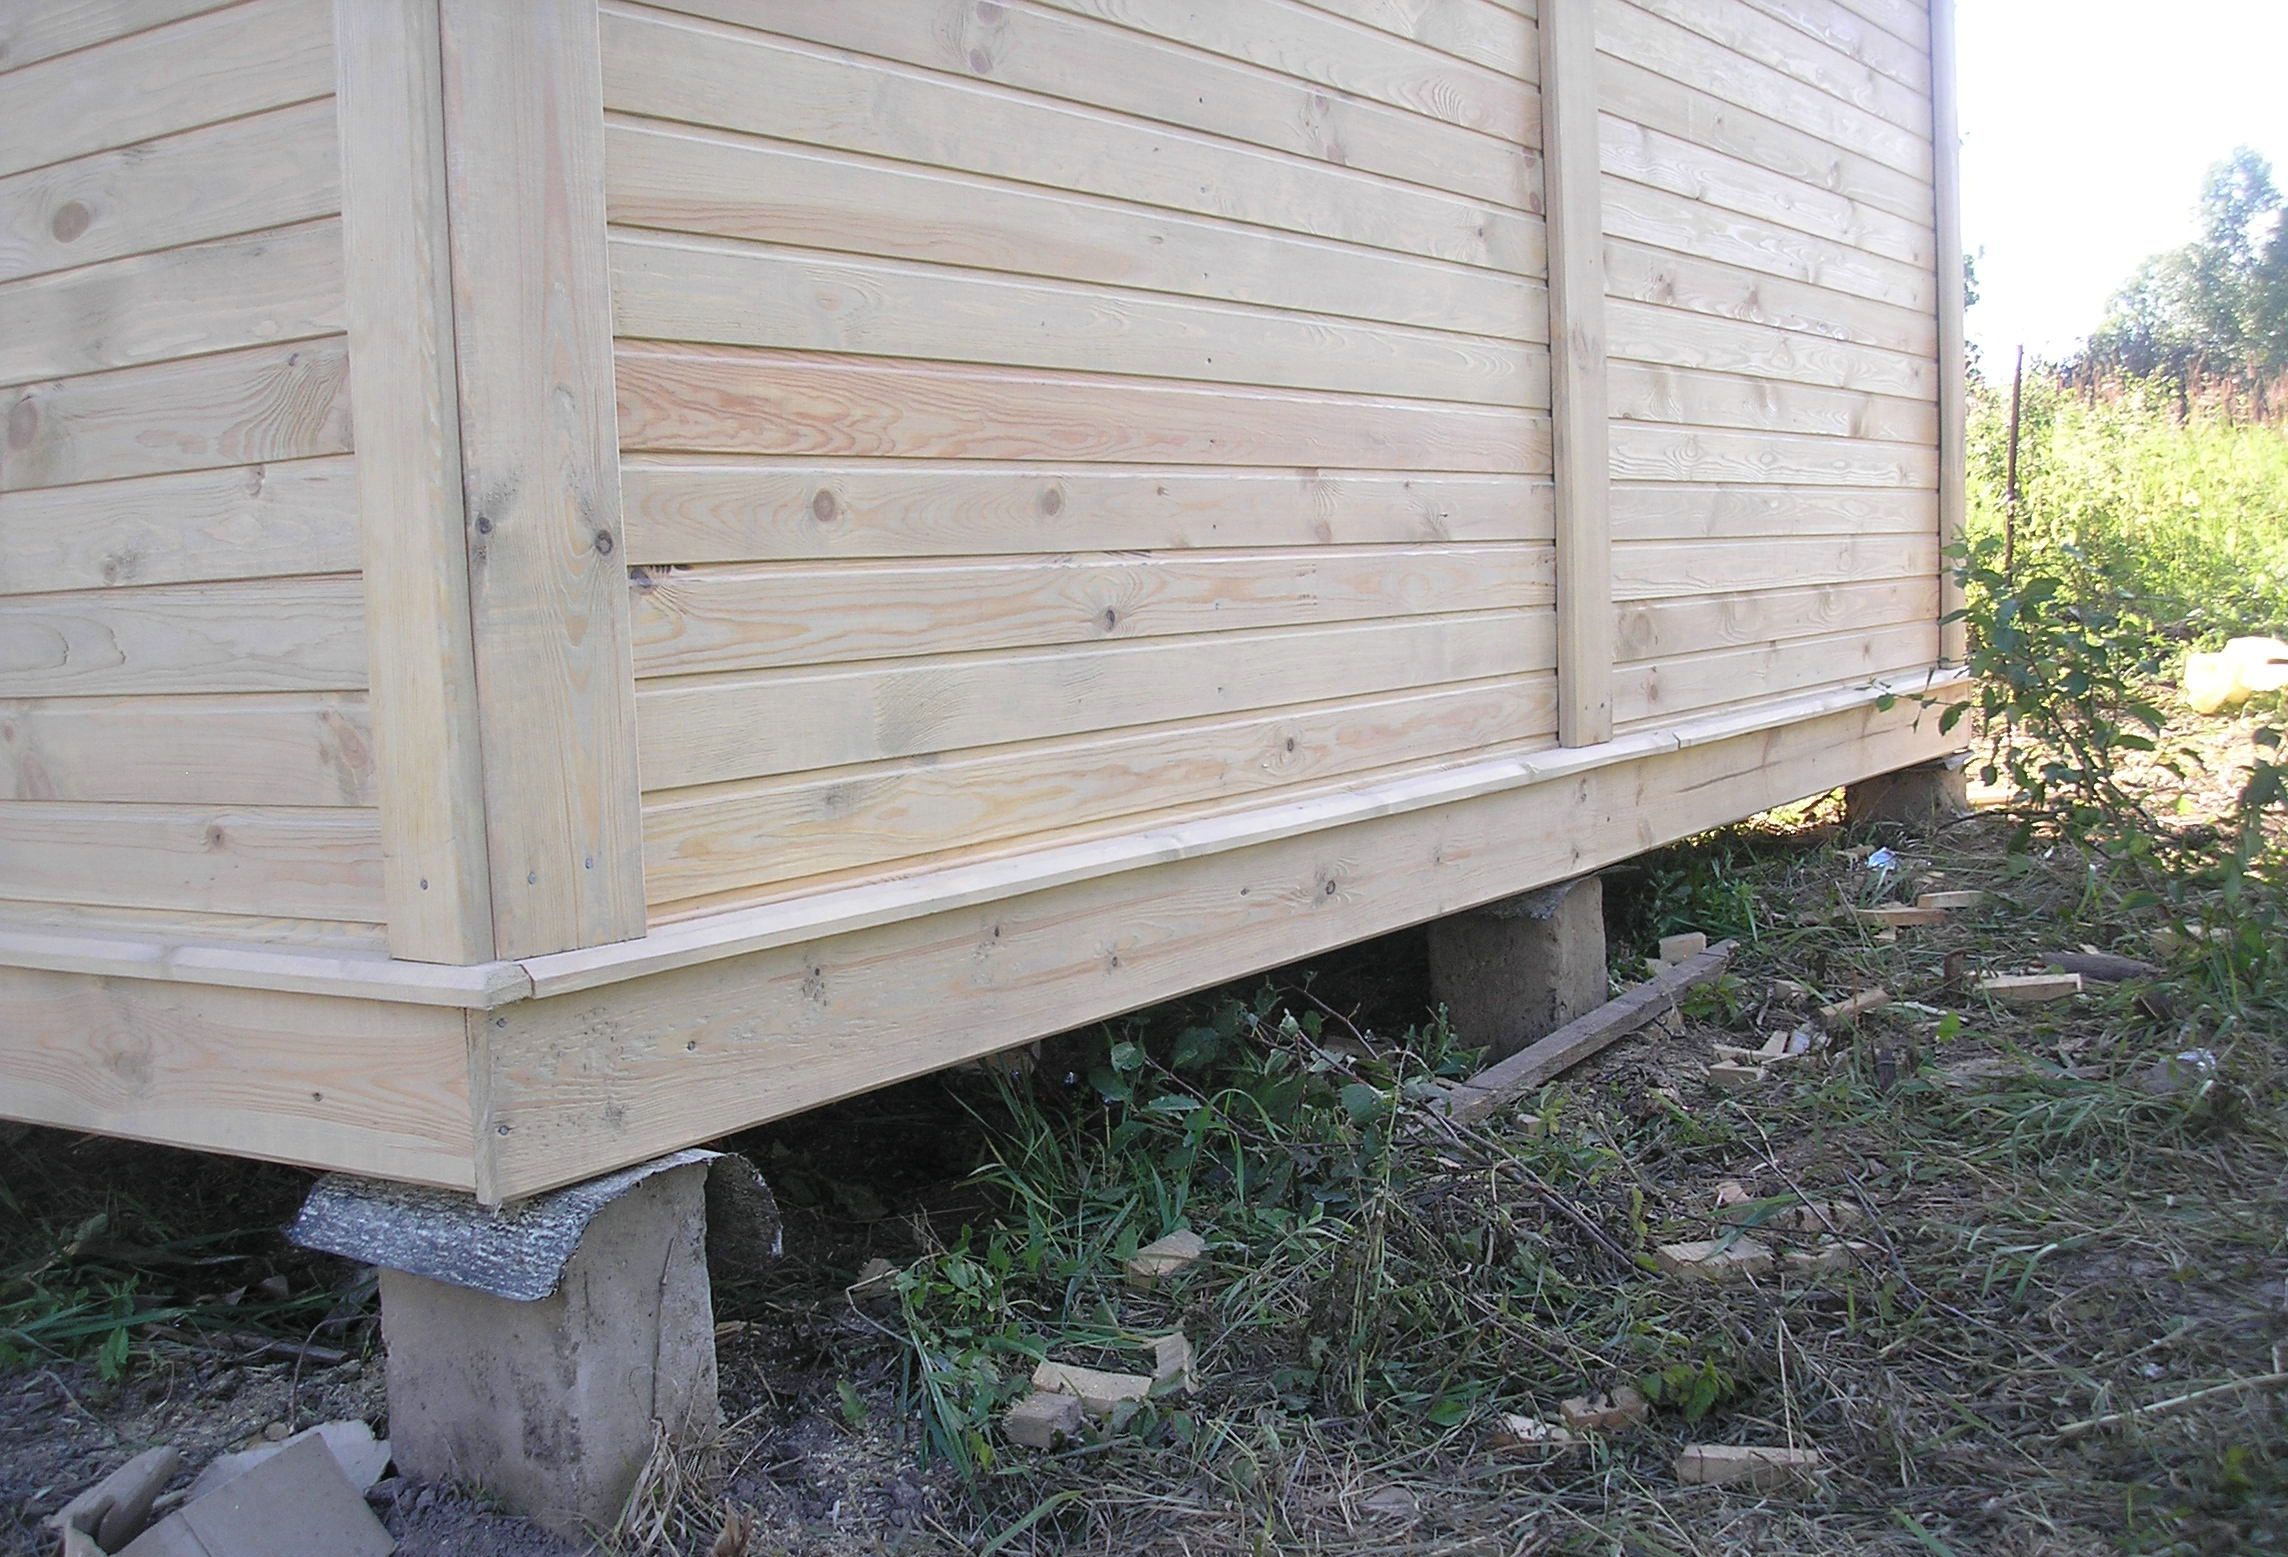
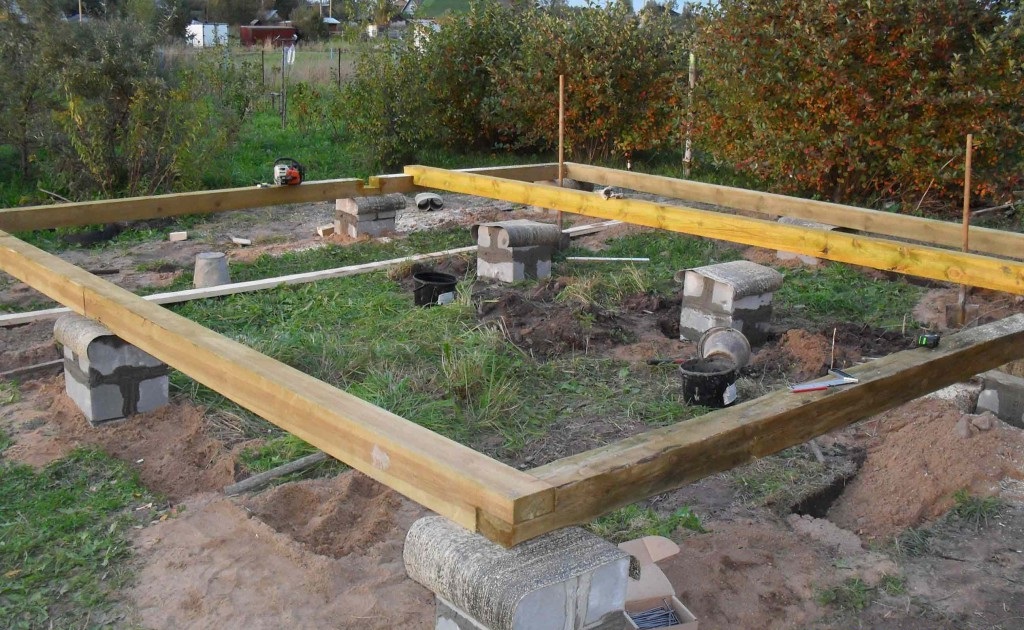
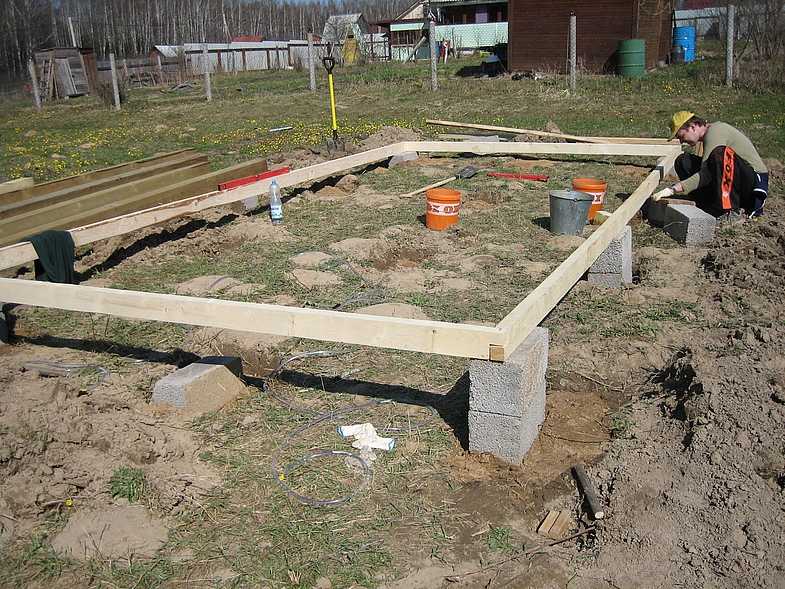
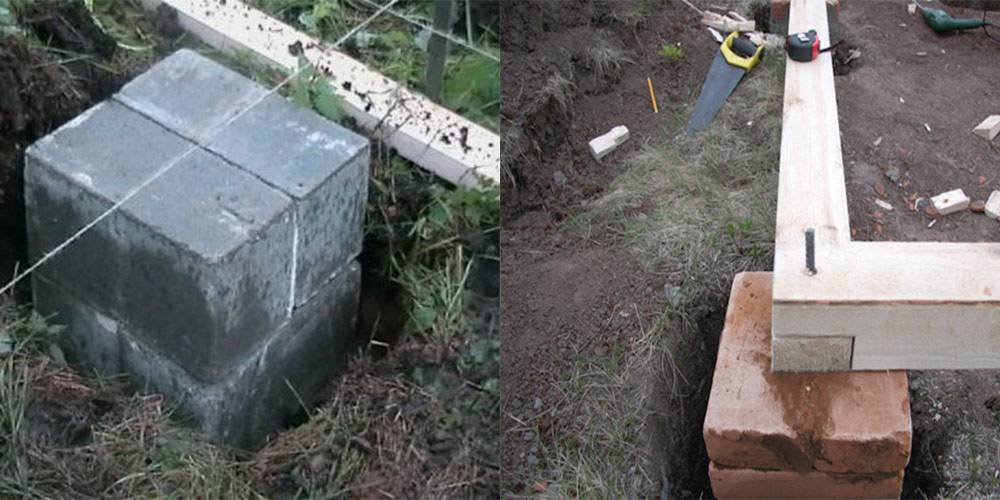
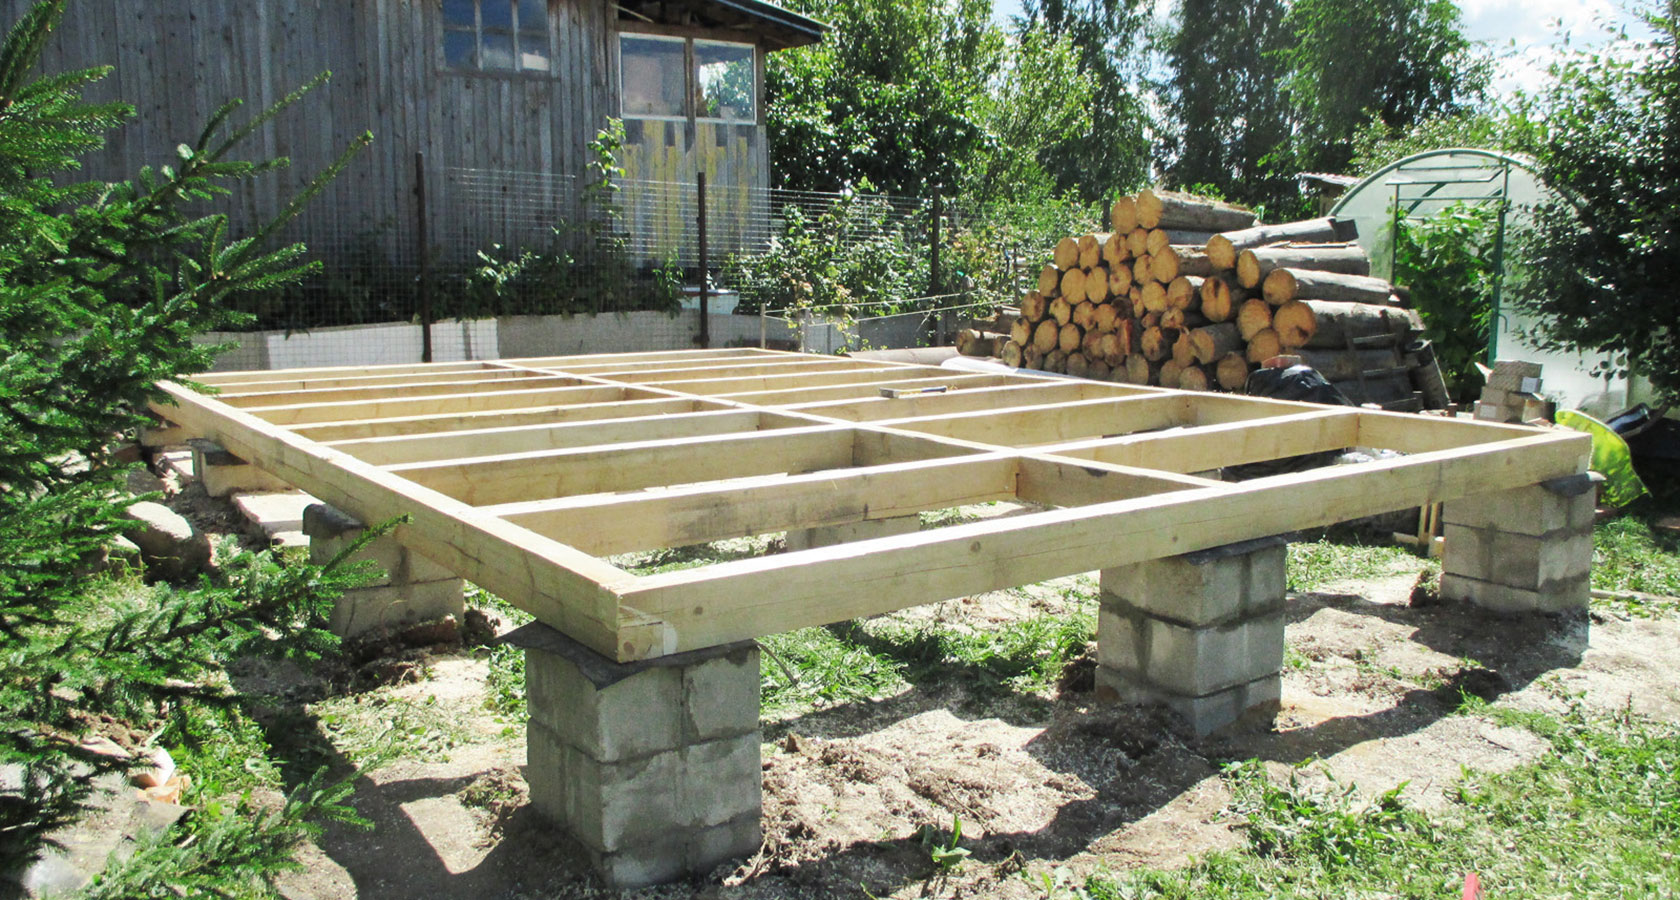
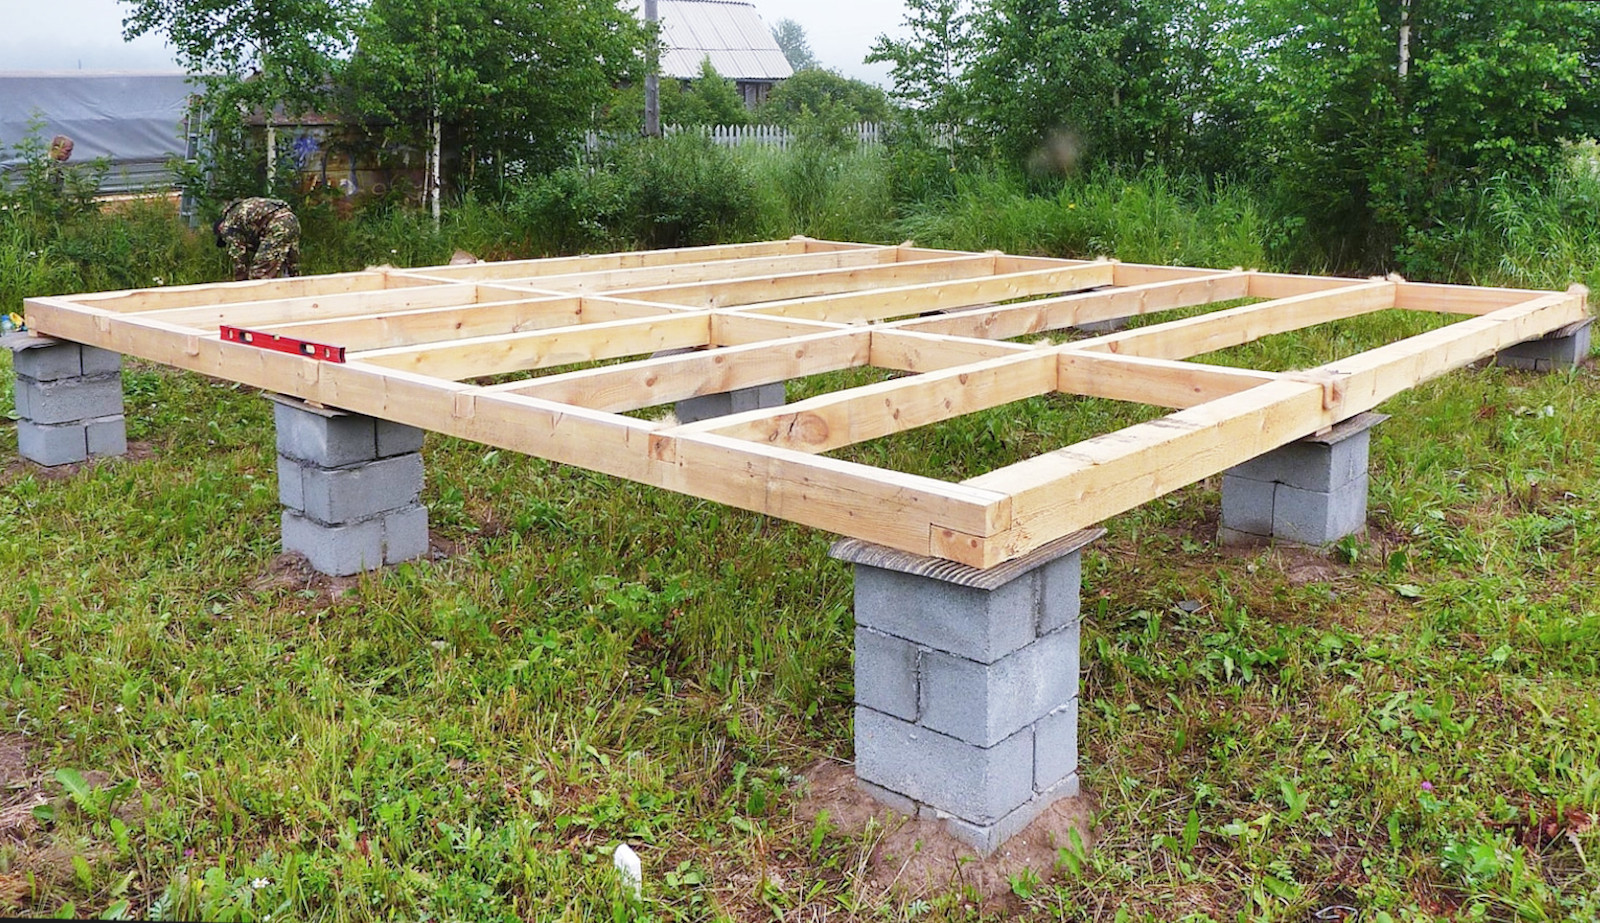
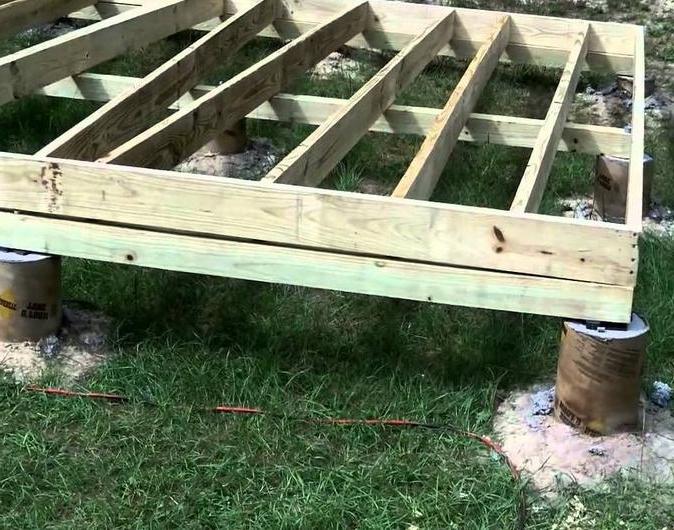
If your only task is to protect your structure from rotting and moisture, and not to create a full-fledged subfloor, then your path is an unburied columnar foundation made of foam or expanded clay blocks. Moreover, we will put the blocks not in a checkerboard pattern of 4 blocks per column, but one on top of the other - two per column. Our design is light.
An example of blocks in pillars of an unburied columnar foundation
Selection and calculation of material
-
It will be optimal to choose foam blocks. They are relatively lightweight and inexpensive.
-
For strapping (grillage), you can use both a beam and a board. Of course, you are more likely to have a medium section board. But the harness is still better made from a bar.
-
And from the board you need to make internal stiffening ribs.
-
For the mortar, it is better to choose Portland cement of the M400 brand, it has a much better adhesion.
-
The sand in the solution should go river, fine, without clay.
-
The crushed stone for the pillow should also be small, since only small crushed stone will provide evenness and good adhesion of the blocks to the ground.
-
Ruberoid will require very little. But if there is none at all, you will have to buy a whole roll.
But on any site (if you have not just arrived at a virgin piece of the field) there are always remnants: pieces of roofing material, a pile of sand or rubble, several blocks or a hundred bricks. So you probably won't need to buy materials. But if necessary, then the following figures can be displayed.
Table: calculation of the required material and its approximate cost, based on average prices
| Position | Material | Specification | Required quantity | Unit price (rub) | Total price (rub) |
| 1 | Foam blocks | 600х300х200 mm, weight - 20 kg | 24 pieces | Rub 125 / pc | 3000 rbl |
| 2 | Cement | M400 | 50 kg (1 bag) | Rub 250 / pc | 250 rbl |
| 3 | Sand | Fraction 0-2.5 | 100 kg (4 bags) | Rub 100 / pc | 400 rbl |
| 4 | Crushed stone | Fraction 2-5 | 100 kg (4 bags) | Rub 150 / pc | 600 rbl |
| 5 | Roofing material | 1 roll | Rub 250 / pc | 250 rbl | |
| 6 | Edged board | 25x200x6000 mm | 2 pieces | Rub 370 / pc | 740 rbl |
| 7 | Pine timber of natural moisture | 100x100x6000 mm | 3 pieces | Rub 400 / pc | 1200 rbl |
| 8 | Reinforced fixing angle | 90x90x65x2.0 | 8 pieces | Rub 20 / pc | 80 rbl |
| 9 | Self-tapping screws and anchor bolts | On demand | |||
| Total (excluding the cost of screws and anchor bolts) | 6290 rbl |
If you replace the timber with a board, then the already low cost will be even lower.
It is done in the most primitive way.
The tools you need
- shovel bayonet
- shovel shovel;
- wheelbarrow;
- rammer;
- a construction mixer for mixing cement mortar (if it is not possible, then an ordinary trough or even a sheet of roofing iron);
- trowels;
- hammers;
- nail puller;
- pliers;
- circular saw, power saw or hacksaw;
- drill and screwdriver;
- pegs and twine;
- tape measure and hydro level (or laser level).
Step by step process
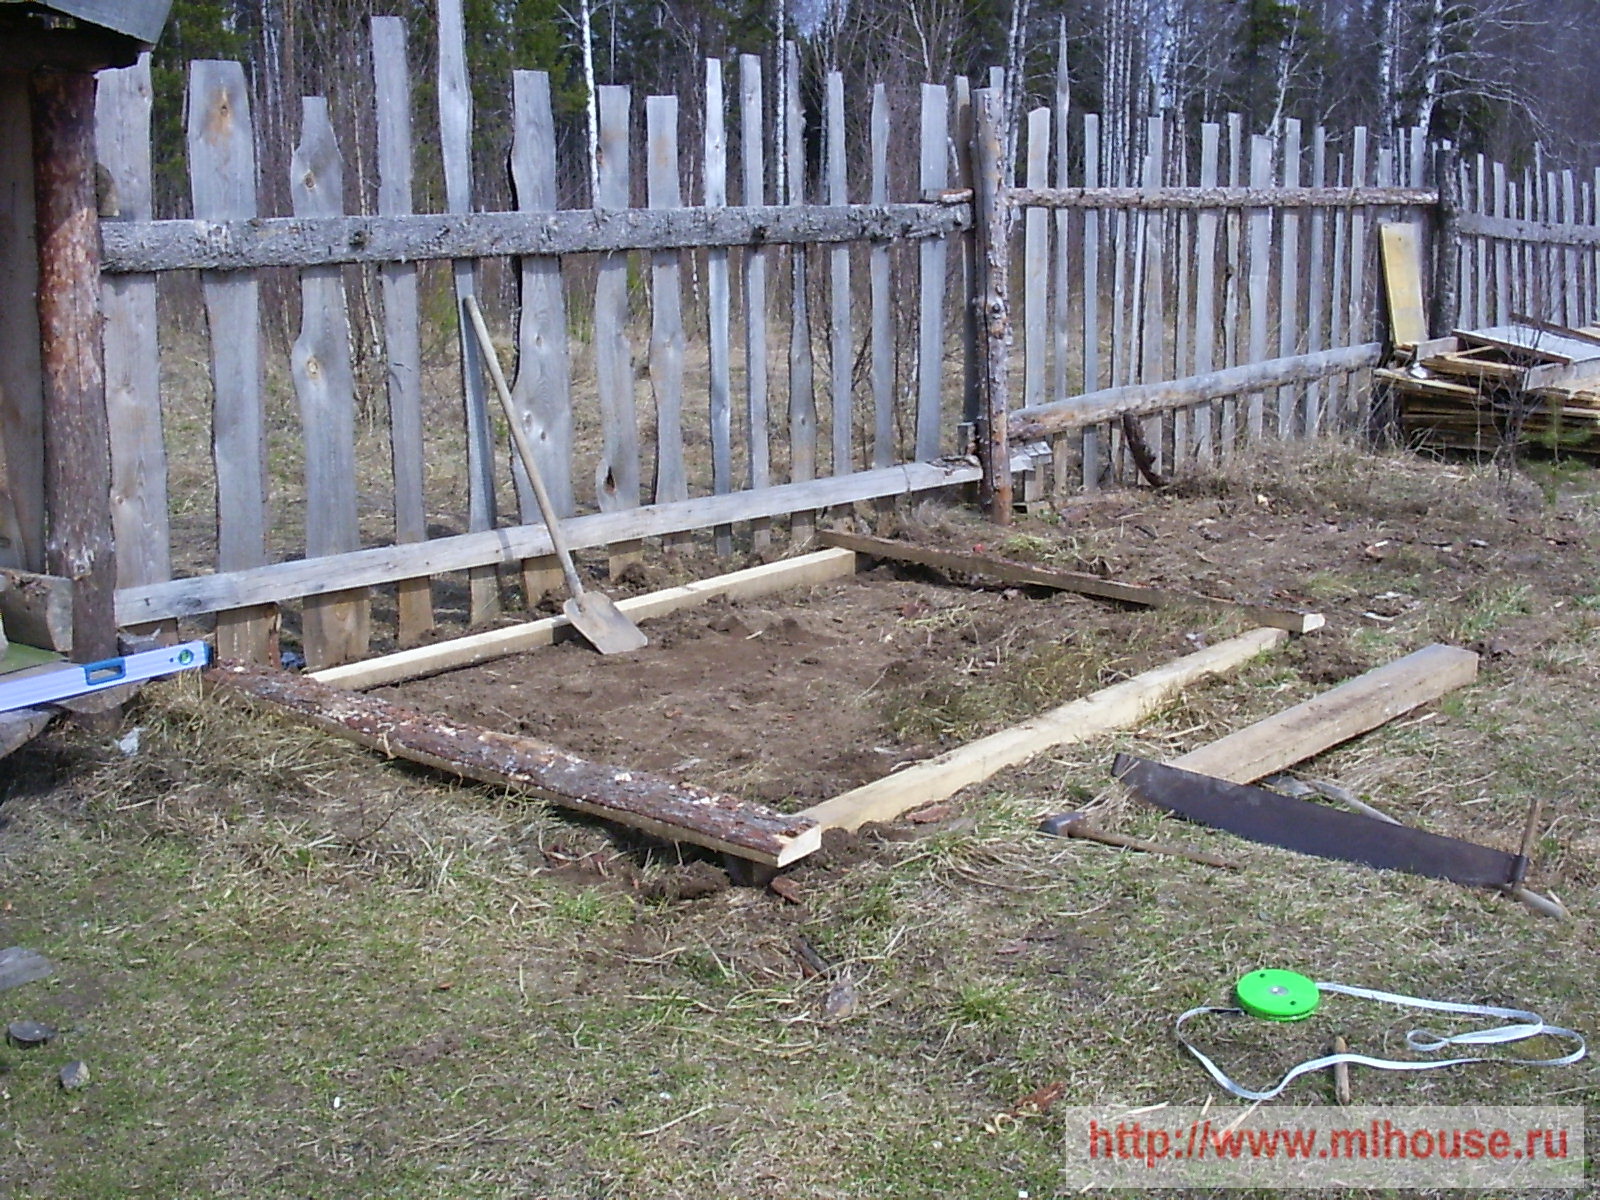
- We choose, as mentioned above, and we clear the site. We uproot stumps, remove roots, mow vegetation.
- We align the cleared area, this must be done very carefully, it is better - with the help of a level.
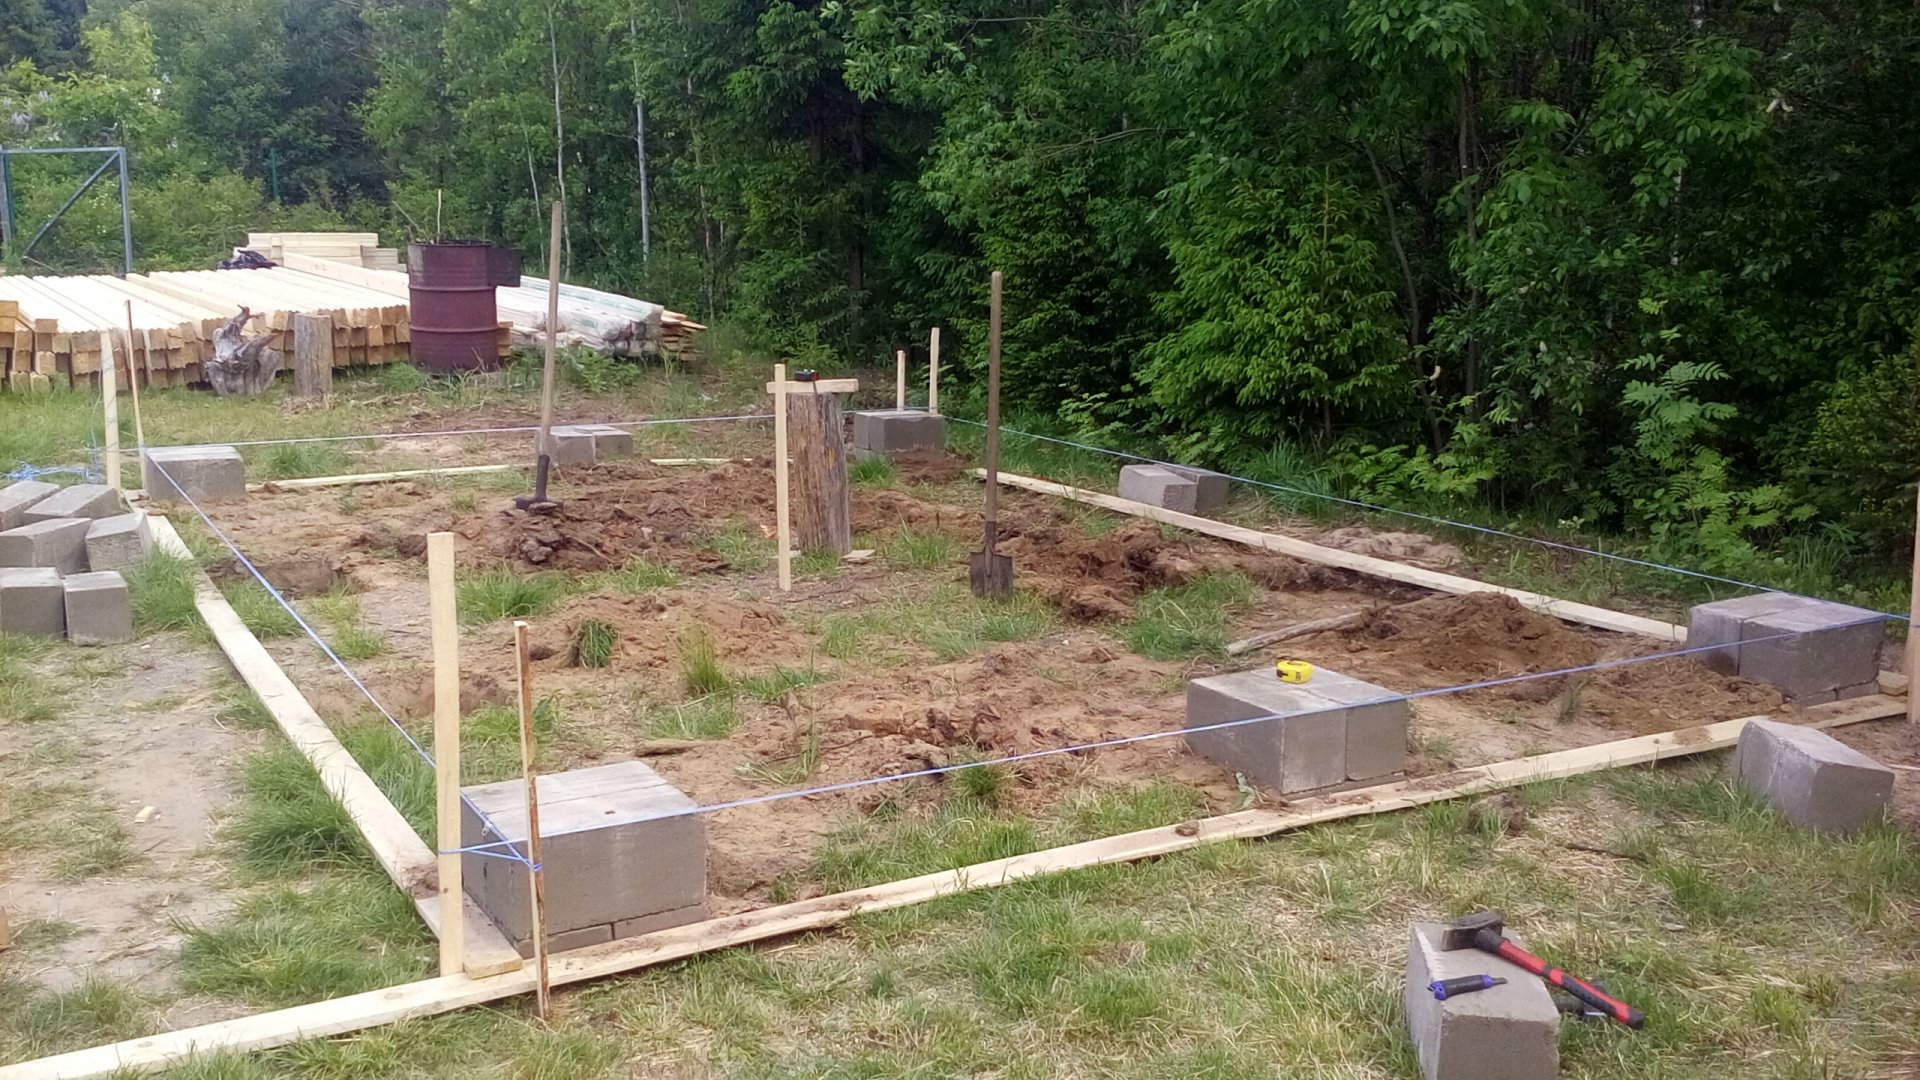
- We mark the square, as well as the places of the posts, with pegs and twine. The square should be at least half a meter larger than the foundation area in each direction.
- We deepen the ground in the marked square (remove the fertile layer) by 30 centimeters. (you can be lazy and remove this layer only under the posts, then less crushed stone will be needed).
-
We put a crushed stone pillow there, spill it with water, tamp it.
-
In the places marked for the posts, we put two blocks per solution, first one at a time, we check it with a board along the hydraulic level, then one on top of the other - a total of 12 pieces of posts, 24 blocks.
-
We leave it for a couple of days so that the solution grabs well. But it is better to let it stand for a week.
You can immediately after laying out the column "iron" the surface with a solution of cement and sand in a ratio of 1: 1. This will make the waterproofing even better.
-
We put pieces of roofing material on bitumen for waterproofing.
- We mark and cut all the lumber into the required pieces.
- We saturate them with a hydrophobic and antiseptic liquid.
-
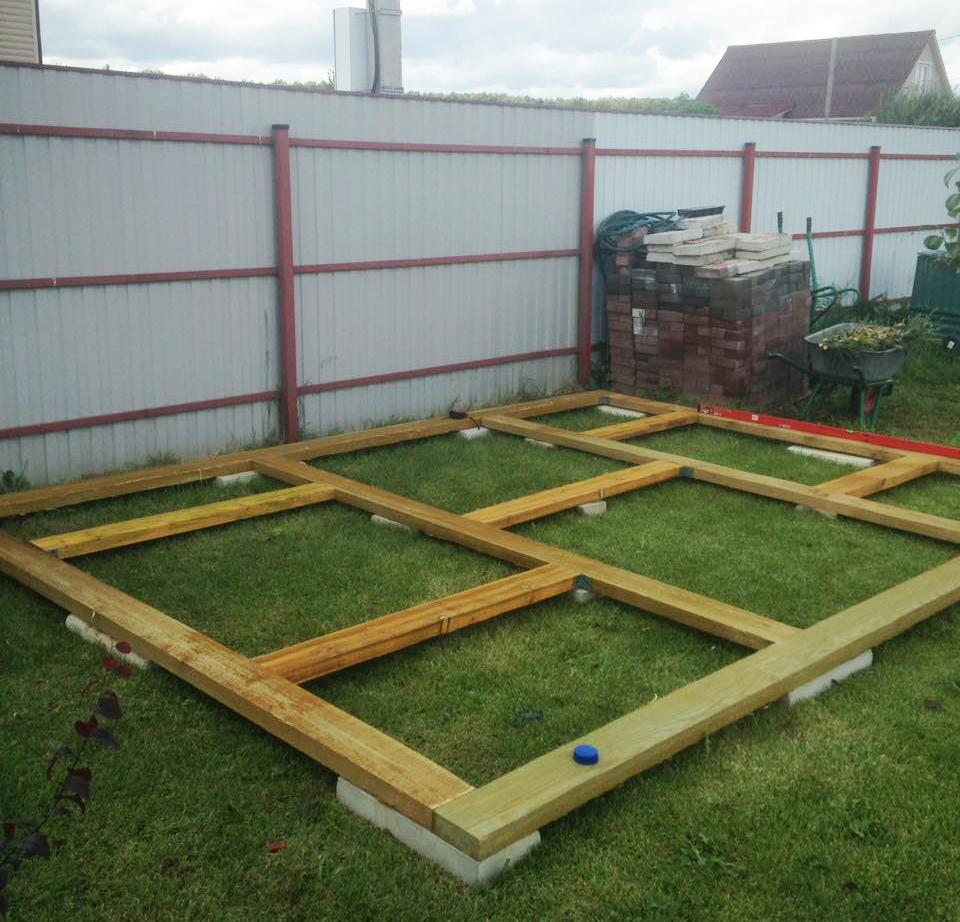
We mount the grillage from a bar on self-tapping screws.
You can do it on the ground, or you can - already on the posts.
- We fasten it to the foam blocks with anchor bolts, reinforce it with corners.
-
We connect it with internal stiffening ribs from the board. There are a lot of them in the photo, but in the project we have chosen - there are not many.
-
You can put supports for the shed frame.
-
Our foundation is ready.
Video: how to design a frame shed and put a foundation for it from blocks
A columnar shallow foundation of blocks with a grillage from a bar is the easiest and cheapest way to create a good foundation for your barn. And it will be quite reliable. Go for it!
Tape
It is necessary to start a conversation about a strip foundation with the choice of materials. Since the structure is light, you can use various technologies that use different building materials.
For example: brick, the same concrete blocks, railway wooden sleepers, a monolith made of concrete mortar.
Brick foundation is one of the budget options. The main thing in this process is to correctly lay the masonry with a sling of the elements, which guarantees the strength of the structure and its long service life. It should be borne in mind that such a foundation is usually laid on the surface. Laying bricks in the ground is not worth it. If you cannot do without this, then you will have to carry out a thorough waterproofing of the walls of the foundation, for example, with bituminous mastic.
The foundation of a barn from sleepers is also an inexpensive option. The sleepers themselves are impregnated with oil, which increases their service life in difficult environmental conditions. The main thing is to correctly connect them together, for which the joint between the two elements is made according to the principle of a half cut. After assembly, the joints are fastened with metal brackets and perforated plates on self-tapping screws.
And the most famous technology is to pour the foundation under the shed with concrete into the formwork. The method is not the cheapest, but in some situations this is the only possible option. If a shallow or surface foundation is poured, then there is no need to take into account the level of soil freezing.
Work progress
Let's take a look at how to properly pour a concrete foundation. First of all, the parameters of the tape are determined. Its length will be equal to the perimeter of the future structure. Width and depth within 30 - 40 cm is a surface model, width 20 - 30 cm and depth up to 70 cm is a shallow version.
In the first case, sod is removed around the perimeter of the shed, that is, a trench is dug with a depth of 20 cm.
A sand cushion is poured with a rammer to the edges of the ground.
The waterproofing material is laid, preferably in two layers.
Formwork is being installed, for which you can use boards, plywood, OSB boards, corrugated board, iron sheets and other durable slab or sheet materials.
A frame made of reinforcement is laid inside. It is knitted in the form of two lattices, which are then connected to each other by transverse pieces. The distance between the grates is determined by the width of the trench. They should be spaced within 5 cm from the internal planes of the crate. If a very light shed is being erected, then the reinforcement frame can not be laid in the foundation.
A concrete solution is prepared from cement with the addition of a mixture of sand and gravel. The ratio of the components: cement - sand - gravel, as 1: 2: 3. By the way, the mixture can be of sand and crushed stone.
Pouring of concrete is carried out with a uniform distribution of the material throughout the entire volume of the formwork. The main task is to carry out the process in one day
In this case, it is very important to remove air from the solution that gets there during the mixing of the ingredients. This is done either with the help of a vibrator, or with improvised means: fittings, pipes, slats and others.
After 7 days, the formwork is removed, after 28 the foundation for the barn is ready to take the load.
Here is such a step-by-step instruction for pouring a strip foundation under a small shed.
Stages of erecting a shed with a gable roof
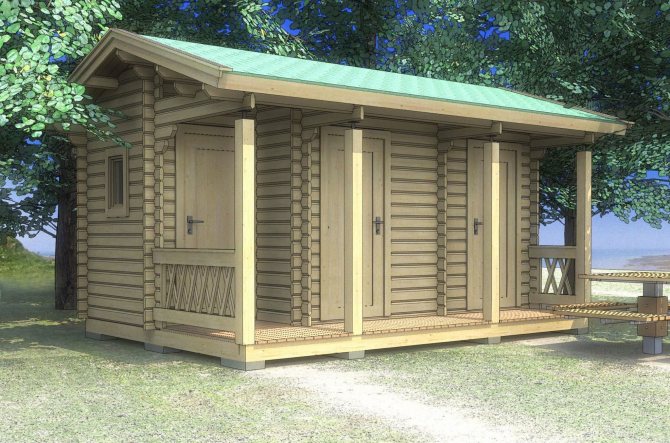
Shed with a gable roof As soon as the pile-screw foundation is ready, you can immediately start building the structure. All work consists of 4 stages:
- The lathing of the foundation is carried out with a board of 100 * 50 mm. After that, ROCKWOOL insulation is laid (or without it), and at the bottom ordinary OSB boards with a width of 8 mm are attached. We paint the entire structure with NC paint, and lay a 15 mm thick tongue-and-groove moisture-resistant chipboard on the floor.
- We make walls using frame-panel technology. In this case, you need a board of 100 * 50 mm and OSB boards 12 mm wide. Due to the use of OSB boards, we will be able to save on mows, crossbeams and joining the boards to each other.
- We nail wooden partitions into the vertical compartment of the wall. They serve to hold the insulation in the structure, as it will settle over time. We make the stand under the ridge reinforced.We sew up OSB walls with plates without using a vapor barrier.
- It remains to erect 2 pitched roof and chop it off with gables. The distance between them must be at least 3 meters. For the roof, we use flat galvanized metal sheets or roofing felt.
As you can see, the work is simple and easy to do with your own hands without the involvement of specialists.
Erecting a barn frame step by step: detailed instructions
The frame is a structure of racks, a bar of the upper and lower strapping, jumpers, inclined jibs. Installation can be done in 2 ways:
- connecting all the elements in series;
- using the "platform" method, fastening the parts into large-sized sections on the horizontal surface of the subfloor.

For the frame, a timber of 150x100 mm and a dry planed board of 150x50 m are harvested. All lumber must be treated with antiseptics and fire retardants.
Fasteners - galvanized screws, nails, bolts, linings, staples. Additionally, you can use wood glue.
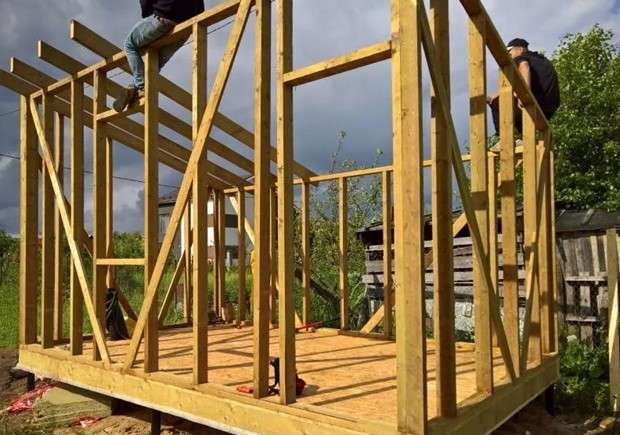
Do-it-yourself frame shed according to step-by-step instructions is mounted in the following order:
- A bar of the lower strapping is laid on the waterproofing layer along the foundation. Secure with anchors, studs or bolts.
- Mount the floor joists.
- Starting from the corner, the racks are installed with a step of 60 cm, they are fastened at the top with a strapping bar.
- The openings are reinforced with boards laid on the edge.
- Strengthen the frame with jibs made of boards or perforated steel strip with a tie-in into the lower and upper horizontal bar.
- The structure is sheathed with finishing materials, windows and doors are installed.
- If necessary, they arrange wooden floors or a concrete screed on the ground, carry out communications, and carry out interior decoration.
If OSB or multilayer plywood is used for cladding a frame shed with their own hands, jibs are not required, since rigid sheets give stability to the frame. The facing slabs must be staggered with the long side parallel to the foundation.


