Self-control: how to bring the diagonal of the foundation
Method one
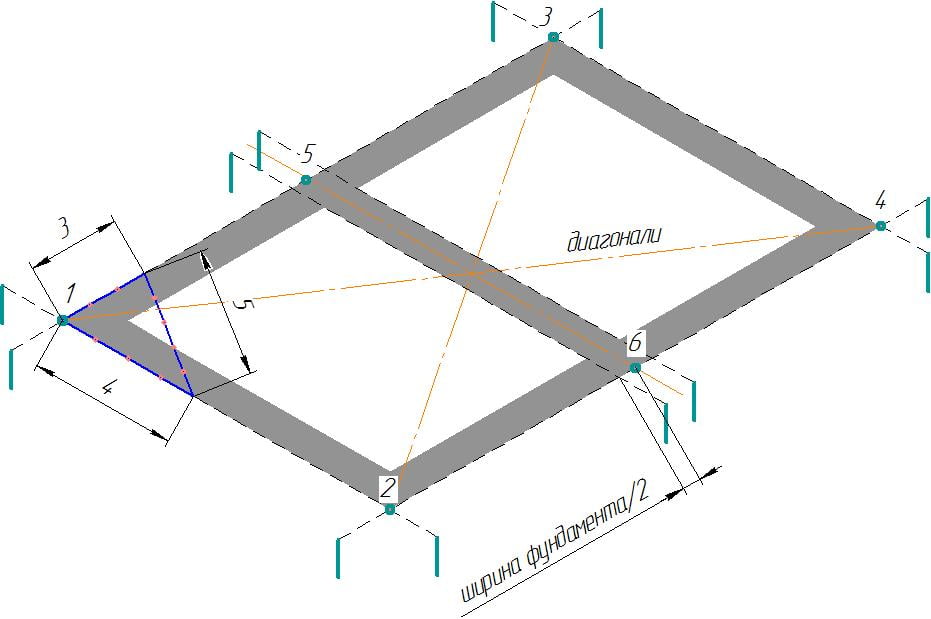
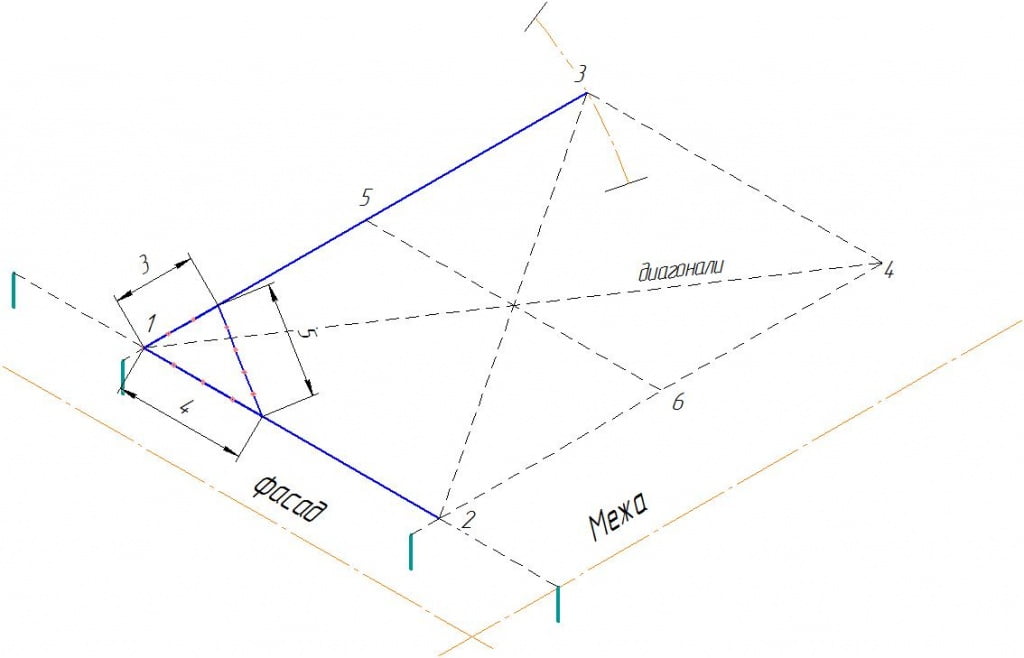
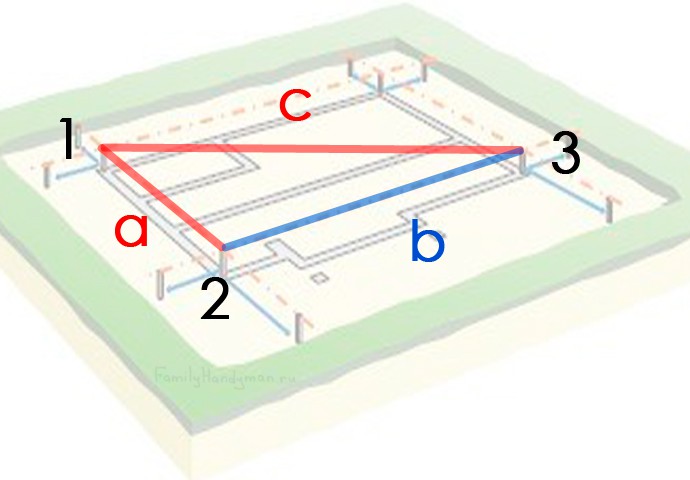
The very first version has been known since antiquity. We have a wall line and a point - the future corner of the house. From this point and lay the perpendicular. Why do we recall the school geometry course: a2 + b2 = c2. Where a and b are legs and c is hypotenuse. In order not to suffer with fractions and square roots, we take prime numbers that allow us to do without fractions: 3, 4 and 5. The first, second leg and hypotenuse, respectively
In this case, it does not matter which units of measurement are selected: meters, feet, elbows. The main thing is that the dimensions of the sides of the triangle are multiples of 3 4 and 5
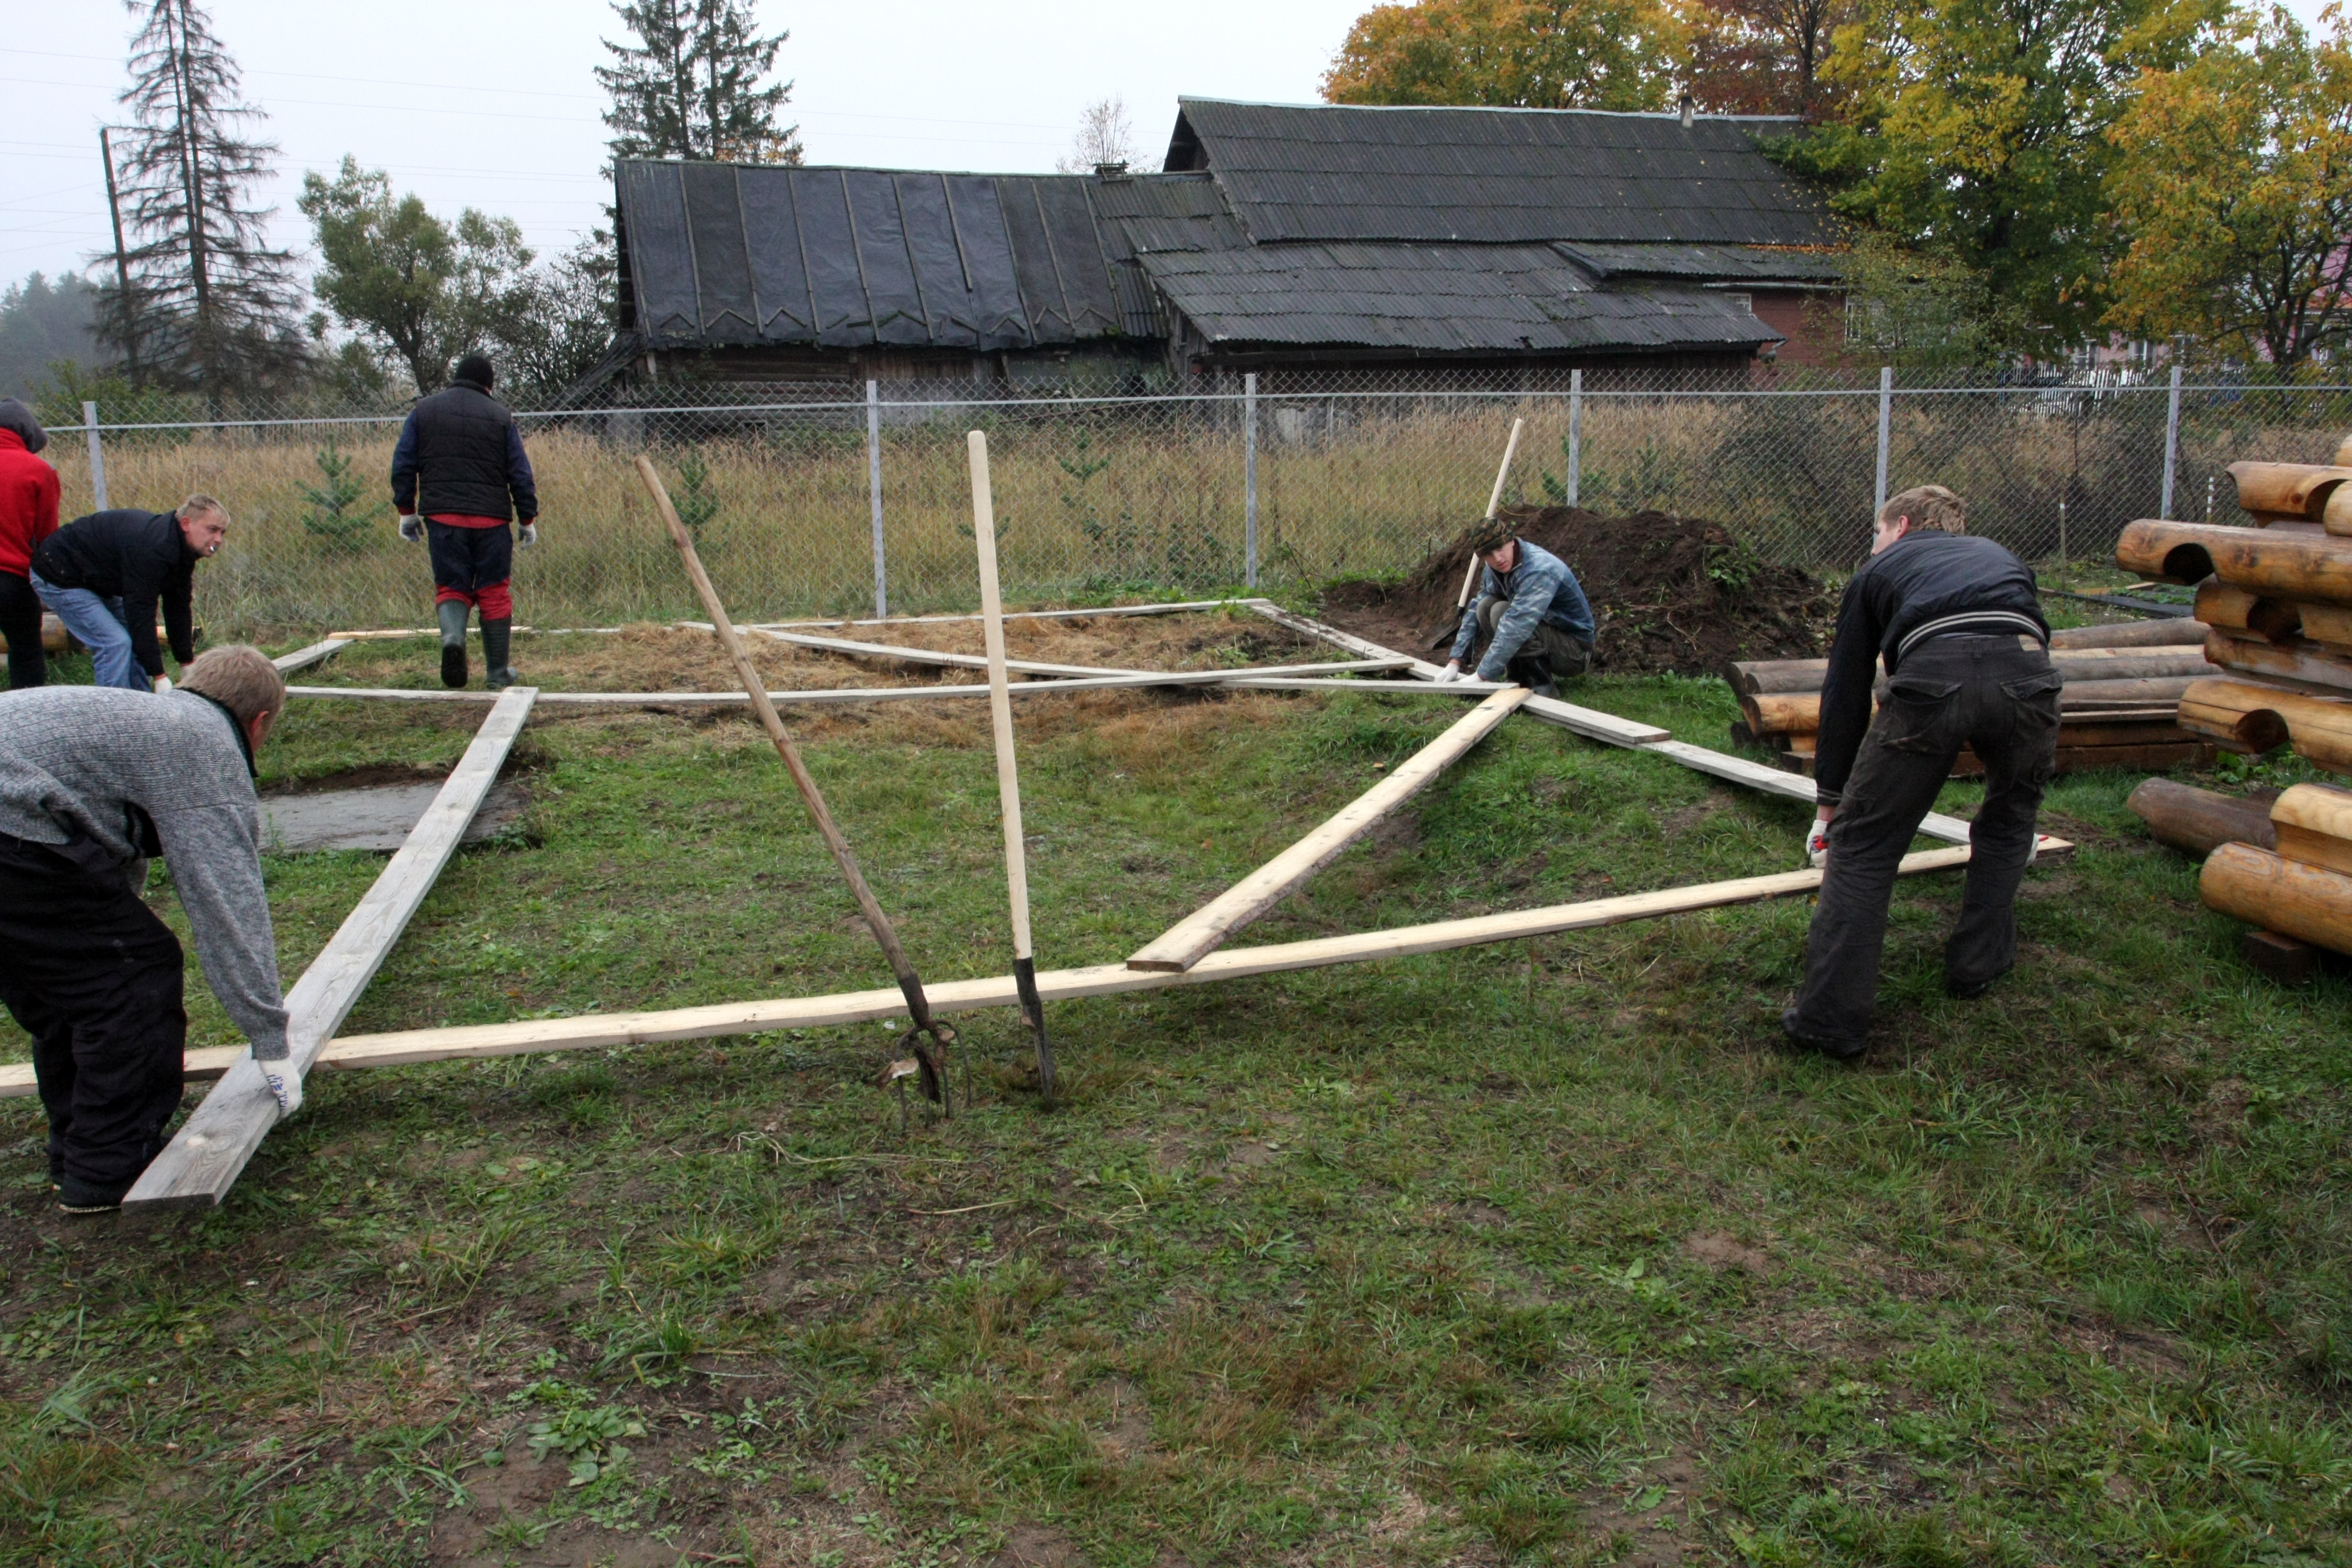
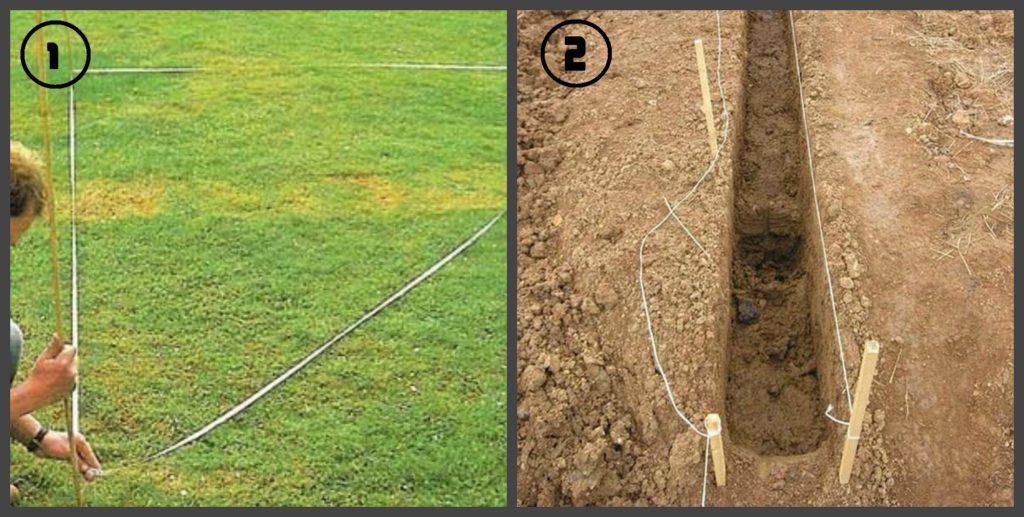
You can make a separate triangle with this aspect ratio, or postpone these dimensions on the cords, denoting the boundaries of the future foundation (from the point of their intersection - from the corner) - these are legs. And then unfold the second wall until the distance between the outer points is equal to the hypotenuse. This will be a right-angled triangle. Next, we continue the second leg to the desired size (the length of the future wall), and then repeat the operation twice - the fourth corner will turn out itself.
Method two
The method with arcs is somewhat simpler, although it requires a certain amount of operational space.
There is a segment - the future wall. We continue this straight line further at the same distance. We get a line, the center of which is the future corner of the foundation. Then, two arcs are drawn from the extreme points (equidistant from the center-corner by a distance equal to the length of the wall) - their radius can be arbitrary, as long as it is greater than the length of the wall. That is, they take a rope, one end of which is looped to a column marking the edge of this doubled segment, and a stick is tied to the second end - it will play the role of a stylus, a line. And on the ground they draw an arc with this stick. A rope, cord serves as a limiter.
The procedure is repeated from the second extreme point. Accordingly, these two arcs intersect. From the point of intersection of the arcs, a straight line is drawn to the middle of our doubled segment - the corner of the future foundation. This is how the desired perpendicular is obtained.
And it should also be noted that the method with arcs works well on small foundations: under a bathhouse or under a garage. It is better to carry out larger-scale markings for the house either using a triangle or using the third method.
Third way
You need a calculator here. First, they tie the cord into a loop - the length of the loop is equal to the perimeter of the desired rectangle. Then the points of the corners are marked on the loop - that is, they lay off segments equal to the length of each wall. It is clear that this should be done consistently. Then, on the calculator, the length of the diagonal is counted as accurately as possible - this is the hypotenuse, and the legs in the calculations are the walls - their length. Then two pieces of cord are measured, whose length is slightly more than the hypotenuse - a margin is needed for knitting.
Marks are made on these two cords (a margin for knitting is left on both sides. Then these cords are tied to a loop-perimeter. So that they go from one corner to another diagonally. That is, through the corner.
Then the resulting "envelope" is stretched at the site of the future home. As soon as all the cords are equally stretched (there should be no sagging either outside or inside this web), then this will be a regular rectangle.
We do the markup for the foundation correctly
Preliminary activities
Before taking any action on the ground, it is necessary to draw up a project for the future structure. This document necessarily takes into account the location of the projected object relative to the boundaries of the site, while all applicable standards related to the permissible distances between objects must be strictly observed.This will deprive the supervisory authorities of an excuse in the future to present you with any claims of relative non-compliance with building codes.
Next, you should decide on the size of the house itself and the materials from which it is planned to be built. The mass of the structure and, as a result, the parameters of the future foundation directly depend on all this.
If a residential building is being built, then at the design stage its position should be oriented relative to the cardinal points. Unfortunately, in most cases, this aspect is determined by the geographic location of the allocated site for construction and the decision about at what angle to its borders to erect a building on it cannot be made independently. However, if possible, it is worth pointing the main facade of the house to the north, so that the southern facade faces the garden. It should also be remembered about the need for different degrees of illumination of different rooms in the building, on the basis of which the layout of the interior rooms should be designed.
Commencement of work and site preparation
 First of all, remove the fertile soil layer
When deciding how to make markings for the foundation with your own hands, you should first prepare a site on which further work on the construction of the foundation will be carried out.
On the site where it is planned to build a house, it is necessary to remove the fertile soil layer, creating a flat surface.
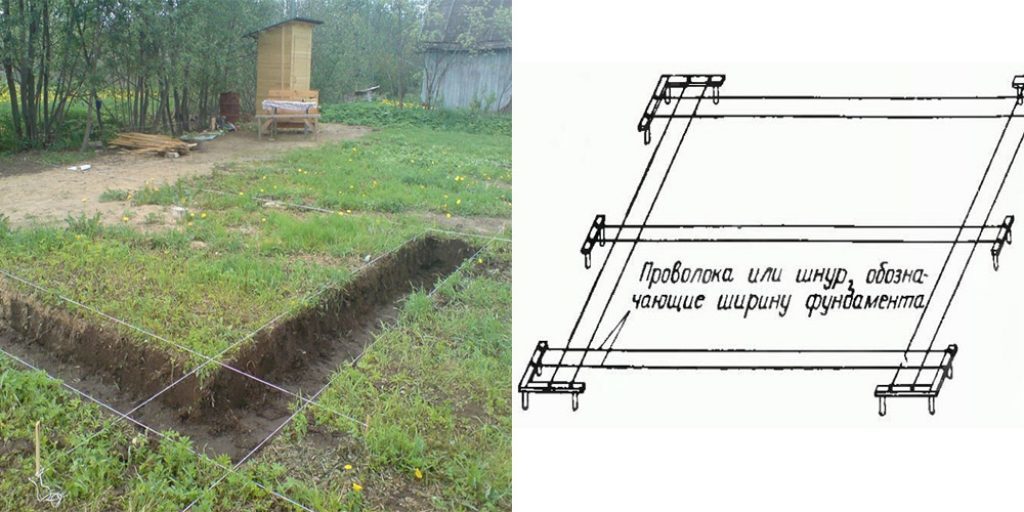
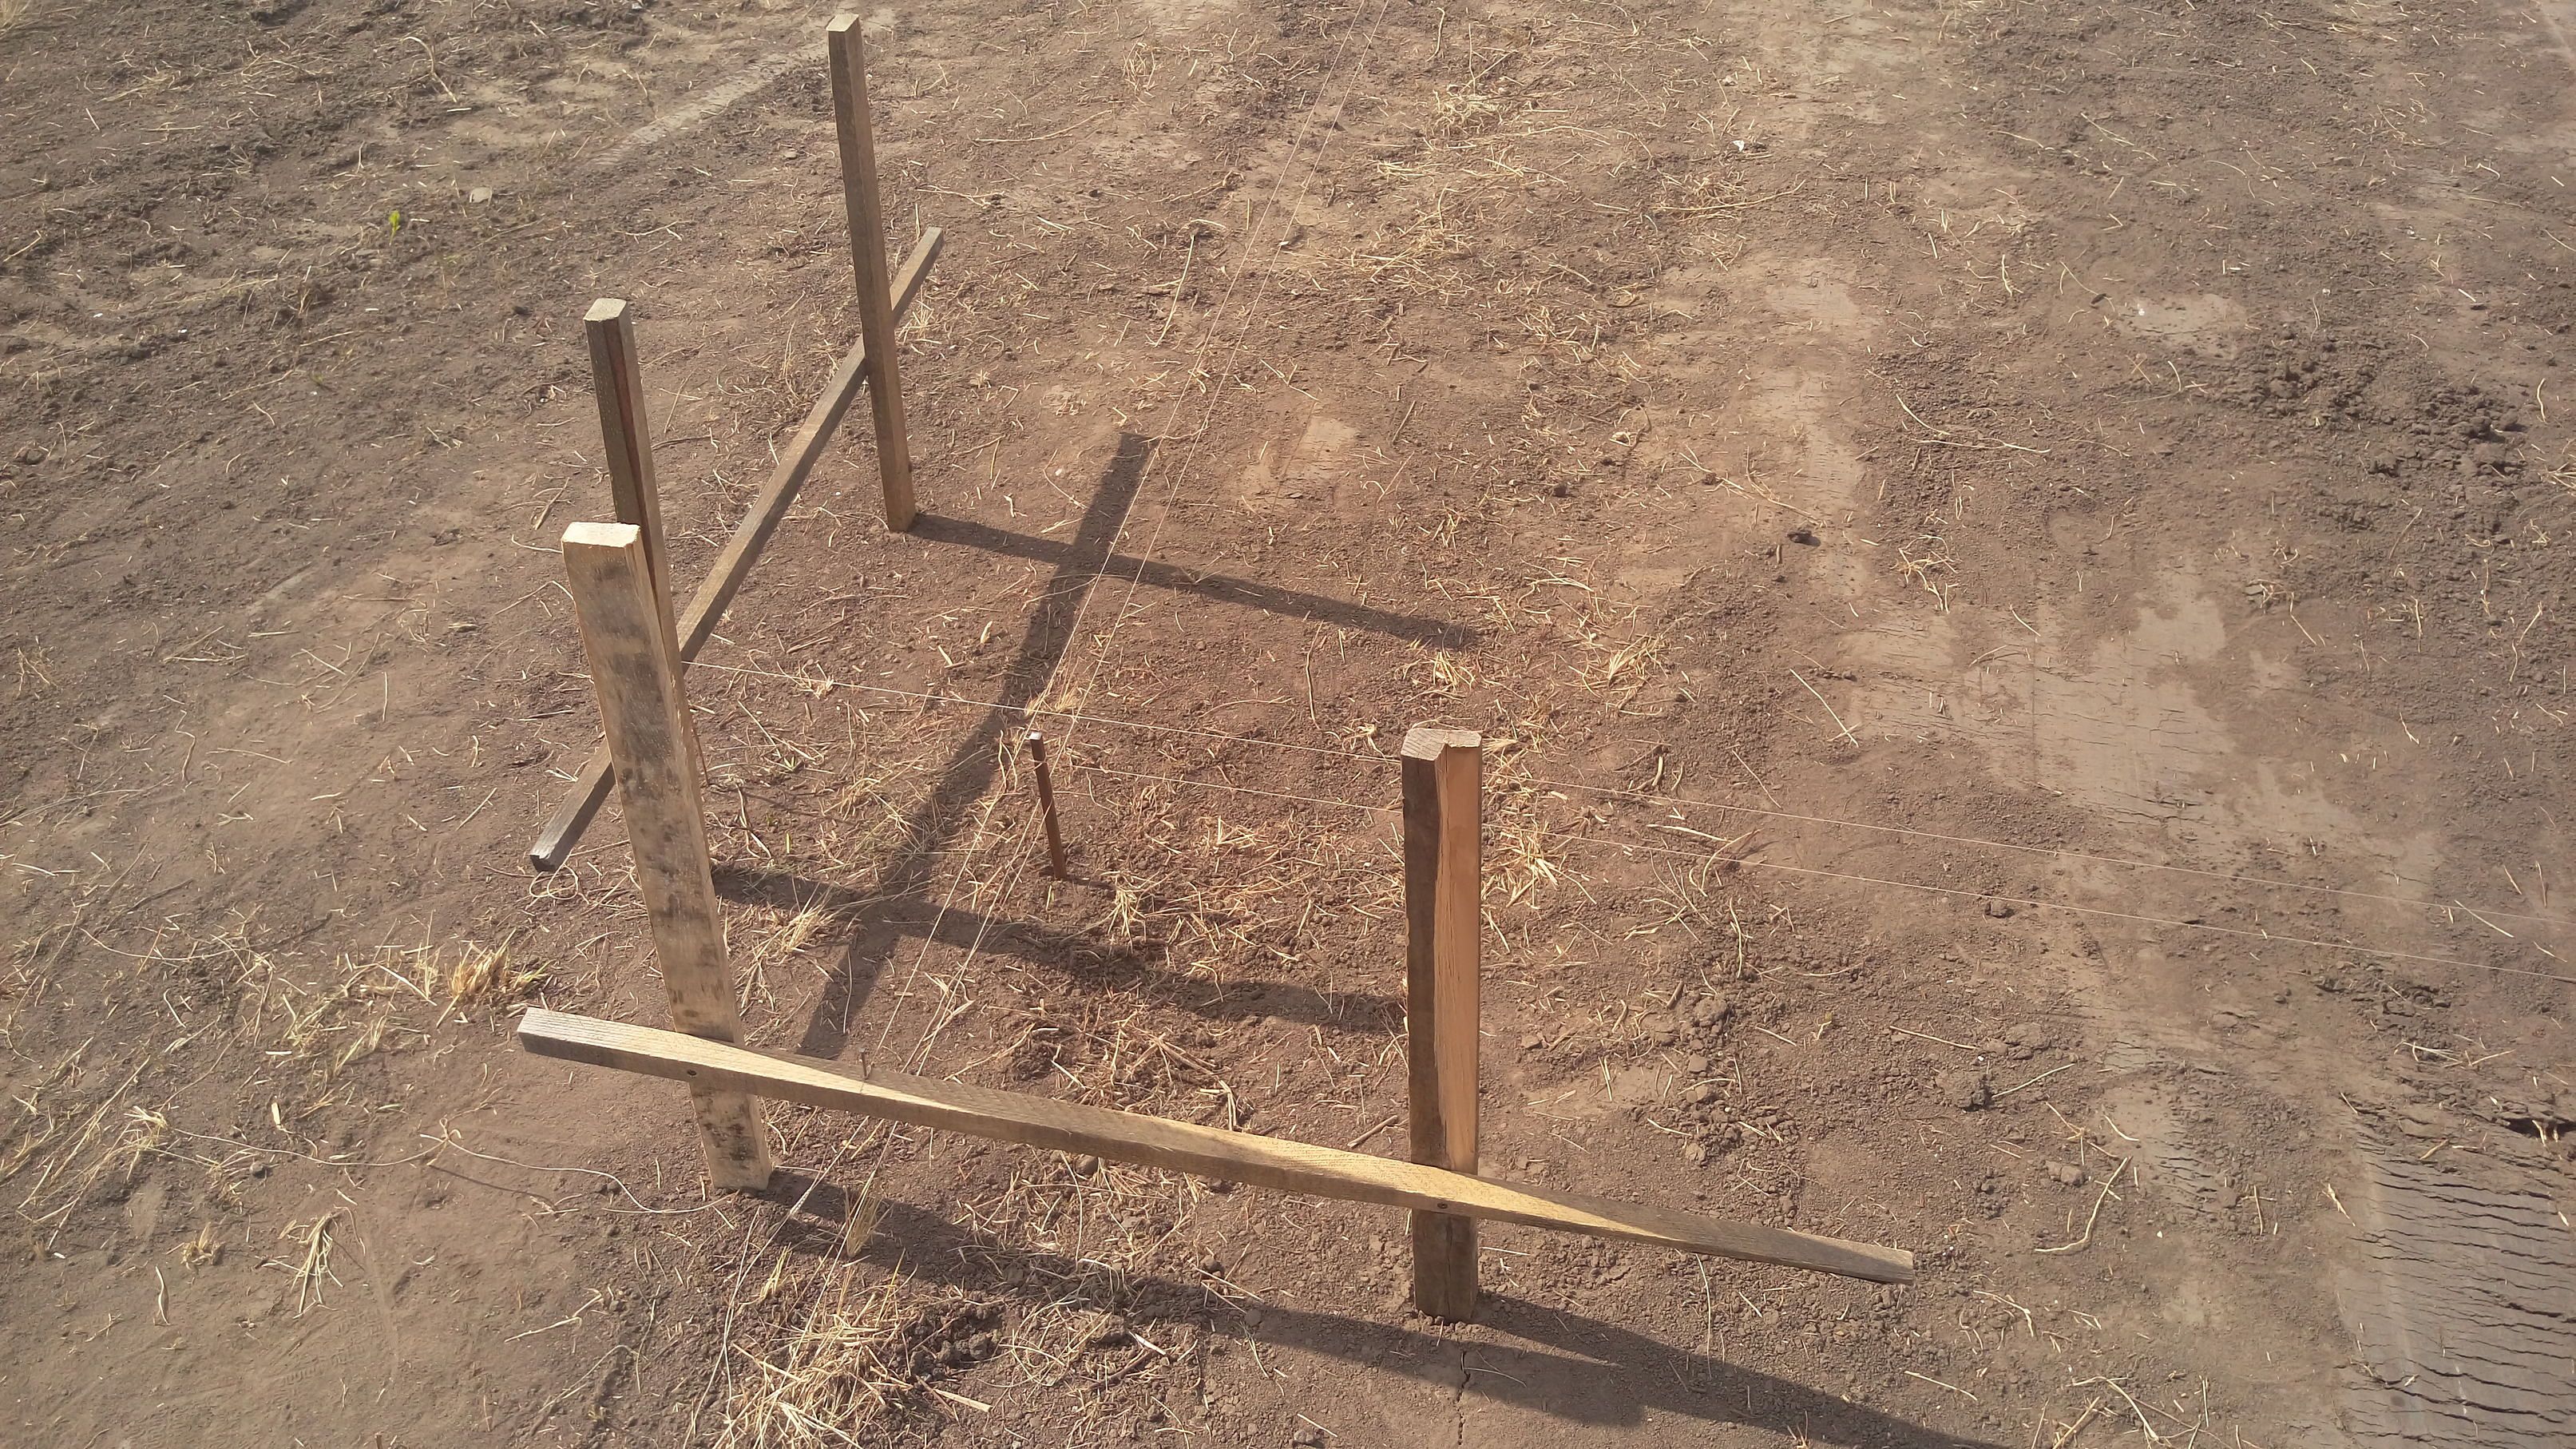
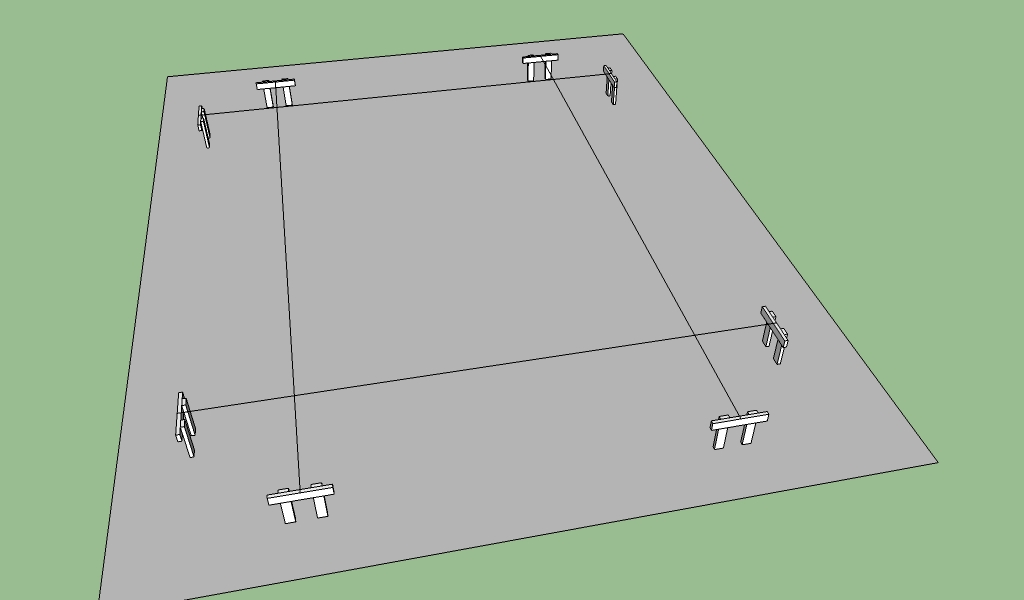
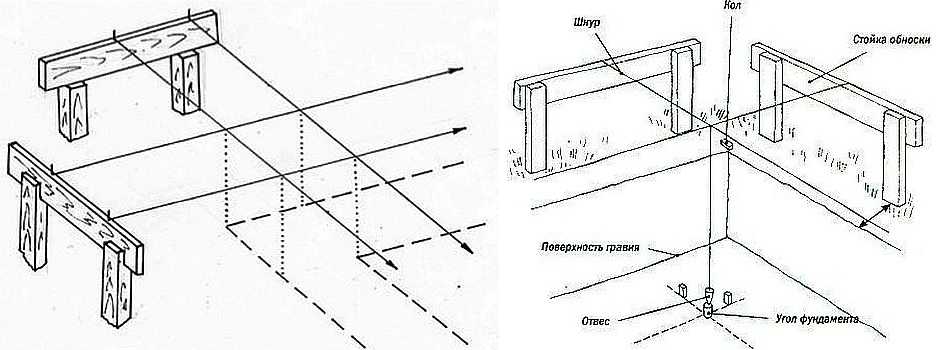
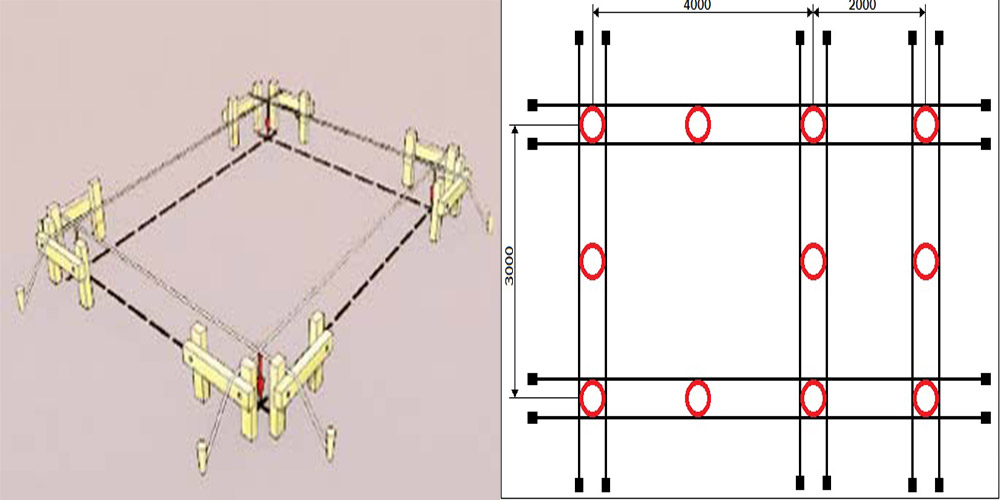
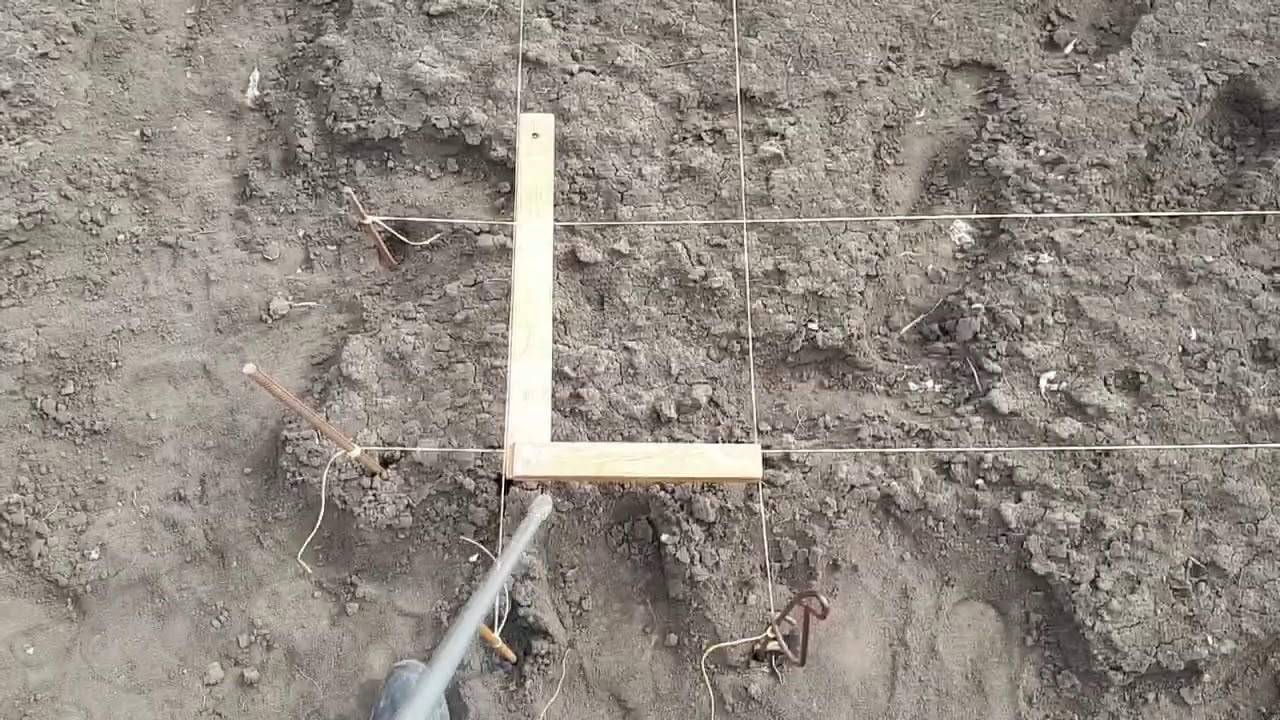
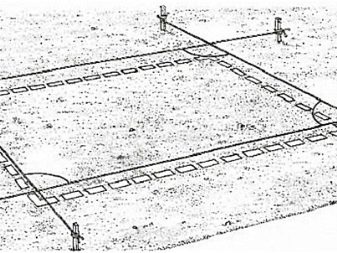
The first structure - cast-off - stakes connected by a board and forming a right angle at the point of contact.
 First of all, the right angle between the sides is laid
One of the basic rules is compliance with the established distance from the control lace to the anchor point or fence line (wall of the house). This distance must be at least 6 m.
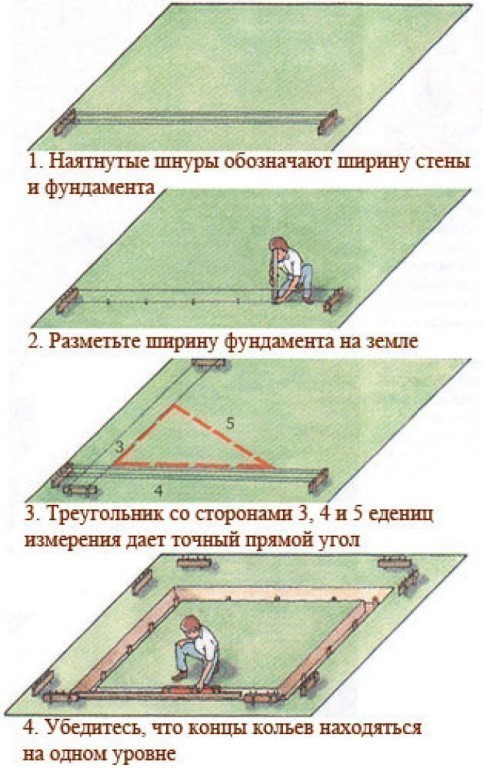
Before you mark the foundation for the house, it is necessary to accurately design the right angle between the sides. The rule of the golden "Egyptian" triangle applies here.
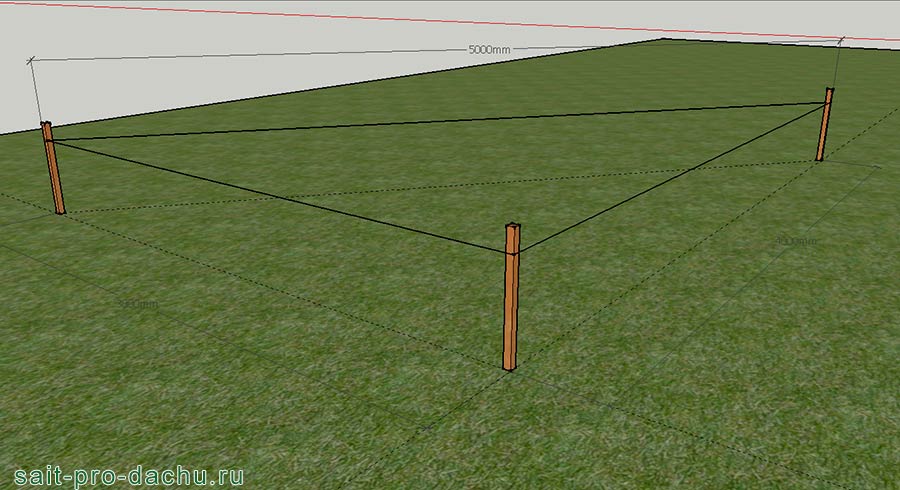
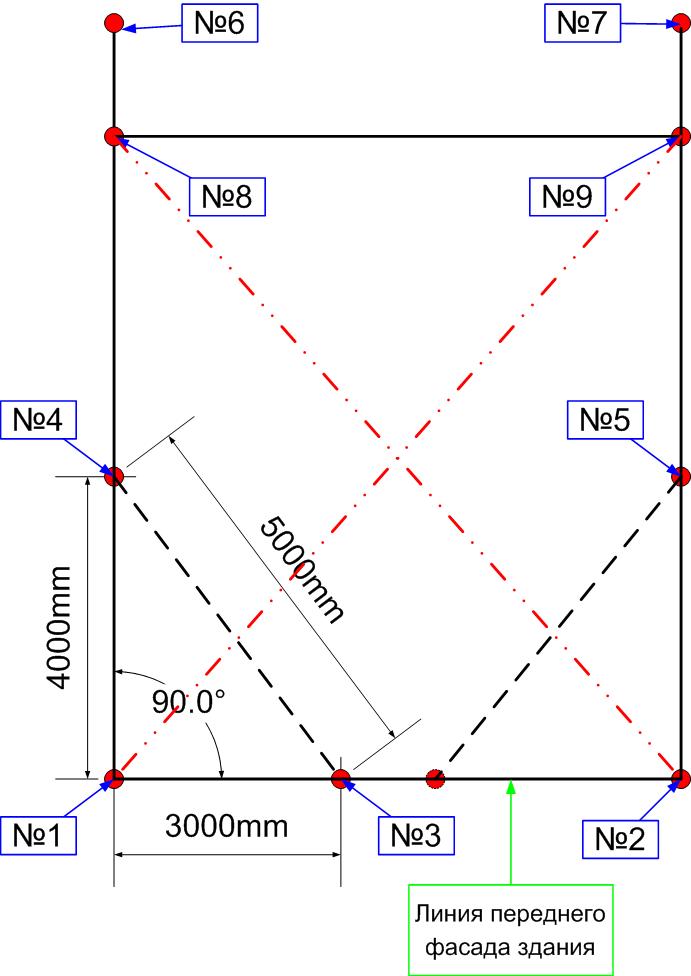
To simplify the task, it is worth using such values of the lengths of the sides so that when the root is derived from the sum of their squares, an integer number is obtained. So, if one segment is 3 m long, and the second 4 m, the hypotenuse of this triangle will be 5 m. By constructing such a triangle, you can be sure of the accuracy of the obtained right angle.

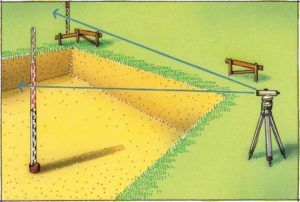 With the help of the "bench" castoff, the remaining two sides of the rectangle are marked strictly parallel (under the control of the rule of the golden triangle). You can check the dimensional accuracy as follows:
- On the lace stretched parallel to the binding line, you need to make a mark at a distance of 3 m from the corner.
- On the perpendicularly stretched lace, mark a point located at a distance of 4 m from this corner.
- In accordance with the calculations performed according to the Pythagorean theorem, it is necessary to fix the tape measure at this point and stretch it to the second point.
- On the tape measure, a distance of 5 m should be obtained. This will be a confirmation of a correctly created right angle.
Technology for marking various types of foundations
Technologically, the marking operation for any kind of materials is associated with drawing lines that limit the future part and its elements. In relation to construction work, the main "canvas" for this is the surface of the earth. On it, it is necessary to somehow apply lines that delimit the outer and inner boundaries of the foundation under the outer walls and load-bearing partitions.
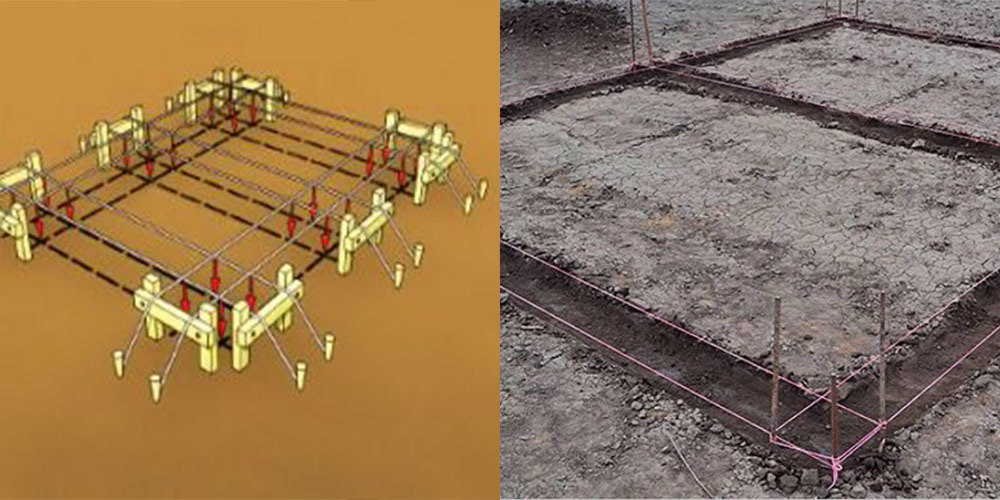
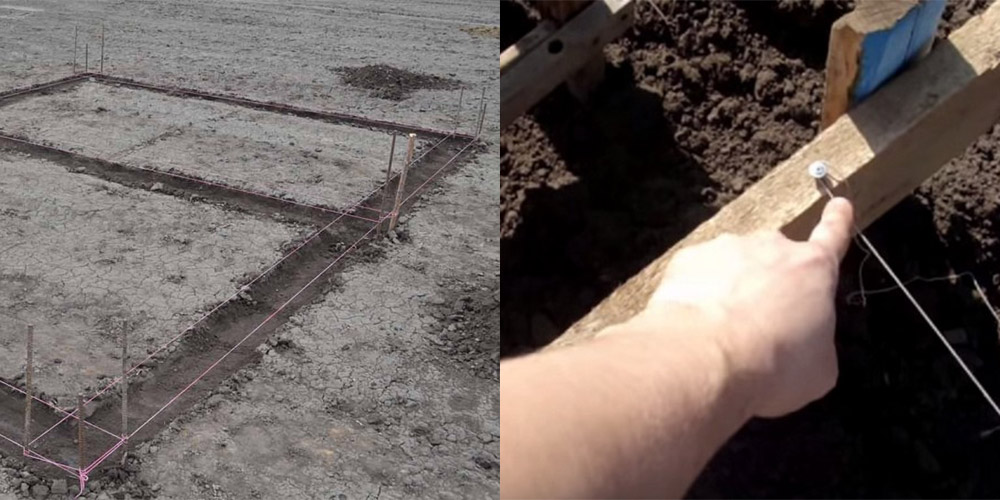
The main method used to solve this problem is to install several strong wooden or steel pegs on the construction site, connected in a certain way with a strong cord of sufficient thickness. The last aspect is important not only for the convenience of work, but also in order to comply with safety rules when performing ground work.
Layout of the columnar foundation
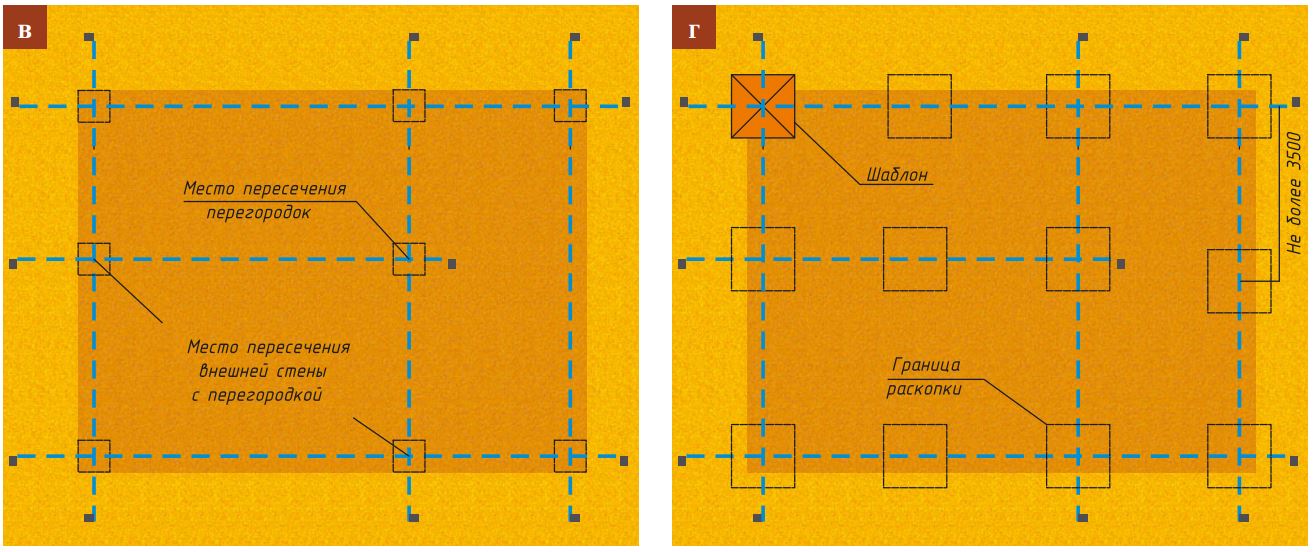
In the construction of small one-story buildings, as well as some elements of buildings, for example, terraces and verandas, a columnar foundation is used, which is a free-standing support, the tops of which (upper ends) are aligned in a horizontal plane at a certain height from the ground. The marking of this type of bases consists in drawing one line of the cord on the pegs along the entire perimeter of the structure. Additionally, along the future walls with a certain step, using a bayonet shovel, you can dig shallow holes in the places where the supports are installed.
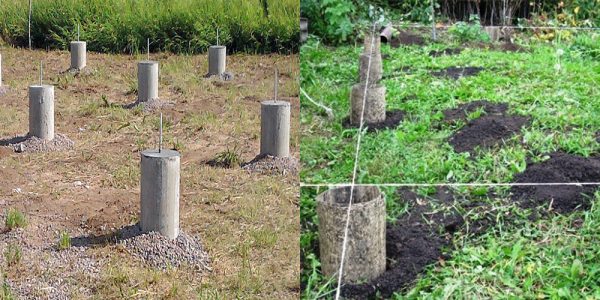
We mark the columnar foundation
When marking any type of base of a house or structure, it is important to correctly make a right angle for the foundation. To accomplish this task, they use both a specialized construction tool, for example, a laser level, and apply knowledge of the basics of geometry
In more detail about how to correctly calculate, set and check the angles and diagonal of the foundation in one way or another, we will dwell below.
Strip foundation marking
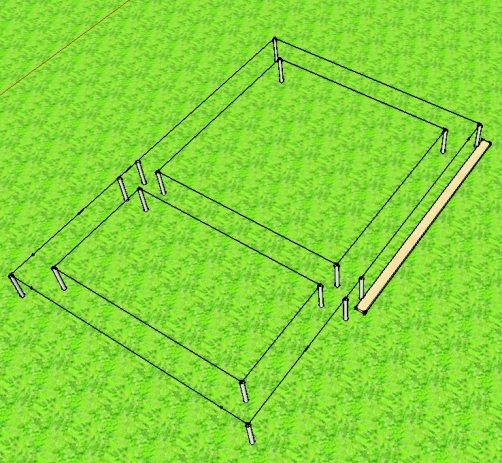
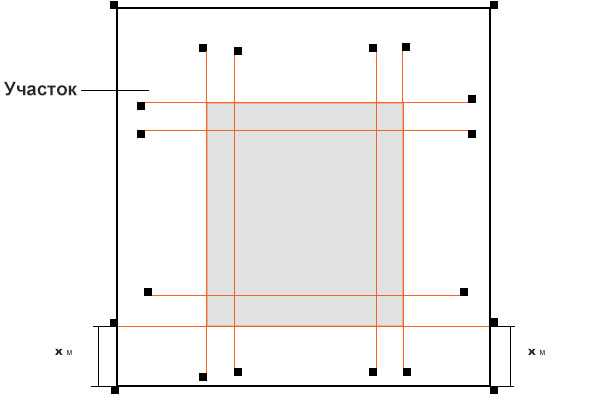
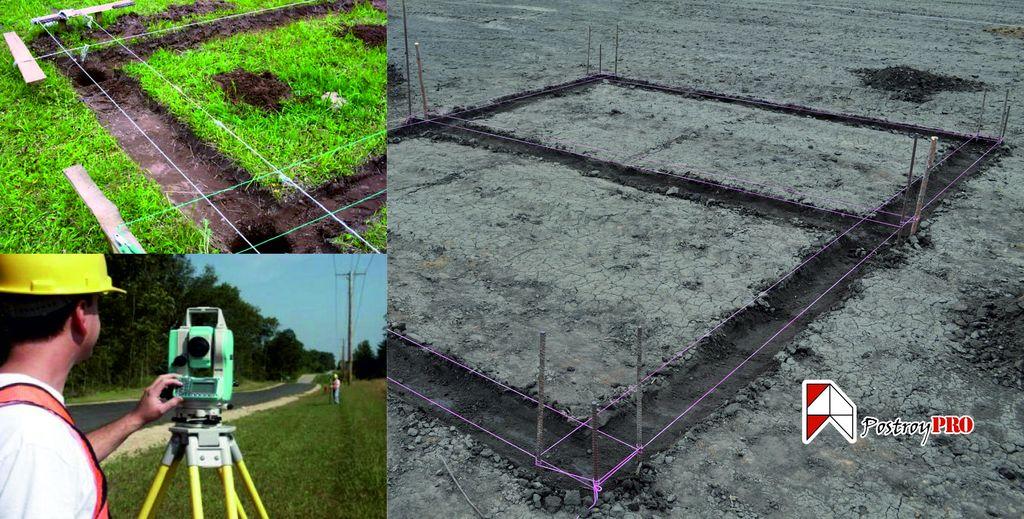
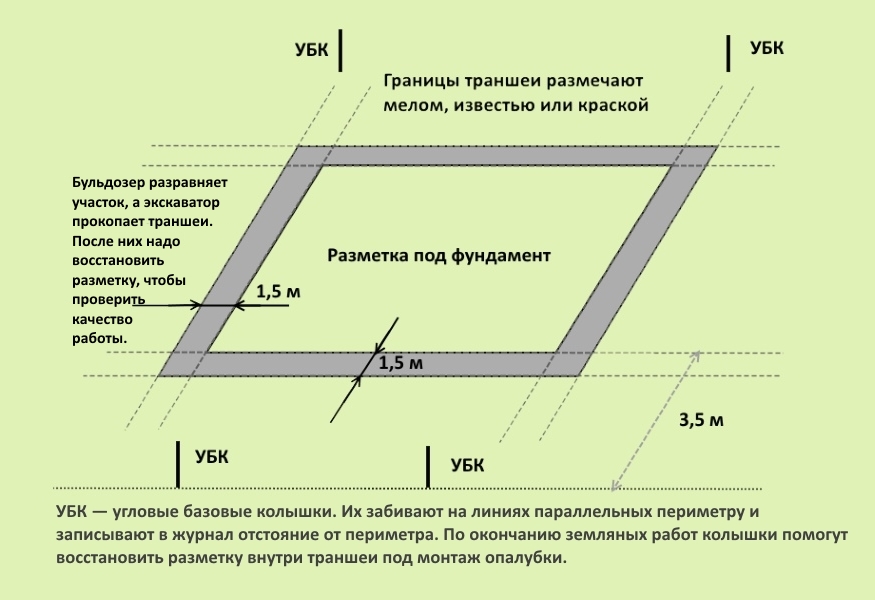
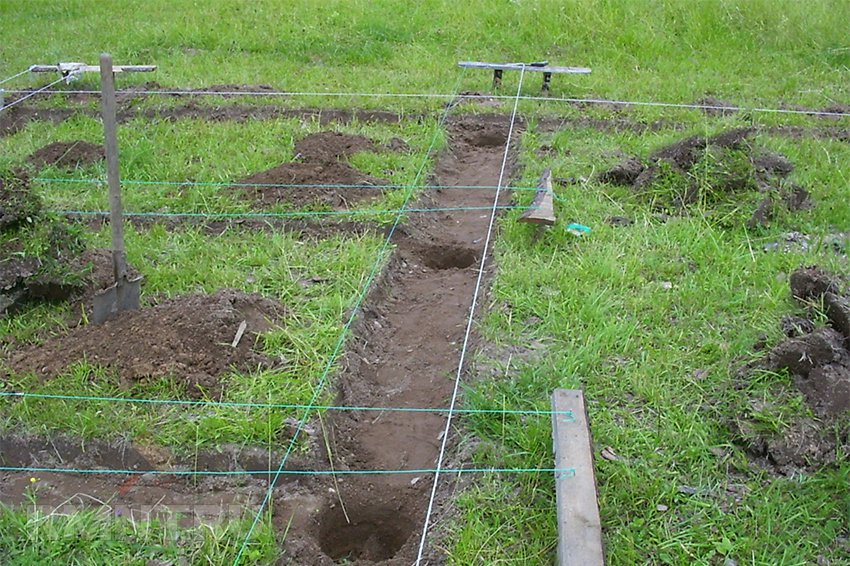
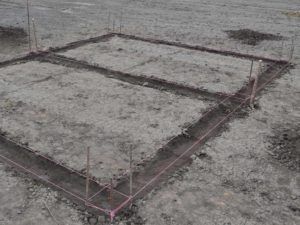
More often, builders are faced with the problem of marking strip foundations as the most common type. Unlike the previous type, in this case, only a single-circuit marking is not enough. It is performed with two parallel cords located along the outer and inner borders of the tape.
The internal partitions of the house are marked in a similar way. Sometimes, the marking is additionally performed with two more parallel cords, which determine the height of the formwork installation under the tape. Thus, the process requires high precision and responsibility.
Layout of the slab base
Often the slab foundation, which is the most costly from the technological and financial point of view, is chosen as the base of the house. It is irreplaceable on "restless" heaving soils and allows you to erect rather high massive structures on them. A small depression is made under the entire area of the foundation as a foundation pit for the slab.
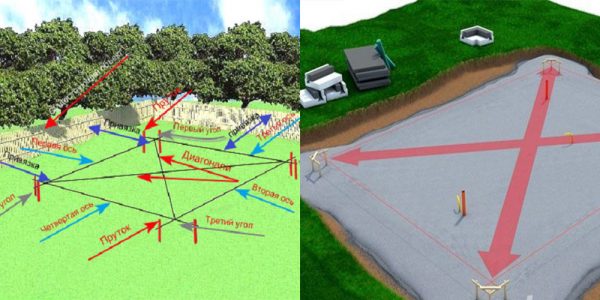
We mark the slab foundation
The markings for this type of base are similar to the columnar type markings. In contrast to it, similarly to the layout of the strip foundation, the cord can be pulled directly at the soil level along the perimeter of the pit and at a certain height that determines the height of the slab. After trimming the ground, the bottom line of the markup can be removed.
Features and nuances of marking the foundation
Due to the fact that many construction operations in order to reduce the total cost of work, future homeowners are trying to do it themselves, you should dwell on how to plan the foundation for a house in more detail.
After determining the location of the future house in relation to the existing buildings in this and neighboring plots, as well as in relation to the fence, you can start marking the foundation. It begins with the installation of the first peg, which defines one of the corners of the future base.
A cord is tied to the first installed rod. Having measured a segment of the required length, equal to one of the sides of the future foundation, a second peg is installed. The direction of the first cord is chosen either along the cardinal points, guided by the compass, or in the direction of the boundaries of the site. The latter option is preferable in a small area.
The next step is to install the third support. In most cases, it should be positioned so that the sides of the foundation form a right angle. To correctly mark it at the construction site, it is necessary to recall the basis of geometry - the Pythagorean theorem, according to which the square of the larger side of a right-angled triangle is equal to the sum of the squares of its other sides.
In our case, the longest will be the diagonal (a segment connecting opposite corners) of our foundation, and the shorter segments will be its sides.Using simple calculations, we found that the lengths of the sides of a triangle with a right angle are related to each other as 3: 4: 5. In practice, this is used as follows:
- on the first cord from the corner peg, set aside a distance of three meters and knit a knot or tie a bright ribbon;
- on the second segment, lay 4 meters and make a mark in the same way;
- the second segment of the length required for the project is pulled and, using a tape measure, the distance between the marks, which should be 5 meters, is driven in, the third peg is driven in.
- The last fourth peg is placed equidistant from the previously installed first and third. The distance to it is determined by the length of the sides of the future foundation.
It is much easier to mark the foundation with a laser level. This tool allows you to obtain two mutually perpendicular light beams on a horizontal plane. Use a laser level to build a foundation as follows:
- similarly to the first option, the first peg is driven in;
- a level is installed above it on a tripod and tuned to the projection of perpendicular rays;
- using a tape measure or a laser rangefinder, lay the required lengths of the sides of the foundation and install supports for the cord;
- from any of them, the markings of the following sides are similarly performed.
It should be noted that most laser levels do not allow you to get beams that are clearly visible in bright light. This makes certain adjustments to the work. This stage is best performed at dusk, since it is practically impossible to correctly mark the strip foundation for the house with a laser level during the day.
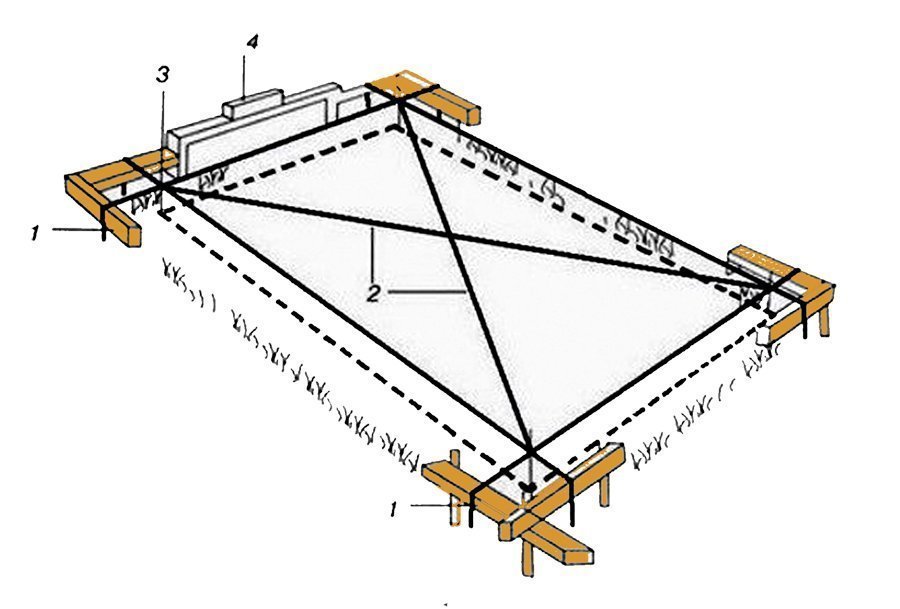
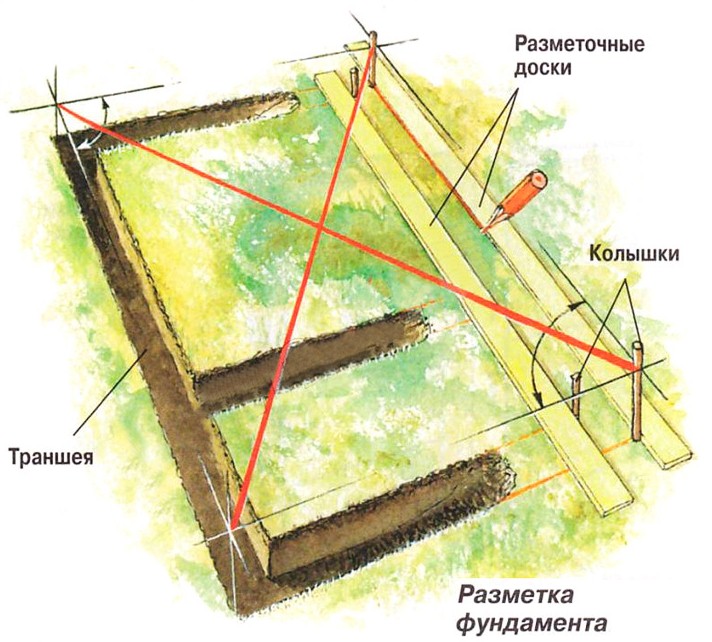
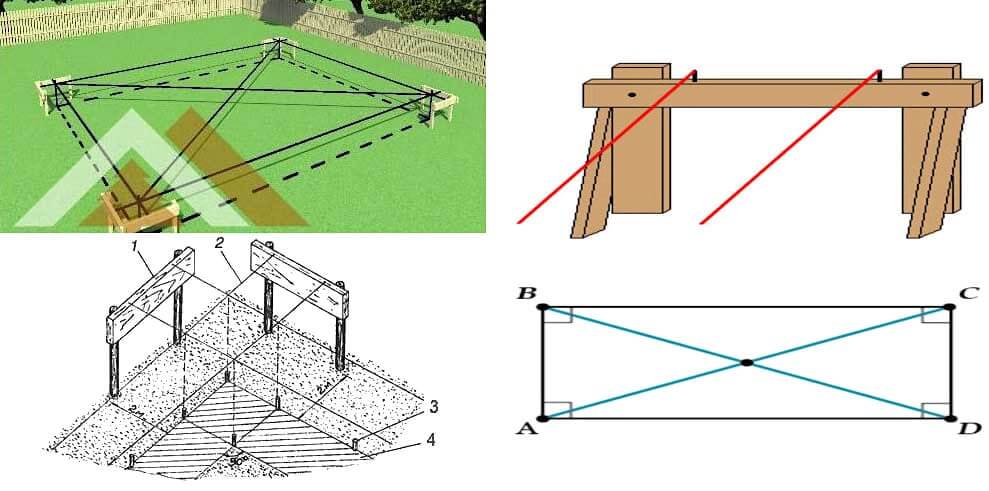
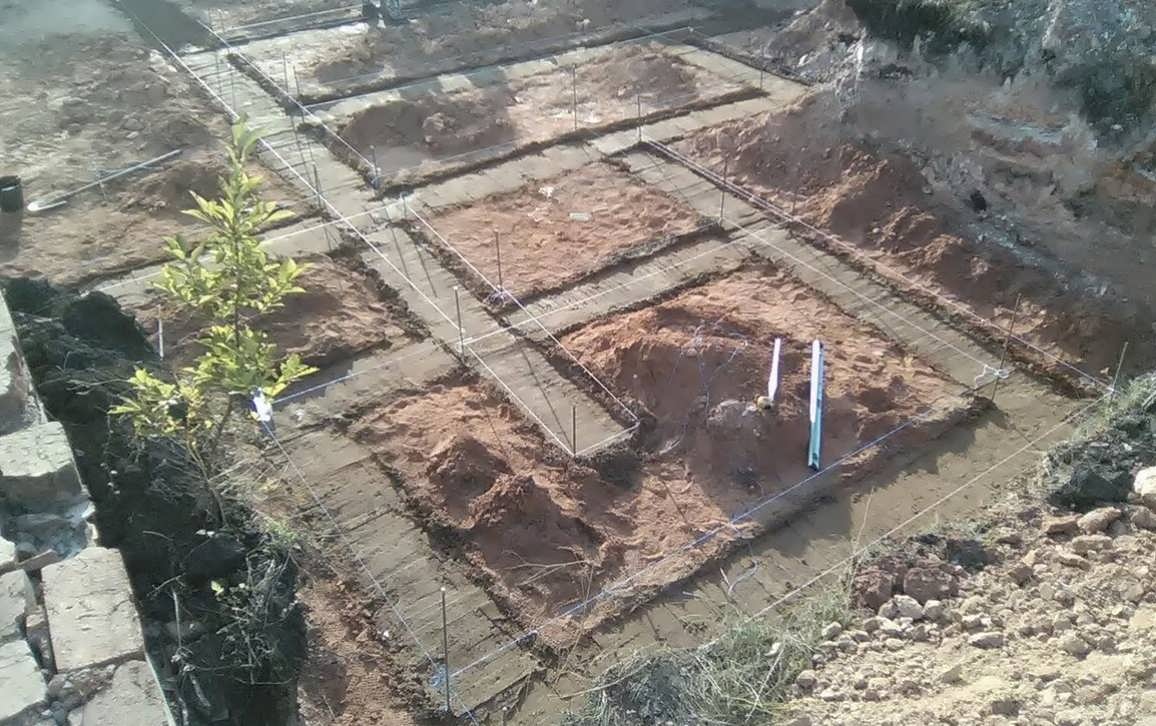
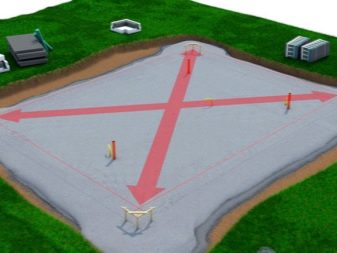
After installing all the pegs and cords around the perimeter, you must check the correctness of the markings. To do this, you can beat off the diagonal of the foundation. For a regular rectangle, they must be equal. After making sure of this, you can proceed to further work on the site.
Thus, as part of the review, we not only considered how to make a markup for the foundation in one way or another, but also found out a number of basic nuances when performing this type of work. Remember that mistakes made at the very beginning of construction will be almost impossible to correct.
Constructing a rectangle
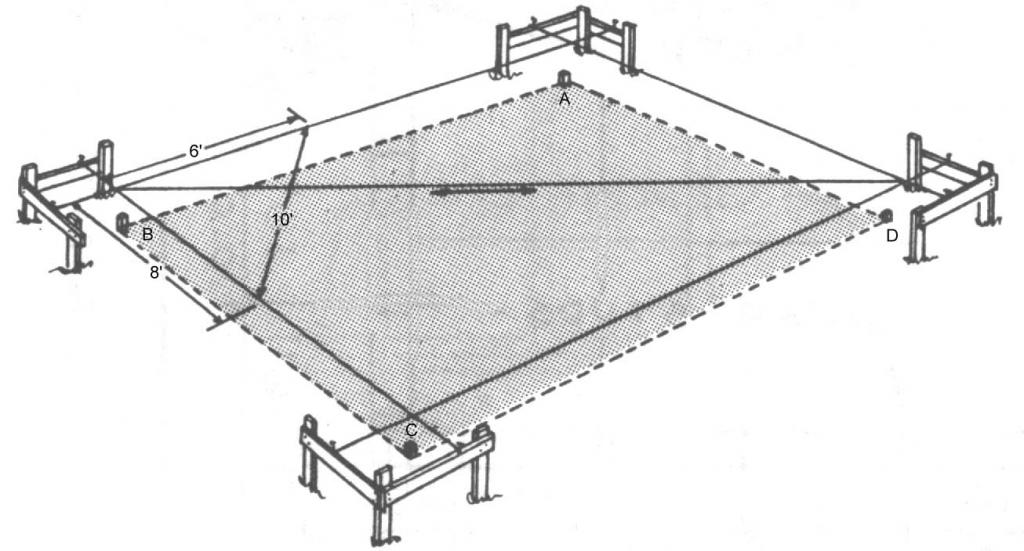
Step-by-step instructions for determining the right angle After aligning the angle of 90 degrees, mark 8 m on the length cord, and 6 m on the cord width. Then go to the third side. Pull the third cord perpendicular to the first and fasten it at the 8 m mark.
The fourth cord is pulled perpendicular to the second and fastened at the 6 m mark. To obtain a rectangle with right angles, it is necessary that both marks on the third and fourth cords coincide.
If the lengths of the diagonals of the quadrilateral are the same, then a rectangle is obtained. But the diagonals can be the same in an isosceles trapezoid. Therefore, the main condition for constructing a regular rectangle is the presence of an angle of 90º, and there are no such angles in an isosceles trapezoid.
This method is external markup. It is suitable for slab foundations. In the manufacture of the tape-type foundation, markings are made along the inner perimeter, taking into account the width of the tape.
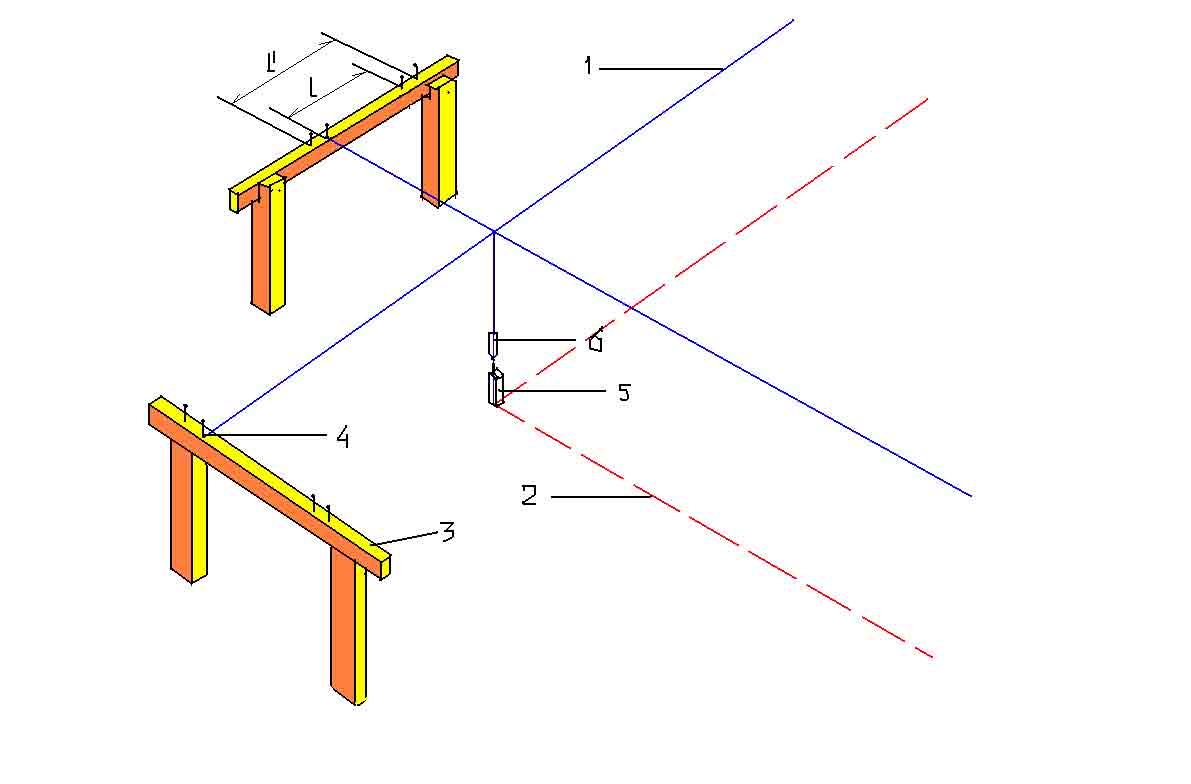
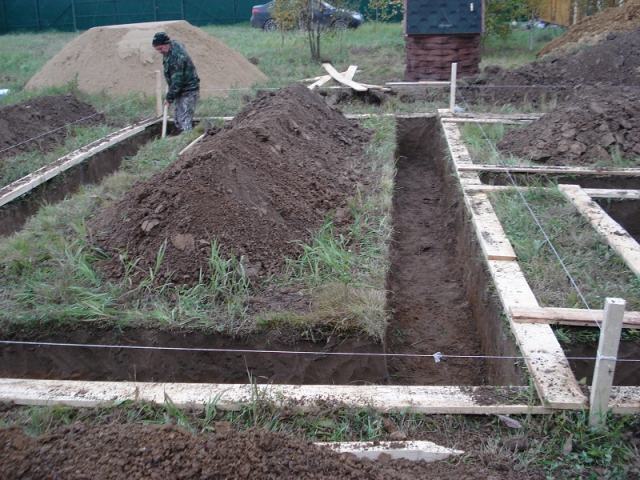
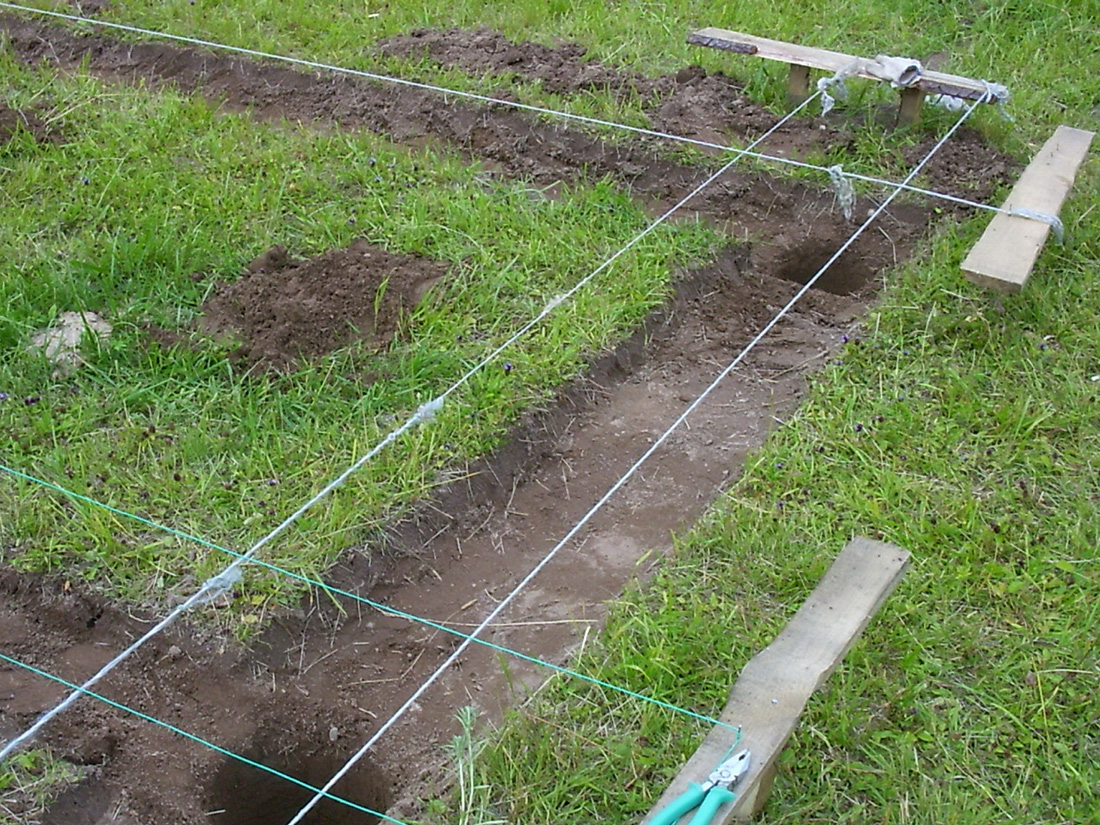
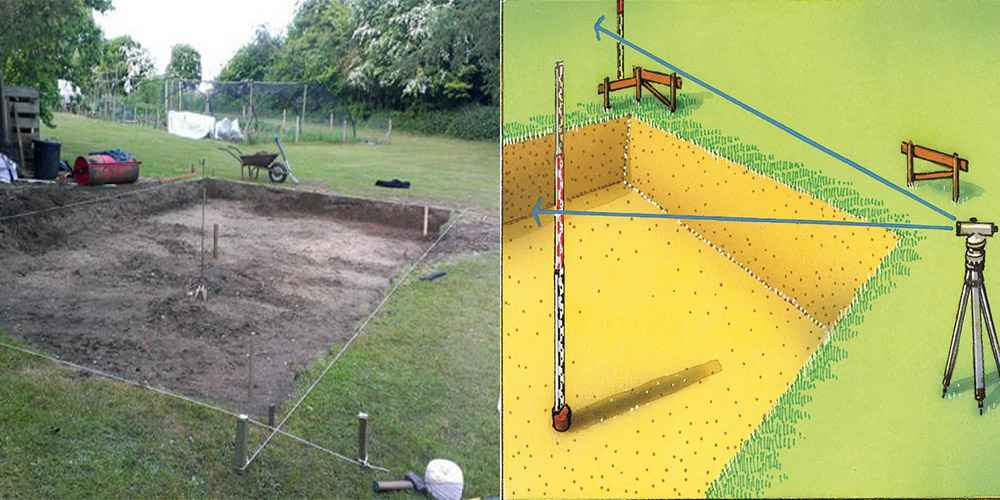
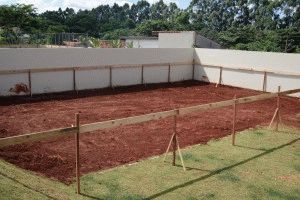
Castoffs are installed outside the trenches. They consist of pillars driven in pairs, connected by a bar. Installing rags is a crucial moment. They are mounted so that the upper parts of the planks are on the same level. For this, a hydro level is required. The cords pulled over the top planks will serve as the horizontal zero mark for the support.
What tools do you need?
Produced marking the foundation with your own by hand using tools:
- Roulette;
- Cord;
- Hydro level and plumb bob;
- You will also need wooden pegs.
Where to start markup?
So, how to mark the foundation? To begin with, you need to determine two starting points by driving in pegs at the corners of the future building, which are on one straight line from the side of its longest wall. Further, it will be necessary to draw perpendiculars from them, thus marking the outer contour of the adjacent walls.
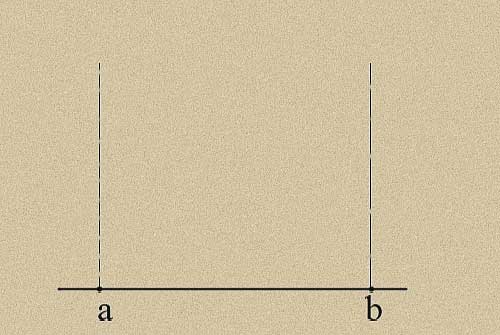
"Egyptian Triangle". The easiest method
Do-it-yourself foundation marking can be done most quickly by the "golden" triangle method, which has a aspect ratio of 5 * 3 * 4. In this case, the event is carried out in several stages:
1. First you need to find a long rope and tie four knots on it. The first is at the end, the second is at a distance of 3m, the third is four meters from the second and the last is five meters from the third; 2. After that, the very first and very last knots are connected with a nail. A nail should also be driven into each of the intermediate nodes; 3. In this case, the long side of the resulting triangle must be placed along the line between the two already driven pegs; 4. Along the short side, draw the required perpendicular; 5. On the resulting straight line, drive in the third peg at a distance equal to the width of the building.
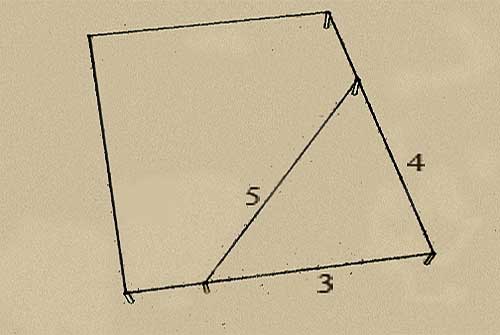
Important: It is imperative to check the correctness of all measurements. To do this, two cords are pulled diagonally between the hammered stakes and tied at the intersection
Two arcs method
The marking of the foundation on its own using this method is also performed using a rope. Previously, equal distances are measured from one of the pegs in both directions along the existing line and the places found are marked. Next, a rope is attached to one of the points obtained with a nail tied at the opposite end. Having pulled it, they draw an arc opposite the peg from which the distances were measured. Then the rope is attached to the second marked place and another arc is drawn. From the point where the arcs intersect, draw a line to the peg. The result is a right angle between it and the existing line.
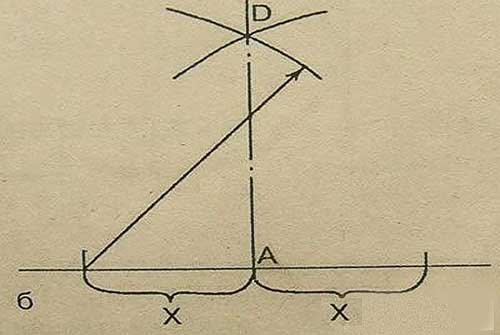
At the final stage, a cord is tied to the stakes at the height of the future foundation, checking the horizontal position of its position from all four sides, using the building level. For the strip foundation, draw an inner contour parallel to the outer one found and also pull the cord.
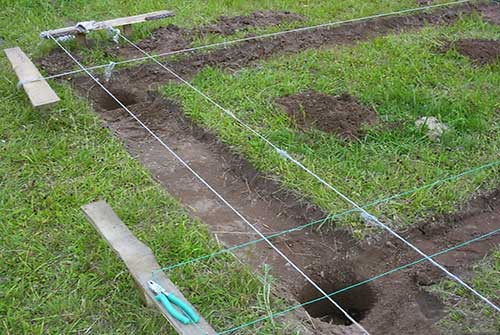
Tip: In the event that the trench is supposed to be dug with the assistance of equipment, it is better not to use the cords. In the process, they can break. In this case, the lines between the found points should be drawn with sand. To find the centers of the pillars of the columnar foundation, the necessary distances are measured from the found corners along the drawn lines and marks are put. Next, check the rectangularity of the corners obtained at the intersection of the lines (connecting the obtained points on opposite sides and the perimeter line on which the marks are located).
Do-it-yourself foundation marking, as you could see, the procedure is not so complicated. The most important thing is to do everything carefully, to pull the rope well and be sure to check the result obtained by the method of diagonals.
Related videos:
How to mark the foundation depending on its type
Moreover, it can be used not only by amateurs, but also by professionals. Some aspects and they may be incomprehensible during the construction of the foundation, and by looking at this article, you can find the answer to almost any question related to pouring the foundation and preparing for it.
How to do it right: Correctly cut men's haircuts video 7 How to mix the cement mortar for the foundation 7 Meta tag description how to fill it correctly 3 How to spray cucumbers 2 How to install a sidewalk curb 2 Proper nutrition is to lose weight 2. Correctly accept the position. How to properly put on the penis attachment. How to use the penis attachment Published: 27 next How to tan correctly and quickly in a solarium.
Tanning in a solarium: how to tan beautifully and further Correctly take an egg worm test.
How to do it?
The markup is made for different types of foundations. It is necessary to bind the markup to the type, since it can have its own characteristics in each specific case. All of them must be considered. However, first it is necessary to consider the general specific features.
Two methods for constructing a rectangular foundation
In fact, everyone who studied geometry at school can build a right angle. This does not require any special knowledge. So, in one of the cases, you can apply the Pythagorean theorem:
C = √ (A² + B²)
Without delving into the jungle of geometry, it is worth considering the use of the Pythagorean theorem with an example. If there are two sides already built. One is located along the fence. It is not planned to change it. The second is built side by side, but I am not sure that it is located at a right angle and I want to check it out. Then from the corner on each side you need to measure along a segment. For example, many take the entire length for a segment.
For example, let's take sides 9 and 12 m. Then √ (9² + 12²) = √ (81 + 144) = 15 m. This means that the diagonal between them should be equal to 15 m.
The second method is called the "web"
It is important here to prepare a string that does not have the property of stretching.
Be sure to pay attention to this fact, otherwise nothing will work. First, you need to cut the twine exactly to the dimensions of the future foundation
Let's take the same 9 and 12 m. It is necessary to cut off a piece in order to measure the diagonals in the future. You will need two segments of 9, 12 and 15 m, as well as a small amount for fastening.
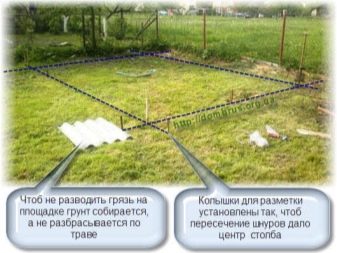
Now the twine needs to be fastened at the corners, and also attached to the diagonals. After that, you can start pulling. First, pull on one side, preferably long or along the fence. After that, you need to pull one of the short sides.
Under the columnar foundation
It should be cast in two tiers. In this case, the lower tier should be located at the same level as the pillars. Then you can pull on the string. Check that the strings cross at right angles. Where the points of intersection of the twine are located, using a plumb line, you need to mark the places for the piles and fix the wedges. The twine should be removed so as not to interfere.
Now you need to drill holes under the pillars and install the pillars. Re-tighten the strings. Now you need to bring all the pillars out of the ground in the same way so that they touch the string.

Under the strip foundation
In this case, you will need to make a double marking, since the strip foundation is a strip. First you need to position the batten, then you need to pull the string at right angles. First, the outer contour is made. It should be remembered that the height of the location of the twine must be equal to the top level of the foundation. After that, you need to make an inner contour. To do this, a piece equal to the width of the tape is laid on the cast-off from the existing twine, after which an inner contour is made.
In the future, using a plumb line, angular places are determined. Pegs are attached to the corners on the ground. A string is stretched between them, denoting the boundaries of the trench under the strip foundation. After that, they dig a trench. When forming the lathing, it is not necessary to re-tension the upper strings if the height of the foundation will be determined by the lathing.
Under the slab foundation
In this case, it is much easier to make the markup than for a columnar or strip foundation. All you need to do is draw a rectangle with twine.
Particular attention must be paid to drawing right angles. Basically, this is where it all ends
In the future, just as in previous cases, using plumb lines, you need to find corner places on the ground and mark them with pegs.

Complex markup
When you need to make a markup of an extraordinary rectangular foundation, and structures with many protruding corners, you will have to sweat. However, this is still possible.
The step-by-step instructions are as follows:
- for a start, the general outline of the future structure is outlined. The plan should mark the distances from the extreme protruding points to each other. Based on this data, a large rectangle is built into which the house will be inscribed;
- after that it is necessary to correct all the corners, re-measure the diagonals and side lengths;
- further, they move on to the most difficult thing - marking the breaks of the walls. It should be borne in mind that in almost a hundred percent of cases, each of these kinks is another rectangle, so all you need to do is draw several rectangles inside. In the future, it is necessary to set and recheck the corners;
- using plumb lines, it is necessary to calculate the intersections that are on the plan and form the general outline of the house.
Foundation types
Previously, one main type of foundation was used - concrete; a good half of the Soviet buildings were laid out with it. Now there are houses with no foundation at all. Basically, foundationless buildings are being built for outbuildings. You can build a house without a foundation in one of the simplest ways. The method consists in constructing a base of pillars-supports, on these supports the building will be held.
Fencing a plot for construction
There are such types of structures:
- Tape. It is a fundamental tape-shaped structure embedded in the base of the building. The strip foundation is laid in order to reach an area of land that is difficult to compress. The width depends on the weight of the house; the wider the foundation is, the less pressure on the ground will be. Clay soil or soil with groundwater is not problematic for strip foundation installation. Such a "sole" is not recommended for particularly uneven soil structure.
- The foundation slab is an asphalted area. The load with such a structure is minimal, but at the same time it is the most subject to destruction of all types of structures.
- Column and pile foundations. These two species are similar, but not the same. They are designed for the most difficult soils (wetlands). Such foundations are laid by driving and screwing piles into the ground.
- Combined types - basement with basement. To do this, a pit is pulled out, the walls of the basement are mounted in it, followed by the floor.
- Columnar. It is produced by placing the pillars in the corners, and in the areas of intersection of the walls. With such a foundation, you cannot build a basement floor.
- A monolithic foundation is used in the construction of lightweight wooden structures.
- Tiled is one of the monolithic foundations; a monolith is often used as a floor.
- The floating foundation is used on fill soils and areas with abundant groundwater.
- Screw foundation. Consists of screw piles, intended for soils with groundwater and landslides.
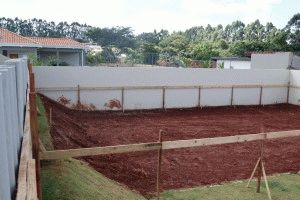
Preparing the ground for the foundation
Site requirements. Binding to the terrain taking into account geodesy data (soil types, groundwater)
The construction site should be as flat as possible, free of trees and bushes. It will be nice if it has a slight bias.
The contours of the site must have clear, i.e., points that do not move during the entire construction period, which are marked on the plan. If one of the edges of the plot goes to the "red line", then it should be marked on the ground. You can score several stakes on this line.
If possible, it is necessary to drill several wells to determine the characteristics of the soils on the site, the level of groundwater and their chemical composition.
If the groundwater on the site is close to the surface and is located near the design level of the foundation, then it is imperative to arrange drainage, that is, drainage.In this case, the water must be diverted 0.7 - 1 m from the bottom of the foundation.
How to zero out when concreting?
The first step is to set the zero point correctly. For this, a mark is made from the inner area of the formwork, preferably in one of the corners, which will be the alignment boundary. Next, we will use the hydro level to determine the other three points. If such a tool is not available at hand, an ordinary transparent hose will work as an alternative. To mark the corresponding boundaries, the latter is pulled from the marked area to opposite corners, after which water is released. At the primary point, a zero level is fixed, in the process of balancing the liquid, a second point is selected and a mark is put in this place. The remaining points are found according to a similar principle, there are no difficulties at these stages:
In the finished formwork, it is necessary to make holes for the hose at the middle section of the planned walls.
A cord or twine is threaded into the holes, after which the structure is fixed until tension appears.
The zero level is measured and concrete is poured.
The mixture is leveled by the building rule, it is important to evenly distribute it over all areas of the surface.
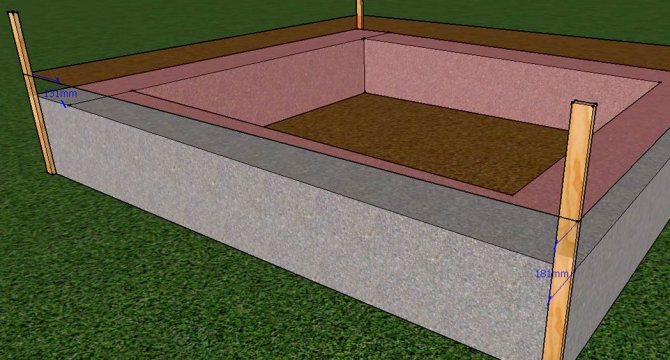
After the concrete solution has finally hardened, the perfectly flat area of the foundation is completely ready for the further construction of a basement or a possible basement. In this case, do not forget about regular checking for the correspondence of the horizontal and vertical levels of each brick row or building block.

