What is basement siding
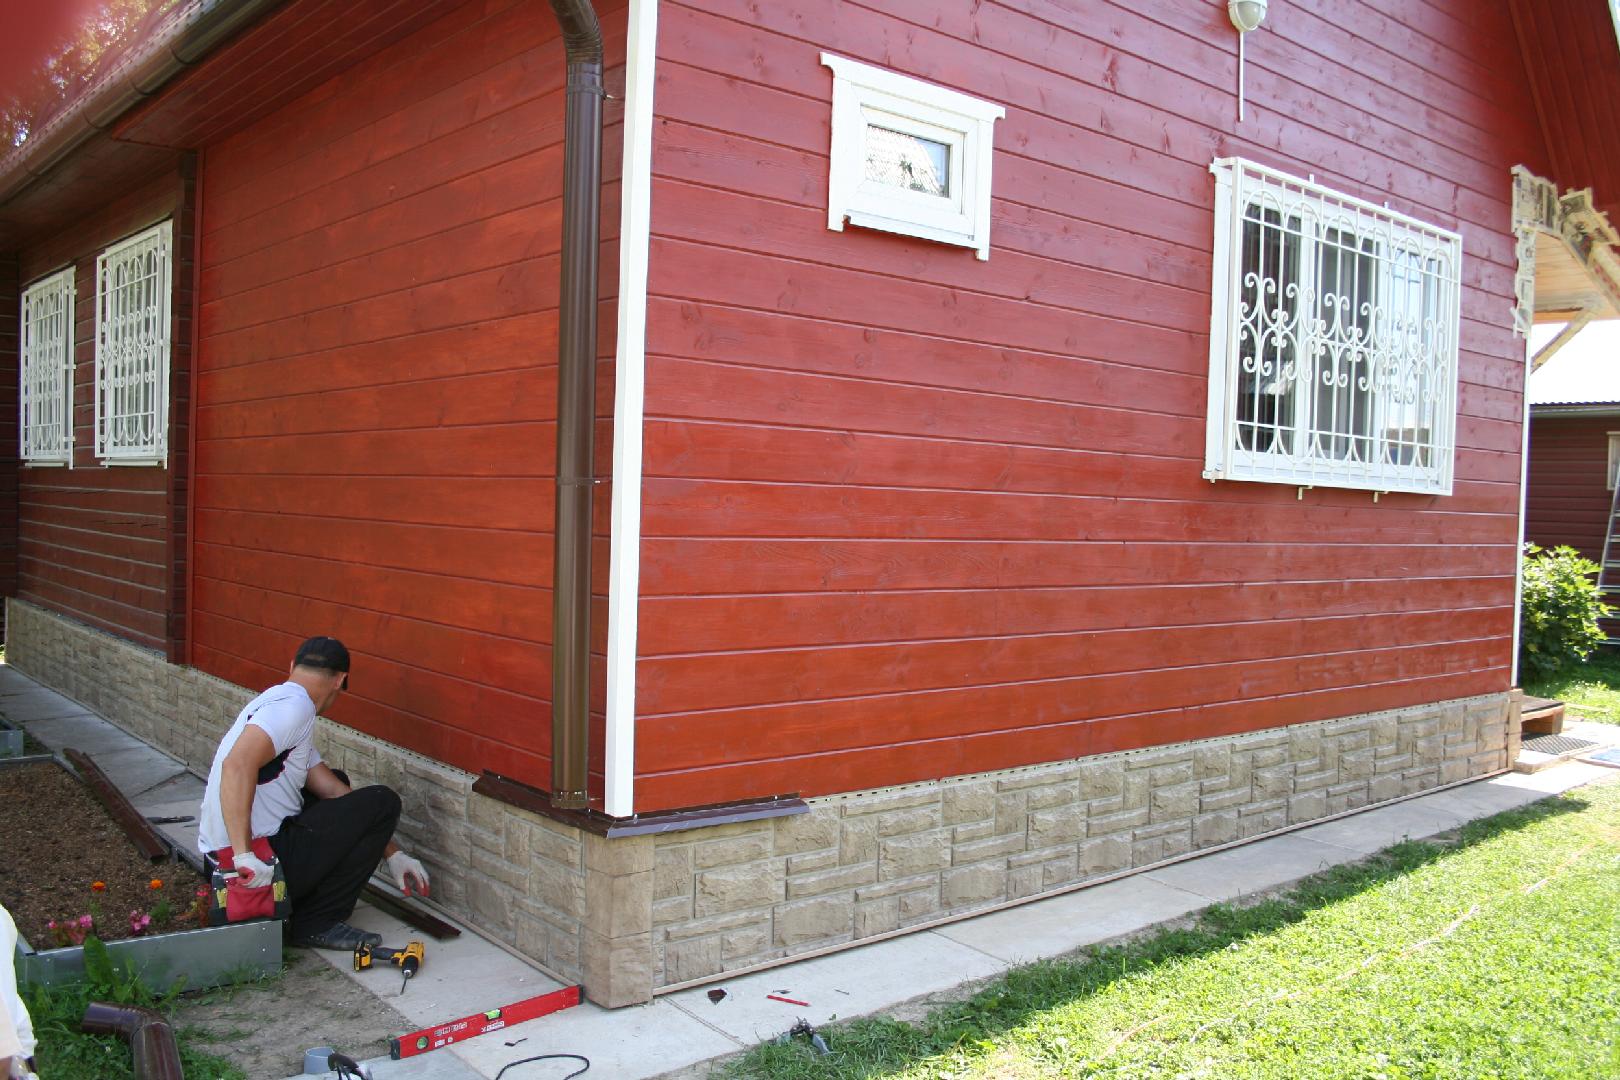
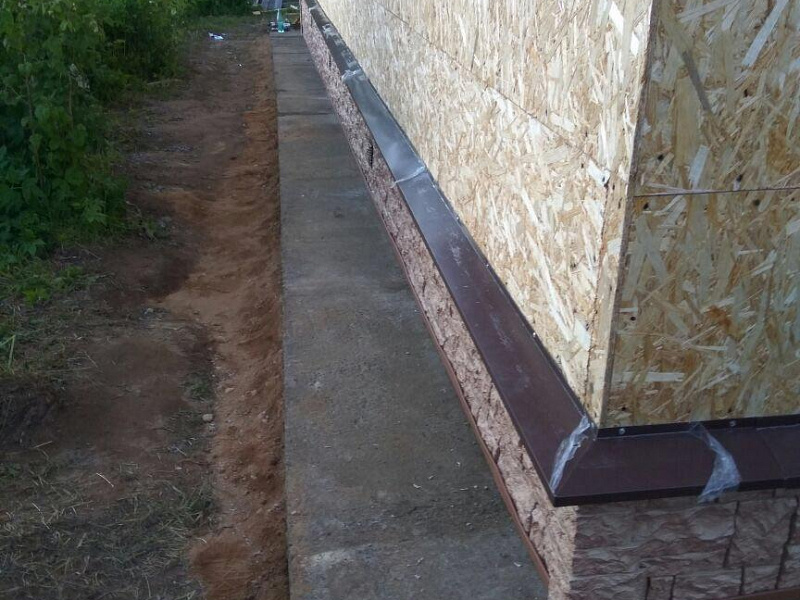
Each building has a basement level. This is a part of the foundation, the main purpose of which is to protect the walls from moisture (in case of precipitation). Its height depends on the characteristics of the landscape. Although this is not yet a brick wall, nevertheless, this element also needs protection from the aggressive effects of moisture and cold, as well as a sharp change in weather conditions. When it rains outside, splashes of water always fall on the plinth. As a result of this constant exposure, it begins to absorb moisture. If it is deep autumn, then at subzero temperatures at night the water begins to crystallize and imperceptibly destroy the cement monolith. To protect the lower part of the wall from such a load, a base / plinth protection is installed.
 Siding design options
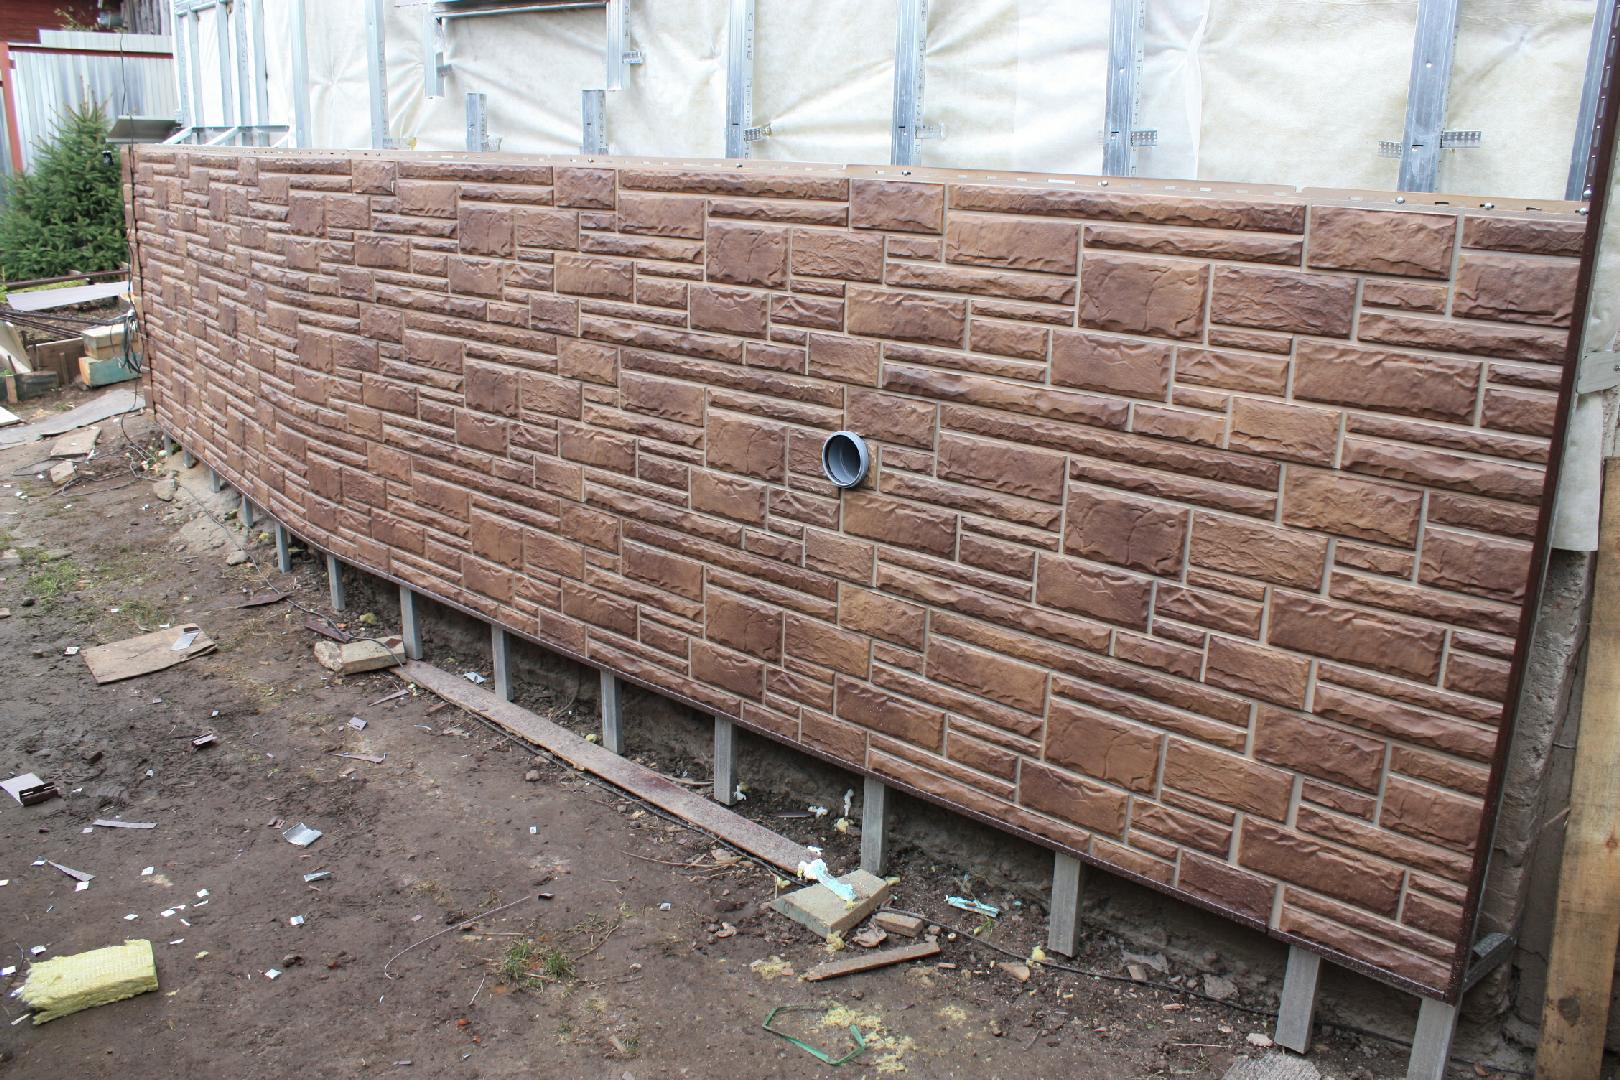
Such a design can have a different shape and color of decorative panels, but the principle of fastening the siding is almost the same. This element of protection consists of profile strips that ensure a firm fixation of the ends of the structure on the wall. Thanks to the use of innovative technologies, different manufacturers produce a wide variety of such parts. The panels serve two purposes:
- Protection of the basement from the adverse effects of moisture on the masonry (destruction of the structure of the monolith, the formation of mold).
- Decorate the building.
A large selection of manufactured models allows the consumer to choose such a siding that will satisfy his requirements as much as possible.
Application of PVC products
PVC products are called vinyl. They are manufactured in the form of two-layer parts. Polyvinyl chloride is used in their production. As a result of the two-layer coating, high strength and reliability are provided.

With the help of one of the layers, the physical properties of the finish are preserved, and with the help of the other, the cladding is protected from the influence of adverse influences. Such coatings have universal characteristics.
You can learn more about PVC products for base cladding by watching the video:
Installation can be carried out in any part of the structure. Vinyl does not rot, mold does not affect it. Temperature drops are not terrible for him. The material cannot be damaged by microorganisms and parasites.
Types of basement panels
Panels for exterior walls can vary in materials of manufacture, design, size. These are the main criteria for their selection.
Dimensions of individual cladding elements
Plinth panels are easy to distinguish not only by their thickness, but also by their size. Most often they have an approximate aspect ratio of 1: 2.5. For conventional facade siding, the length to width ratio is approximately 1:10. Accordingly, the individual base / plinth trim elements are rather short.
But their width can vary significantly and fluctuate in the range from 16 to 50 cm. Manufacturers produce such panels for the convenience of decorating a narrow strip at the bottom of the walls. Sometimes it is enough to put them in just one row.
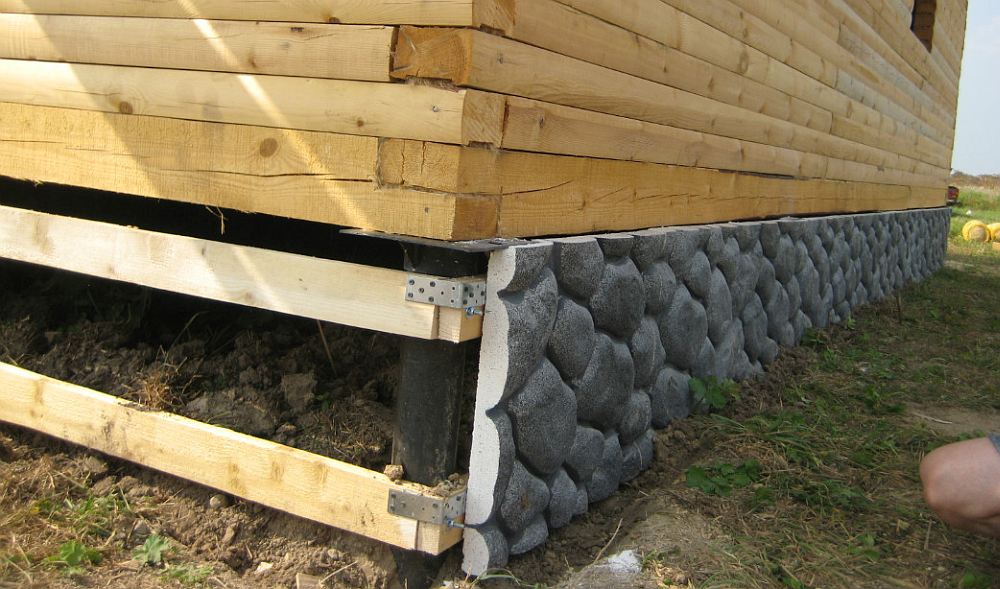
The dimensions of the products are also influenced by the type of the simulated material. Thus, chipped stone panels will be shorter and wider than elements with a red brick look.
When buying, keep in mind that each panel, in addition to the actual one, also has a usable size. This is the apparent height and width of the product after installation.
Panel material
A wide range of products are made of polypropylene, fiber cement, galvanized steel.
Polypropylene should not be confused with polyvinyl chloride (PVC).Polypropylene sheathing is much more resistant to weathering. It is also characterized by a high degree of strength, which is achieved by the casting method. The finished products are lightweight, easy to clean and faithfully imitate the relief of natural stone.

Metal panels are products based on galvanized steel sheets. They are also coated with a primer, an anti-corrosion compound, and have a decorative and transparent protective layer of polymers.
The metal cladding meets all the requirements for the material for the base / plinth decoration. However, it does not always faithfully imitate natural material and may be exposed to moisture in places where it was cut.
The main components of fiber cement boards are cement, cellulose fiber, water, quartz sand. They are made by pressing at high temperatures or pressing with further “ripening” within a month (by analogy with concrete). Finished facades made of DSP are distinguished by a high degree of decorativeness, low thermal conductivity and durability.

Basement panel design
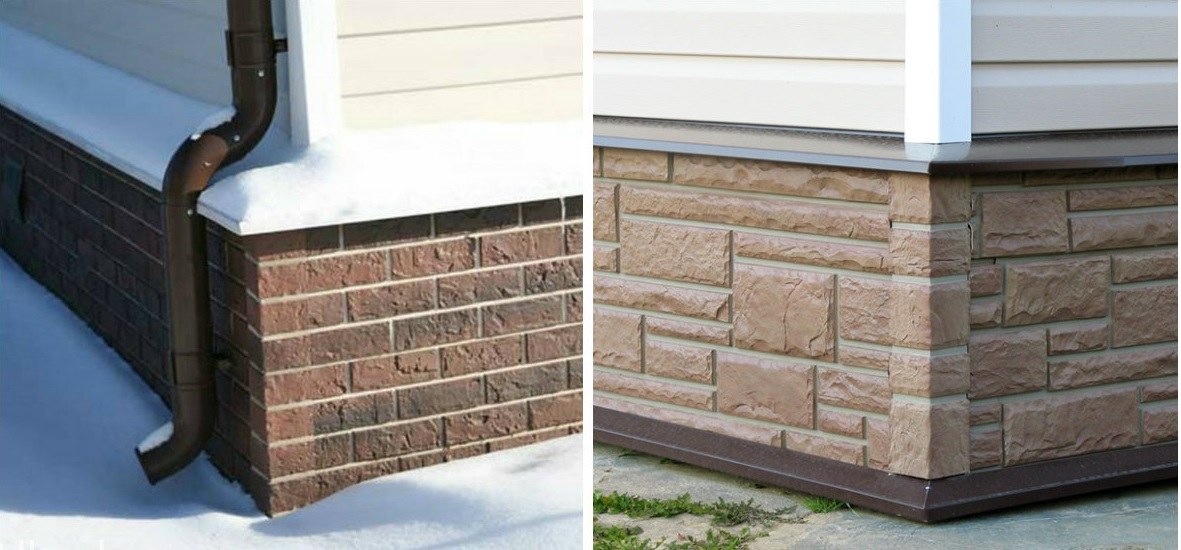
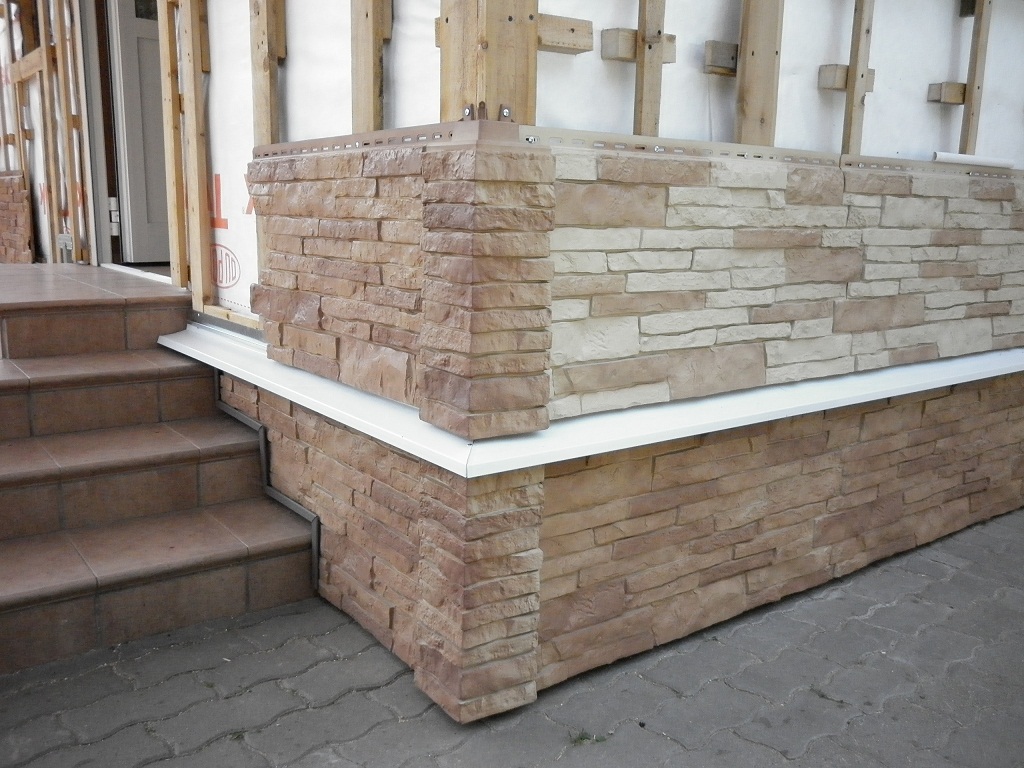
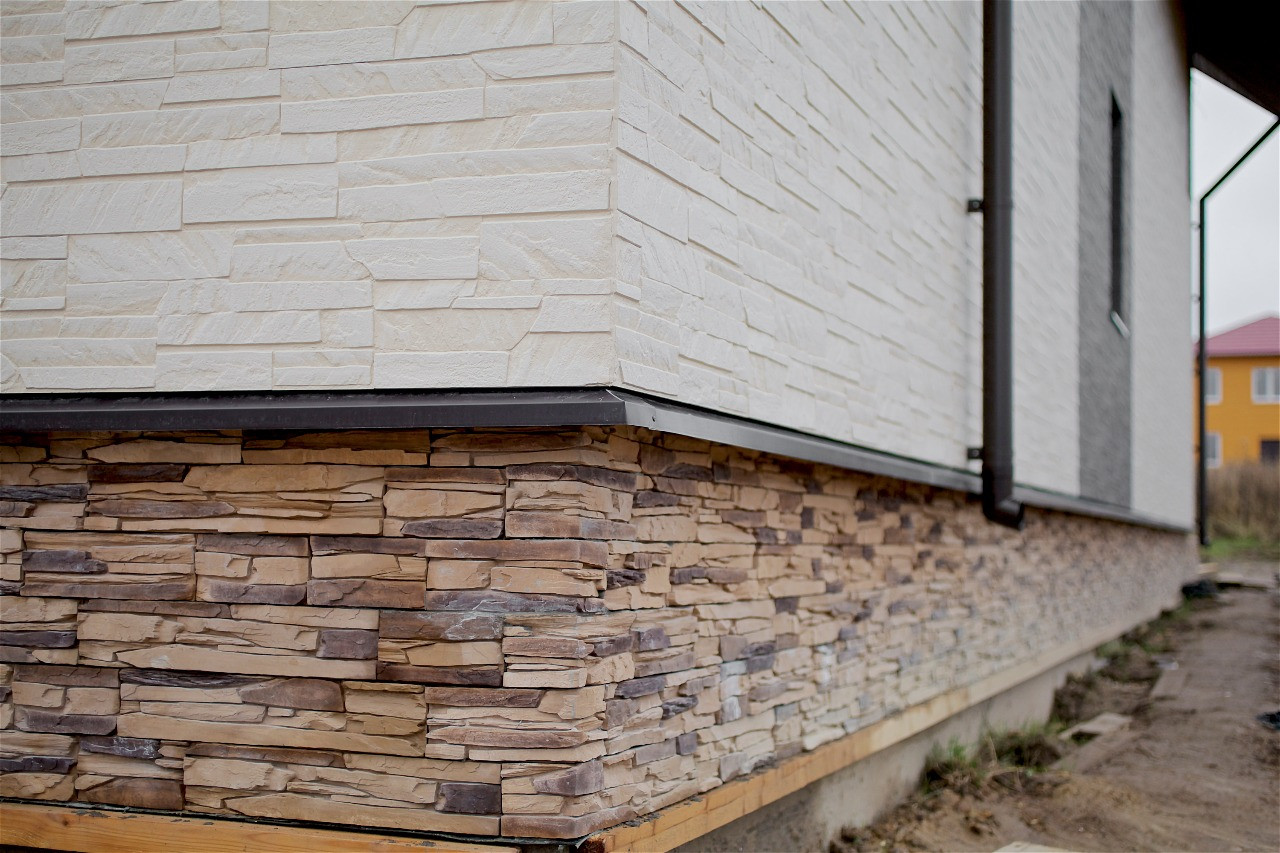
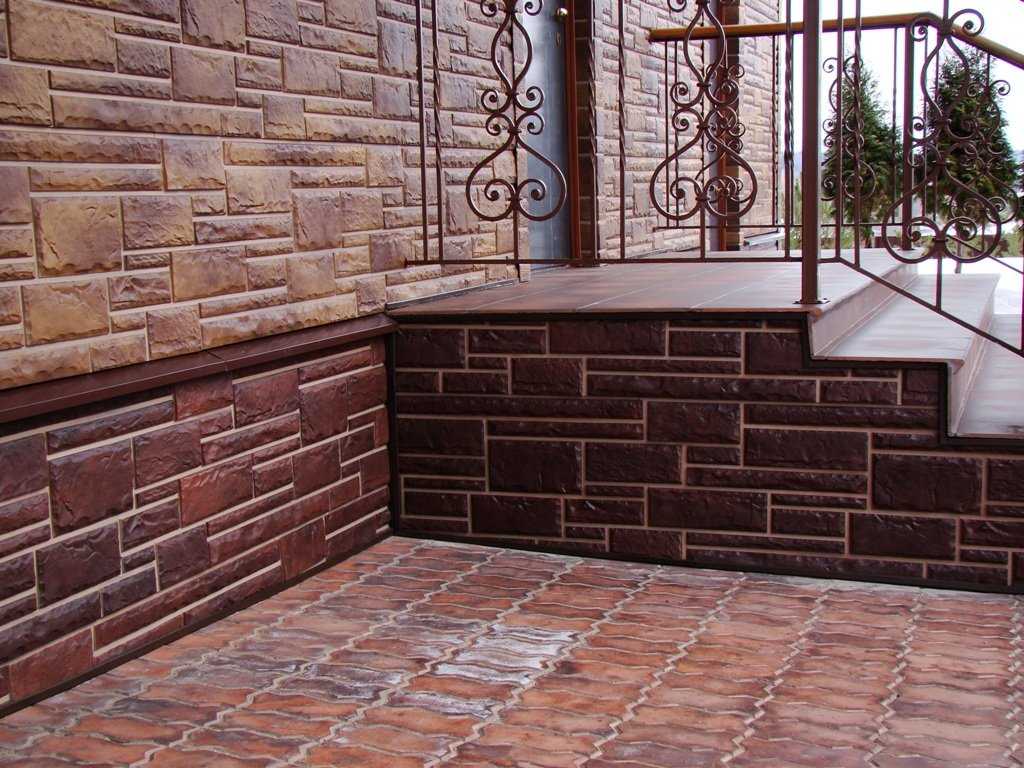
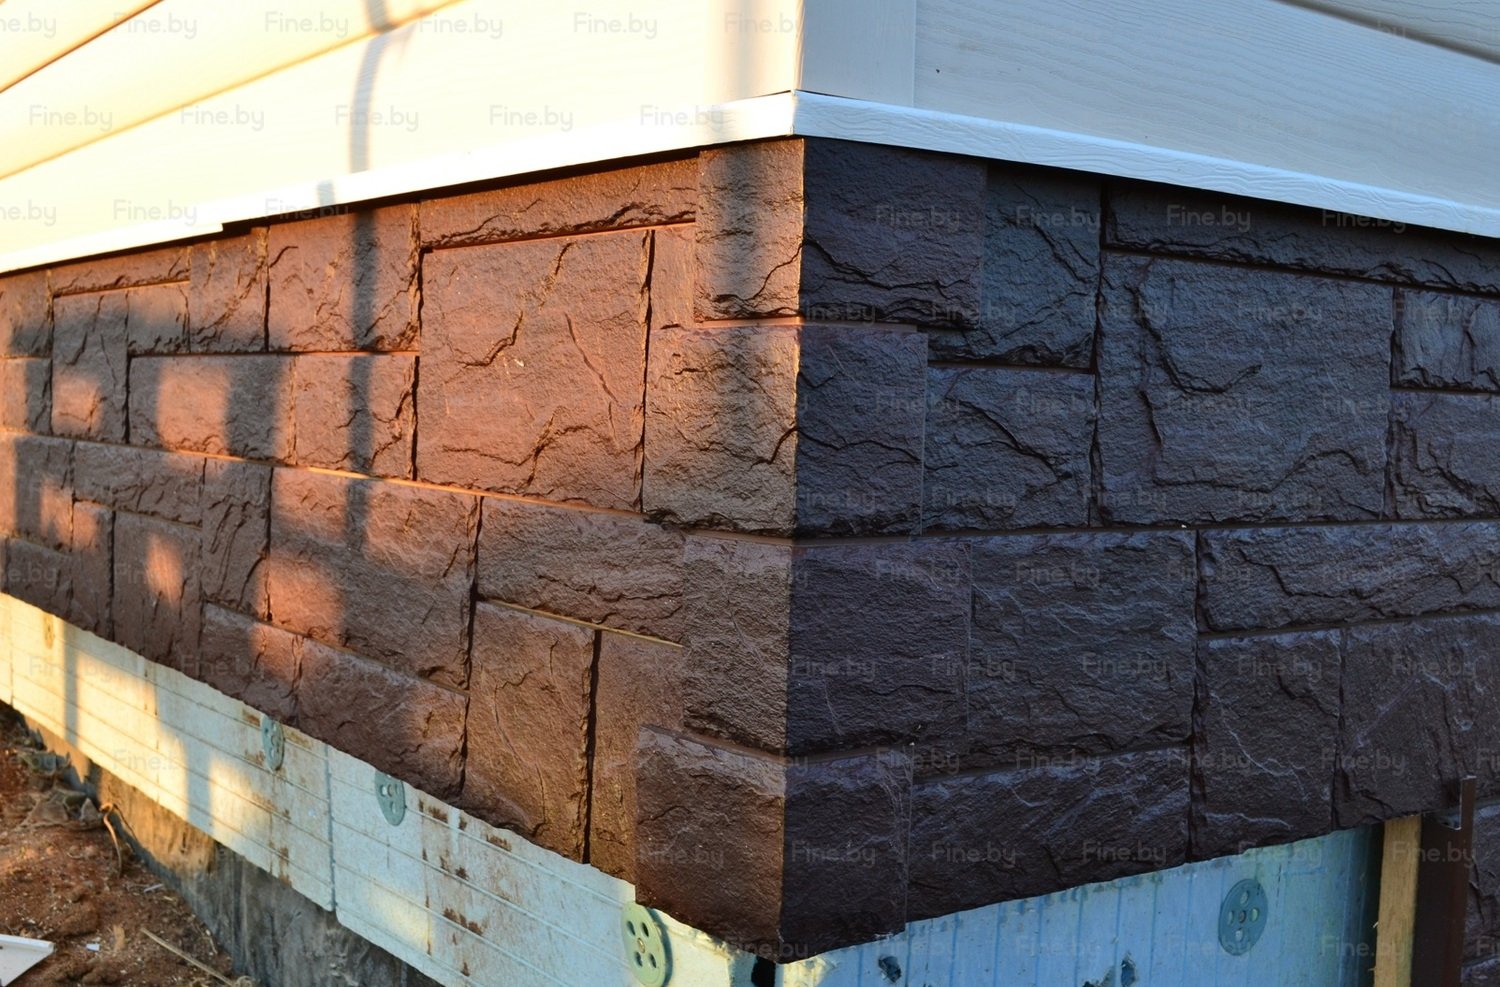
Plinth cladding panels can imitate several dozen natural materials. The most popular options:
- dolomite;
- granite;
- rubble stone;
- sandstone;
- rocky stone;
- clinker brick;
- aged brick.
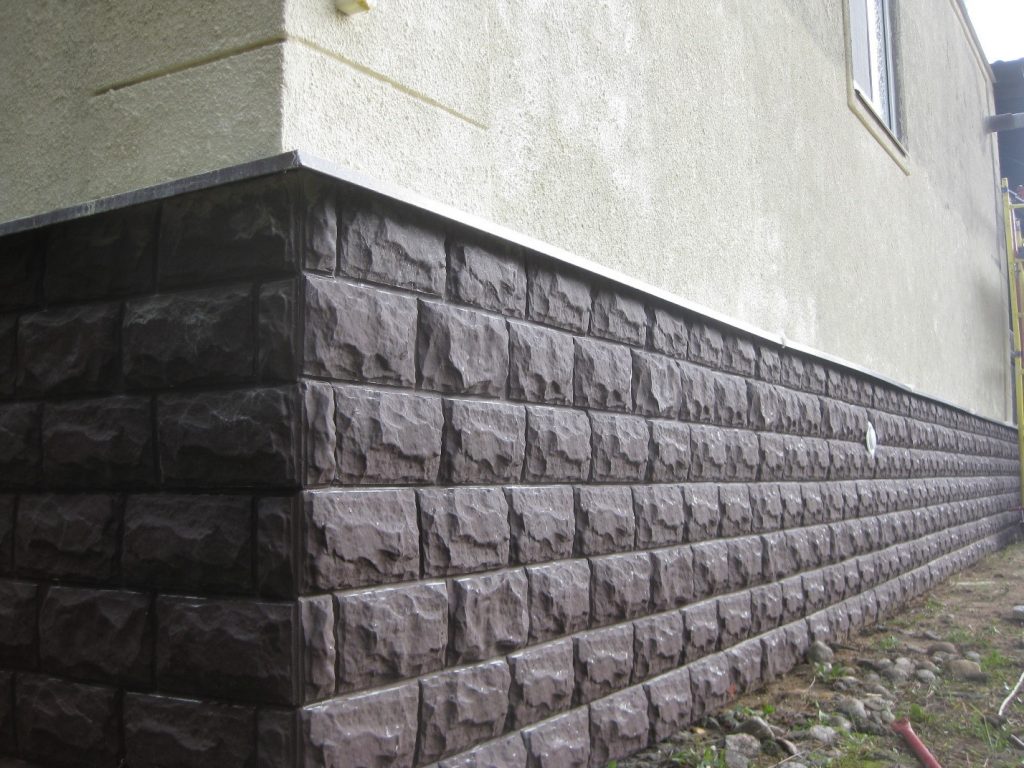
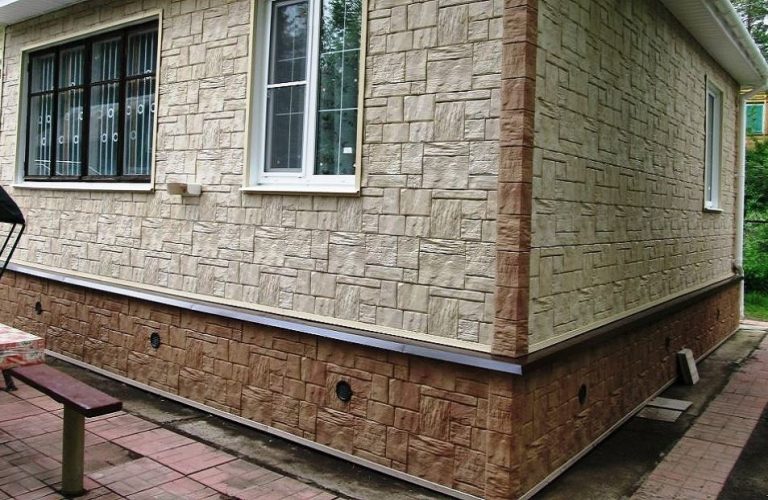
Facade panels with imitation of large stone are associated with a fortress, a castle and visually increase the dimensions of the building, creating a feeling of its increased reliability.

If desired, you can use panels with imitation of wood chips. This is a rather original solution. It requires careful study if the walls of the house are decorated in a different way.
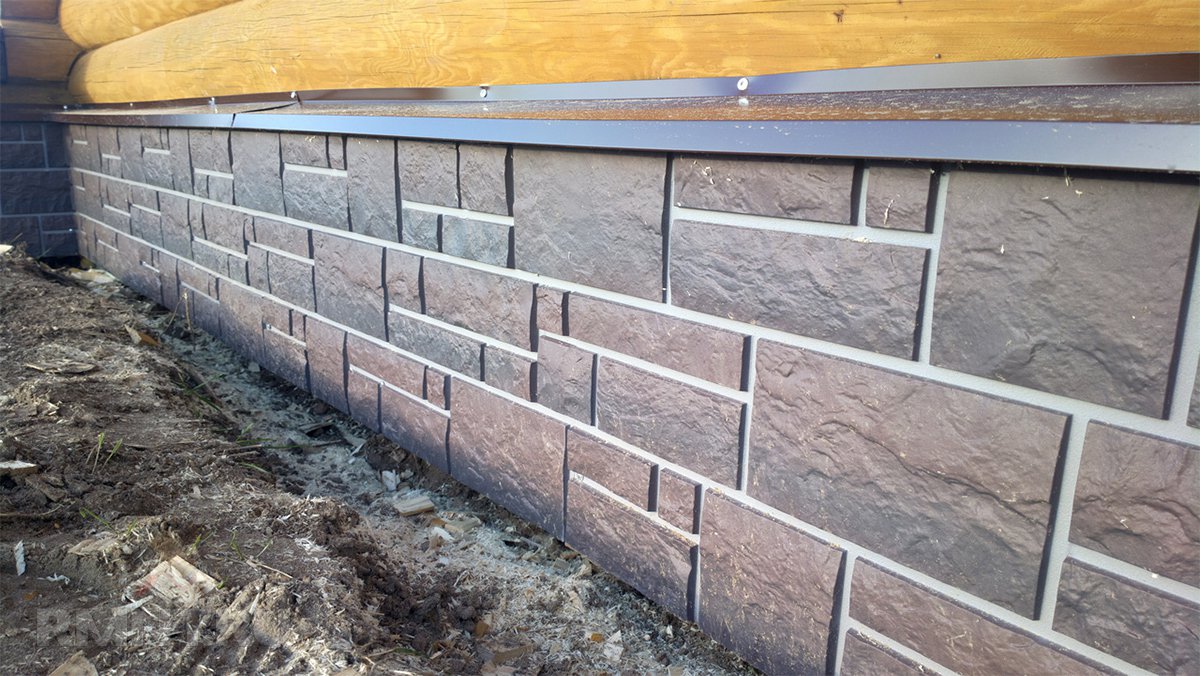
The panels differ not only in the type of imitated stones, but also in the width of the seams between them.
This point is important to consider if you plan to grout them. The wider the seam, the easier it will be for you to work with it.
Pay attention to the relief of the cladding elements. If it is very pronounced, be prepared for the fact that dirt on such a coating will accumulate more often.

Facade panels with insulation
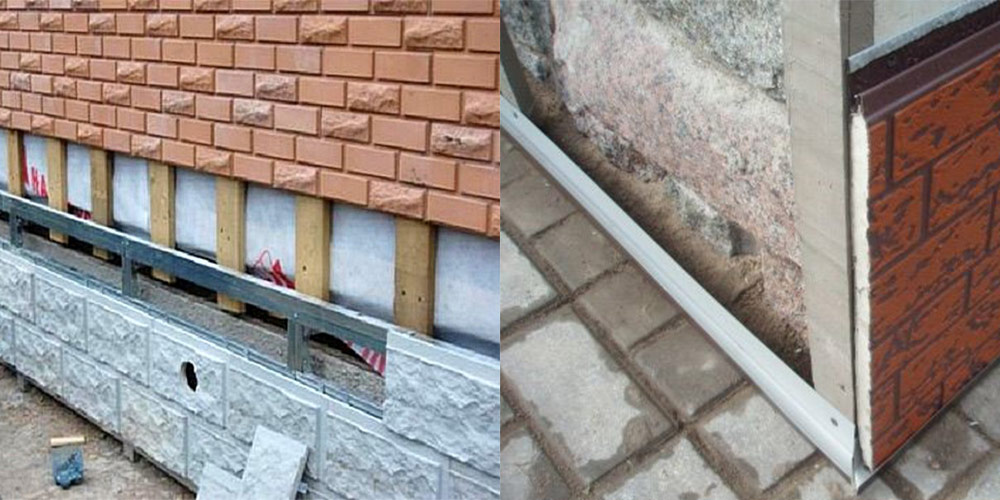
As a rule, the plinth is additionally insulated when trimmed with decorative material. This is done with the help of heat-insulating material, which is placed in the crate cells. An expensive, but time-saving and time-saving alternative - insulated facade panels for exterior decoration of the house.
They are a “cake” of three layers:
- The foundation. Its role is played by an OSB substrate or moisture-resistant plywood.
- Insulation. It can be polyurethane foam, extruded polystyrene foam, expanded polystyrene. In this case, the best option, taking into account the operational properties, is polyurethane foam.
- Decorative layer. It can be made of metal, ceramics, cement, polymer composition, clinker. Polymer and clinker panels are good value for money solutions.
Thermal panels, as well as facade cladding without insulation, are presented in a wide range.

Frame device (lathing) for DSP installation
Cement particle boards are mounted on a solid base: a wooden or metal frame. For its device, the following materials and tools will be required:
- galvanized metal profile designed for working with drywall, or wooden bars with a cross section of 40 / 40-50 / 50 mm;
- metal perforated hangers;
- self-tapping screws with anti-corrosion coating;
- drill or hammer drill;
- screwdriver;
- roulette;
- marker.
The sequence of work when constructing the lathing
Surface preparation
Step 1. Draw up a frame diagram, focusing on the dimensions of the cement-bonded particle board: the panels must be installed intact, without preliminary cutting. Based on this rule, the optimal step between the posts of the crate is found (but the distance between the supports should not be more than 60 cm).
Sheathing scheme
It is more difficult to "lengthen" (build up) a wooden bar, so the length of the upright bar should be equal to the height of the house
Prices for various types of timber
Beams
The tree for the sheathing must be thoroughly dried and treated with an antiseptic
Metal lathing for siding
Step 2. On the wall of the foundation, the corresponding marks are applied with a marker.
Step 3. If the installation of suspensions is required, the points of their attachment to the foundation are marked. If the base is flat and does not need insulation, wooden or metal racks of the crate are attached not to suspensions, but directly to the wall.
Rules for installing metal crate
Marking and fixing the bars
The CD-profile is attached to the wall with an ES-bracket
Step 4. If wooden blocks are used in the frame device, they are pre-coated with a compound that protects the wood from the formation of rot, fungus and mold.
Installation of wooden lathing
Docking metal battens at the corner of the building
Installation of battens around the window
Foundation cladding technology with DSP panels
Plinth finishing with cement-bonded particleboards is carried out according to the technology of ventilated facade construction
When installing the battens, it is extremely important to prevent the racks from deviating from the vertical. If this requirement is not met, the distortion of the frame will entail bending and subsequent destruction of the chipboard panels when they are attached to the racks of the sheathing.
All supports of the frame must be located in the same plane. In order to fulfill this condition, first of all, corner posts are installed, between which the lace is pulled. It will serve as a guide for the correct installation of the intermediate supports of the battens.
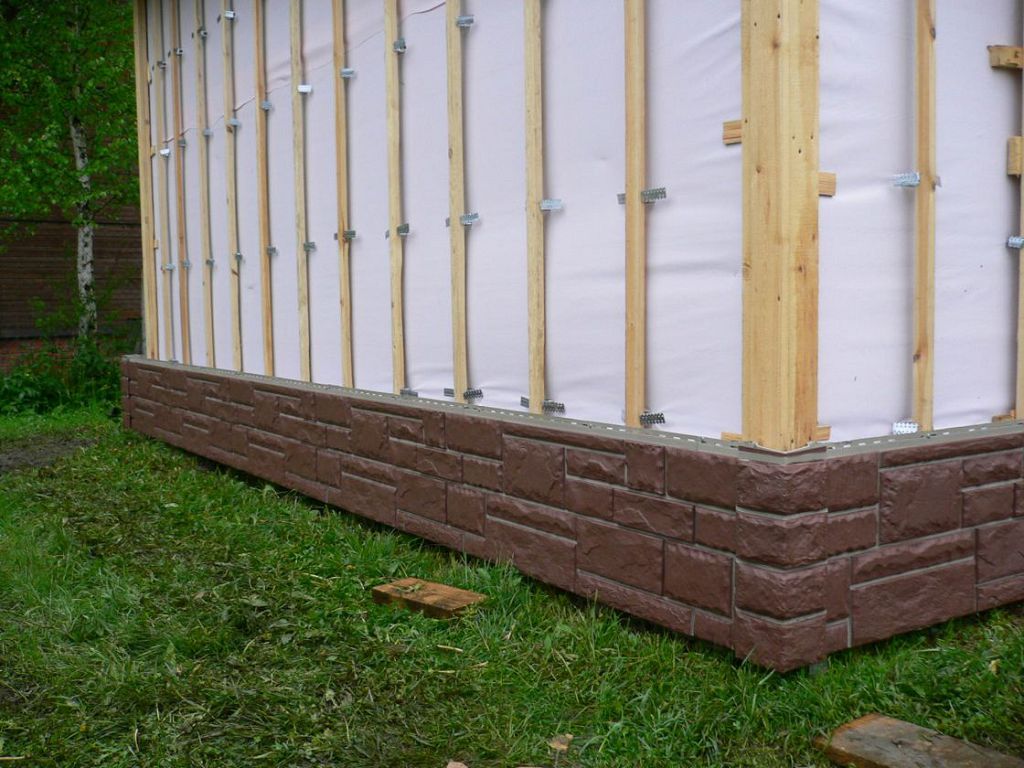
Frame for basement siding
If insulation of the foundation is provided, heat-insulating material (mineral wool blocks or foam sheets) is laid in the space between the frame posts. Any of these heaters are attached to the basement wall with dowels with wide hats (umbrellas).
Prices for thermal insulation materials
Heat insulating materials
Ventilated facade technology provides for a gap between the heat insulator and the cladding panels. In the case of cement-bonded particleboards, a gap of 0.8-10 mm will be sufficient. Therefore, when installing the insulation, it is pressed against the foundation wall so as to provide the required gap.
If the lathing consists of wooden bars, the supports are waterproofed before cementing the DSP to them. For this purpose, each bar in the places of fixation with the panel is wrapped with roofing glassine with bitumen impregnation and the edges of this waterproofing sheet are fastened with a construction stapler.
DSP is installed on the crate not close to each other, but at a distance of 4-5 mm. First of all, whole panels are mounted, secondly - cut side panels. The caps of the self-tapping screws, recessed in the plates, are covered with plaster putty, to which a little PVA glue is added. After this composition dries, the places where the putty is applied are sanded with fine-grit sandpaper. At the final stage of installation, dust is removed from the cement-bonded particleboards with a damp cloth.
False base device diagram
Possible edge and seam designs
Fixing DSP with self-tapping screws
Decorative seam strips with stone chips
Assembled base plates
Completed home decoration with CBPB slabs with stone chips
Foundation preparation
Before installing finishing tiles on the surface of the foundation, preliminary work should be performed:

Waterproofing
Carry out high-quality waterproofing of the base of the house to a height of approximately 25 to 30 cm from the soil
This is important, since the future of the entire foundation of the house largely depends on waterproofing.
Insulate the basement by attaching polypropylene or foam sheets. In the future, these sheets are plastered using a reinforcing mesh
Such an insulated foundation is protected from freezing.
Make a blind area of the building. It protects the foundation structure from moisture ingress. When working, it is advisable to adhere to the angle of inclination of the blind area at the rate of 1 degree for every 10 cm.The length of the blind area should be such that its edge protrudes beyond the edge of the roof slope by at least 20 cm.
Prepare the outer walls of the foundation. It is necessary to remove the old cladding, knock down the dilapidated plaster, and clean the surface of the base of the house from all sorts of dirt by treating the surface with a broom, a rough brush or a rag. Level the surface. This will further ensure the geometrically correct shape and reliability of the fastening.
Frame device for panels. The frame can be made of metal or wood. In the case of a timber frame, it is necessary to take long wooden blocks impregnated with an antiseptic composition. The bars should be mounted directly to the surface of the foundation using a screwdriver or directly on a concrete screed. It is necessary to perfectly calculate the thickness of the frame, so that the insulation from above is not squeezed by the panels. Otherwise, he will lose his qualities. Leave a clearance of one to two centimeters for ventilation.
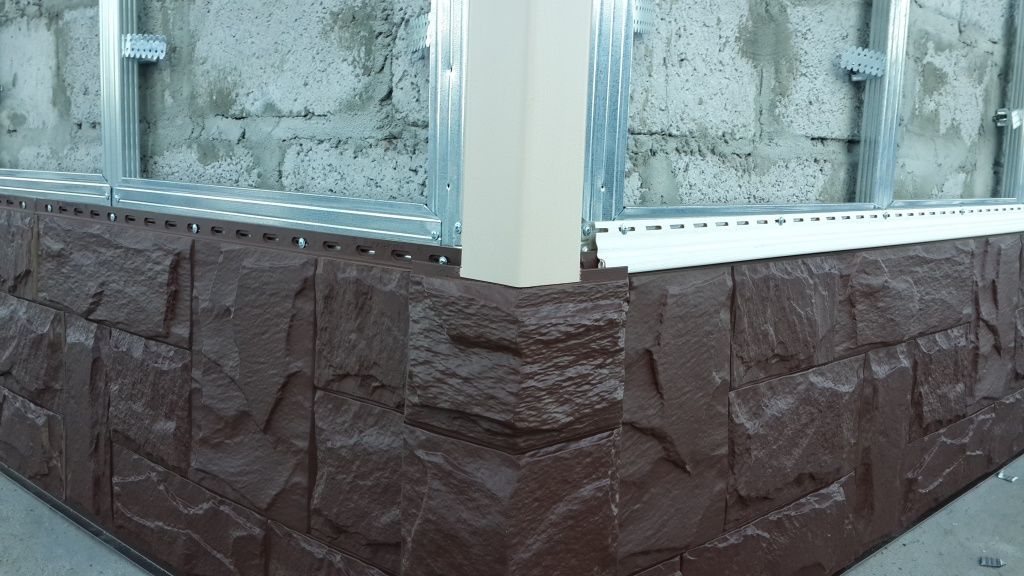
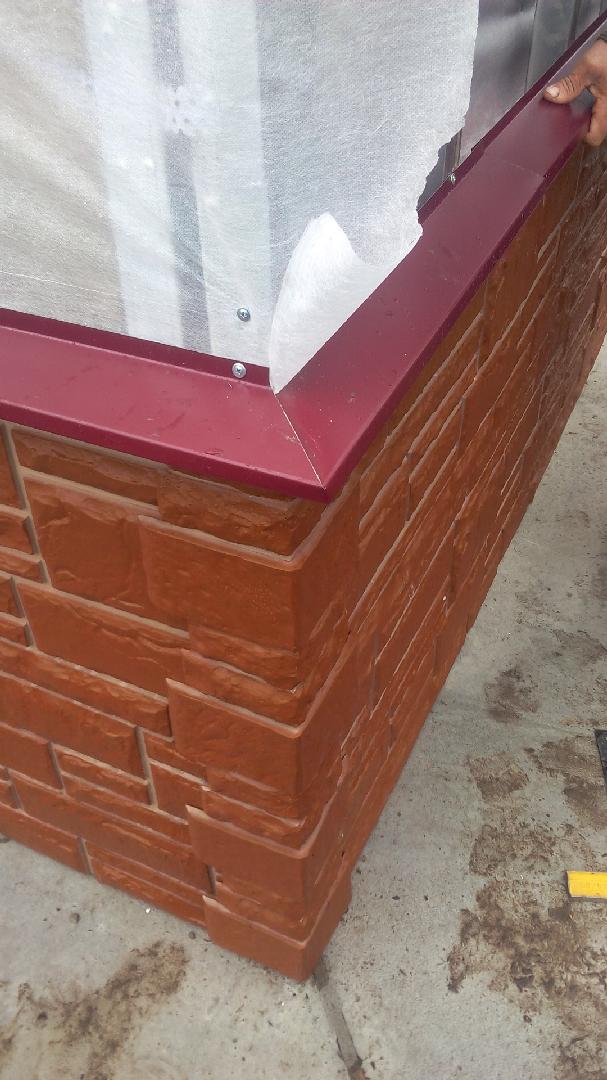
Facing corners. To this end, buy specialized plastic corners, which should be cut into the desired pieces and fastened to the frame with self-tapping screws. It is not necessary to put the corners, but this will significantly simplify the joining of parts at the corners. The corners will allow you to cover minor irregularities at the joints of the tiles. The frame with corners must stand for at least two days.
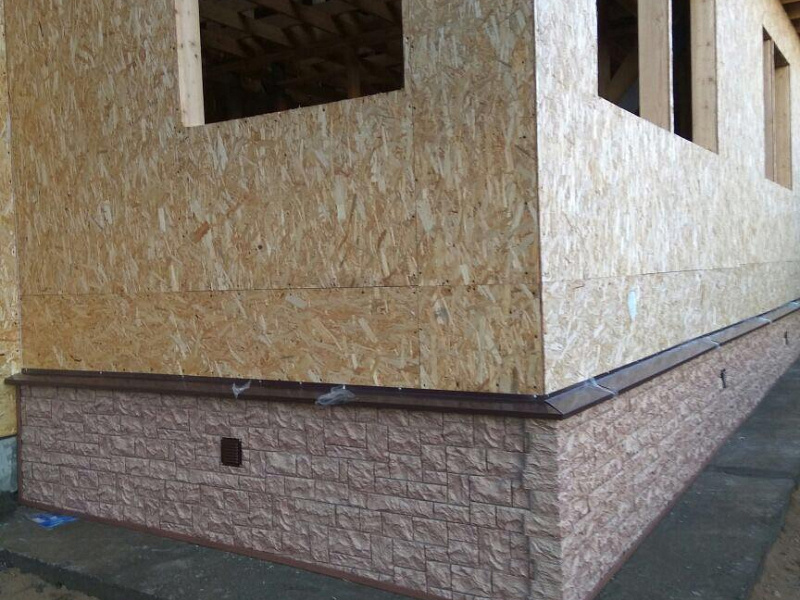
Installation of a moisture-resistant plate of a variety of OSB. The slab is fixed on the plinth to the bars with self-tapping screws. When using several non-thick slabs, they should be butted together. The slab should be placed at a small distance from the soil. Such an arrangement will protect from moisture, protect and protect from destruction.
Attaching plastic panels. Installation of panels should be done one after the other from above and proceed very carefully. This will make it possible to eliminate the occurrence of distortions. Continuous use of the level will prevent curvatures and slopes.
Panel selection
Before choosing a specific sample for future cladding, you need to answer the following questions:
- Do you need to insulate the foundation?
- Does the facade need ventilation?
- Will the cladding be installed wet or dry?
- What size should the trim elements be?
- Will the work be done independently or by craftsmen?
- Do you need a supporting crate or a power crate?
- How much do you need to meet?
Having clarified for yourself the listed points, you can select samples by drawing, shade, relief, not forgetting about strength.
 Siding
The following tips will not be superfluous:
- The front side should not have mechanical damage, defects, the paint layer should be uniform, the color of the elements of the same batch should be the same, without halftones.
- The thickness, rigidity of the material is evaluated.
- Checking the easy snapping of the locking system, tight connection (no gaps) of several elements.
- Product certificates are being studied. Its performance is compared with the required cladding requirements for a specific base / plinth structure.
Installation of basement panels
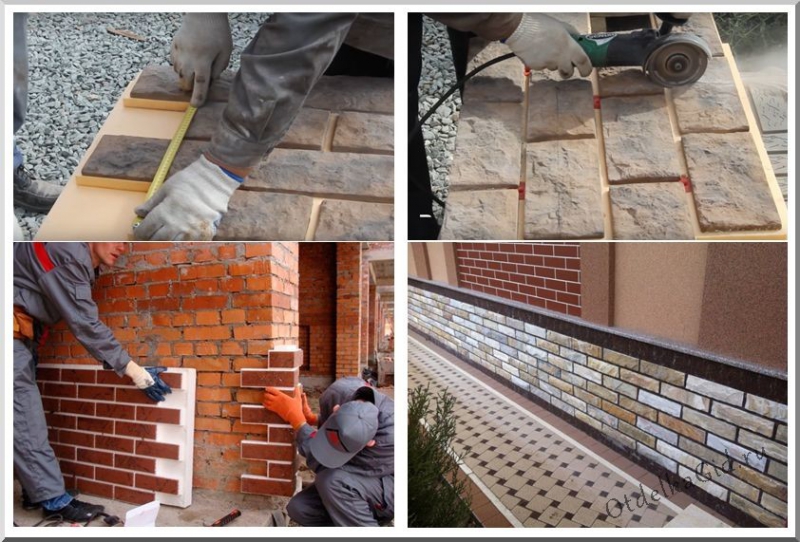
It is possible to sheathe the plinth with finishing material on your own, even if you are not a master with many years of experience. To do this, you need to know the technology for performing work and some subtleties.
Stage of preparatory work
Before starting work, carefully inspect the surface of the base. If it has protruding elements that can be removed, you need to do this. You should also level the work surface if possible.
At the next stage of installing the facade panels with their own hands, markings are applied to the walls. Its quality determines the evenness of the fastening of the frame, the starting profile and the entire cladding.
Please note: the lower edge of the base is flush with the ground if it does not freeze in winter. Otherwise, it is raised 15-20 cm
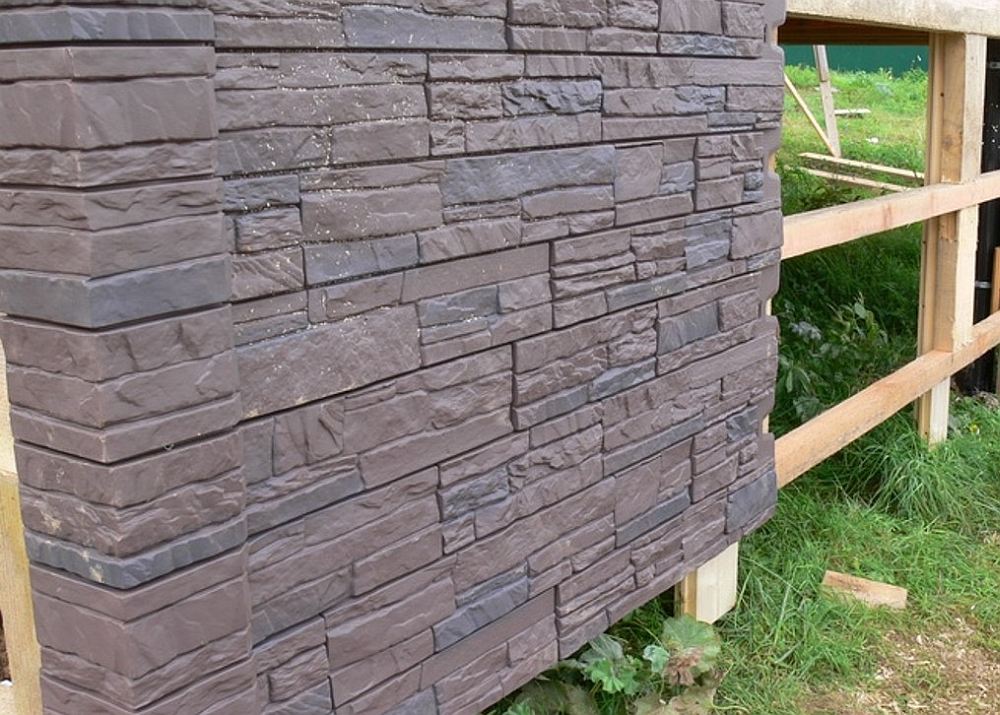
The marking is performed above the indicated level by about 5 cm. For this, a coated or painted cord is used. It is attached to two self-tapping screws screwed into the outer corners, set in level. The cord is pulled and released abruptly, “beating off” the line on the wall.
Assembling the frame and laying insulation
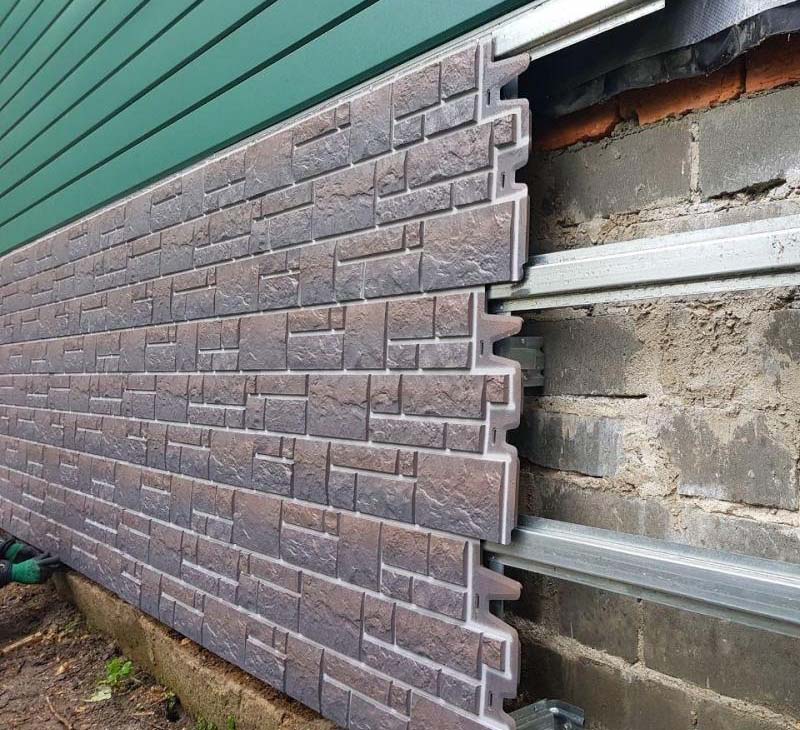
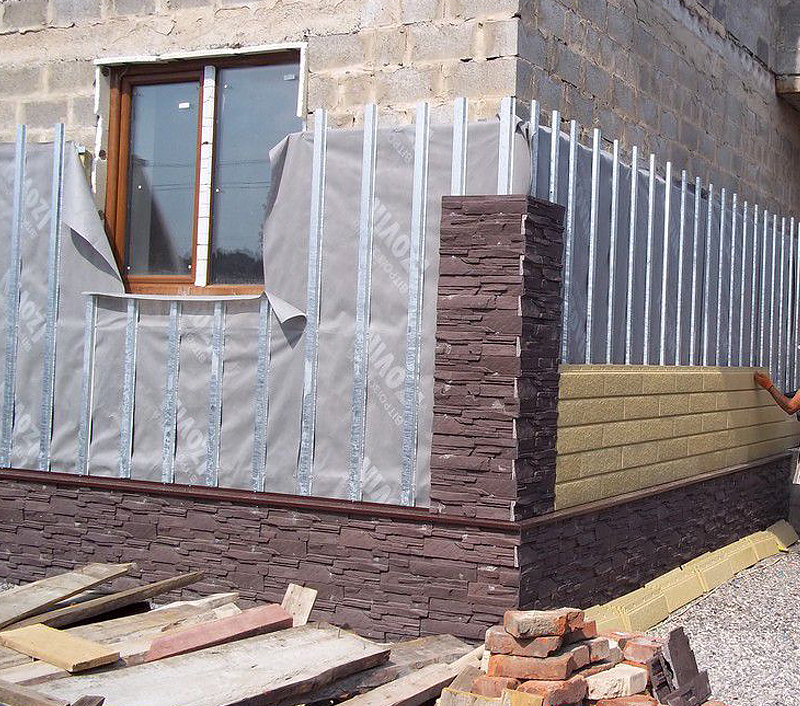
For plinth plating, it is better to use not a wooden crate, but a strong frame made of galvanized profiles. It will support the weight of both polypropylene and insulated metal panels.
Installation of the structure is as follows:
- Special U-shaped brackets are attached to the surface of the wall with an orientation to the markup. The fixing step horizontally is ½ of the panel width, and vertically ½ of its height.
- Guide profiles are inserted into the brackets, setting the distance between them and the wall using fasteners.
- The resulting cells are carefully filled with insulation.
- Lay a layer of vapor-permeable membrane (waterproofing).

The frame can be single or double layer. In the second case, another layer of galvanized profiles is mounted perpendicular to the guides. Self-tapping screws for metal are suitable as fasteners. The rest of the technology is unchanged.
If you are finishing the house with thermal panels, then the frame will be single-layer, and the cells will be without insulation. In this case, the waterproofing is laid before the installation of the profiles.
Fastening front panels
The first row of façade plinth panels is fixed to the starting level. It is preliminarily fixed on the lower guide profile.

The panels are installed from left to right. In the upper part, they are attached to the frame with self-tapping screws with a wide washer. The finishing elements are joined together using a special lock connection.
Please note: a temperature gap must be left between the screw head and the frame. To do this, the fastener is screwed in to the end, and then loosened by half a turn.
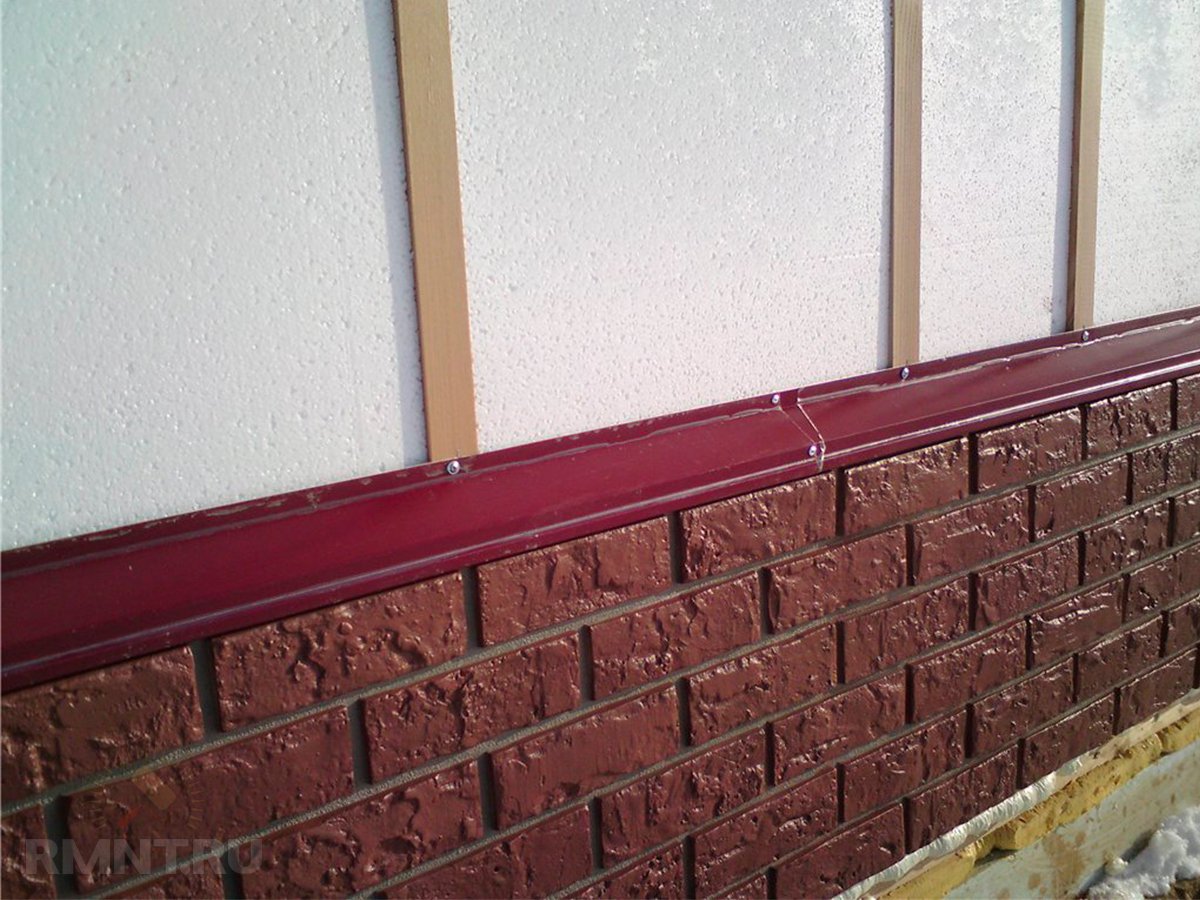
The installation of a decorative facing strip completes the work.
Thus, the variety of facade panels is an opportunity to creatively approach the design of the house from the outside. The simplicity of their installation is an opportunity to gain invaluable experience and save the family budget on the services of specialist finishers.
Types of decorative panels
Since the finishing elements are diverse, there are several main types:
- Vinyl. Such panels are made of polyvinyl chloride and are two-layer elements. Due to this, the parts are highly durable. One layer is responsible for maintaining physical properties, while the other provides protection against various adverse effects. This material is highly valued due to the fact that it is not subject to rotting, mold formation, and is able to withstand various temperatures. Also, it is not affected by parasites and prevents moisture penetration. Maintenance of such a surface is not difficult. If it is heavily soiled, it can be cleaned with plain water.
-
Basement siding is made on the basis of polypropylene. If you compare it with the previous version, it has a higher strength. This is due to the stabilizers included in the substance and the greater thickness of the finished products. Just like vinyl boards, they are not affected by mold and vermin. Provides excellent protection against moisture and other external factors. It costs, of course, a little more, but the price corresponds to the quality that is offered. Due to the fact that this type of finish can outwardly copy almost all surfaces, it can be safely used for creative design solutions.
- Decorative plastic panels for the foundation. This facing material consists of 3 layers.In the center is a sheet of PVC, protected on both sides with durable plastic. In addition, PVC is fastened to the metal crate, due to which the plate becomes rigid and, accordingly, durable.
- Artificial stone in appearance is in no way inferior to natural. Due to its texture, with the help of such a finish, you can create beautiful and durable projects. The advantages of artificial stone primarily lie in the ease of installation. Since natural stone is much heavier, it is often necessary to use anchors to fix it. The appearance of an artificial stone eliminates the laboriousness of the process and unnecessary costs. In addition, the manufacture of artificial stone is not limited to one method. There are three main types, which, in turn, differ in composition and method of production:
- Agglomerate - produced on the basis of different types of fillers, such as natural stone, that is, its chips or quartz. It can be limestone, marble, granite. Polyester resins are used for bonding, and various paints are used to create the required color scheme.
- Porcelain stoneware is produced using several types of clay, while adding feldspar and coloring agents. Further, the substance is vibrocompression and firing.
- The stone based on colored concrete is not very full of its variety, but it is quite suitable for decorative finishing. To obtain this type of finish, Portland cement, natural stone chips, plasticizers and reinforcing agents for stiffness and dyes are mixed.
Preparation of cement-bonded particle boards for installation
In order to properly prepare a cement-bonded particleboard for installation, you need to familiarize yourself with the features of this material. CBPB consists of cement and wood fibers, therefore it has a relatively low impact resistance. Installation rules require careful handling of these plates.
DSP is easy to cut. It is easy to drill holes of the required diameter and depth in them, including through holes. It is this work that will need to be done, preparing the panel for facing the foundation.
The need to drill holes is due to the fact that the DSP will need to be fixed to the racks of the sheathing pre-installed on the plinth. In order to simplify this task, experts recommend drilling the required number of holes in advance.
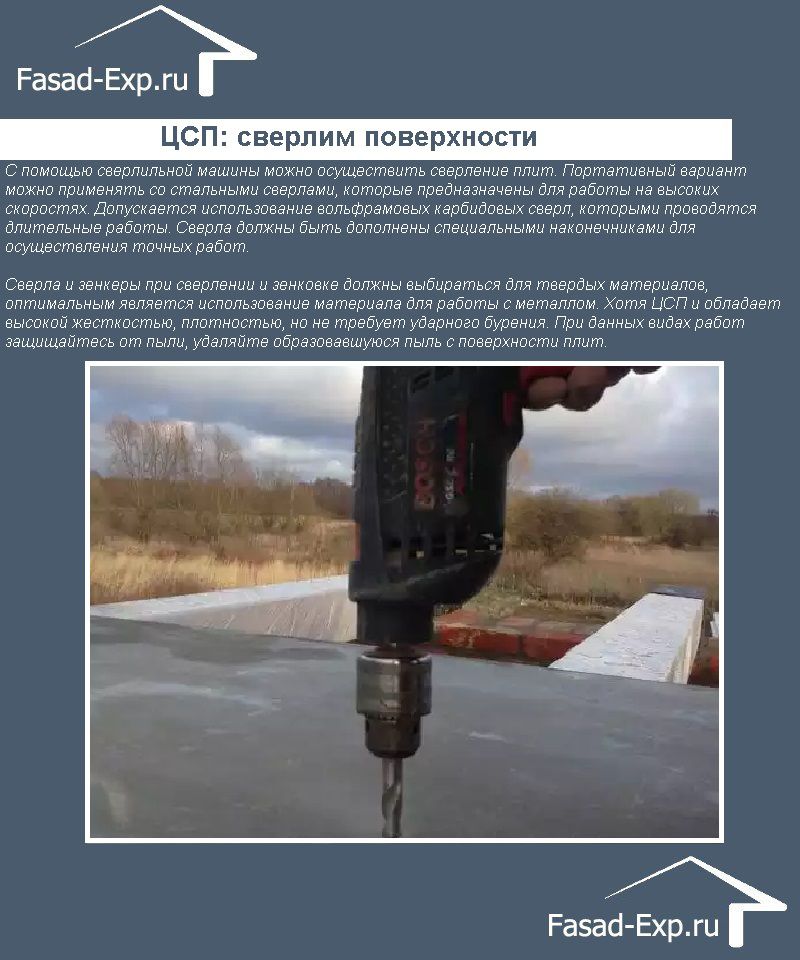
DSP: we drill surfaces
This work is guided by the following rules:
- screws or self-tapping screws with a countersunk head are used to fix the panel;
- the optimal diameter of the fasteners is 3-6 mm;
- the section of the hole in the plate must correspond to 1.2 times the diameter of the screw used;
- fasteners should be located at a distance of 2 cm from the edge of the panel;
- the optimal pitch between the screws is 20 cm, but this figure can be adjusted depending on the lathing scheme;
- the pitch between the screws should not exceed 40 cm.

Step between screws
If it is not possible to pre-drill holes in the chipboard, during the installation process, exclusively self-tapping screws with a strong and thin edge are used to fix the panels. The head of these fasteners must be equipped with special blades designed to form indentations and allow them to be countersunk.
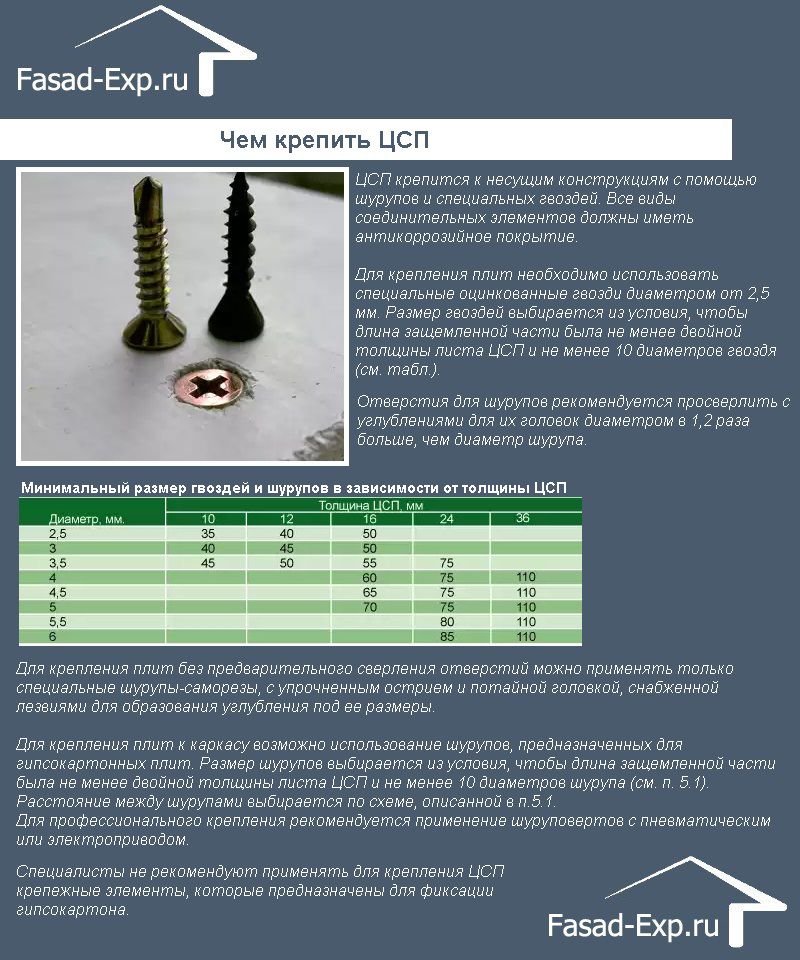
How to fix DSP
To fix chipboards to metal or wooden racks of the sheathing, you cannot use self-tapping screws intended for working with drywall and gypsum plasterboard. To drill holes in the DSP, they take drills for working with metal or with a victorious coating of the tip.
At the stage of preparing panels for installation, it may be necessary to cut them. For sawing, you can use a circular saw or grinder. A diamond-coated segment disc is mounted on the tool.
Prices for popular models of circular saws
Circular saws
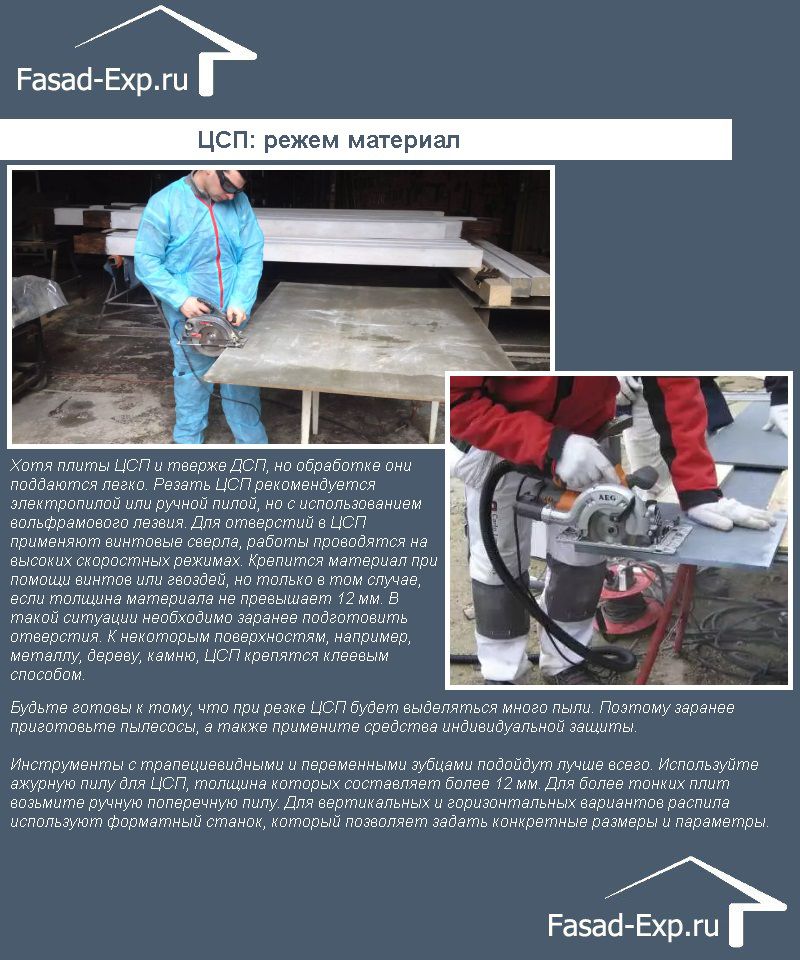
DSP: we cut the material

DSP: we grind plates
Before proceeding with sawing, it must be borne in mind that a large amount of cement dust will be generated during this task. Therefore, when working indoors, it is recommended to use a dust collector.
Installation of plastic panels
Like all construction work, the cladding of the foundation with plastic panels is carried out in several stages.
Preparatory work
Despite the versatility of the panels, the surface of the base of the house still requires preparation. It includes cleaning of debris and dirt, as well as the elimination of small defects in the form of cracks and cracks. At the preparation stage, it is also recommended to waterproof the outer part of the foundation.
Assembling the frame
The frame can be assembled from wooden blocks or metal profiles. In this case, metal products are subject to mandatory protection against corrosion, and wood is treated with antiseptic agents and fire retardants.
The frame elements are fastened horizontally, starting from the bottom. In this case, you should make a small deviation from the surface of the earth. The bars or profile are placed parallel to each other, maintaining a distance of about 20 cm.
The vertical elements of the battens are installed at such a distance from each other that the panel can be fixed at the edges and in the middle.
Thermal insulation
Mineral wool is most often used as thermal insulation. The material is laid between the elements of a wooden lathing or a metal frame, securing for greater reliability with special fasteners.
Thermal insulation for finishing the plinth
On top of the thermal insulation, a waterproof film is fixed directly to the frame. As fasteners, you can use tape or special staples.
Panel mounting
To fix the plastic panels, you must first install the appropriate fittings. A starting profile is installed on the lower bar of the frame, corner elements are installed at the corners of the foundation, and the finishing profile is fixed in the upper part. These elements allow for high-quality installation of plastic panels, and also make the entire structure more stable.
Work begins from the top, checking the horizontal position of each panel with a building level. The panels are attached to the frame with self-tapping screws.
Foundation finishing technology on the example of installing porcelain stoneware panels
The plinth cladding is carried out according to the principle of a ventilated facade. Regardless of the type of finishing materials used, it includes the following steps:
- preparation of foundation walls;
- frame device;
- installation of plates.
Fasteners for installing porcelain stoneware
In order to complete these tasks flawlessly, it is recommended that you follow the suggested step-by-step instructions.
Step 1: preparatory work
First of all, it is necessary to visually inspect the walls of the foundation. After that, they determine what tools and materials will be required to perform the preparatory work. They consist in strengthening and leveling the basement walls. Regardless of whether it is concrete or brick, all its disadvantages are eliminated:
- cracks and chips are filled with cement-sand mortar;
- replace bricks;
- even out depressions and other flaws.
Strengthening the destroyed basement
Step 2: installing the brackets
Depending on the size of the slabs and the characteristics of the project, the optimal step for installing the brackets is chosen. These metal parts are attached to the wall with dowels, after having drilled holes of the required diameter.
bracket
Step 3: special fastening clamps are installed on the brackets
Then the vertical metal racks are mounted.
Two types of frames for facade panels
Photo - vertical alignment of the bracket
Step 4: laying the insulation boards
Foam sheets, rolled fibrous materials (glass wool, basalt wool, stone wool) or mineral wool slabs can act as a heat insulator. The heat insulator is placed in the space between the vertical metal posts and fixed to the foundation wall using disc dowels.
Insulation laying
Step 5: installation of porcelain stoneware slabs
At this stage of work, metal clamps are used, with the help of which the plates are set and fixed, setting them close to each other.
Installation of a ventilated facade made of porcelain stoneware
Porcelain stoneware facade
An example of a plinth cladding with porcelain stoneware
There is another way of installing porcelain stoneware slabs: on a cement-sand mortar, a layer of which is applied to the wall of the basement. This method is used if the foundation does not require insulation. But even in this case, a metal frame is needed. The porcelain stoneware slab will be attached to it by means of special clamps located on its back side.
The basement of the house, finished with porcelain stoneware
If it is decided to sheathe the basement with vinyl, fiber-cement, cement-particle boards or wood panels, you can take a metal profile or wooden blocks for mounting the frame.
At each stage of work, it is necessary to use a building level, with which the deviations from the horizontal and vertical are determined. If you follow the technology of work, the lining of the foundation will be done quickly and efficiently.
Using a level when working
Facing with artificial or natural stone
The cladding of the foundation with natural stone is no less popular. The interesting texture and natural shades of the material give the building a presentable look. The disadvantages of such cladding include:
- high price;
- heavy weight;
- laborious installation.
 To finish the foundation with natural stone, you will need a support frame, which is made from hooks, a reinforced lattice and wooden pegs. Cladding elements are fixed in the cells, observing the following rules:
- fix everything with pegs and hooks;
- pour the mortar between the grate and stones after laying the first row.
Artificial stone can be used as an alternative to natural rocks. Its installation is less laborious


