Types of knitting devices
Builders with experience say that it does not matter what kind of device for tying reinforcement the specialist uses when preparing the frame for concreting. Skill is important in this process, and therefore it is not worth spending money on expensive equipment
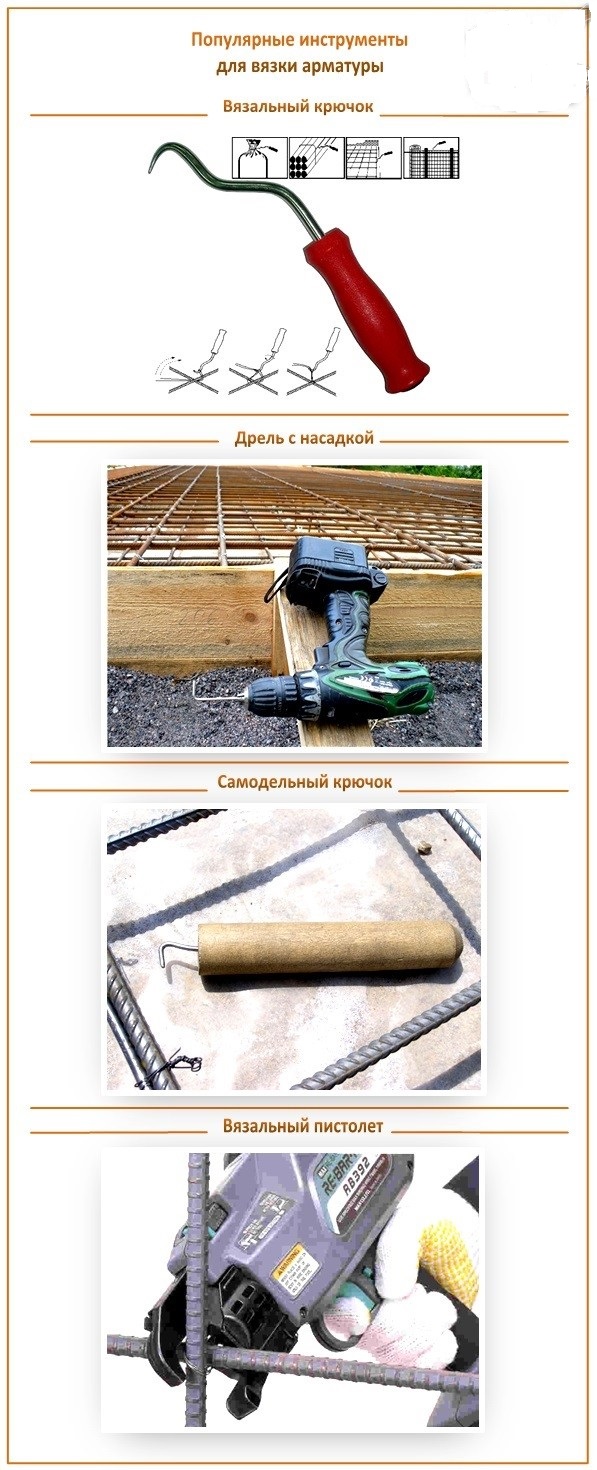
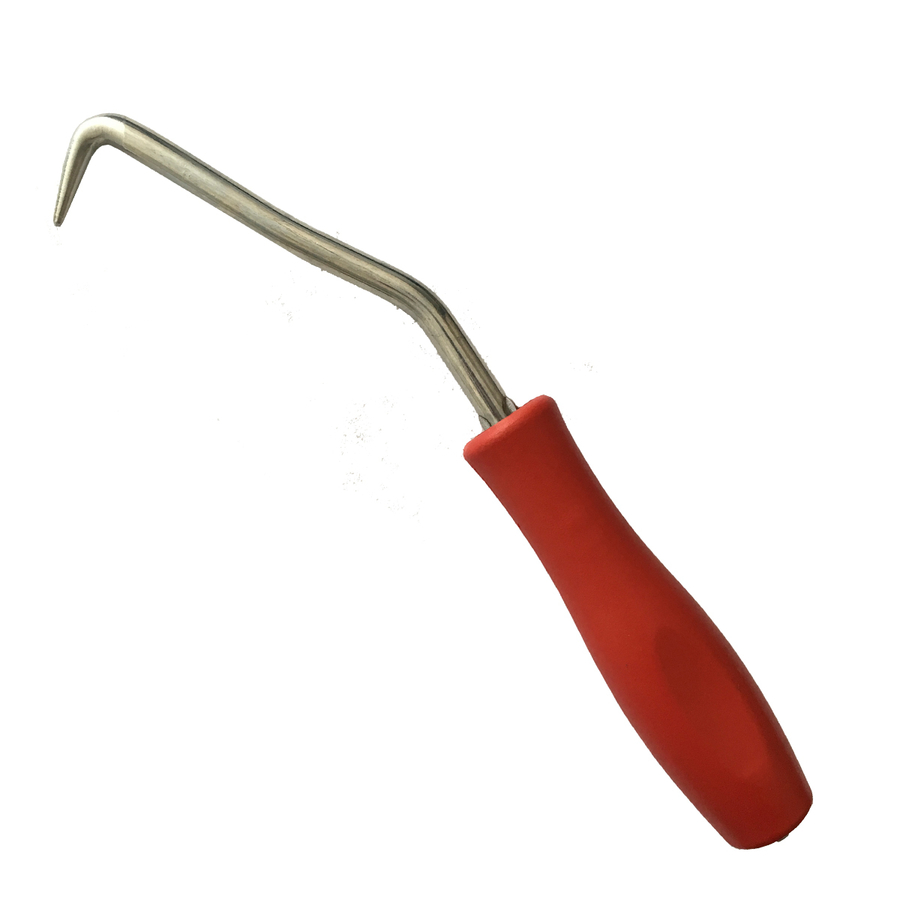
For a skilled installer, an ordinary hook for knitting reinforcement will be enough.
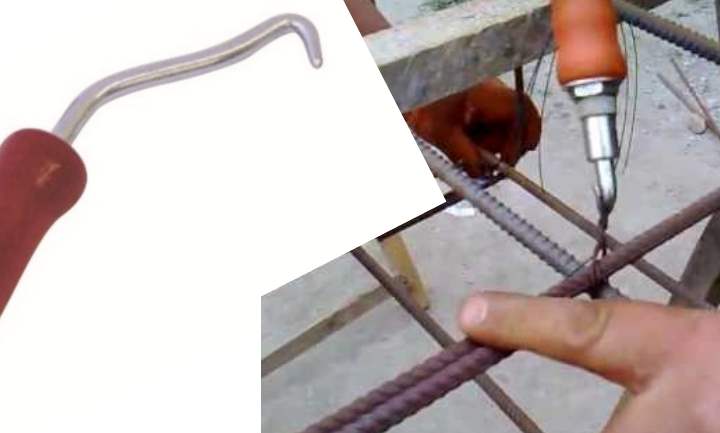
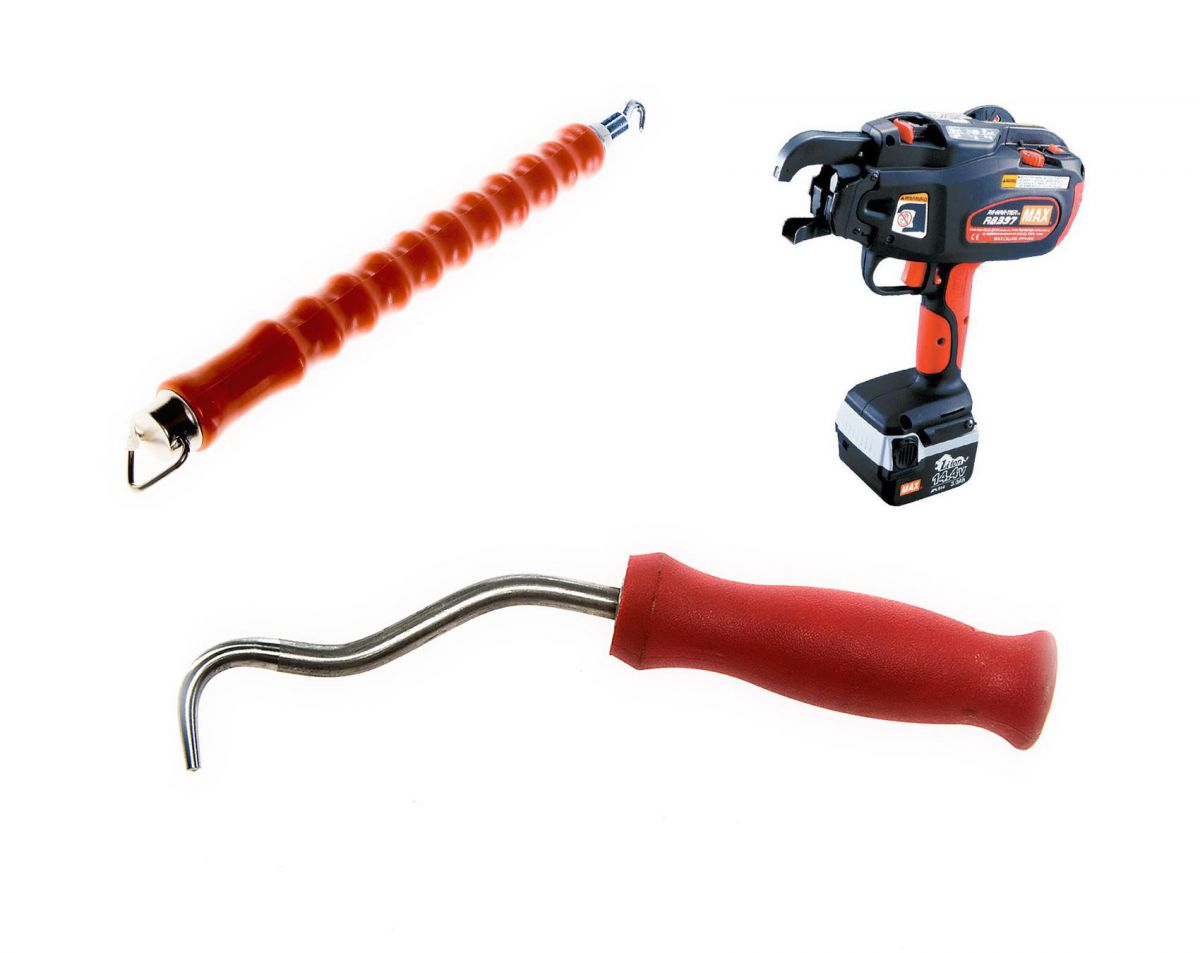
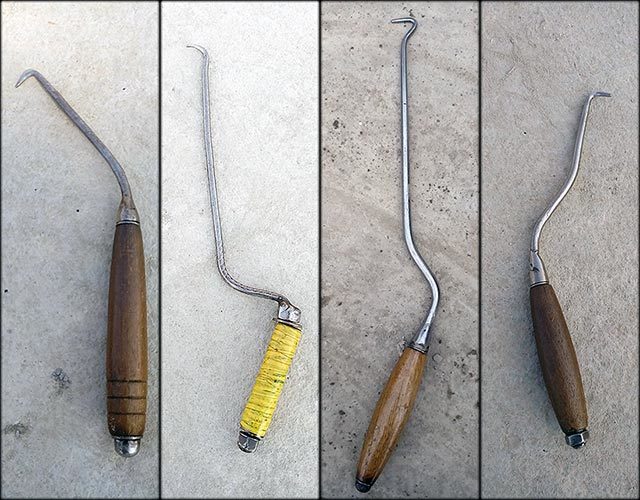
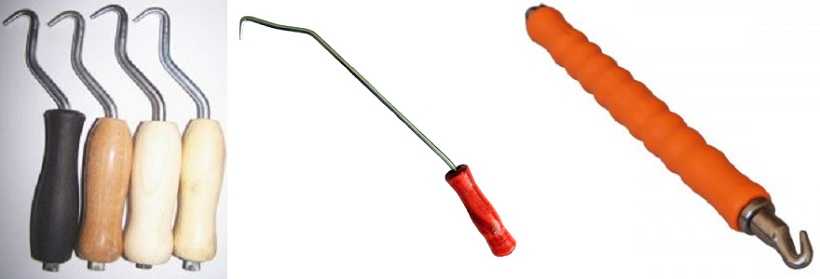
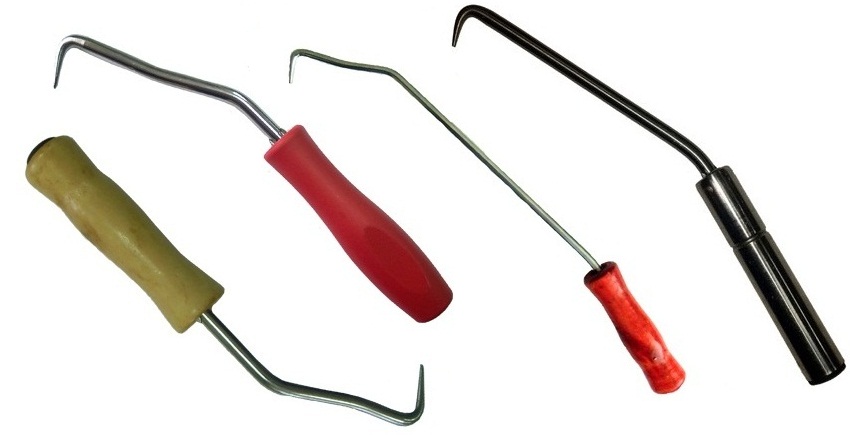
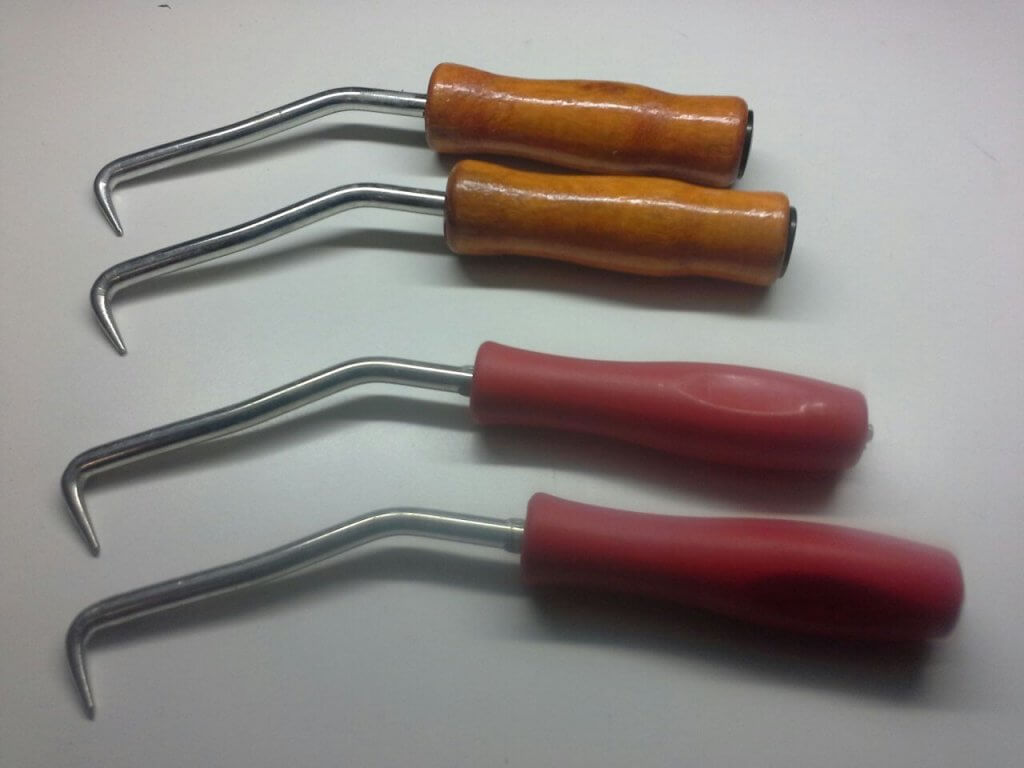
Crochet hooks are of three types.
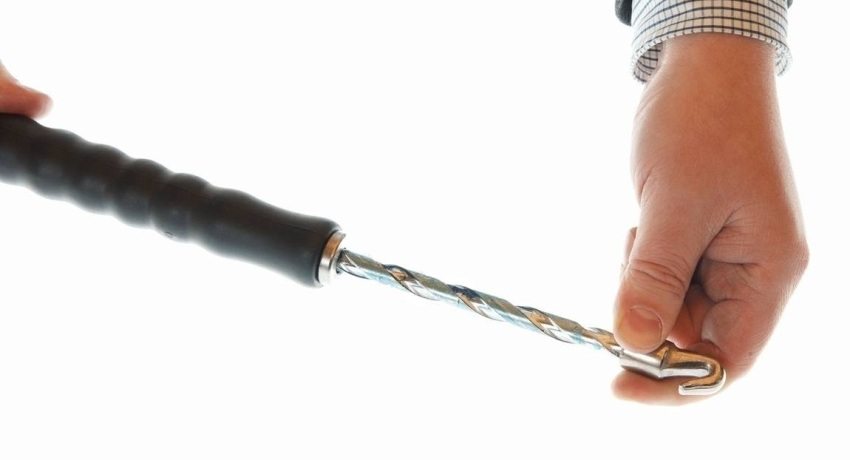
Semi-automatic
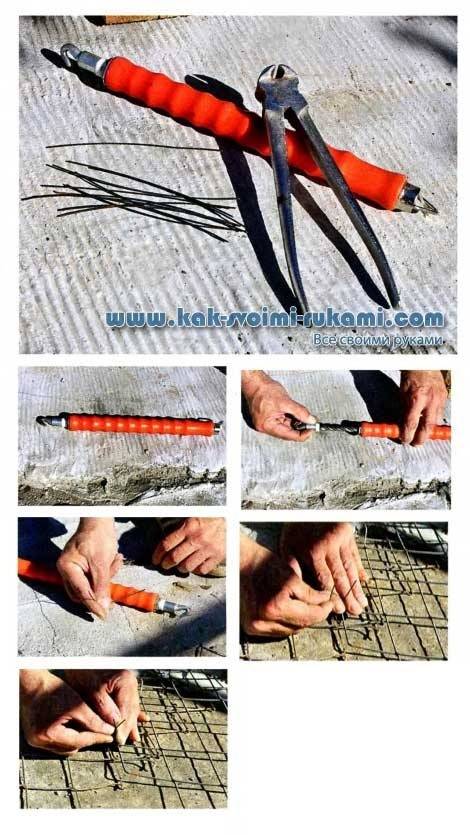
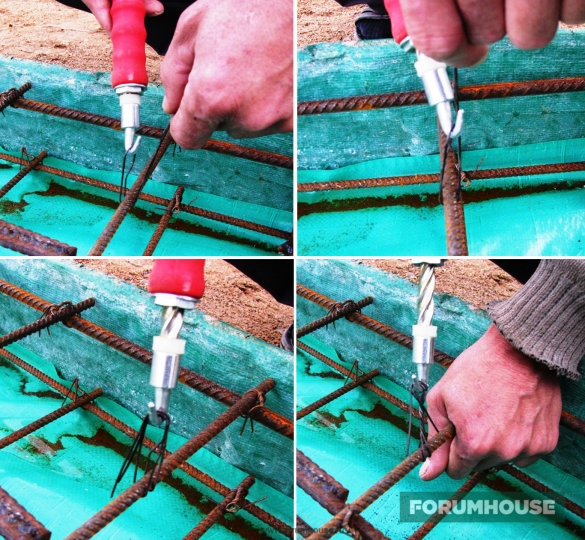
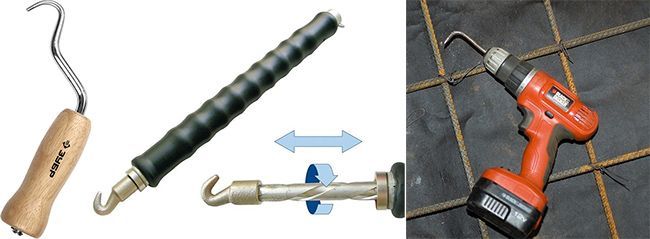
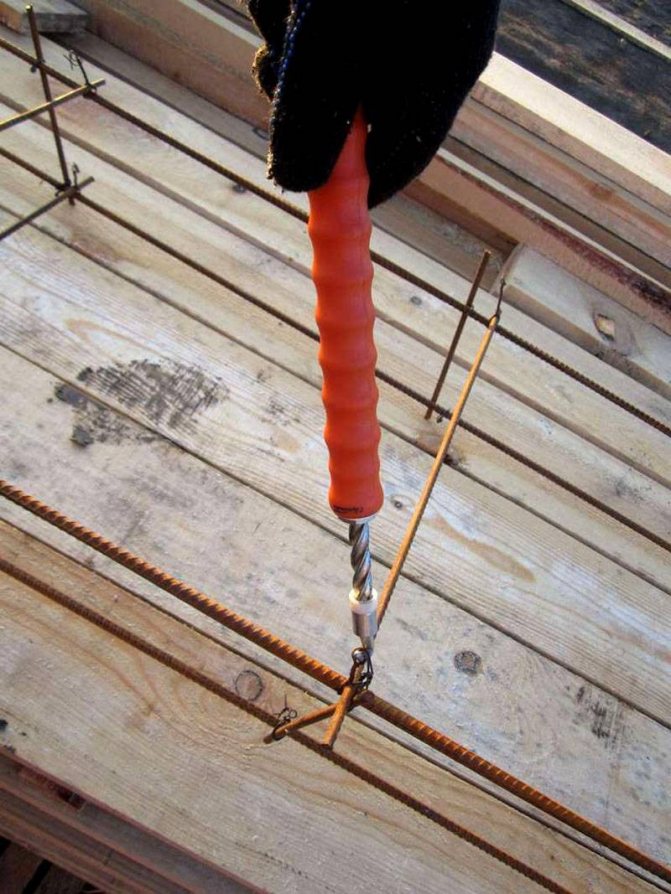
The semi-automatic hook has a thread inside the handle that allows the base to rotate when the tool is pulled towards itself. This design, with a certain skill, allows you to tie a knot in one movement.
Crochet hook for semi-automatic fittings significantly increases labor productivity when assembling frames.
Automatic
This device is designed to carry out large volumes of work by professional builders, but due to the large number of complaints, the automatic hook is not popular on the construction site. The main claims are related to the following shortcomings:
- the automatic hook is too heavy, it requires a lot of physical strength to work with it;
- for knitting the frame with an automatic machine, only the type of wire can be used;
- when the rods are displaced relative to each other, the machine may misfire and not tie the wire in the right place;
- when preparing the machine for work, a lot of time is spent installing a wire spool;
- the cost of the device is very high;
- you cannot use the machine in rainy weather.
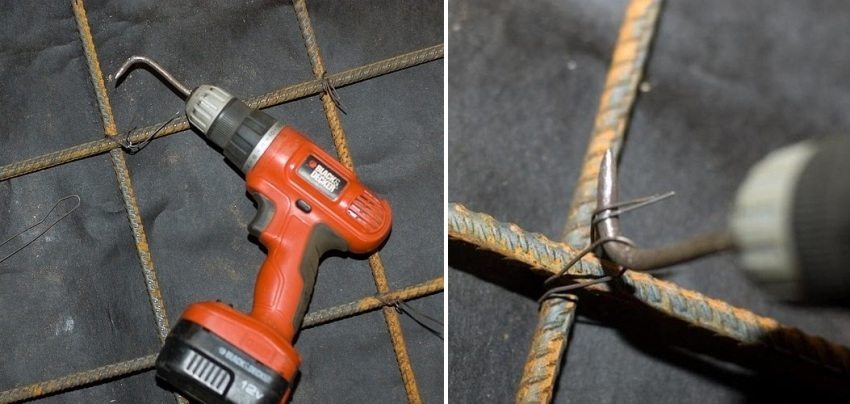
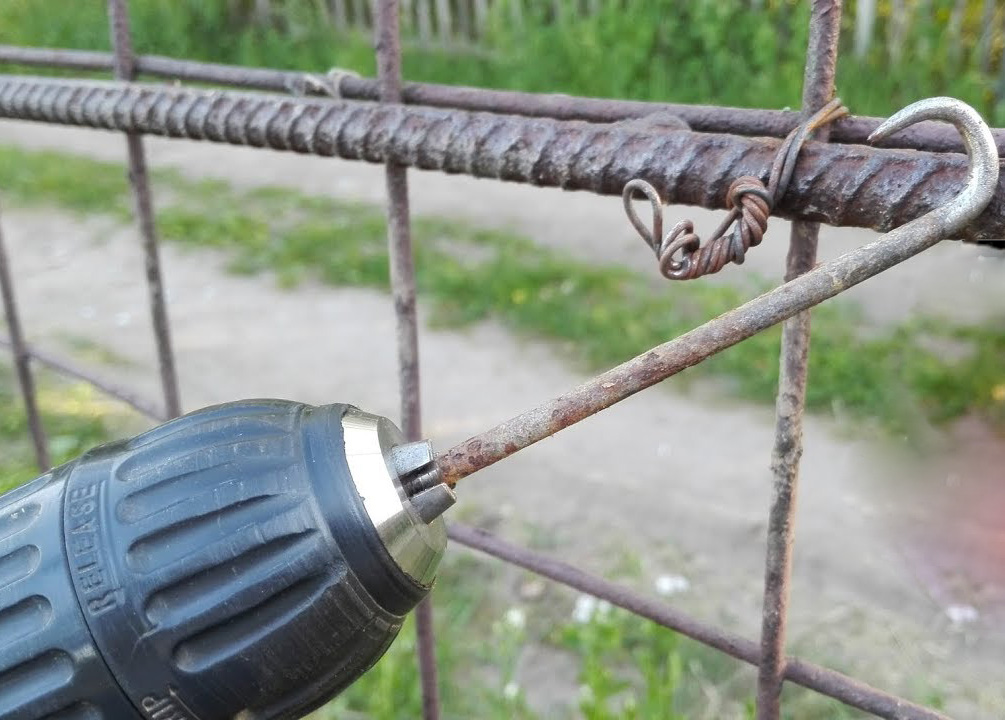
Given the impressive list of shortcomings, it becomes clear why builders abandon the mechanical method of tying reinforcement. In practice, if builders want to mechanize the process, they use a screwdriver and a homemade hook attachment.
To knit reinforcement, use annealed wire with a diameter of 1.2 to 1.5 mm. With high tensile strength characteristics, this wire bends easily, making it easy for the installer to form a reliable knot.
To make your own hook for knitting reinforcement, you will need the following tools and materials:
- an electrode with a diameter of 4 mm or a steel bar, 4 mm thick;
- a piece of hose or a finished handle from another tool;
- grinder;
- vice.
It is not necessary to prepare a drawing for a locksmith, because the design of the hand hook is quite simple, it can be made by any worker himself.
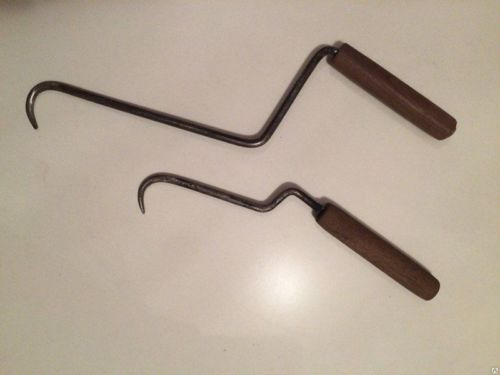 The crochet hook is a simple and safe tool that allows you to tie the rebar quickly, securely and evenly.
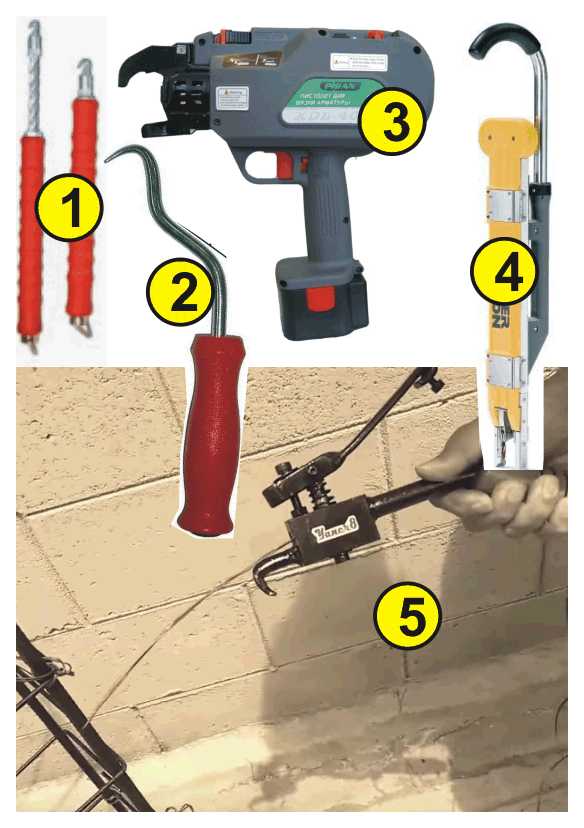
Today there are three types of ready-made crochet hooks that can be purchased in the store. In addition, you can make your own rebar hook.
Manual
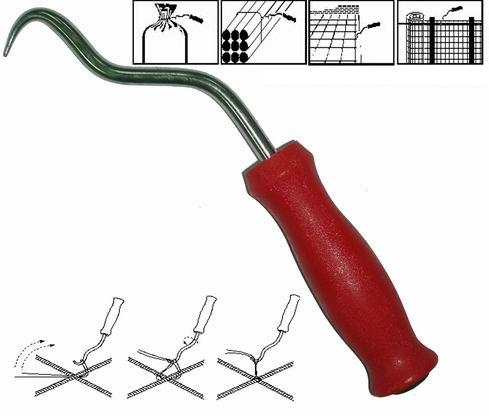
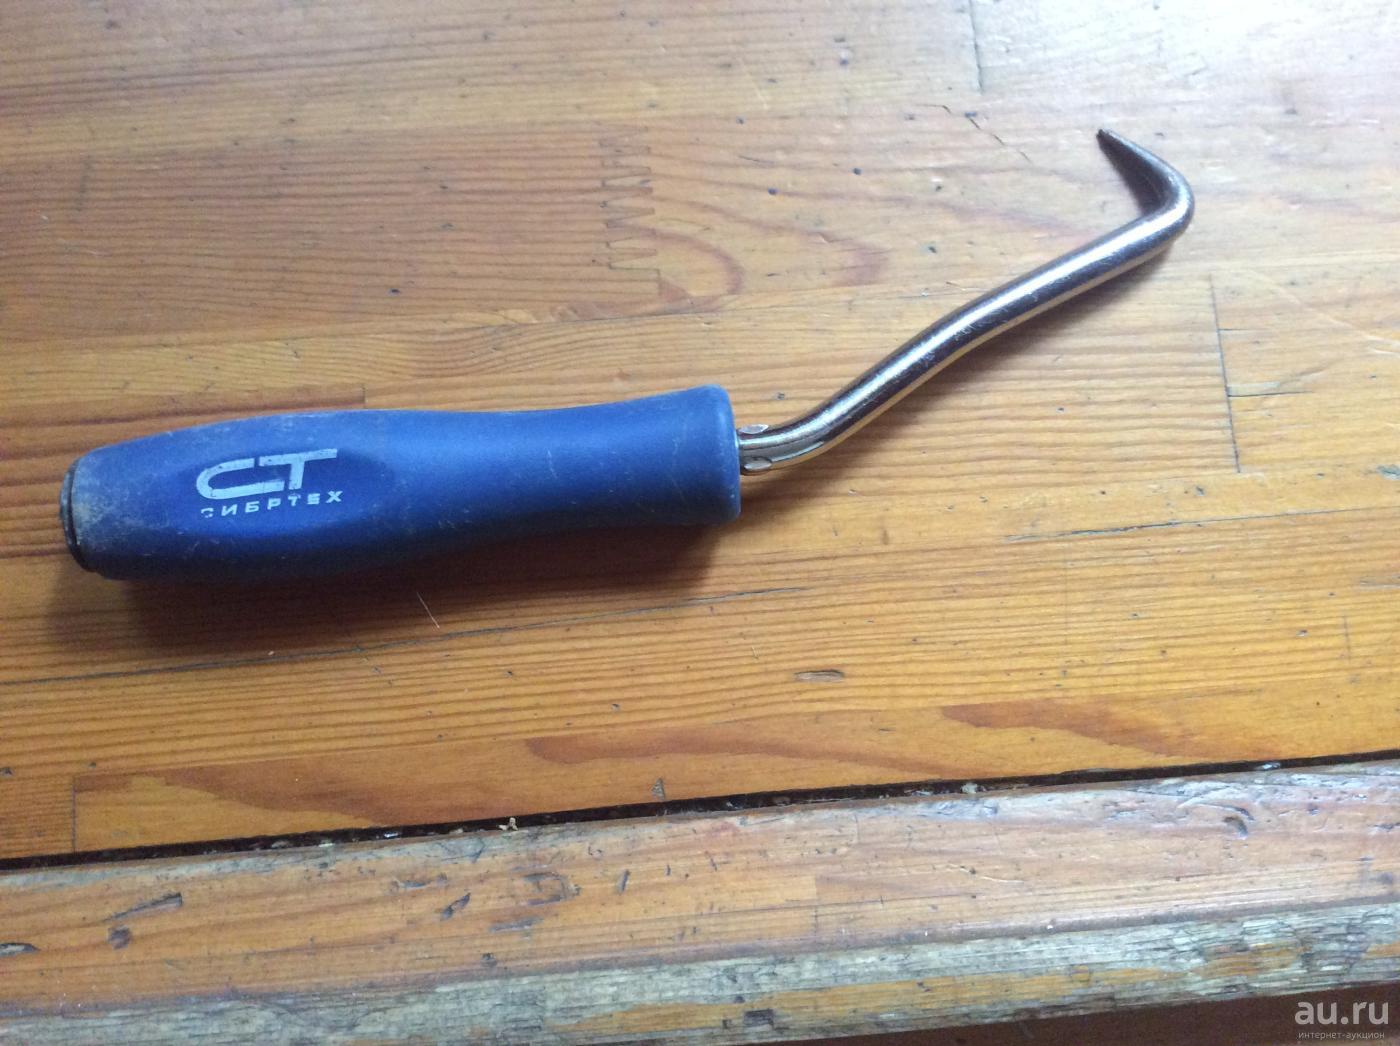
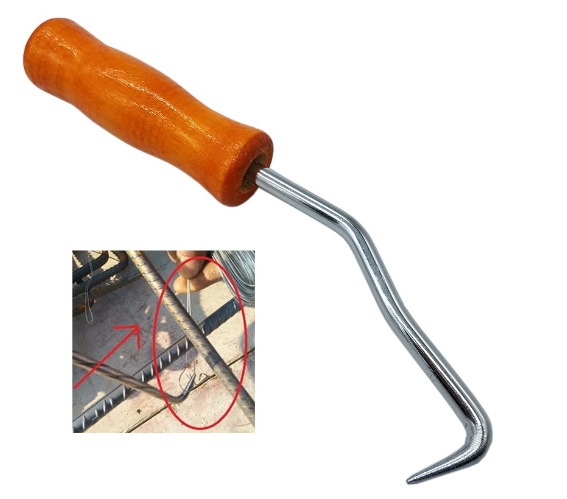
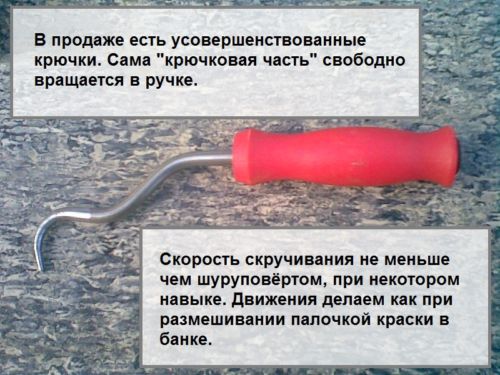 Photo of a purchased hook. The handle rotates freely.
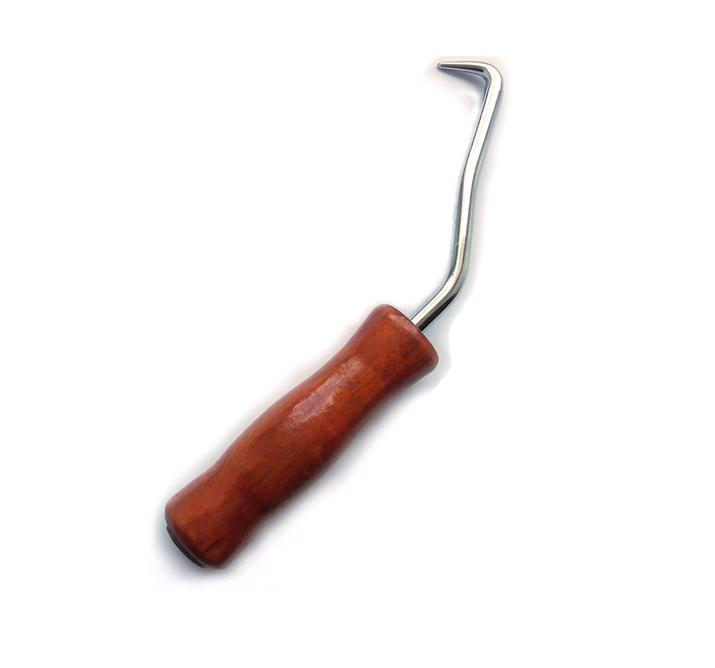
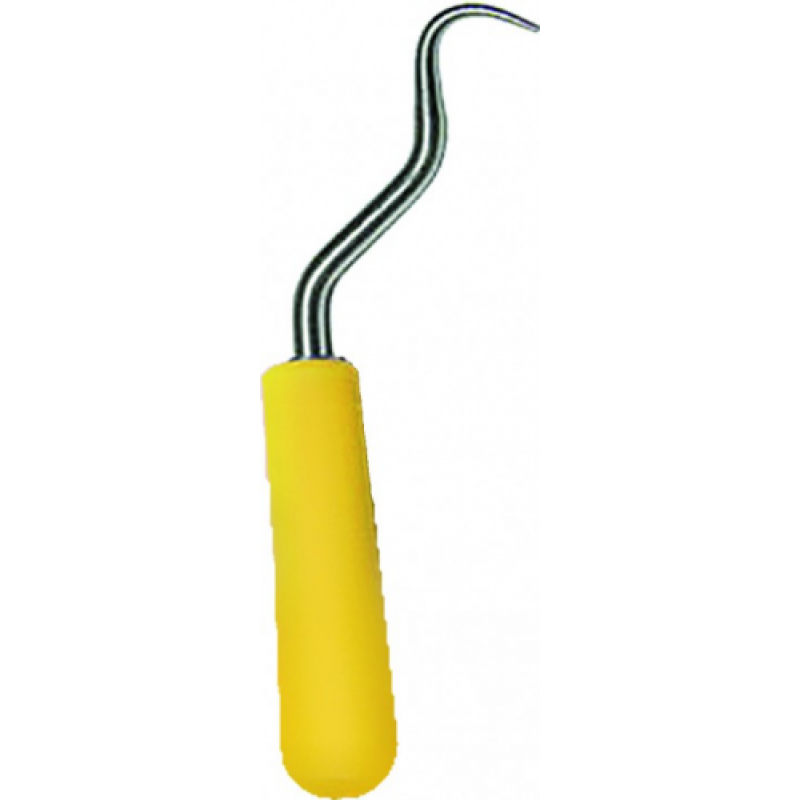
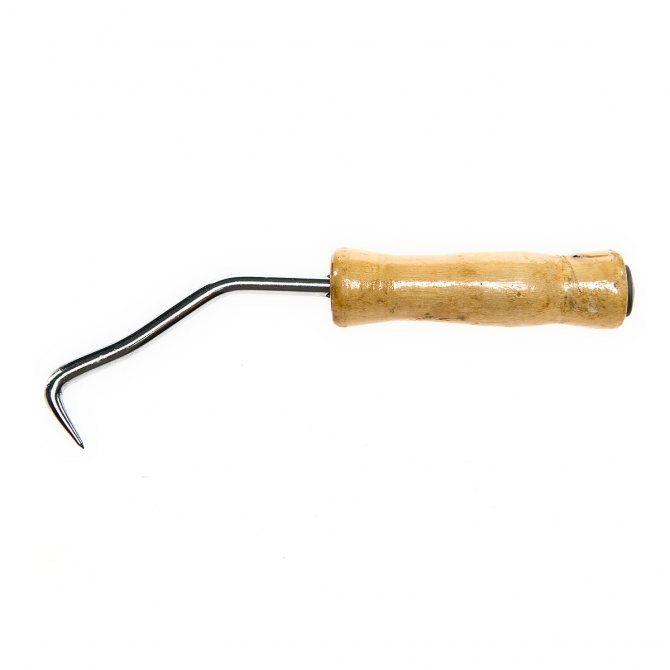
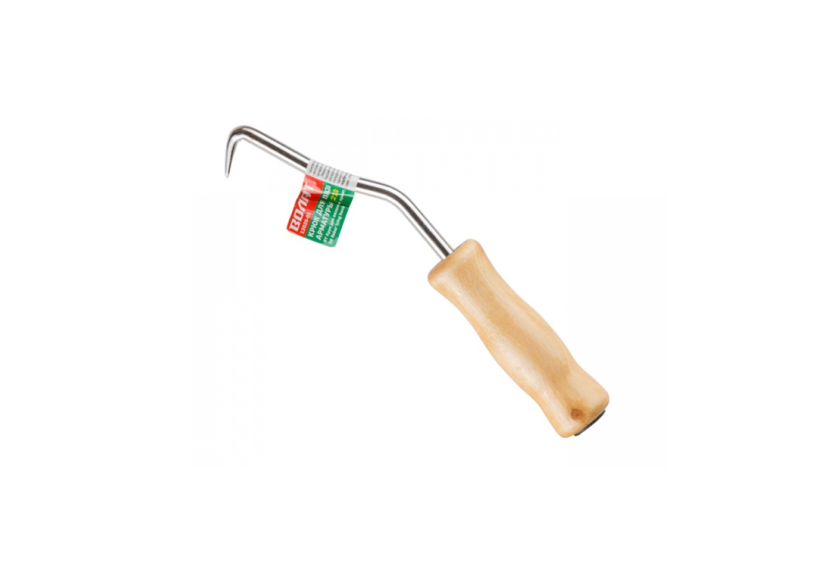
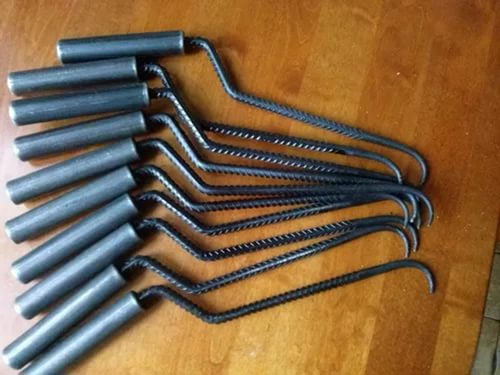
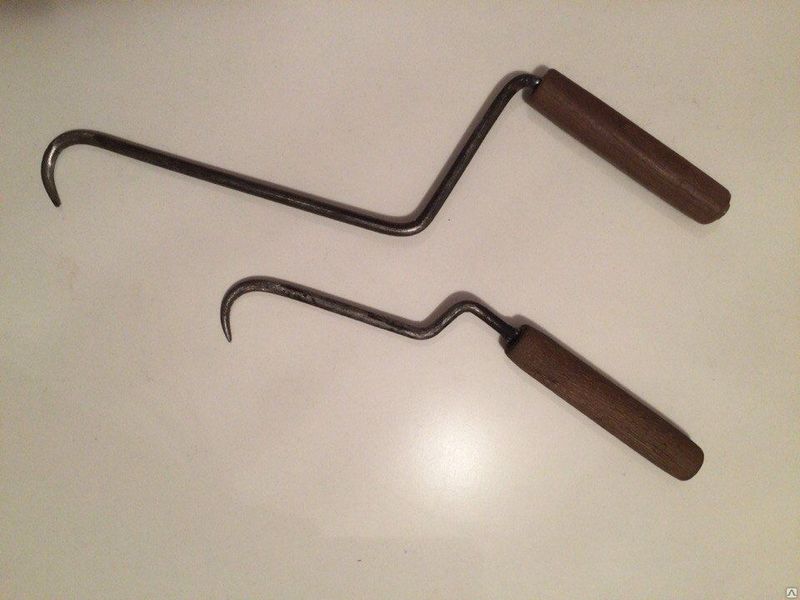
A simple hook is a rod with bends attached to the handle, which grips the wire. The hook for tying reinforcement manually rotates. The advantage of hand tools is their availability, durability and ease of use.
Screw
 The knitting wire is selected with a diameter of 0.8 to 2 mm.
The semi-automatic hook is a reversible tool that works with the forward movement of the handle. The device has a rod with a hook in the form of a drill, which enters the funnel of the handle along the thread, tightening the wire.
The cost of such a tool is higher than a manual one. But the screw tool makes it possible to cope with a wide range of work in a short time - in order to fully tighten the knot, it is enough to make only a couple of movements.
Mechanical
Builders who value every second choose an automatic hook (gun) for knitting reinforcement.The principle of the pistol is based on a fully automatic rotation of the hook. This device - the most modern and perfect, allows you to achieve maximum results and speed without much labor on the part of the builder.
Operating principle.
Prices for various models of crochet hooks
Ready-made hooks for knitting reinforcement cages can be bought at any hardware store. We list the most popular manufacturers of manual and semi-automatic hooks, and prices for finished products:
- a hand crochet hook for knitting rebar by the Chinese manufacturer Remocolors Tools Limited can be purchased for 100 rubles. A semi-automatic hook from this manufacturer will cost 600-800 rubles;
- a semi-automatic Sparta tool from Germany costs 780 rubles. Model RG 400T, by adjusting the speed and tension, allows you to get strong connections with minimal wire consumption;
- a manual hook of a domestic manufacturer Bison, sold in a retail store for 250 rubles;
- a steel hook from China STAYER MASTER with a plastic handle costs 140-150 rubles.
Depending on what type of product you plan to purchase, the cost of the latter will also vary. Naturally, simple models will be the cheapest. Mechanized hooks will cost a little more, and the most expensive will be professional devices, they are also pistols for tying reinforcement. In the table below we will look at all three categories of tools, compare their prices and specifications.
| Model name | Specifications | Product cost |
| Hook for fastening reinforced meshes SIBRTECH |
|
134 p. |
| Hook for fastening reinforced mesh SIBRTECH 84879 |
|
220 p. |
| Hook for connecting reinforcing rods, mechanized SPARTA 848805 |
|
630 p. |
| Hook for tying reinforcement mechanized KA300 |
|
800 p. |
| Rebar tying gun RT 308 GROST |
|
38,790 p. |
| Gun for tying RB655 MAX |
|
148,000 RUB |
What to do and can you eat such eggplants?
It is impossible to use green overgrown fruits for food, unless you first remove the harmful alkaloid, and it is quite possible to remove it.
With solanine poisoning, nausea, vomiting, stomach pain, migraine, fever, diarrhea, disorientation are observed. Then it is necessary to rinse the stomach and take sorbents (white coal, "Enterasgel").
Important! The skin from green fruits must be cut off. The following manipulations significantly reduce the concentration of solanine:
The following manipulations significantly reduce the concentration of solanine:
- Cut the eggplants (into cubes, circles, sticks) and sprinkle with salt. Leave for 30-60 minutes so that they let the juice out. Then drain the juice, and rinse the pieces well several times with water, washing out large seeds, put in a colander and squeeze.
- The pieces are soaked in salted water (1 tablespoon salt per 1 liter of water) for 30 minutes, and then squeezed out.
- The fruits are blanched for 5 minutes. with a quiet boil. After that, not only the bitterness goes away, but the skin is easily removed.
- If the seeds are small and the eggplants are bitter, then it is enough to sprinkle them with salt for 30 minutes, and then squeeze.
Crochet rod technology
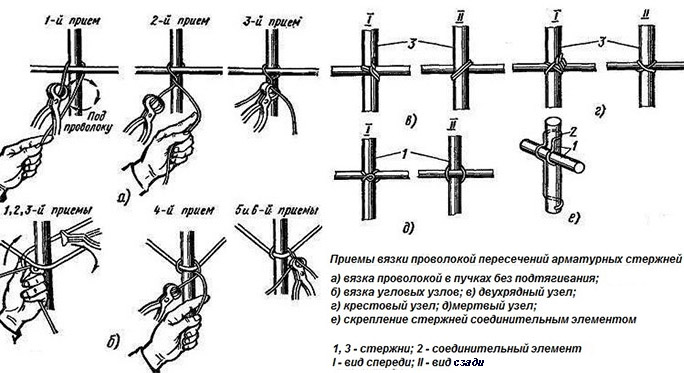
Rebar knitting is a fairly simple technology.It involves many ways of knitting:
- corner;
- double row;
- double;
- cross;
- dead nodes.
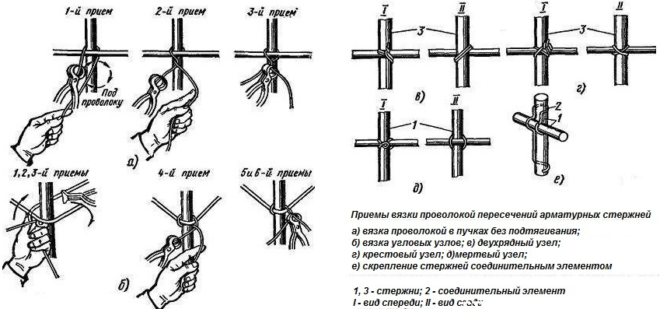
Reinforcement knitting techniques
The main mounting methods are as follows:
- Formation of one loop with an overlap, observing the length of the overlap of the rods.
- Formation of two butt-fastening loops.
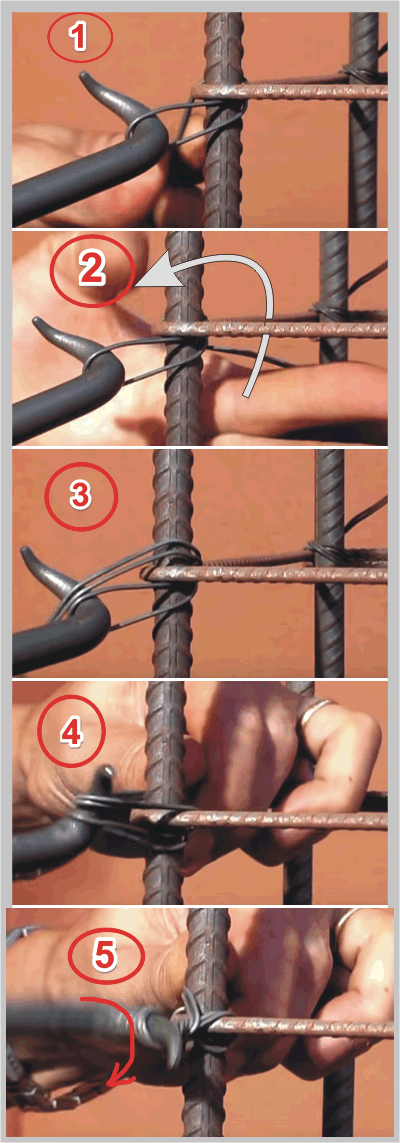
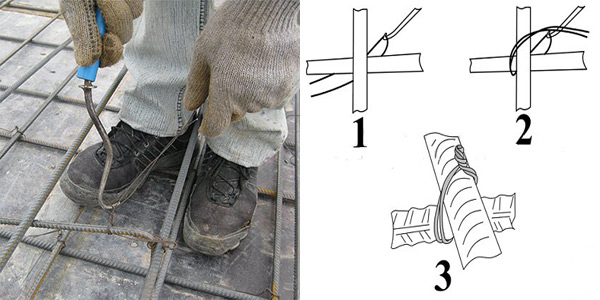
For each type of metalworking, a specific brand of mounting rods is used. The simplest and most commonly used is the first method. Actions are performed in this order:
Reinforcement wire is pre-cut into pieces - up to 30 cm long.
In work, you need to use a flexible, elastic material that does not tear. These properties are possessed by a fired profile with a diameter of 1 mm.
The workpiece is folded in half and wrapped around the reinforcement rods.
A hook is threaded into the loop.
The tool grips the ends of the wire rods.
Rotate to secure the wire
It turns out 2-3 turns.
Carefully pull on the knot so as not to break.
The crochet hook is pulled out.
The main thing is not to do long twists.
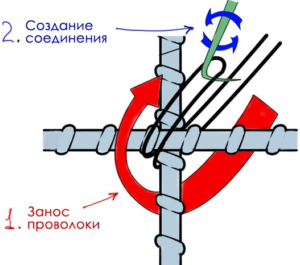
Check the strength of the connection. You do not need to touch the wire for this. It is enough to move the reinforcing bars. They must hold tight to each other.
Knitting reinforcement in the second way is performed in this way:
- A piece of an armored rod is bent in half.
- Retreat a third of the distance from the loop, re-bend.
- Cover the joint. The loop is on one side, the free ends on the other.
- The hook is inserted into the loop, the tips are hooked, pulled.
- The elements are twisted together with the loop in several turns.
Knitting reinforcement requires compliance with certain rules in accordance with the norms of SNiP.
Scheme of knitting techniques according to the working drawing of a monolithic structure.
The technology for connecting the reinforcement rods for the foundation is quite simple and is not determined by the type of hook: the knitting wire, one way or another, is tightened with a loop, thereby connecting the metal rods.
In practice, there are two main knitting technologies:
- One overlap loop.
- Two butt joint loops.
Most often they knit in the first way, since it is the simplest: you can learn it in a few minutes, and it is quite difficult to make a mistake when working. On the other hand, butt-knit is, in theory, good for corner pieces.
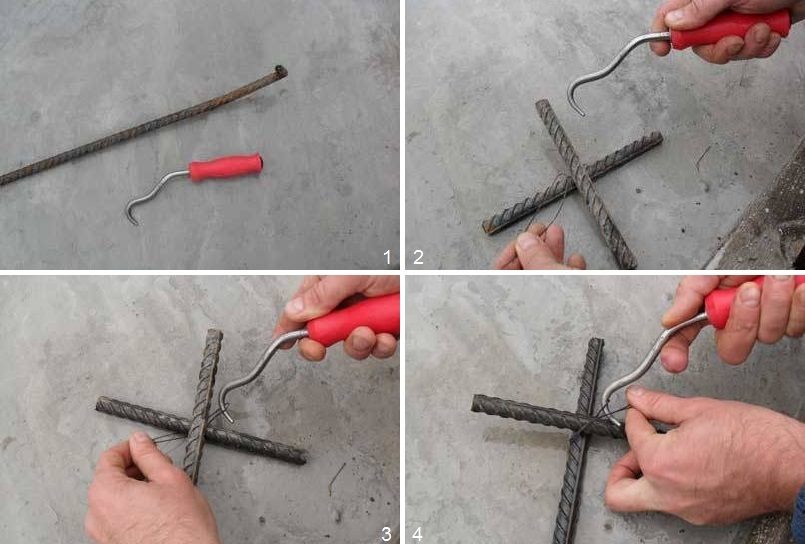
The principle of knitting reinforcement with one loop in the first stages does not depend on the type of hook. Differences in work with different tools will be only in the way of rotation of the rod: with a brush, by inertia or automatically.
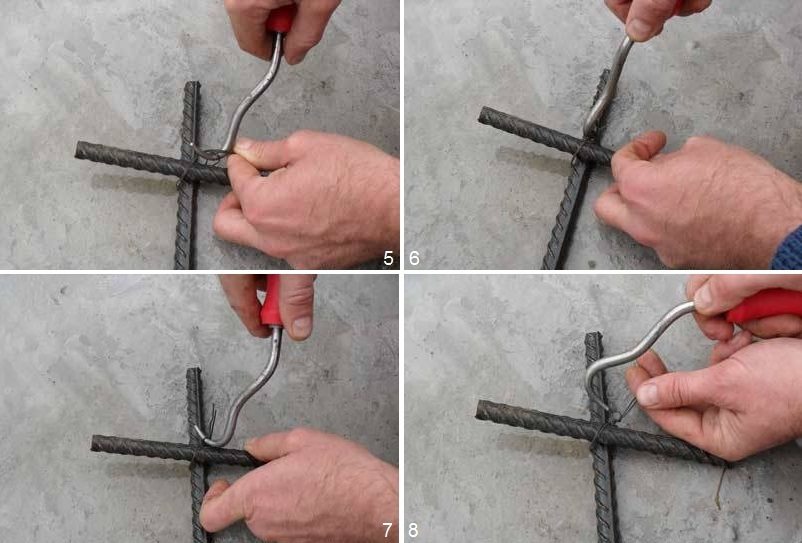
To connect the rods of the frame, you must:
- Cut the knitting wire into lengths of 20-40 cm (depending on the diameter of the rods).
- Fold the segment in half and wrap it around the joints at the intersection of the rods with a little overlap.
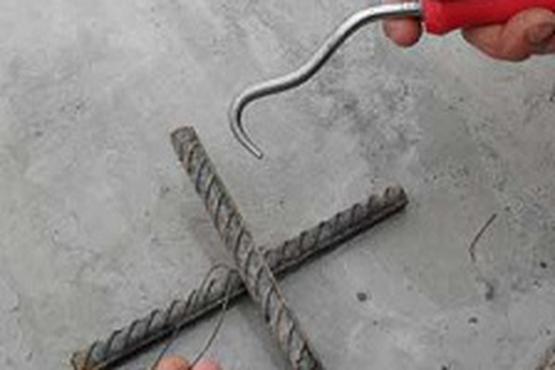
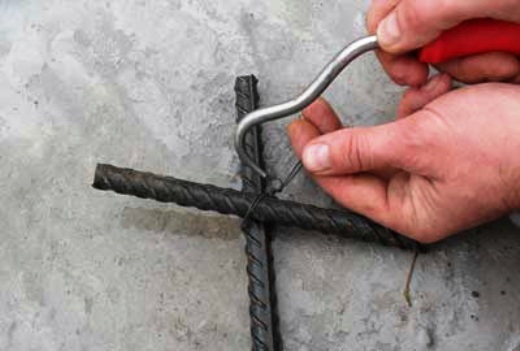
- Take the hook, pull it into the loop.
- Hook the two free ends of the wire with the tool.
- Twist the wire tightly, slightly lifting the tool up.
- Remove the tool from the loop and check the quality of the knot.
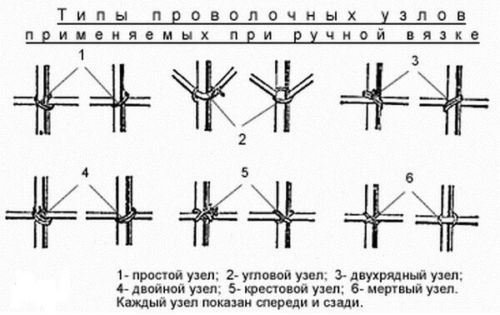 Diagram of types of wire knots for manual knitting.
The reliability of the bundle is checked not by the wire tension force (if you overtighten it, the wire can easily break), but by the mobility of the rods.
Diseases of eggplant in case of malnutrition
Observing the rules for growing eggplants, you can significantly reduce the risks of diseases that are dangerous to the culture. And yet, even with proper watering, fertilization, planting plants, it is not possible to achieve the proper yield.
In the southern regions of the country, gardeners may encounter a viral mosaic, manifested in a change in the color and shape of foliage. As the disease progresses, alternating dark and light green areas appear on the leaf plates, more noticeable on the tip of the shoots. As a result, the eggplant plants turn yellow, the leaves are noticeably deformed, the flowering and the amount of ovary decrease.
With viral internal necrosis, which also develops at high humidity, areas of dead brown tissue appear on the fruits of eggplants, which sharply reduces the yield. As preventive measures and to exclude the development of eggplant diseases, the following techniques are used:
- collecting seeds only from healthy ripe fruits;
- disinfection and selection of inoculum;
- disinfection of soil at the site of planting and soil in sowing containers;
- compliance with crop rotation;
- selection of healthy seedlings;
- destruction of plant residues in the beds;
- compliance with agricultural standards.
For the treatment of affected plants, observing precautions, they use drugs of chemical and biological control, carry out foliar dressings that increase the resistance of eggplants, and also necessarily disinfect the used equipment. Why do eggplants turn yellow, refuse to bear fruit, and seemingly die for no apparent reason? Sometimes plants seriously suffer from an imbalance in the mineral composition of the soil, an overabundance or lack of basic nutrients
Why do eggplants turn yellow, refuse to bear fruit, and seemingly die for no apparent reason? Sometimes plants suffer from an imbalance in the mineral composition of the soil, an overabundance or lack of basic nutrients.
Nitrogen has a direct effect on the growth of the bush, and the lack of this element negatively affects the size and appearance of leaves and shoots. They become small and pale. The fruits are deformed, do not develop properly and fall off. An excess amount of nitrogen provokes the active growth of green mass and inhibition of the formation of fruits, moreover, the element can accumulate in the form of nitrates dangerous to humans.
Falling foliage and its acquisition of a purple hue is possible with a lack of phosphorus in the soil, one of the three main nutrients. But eggplants react especially sharply to a lack of potassium during the period of active fruiting. This is reflected in the fact that the eggplants turn yellow, the edges of the leaves dry out, and the fruits become stained. Plants grown on acidic soils after liming, as well as during dry periods, have a special need for the element.

The lack of calcium and boron in the soil negatively affects the development of plants. And in such cases, eggplants look depressing and require urgent measures in the form of soil or foliar dressing.
A source
Why do ripe eggplants turn green?
Eggplants, like all nightshade crops, are capable of accumulating the toxic alkaloid solanine. It is this alkaloid that gives them a bitter taste. In young fruits, its content is tolerable and quite acceptable, but when overripe, they begin to taste very bitter and change color to green, yellow or brown. The pulp quickly turns brown inside, and the seeds become ripe and also darken.
It should be borne in mind that there are varieties of eggplant that have greenish peel tones at maturity.
They are popular in Asia, but we also have, for example, the Emerald variety, which has a green or whitish peel and a creamy white pulp that is not bitter and tastes like mushrooms. And sometimes the eggplants do not turn blue due to the fact that their development is inhibited by an excess of nitrogen or the fruits are lightened and do not turn blue due to a lack of light.
Did you know? Higher doses of solanine can be found in potatoes that have sprouted or turned green in the sun. Most of all, it is concentrated in sprouts and skin. There is a harmful alkaloid in unripe tomatoes, but when they grow and begin to change color, then it is permissible to use them for blanks.
Planting and leaving
Seeds are planted in seedlings. For this, the seeds are treated with a solution of potassium permanganate for the prevention of diseases and dried. Take a container and fill it with earth with humus or peat, pouring water over it.Seeds are sown into the resulting soil at a distance of 2 cm from each other to a depth of 1 cm.
It is necessary to cover the seedlings with plastic wrap and make sure that the room temperature does not drop below 20 degrees.
In phase 2 of these leaves, the seedlings are dived into separate containers made of peat or plastic. On the 55-65 day, the seedlings are transplanted into the ground. It is supposed to plant 6-7 tomatoes per square meter for good nutrition and high productivity.
Tomatoes are regularly watered with warm, settled water when the soil dries up. Between watering, the soil is loosened and weeded, which protects the plant from fungal diseases and gives it additional nutrition.
Mineral fertilizers are applied every 12 days until the fruits ripen. Organic dressings are diluted in water for irrigation so as not to burn the roots.
Advantages and disadvantages of tying reinforcement
The connection of elements with wire is a laborious process and is used for small volumes of construction production. Wire knots are cheaper than welded joints because for the latter, electrodes are required, and the operation and transportation of the apparatus also requires material costs. Galvanized wire will hardly deteriorate over time.
Welded joints are less durable, the work requires skilled workers to exclude burn-out of steel, and only certain reinforcement is used as a material. After concreting the foundation, the structure shrinks. Wire connections give freedom, so tension in the frame is eliminated. Welded joints are destroyed by shrinkage and are not used in areas of unstable ground, such as swampy areas.
Correct use of the hook
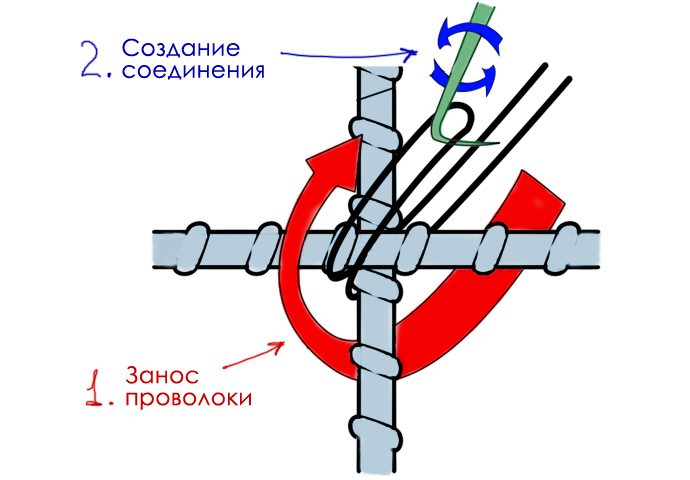
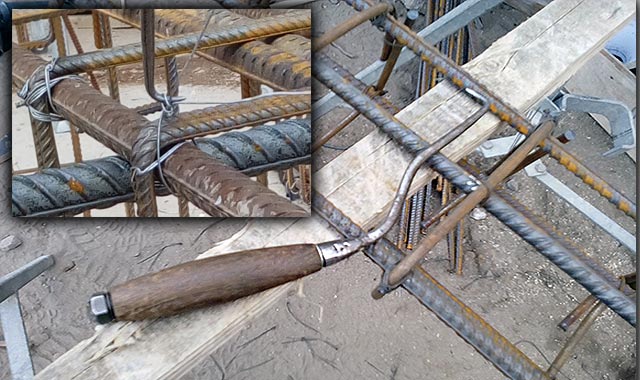
The manual hook attachment makes it easier to tie the foundation reinforcement, saving time and effort. A metal hook is sold, but you can make one yourself. A reinforcing bar or steel rod with a diameter of 8 mm and a length of 20 cm is taken. You will need two nuts and washers with a diameter slightly larger than a rod and a handle from an old roller or screwdriver. One side is sharpened under the tip of the awl and bent, and the handle is attached with hardware on the rod.
The process of forming a knot:
- A piece of wire 30 cm is folded in half and the point of intersection of the reinforcing bars is clasped so that the loop at the bend is opposite the tails.
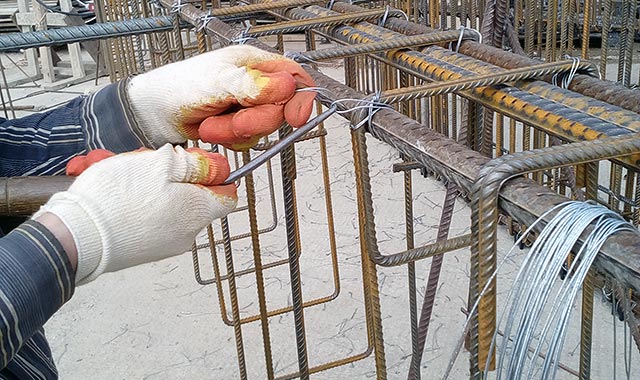
- The hook is looped into a loop, grips the ponytails and rotates to wrap the ends around the loop.
- The resulting knot is tightened with effort, without bringing the wire to break.
- The hook is removed from the loop, the remnants are trimmed.
The wire also folds in half, the hook is wound into a loop, the end is wrapped around the loop and the hook is pulled towards itself. Turning the handle tightens.
Make a hook for knitting reinforcement with your own hands
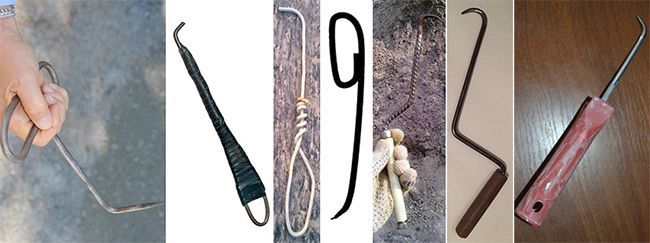
Not always, a product bought in a hardware store will be ideal for the required type of work. Therefore, many craftsmen eventually switch to homemade crochet hooks for knitting reinforced nets. There can be many reasons for this:
- too small or too large thickness of the rod;
- inconvenient angles at which the hook is curved;
- steel of inadequate quality, due to which the hook unbends quickly, etc.
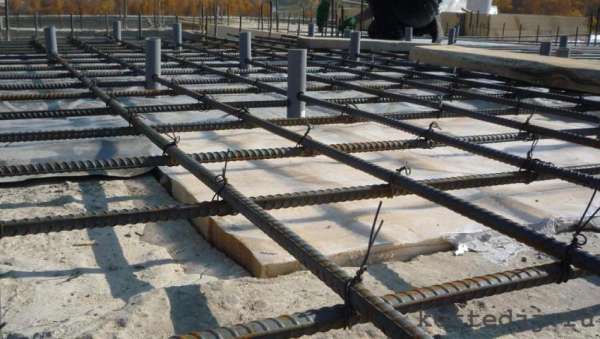
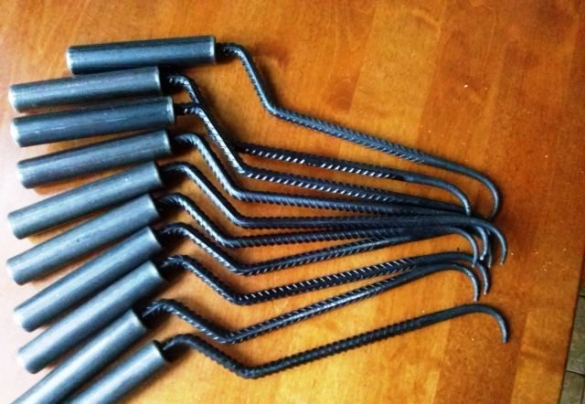
Therefore, it is often possible not to buy a hook, but to easily make it yourself. And so that it was convenient to work with it, and all its parameters were adjusted to the wizard. Below we will look at a number of ways in which you can make a homemade hook that allows you to fasten reinforcement rods.
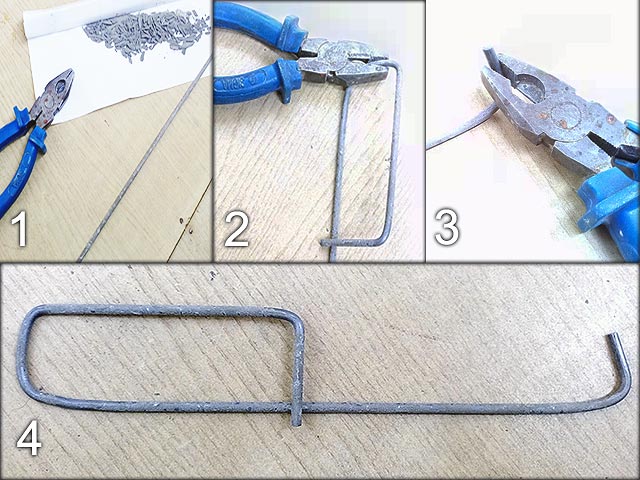
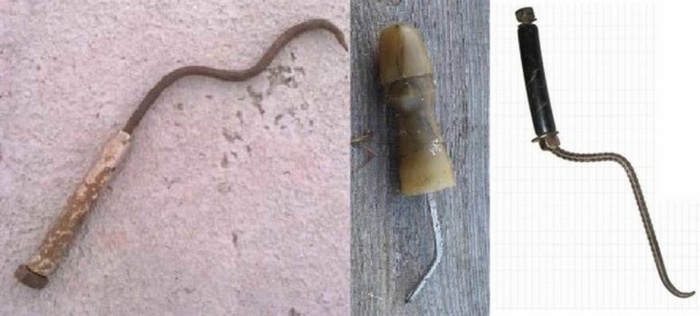
Electrode hook
This type of product can be made from thickened steel wire. Its cross-sectional size should be 4 mm or more. Most often, a special welding electrode is used for this, since it is made of a sufficiently strong metal. Manufacturing proceeds according to the following principle:
- At one end of the wire, a circle is bent, into which the handle will rest against in the future. Moreover, it is necessary to make a bend precisely in the shape of a circle, so that later, during operation, the bent end does not catch on the sleeves and does not cause inconvenience. Therefore, you should definitely make sure that the bent end is directed towards the main rod.
- Next, the specified rod is bent to obtain an angle of 30 degrees approximately in the center. After this action, the rod should represent some semblance of a rocker arm.
- The next step is to string 2-3 washers and slide them towards the ring. They will need to serve to fix the handle.
To create a handle, you can use several options:
- Use two tubes, one of which has a slightly larger diameter than the original rod. For this, the diameter of the inner hollow part of the tube must be at least 5-6 mm, if the thickness of the rod is 4 mm. The second tube should have an even larger cross section. The length of the tubes should be one third of the entire hook, or slightly longer. One tube is inserted into the other, and their ends are riveted with a hammer.
- Take one tube and weld washers to it on both sides, whose inner diameter will be slightly less than the diameter of the rod itself.
- Use a lathe and grind on it a handle of the required size and with the required diameter of the inner hollow space for the rod. For this option, only dense tree species are suitable. It is better not to use spruce or pine for such a product, since such a handle will quickly wear off.
- Instead of wood, a polymer pipe of a suitable length is also suitable. For the bottom stopper, a nut or washer is welded to the product.
- Or use any other suitable solution to the problem, if you have the right material for the job.
After the base and handle are ready, you can proceed to the hook itself. To do this, with the help of a grinder, the end of the rod is sharpened so that a cone-shaped shape is obtained. Don't make the end too sharp, just keep it a little rounded. This significantly reduces the risk of scratches or more serious injury while working.
As for the length and angle of the hook, the necessary parameters are selected taking into account individual characteristics. The easiest way is to experiment for optimal results. Some people prefer to use shorter hooks with a tightly curved end. Others, on the other hand, will prefer to use a longer tool, but with a less curved end.
It is even easier to make this type of product with your own hands than a manual counterpart. This will require additional devices. The most common solution is to use a screwdriver. To do this, a hook is inserted into the cartridge of the apparatus, which must first be made from an ordinary nail of the required length.
The shape of the hook is practically the same as described above. The process of tying a reinforcing belt is also no different from what is used with manual types of products. Therefore, the main difficulty when working with an automatic knitting construction hook will be the selection of the optimal operating mode of the screwdriver. The defining indicator here is speed. With a correctly selected parameter, the work will proceed quickly and without scrap.
The main goal, again, is to ensure that the tying wire does not break when connecting the reinforcement. Otherwise, using this device, you can significantly reduce the cost of physical labor and reduce the time to work.
How to correctly knit reinforcement for a strip foundation
The strip foundation is the most practical and requires much less costs than with a monolithic fill. But this type of foundation receives a significant load from the erected building and requires correct and reliable mesh reinforcement, on which you can also save money, because strengthening the middle part of the strip foundation is not necessary.

Example of a standard strip footing
Installation of the strip foundation:
- For pouring this type of foundation, formwork is used, tightened with metal pins. Therefore, the distance between the rods should be such that, after tying them, the finished structure can be inserted into the formwork.
- The side walls of the frame are tied so that the sides of the cells are no more than 20 cm.
- After the sides are ready, short pieces of rods should be laid between them, which are also knitted by means of steel wire or plastic clamps.
- The resulting structure is installed inside the formwork, which also requires some skill and, preferably, two assistants.

Installation of the finished frame into the formwork
Tying reinforcement under the strip foundation:
- One connection requires a piece of knitting wire of at least 30 cm, which must be folded in half.
- A double-folded piece of wire completely bends around the superimposed rods and a crochet hook is inserted into the loop.
- The other end of the wire should also be wrapped around the crochet hook.
- You can start rotating the crochet hook until the 2 rods are firmly in place.
- Remove the hook from the loop.
Having familiarized yourself with how to correctly knit reinforcement for a strip foundation, you should also pay attention to the fact that if you apply excessive force, then the knitting wire can be torn freely, so you should control the movements of the tool. Also, it is not necessary to leave the wire in a weakened state when the rods will move freely.
This will lead to insufficient structural strength.
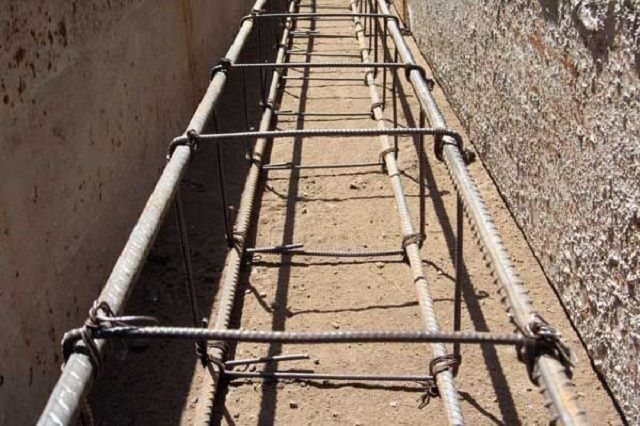
Ready frame for strip foundation
Very often on the net you can find a popular way to remake a drill, when a hook is installed on it for knitting reinforcement, with which professional builders strongly disagree. Using such a homemade tool, it will not be possible to achieve the correct tension of the knitting
wire. Also, the drill is not convenient enough for installing the strip foundation, the result will be quickly tired hands. And not always in the places where the foundation is poured there is access to electrical energy.

