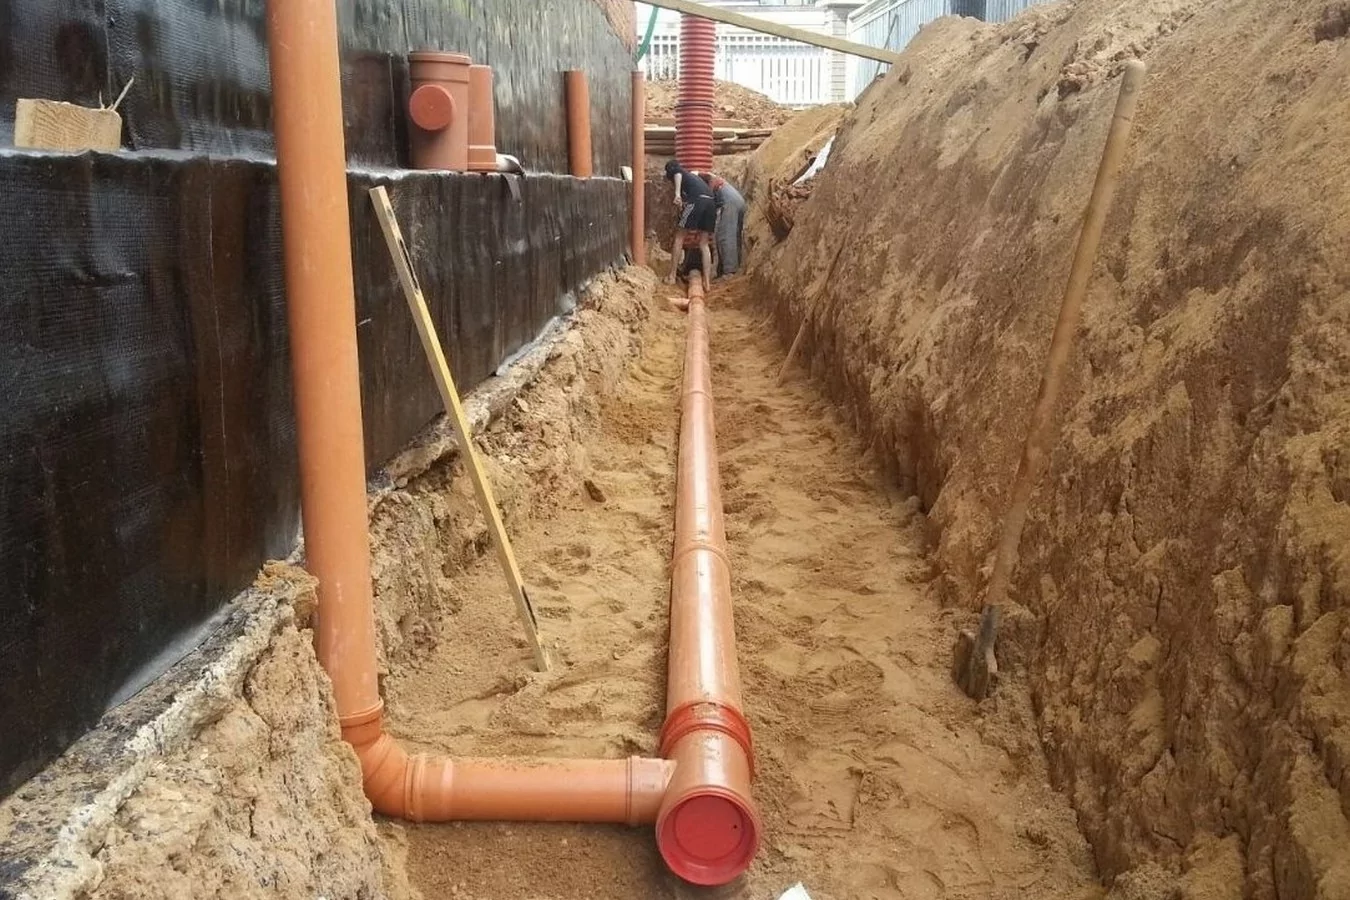
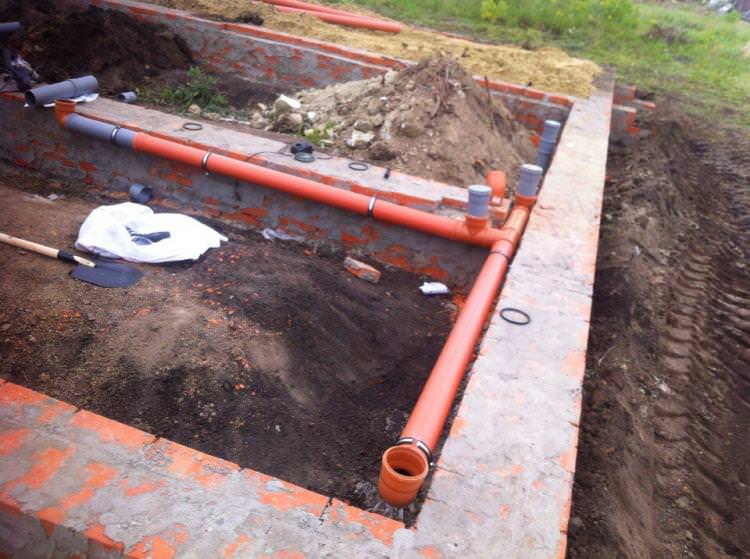
Sewerage device
The sewage system is designed in such a way that it always contains:
- Outer contour,
- Inner contour,
- Collection or septic tank.
As mentioned above, you will need to complete the drawing. Thanks to him, you can accurately determine the number and parameters of pipes, fittings and other accessories.
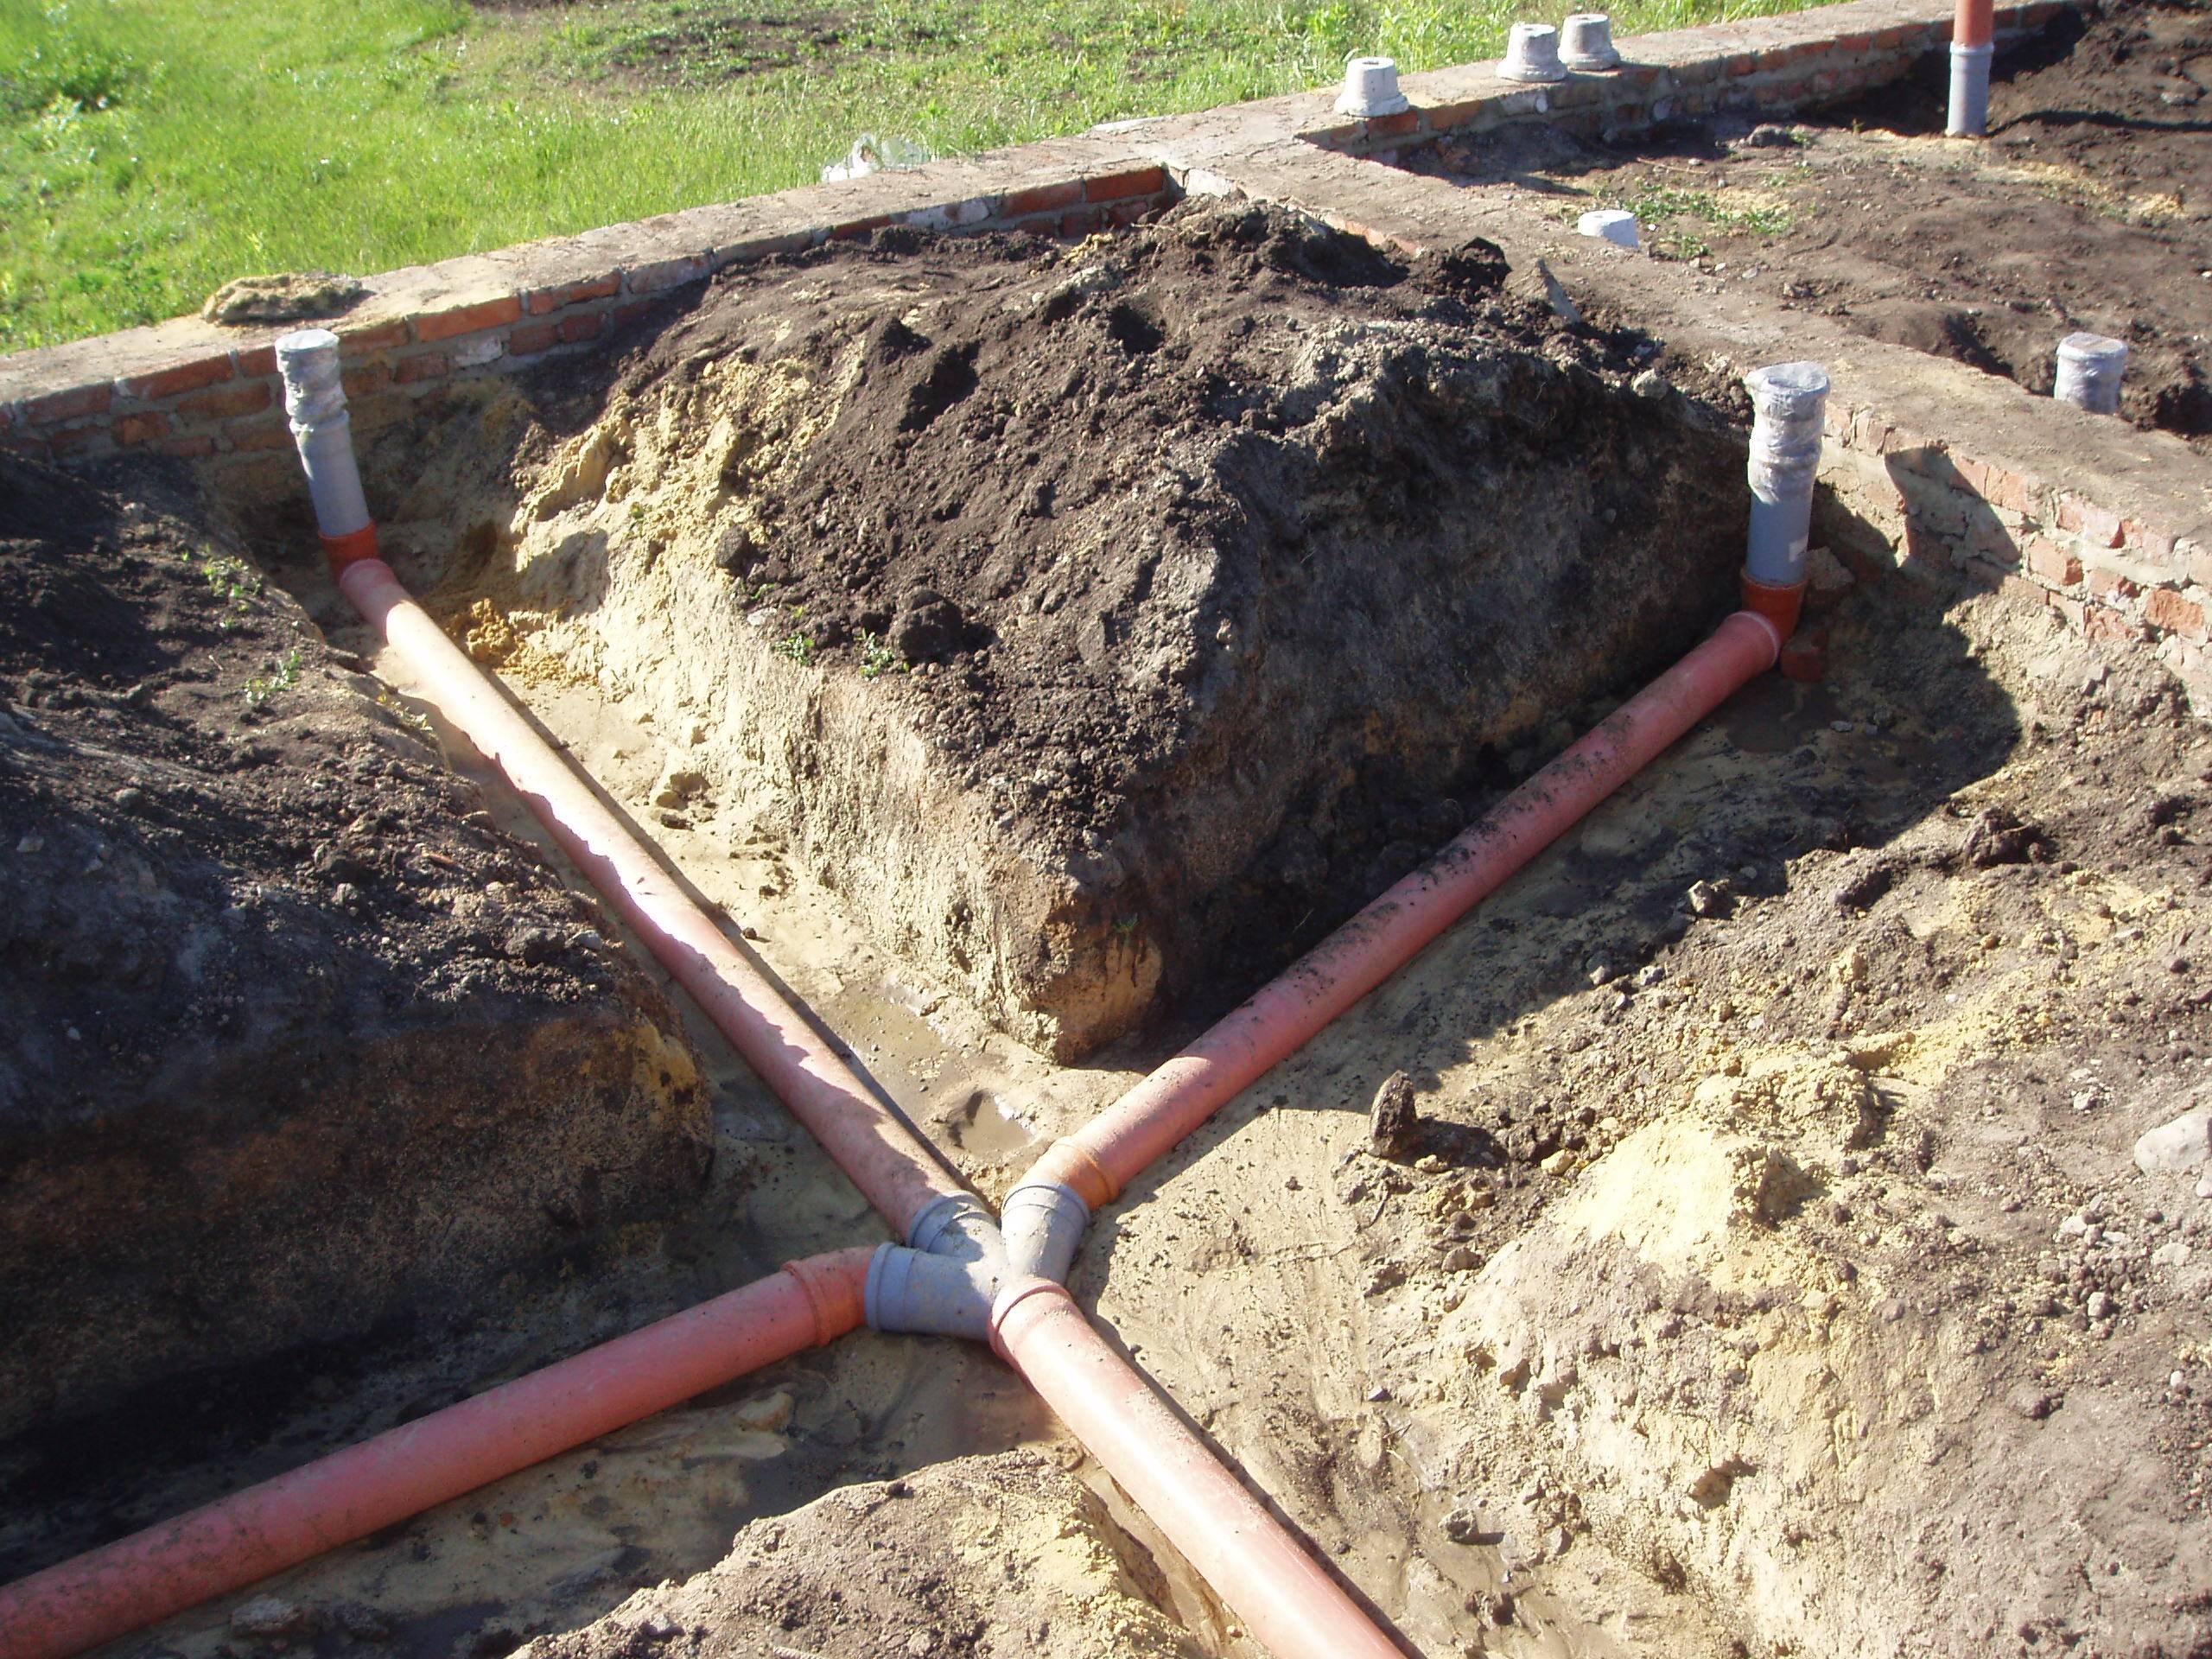
Sewerage under the slab foundation is installed using pipes made of metal, concrete, plastic, or cast iron. Cast iron pipes are the most reliable and have the longest service life. But they are not used so often due to the fact that their installation is too complicated and the price is too high. Pipes are mounted at a depth of no more than 3 meters.
Fittings are used to connect pipes, such as:
- Couplings, the diameter of which is consistent with the cross-section of the pipes.
- Sewer tees.
- Adapters to help connect pipes with different diameters.
- Plugs for closing openings.
- Fixing elements.
Sealing is possible thanks to the use of silicone from a silicone gun.
Without documents, it will not work to bring water to a private house
To connect a private house to centralized water supply, you will have to contact several authorities and obtain permits.
First, we contact the geodetic service
You should first contact your local geodetic service. Its employees will carry out a topographic survey of the area and draw up a situational plan of the site. All objects on the ground are applied to it, indicating the distance between them and the nearest engineering communications.
Surveyors will complete their work within ten days and will issue an invoice for the services rendered. If there is a situational plan, more than a year has passed since it was drawn up, you will have to order a new explication, this is another name for this document. When contacting the geodetic service, you will have to present documents of title for the use of the land plot.
We receive technical conditions for connecting to the water supply
To obtain a technical specification for connecting water, the owner of a private house can apply to the authority that issued the permit for the construction of the facility. There it will be determined which company will provide centralized water supply services to a new user. There should be submitted documents, which will have to collect an impressive list. You will need the following:
- confirmation of ownership or use of the house and plot;
- owner's identity card;
- seven copies of the explication;
- two copies of the building permit;
- the balance of water consumption prepared by the designers;
- two copies of the application.
The technical conditions, which are provided to the user 14 days after the submission of the package of documents without charging a fee, indicate the dates of connection to the central water supply line and the permissible load on the central water supply system of the user in question. The institution that provided the technical conditions assumes the obligation to connect the private house to the central water supply.
Now you can order a water supply project
The technical conditions have finally been received, and now it is possible to order a water supply project. Without it, you cannot sign an agreement with a company providing centralized water supply services. On the basis of the developed technical conditions, the water supply project can be carried out by any competent organization, but in any case it must be approved by the local water supply and sewerage company.
The document will also need to be coordinated with the suppliers of electricity, gas and even with the telephone exchange due to the fact that their utilities are also supplied to the house, and the water supply network should not interfere with their functioning. The final project is approved by the architectural committee.
Lay the pipe yourself or contact a licensed organization?
When connecting a private house to a centralized water supply, one must understand that all earthworks outside the site, according to the rules, must be performed by an organization that has a license for this.Unfortunately, the latter use their position and charge high prices for their services. The penalty for a violation is noticeably less, so many people do this work on their own.
The costs of arranging a water supply system consist of payment for the services of installers, the purchase of materials and various fees. The cheapest way to get water is to do all the work with your own hands, and install the water supply network from pipes made of polyethylene or polypropylene.
We contact vodokanal to conclude a contract
Now you should contact the water utility to conclude an agreement on connecting the water supply. Its essence lies in the fact that the organization performs all the necessary steps to prepare and connect the infrastructure of a private house to the central water supply, and the user pays for these services.
Contracts for the execution of works and water supply
The price is set by the local branch of the water utility, and it consists of the payment for the pipeline system from the house to the point of connection to the main network and the connected load of the system. The cost of materials and the labor of a team of installers are included in this price.
Methods for laying sewage
The selection of the technique depends on the type of foundation of the structure. With the right approach, it is possible to equip the pipeline already in the constructed building.
Column and pile foundation
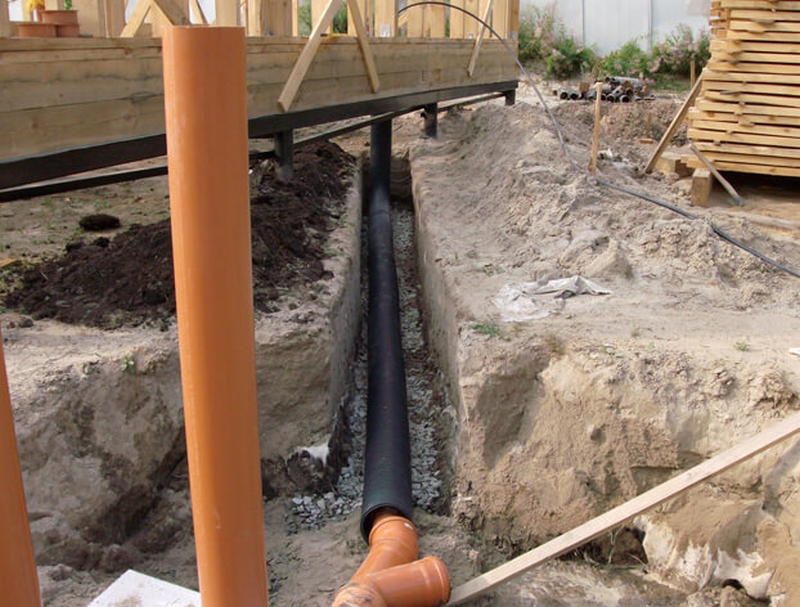
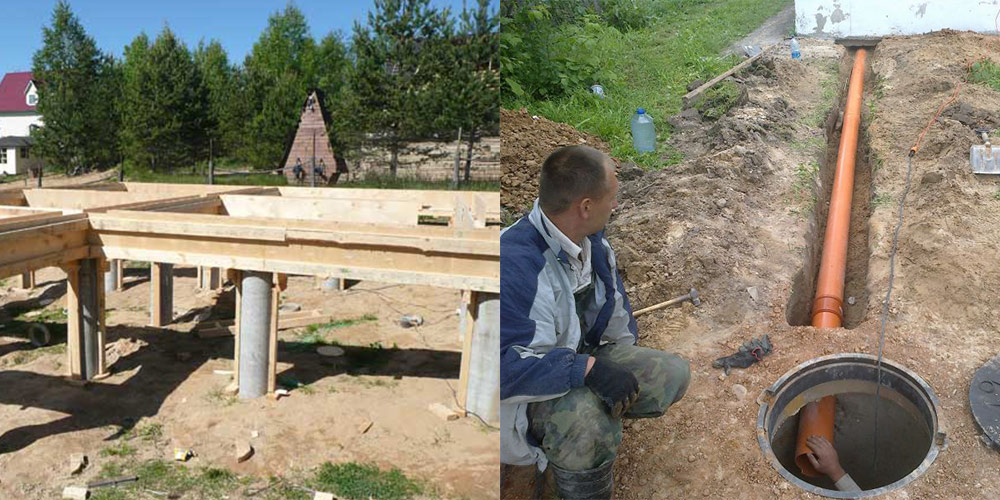
Conducting work in buildings with similar foundations is the easiest way. Columnar and pile foundations allow the installation of communications both before the construction of the main elements and after the construction of the house. When carrying out work, make sure that the trench is not dug too close to the posts in order to avoid weakening the soil around them. This can reduce their carrier quality.
To remove the pipeline from the foundation space into the plumbing room, you will need to make a hole in the floor slab for the sewage main.
When laying pipes under a columnar base, it must be remembered that the space under the floor is not heated. The main line is insulated with insulating materials or additional heating is installed using an electric cable.
Monolithic slab
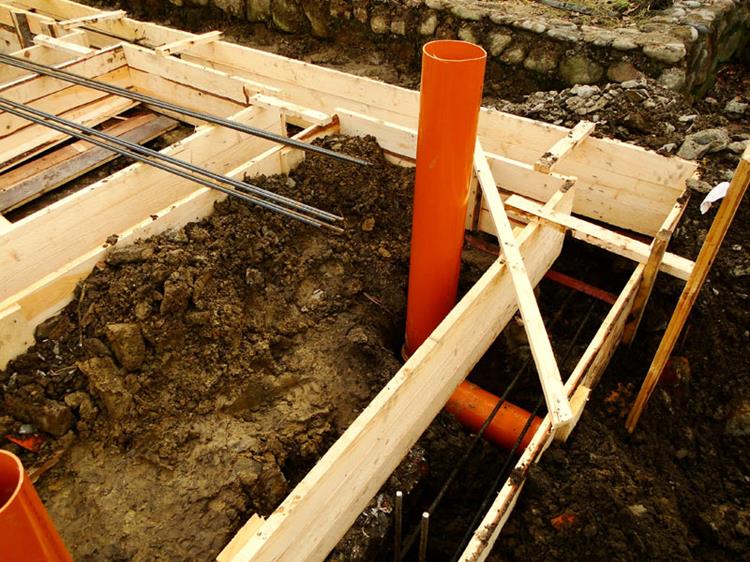
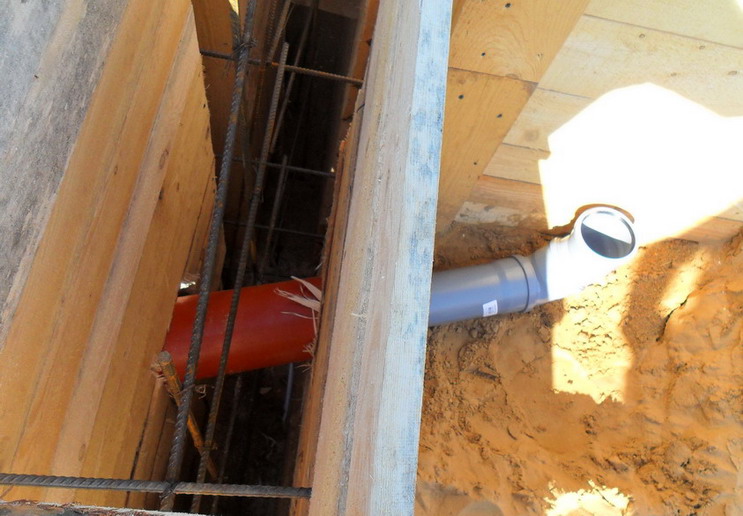
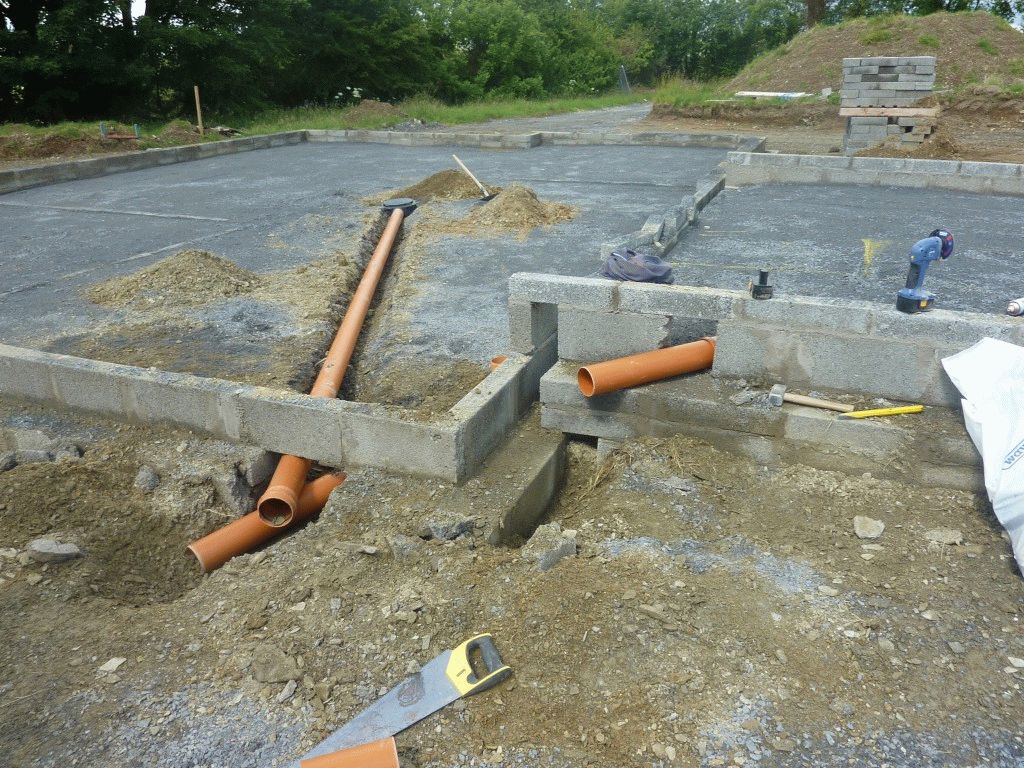
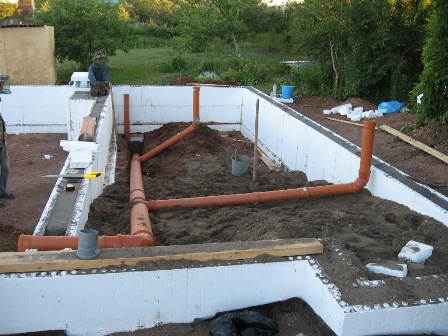
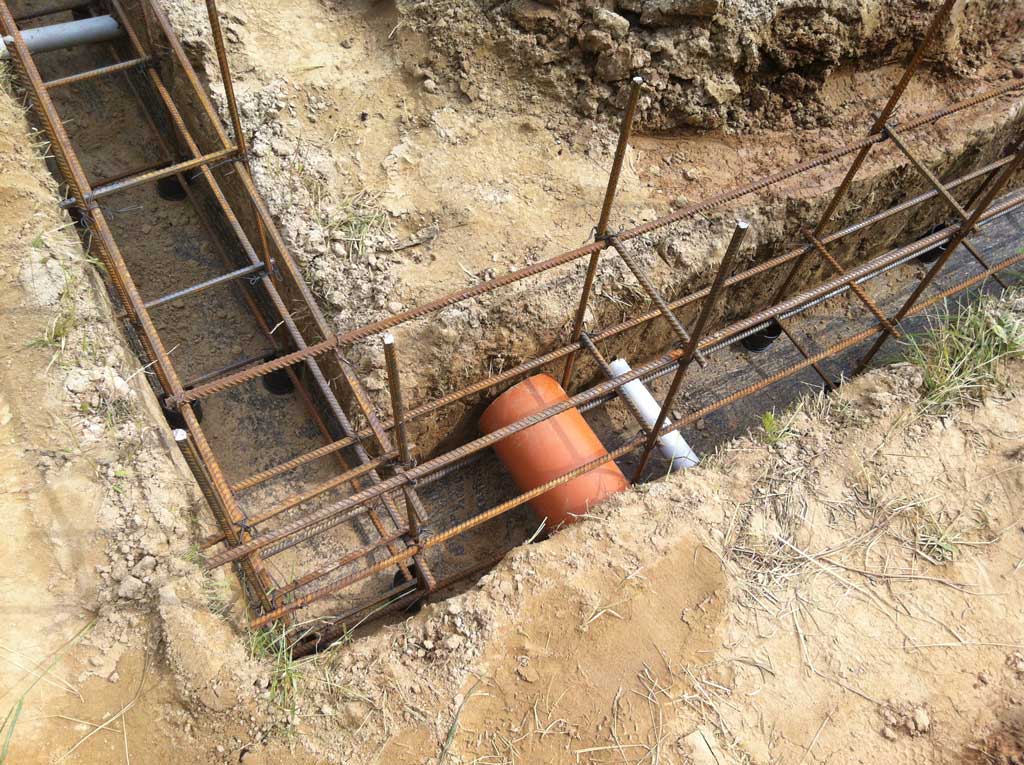
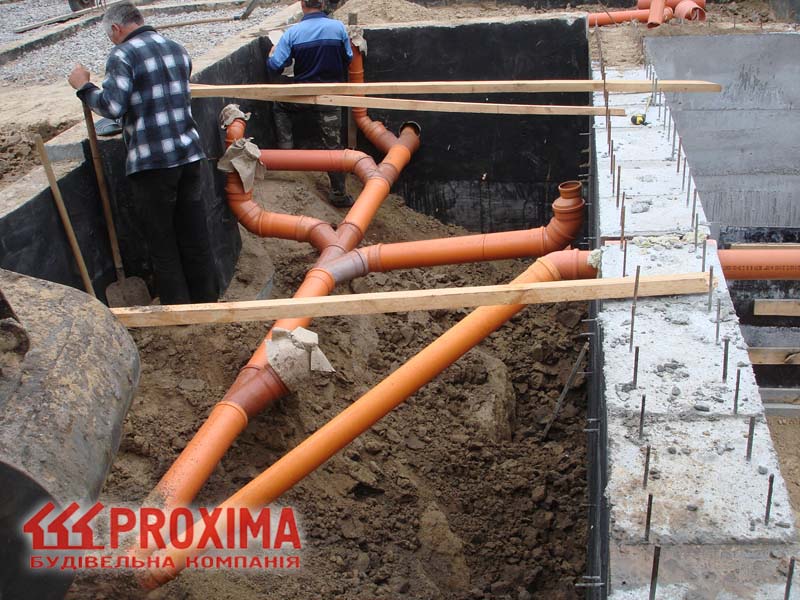
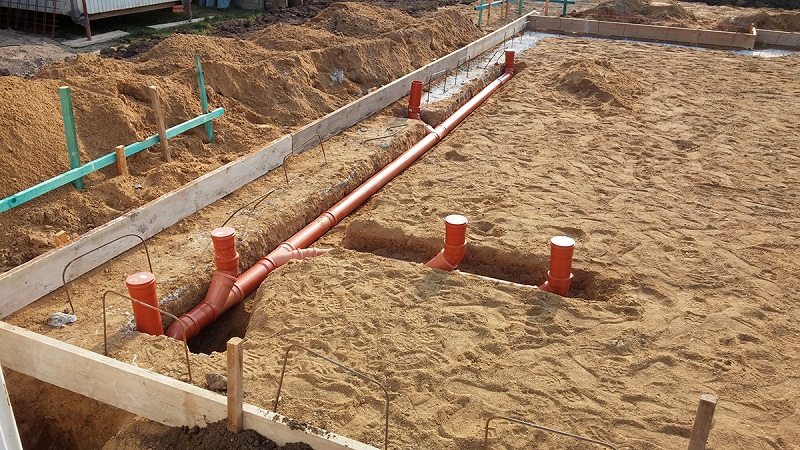
The laying of the sewerage system is possible only before pouring the monolithic base. Here you will definitely need sleeves for sewer pipes. They do not allow the slab base to create a load on the pipe, and also prevent damage to communications in the foundation slab when pouring concrete. If an emergency arises, you can quickly dismantle the damaged section and replace it with a new pipe section. The sewer main, protected by sleeves, is laid in a pre-dug trench, which is then covered with soil and filled with concrete.
Tape base
If it is possible to lay the system before pouring the concrete tape, two methods are used depending on the type of base.
Sewerage options depending on the type of foundation
The complexity and method of laying sewer pipes largely depends on the type of base.
Sewerage and columnar base
The simplest is considered to be the conduction of sewer pipes through the foundation of a columnar or pile type. Such a foundation allows communication both before the installation of the poles and after the completion of the construction process.
When performing work, it is important to ensure that the trench is located at an optimal distance from the poles. In this case, the soil around the supports will not weaken, which can lead to a decrease in their bearing capacity.
Sewerage in a columnar foundation
However, when laying sewer pipes under a columnar foundation, it is worth remembering that the underground space is not heated in this case. Consequently, the sewage pipes must be provided with reliable thermal insulation or made additional heating with cable heating elements.
Conducting the sewage system through the strip foundation
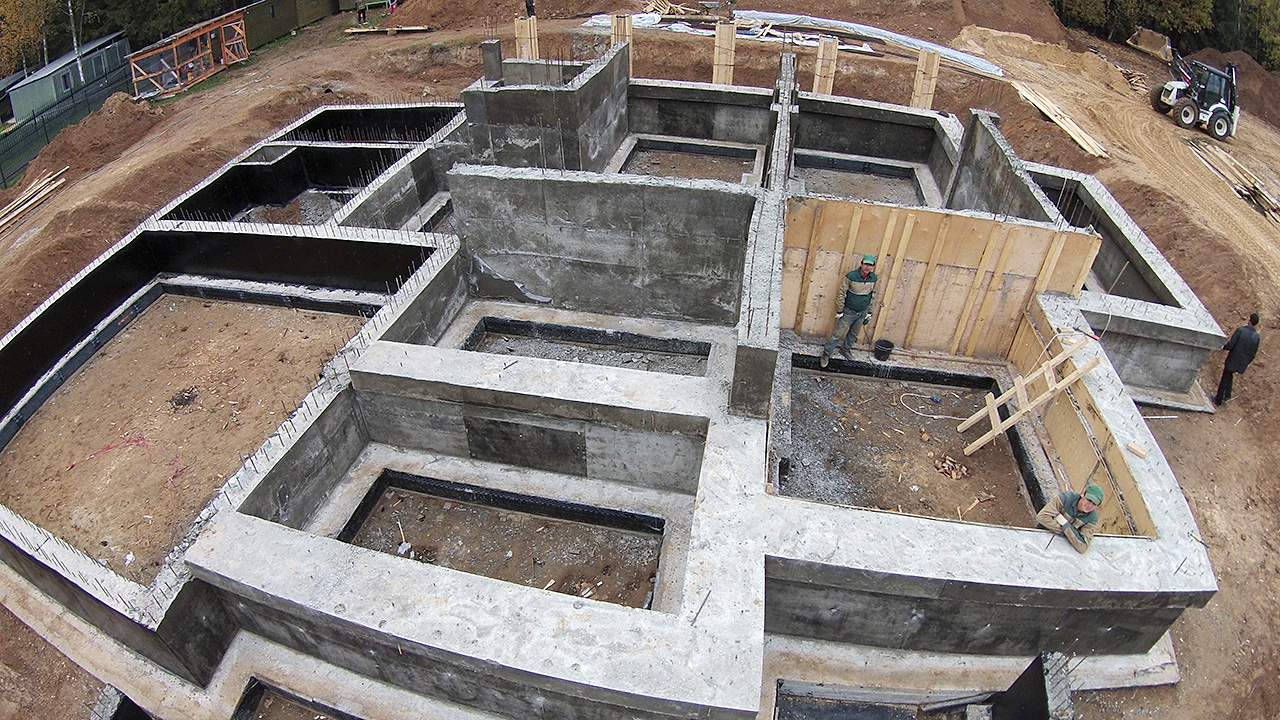
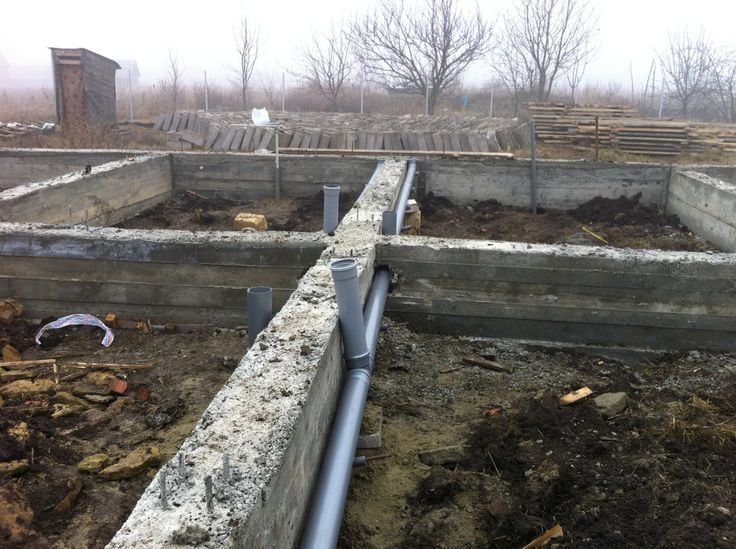
It is better and easier to plan and lay sewer pipes before the process of pouring the concrete base tape. In this case, the method of laying the communication depends on the type of strip foundation:
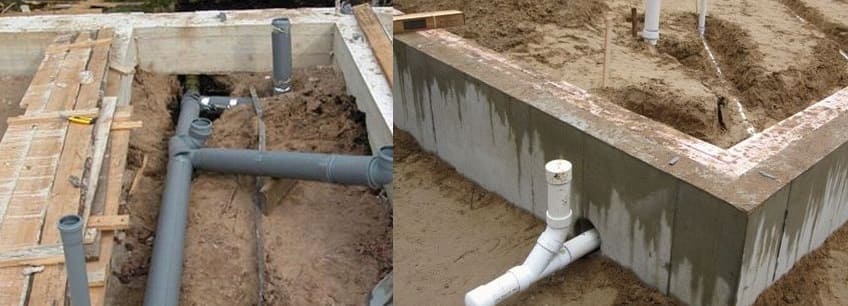
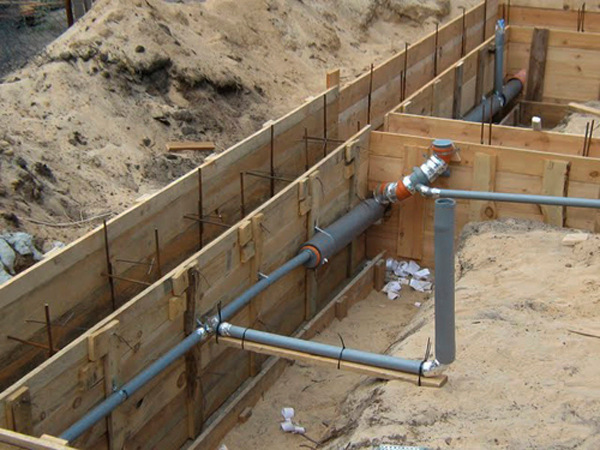
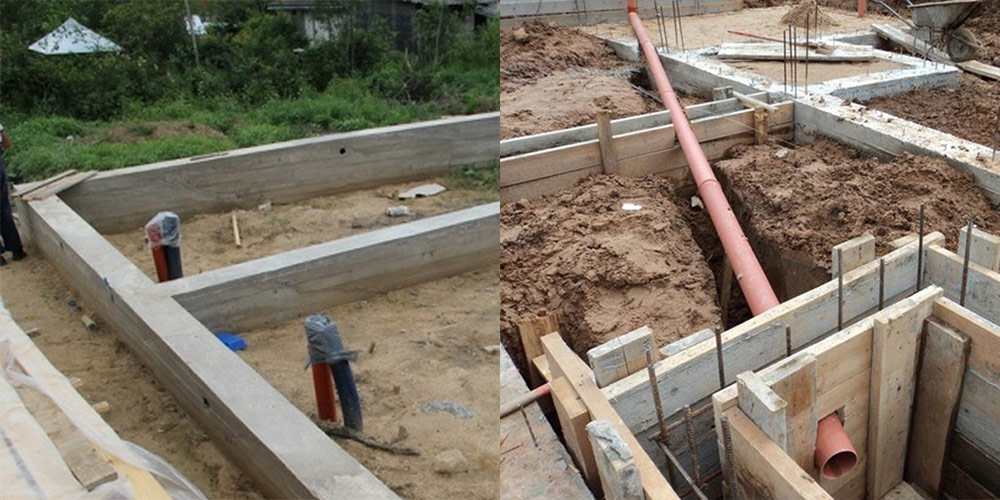
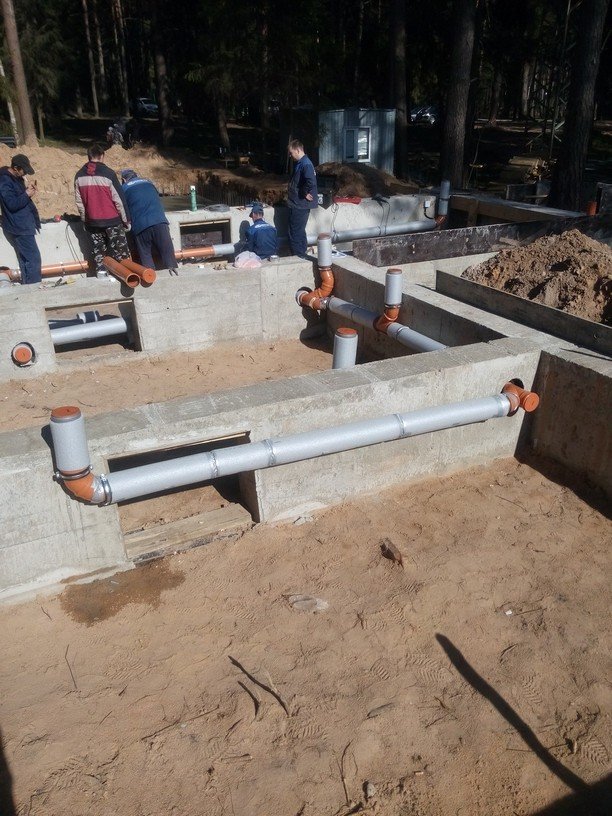
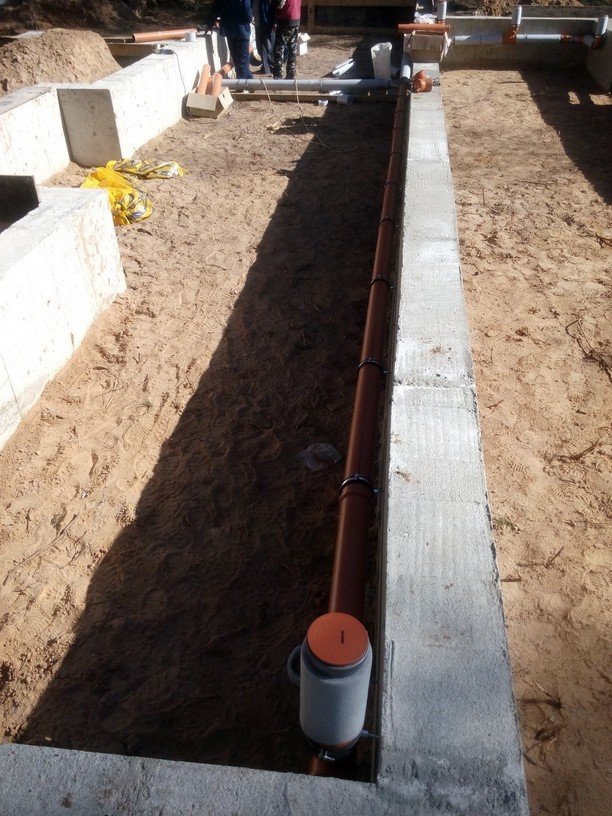
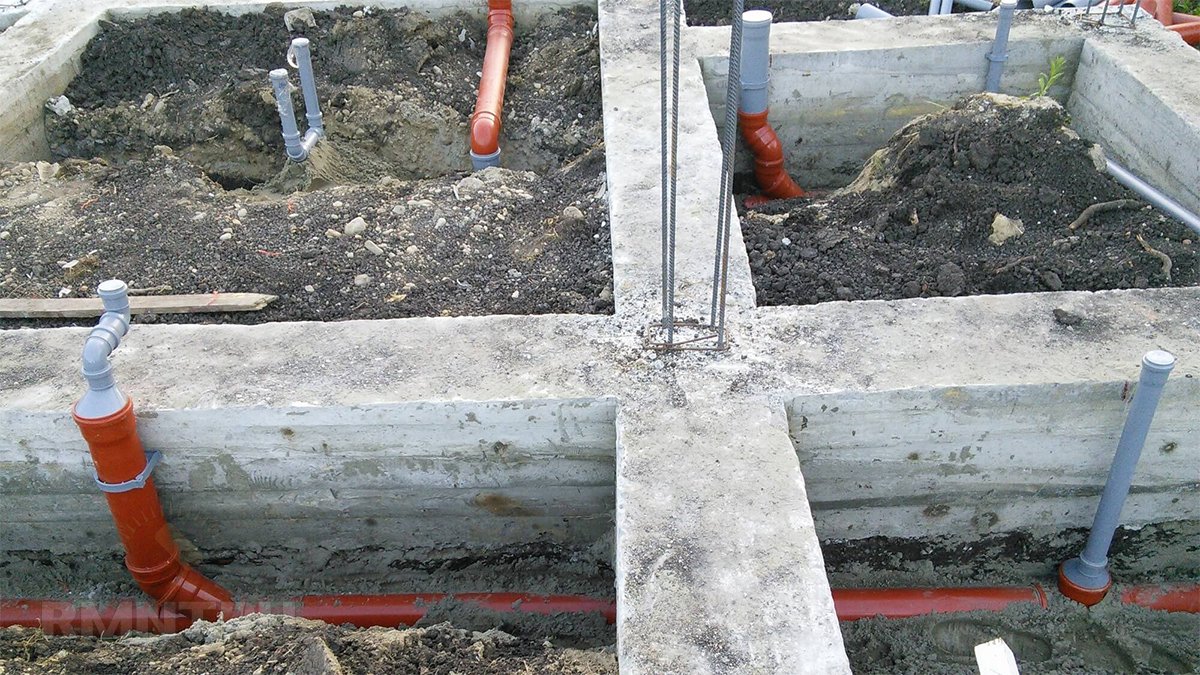
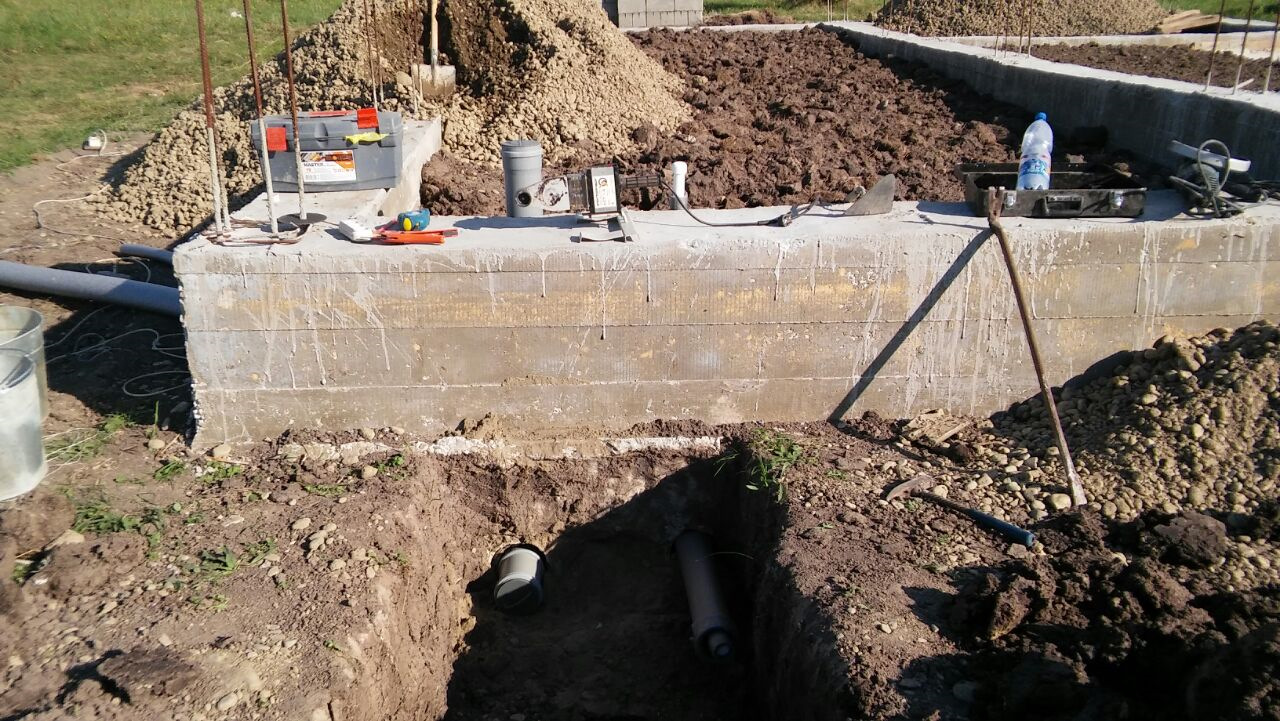
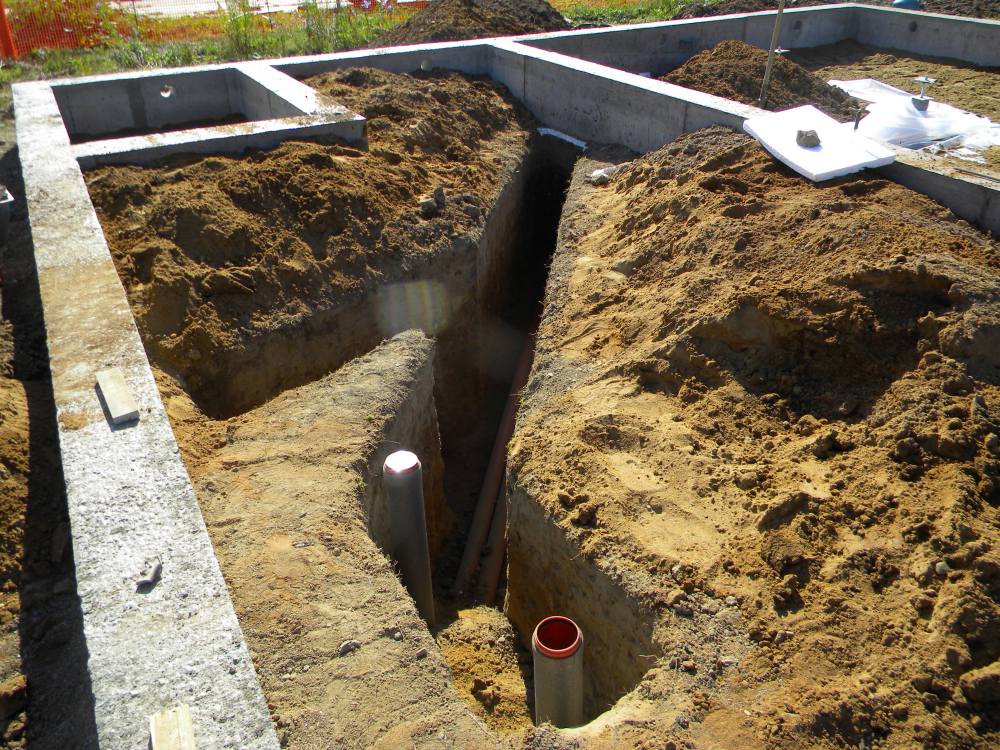
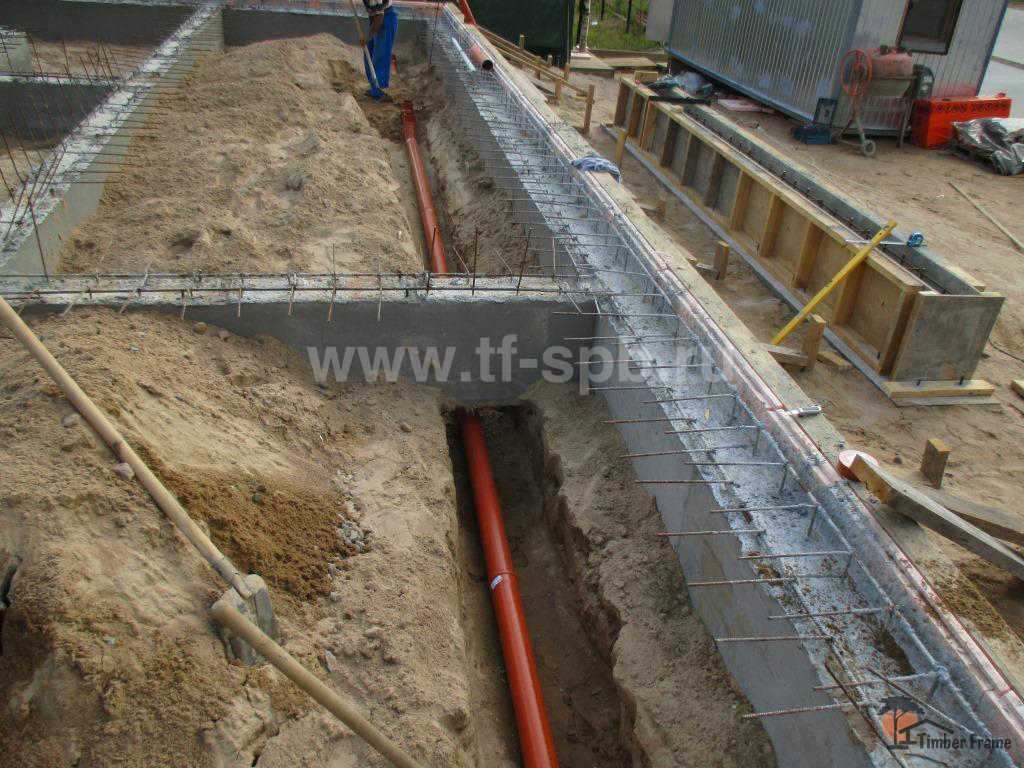
- With a shallow base, the pipes are laid below the freezing level of the soil, directly under the foundation. It is recommended to dig a trench prior to the construction of the tape. Moreover, the piece of pipe that will be located under the strip base is recommended to be placed in a sleeve, which is a piece of metal pipe.
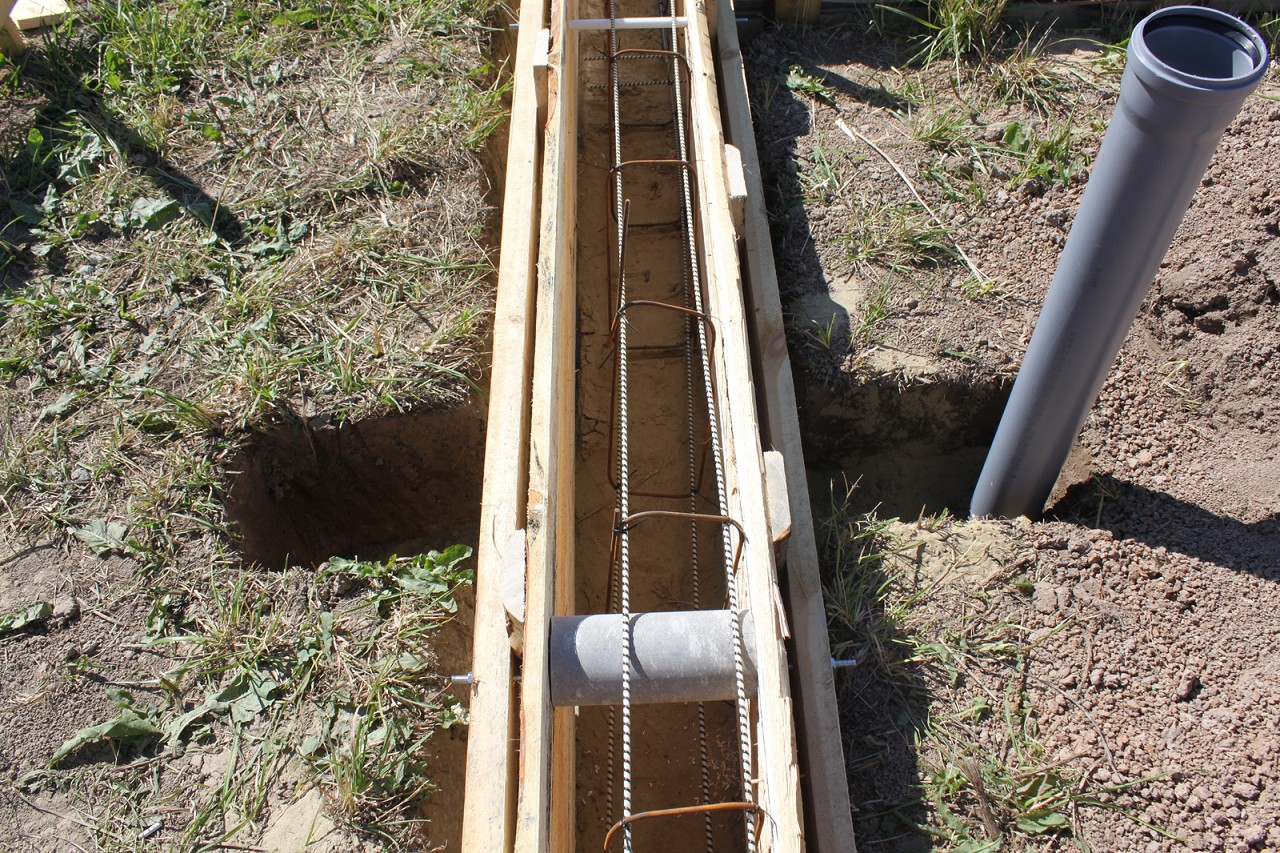
- The deep foundation tape requires the performance of actions of a different nature. A hole is sawn in the formwork, into which an asbestos-cement or steel sleeve is inserted. It is fixed in the formwork and poured with concrete mortar. The pipes of communications are subsequently inserted into this sleeve.
The strip foundation allows you to lay sewer pipes after the foundation is poured. Performing work of this type requires a lot of effort and expense, but everything can be done by hand. The process can be carried out in two ways: a tunnel is made under the foundation and pipes are passed through it or a hole is drilled in a concrete tape.
Sewerage in strip foundation
The second way is done as follows:
- A mark is made on the foundation where the sewer pipe should pass. The hole must be sized to fit the pipe thermowell.
- Using a hammer drill, a hole is hollowed out in the concrete.
- The encountered reinforcement rods are drilled with a drill.
- A sleeve is inserted into the prepared channel and the space around it is sealed with cement mortar.
- A sewer pipe is passed through the protective sleeve, and the gap between them is filled with polyurethane foam. It serves as a good heat insulator.
Sewerage in slab base
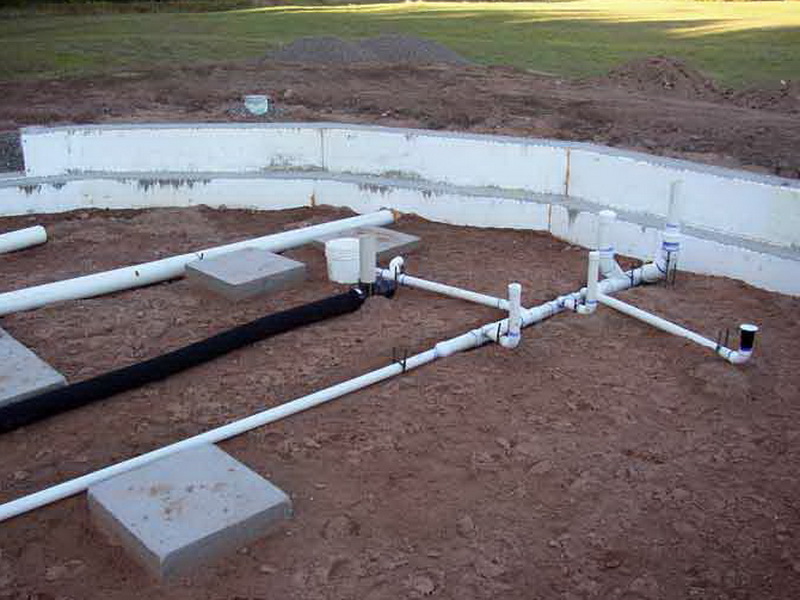
The answer to the question "how to make a sewage system in a slab foundation" is simple. If the project provides for a base in the form of a monolithic slab, then the sewage system must be carried out before pouring the concrete solution. The process looks like this:
- According to the layout of the sewer pipes, trenches are being dug.
- They select pipe sleeves.
It is not recommended to lay pipes under a monolithic foundation without a thermowell.
Firstly, it will not allow the slab base to press on the pipe, and also prevents damage to the communications in the foundation slab when pouring concrete. Secondly, in the event of an emergency, for example, in the event of a rupture, you can pull out the damaged pipe and replace it with a new element. The absence of a sleeve prevents such actions from being performed. In this regard, you should choose sleeves made of extra strong material.
- Pipes are placed in protective sleeves.
Sewerage in the stove
The sewerage system makes living in the house more comfortable
Therefore, the communication should be treated with special attention so as not to harm the foundation and ensure the flawless functioning of the sewage system.
When performing work of this type with your own hands, it is important to take into account all the features of laying the sewage system in the foundation, depending on the type of foundation under the house
This can be helpful:
- How to make a hole in the foundation for sewerage or plumbing
Additionally, we recommend reading:
If the foundation is already poured
If it is necessary to make holes in an operating foundation or in a newly made structure, in which they forgot to lay the sleeves, several technologies are used. The most difficult case is a floating slab; the easiest way is to establish communications under the grillage on piles or poles.
Slab foundation
Unlike a floor on the ground, a floating slab is a supporting structure, the integrity of which must not be disturbed.The only option for underground service entry in a slab foundation is directional drilling.
The mobile machine is mounted only after drilling a hole in reinforced concrete with a diamond bit at an appropriate angle. The drill bit will not be able to pass through the reinforcement mesh without completely destroying the structure. The method is very expensive and rarely used.
Therefore, most often, sewer pipes and water supply are introduced through the walls or basement:
- a caisson is being built close to the wall of the cottage;
- engineering systems are deepened to the required depth;
- shut-off valves, metering devices, filtering equipment are mounted inside the caisson;
- a light structure (booth) is being erected on top;
- heating is organized inside it in any convenient way.
Strip foundation
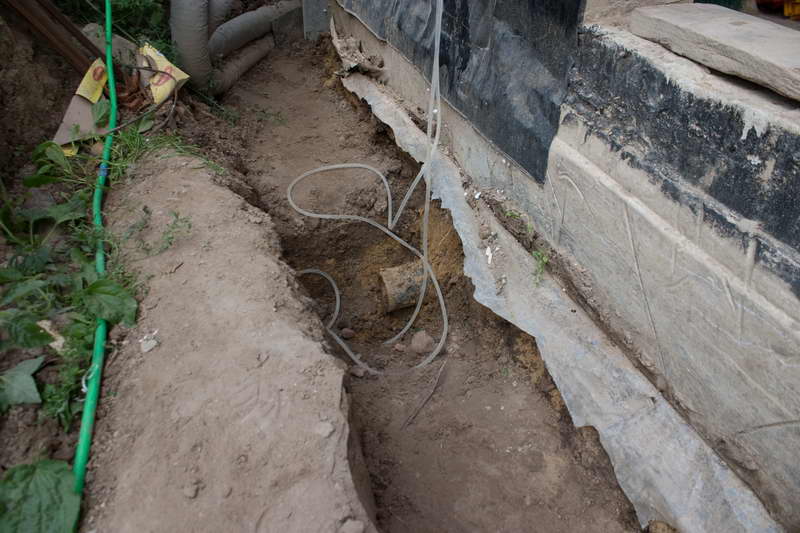
When operating NZLF, MZLF, there are usually no special problems with the introduction of engineering systems. Outside, the blind area collapses, a trench is dug to the building at the design depth. The sub-floor is partially opened from the inside or the floor is dismantled on the ground in a separate area. Piping runs underneath the tape in sleeves to ensure maintainability of the systems.
The easiest way to skip communications within the walls of a buried strip foundation is if there is a basement in the cottage. If the inside of the recessed tape is completely filled up, by analogy with the previous case, the floor on the ground or overlap is opened. Then the pit comes off from the inside, the trench is outside. Holes in reinforced concrete can be made in several ways:
- diamond drilling is the best option that does not damage the structural material of the foundation; it is expensive, even if you rent a machine;
- perforator - percussion drilling, slotting are equally harmful to concrete, since microcracks appear in this material, concrete peels off from the reinforcement;
- Shockless drilling - a safe option, but very long, many small holes are drilled around the perimeter of a large hole, the concrete plug is destroyed by an impact tool, the reinforcement is cut off with scissors or welding.
Read more in the article: How to punch a hole in the foundation.
Diamond drilling holes in the foundation.
In pile and columnar foundations, the only problem is making a pit inside the grillage. If the beams are located below 1 m from the ground, ceilings and floors are also opened. In high grillages, there are no difficulties in wiring communications.
Thus, it is cheaper and of the best quality to put the water supply in place at the stage of making the foundation. The sleeve is mounted vertically in slabs, horizontally in tapes or at an angle for sewage. Carrying out engineering systems into a finished floating slab is problematic and very expensive, so be careful when planning the work.
Good publicity
Sewer system installation
It is not difficult to lay the water supply system in the house on your own and carry out all the installation work
It is not difficult to lay the water supply system in the house on your own and carry out all the installation work, but in order not to make mistakes, you must first familiarize yourself with the building codes and regulations (SNiP). Remember that the drain of the sewage water must be below the freezing level of the soil. When building the foundation of a house, each owner is obliged to familiarize himself with this information, it is in the directories of climatic conditions in the public domain and differs for different regions.
The rules also stipulate the mandatory presence of a viewing well, which must be located at least three meters from the building. The observation well, as a rule, is made of reinforced concrete rings with a cross section of about 0.7 m, red brick or rubble stone. The upper part must be equipped with a cover, the lower one with a concrete tray with a depth equal to the diameter of the largest pipe of the drainage system.
The issue consists of:
- pipes, preferably made of plastic or cast iron with a sufficient cross-section, since it is this material that is most durable;
- sleeves of a larger diameter than the system itself, in which drains will be dressed, like clothes;
- tee and branch with a plug;
- output to a well with a septic tank.
Installation work on assembling pipes and a septic tank into a single structure is simple, you can lay it yourself the first time.
Installation work on assembling pipes and a septic tank into a single structure is simple, you can lay it yourself the first time
At the first stage, you need to prepare the release of pipes into a drain tank, septic tank or other well container. Next, the riser is assembled, which is made from the bottom upwards through the installed sleeves. The sleeve is needed to prevent the destruction of the pipes. Such a sleeve should be thicker than the pipe, and its edges are led out by 15 cm beyond the foundation. It is imperative to make a circular gap between the sleeve and the pipe, which is insulated with foam spacers or a loose rope. Remaining gaps are sealed with clay or other waterproof material.
The outlet pipe must be located directly inside the sleeve. The strictly vertical position prevents clogging of the drain, while the outer part of the pipeline should be laid with a slight, gentle slope. Such a system will provide sound insulation.
A tee with a plug is installed between the horizontal and vertical parts of the water supply system. The tee should be selected with a gentle angle of no more than 135 degrees. The straight branch of the tee must be closed with a plug. This part of the plumbing will be needed to clean the system in case of contamination and in order to drain excess water if necessary.
The pipe joints must be sealed only after checking the sewerage system for operability. You can maintain tightness with a sealant.
The final point of laying the drainage system is to check the system. If there is no noise, no leaks, and water easily seeps through the drain system, then you did everything right.
The use of a septic tank is advisable to prevent clogging and clean the sewer from hardening and unpleasant odors.
Features of the site
Private house sewerage
is divided into two sections:
- interior. This is a horizontal wiring to which the plumbing outlets are connected. It is connected to a vertical pipeline - a riser;
- outer. It consists of receiving tanks, manholes and connecting pipelines. A special feature of the outdoor area is the underground location of all elements.
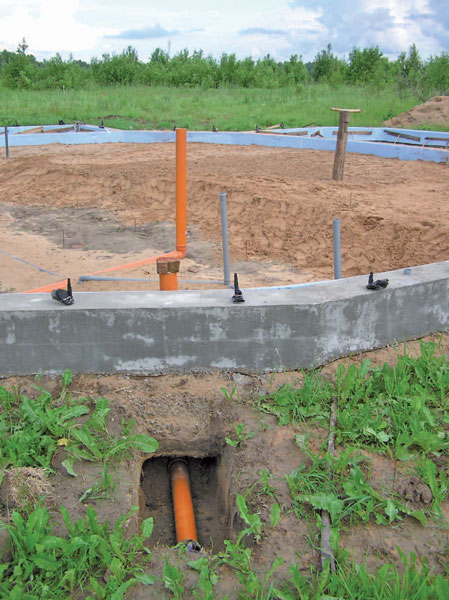
A sewer outlet is a section connecting
the inner and outer parts of the system. TO
it includes all the elements located from the point of passage of the riser through
overlap to the section of entry into the first well. If the receiving tank is a cesspool, then the length of the pipeline is from
the foundation to the container will be quite large - according to the rules, it should not
be less than 10 m (according to other standards - at least 5 m). Sewerage withdrawal from a private house in a cesspool directly
done only in the case of a close location of the tank to the foundation. Greater
the distance will require the installation of an intermediate manhole to perform
cleaning or repair work. Deduce
pipes are recommended at the stage of completion of the assembly of the foundation, until the sinuses are
covered with soil. In this way, all earthworks can be carried out at once and
start decorating the site, planting plants or building household
premises.
Output site requirements
The conclusion of the sewer from a private house must
meet the following requirements:
- the height of the point of passage through the foundation must ensure the standard slope of the pipe;
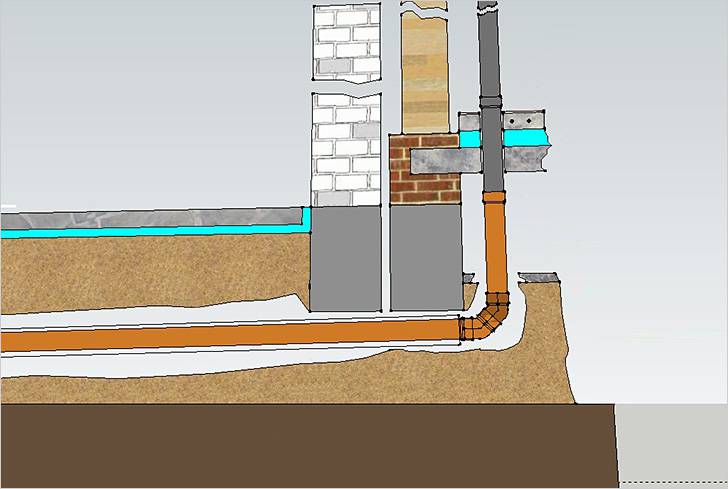
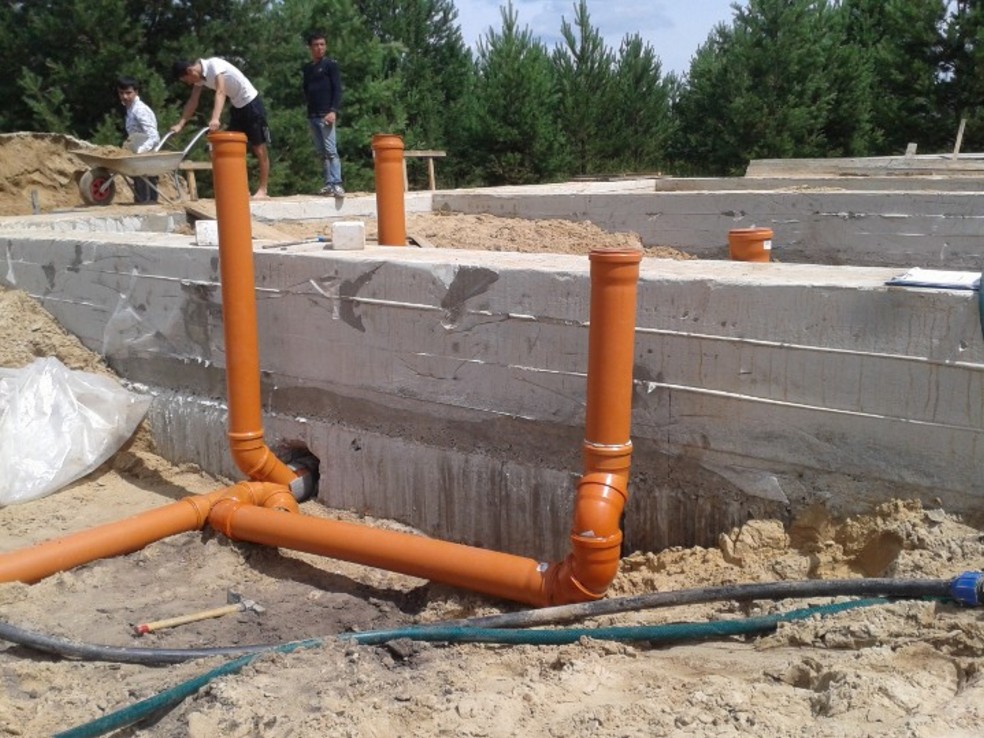
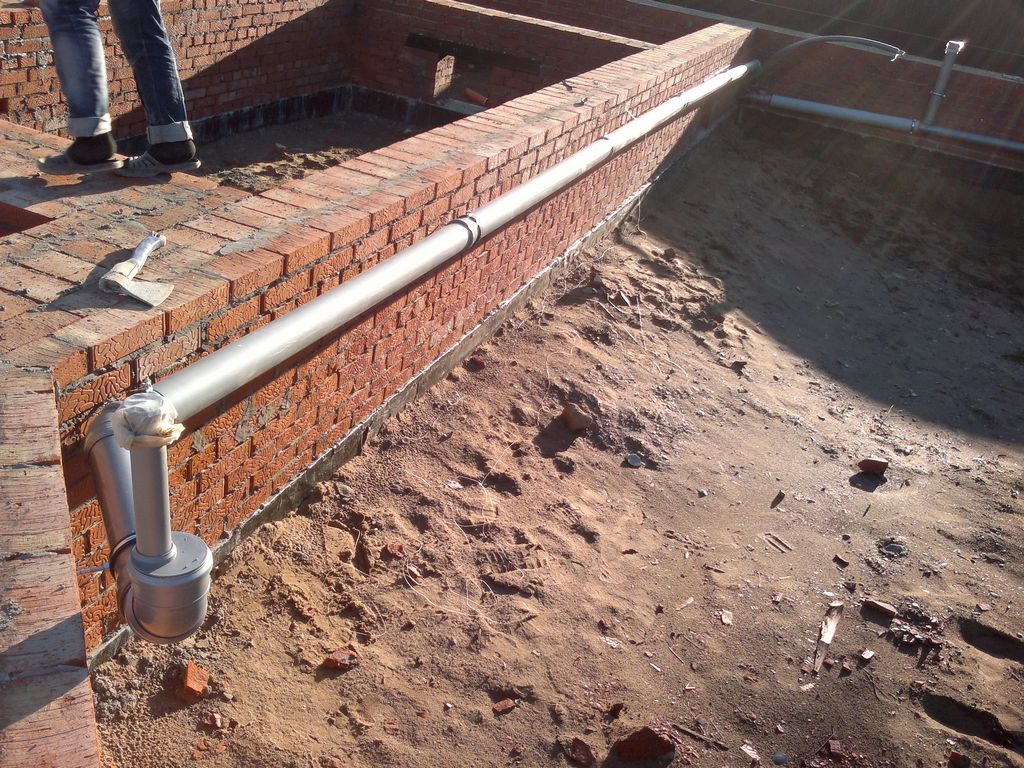
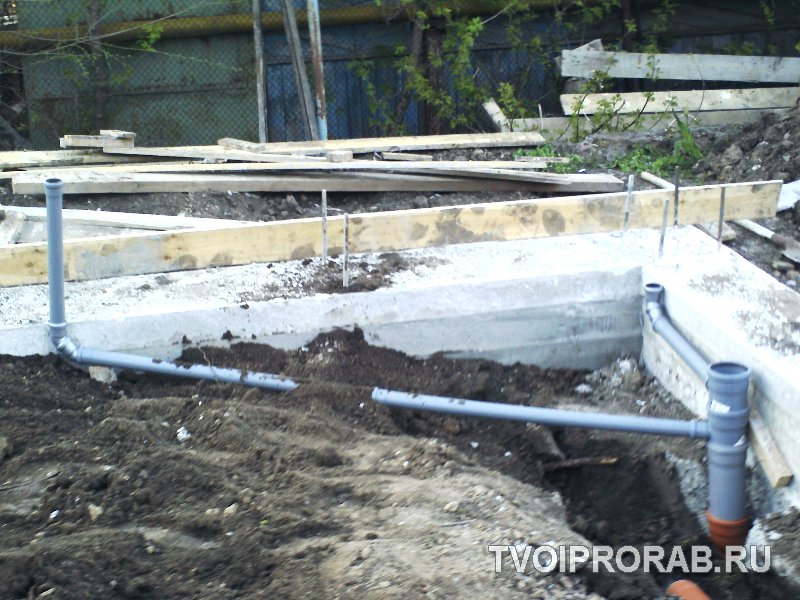
- at the transition from the vertical to the horizontal part of the system, it is forbidden to install one adapter at 90 °. It is necessary to use several elements at 135 ° to ensure a smooth transition;
- the channel is laid through a special metal sleeve;
- the hole in the foundation runs strictly horizontally. This means that all fittings must be located on the inside of the tape;
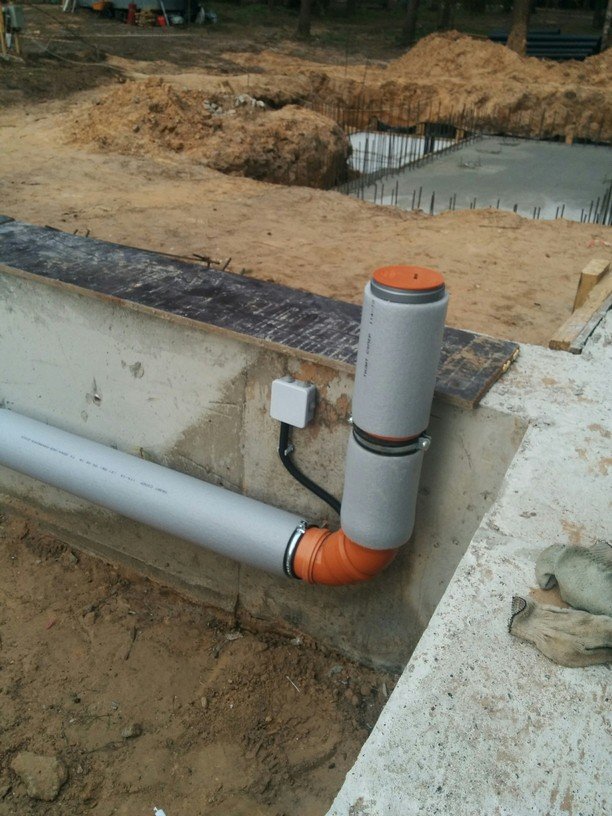
- starting from the section of passage through the ceiling and up to the point of entry into the well, a heater must be installed on the surface of the pipe.
Typically for the outside
systems use channels with a diameter of 110 or 150 mm. Before removing the sewer
pipe from home, you need to calculate the distance to the first receiving
tank and determine the height of the point of passage through the foundation. Point height
must ensure the standard slope of the line, otherwise the system will not be able to
work. Blockages will constantly occur, or the liquid will go back
side.
Sometimes there are recommendations on how to remove the sewer from the house.
under the foundation. This method is only suitable for houses with shallow
grounds. If the immersion depth exceeds the level of freezing of the soil,
have to dig a deep trench. The system is laid 40 cm below the level
freezing, which for the Moscow region is 1.4 m. In other regions
the depth reaches 2.5 m.Considering the slope of the sewage system, the
the receiving tank will be at a considerable depth, which is rarely the case
achievable. Groundwater will interfere, there will be a danger of weakening the foundation, and
etc.
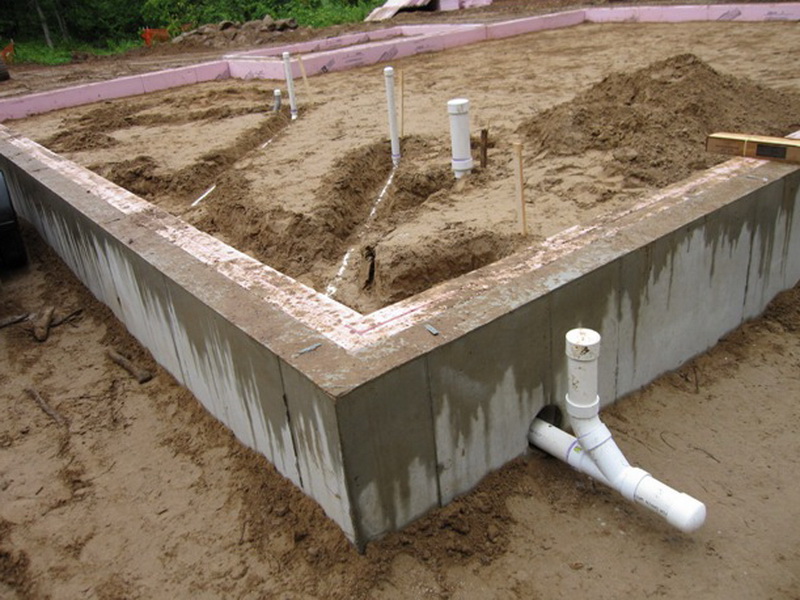
Most often, sewage is withdrawn from the house.
through the concrete tape. This method allows you to reduce the amount of earthwork, and
also reduces the impact of groundwater. If the project of the house is drawn up correctly,
the corresponding hole will be placed during the base casting stage. In others
In some cases, you have to drill a passage with a special tool.
Organization of the withdrawal of sewer pipes from the house
We have already decided how and through what our pipes will go outside the house, now we will consider the organization of the withdrawal of elements directly from the building. The basic requirements for work are as follows:
- If the plan of your house provides for a technological hole through which the pipe will go, then the work will be much easier for you. If not, you will have to break it through the finished foundation.
- The angle at which the pipe comes out must not be straight.
- At the junction of the outer and inner pipes, install a pair of bends at 135 °, this manipulation will reduce the risk of blockage, reduce the degree of wear of the elements, and reduce the noise level of the sewage system.
- The pipe at the base of the house must pass through a metal sleeve.
- Fill the space between them with a soft insulation material, your pipe, thanks to this manipulation at the outlet, will not freeze, in addition, if the house sits down, the elements will not suffer.
The laying of networks along the street is done using polypropylene and PVC pipes. If a serious load is expected on them (passage under the roadway, for example, or deep bedding), then choose two-layer elements with an outer corrugated surface. The gasket is carried out as follows:
Two-chamber septic tank made of reinforced concrete rings.
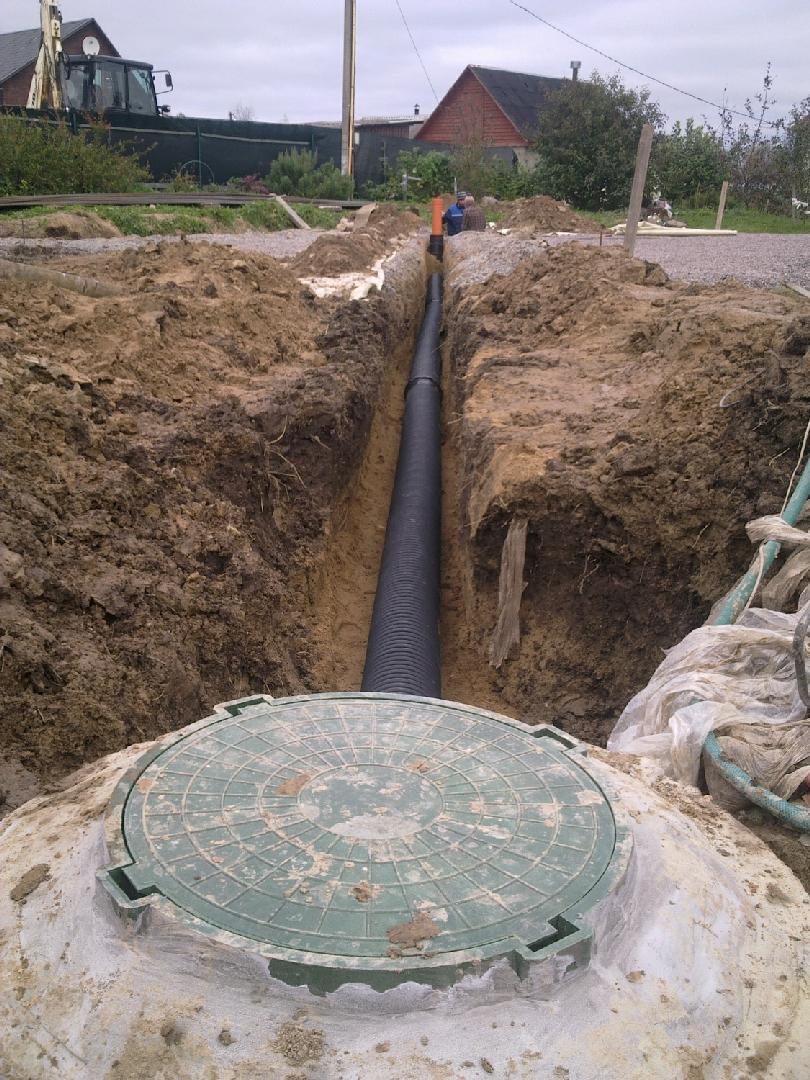
- Pipes are laid in trenches (they are pre-dug manually or with the help of special equipment).
- The width of the trenches should allow, after laying the elements, to make their joining. The minimum distance between the pipe (section - no more than 20 cm) and the inner slope of the trench is 20 cm (if pipes of larger diameter are used, the distance increases).
- The trench is dug so as to ensure the slope of the pipes.
- The bottom of the trench is carefully rammed, it should not contain large stones, frozen areas. Fill the excavation site with soil and compact.
- Make a sand cushion under the pipes, this is a must for all types of soil.
- Lay the pipes in the prepared places.
- Start connecting the elements from the place where the sewer is taken out of the house.
- Use silicone grease to connect (alternatively, liquid soap). Apply it to the smooth end of the element, which immediately insert into the socket with a rubber cuff.
- If necessary, turn the pipeline using smooth bends.
- Connect the external pipeline to the septic tank chamber with a rubber seal, this connection should not be rigid.
- Fill the pipes first with sand, then with soil that was previously removed from the trench.
Laying a sewer network when arranging a house outside the city can be done independently. Before performing work of this type, a novice master should carefully study the requirements of sanitary and building codes, because only if they are observed, their design will work effectively and will last a long time.
Ivan, in this case, you need to push off from a bucket with a volume of 10 liters. Fill a full bucket with sand and add 1/3 of the cement; everything will be mixed with 10 liters. or.
October 16, 2015
How is the calculation of ready-made concrete for 1 square meter of a 5 cm thick screed? How much sand and cement is required for this? So as not to buy too much. Want.
12 october 2015
For different grades of concrete, if measured by volume, then only the ratio of sand and crushed stone to cement changes, and exactly half of the volume of cement is always taken water.
20 October 2015
Ivan, in this case, you need to push off from a bucket with a volume of 10 liters. Fill a full bucket with sand and add 1/3 of the cement; everything will be mixed with 10 liters. or.
October 16, 2015
How is the calculation of ready-made concrete for 1 square meter of a 5 cm thick screed? How much sand and cement is required for this? So as not to buy too much. Want.
12 october 2015
For different grades of concrete, if measured by volume, then only the ratio of sand and crushed stone to cement changes, and exactly half of the volume of cement is always taken water.
A few additions: 1. If you need to perform high-quality waterproofing with liquid rubber, it is advisable to apply geotextiles over the entire surface. Consumption.
23 september 2015
How and how to make the upper border of the foundation cladding (natural stone, slab)?
Copyright 2014–2017,.
- foundation work
- Reinforcement
- Protection
- Instruments
- Mounting
- Finishing
- Solution
- Payment
- Repair
- Device
- Foundation types
- Tape
- Pile
- Columnar
- Platen
- Other
- About the site
- Questions to an expert
- Editorial staff
- Contacts
- Foundation works
- Reinforcement of the foundation
- Foundation protection
- Foundation tools
- Foundation installation
- Foundation finishing
- Foundation mortar
- Foundation calculation
- Foundation repair
- Foundation device
- Foundation types
- Strip foundation
- Pile foundation
- Column foundation
- Slab foundation

