Work technology
Foundation waterproofing technology involves several successive stages of work.
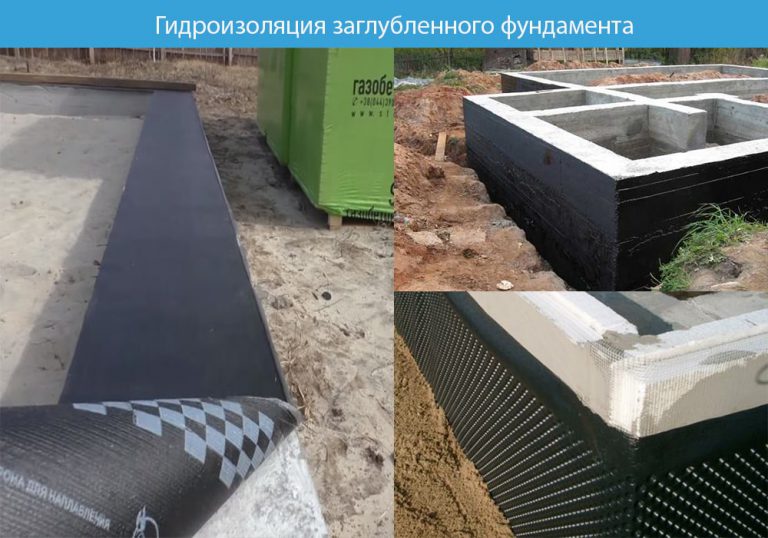
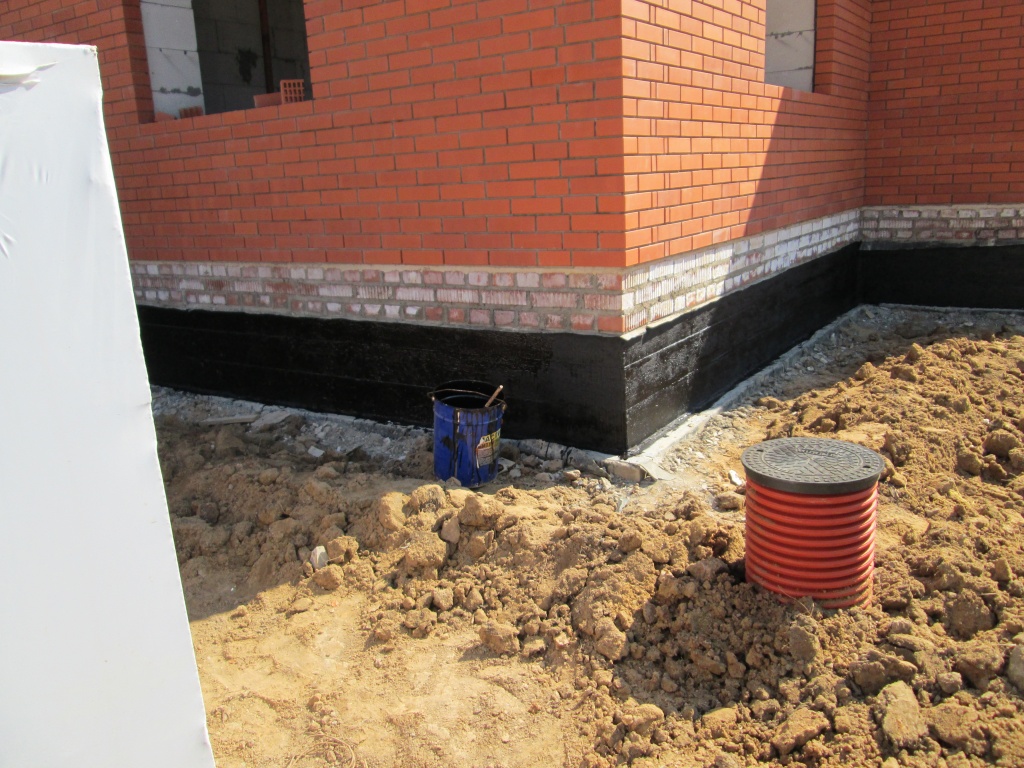
If groundwater flows much below the base, one meter or more, a horizontally laid roofing material and vertically coated foundation walls are sufficient for waterproofing.
If the water flows higher, then it is necessary to produce a more laborious method of waterproofing the foundation, consisting of several stages:
- It is recommended to install two layers of horizontal insulation, with mastic smeared between them.
- Then, in two stages, carry out a vertical defense. The first layer is the coating material, the second is the pasting of roll products.
If possible, protect all parts of the basement and foundation with penetrating insulation to prevent dripping water in the structure.
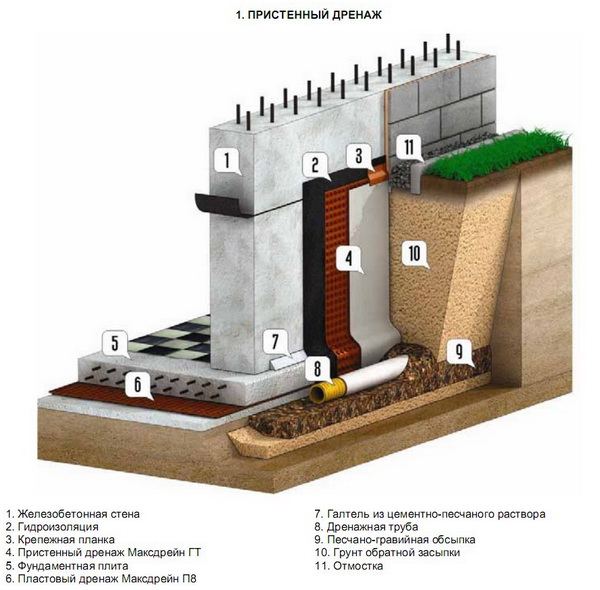
With frequent precipitation or groundwater running above the level of the foundation or basement, a drainage system is additionally required.
What to consider
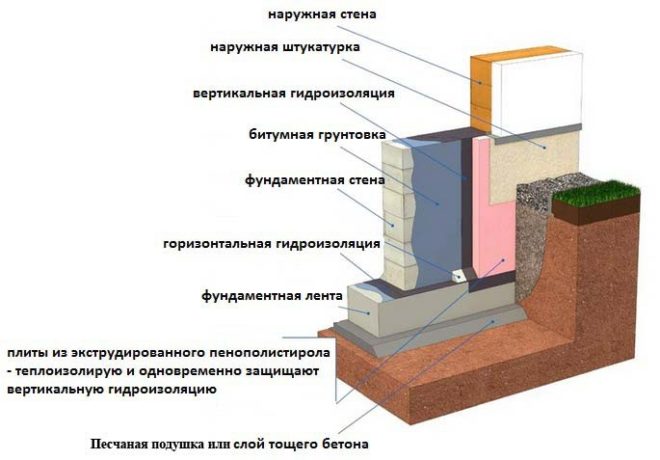
The strip foundation is a closed "tape" of reinforced concrete blocks or monolithic reinforced concrete (less often of brick or rubble masonry). This type of base resists well the forces of frost heaving and distortions.
When building a strip foundation, waterproofing is important. Correctly selected protection will preserve the strength of the foundation and ensure a long service life.
Lack of water protection, on the contrary, will lead to negative consequences. The harm can be from dampness in the house to cracks in the foundation and walls.
The foundation is a crucial part of the house and the whole structure depends on its strength and reliability. Therefore, foundation hydraulic protection is an important and crucial stage of construction.
Waterproofing the finished foundation
If waterproofing work was not carried out during the laying of the foundation, this significantly complicates the task and does not make it possible to protect the structure in full.
The waterproofing of the finished foundation begins with the preparation of the trench along the entire perimeter. If this is not done, only the outer part of the tape can be processed, which will significantly reduce the protective properties of the structure.
Waterproofing the finished foundation is almost impossible without preliminary excavation of a trench.
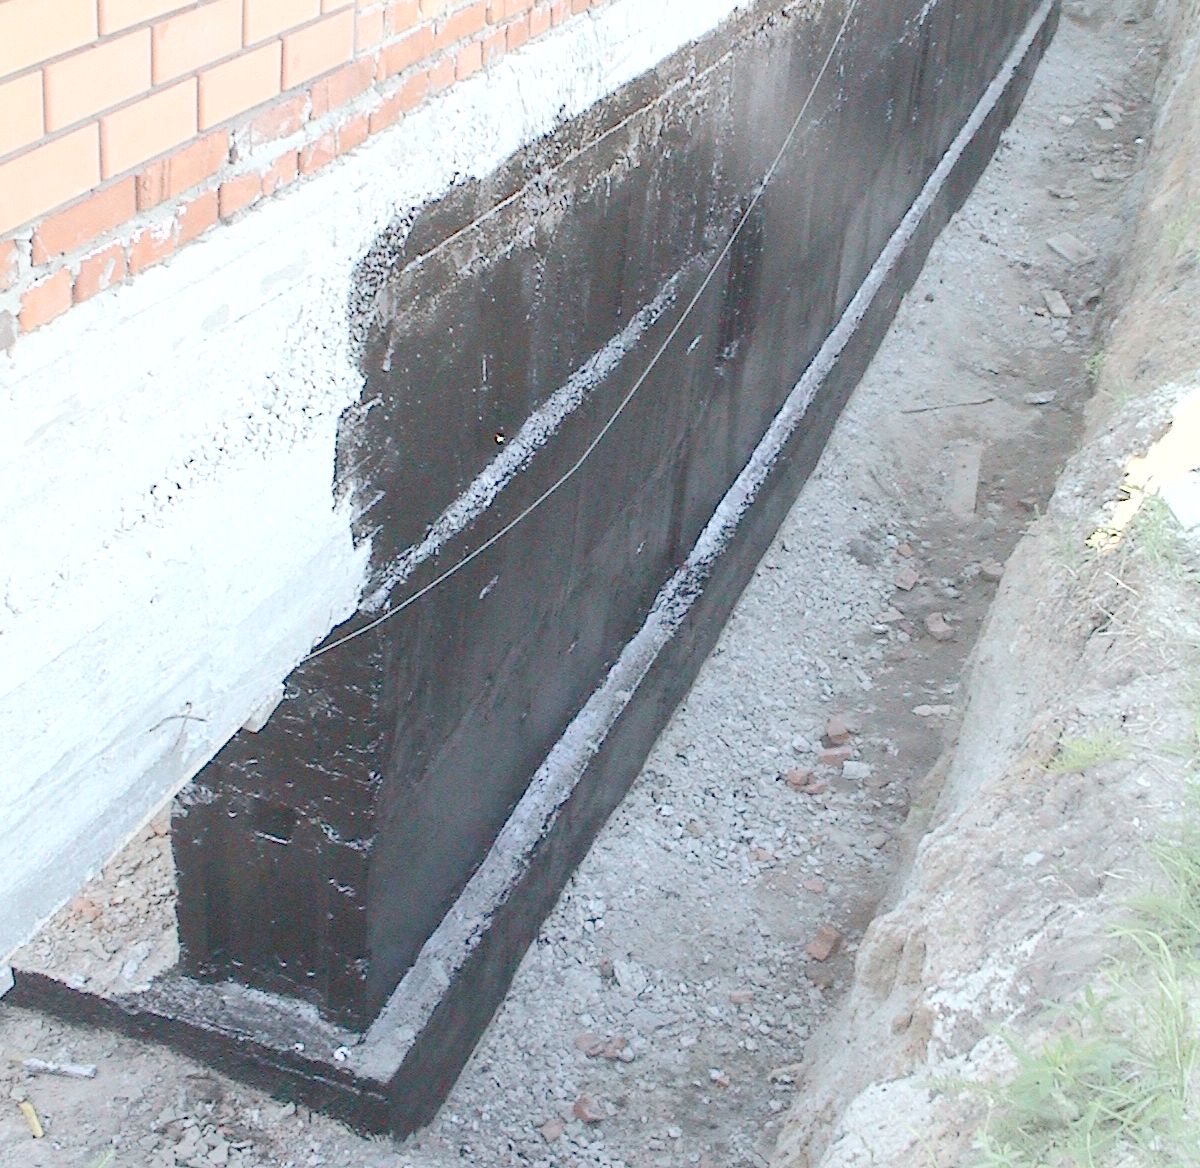
The surface of the foundation is checked for chips and cracks. If found, they should be repaired with a solution, after which a layer of plaster should be applied over the entire surface of the foundation. When the plaster has dried, the selected waterproofing material is applied to it. And after the waterproofing layer has dried, the trench is buried and a blind area is arranged on top of it.
DIY waterproofing
Do-it-yourself foundation waterproofing can be arranged in several ways. The easiest and most reliable method to protect the walls of the foundation and its base is
the use of waterproofing mixtures of penetrating action... The advantages of penetrating additives to concrete are the simplicity of preparing waterproofing from water and the ability to exclude contact with more toxic and easily soiled bitumen compositions.
By turning into a crystalline substance, they prevent the penetration of moisture and corrosive substances to corrode the material. Concrete becomes stronger and more resistant to chemical and water attack. Its susceptibility to these substances becomes 4 times less. Frost resistance increases significantly.
Foundation waterproofing materials
Penetrating mixture "Pronitrate Mix" is added to water for preparation of concrete solution (in the ratio of dry mixture: water - 1: 1.5). The solution itself is kneaded using standard technology. The consumption of the product is 4 kg / m3 of concrete.
Penetrating waterproofing tools and equipment:
- gloves;
- Master OK;
- bucket;
- concrete mixer;
- shovel.
Diy foundation waterproofing scheme using Penetrate
Penetrat Hydro system applied to walls outside or inside the premises, providing a surface and penetrating waterproof layer.
The use of the product is preceded by a thorough preparation of the surface, which aims at maximum adhesion of the drug and its deep penetration. System consumption
is 200-300 g / m2 of surface.
Preparation of the wall for processing by the GS "Penetrat Hydro":
- removal of mortar and building material residues from the surface;
- cutting seams with a jackhammer to a depth of 10-20 mm;
- thorough cleaning of dirt and dust residues; - saturation with water (5 liters of water per 1 m2 of surface);
- application of the system until a mirror-like surface is obtained (in 2 coats, with an interval of 24 hours between coats).
Do-it-yourself foundation waterproofing is ready! Further finishing of the wall is possible one week after the completion of processing.
Compliance with the basic requirements for waterproofing works allows you to obtain a building that is resistant to the action of melt and groundwater. The use of high-quality protective compounds "Penetrat" leads to the maximum waterproofing effect during the construction of building structures, as well as the processing of finished surfaces. Read more about the use of GS Pronitrat Mix and GS Penetrat Seam. here.
Comparison of materials
In order to make it easier for you to compare all the "pros" and "cons" of various materials, we have combined them into a table.
Table "Characteristics of materials for waterproofing"
| Material | Dignity | disadvantages | Price |
| Bituminous mastic |
Suitable for all types of foundations. The ability to completely apply waterproofing alone. |
The coating lasts no more than five years. | One of the cheapest waterproofing options. |
| Roll waterproofing | A versatile material suitable for both horizontal and vertical waterproofing. | The need for preliminary surface preparation. | A wide price range - from low (roofing felt) to high (technoelast, glass-insulated). |
| Liquid rubber | Reliable waterproofing material with a long service life. | Rather complex application technology. The need for preparatory work. | Average price category. |
| Plaster insulation | Ability to skip surface preparation. | The need to use an additional layer of waterproofing. | The middle category, but due to the savings on preparatory work, can be attributed to the low. |
| Bentonite mats | One of the most reliable and durable materials. | Hardly ever. | High price category. |
Modern blends
Liquid rubber. The compositions are dispersion particles in H2O modified with a polymer. The advantages of modern insulating substances are that they are non-flammable and non-toxic, they have no smell. Liquid rubber can also be used on a damp surface, it adheres perfectly. When the coating dries, insulating membranes form inside.
The disadvantage of such protection is similar to the previous method: it can be damaged in the process of falling asleep. Because of this, it is recommended, after applying the composition with a spray gun or manually, to additionally carry out work on fixing with geotextile (or expanded polystyrene). This also gives you thermal insulation.
Before applying liquid rubber, it is necessary to pre-prime with a mixture of "rubber plus water" in a one-to-one ratio or other special compounds. After drying (about 60 minutes) the soil layer is covered with a pair of rubber layers.
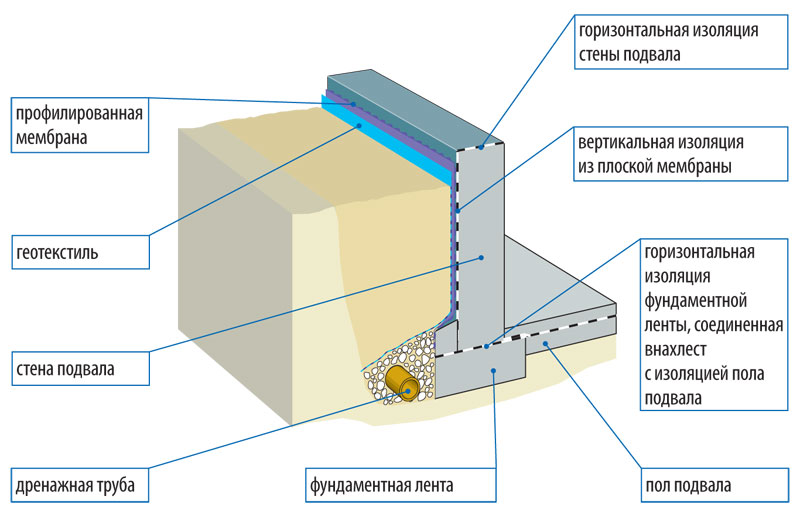
If the soil water is located high, the foundation surface is unlikely to qualitatively protect the basement from moisture ingress.In order to protect the strip foundation in this case, a system of channels is being developed, through which moisture is removed.
On heaving soil, when arranging plinths, the formation of drainages is a prerequisite. To do this, you need to arrange drainage in a ring, lower than the floor of the basement. Distance - 5-8 m from the walls of buildings. Internal areas are insulated from moisture.
Wall drainages are applicable on clay soils from the outside of the building at a short distance from the walls. The filling depth should not be more than the depth of the foundation. Reservoir drains are used when the water level of the soil is high. Then a pipe system is laid.
A ditch is dug around the foundation, the bottom is covered with broken bricks or large gravel. After that, the drainage pipes are laid. They are closed with geotextiles. The system of "drainage" pipes should be laid out in such a way that the water is drained into the well.
To protect the foundations from rainwater falling on them and under them, blind areas are arranged along the perimeter of the structure. The blind areas are concrete strips that deviate from the wall of the building from the outside by 2-5 °.
Types of waterproofing
When, at the time of the design work, a variant of the strip foundation arrangement is selected, certain studies are required that will help in the correct performance of the work:
the base should be below the freezing point of the soil;
- the level of groundwater is taken into account;
- the requirements for a waterproofing coating may change taking into account the purpose of the facility under construction;
- it is necessary to carry out a study of the area on the issue of a sharp increase in the water level during the flood period or during heavy precipitation;
- an important factor is the strength of the heaving of the soil, which changes its level.
According to the principle of location, the waterproofing coating applied to the foundation base can be divided into horizontal and vertical. Each type differs in execution options.
Horizontal
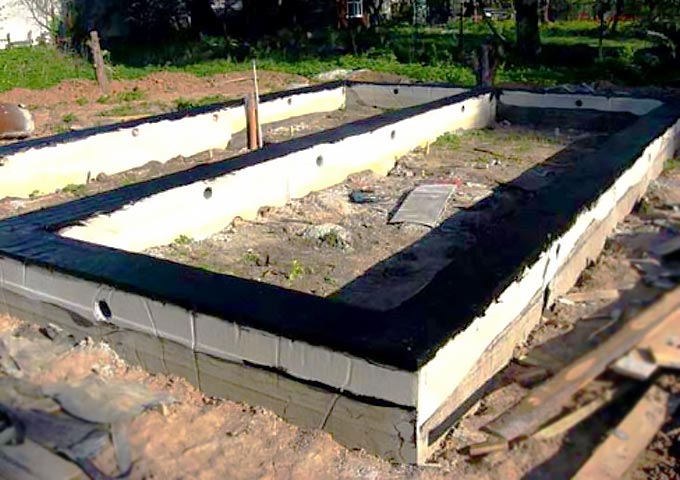
This option of protection is performed before the start of the construction of the foundation, in order to prevent the penetration of moisture droplets from the ground. It is a special base, sometimes even slightly larger than the perimeter of the future structure.
For a small-sized structure, it is enough to pour a sand-cement screed in a ratio of 1 to 2. In the process of building a residential facility, it is necessary to carry out enhanced preparation:
- sand is poured and rammed along the bottom of the trench, the layer height of which should be from 20 to 30 cm;
- the first layer of this pillow can be made of clay;
- a screed is arranged along the sandy layer, the thickness of which varies from six to eight centimeters;
- it is necessary to wait two weeks for the solution to dry completely;
- the screed is covered with bitumen, roofing material is laid, mastic is applied again;
- the final stage is pouring another screed.
As soon as the mortar is dry, you can begin to build the foundation. If the planned object is built of wood material, it is recommended to carry out the upper horizontal isolation of the base from water. Otherwise, moisture will penetrate into the wood and cause rotting.
Vertical
The main difference of this type is that its implementation is possible not only during construction work, but also on the finished object.
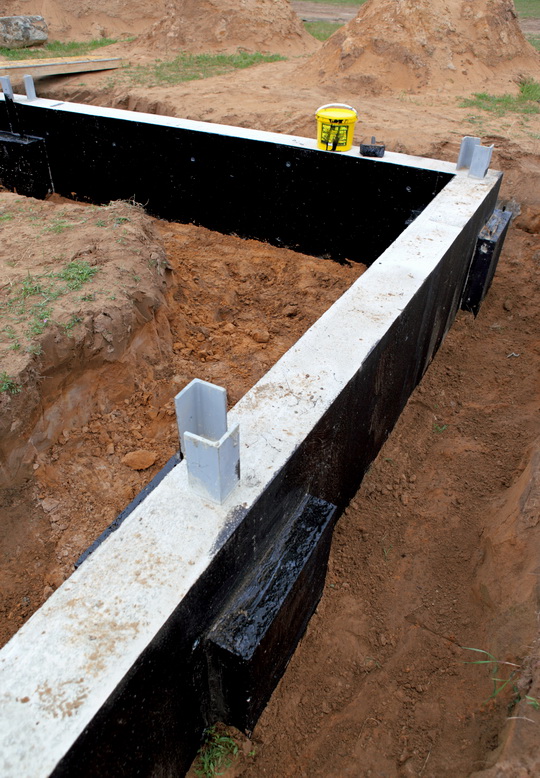
In this case, specialists can use various materials - polyurethane mastic, roll bitumen, polymer-based membranes. Each product is distinguished by its durability, duration of the operational period, elasticity index, method of application and price.
Frequently used protection methods
Spray-applied waterproofing.
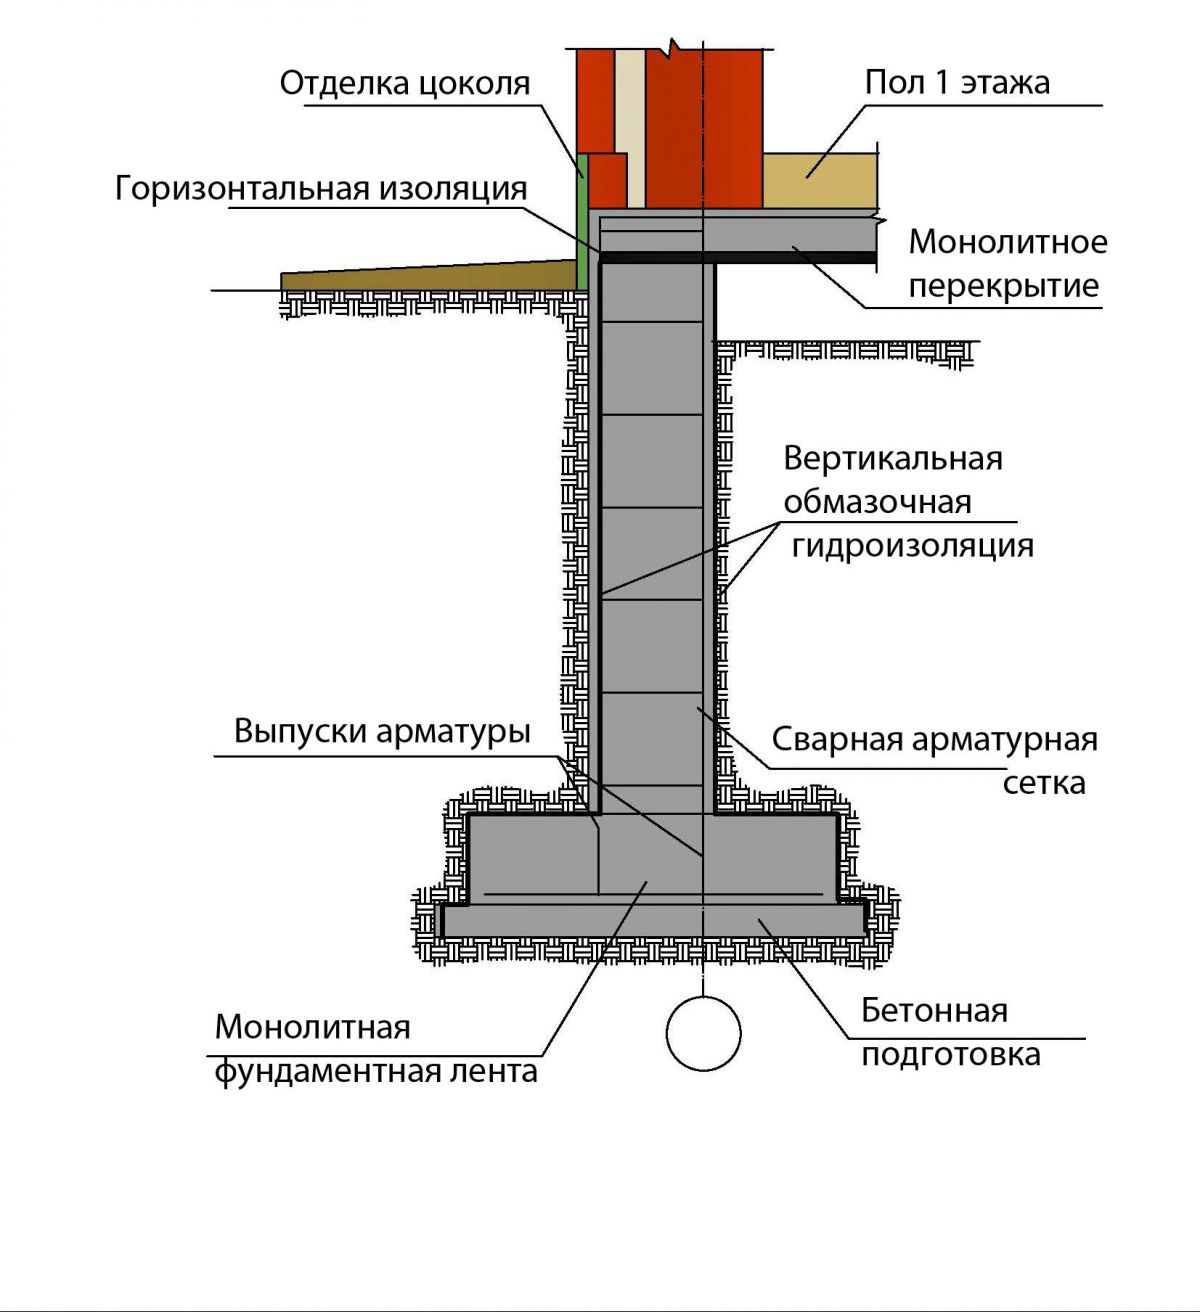
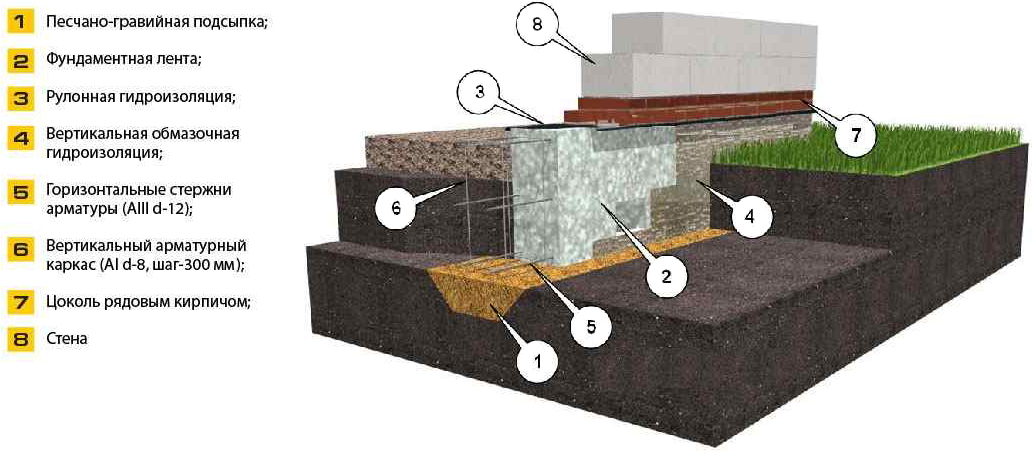
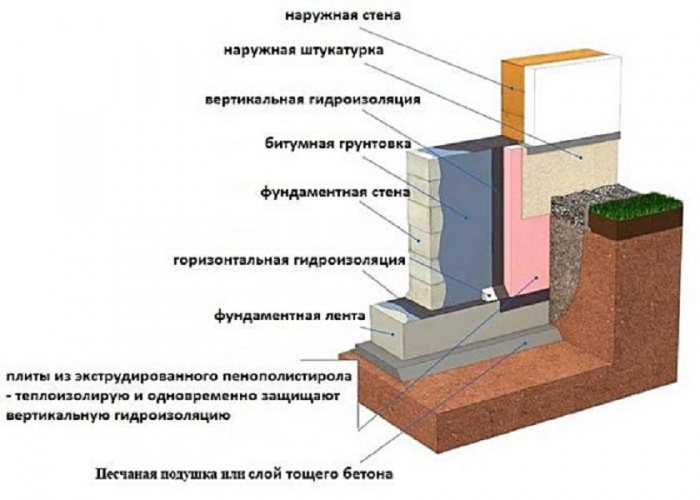
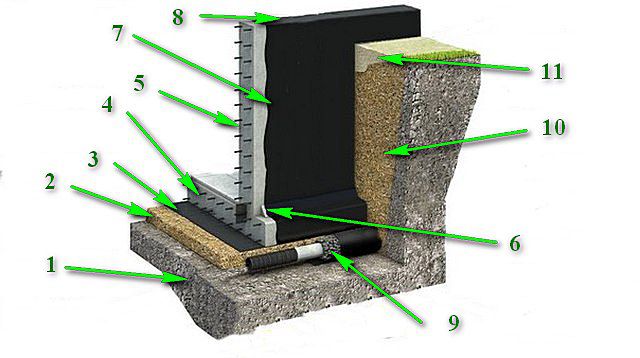
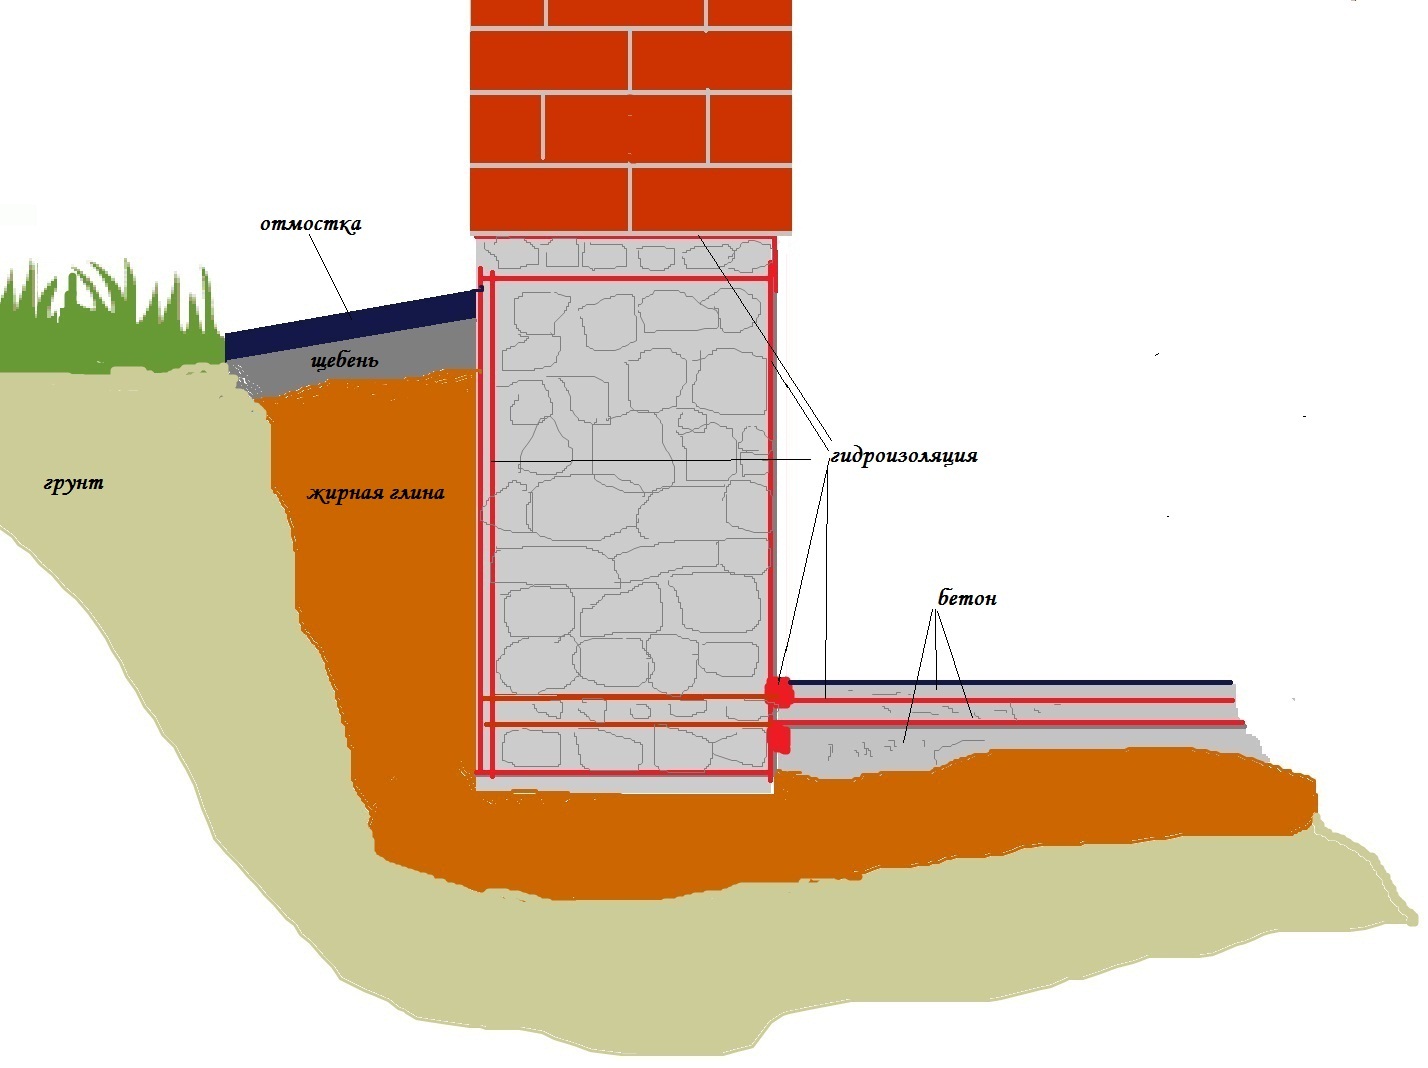
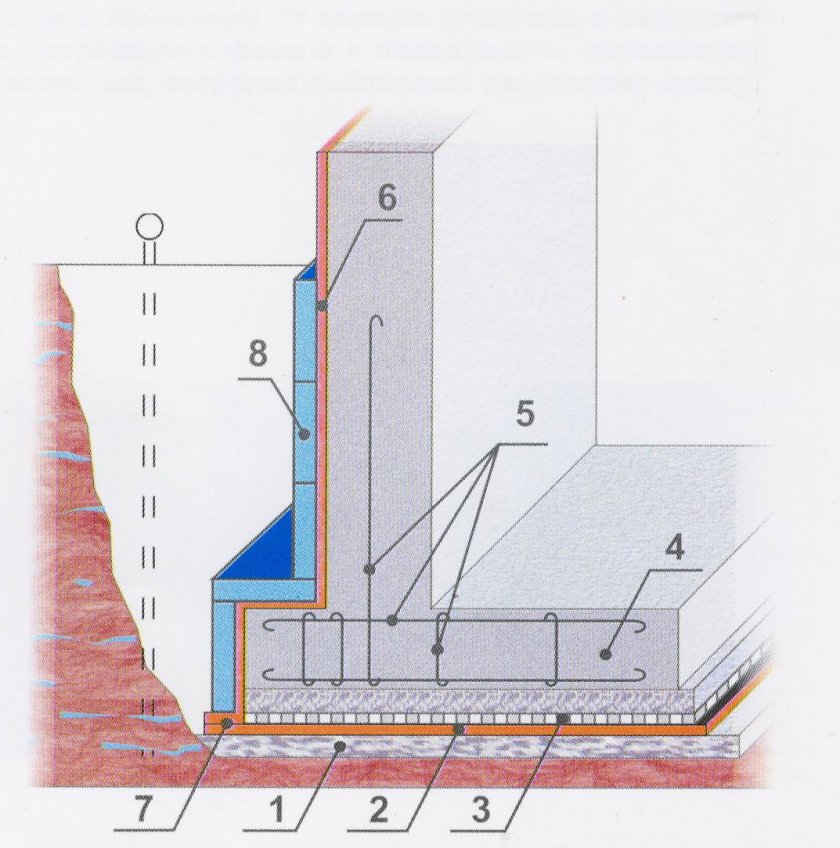
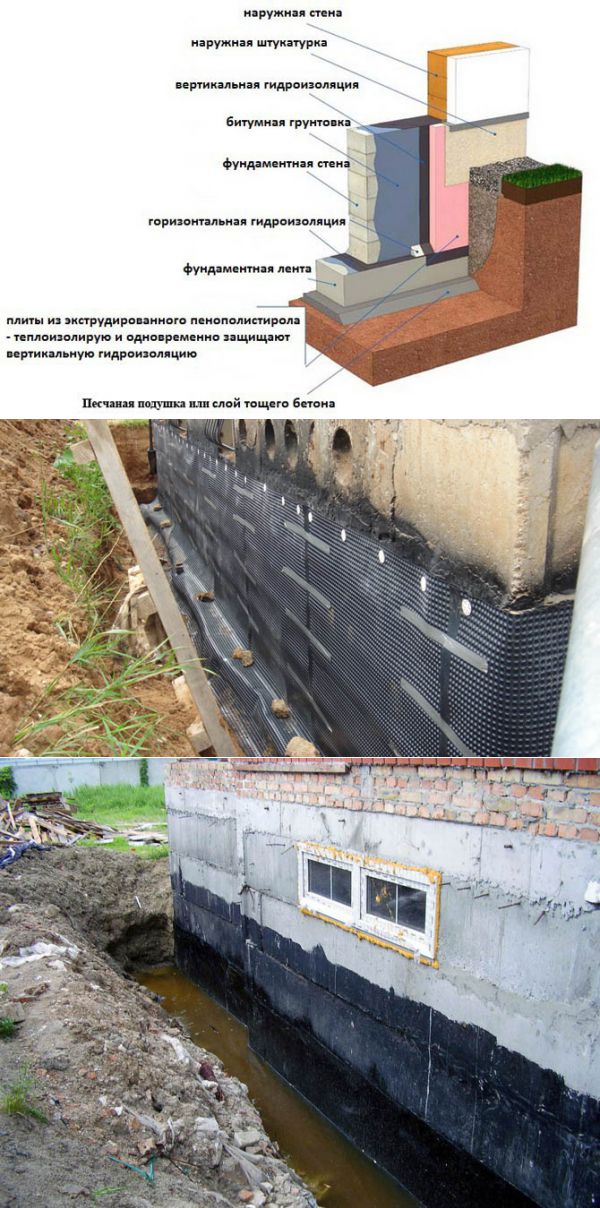
Diagram of a strip foundation with waterproofing.
This method does not require special surface leveling work. All that is needed is to remove the dust.For spraying liquid rubber, a special spray is used. The material is quite expensive and it is advisable to use this method of insulation for structures of complex shapes, which are very inconvenient to paste over with roll material. It is possible that a new building will be built in the immediate vicinity of an existing building, then the use is also justified.
After spraying, reinforcement with geotextolite having a density of at least 130 g / m² should be performed.
Drainage protection.
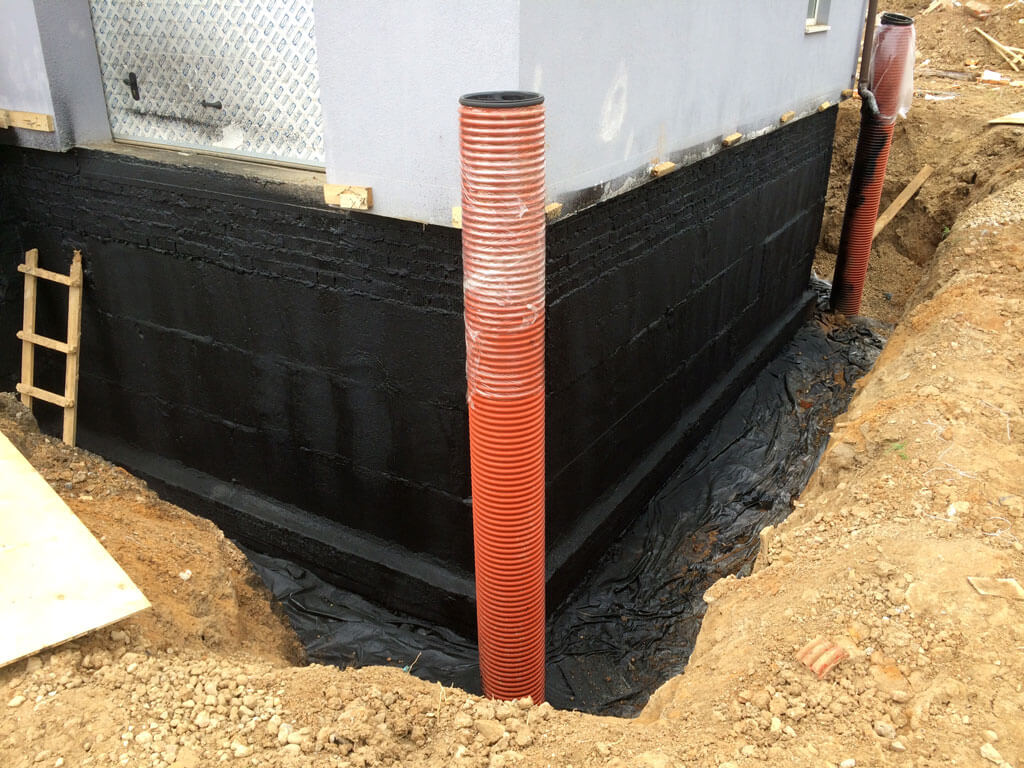
Such protection is almost always necessary. A trench is being dug along the perimeter of the building somewhat deeper than the bottom of the foundation. The trench is covered with crushed stone, on which corrugated drainage pipes are laid, with a slope towards the corner of the structure. At the corners (at least two), drainage wells are installed, the depth of which should be about 50 cm below the foundation. Wells must be equipped with pumps and a level sensor.
Isolating the base of the building and reliably protecting it from water is the main task when laying the foundation. This will ensure the strength and durability of the building.
Overview of the main materials for waterproofing screed
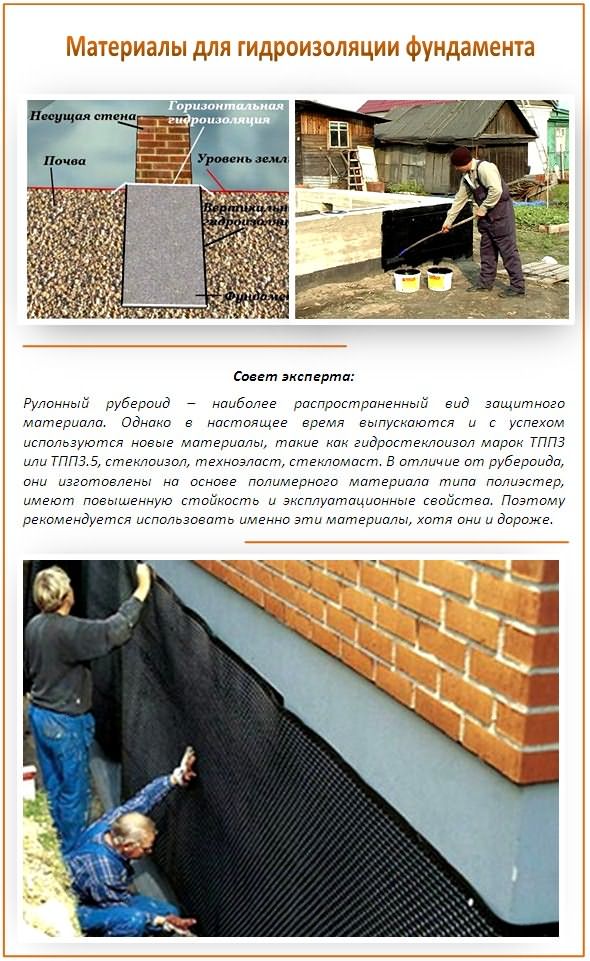
That at the time of using the materials, I knew about them. Roofing material is roofing cardboard. It is impregnated with petroleum products. In particular, bitumen. And in two layers: 1. Internal - it is soft bitumen. 2. External - refractory. An external powder is used to increase the strength. The advantages of this product are enough:
- Reliability.
- Durability.
- Compliance in self-execution.
- Provides waterproofing and vapor barrier.
Roofing material is not devoid of disadvantages:
- He is afraid of direct sunlight. Therefore, it requires finishing with plaster. Not always, though.
- The material located in the ground is protected with asbestos-cement sheets. Not always, either.
- Roofing material does not tolerate caking. Storage in an upright position solves the problem.
- The mastic spreads easily on concrete.
- Has a good adhesive effect.
- Does not exude an unpleasant odor. Although all the work was carried out on the street. Among the minuses, I single out those that I could not cope with due to inexperience:
- The mastic gets very dirty. You need to be careful or wear protective clothing that you do not mind.
- Dries for a long time. In the open sun, a day is enough, but under roofing felt the drying time is several days. It depends on the air temperature and humidity.
- Does not tolerate contact with water. It was a sad experience of mine. About him further.
The mastic consists of petroleum bitumen with a solvent. For the more curious builders, I will list the technical characteristics of the product for covering the foundation:
- Bond strength 0.1 MPa. This applies to concrete, metal, wood.
- Water absorption per day 2% by weight.
- Water resistance is positive. Time and pressure conditions are 72 hours and 0.001 MPa, respectively.
- The proportion of non-volatile substances is from 75 to 90%.
- Use temperature from -10 to +40.
- The layer dries for a day. My observations confirm a longer drying time.
The materials I purchased were fresh and free from defects. This is the main question when choosing even an expensive building material.
Waterproofing roll materials
Such material is ordinary roofing material or hydroglass. The latter is based on fiberglass or fiberglass. This material is impregnated with an oil-bitumen mass, to which plasticizers are added. The surface is covered with vermiculite powders. The material does not rot, fungus does not form on it and insects do not start.
Roll hydrostekloizol is laid with uniform heating of the surface. Spot heating is not allowed. It can cause fire. An air dryer capable of creating a high temperature is suitable for heating. Can be heated with a diesel or gas burner. For the foundation, this is the main way to carry out waterproofing work.
There are two options for unrolling rolls:
Vertical.
Device diagram injectable waterproofing of the foundation.
The method is quite convenient. Laying starts from the top horizontal part of the foundation. After the vertical plane is closed to the width of the sheet, it is bent and laid on a horizontal surface. It makes no sense to weld the sheet down to the horizontal surface, since under the weight of the poured soil, it will reliably connect to the concrete. The next sheet is overlapped.
Horizontal.
With this method, the roll is rolled horizontally along the foundation. First, they are rolled out on a horizontal surface without welding (the sheet will be pressed against the soil). Then they begin to weld to the vertical wall so that the lower edge of this row covers the previously laid horizontal sheet by about 10-15 cm. In this case, it is possible to weld not over the entire width of the sheet, but only in its upper part. All this will then press against the vertical surface through the insulation with bulk soil and gluing will occur under the weight of the soil. The laying work ends with the next sheet, which will capture the upper horizontal part.
This coating option is more laborious due to the inconvenience of heating long sheets of roll material.
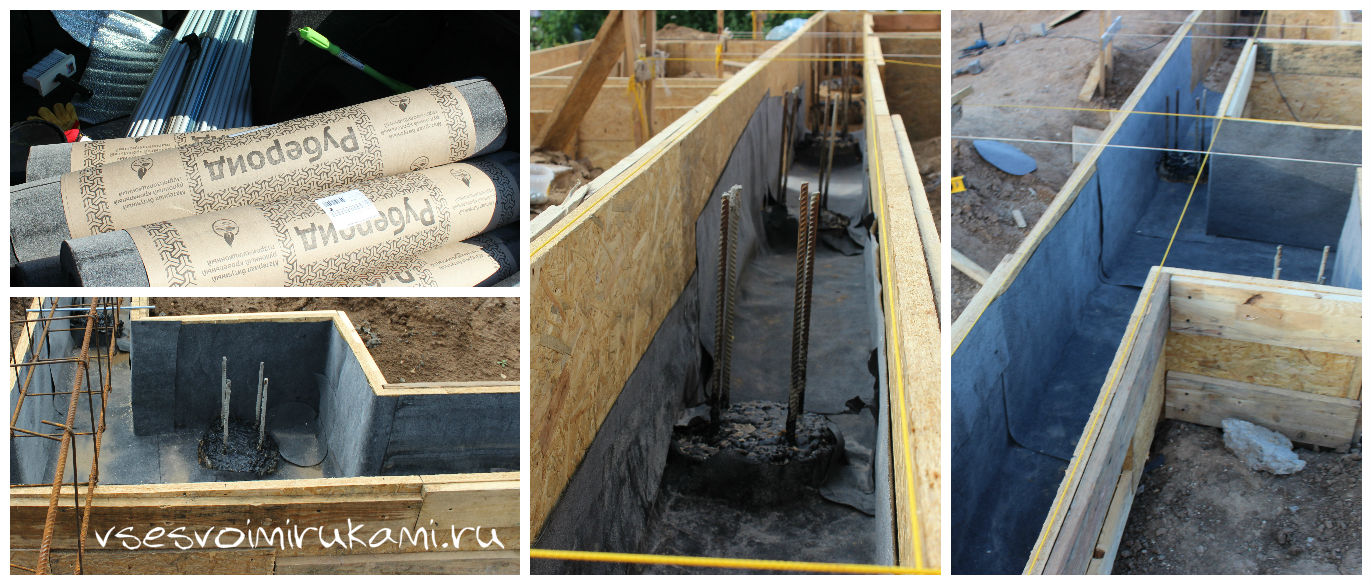
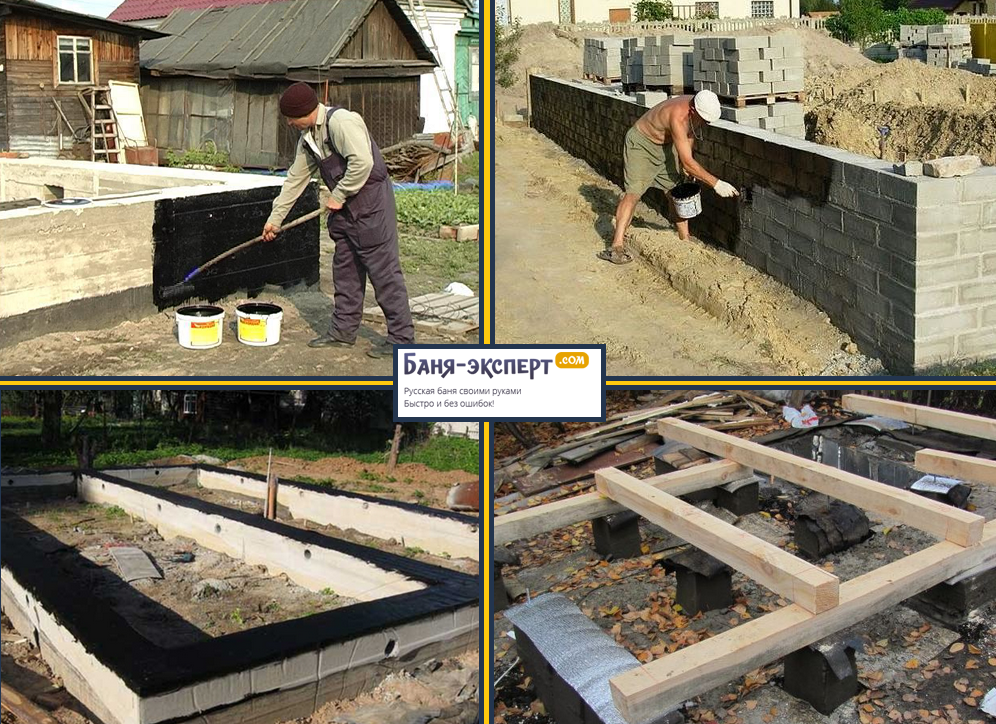
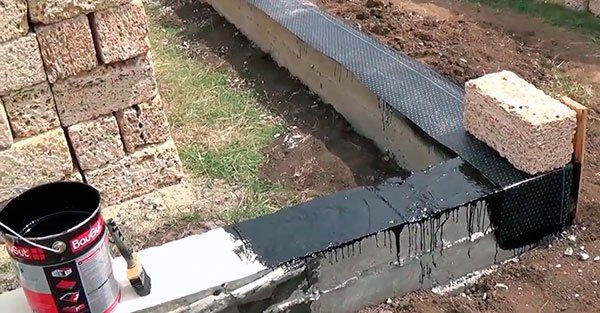
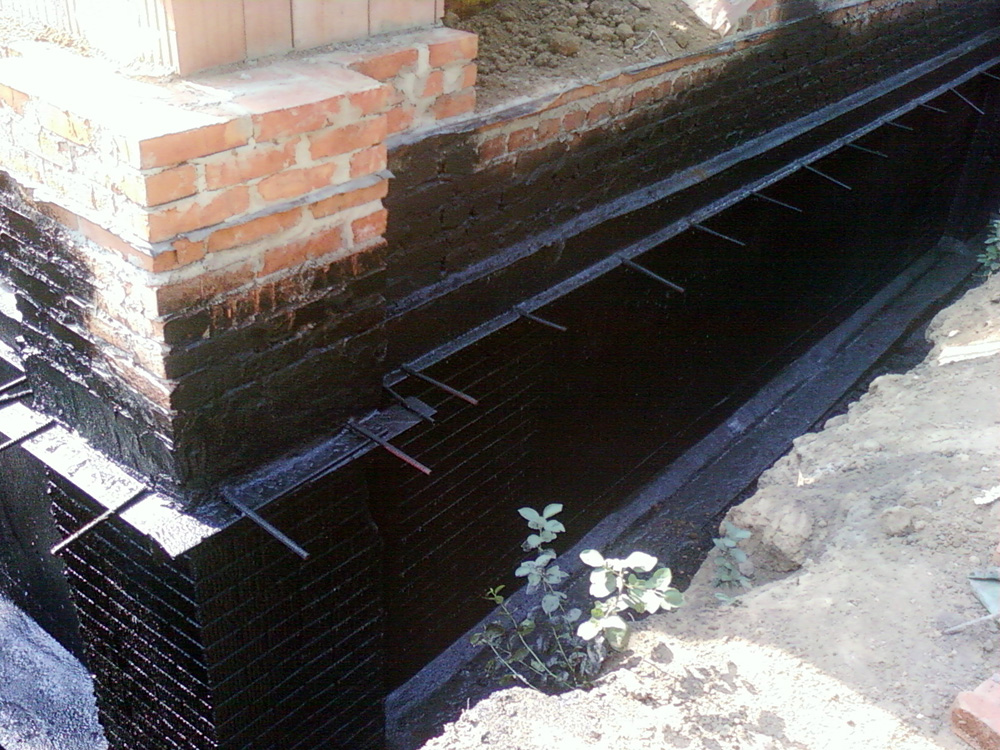
The foundation is insulated with roofing material, after having previously treated it with hot bitumen mastic. Apply 2 layers with an overlap (minimum 10-20 cm).
Both roll materials must be applied to a well-leveled surface.
Installation of foundation formwork
If you did everything correctly, then proceed to the installation. Much depends on the size of the building. If you want to build a small and light house, then you can get by with a simple formwork installed at once in the trench. If the house is large, then we begin the installation of the formwork gradually, starting from the bottom of the trench. It is also necessary to set the angles of rigidity and additionally strengthen all sides to avoid further deformation. The second option is wall formwork, which is necessary for concreting the basement and walls of the basements.
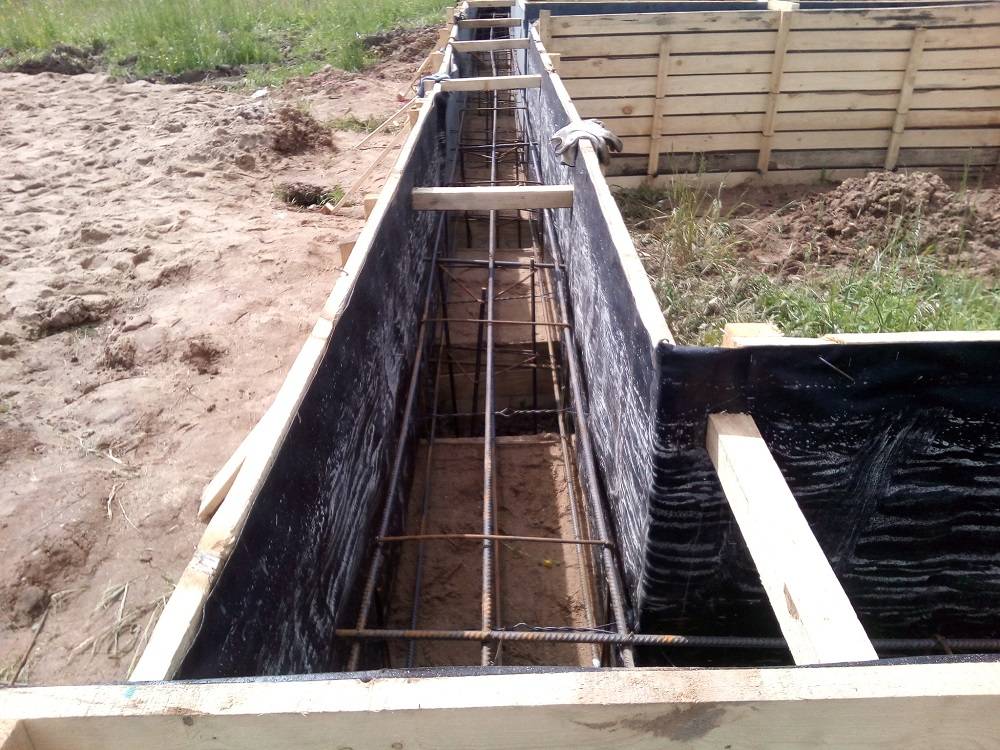
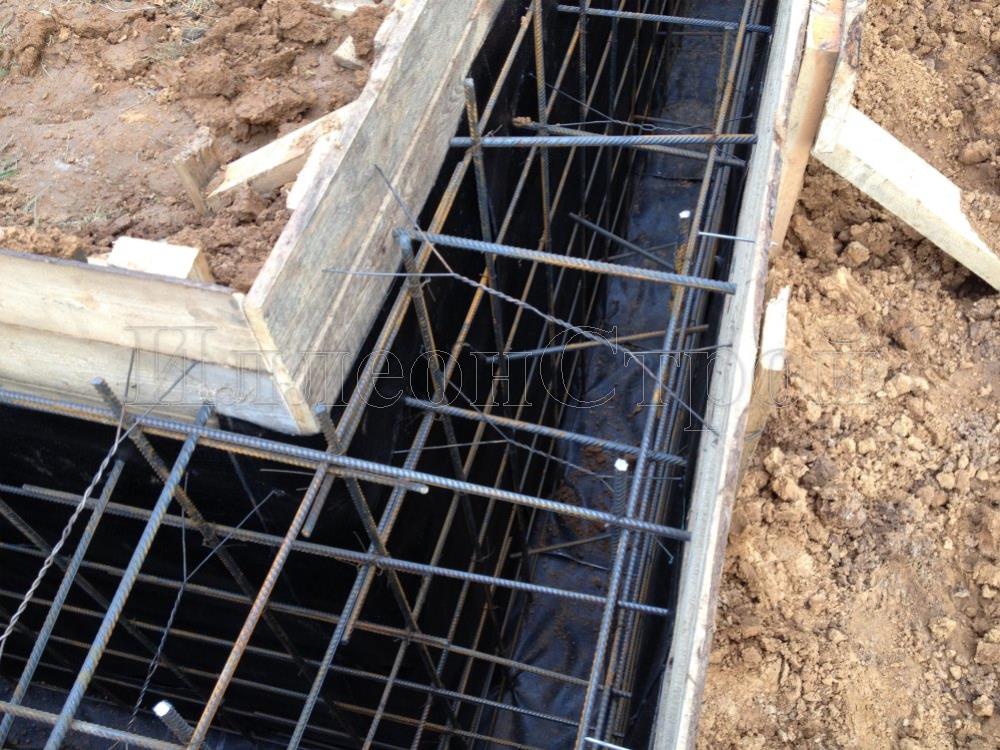
After preparing the trench, metal pegs are driven into its bottom at such a distance from the walls that formwork boards can be inserted between them, plus a gap of 10-12 mm. The outer part of the formwork is reinforced with various supports, which will stop the deformation of the formwork under the pressure of the poured concrete. There are three types of supports in total: horizontal, vertical and diagonal. If the width of the foundation exceeds half a meter, then it is necessary to use this entire row of supports.
There is also a non-removable formwork. It cannot be removed and, after the concrete has dried, remains a structural part of the building. Fixed formwork has a number of very important advantages over conventional formwork:
Scheme of the formwork device for the strip foundation.
- First of all, it greatly facilitates installation.
- Significantly speeds up the work of formwork installation.
- Provides additional protection against noise and heat loss.
- Increases resistance to temperature daily and annual changes.
- Does not rot and practically does not decompose (if made of expanded polystyrene).
- Provides excellent waterproofing properties.
- The service life is enormous (about 80 years).
- Provide convenient installation of communications.
- Economical.
The sequence of installation of permanent formwork:
- Lay out roofing material or other rolled waterproofing material.
- Insert reinforcement around the perimeter of the future foundation.
- Attach formwork blocks to the reinforcement.
- Insert horizontal reinforcement bars through the holes.
- After the third layer, it can be filled with concrete.
- Carry out tamping (either manually or using special equipment).
The use of wood as a formwork material has both positive and negative points. The boards are lightweight and can be used widely, quickly and without special equipment. The disadvantages are their instability to deformation and hygroscopicity.Partially these problems can be solved by strengthening the angles of the structure's rigidity and its additional fasteners.
Do-it-yourself horizontal insulation
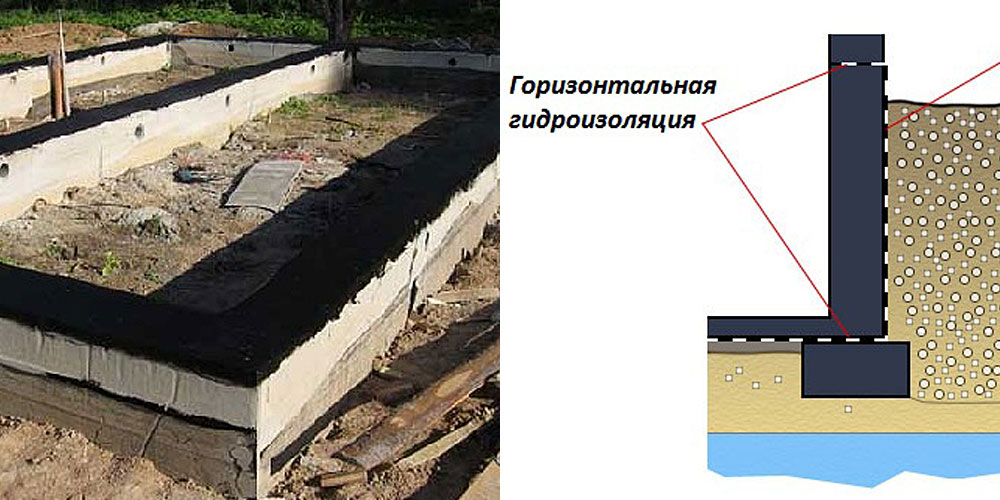
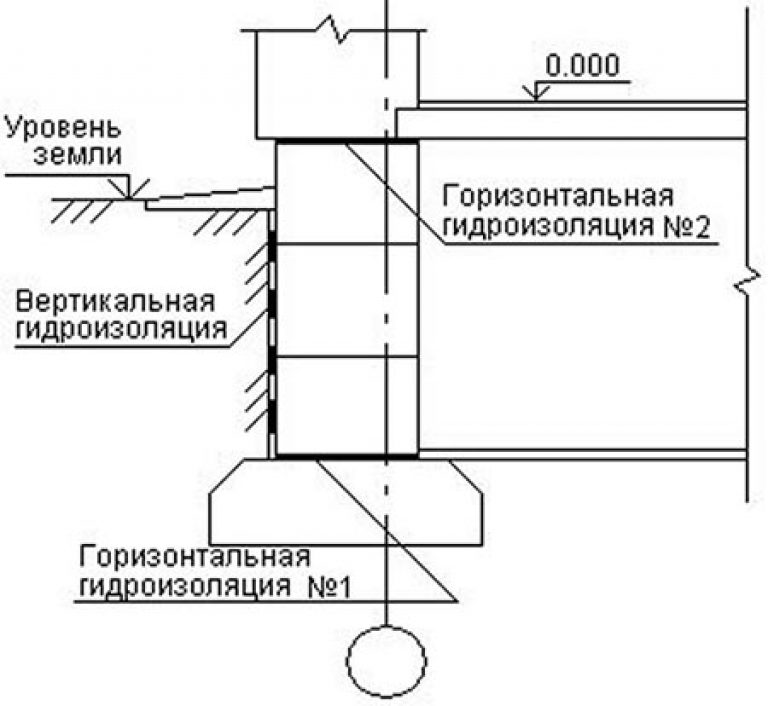
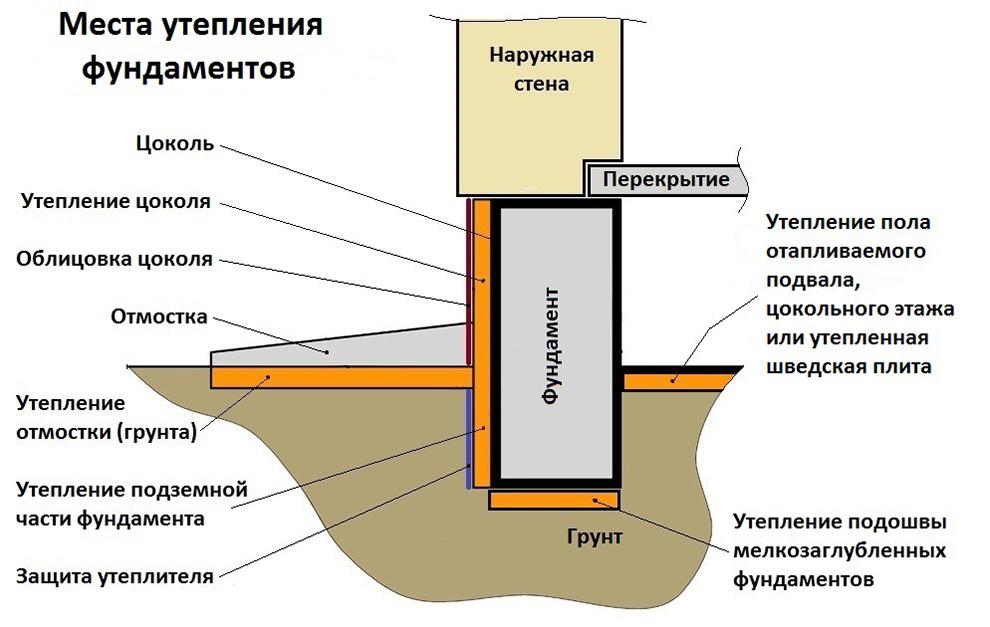
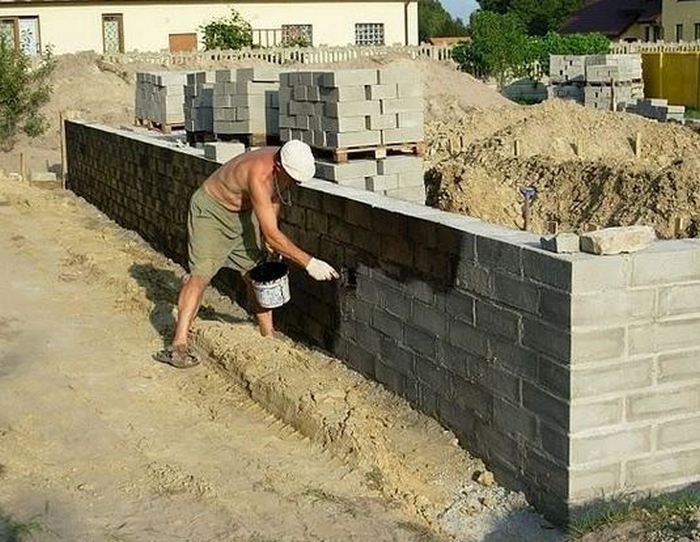 When performing a strip monolithic foundation, which is most often used in individual construction, horizontal waterproofing is done in two places
When performing a strip monolithic foundation, which is most often used in individual construction, horizontal waterproofing is done in two places:
- on the same level with the basement waterproofing layer or just below it (along the top of the foundation pad);
- at the point where the foundation joins the wall.
The first layer of waterproofing is performed after the installation of the foundation cushion in the form of a monolithic reinforced concrete tape. Quite often, this waterproofing layer is flush with the basement floor waterproofing. The work on the device is carried out as follows:
- After making a monolithic foundation pad, the concrete should stand for a couple of weeks.
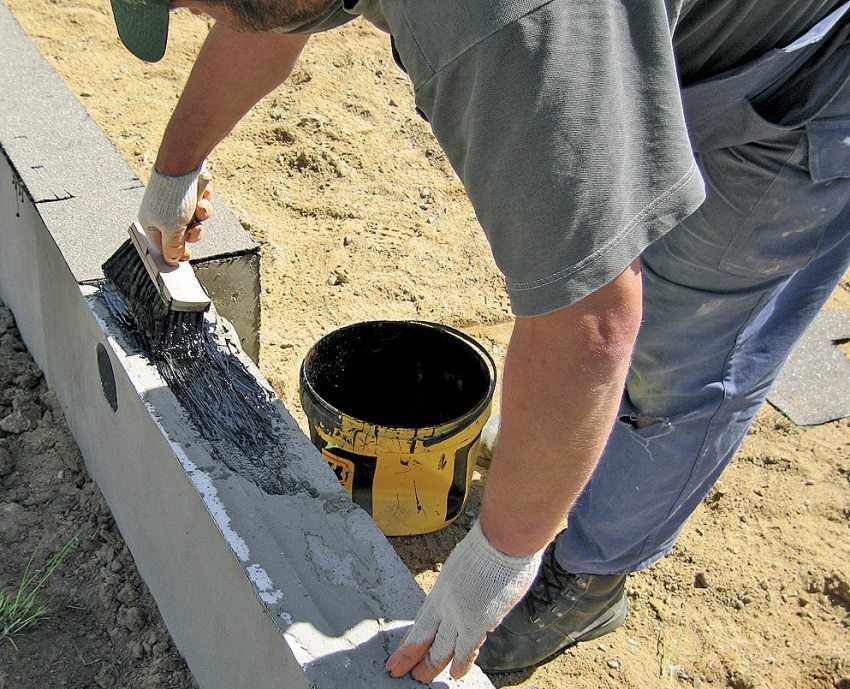
- Then the upper surface of the foundation pad is coated with bitumen mastic.
- The 1st layer of material is laid on it.
- After that, the surface is again covered with bituminous mastic and a second layer of roofing material.
Sometimes, to further increase the moisture resistance of concrete, it is ironed. The procedure is performed like this:
- Freshly poured concrete is allowed to brew for a couple of hours.
- Then sifted cement is poured on top of it. The height of the cement backfill is 10-20 mm. The surface is leveled.
- Over time, the cement gets wet as it absorbs moisture from the concrete.
- After that, the concrete surface is allowed to dry in the same way as an ordinary concrete mortar (covered with a film and periodically moistened with water).
The upper horizontal waterproofing is done after the foundation is installed, before the walls are laid. This process is shown in detail in the video below. The waterproofing layer will not allow capillary moisture to penetrate from the foundation structures into the walls of the house. The sequence of actions is as follows:
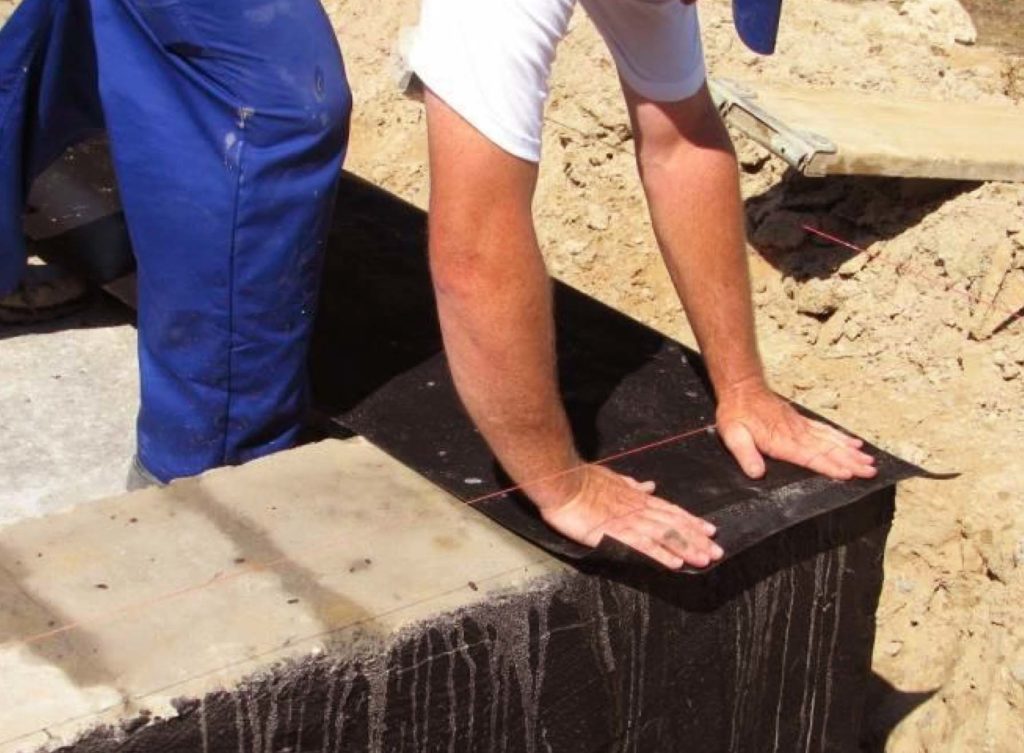
- The horizontal surface of the foundation structures is lubricated with bitumen.
- After that, the first layer of material is spread.
- Then we carry out the coating a second time, and again we roll out the roofing material.
- We do not cut the ends of the roofing material from the inside of the building, but put them on the walls and connect them to the waterproofing of the floor of the first floor, if such is planned.
You can learn how to make horizontal waterproofing from the proposed video:
Procedure
- Here, one cannot be mistaken in the dimensions of the pieces of bituminous cardboard.
-
It is necessary to correctly mark the overlaps.
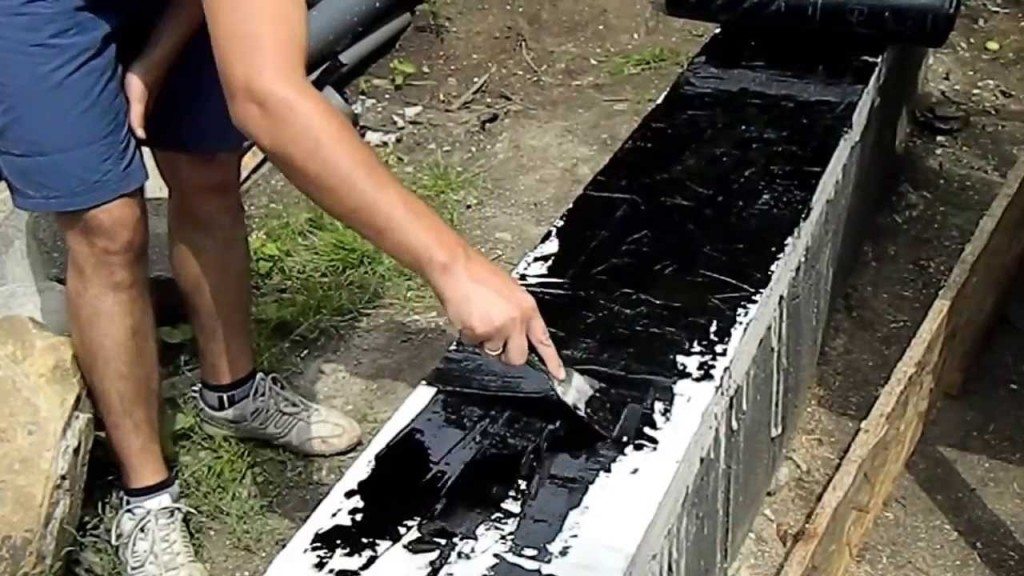
- After cutting out all the shreds, proceed to applying the mastic.
- The mastic must be pry off with a trowel, periodically scrolling around the axis. This is a safety net against the material jumping off the trowel.
It can be applied to concrete in several ways:
- A lot to distributed areas with further smearing.
-
Little by little. But, doing it consistently, creating a thin layer.
- You don't need to overdo it with the layer thickness. Since the manufacturer himself warns that the layer will not dry out or will flow at high air temperatures.
- Further, the sheets are stacked one after another.
And now about the mistakes.
How to fill a strip foundation
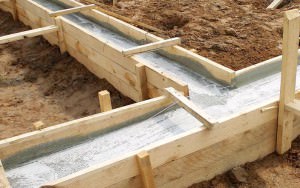 Filling the strip foundation, like any other work with mortar, is best done in the warm season, in dry and warm weather, since cold, excessive humidity and wind can adversely affect the quality of the work performed.
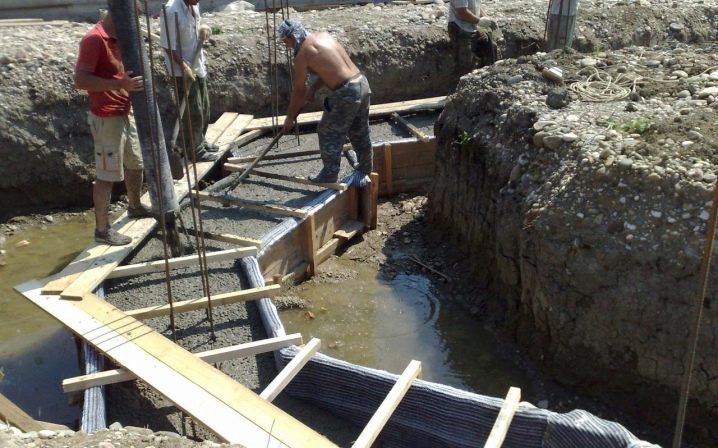
The foundation is poured from the corners, moving from the corner to the center of the wall. The filling is carried out in layers from 10 to 25 cm. Each layer is rammed with wooden boards and leveled with a trowel. Tamping is carried out in order to avoid the appearance of air bubbles in the foundation. When the last layer is poured, it must also be tamped and leveled. Also compaction can be performed with a special vibrator for concrete.The formwork is poured with concrete all the way to the top.
The poured foundation should harden within 3-5 days. During this time, it is not recommended to touch the foundation or do anything with it. After complete solidification, the formwork is carefully removed from the foundation and the foundation is waterproofed for further construction of the house.
Another type of foundation is columnar, a step-by-step guide to laying a columnar foundation.
Monolithic reinforced concrete grillage is one of the constituent parts of the columnar foundation.
We talked about the rules for arranging a strip foundation, now we will consider the most common mistakes of builders.
Do-it-yourself strip foundation construction alone. A practical guide to building a foundation on solid ground.
We are waiting for your questions and will be happy to clarify any points that may have raised your questions.
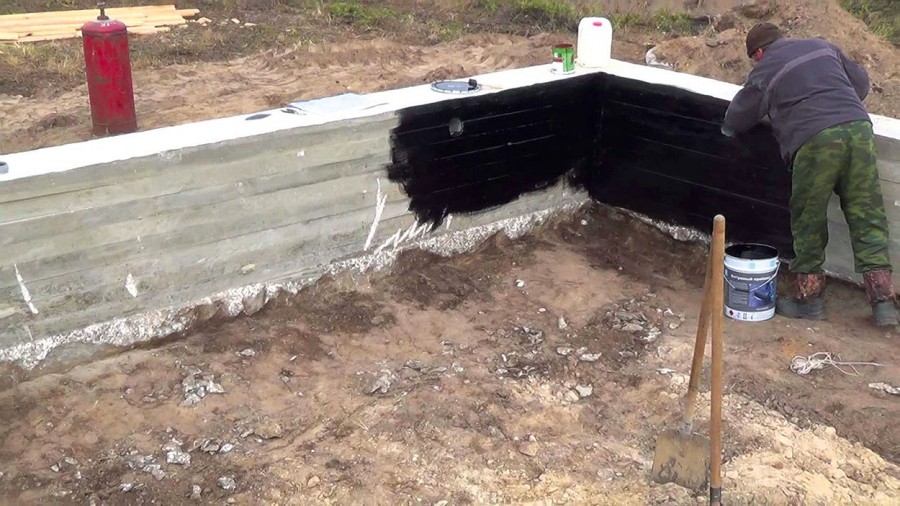
Waterproofing with bitumen mastic
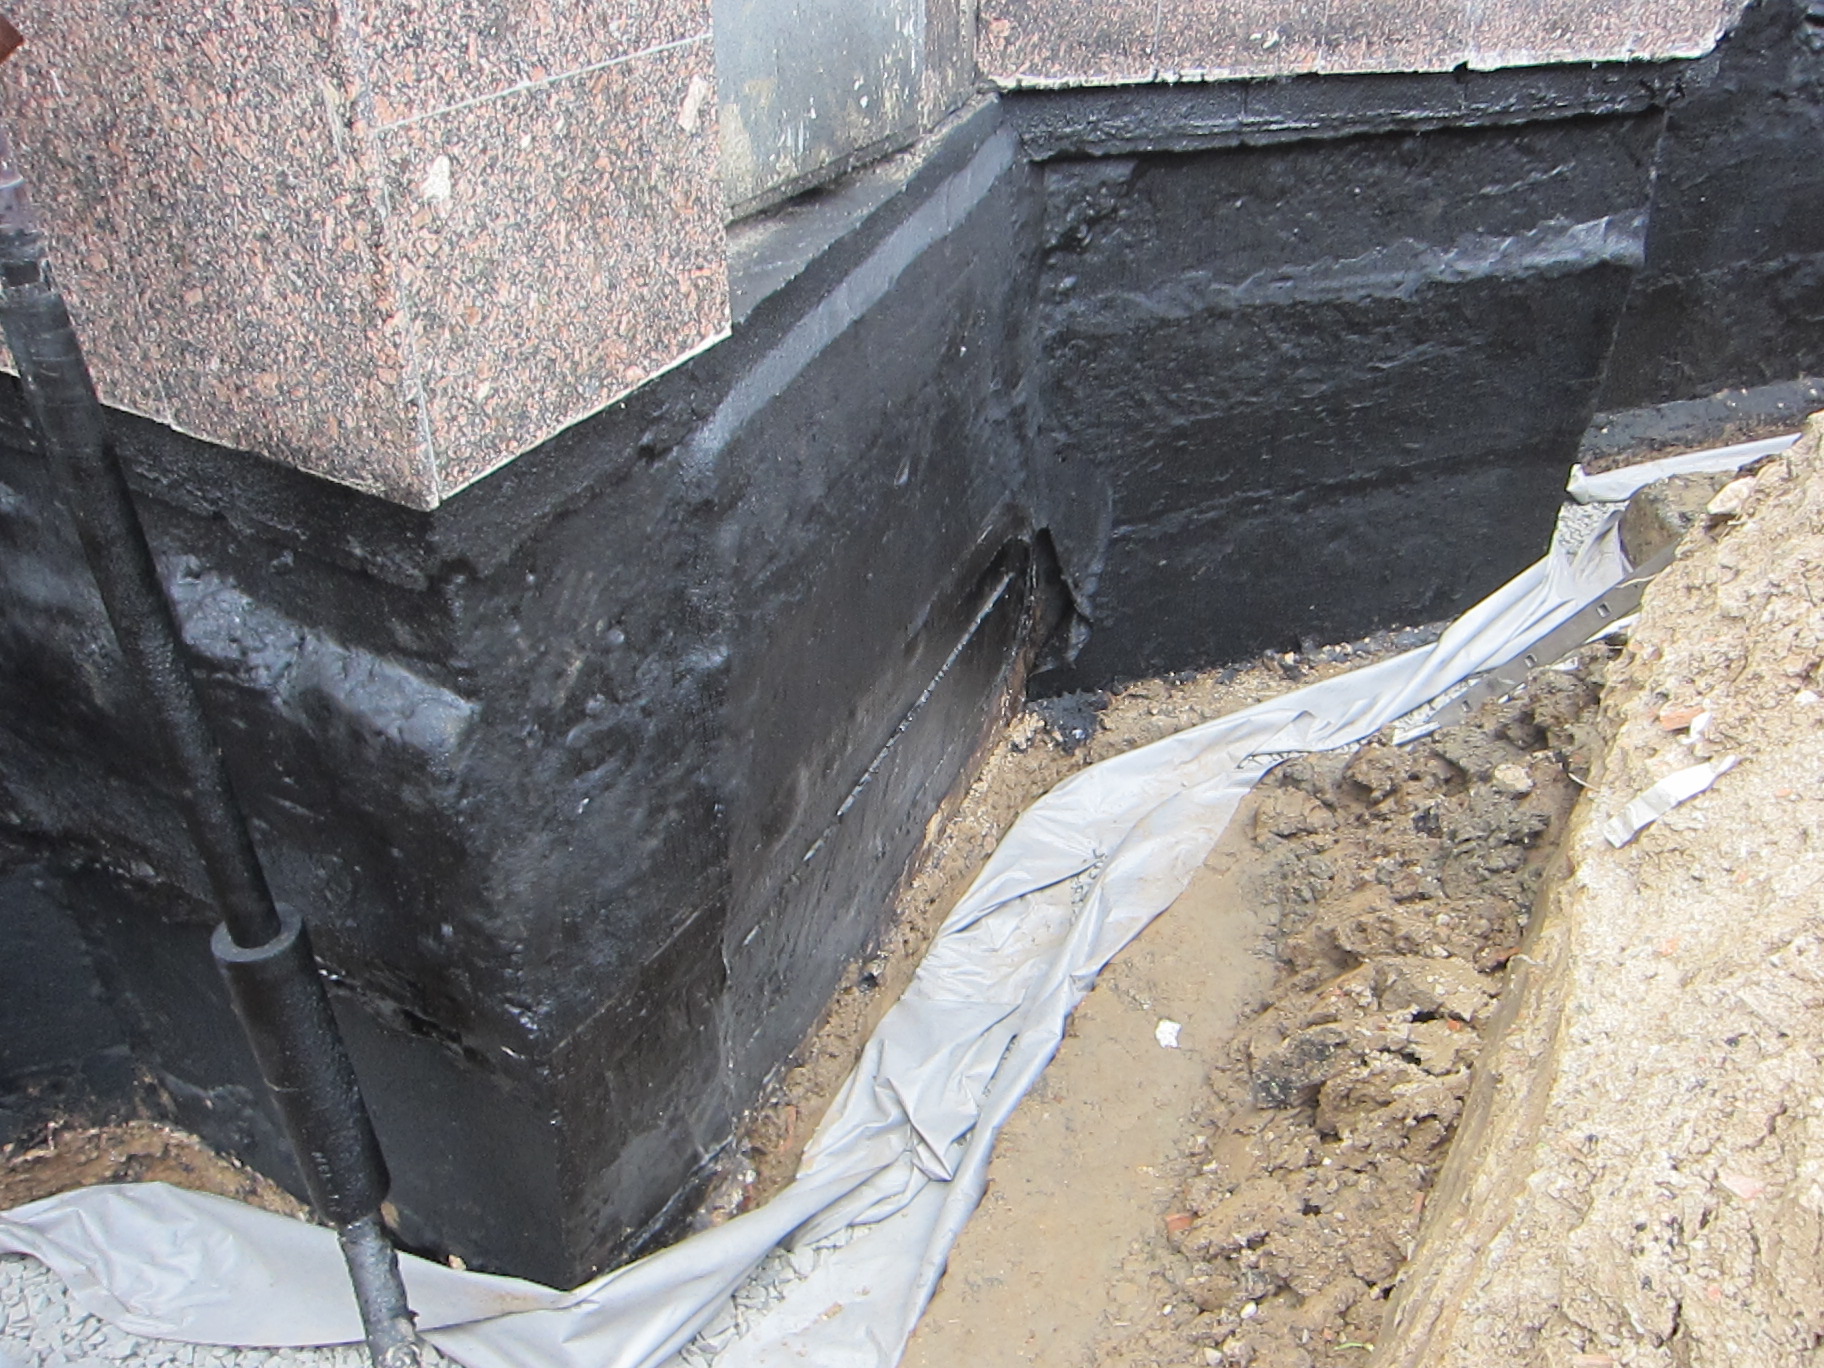
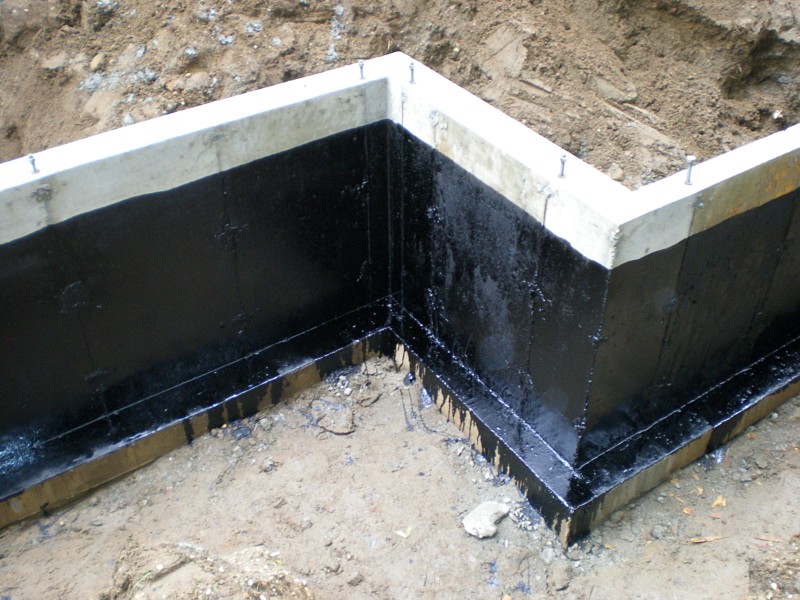
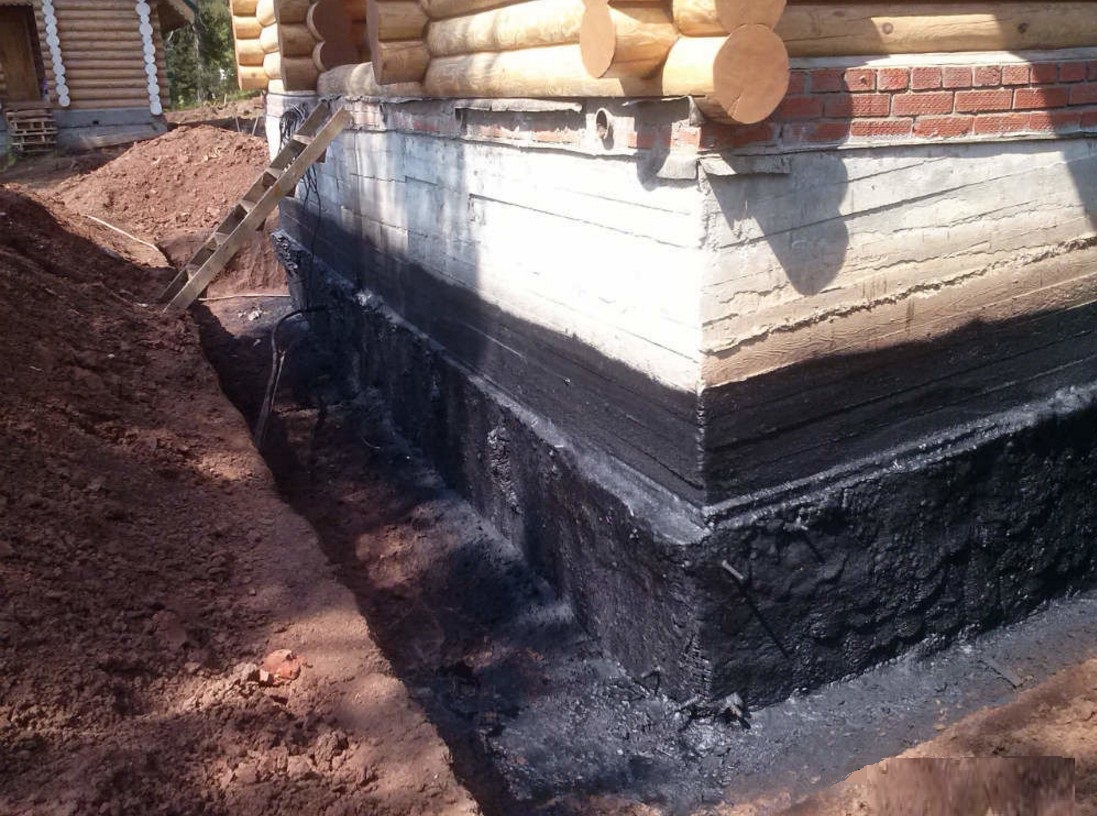
To protect against capillary increase in groundwater level and from surface water, it is advisable to use the cheapest type of insulation using bitumen mastic. Such a coating will not protect against pressure water. Water pressure exceeding 2 m, the mastic simply will not withstand. Such a coating is very sensitive to shear and tensile loads.
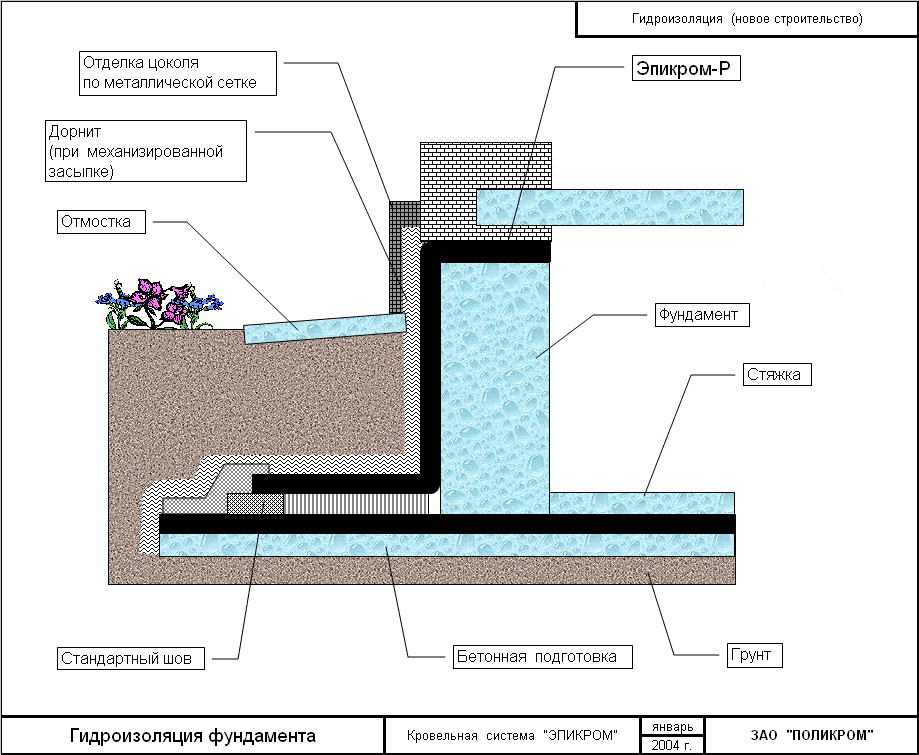
The scheme of waterproofing the strip foundation with bitumen mastic.
The mastic should be applied to a carefully prepared, even, dry surface. A layer of mastic requires protection from mechanical damage when backfilling with soil. To do this, you can use geotextiles with a density of at least 180 g / m². If soil without debris is used for backfilling, for example, clean sand, then the waterproofing can be protected with geotextiles - strips at least 20 cm wide, placing them only at the corners of the foundation. However, if the foundation to the level of freezing of the soil is protected by a heater, the problem of protecting the waterproofing will not arise. To avoid cracks in the hardened mastic at the corners of the concrete base, the corners should be rounded.
Horizontal waterproofing
Horizontal waterproofing
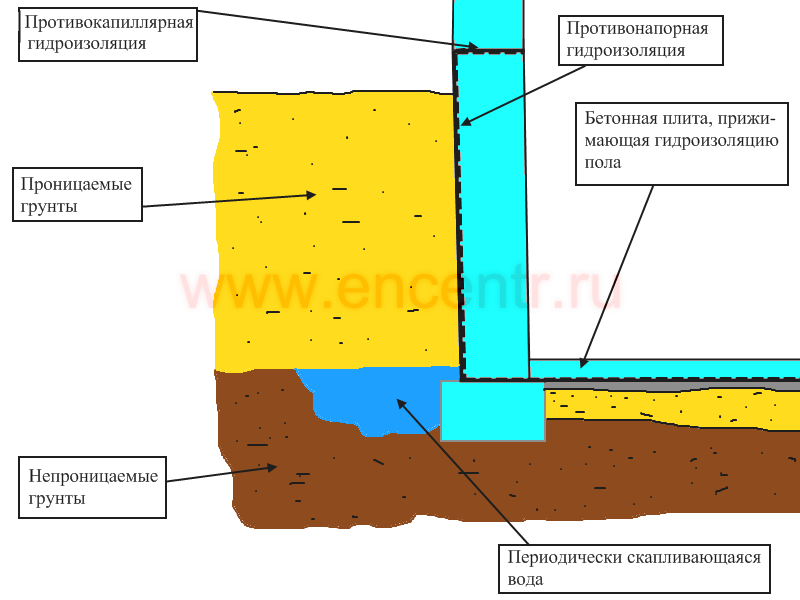
It is performed even during the construction of the foundation, while additional time (15-17 days) may be required for preparatory measures. The main function of such insulation is to protect the base in the horizontal plane (mainly from capillary groundwater). An important component of horizontal waterproofing is the drainage system, which is developed at a high level of groundwater.
Isolation diagram
It is worth noting that under the "tape" there must be a sufficiently strong base, on top of which the waterproofing layer will be laid. Often for this, a "pillow" is cast with a slightly wider width than that of the future foundation. In the absence of the need for high quality (for example, if the foundation is being built for a bath), it is enough to prepare a screed of sand and cement in a 2: 1 ratio. During the Soviet era, asphalt screed was made, but today this technology is practically not used.
The horizontal waterproofing procedure consists of several stages.
Reading now
Stage 1. The bottom of the pit, dug out under the base, is covered with a sand "pillow" about 20-30 cm thick (instead of sand, you can use clay) and carefully compacted.
Stage 2. Next, the "pillow" is poured with a cement screed 6-8 cm thick.
Stage 3. When the screed is dry (it takes about 12-14 days), it is covered with bituminous mastic and a layer of roofing material is attached. Then the procedure is repeated: applying mastic - fastening roofing material. On top of the second layer, another screed of the same thickness is poured.
Heating bitumen
Stage 4. When the concrete hardens, the construction of the foundation itself begins, the surfaces of which are additionally covered with waterproofing of vertical types (they will be discussed later).
Waterproofing works
Photo of horizontal waterproofing
Drainage
Drainage may be required in two cases:
if the permeability of the soil is low and water accumulates, and is not absorbed by it;
if the depth of the foundation is lower or corresponds to the depth of the groundwater.
Drainage "pie" scheme near the foundation
The algorithm of actions for arranging the drainage system should be as follows.
Drainage scheme
Stage 1. Along the perimeter of the structure - about 80-100 cm from the foundation - a small pit 25-30 cm wide is digging. The depth should exceed the depth of the foundation by 20-25 cm
It is important that the pit has a slight slope in the direction of the catchment, where water will accumulate
Digging trenches
Stage 2. The bottom is covered with geotextiles, while the edges of the material must be wrapped on the walls by at least 60 cm. After that, a 5-cm layer of gravel is filled up.
Stage 3. A special drainage pipe is installed on top, observing a slope towards the catchment area of 0.5 cm / 1 linear meter. m.
Pipe laying
Pipe laying on geotextiles and crushed stone backfilling
Next, the pipe is backfilled with a second layer of gravel 25 cm thick, after which the formed sandwich is wrapped in geotextile, the edges of which were left earlier, and backfilled.
Backfilled trench ramming
Thanks to this design, water will flow into the drain pipe, while it (pipe) will not be clogged. Moisture will be discharged into a drainage tank (this can be a well or a pit, and the dimensions depend on the flow of water and are determined on an individual basis).
The drainage well is the final stage of the construction of drainage systems on the site
Drainage scheme around the house indicating the location of the well
The main types of waterproofing
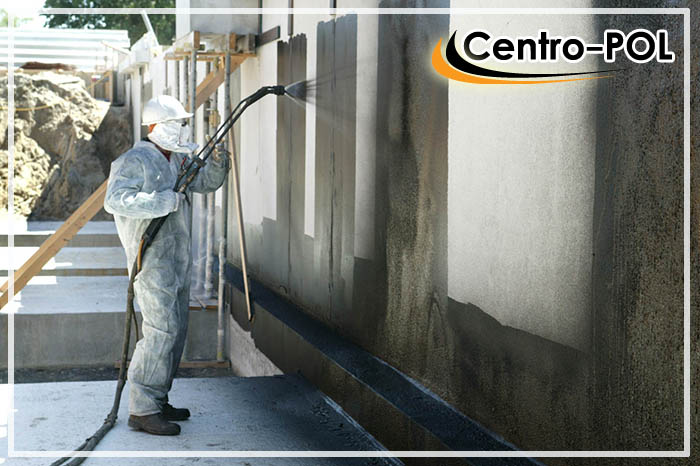 Application example of sprayed waterproofing
After installing the strip base, it is important to take care of "cutting off" moisture from the structure. To do this, use various waterproofing materials, namely:
- Lubricating - insulation is carried out using polymer or bituminous compounds that prevent moisture from penetrating into the foundation;
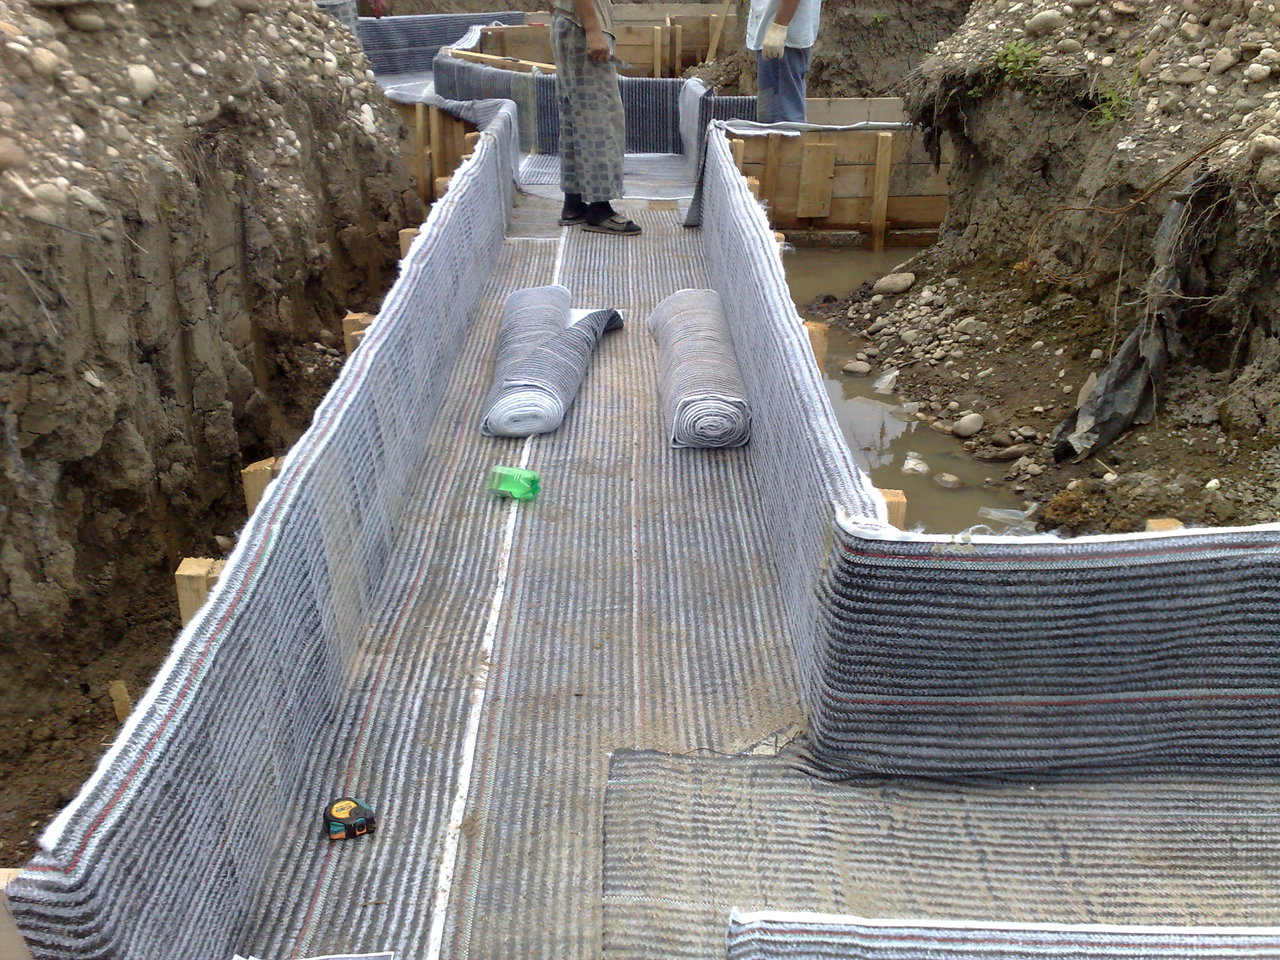
- Roll - materials with good water-repellent properties are suitable for finishing the basement, pile-strip base (bearing supports), as well as waterproofing the foundation for a monolithic slab. The most popular among roll moisture insulators are roofing material, polyethylene film, geotextiles;
- Sprayable - waterproofing agents are applied to concrete structures using spray guns. As a spray mixture, liquid solutions based on bitumen and polymer additives are used;
- Impregnating - mixtures of liquid consistency that easily penetrate into the structure of the concrete coating, filling all the pores. Thus, it is possible to prevent the ingress of moisture into the foundation and the destruction of the reinforcing mesh.

