An important component
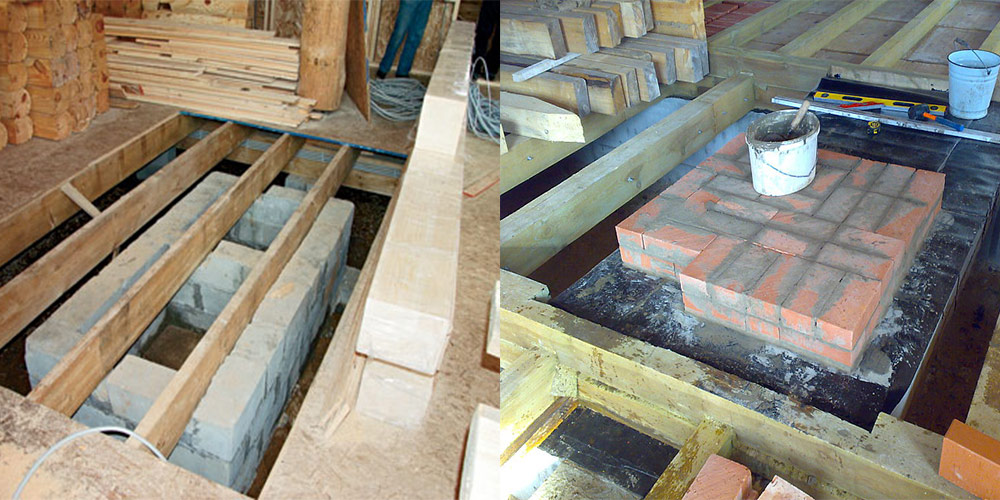
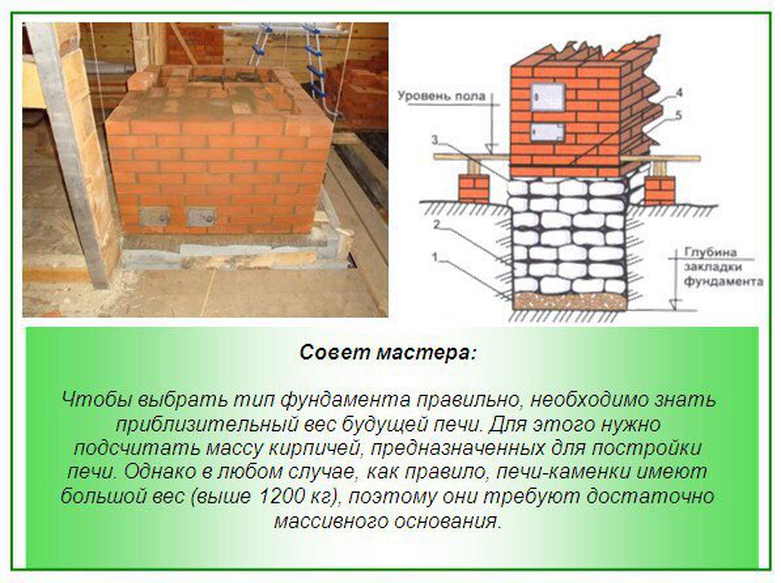
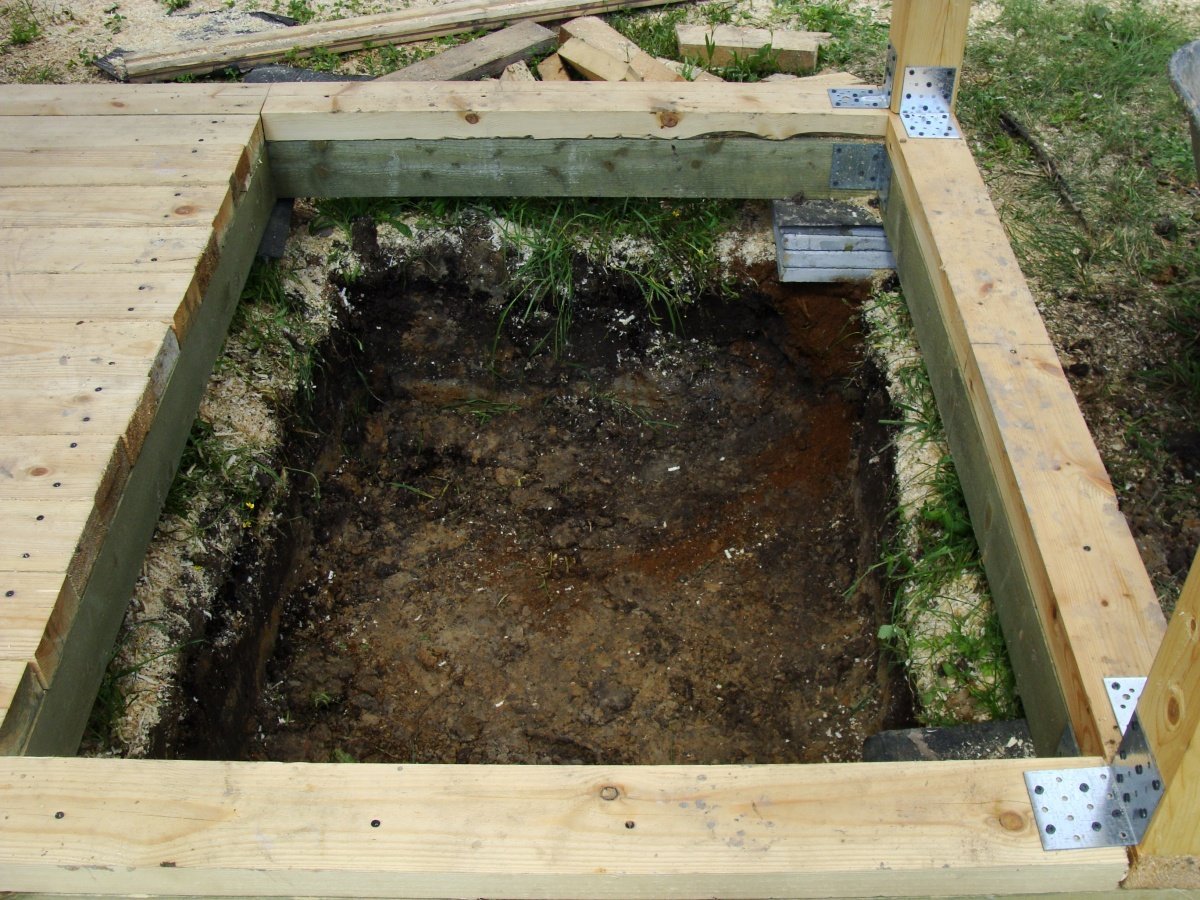
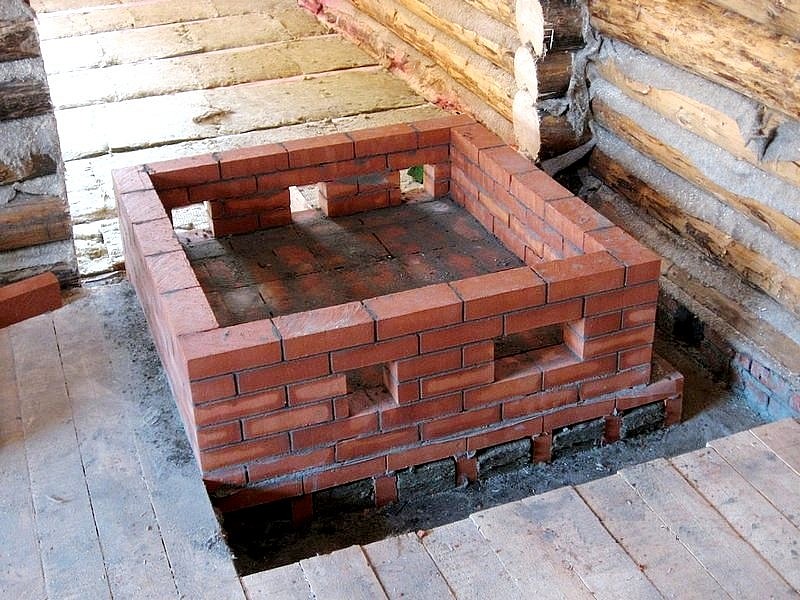
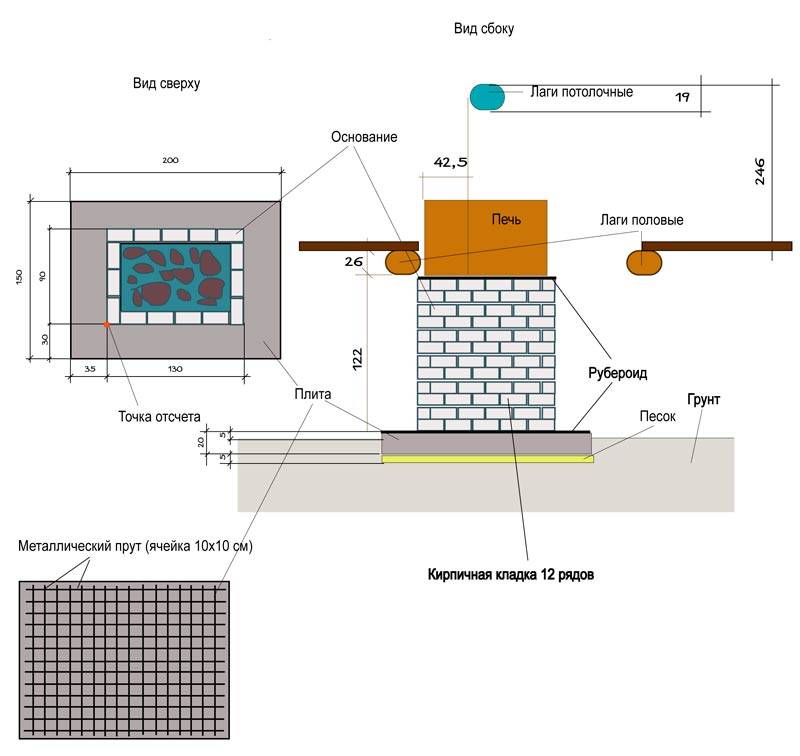
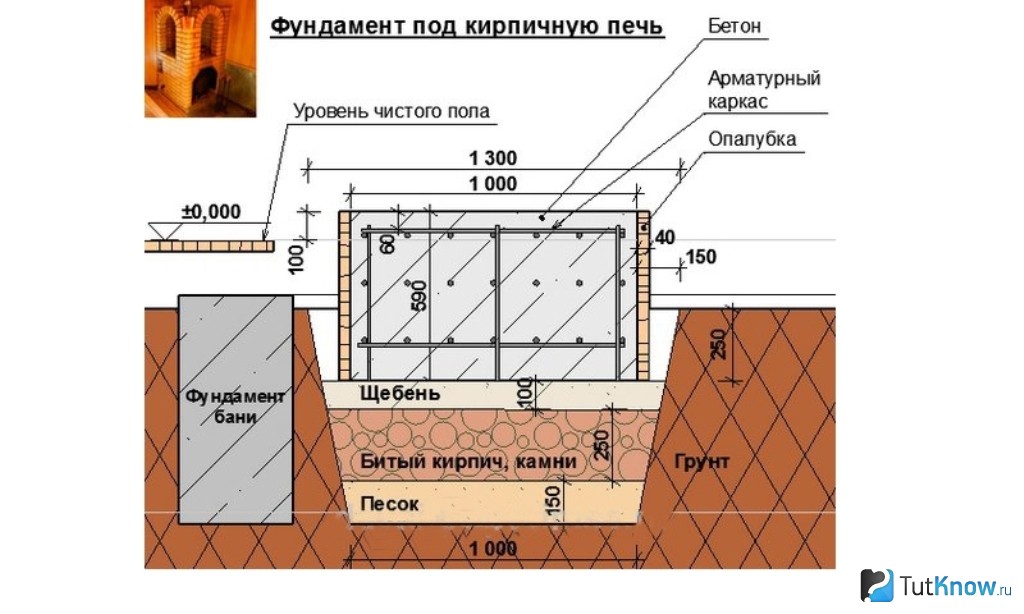
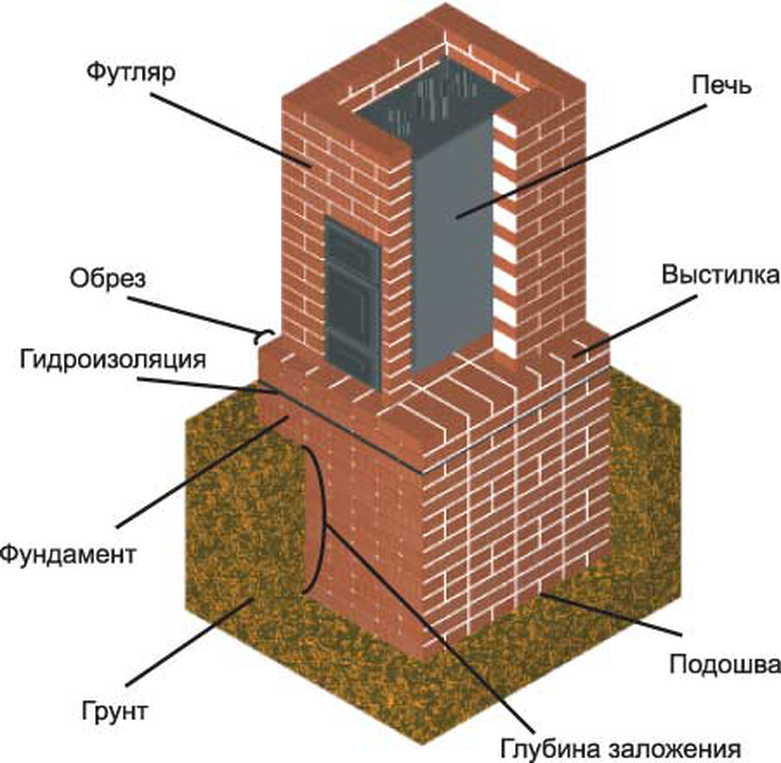
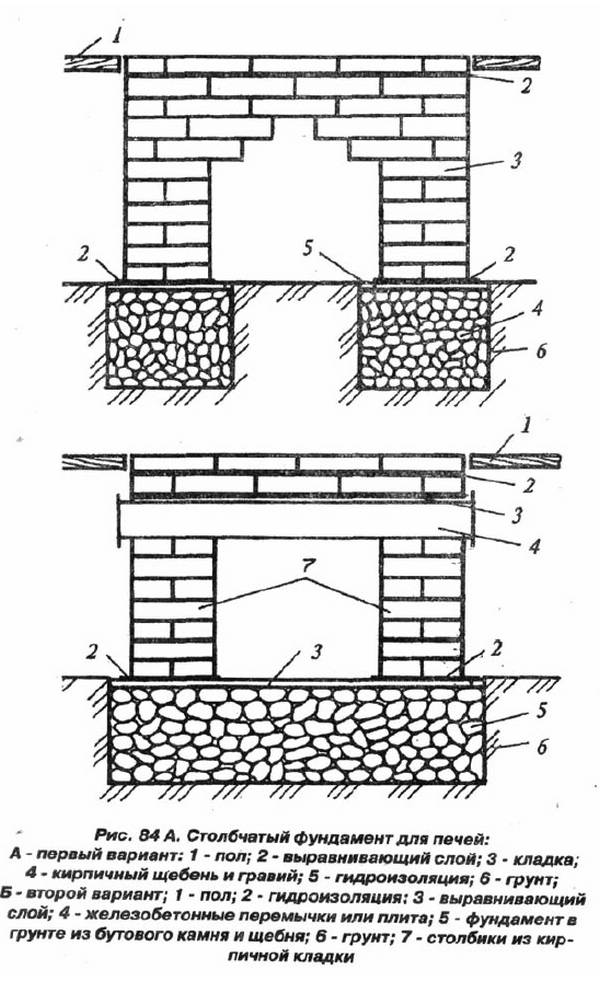
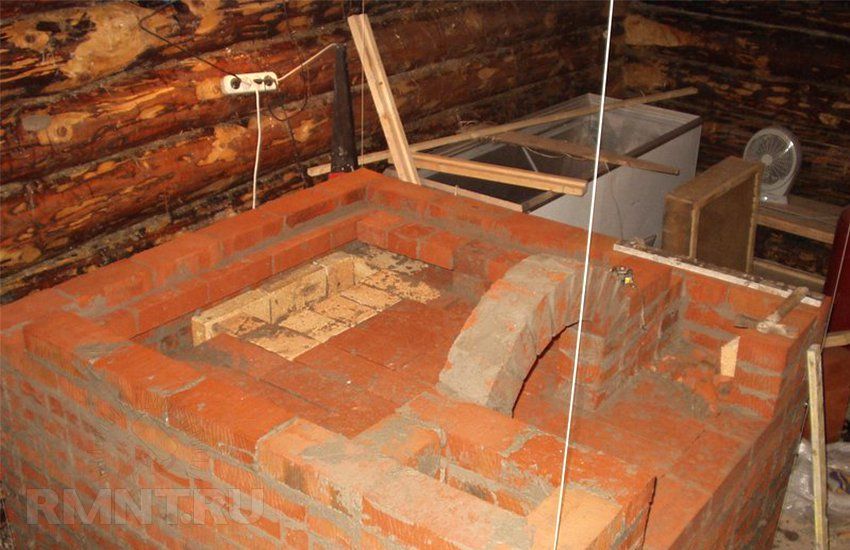
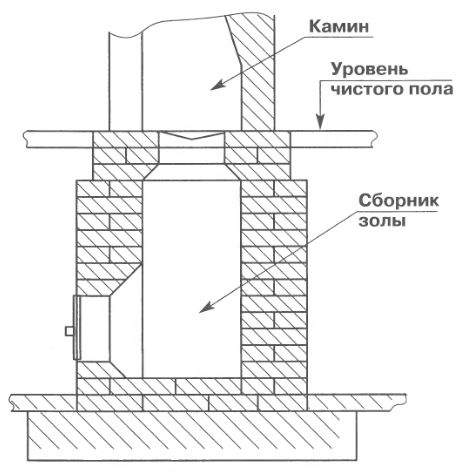
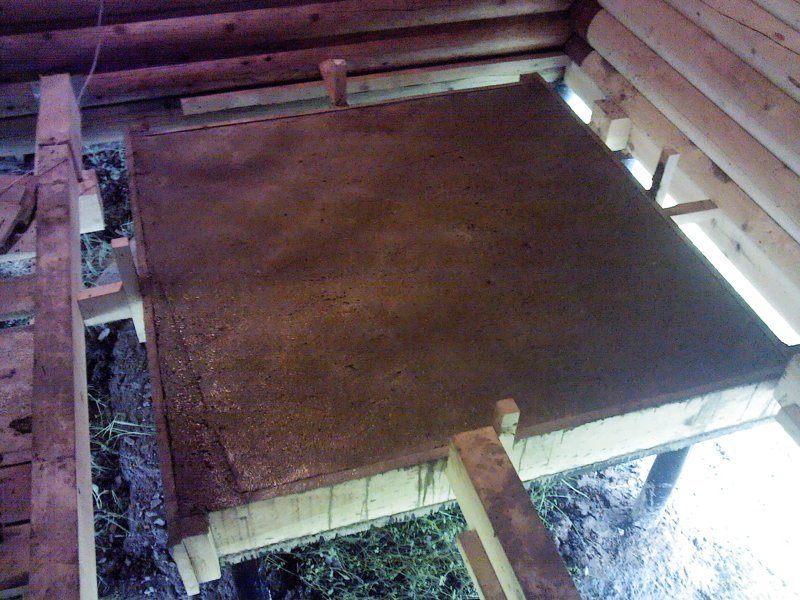
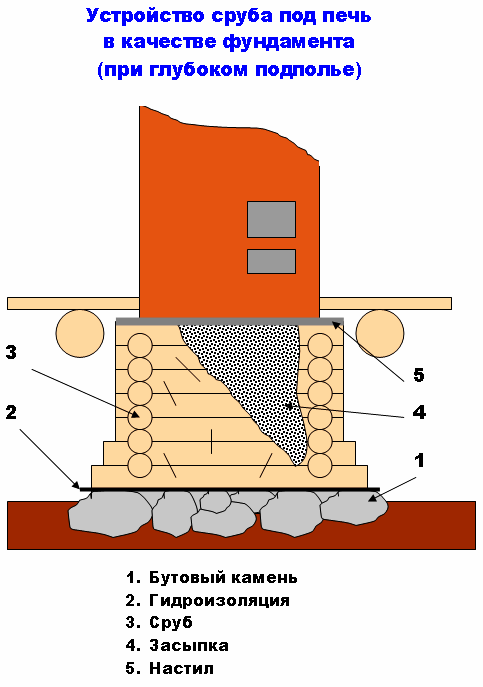
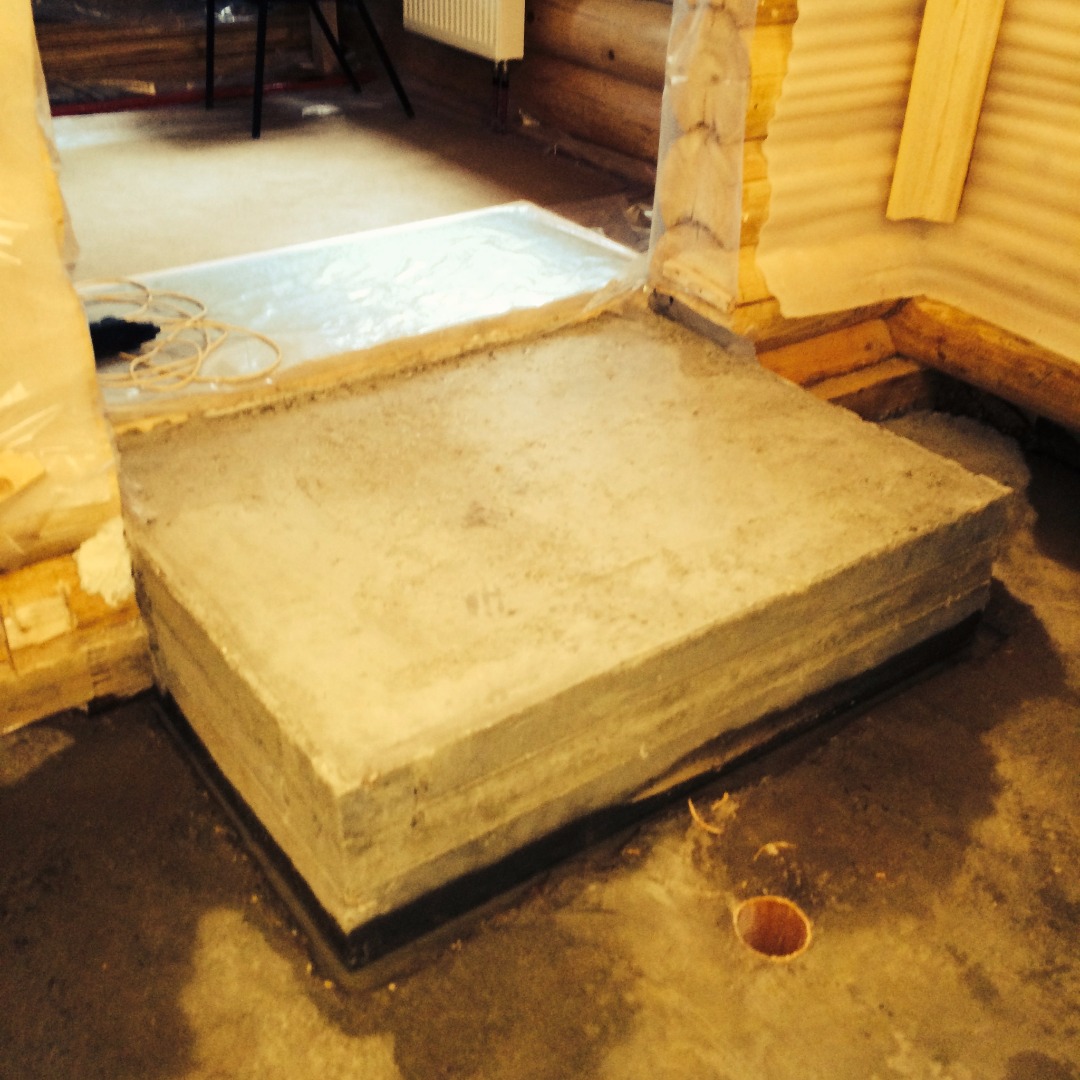
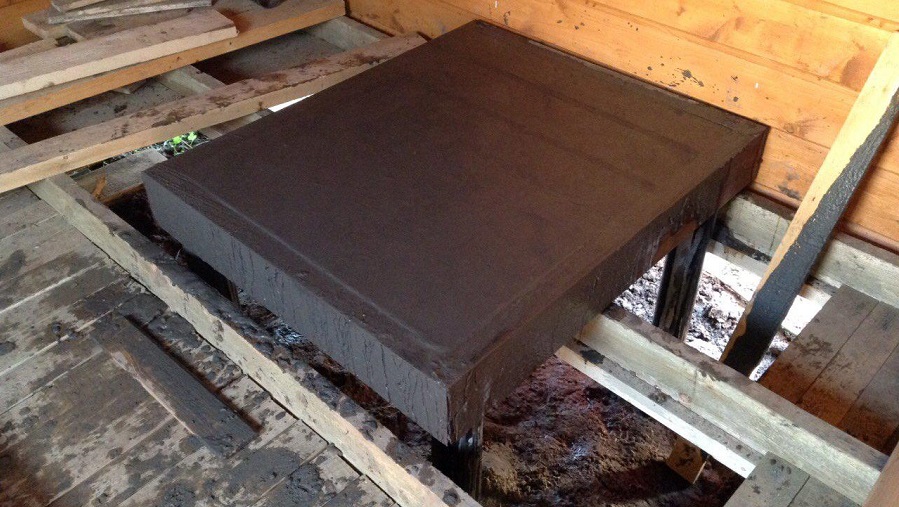
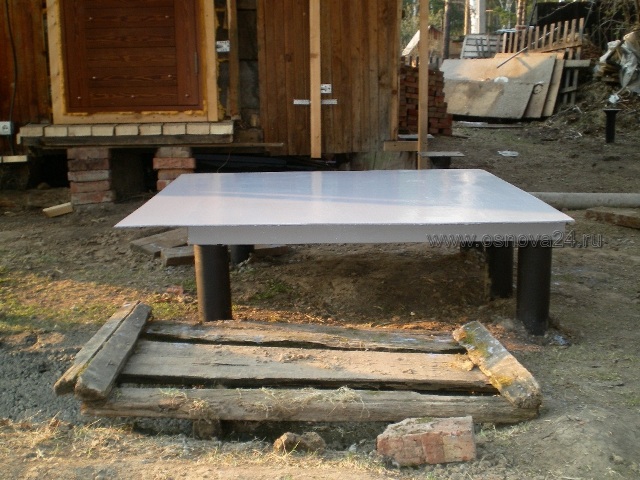
Some people think that the foundation is not needed at all, but this is not so. It is possible to make a stove without it only if it is light and its weight is no more than 500 kilograms, and a brick one weighs much more. To determine how much weight the stove will have, several factors must be taken into account:
- oven weight;
- the weight of the stones that are in the bookmark;
- the weight of the water that will be in the tank;
- if there is a brick lining, its weight is also taken into account.
If the sauna is being made with your own hands, then you should pay attention not only to the weight, but also to the fact that there will be high humidity in the room, so the foundation in this case is required. Since water during bath procedures gets directly under the stove, the ground from below will get wet, this leads to deformation of the stove itself
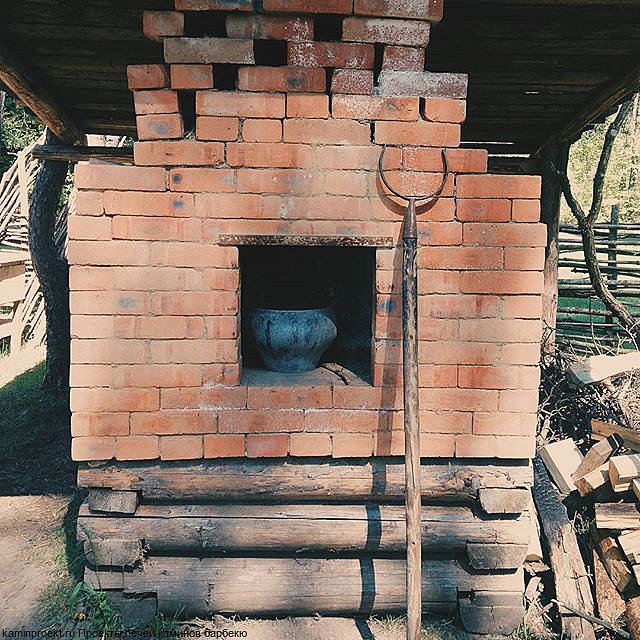
Simple brick brazier
Any brick structure requires a foundation. And even such a small barbecue, as presented below, is very undesirable to put directly on the ground. The foundation will have to be poured. You can make it tape or slab. The slab is safer: in winter it will not lead and the masonry will not fall apart.
Even a beginner can fold this simple brick brazier with his own hands.
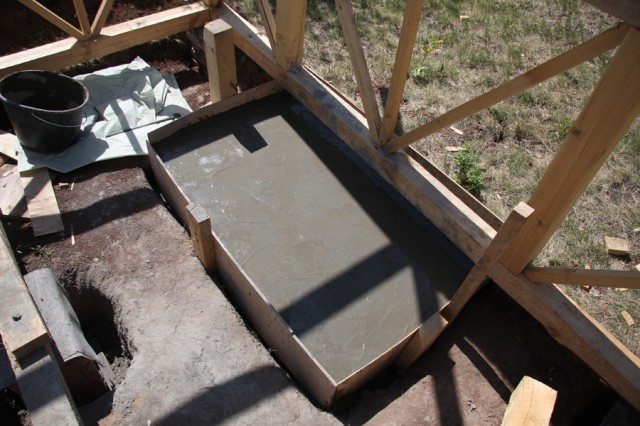
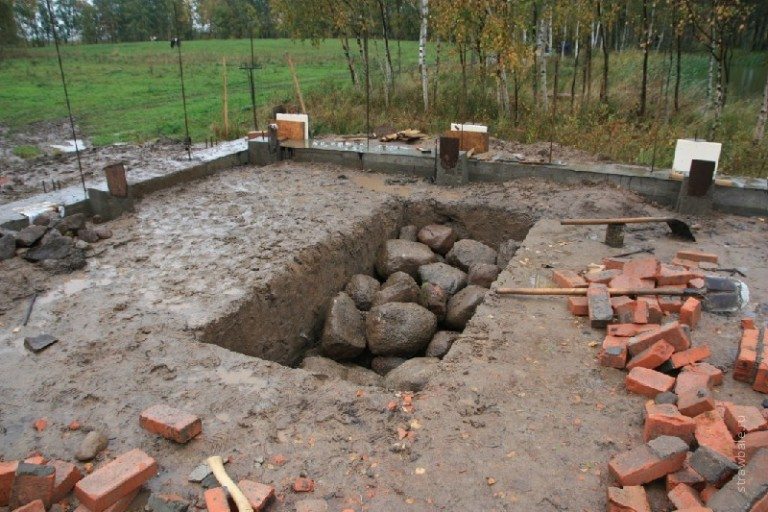
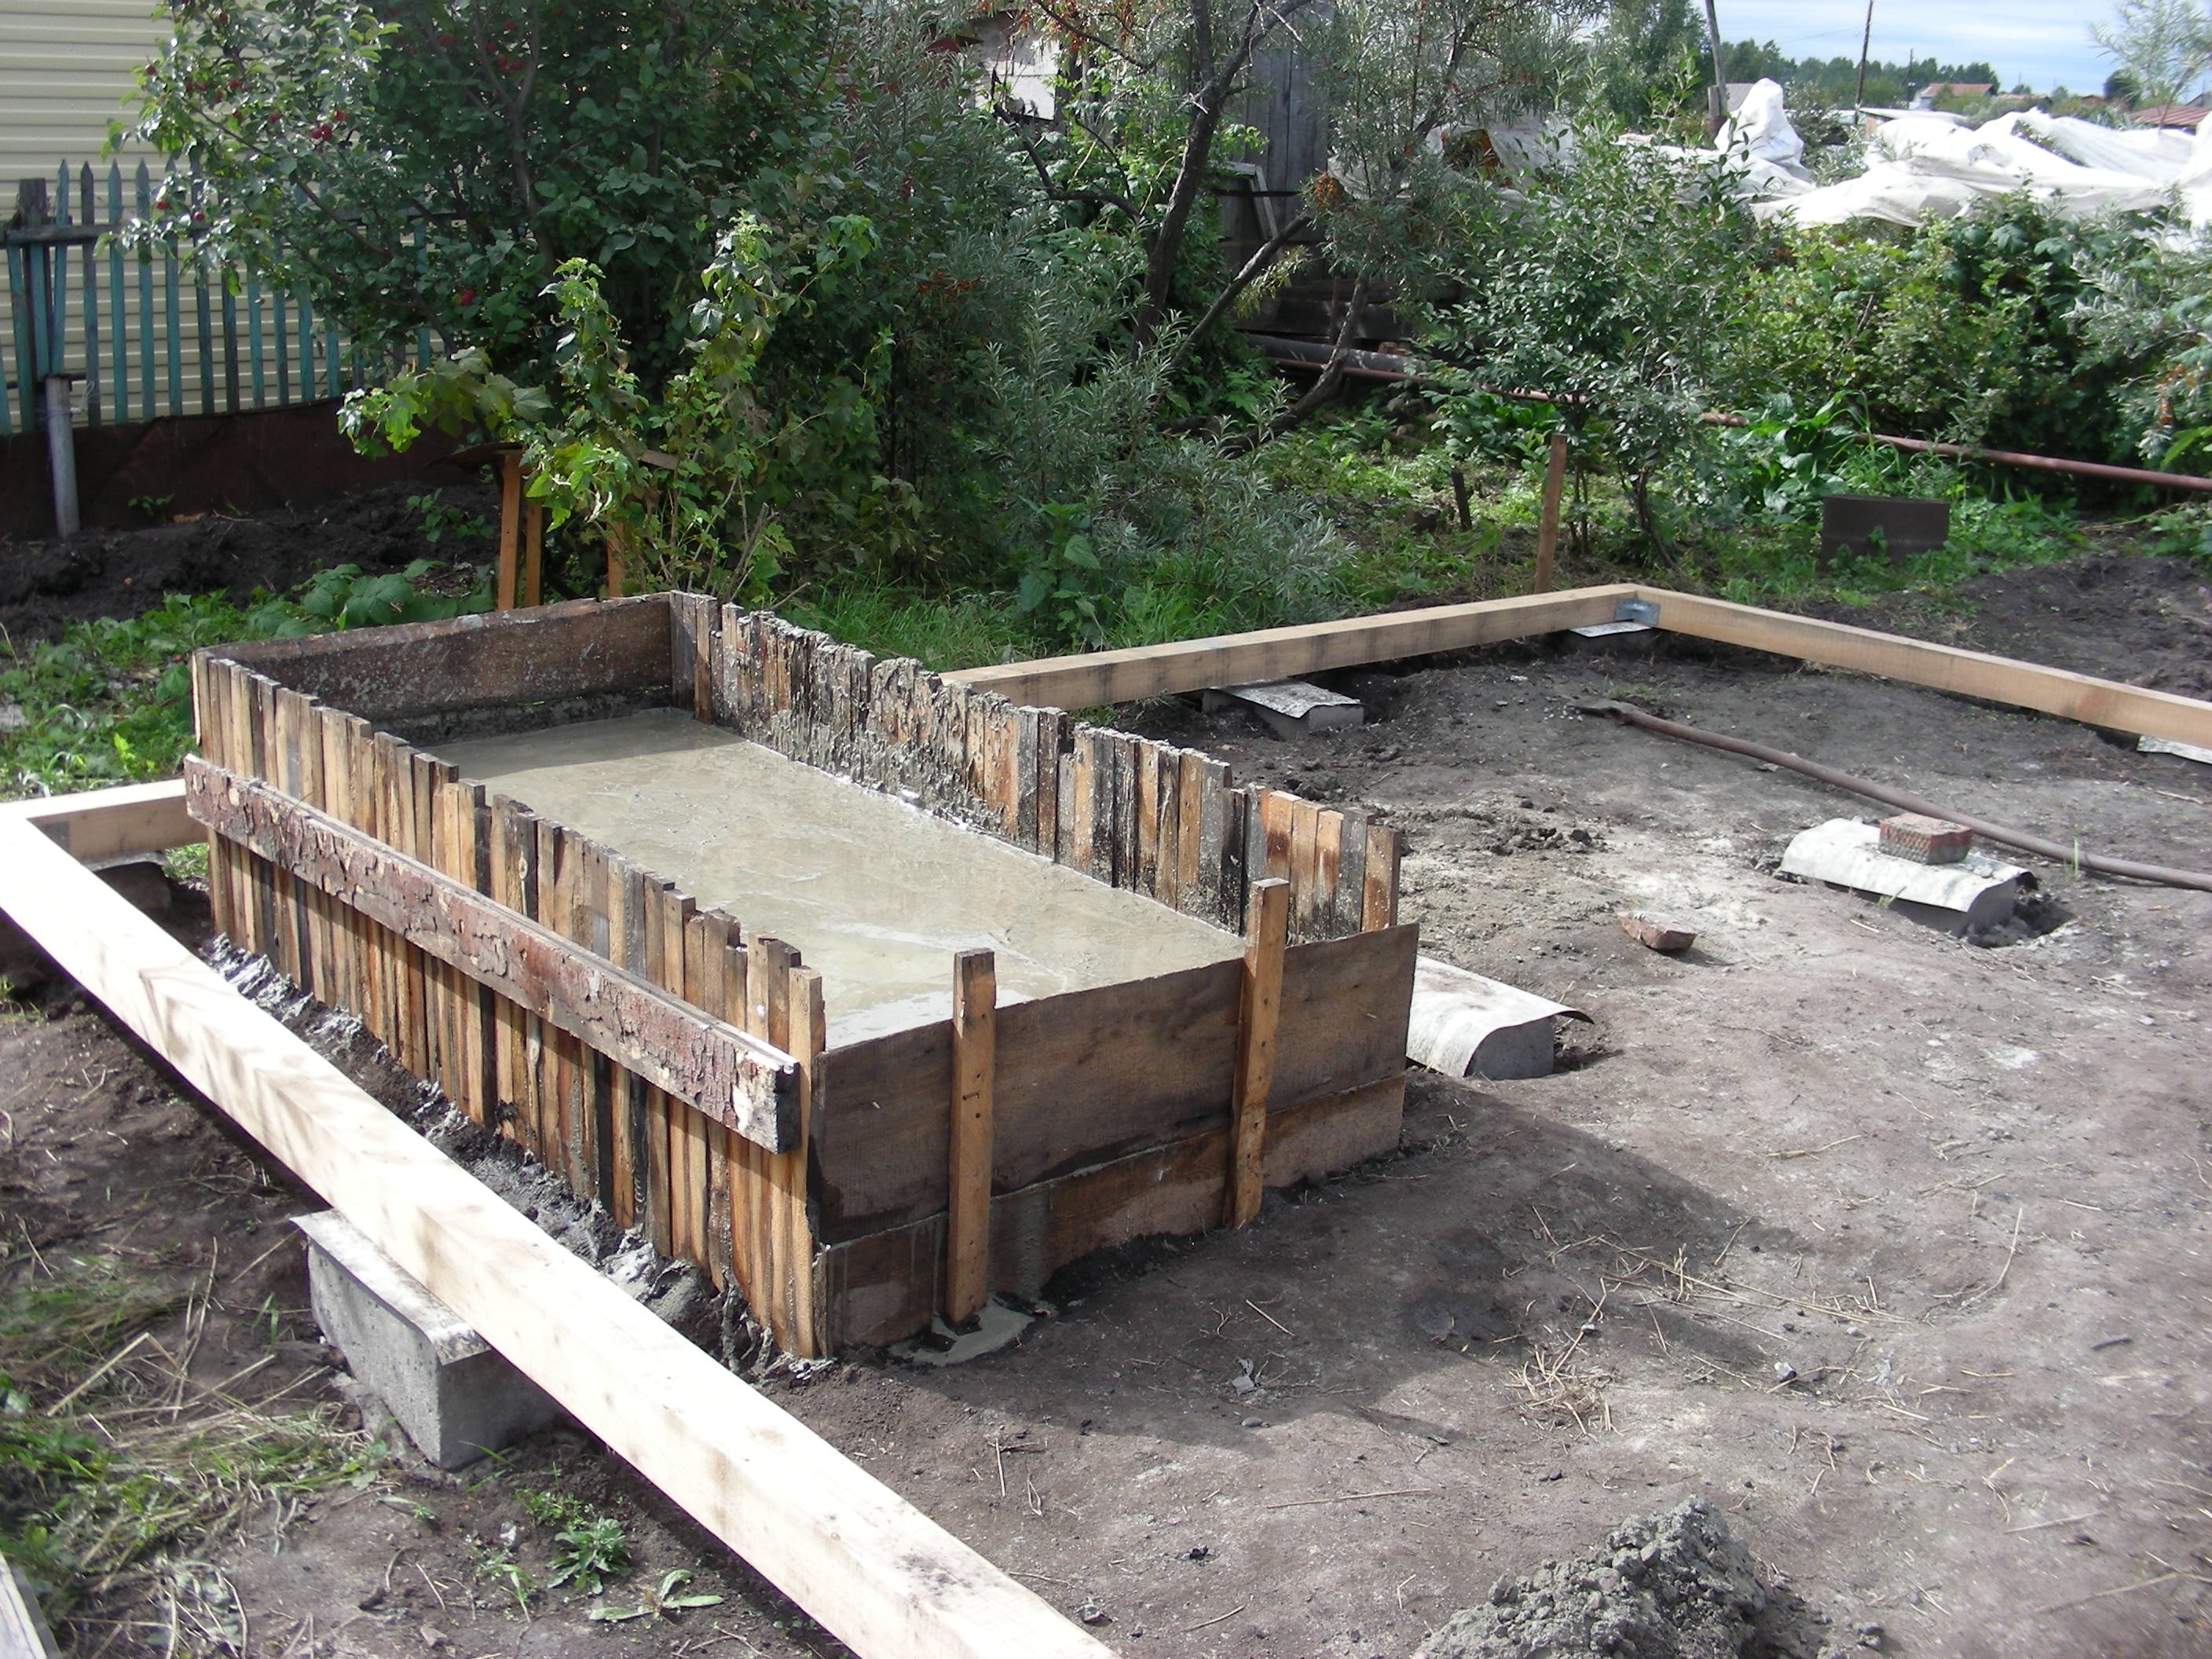
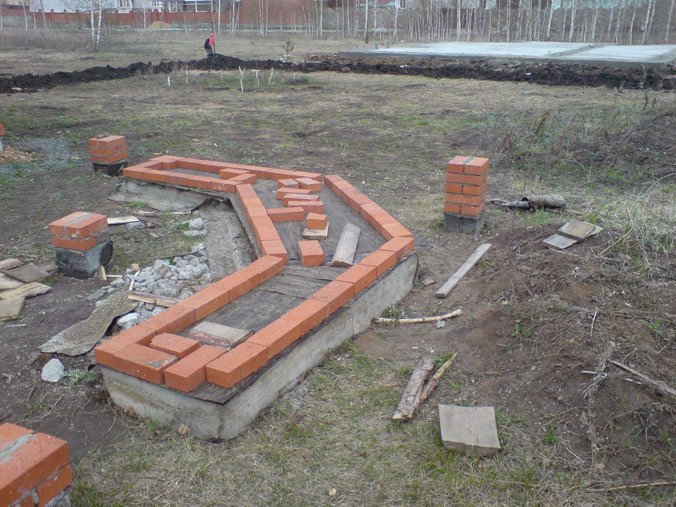
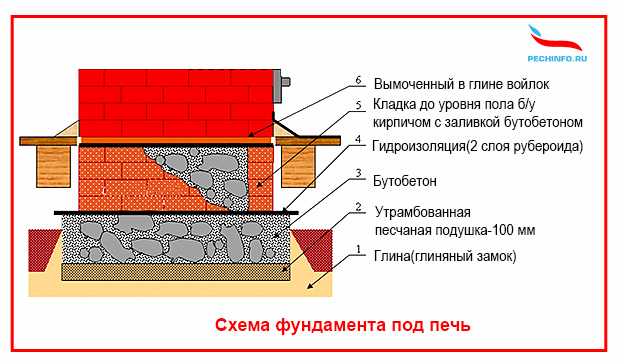
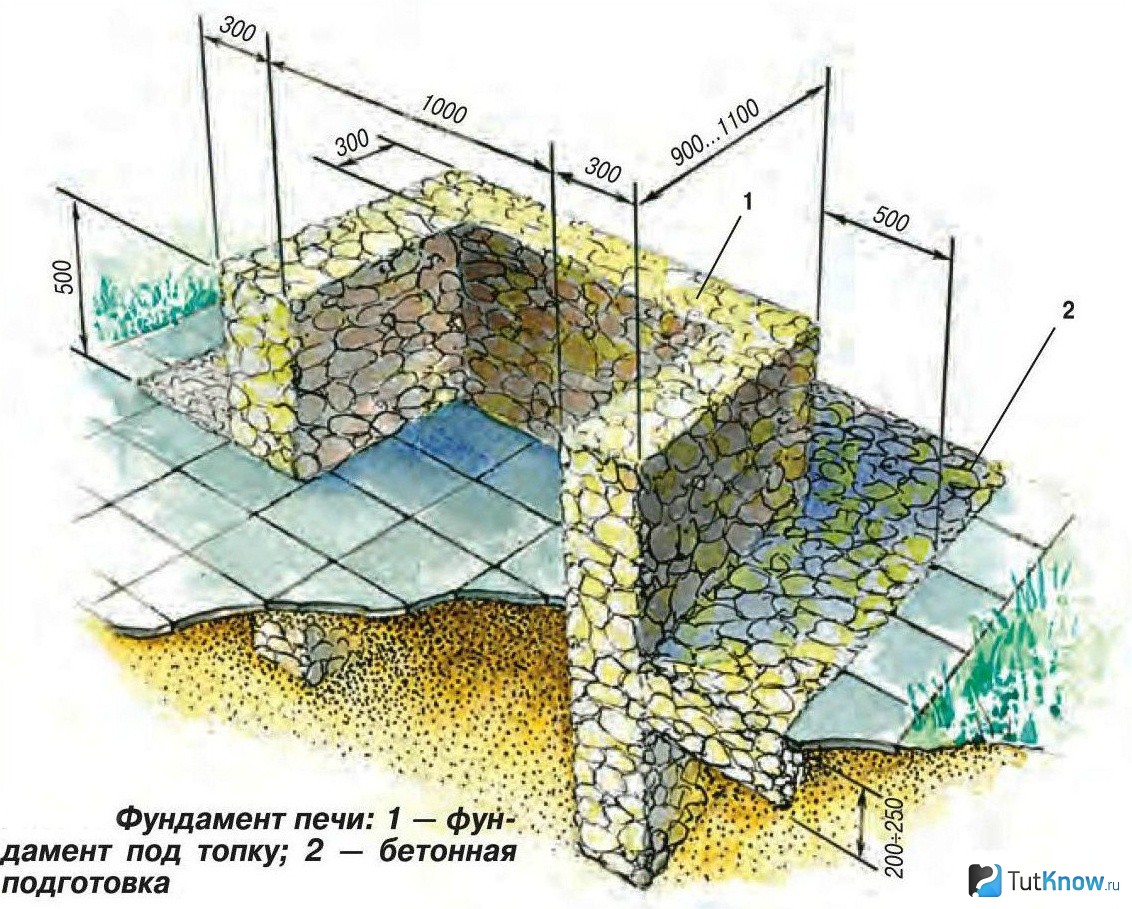
The dimensions of the foundation for a brick brazier are 10-15 cm larger than its dimensions. First, the vegetation layer is removed, if necessary, the pit deepens by 10-15 cm. Its bottom is leveled and rammed. A layer of crushed stone 10 cm is poured and rammed again. It is advisable to use a vibrating plate in this case: you will not compact enough soil with a manual rammer. The height of the tape is 20-30 cm, the thickness of the slab foundation is 10 cm.
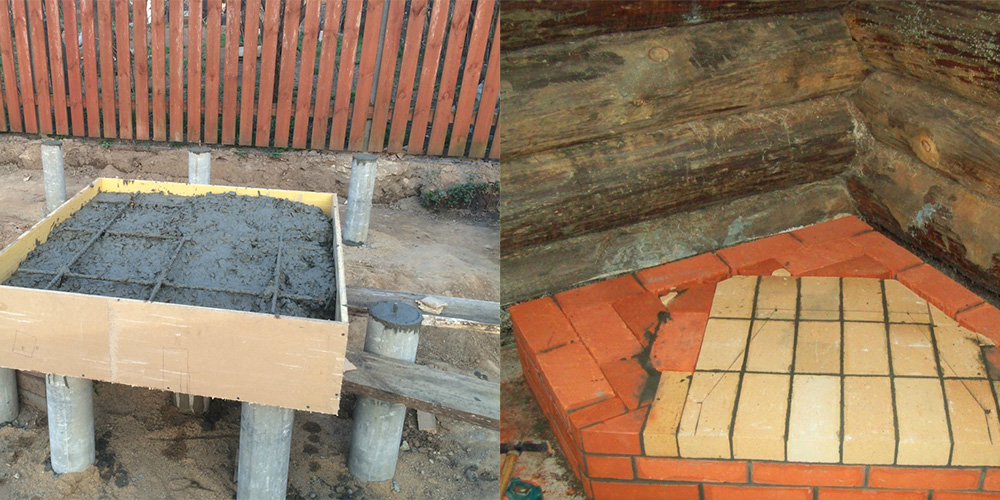
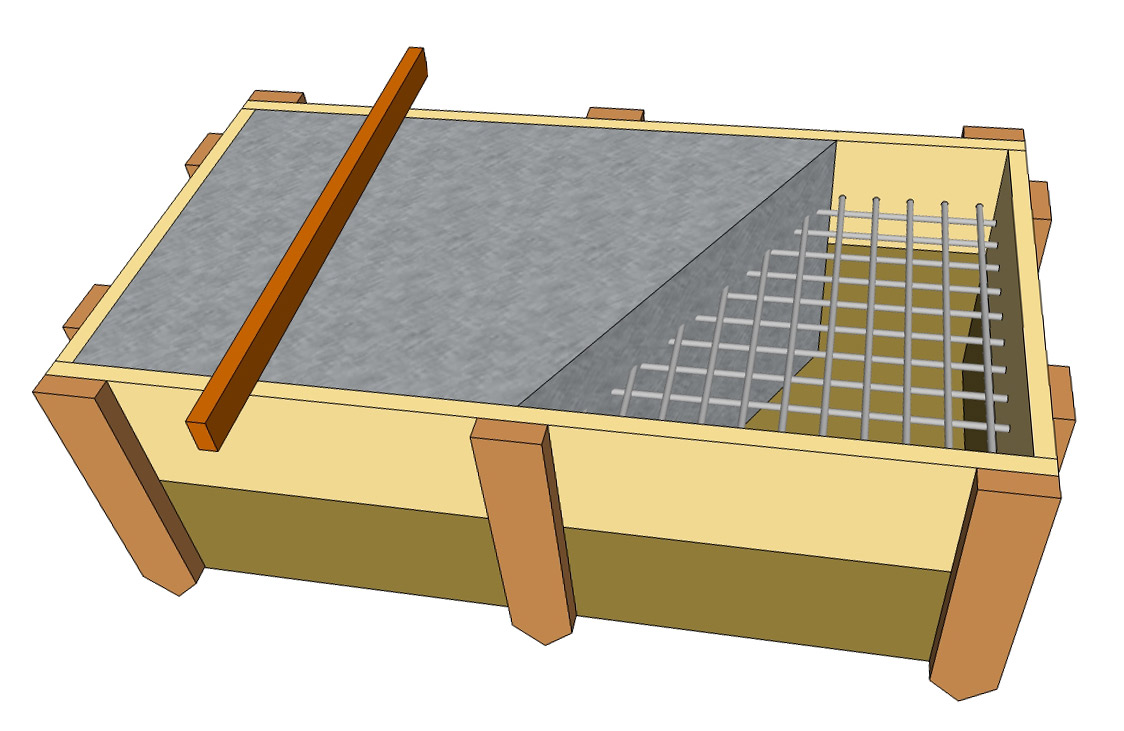
Depending on the type of foundation chosen, an appropriate formwork is constructed. For greater strength, reinforcement is made with a rod of 10-12 mm in diameter. For the tape - two threads are laid along the perimeter, a "cage" is made for the slab: the bars are laid along and across with a step of 20 cm. Everything is poured with concrete of a grade not lower than M200.
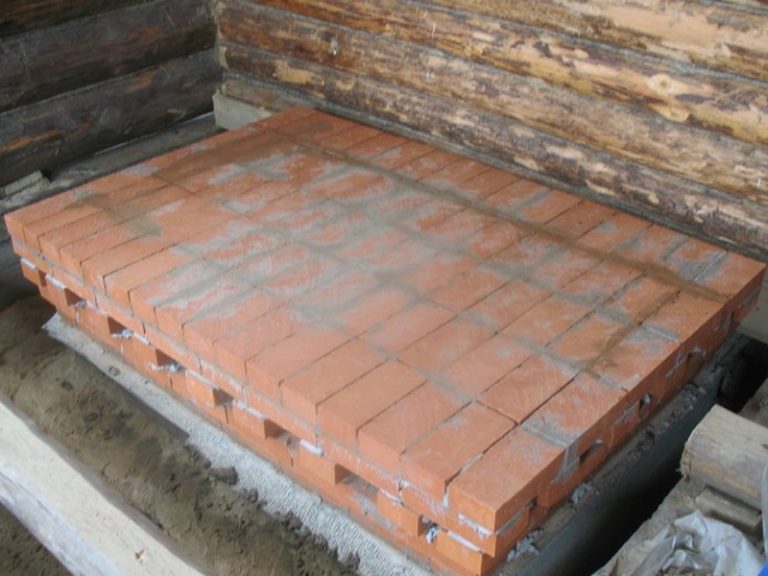
If the temperature during construction is kept around + 20 ° C, work can be continued after about a week: the concrete has gained more than half its strength. Two rows of waterproofing (roofing felt, roofing felt, modern roll waterproofing) are laid on it, coated with bitumen mastic or other liquid waterproofing solution. After that, you can start laying.
Dimensions and materials
This small brazier made of bricks with your own hands can be folded even without any experience. It is a structure in the shape of the letter "P". There are two parts: the brazier itself and a table next to it. The design is simple and easy to modify. You can add another section side by side, make it wider or narrower, deeper or shallower. You can make two ledges under the grates - this is if a large number of kebabs will be prepared.
In the basic version, the dimensions are as follows:
- width 180 cm;
- depth 90 cm;
- barbecue height 100 cm.
For laying this garden barbecue, you can take a solid ceramic brick, you can also use fireclay SHA-8. For the order given below, 202 bricks were used.
For the lower part - up to the 5th row - the mortar is used cement-sand 1: 3 or with the addition of one part of lime to it. Further, where heating will already take place, a clay-sand mortar is used. Its proportions are selected based on the qualities of the clay (oily, normal, skinny). In terms of density - it should not be too liquid, but not too thick. About how good thick sour cream is.
Order and order of work
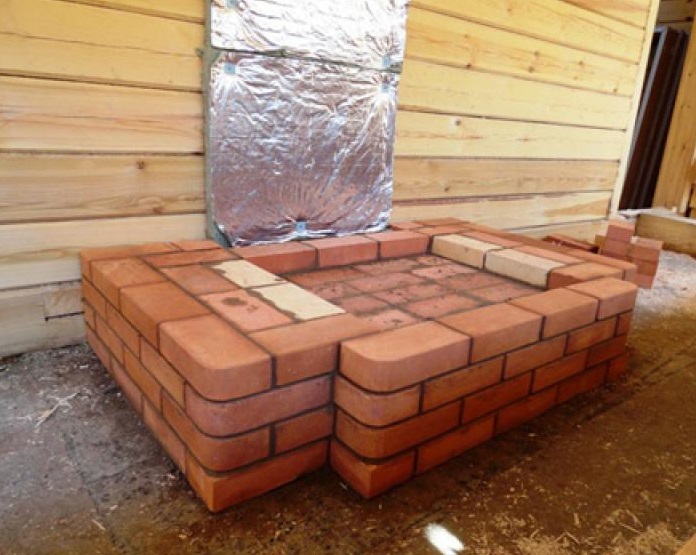
This country grill is made up of bricks laid on the bed. Two protruding rows (bricks are laid across) serve as a support for a brazier sheet and a brazier mesh.Here you can put it on a spoon (put on a narrow part), then the sheet will rise a little higher. In the lower part, you can stack firewood or use it for other household needs.
The rows are put in a dressing - with an offset, for this you need halves of bricks. They can be cut with a grinder. The first six rows form the brazier and table on the right. Starting from the 7th row, the laying goes only in the part where the brazier itself will be located.
Seam thickness 5-8 mm. It should be the same.
Ordering a small country grill made of bricks
In order not to break the geometry during construction, you can pull the cords and align all the rows along them. But each brick and each row are controlled by the level for horizontalness. It is constantly necessary to check the verticality of the walls and corners. To do this, use a construction plumb line (a cord with a load at the end). You can check the verticality with the level, but it has an error, especially if it is not a professional, but an amateur instrument. So with such a check, there is a solid likelihood of getting a brazier with oblique, heaped walls.
The order of this brick barbecue is simple, and does not require additional explanations. Questions about drying may arise. If the weather is dry, leave the grill to dry for three to four days. Then you can start a fire little by little. Heat for a couple of days in a gentle mode, using thin firewood and a little. Then you can fry the first batch of kebabs.
One of the options for a simple brick barbecue. It differs from the basic version in that there are two rows of protruding bricks. Another difference is that the table is smaller.
If rain is foreseen, and there is no canopy over the barbecue, cover it with oilcloth. After about a week, you can start slow drying: light the fire small and briefly. Drying will also take 2-3 days. Then a brick brazier, folded with your own hands, can be tested.
Perhaps you will be interested in reading "How to make a brazier out of metal with your own hands"
How to make a brick stove with your own hands? Ordering the device
For masonry, the following solution is suitable: cement, sand and red clay in proportions of 1: 3: 2.
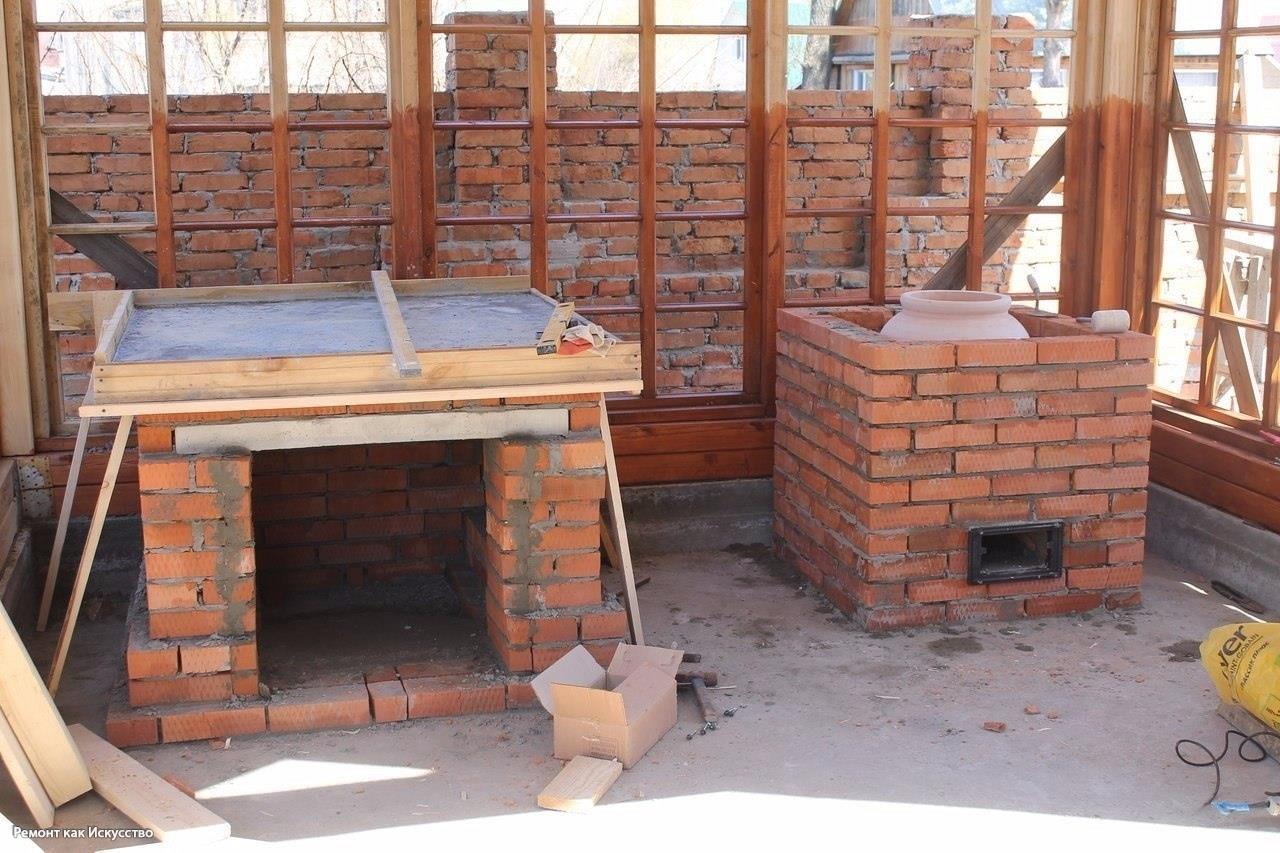
- In a project that includes a worktop, the bottom rows should be laid out in the shape of the letter "W". The oven itself is supposed to be on the left, and on the right is a tabletop or table for cutting meat. Lay five rows first. Be sure to check them by level. For firm vertical fixation, the mortar must be applied to the walls of each brick.
- Every second row should start with half a brick. The thickness of the back wall is 3 bricks, the thickness of the side walls is 2.
- Make rows 6, 9 and 14 protruding. The lower one is for a removable tray, the middle one is for barbecues or grates and the upper one is for a smokehouse. The final 15th row will be just under the working surface of the table.
- The gap between the brick and the countertop should be covered with an airtight gel so that, if desired, a sink and water supply can be built into the workspace.
- The front of the stove can be rounded with an arch. To do this, a wooden frame should be installed, on top of which bricks are laid and poured. Laying must be completed with a central brick, securing the entire arch with it. After the solution has hardened, the wooden stand can be removed.
- The table top is ordered in advance or is independently made of plywood and porcelain stoneware.
- The chimney and hood can be purchased ready-made or made by yourself. To do this, you will need to weld the sheet metal together to obtain the desired shape. The joints must be treated with a sealant so that smoke does not escape through them. The pipe must be at least 60 cm long and 12 cm in diameter.
- If the gazebo has a roof, the chimney should be insulated by wrapping it with asbestos cardboard or non-combustible mineral wool. The top of the pipe is protected with a sheet metal cone to prevent rain and snow from entering.
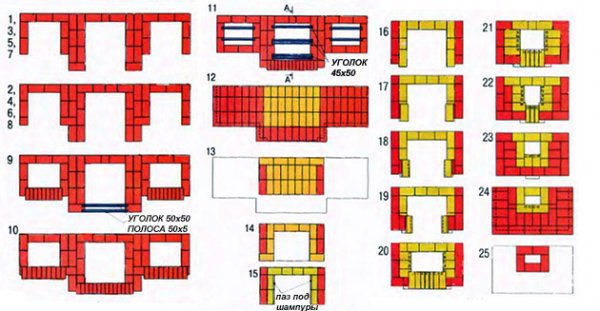
Photo 2. Ordering a brick oven for a gazebo.Consists of 26 stages, two types of bricks are used in the manufacture.
The lower part of the resulting structure can be used as a firewood. It is more practical to make the bottom of the brazier steel.
Difficulties in building
Many difficulties with the construction of a furnace arise even at the design stage. With a lack of experience, ready-made schemes for brick stoves are best found on the Internet: they fit any gazebo. It remains to fill the foundation correctly and calculate the space.
If the brick is not laid correctly, irregularities and protrusions may appear. At first, flaws may not be noticed, but they will certainly show themselves as the next rows are erected. To avoid this, you can focus on a horizontal thread stretched along the level. It will help you see irregularities at once.
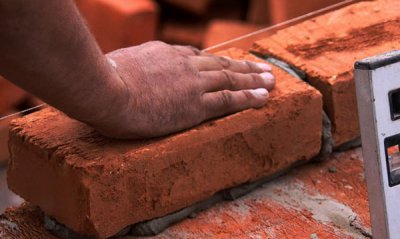
If a bump does appear, remove the top rows of bricks.
It is necessary to ensure that no niches remain in the masonry, so that the solution is evenly distributed. There are only 2-3 hours to correct the error, until the solution has set.
When building an arch, you need to trim the side bricks with a grinder. If it is not there, the building material can be gently split with precise blows.
If precipitation falls through the joint between the chimney and the roof, it is possible to fix this without dismantling the masonry. Pass the bitumen-based roofing tape along the joint. She needs to wrap the pipe, completely closing the cracks and problem areas. When heated, the tape sticks together. After such manipulations, no bad weather is terrible.
Construction technology
High-quality ordering of a barbecue with a brick cauldron will allow you to preserve the structure for a long time and improve its safety during operation. This stage is very important and takes some time even for professional builders.

Foundation
We proceed to laying the base under the brazier with a brick cauldron
It is important to follow the sequence here:
| Stage | Comments (1) |
|---|---|
| Dig a trench under the foundation, then cover it with a layer of sand | The depth should be approximately 25-30 cm |
| Cover with a sand pillow and cover with water | Layer thickness - 5 cm |
| Put a layer of gravel or fine gravel on top of the sand layer | Layer thickness - 10 cm |
| Make formwork from planks | The protrusion above the ground must be at least 5 cm |
| Lay reinforcement mesh layer | Mesh thickness - 15 by 15 or 20 by 20 |
| Pour concrete level | After filling, wait at least three days |
| Lay layers of roofing material for waterproofing | Number of layers - 4-6 |
Masonry mortar
At the next stage, we prepare the solution. To do this, take:
- 2 buckets of cement mixture;
- 0.5 buckets of slaked lime;
- 1 bucket of sand.
Mix the ingredients in a special container, mix thoroughly and bring the mass to a thick dough.
Plinth
Before you start laying a brick barbecue with a cauldron for mortar, fold the future barbecue in rows without mortar, dry. There are two important rules for implementing this stage:
- Keep in mind that between the bricks there will be a layer of mortar with a thickness of 5-10 mm;
- Always use protective gloves when adjusting bricks to avoid injury;
When everything "worked out" and the result suits you as an architect, proceed to the brickwork with mortar:
- The laying of the base, that is, not the hot zone, is carried out in half a brick;
- When laying bricks, be sure to check all horizontal and vertical lines with a building level;
- When you reach a height of about 70 cm from the open side, place 2 steel corners 50 x 50 mm with the shelves facing up. They are needed, since from this place you need to lay the bricks of the fourth wall-sidewall of the barbecue;
- Next, continue laying in 1/4 of the brick, that is, lay the bricks on the edge;
- By placing the bricks on the side and back walls in 1/4 bricks, you will get a support ledge for the bottom along the entire inner perimeter. Keep in mind that these are already rows of the hot zone, therefore it is recommended to use refractory or solid red bricks.

Brazier
Before laying the brazier, decide whether to remove ash from the firebox. For example, install a metal tray that can be easily pulled out and cleaned of the combustion product. Many builders recommend constructing a firebox of at least 80 cm. This value is equal to 12 rows of brickwork. Close the top of the structure with a concrete slab and adjacent brickwork.
Walls and smoke box
The construction of a smoke collector is somewhat more complicated, but it is quite within your power. To do this, the walls of the focal zone, where cooking directly takes place, must be laid out higher, so that it is convenient for you. Then you need to "narrow" the pipe. We lay bricks, shifting each new row by half a brick inward. This is how the bell of the furnace is formed.
Decorative finishing
There are a huge number of options for decorating your home. Unleash your limitless imagination and apply all your creative skills.
There are several options for finishing the barbecue:
- plaster a brick brazier with a stove under the cauldron;
- revet with tiles and tiles;
- install metal cases;
- apply a decorative finish without facing by joining bricks.

Types of foundations for gazebos
The foundations of these summer cottages can differ both in design and in the type of material used. The main thing is to ensure that the foundation is solid, reliable and durable.
Strip foundation
This type is usually poured under rather heavy brick and concrete structures. Sometimes a similar foundation is erected under chopped and cobbled pavilions. It is advisable to use a strip foundation for light shield buildings only if the soil on the site is very weak.
A strip base is usually poured under brick arbors.
It is not necessary to make a filler strip foundation. For a gazebo, such a base can also be assembled from ready-made narrow concrete blocks. When using them, the foundation will be erected much faster.
Video on how to fill the tape support under the gazebo:
Column foundation
Such a base is usually erected under light wooden panel or metal arbors. On stable semi-rocky or sandy soils, this type of foundation can also be used for log or cobbled structures. Sometimes small brick arbors are also placed on the pillars. In this case, a solid concrete tape is poured over them - a grillage.
It is easiest to fill in an inexpensive columnar foundation with your own hands.
The material for the construction of such a base can be used in different ways. Columnar foundations are usually made of concrete. Brick is often used for their construction.
Important: You can not assemble the foundation for the gazebo from white bricks (silicate), foam or aerated concrete blocks. These materials do not tolerate high humidity very well. Within a few years, such columns will crack and warp.
Within a few years, such columns will crack and warp.
Pillars are most often erected by the "brick" method. Concrete supports are poured into the formwork.
Brick pillar supports will be quite reliable
Sometimes they also arrange a foundation for a gazebo made of timber. It is also quite reliable, but not very durable option. It is suitable only for a wooden gazebo. Before installation, that part of the pillars that will be in the ground must be treated with bituminous mastic or drying oil. For greater reliability, a cross is nailed to the wooden supports at the bottom.
Simple columnar foundation from a bar
Pergola on screw piles
Such supports are one of the most reliable and at the same time inexpensive types of foundations. Screw piles are screwed into the ground at the corners of the building and along its walls using a lever. Of course, they can be installed only if the land on the site is not rocky. The gazebo will stand on piles even on unreliable ground for a very long time.
The base on piles is very good to use when erecting a street "house" for recreation, for example, on the side of a mountain.
At the final stage, the piles are tied from above with a rigid wooden or metal horizontal frame.
A gazebo on screw piles will stand for a very long time
Slab base
The slab foundation is placed under structures made of wood, brick and concrete on very unstable soils. When moving, the site moves as a single monolith, and with it the structure itself.
The filling of the structure in this case is usually carried out with the involvement of special equipment. However, for a very small gazebo, you can also make a stove manually, calling for help, for example, neighbors or relatives.
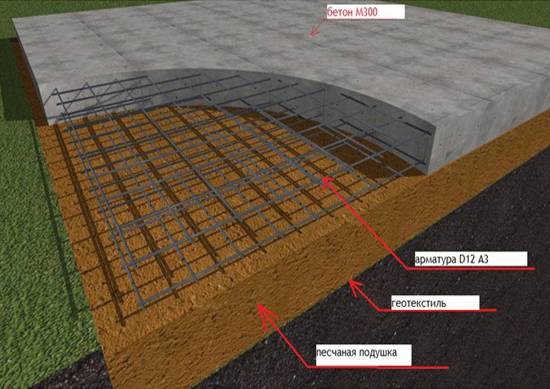
Slab foundation is the most reliable foundation
Foundation preparation

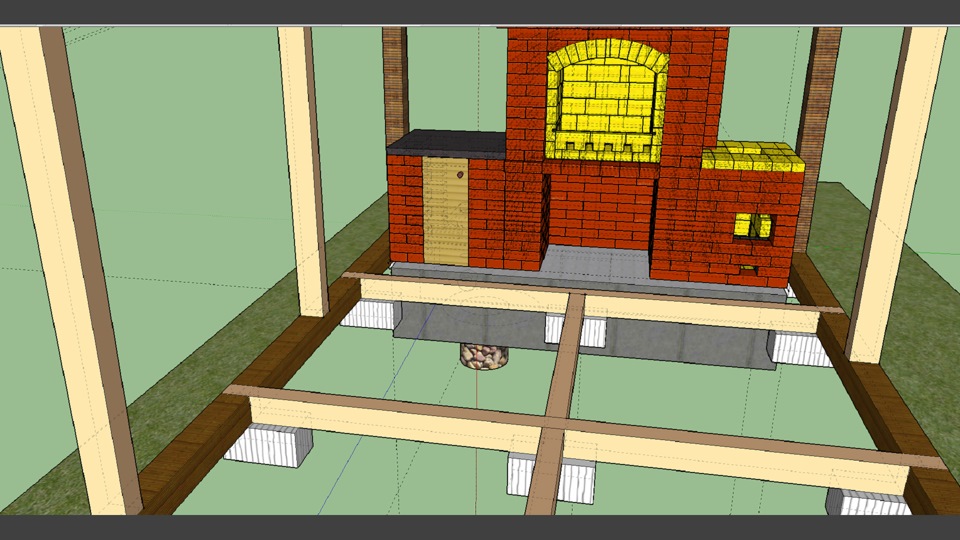
It is better to think over the project of a gazebo with a built-in stove, since a wooden structure may not withstand a bulky structure.
If the installation of the device is planned in an already built gazebo, you will have to disassemble part of the foundation.
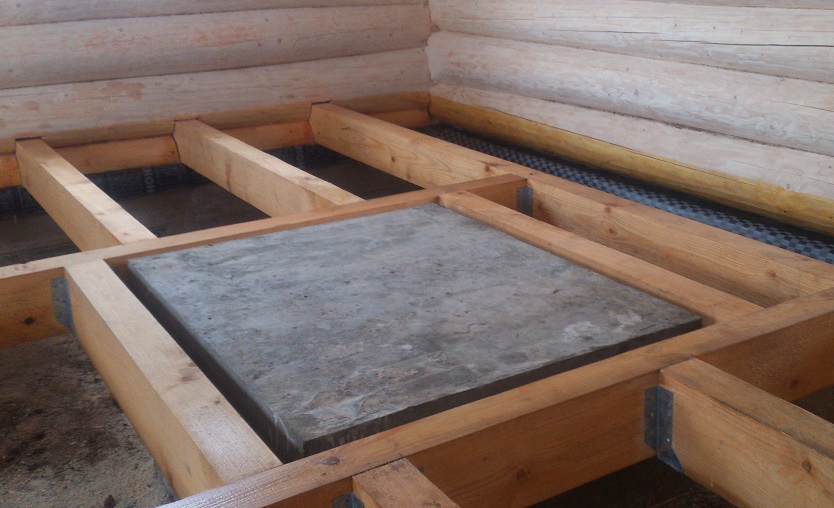
The wooden floor must be removed and filled with concrete. On such a platform, it is permissible to carry out further work:
- Dig a 30-centimeter ditch, the bottom of which is tamped with sand and gravel.
- Fix the ASG with a thin layer of concrete mortar.
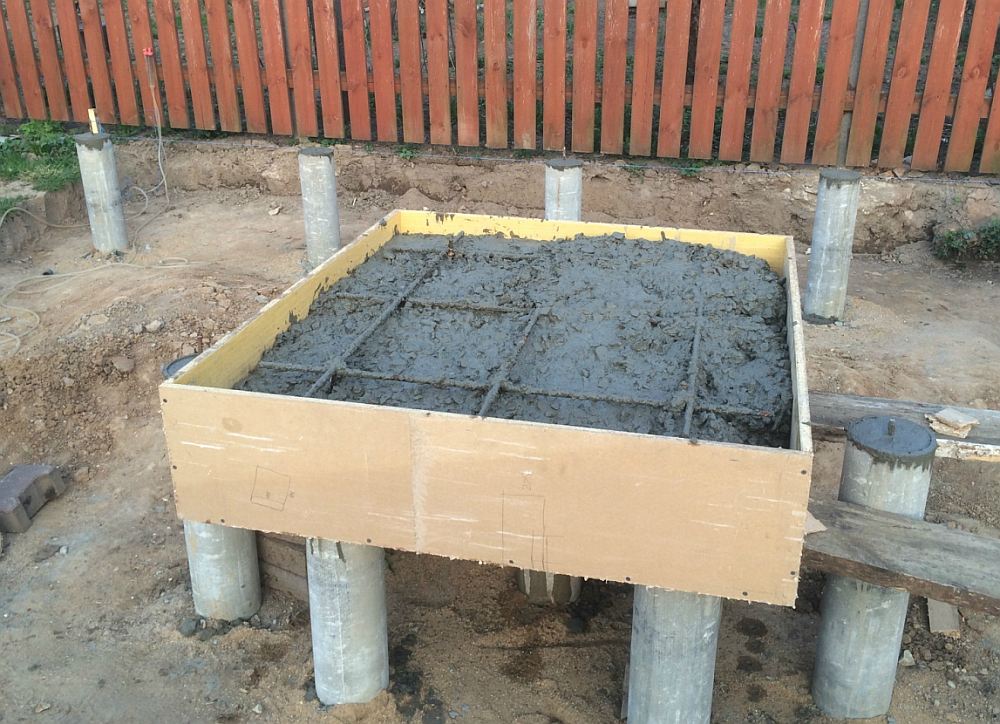
- Construct the formwork for the construction of the foundation. For this, chipboard or ordinary durable boards are suitable.
- Inside the formwork, make a frame from reinforcement, connected by wire.
- Pour everything with concrete. It is necessary to ensure that the reinforcement is under the mortar.
- The foundation should harden within three weeks. At high temperatures and in dry weather, you need to moisten it with water.
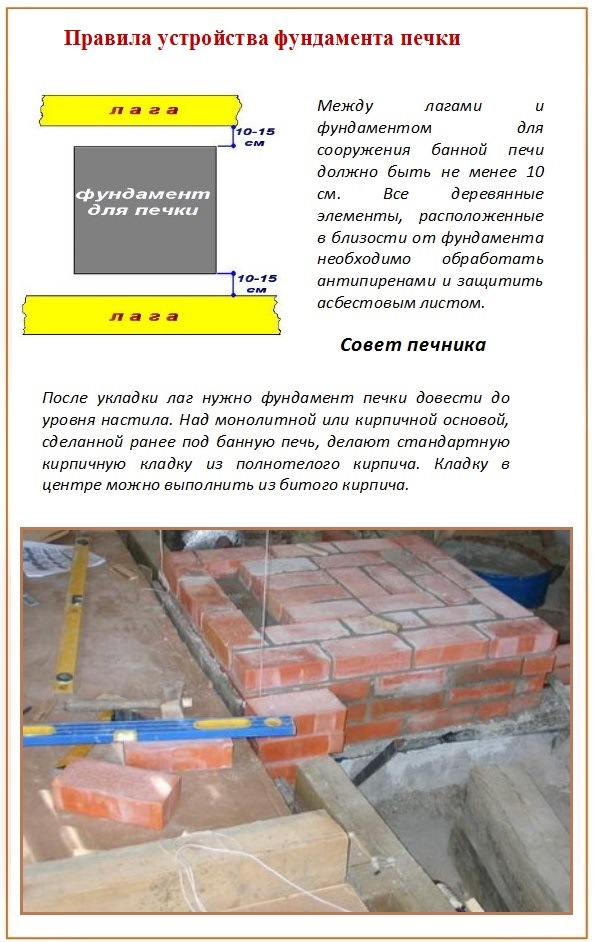
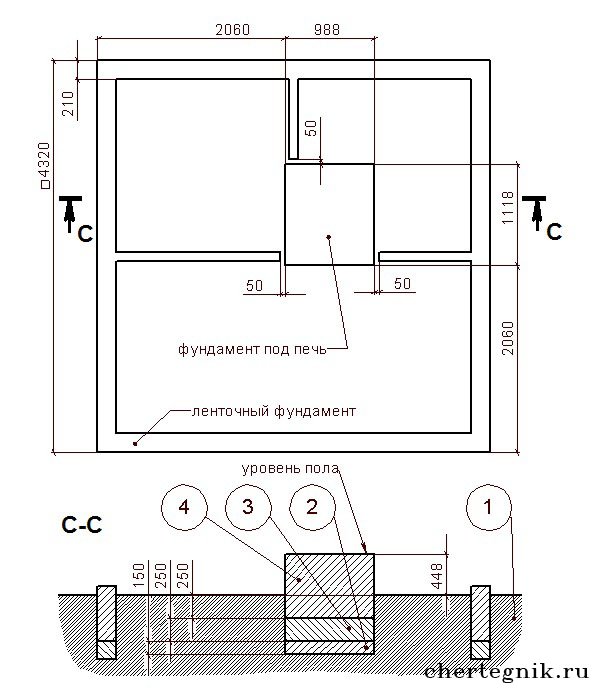
Attention! The foundation should extend beyond the base of the oven by 15 centimeters
Determination of the place for the foundation
Planning construction work should begin with choosing a place for a gazebo with a barbecue, which largely depends on the design and shape of the future building. If you are not satisfied with a simple barbecue and you want to build a gazebo or a summer kitchen, you will have to find the most convenient place for this, because you cannot move the capital structure.
Arbor foundation diagram.
Firstly, you should take into account the distance from the gazebo with barbecue or barbecue to the main buildings on your site: kitchen, house, bathroom, etc. It is inconvenient to carry everything you need for cooking over long distances. However, the tenants of the house are unlikely to like the penetration of the smell of grilled meat or smoke from the fire into the living rooms. The barbecue should be located near the residential building, preferably in a place protected from the wind or on the leeward side. It is good if the recreation area is fenced off by a wall of trees.
Secondly, the future gazebo for a barbecue, built with your own hands, should be in an easily accessible place so that residents or guests do not have to make their way to it through flower beds or beds. It is necessary to lay garden paths from the gazebo to the house and outbuildings. Thirdly, it is necessary to observe safety precautions, since a brazier or barbecue presupposes the presence of an open fire. The gazebo with barbecue should be as far away from trees and wooden buildings as possible. The distance from open fire to structures made of combustible materials should be at least 10 m, there should be no overhanging branches above the gazebo. There should be a source of water for extinguishing the fire near the recreation area with barbecue, for example, a large container of water, a box of sand or a water pipe.
Installation of formwork and reinforcement
Before proceeding with the self-pouring of the concrete base under the barbecue, you will need to build a formwork and make reinforcement.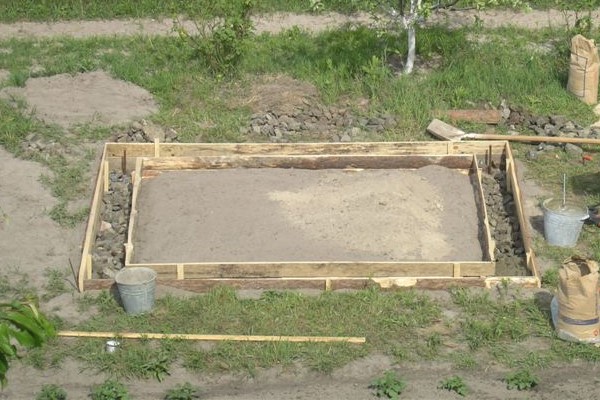
You will need the following materials and tools:
- Wooden boards (plywood);
- Hacksaw or jigsaw;
- Hardware;
- Metal reinforcing mesh;
- Metal wire;
- Bulgarian or special scissors for metal;
- Pliers and hammer.
The formwork of strip foundations is assembled from boards with further installation and fastening along the perimeter of the dug trench.
The boards are sewn together into shields in dimensions equal to the height of the base and the length of the trench. After installation, the shields must be fixed with pegs, bricks or slate so that they do not fall and prevent the liquid concrete mortar from flowing out.
The formwork is made of boards and sawn timber scraps, but if the base for the furnace is planned with a complex design with lines of different geometry, then it is better to use plywood to erect the formwork and hold the mortar.
The foundation can be built without reinforcement. If the load on the monolithic slab is planned to be small, the foundation is built without first installing reinforcement in the trench.
If it is decided to strengthen the structure, then it is possible to make a reinforcing mesh by laying one layer of reinforcement. Or just drive a few metal rods into the trench, to which you can attach a netting mesh with a wire. It is advised to cover the reinforcement with a primer before placing it in the ground, in order to ensure the greatest reliability of the adhesion of concrete and iron.
The so-called "cement milk" is used as a primer. It is prepared in this way:
- Dry cement is mixed with water until a mass is obtained that resembles a batter in density;
- With any brush, a primer is applied to all metal parts;
- Let them dry.
It is necessary to check the level of installation of the reinforcement in height so that it does not protrude. Often, after pouring the base, pieces of wire and parts of the mesh can stick out from it.
How to build a device with your own hands
It is possible to make such stoves with your own hands, the main thing is to choose high-quality materials and strictly observe the stages of construction.
Project selection, drawings
When choosing a barbecue oven project, it is necessary to determine what exactly you will cook on it. In addition, you need to provide space for products and accessories. For example, if you will be cooking meat for several people, you will need a cutting board and cooking surface.
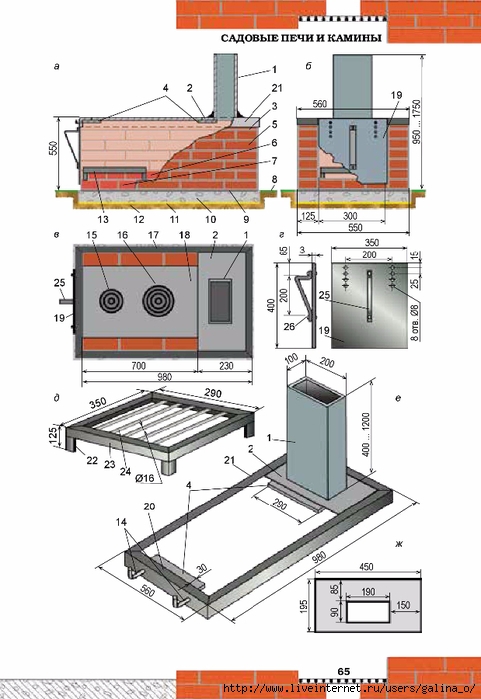
Photo 4. Drawing of the arch of the base of the brick barbecue oven. Dimensions are indicated for each part of the device.
If the site is small, you can stop at a corner stove, which will save the usable area as much as possible. If you want to heat a house or utility rooms with a stove, it makes sense to choose the fireplace option, but in this case it is necessary to allocate a larger area for it. It is worth deciding whether the kitchen complex will be covered or not. The first option is more expensive, but it allows for picnics and outdoor cooking without fear of bad weather.
Photo 5. Drawing of a brick barbecue oven. The device has a sink, a place for cutting food, shelves for storing things.
Selection of materials
The most common option for laying barbecue ovens is brickwork. Brick is an affordable and durable material that allows you to fold a stove of any size without much effort. Use a brick grade not lower than M-250.
The standard design takes 1,500 pieces, while refractory bricks are also required for laying out the furnaces in those places where combustion will take place directly. It is possible to create a structure from wild stone, but it is difficult and it is far from always possible to select the required amount of material in a particular area.
Seat selection
If you decide to build a stove with your own hands, you will need to choose the right place for it. It is best to lay the device closer to your home, to the kitchen. This is necessary in order to make it easier to bring water, dishes, food. Consider the following circumstances:
- you cannot build a structure next to trees, bushes and other sources of fires;
- the place for the stove must be protected from the wind;
- the soil on the site must be solid.
Attention! You can not place the stove next to the house in order to avoid a fire and so that the smoke from the device does not interfere with you and your neighbors.
Stages of construction work
After choosing a furnace design and a site, it is necessary to create a structure in accordance with the following plan:
- preparation of the construction site: clearing, removal of holes and irregularities, arrangement of drainage;
- foundation creation - the usual flooded strip foundation is quite enough;
- laying out the furnace according to special schemes, which can be downloaded on thematic sites dedicated to construction;
- layout of the firebox;
- construction of a chimney and chimney.
The last stage in the construction of a barbecue oven is finishing work. A canopy or roof is equipped, if they are provided for by the project, a lattice is mounted, decorative brick or porcelain stoneware is laid out. At the final stage, the territory adjacent to the structure is refined.
Difficulties in construction and ways to eliminate them
In the process of building a barbecue, some difficulties may arise. They can be corrected or prevented as follows:
In order to compensate for the pressure of the furnace on the ground when pouring its foundation, it is necessary to make its slab 20% larger than the area of the base of the furnace.
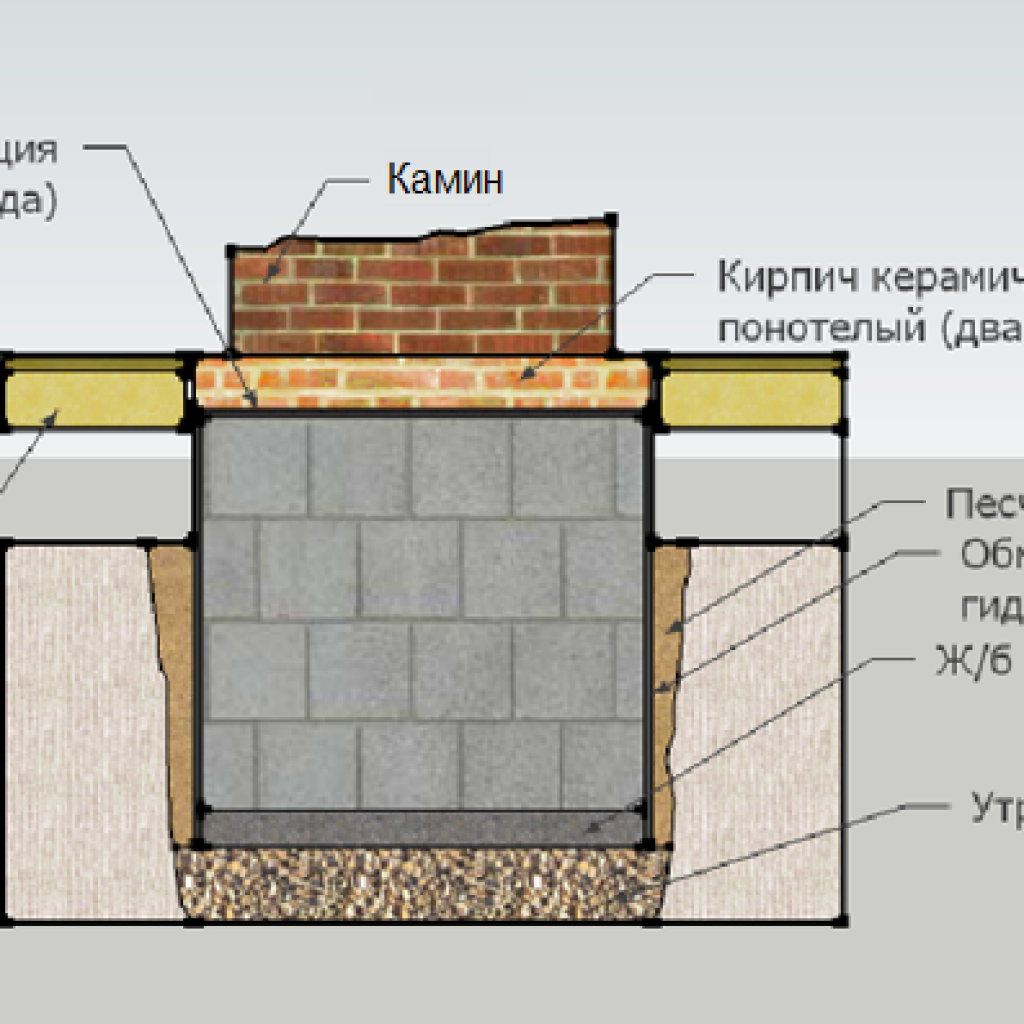
The upper level of the foundation is necessarily raised by about 10-15 centimeters above the ground level and its waterproofing is performed. Separately, it is worth making sure that a reinforced belt is laid every 10 centimeters. It is strictly forbidden to use bricks when laying the foundation. Better to use concrete that is less hygroscopic
Use metal elements carefully. The fact is that the metal expands when heated and can destroy brickwork.
To prevent this from happening, it is worth replacing the metal with stone, for example, making the roof of the furnace on a wedge-shaped lock, and not using iron corners. Refractory and ordinary bricks can crack and swell when used together. To prevent this from happening, different types of bricks are laid with basalt cardboard. This technique allows you to increase the heat transfer in the furnace. It is worth involving a professional stove-maker in the case. It will be needed when you need to lay out the most complex elements of the stove and firebox. An experienced master will always be able to tell you what to do in a particular case. Doing it yourself makes sense when you have experience building a barbecue oven.
Overview of materials for construction
The main aesthetic and functional message of a gazebo with a stove will depend on the material for its construction. Suitable models are chosen taking into account personal preferences and financial capabilities. Suitable for construction:
- Wood. Such a garden building will organically fit into any landscape. The most profitable option from a financial point of view. It will not be difficult to build a gazebo with your own hands.
- Brick. A capital gazebo with a foundation takes up a lot of space, it will look ridiculous in a small area. With proper construction, the structure will last for more than a dozen years.
- Metal. Suitable for the construction of a gazebo that will only be used in the summer. Forged designs look beautiful. It won't take long to build them. Metal supports for the canopy are reliable and safe.
- Combination of materials. The frame is made of metal, inside they are finished with brick or clapboard. The roof is covered with corrugated board, tiles.

Only heat-resistant materials are suitable for the construction of the furnace. It can be brick or metal. For joining the elements, special adhesives are chosen. The brazier, brazier is fenced from the walls of the furnace with dense metal sheets.

