Foundation finishing stages
Before starting to plaster the foundation, you must:
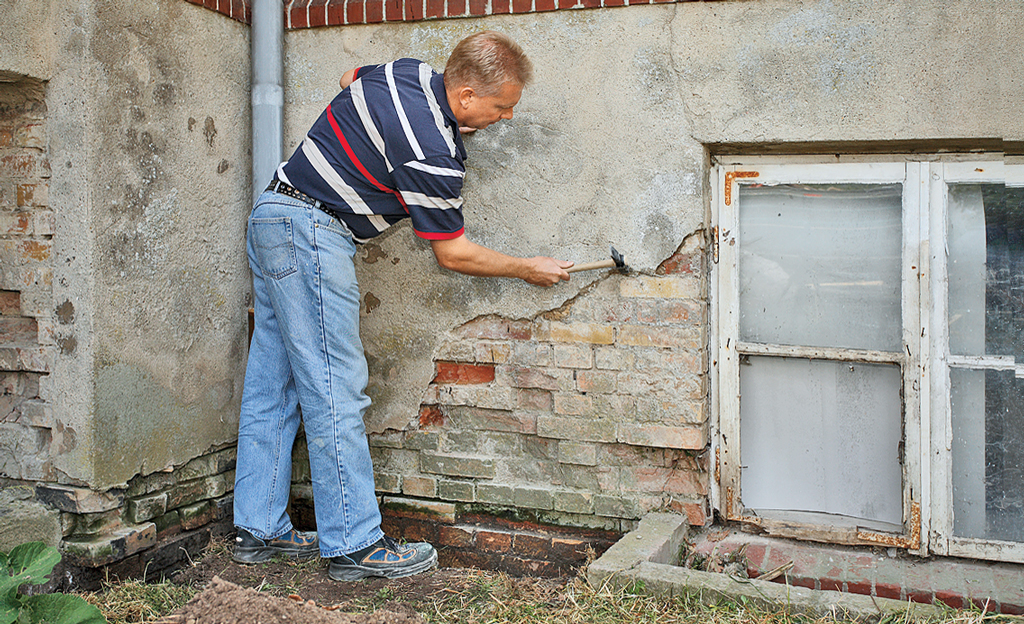
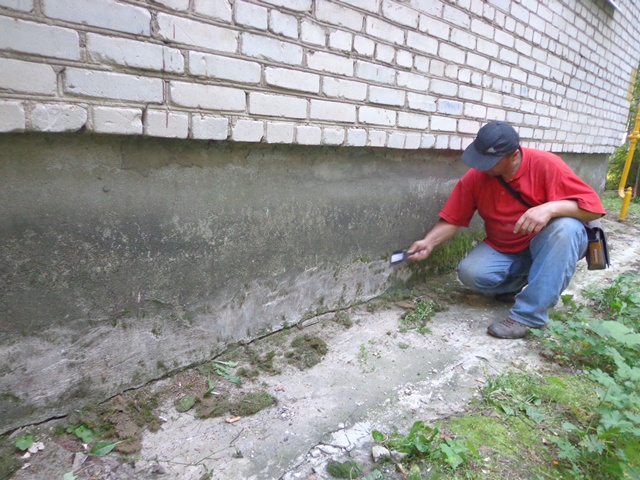
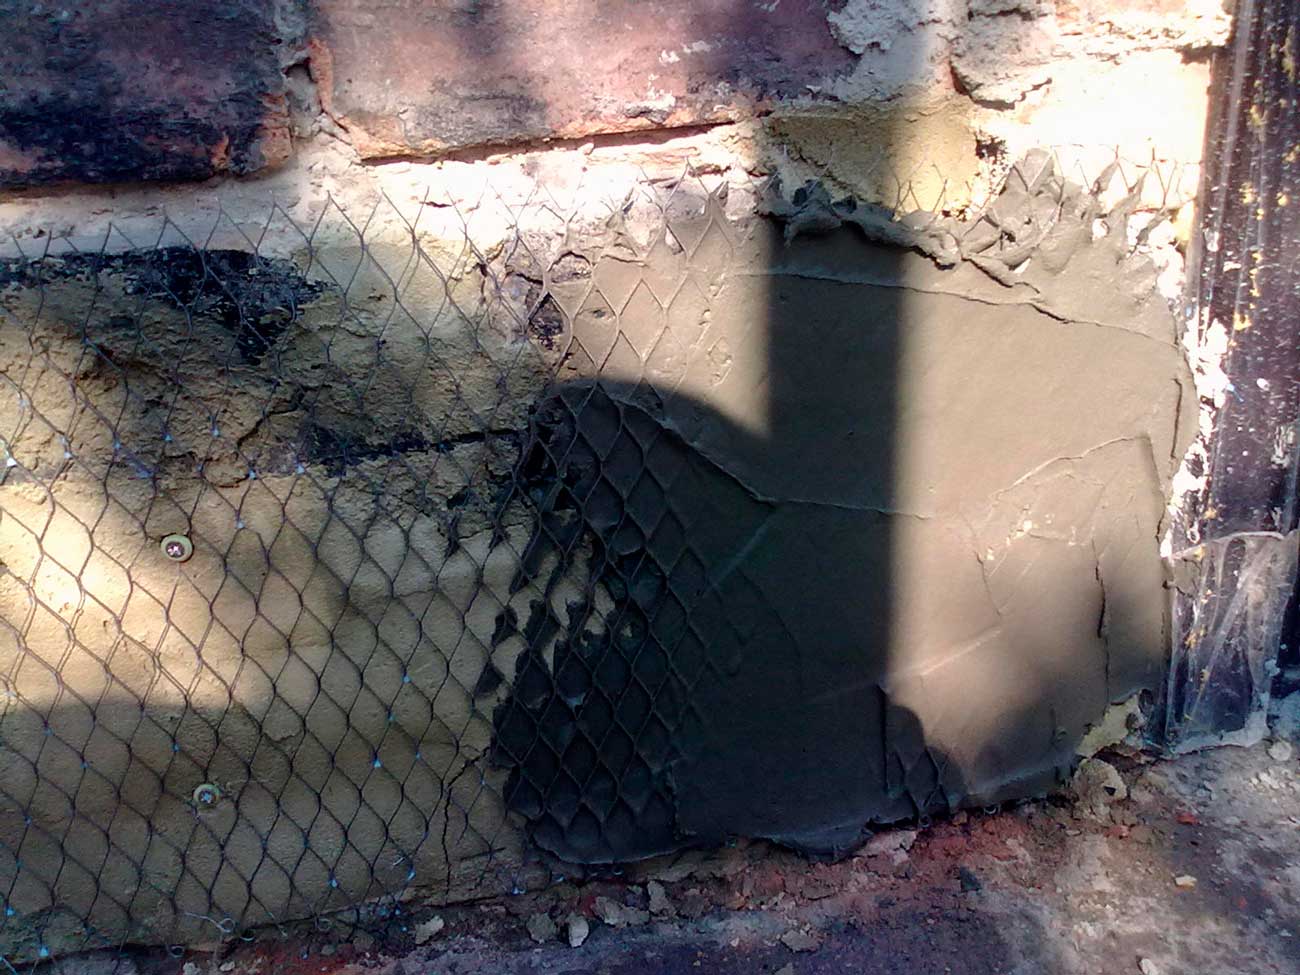
- Make notches over the entire area of the base. This aspect applies exclusively to the concrete foundation. You can make notches with a screwdriver or some other durable metal object.
- Align the surface.
- Prime the surface.
- Moisten masonry joints and any other damage with water, and then fill with a mortar based on cement and sand.
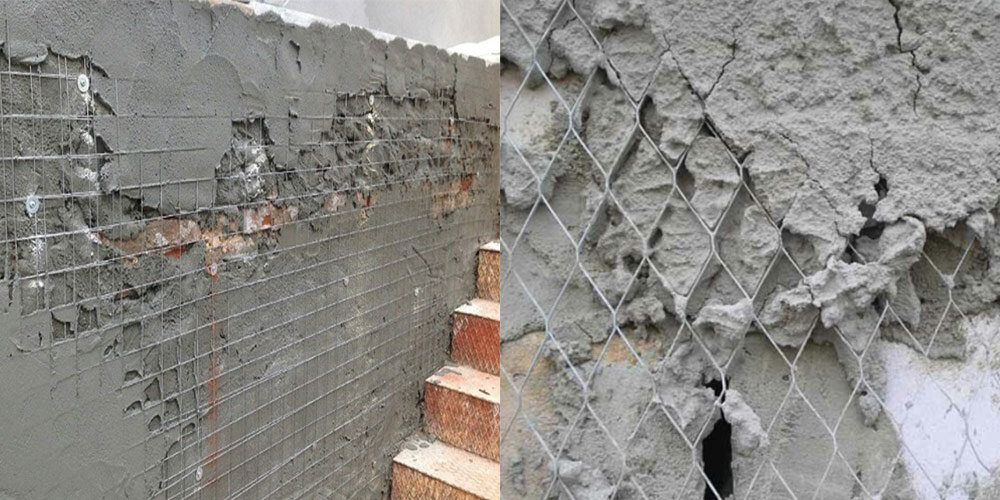
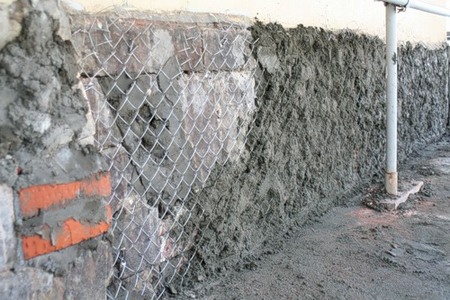
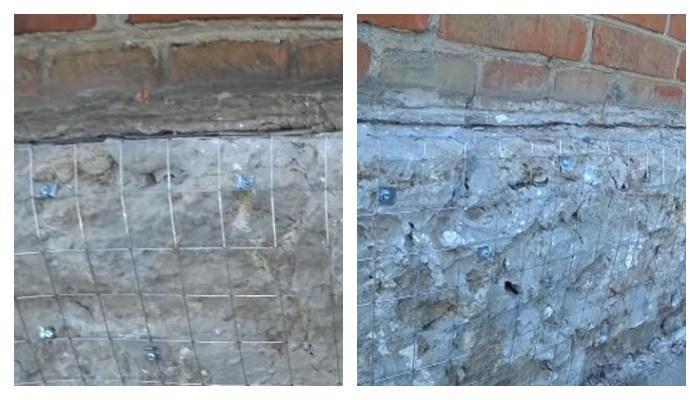
- Shoot a fine-mesh mesh Rabitsa to the foundation. In this case, staples or dowels will help.
Plastering
- Install beacons in the corners and every 1.5-2 meters.
Beacons are installed as follows:
Using the hydro level, a flat strip is drawn on the ground near the foundation
It is important that the indentation from the foundation is almost invisible (2-3 cm), the strip should run close to each other.
At the place where the corner of the wall will intersect with the strip, the peg is installed strictly vertically, and the height of the peg must correspond to the height of the base.
The distance between the peg and the foundation should be filled with mortar. A vertical bump should form, the alignment of which should be done using a building level
Such beacons should be made in all corners, as well as every 1.5-2 meters.
3 nails should be driven into the pegs intended for corner beacons, on which it is necessary to pull the lace. This lace will work as a reference point for plastering the foundation under the stone. Accordingly, after pulling the lace, 3 lines will appear: below, in the middle and on top of the base. It is important to remember that between the laces and the beacons themselves, there is an opening of 1 mm.
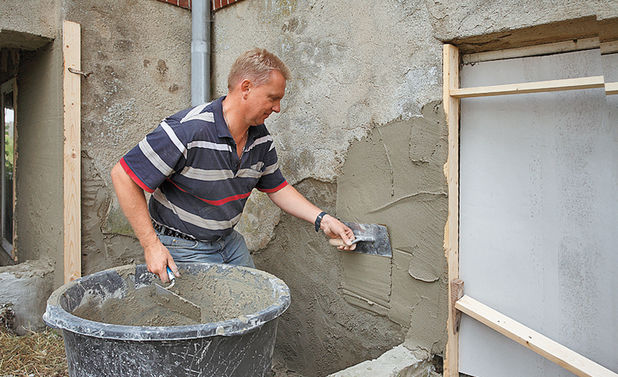
How to plaster the foundation? There is nothing complicated in the further process.


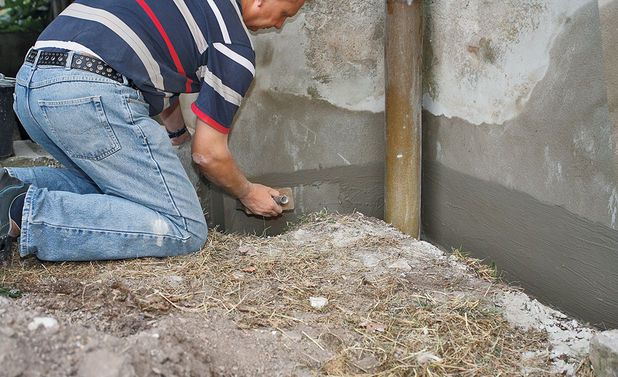
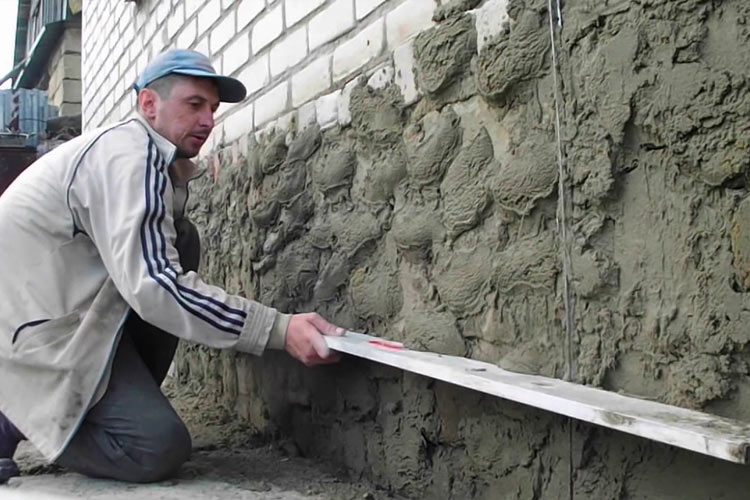
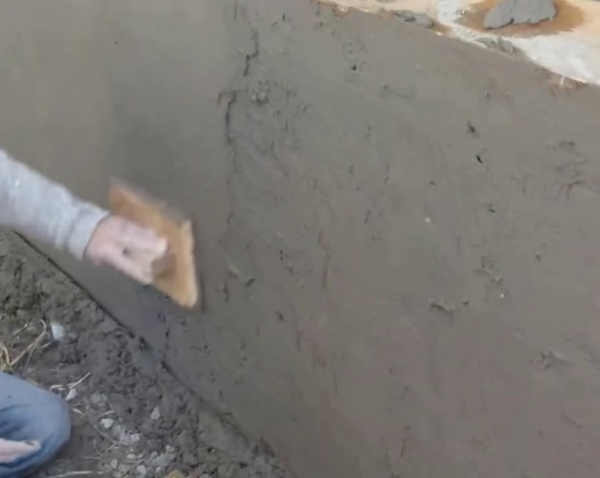
- First of all, you should wait until the lighthouses dry out, after which it is necessary to spray the foundation. First of all, it is wetted with water. After that, using a ladle or trowel, the cement mortar is sprayed, prepared in advance according to the above rules. The permissible layer thickness varies between 5-9 mm.
- After the "spray" has dried, a more liquid primer should be applied on top of it.
- After the primer has set, the covering composition should be applied - thicker and more plastic. It is this composition that is a plaster mortar with waterproofers and plasticizers.
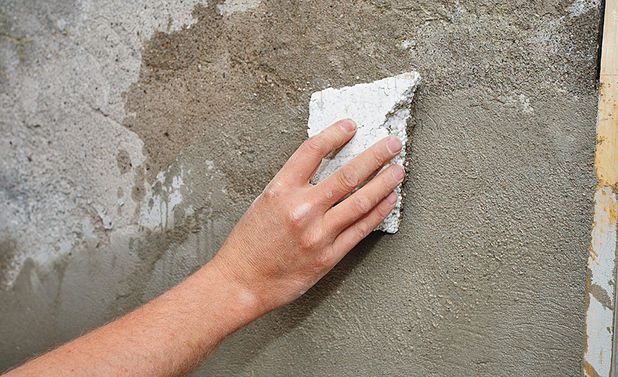
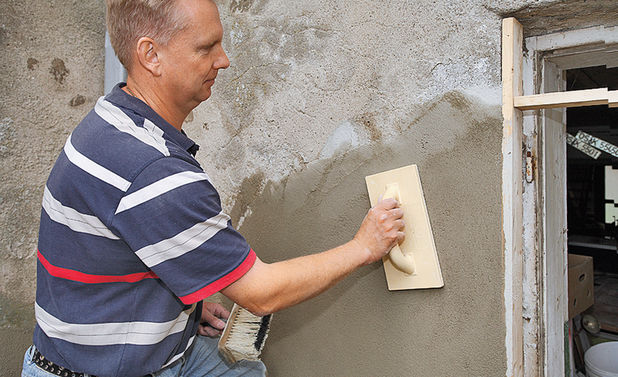
- The last stage involves mashing the surface. This process achieves the smoothest surface possible and also allows it to be leveled. Grouting is carried out using a special grater, which has a fine metal mesh. You can also use foam or some other special tools. The most important thing is to choose the right moment for mashing. In this case, the plaster should not be completely dry, but it should already be seized. You can make plaster in a variety of ways - under a stone, or give it a relief surface.
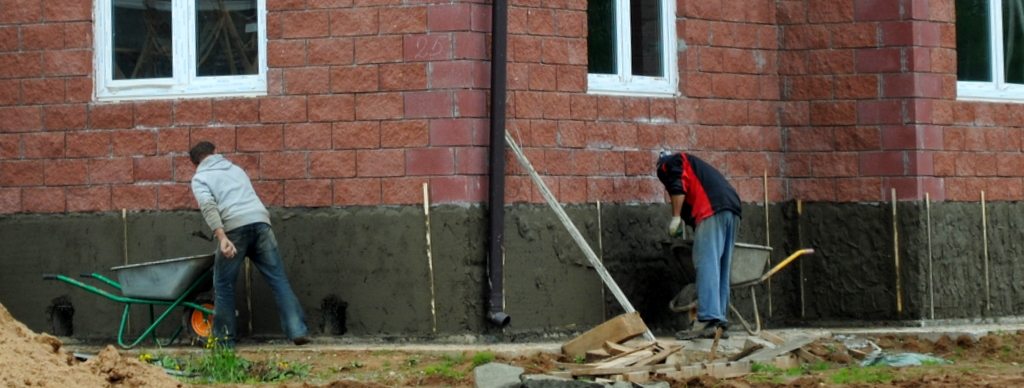
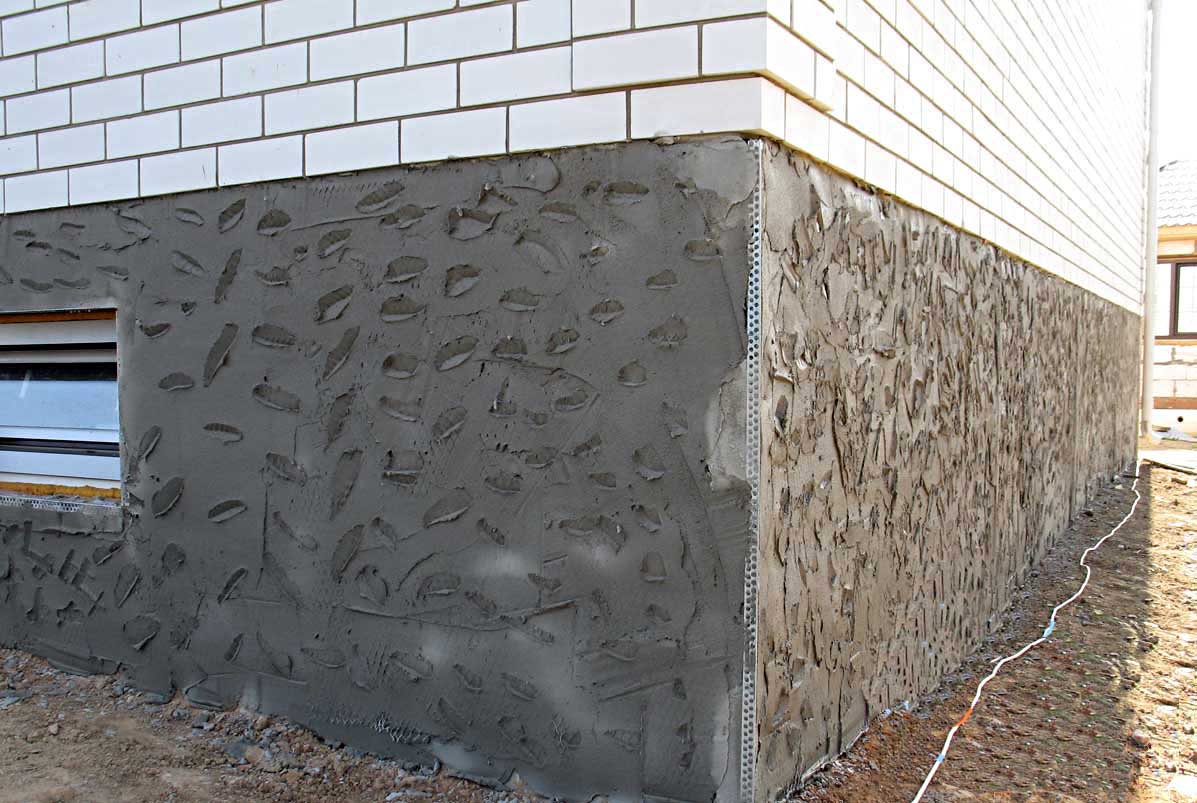
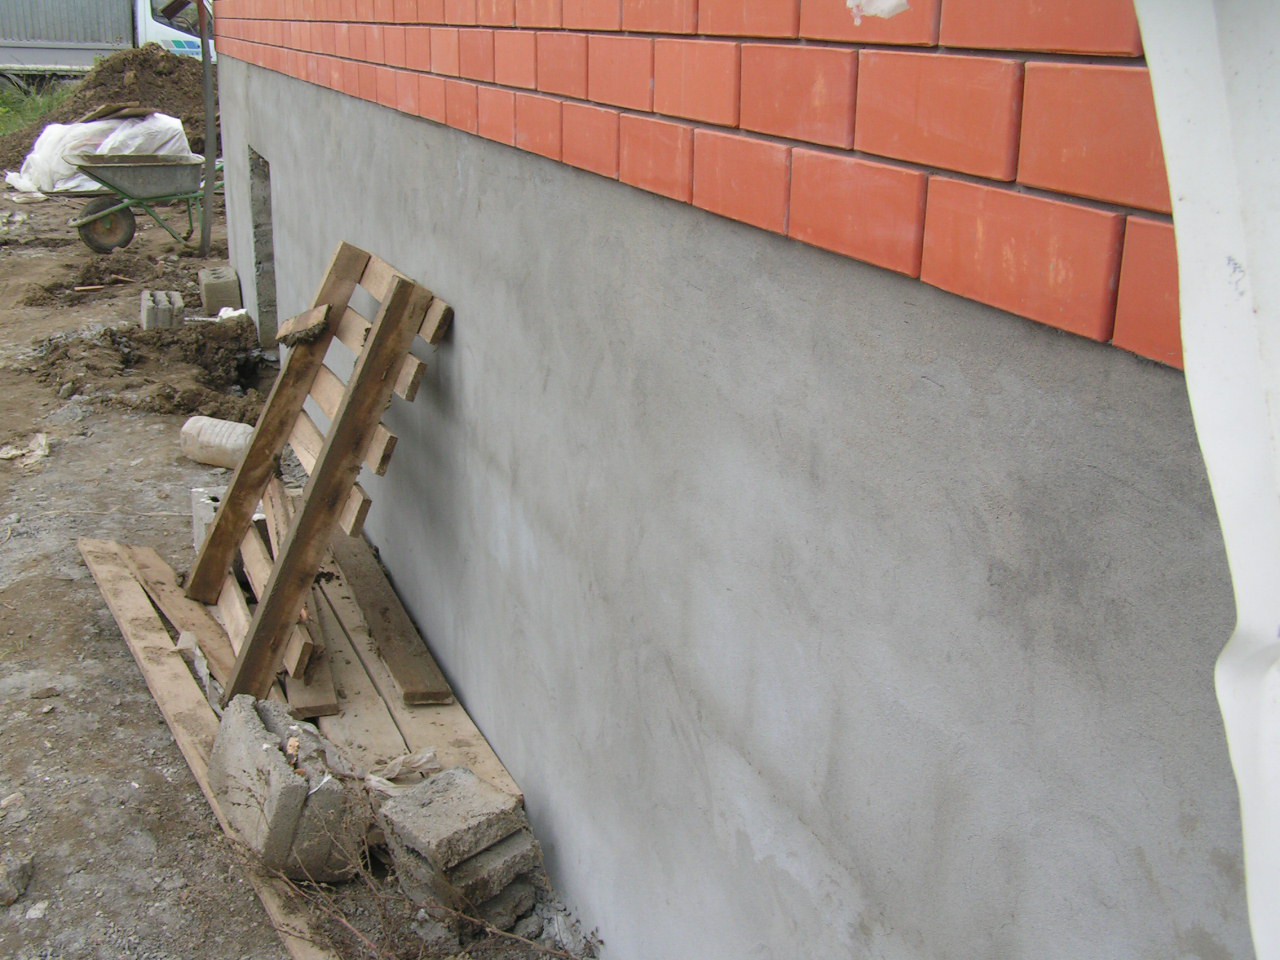
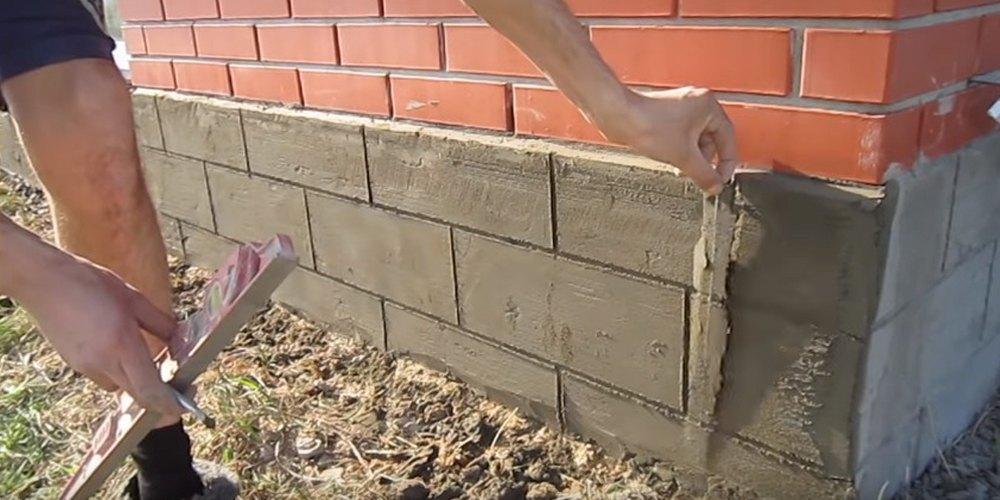
The socle is the part of the foundation that protrudes above the earth's surface. It can be made of concrete, which is an extension of a monolithic foundation structure, or it can be laid out of bricks on top of a strip foundation.
Due to this arrangement, the base is constantly exposed to atmospheric precipitation, low temperatures and weathering, which negatively affects its appearance and integrity.Therefore, the basement part of the foundation needs additional protection, one of the methods of which is layer-by-layer coating with a cement-sand mortar.
How to plaster the foundation of a house with your own hands is described in this article.
Plaster solution - do it yourself
To perform work on the protection of the foundations of residential buildings, a cement composition is usually used. The technology for preparing such a solution is given below:
Take quarry sand (river material cannot be used). Sift it thoroughly with a sieve
It is important to ensure that the composition does not contain clay impurities, small stones and other inclusions. The presence of even very small and insignificant pebbles in it can significantly complicate the plastering work.
If you have purchased absolutely clean sand, you do not need to sift it.
Mix the cleaned quarry material with cement. At this stage of work, it is important to determine the proportions that the finished plaster composition should have. If you use M500 cement, 5 parts of sand should be added to one part of it. And not otherwise. But for cement M400, 4 parts of sand are enough.
Now you need to add water to the mixed composition. Its quantity is selected individually. For wet sand, less liquid is needed, and for very dry sand, much more. In practice, they do this. Add some water to the mixture of sand and cement, knead it, add liquid again. This is done until a solution is obtained that is similar in density to homemade sour cream.
Preparation of cement composition for plaster
When the cement composition is prepared in a concrete mixer, the technology for performing the work will be slightly different. You need to pour a bucket of water into the unit, add a ready-made mixture of sand and cement (2-3 shovels), start the unit. After that, the sand-cement composition and liquid should be added to the concrete mixer alternately until you get the same thick "sour cream".


The characteristics of the mortar for plastering the base of the house can be significantly improved. To do this, add a couple of drops of PVA glue or a small amount of special plasticizers to the composition. Such additives impart high elasticity to the mixture and simplify the do-it-yourself plastering work.
Tips & Tricks
Simple recommendations will reduce the time and effort required for plastering basement works:
- preparation of the basement part should presuppose special care of the measures taken, including work on breaking off convex layers, removing bubbles and exfoliated elements;
-
before priming, it is imperative to thoroughly remove dirt and dust deposits with a stiff brush;
-
the plaster layer should be sufficient, at least five centimeters thick, and the exposed beacons should get the correct geometry. If necessary, it is recommended to strengthen the corners with special corner profiles;
-
the standard distance between the installed "beacons" should not be equal to or greater than the length of the rule used to level the finishing mixture, and from the extreme "beacons" to the corner part should be approximately 25 cm;
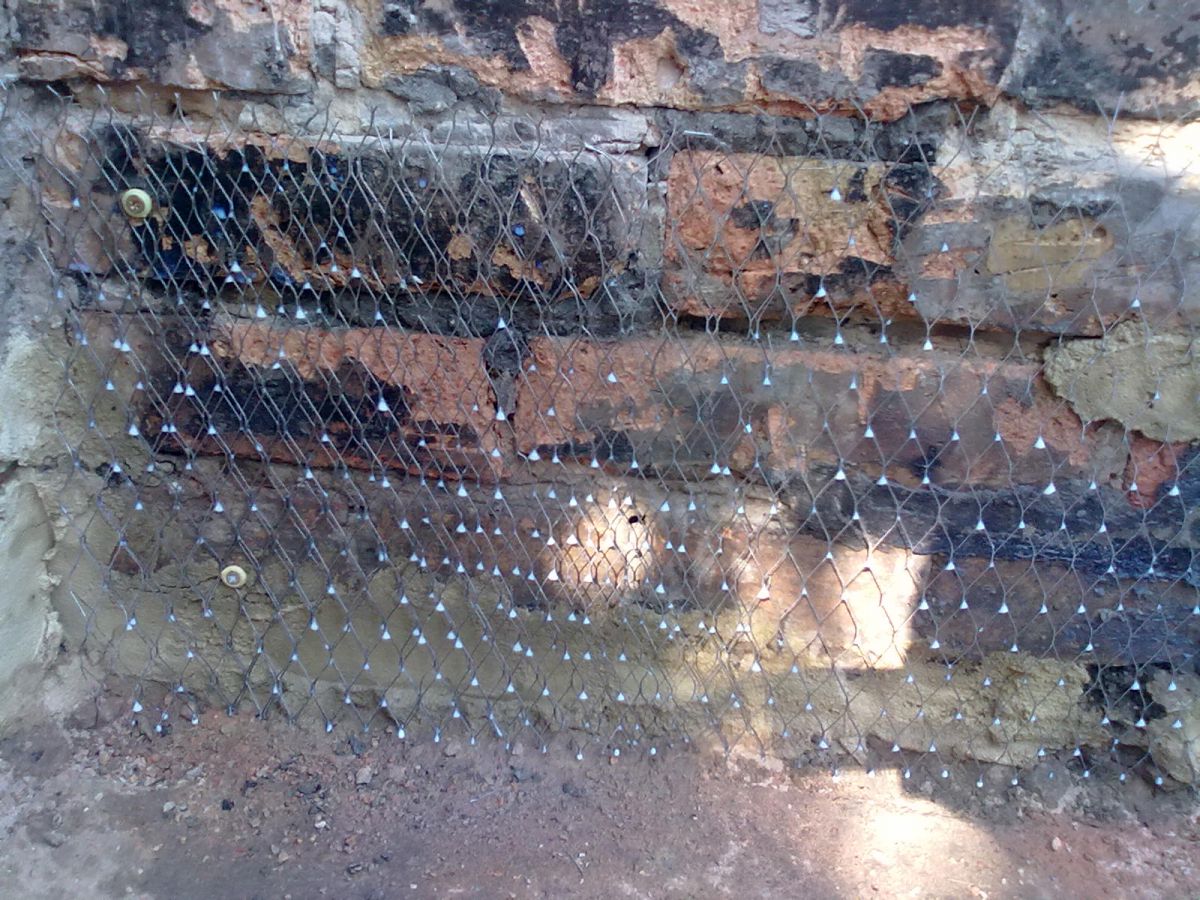
- plastering is carried out on a grid, so you need to fill a reinforcing frame base at a distance of a couple of centimeters from the wall, using a mushroom dowel for fixing, at the rate of 15-20 fasteners for each square meter of the treated surface;
- to get the best grip you need to spray it with clean water. The second plaster layer can be applied with a trowel or mechanized means.
It is important to note that the full drying of the plastered surface takes about three weeks, after which priming and finishing can be carried out with coloring compositions, but it is strictly forbidden to artificially accelerate drying, using heat guns, building hair dryers or other equipment for this purpose.

The plaster of the basement of the house is painted in a tone that matches the color of the walls
Wet facade plastering
For a “wet façade”, special mixtures with water content are required. This mixture is applied as follows:
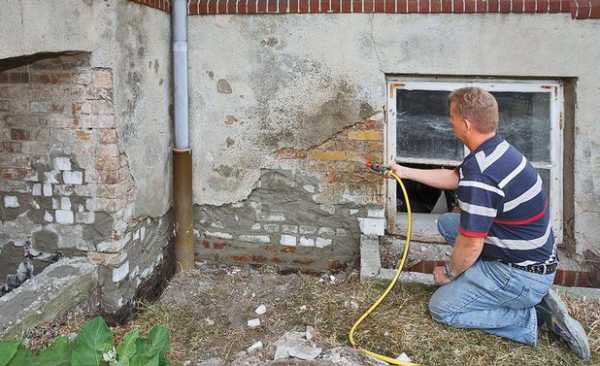
- The base is prepared by leveling it, cleaning it and getting rid of all flaws. Next, a layer of primer is applied.
- A basement profile is installed from the ground by 30 centimeters, a metal profile is screwed on with self-tapping screws.
- The insulation is attached to the base with a special glue, the glue should dry for 3 days, and only then it is possible to supplement the fasteners with dowels.
- Next, the insulation is lubricated with a thick layer of glue, the reinforcing mesh is attached and the glue is again smeared. This should be done as quickly as possible to get a reliable monolith. It should dry out within 7 days.
- After complete drying, they proceed to applying decorative finishes.
 For a “wet façade”, special mixtures with water content are required.
Plastering the basement will give the house a more beautiful look, but most importantly, it will help to make it more durable. And these works are not so difficult to do with your own hands. It is only necessary to carry out high-quality preparation and direct work on the plaster.


Preparation of the solution
The preparation of the solution includes five stages:
Sifting sand. In this case, a metal sieve will act as an assistant. Having passed sand through it, it is easy to get rid of dirt and stones.
Mixing cement with sand. The proportion with M400 cement will be 1: 3, with M500 cement - 1: 4.
Mixing the mortar in a concrete mixer, and first of all, dry additives should be added.
Mixing liquid additives. First, you need to prepare water for mixing, and then add liquid additives to it. This includes plasticizers and waterproofers.
Mixing liquid components with dry
It is very important to add the slurry to the concrete mixer with dry ingredients gradually, thereby adjusting the thickness of the resulting slurry.
Choosing a solution for plastering
The basement is the outer part of the house, therefore, the mortar should be intended for finishing buildings from the outside. In accordance with this, we can say that the plaster mixture for finishing the basement should be prepared on the basis of cement and sand. In addition to these main components, various plasticizers and waterproofing components can be added to the solution.
The amount of sand and cement must also be selected according to specific parameters. The optimal proportion of these components in a solution for plastering a basement is considered to be the following ratio: for one part of M400 grade cements, three parts of sifted quarry sand are taken. The volume of water in each case is selected individually.
It is important that the solution has the consistency of thick sour cream.