Sleeper foundation characteristics
Railroad sleepers are an affordable and inexpensive solution. They are easy enough to find, and transporting such material will not be a problem. Many people have a negative attitude to the idea of using sleepers for the foundation of a house, as they believe that they served as a railroad covering for a long time and lost their strength. But in reality this is not the case, the sleepers are specially treated with creosote and have an unlimited service life, which allows them to become a solid foundation for any building.
The advantages of the basis of reinforced concrete sleepers include:
- High elasticity of the material;
- long service life due to impregnation with creosote;
- resistance to temperature changes;
- low price;
- high level of adhesion to ballast;
- insects or rodents cannot harm this type of foundation.
There are also disadvantages to this solution. These include the large weight of the material, which can vary from 45 to 80 kg, as well as the limited size of the sleeper - up to 2.75 m.
In what cases is it advisable to build a foundation from sleepers
It's time to consider directly the sequence of actions for the construction of a bath from sleepers.
It is worth adhering to a number of suggested recommendations:
- The first step is to acquire the material. To build a bath, you will need to purchase about a hundred high-quality, that is, strong, sleepers.
- After laying the foundation and its subsequent solidification, we lay a waterproofing layer. For this, the surface of the concrete is lubricated with liquid bitumen mastic, and two layers of roofing material are laid on top.
- Now the starting ring is being laid from the sleepers. The first row should be laid on slats, thanks to which the sleepers will not touch the foundation.
- Each subsequent row of sleepers is fastened to the previous one by means of a spike connection. The gap between the first row and the foundation is blown out with construction (assembly) foam.
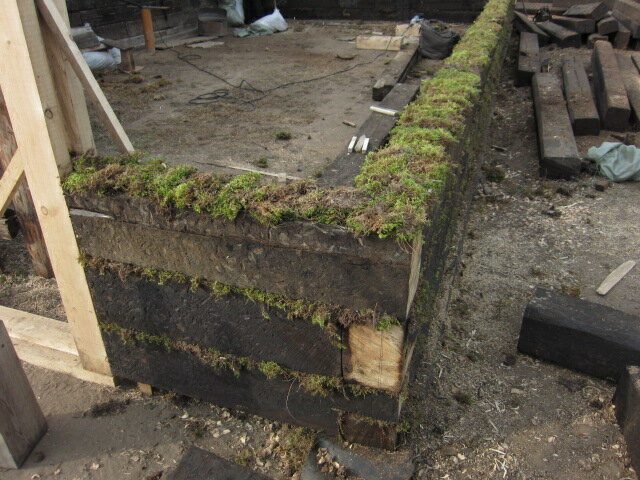
- Insulation is laid on top of the first crown, which can be tow, moss, jute, and other materials that are usually used as caulking in a log house.
- The subsequent crown is laid on the insulation. The fastening is applied according to the "groove-thorn" method, but experts advise to resort to an additional dowel joint. It is carried out by cutting holes in the sleepers at opposite ends for fastening the dowels.
Finally
Wall formation
The technology for assembling the walls is similar to laying a conventional timber, here steel brackets are driven in every 3-4 rows to connect the crowns. The joints are laid with dried moss, flax, jute. The corners are cut by the "half-tree" method with alternating opposite directions.
In the case of a compact bath, the ceiling beams are placed simultaneously with the last 2 crowns. The overlap is formed from the cleanest sleepers divided in two. The pairs are spliced into a long piece that will cross the ceiling.
Rafters for the roof are formed and connected on the ground, then raised in pairs to the upper segment of the walls and cut into the last crown. In parallel, the crate is stuffed and covered with roofing material. The structure must overwinter in this form so that full shrinkage occurs.
Sheathing of the ceiling is made from inside the dressing room and steam room, at the same stage, hydro and thermal insulation is laid.
Before deciding to use this material in the construction of the base, you need to take into account some of the nuances that can play an important role in the construction of the base:
- the opportunity to buy inexpensively used sleepers at an inexpensive price;
- transportation and delivery of material to the site, if the sleepers are far from the construction site, then transportation and transport costs can reduce your savings to zero;
-
the structure installed on a foundation of wooden sleepers should be small and light;
- the arrangement of the foundation will be carried out independently, without the involvement of outside labor.
From the sleepers with your own hands, you can equip the classic types of base, while it will be reliable and durable, subject to construction technologies. Also, each developer has a choice to build a foundation from reinforced concrete sleepers or choose wooden ones, it all depends on the construction budget.
 The process of installing a foundation from reinforced concrete sleepers
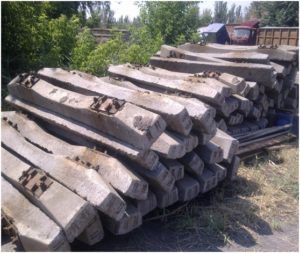
 This is what used reinforced concrete sleepers look like.
In addition, you can build a foundation with your own hands, since the material does not require special processing and is quite easy to use. It is enough to have one assistant who will drag the sleepers with you from place to place, and help in laying the material in the foundation trench.
Installation of a columnar base
Preparation for laying a columnar base includes attracting a drilling rig, searching for a rope, twine, an increased supply of roofing material, which will replace the formwork.
The construction site is marked with a rope, vertical trenches are drilled for sleepers. The pillars will be placed at a depth of about 1.5 m, leaving a distance of at least 2 m between them.
The bottom of the pit is covered with sand, crushed stone, making dense pillows, laying waterproofing material, inserting sleepers into a permanent place.
On top of the pillar, there is a stock of reinforcing bars, to which the reinforcing center of the grillage is attached, roofing material is tightly wound around the tie, as a form, a cement mixture is poured.
How to make a foundation from sleepers with your own hands - installation of a grillage
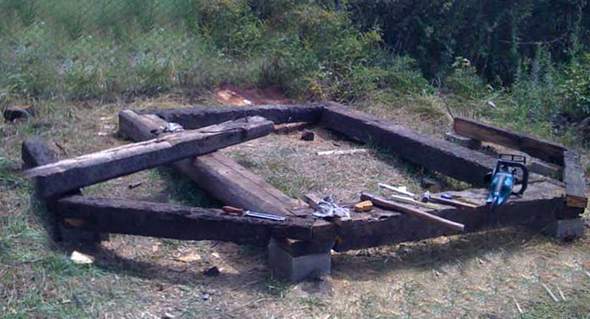
In the structure of the foundation, sleepers are most often used as horizontal strapping beams (grillage).
Well, the construction of the foundation itself, in this case, is carried out according to the following scheme:
- A pit or trench is dug under the base, the depth of which is 40 centimeters.
- At the bottom of an open trench with a step of 1.35 or 2.7 meters, pits are drilled for vertical supports. To equip such wells, you can use a hand drill, the diameter of which is 30-40 centimeters. The drilling depth, in this case, is determined individually, but cannot be less than 1-1.25 meters.
- Roofing material rolled into a roll and a reinforcing cage (four vertical pins with horizontal ligation, mounted with a step of 30-40 centimeters) are introduced into the pits. After that, concrete or a sand-cement mixture is poured into the pit.
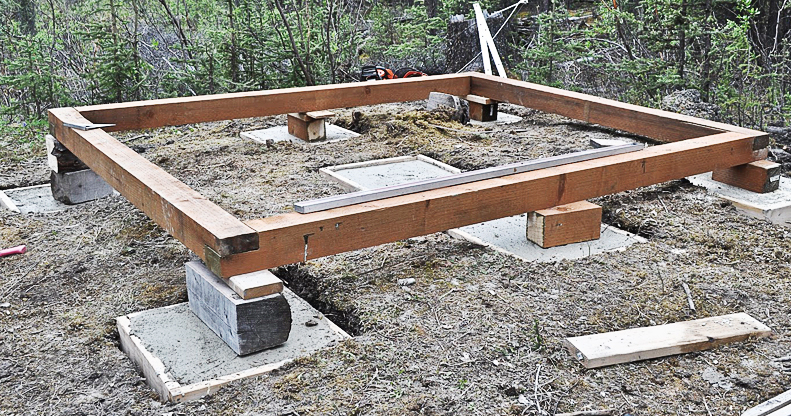
- Having equipped the supports, you can do the grillage. To do this, you need to wait for the supports to completely harden and lay the ends of the sleepers on them. If the supports were mounted with a step of 2.7 meters, then the sleeper will lie on two supports. And if the step was 1.35 meters, then there will be three supports under the sleeper. The latter option is used in the construction of modular garages or sheds. The first option is used as a base for small architectural forms or frame structures.
It should be noted that the foundation of wooden sleepers is built in the same way. That is, the grillage can be assembled not only from reinforced concrete, but also from wooden beams.
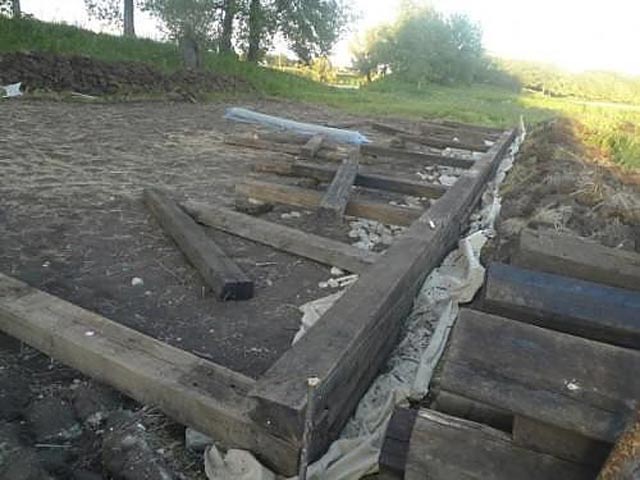
The use of sleepers in the construction of strip bases
In addition, using sleepers under the foundation of a block or brick structure, it is possible to apply not only the technology of assembling a beam grillage on poured supports, but also a slightly different arrangement option, involving the construction of a full-fledged strip foundation.
And the process looks like this:
- A standard trench is being dug on the site for a strip foundation. The width of the trench should not exceed double the width of the sleeper.
- After the completion of the excavation work, a 10-centimeter gravel cushion and a 25-40 centimeter sand cushion are poured onto the bottom of the trench.After that, the depth of the trench should be 40-50 centimeters - this will be enough for arranging two or three-layer masonry from sleepers.
- The walls and the bottom of the trench are laid out with a waterproofing film, on top of which sleepers are laid, stacking them in a pile, on top of each other. In this case, it is necessary to take care of the ligation by placing the element from the upper layer on the two lower sleepers located next to each other (it must close the vertical butt joint).
- After the completion of the laying of the sleepers, a sand-cement mortar is poured into the free space.
The basement part of the foundation, in this case, is laid out of bricks or concrete blocks. And, of course, this technology involves the use of only reinforced concrete sleepers. Wood products, in this case, can be used for the construction of walls or the installation of a basement.


About the site
zalman
Assembling the belt structure
To lay the foundation from sleepers0, you will need to prepare the necessary in advance, hire special equipment.
Of the materials you will need: reinforced concrete products, concrete mortar, sand, crushed stone, clean water. Consumables - metal pins, staples, bitumen-based mastic, antiseptics, fittings, formwork boards, nails.
You need few tools, just take a building level, a shovel, a hammer, a crowbar, a construction mixer, an electric drill with a nozzle.
The markings are applied with a tape measure, pegs, and a rope.
A trench is dug along the perimeter of the future foundation, 80 cm deep, 30 cm wide.
The bottom is first covered with crushed stone, rammed, covered with sand in layers, periodically sprinkling with water to increase the density. The total size of the pillow is at least 30 cm.
They turn to waterproofing flooring made of dense polyethylene, roofing material, laying beams.
The length of the piles should be related to the length of the ditch. Details are fastened with metal staples.
They mount the formwork, knit, put in a reinforcing belt, pour concrete.
Material selection
Capital structures, built, as they say, for centuries, are built of stone or brick. Cinder blocks or foam concrete blocks are also often used. It is reliable, durable, but expensive, and when creating such a structure, one cannot do without the skills of a builder, otherwise it will simply fall apart. In most cases, wood or material based on it is chosen for the shed in the country.
Boards and slabs
If you need to build a wooden shed with your own hands, but there are difficulties in terms of finance, you can choose a budget option - a frame structure with plank sheathing or wood-based boards. For all the seeming simplicity and flimsy, such a shed will last for more than a decade, and in the case of high-quality manufacturing, it will perfectly fit into any courtyard.
In this case, the timber will serve as the material for the frame. It is easy to work with it, and the resulting structure will have sufficient strength and reliability. Such a solution is perfect for wetlands where it is impractical to build a capital building on a foundation.
From all of the above, we can conclude: wood is the best material for a barn. This is indeed the case. A shed made of wood wins in a number of characteristics:
- ease of manufacture;
- tight deadlines;
- material availability;
- ecological cleanliness;
- the ability to build a cold and warm barn.
It is also worth noting the fact that the final finishing of the barn, like any other wooden structure, is extremely simple and has an abundance of options. Any method is suitable here: from budget painting to original clapboard paneling.
Log
Since ancient times, the log has been used as a building material. It is an excellent choice for constructing a wooden shed, especially in wooded areas where this material does not fall into the scarcity category. The log shed has an excellent look, it can be built in an ensemble, for example, with a bath, it will be a good addition to a wooden house.The only significant drawback is that the work will require specific skills.
An excellent building material for the construction of any building. The characteristics of a bar are comparable to a log, but thanks to the rectangular profile, it is much easier to work with it. A barn from a bar will perfectly fit into a wooden courtyard, a masterfully built structure, few people will turn their lips to scornfully call a barn.
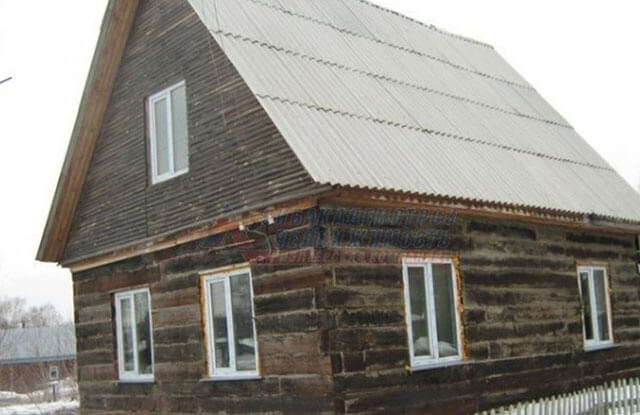
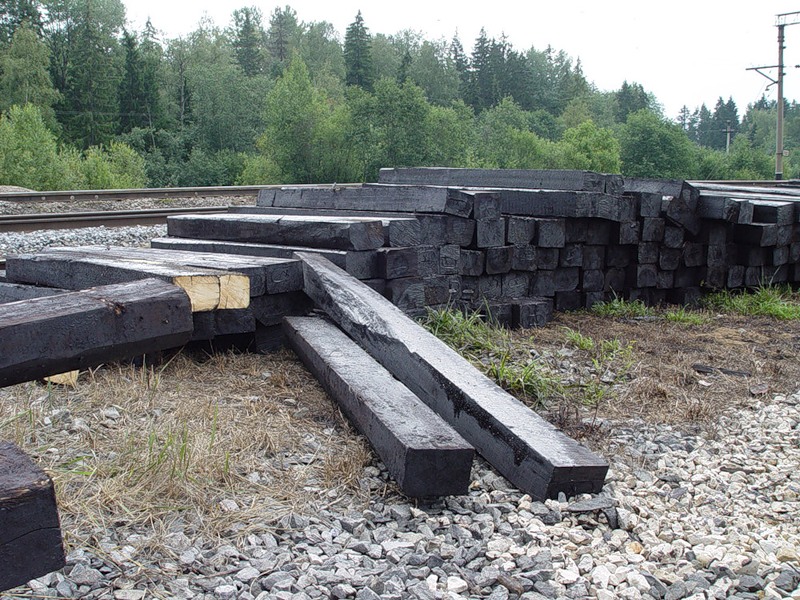
Sleepers
A sleeper shed is an excellent budget solution, especially for villages located near the railway. Wooden sleepers are gradually being decommissioned, and this is a very reliable and durable material. A sleeper, even if it has served for decades, can be an excellent choice for the walls of a small shed.
The advantages of this material are obvious: a sleeper is cheap, due to its shape, even a beginner can fold a wall out of it, thanks to the impregnation of the sleeper, it will last for more than a decade. True, it is in the impregnation that the main drawback of this material lies - a characteristic smell plus an unsightly appearance.

How to make a foundation from used reinforced concrete sleepers
Nowadays, when almost all building materials are increasing in price, each person strives to save as much as possible on the construction of his own house or auxiliary building.
Foundation device made of used reinforced concrete sleepers
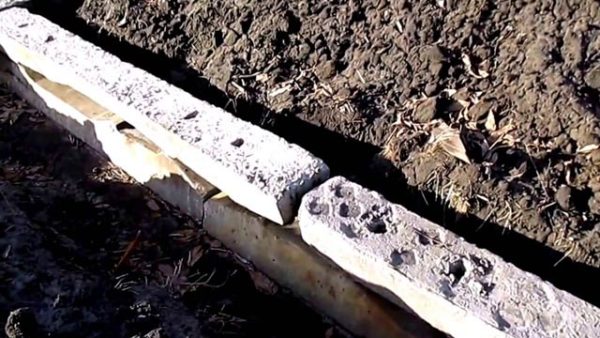
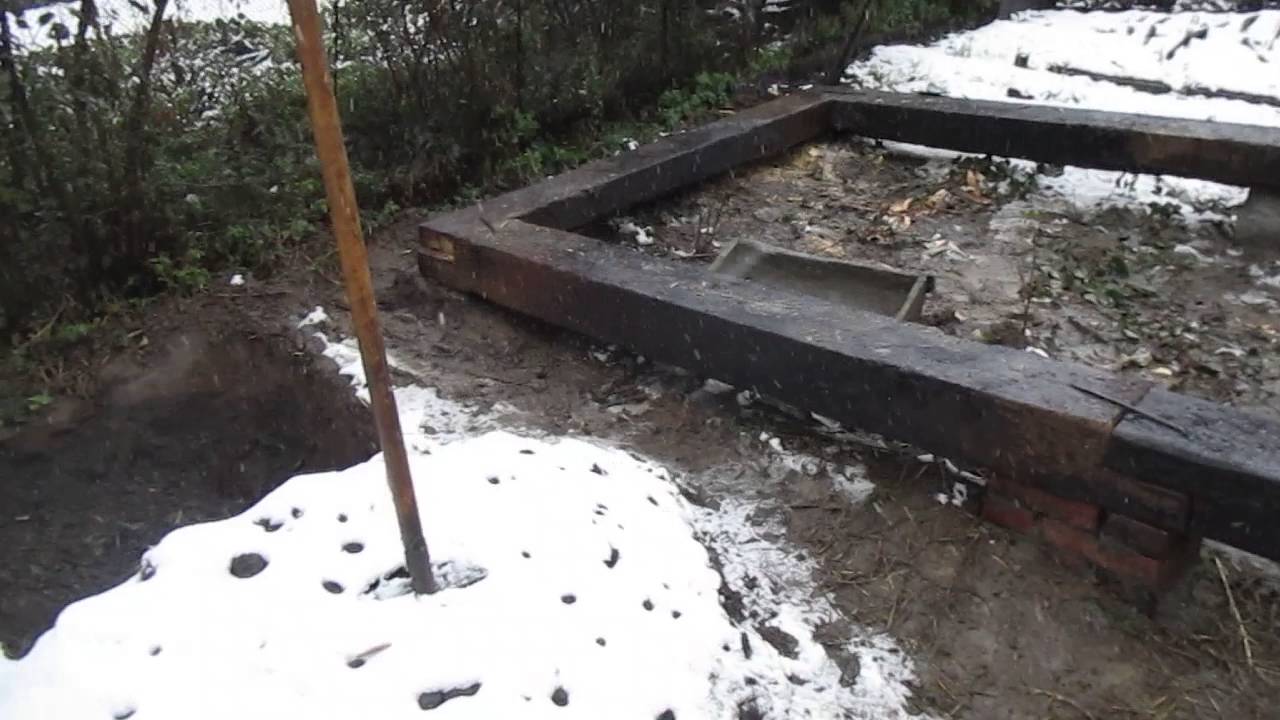
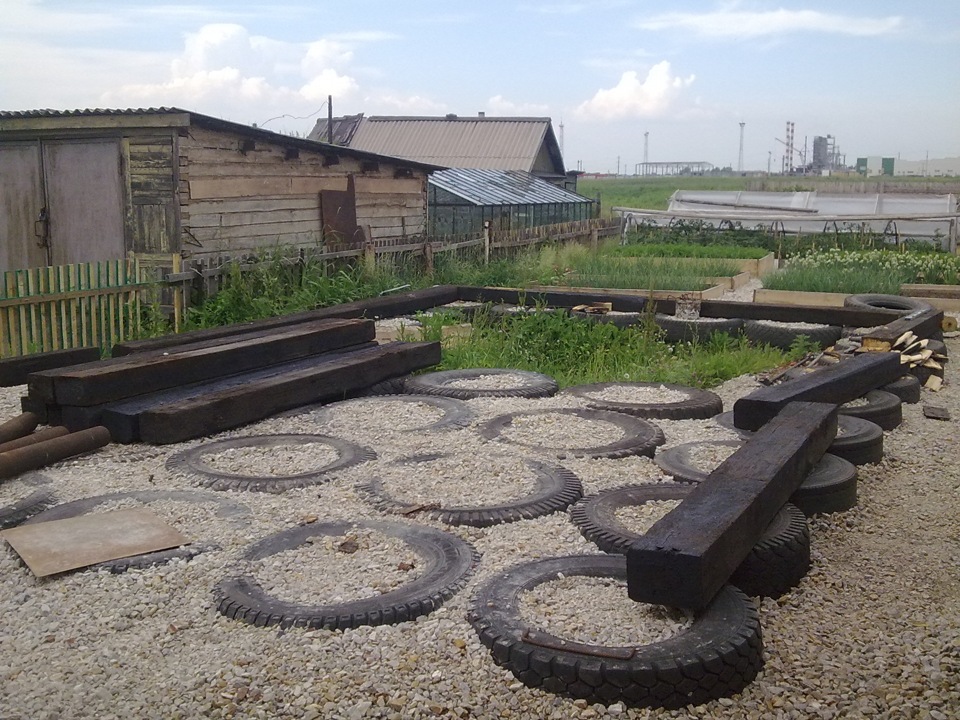
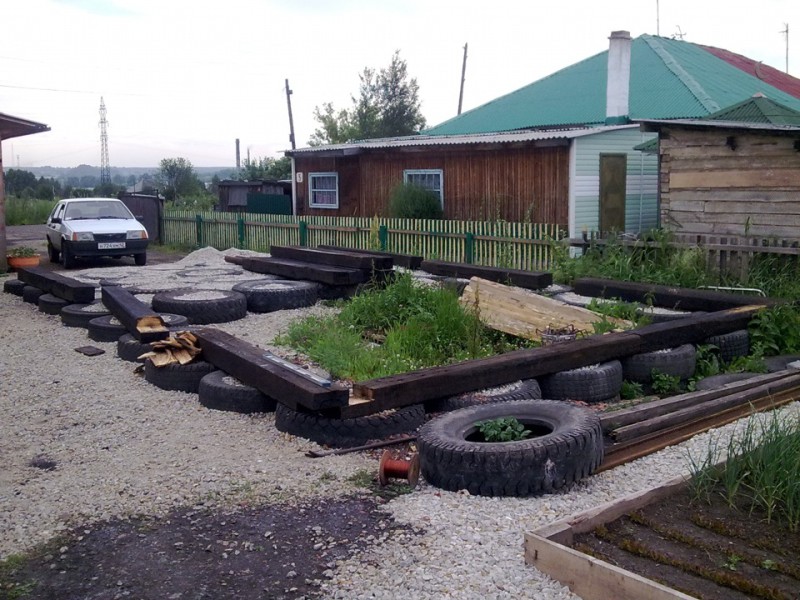
In this article, I would like to briefly cite one of the many ways to save money on the construction of a shallow foundation using used (hereinafter abbreviated as used or used) reinforced concrete sleepers, photo 1.
Reinforced concrete sleepers during foundation construction can be used as:
- coarse aggregate (like rubble), in order to save concrete on the foundation;
- foundation for light buildings.

Photo 1. Bu reinforced concrete sleepers
Used reinforced concrete sleepers can be used for the construction of a strip foundation for construction:
- wooden one- and two-story frame houses;
- one-story brick houses;
- light one-story summer cottages, sheds and greenhouses.
Construction of a strip foundation using used reinforced concrete sleepers
Here is a brief sequence of performing the main work on the construction of a strip foundation from used reinforced concrete sleepers:
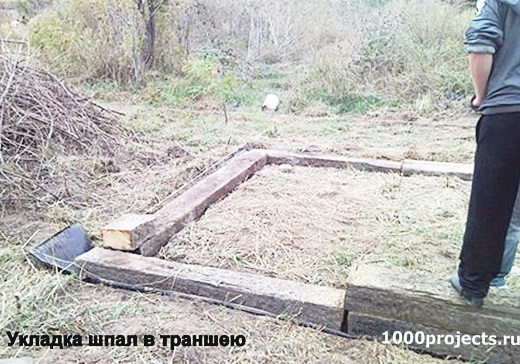
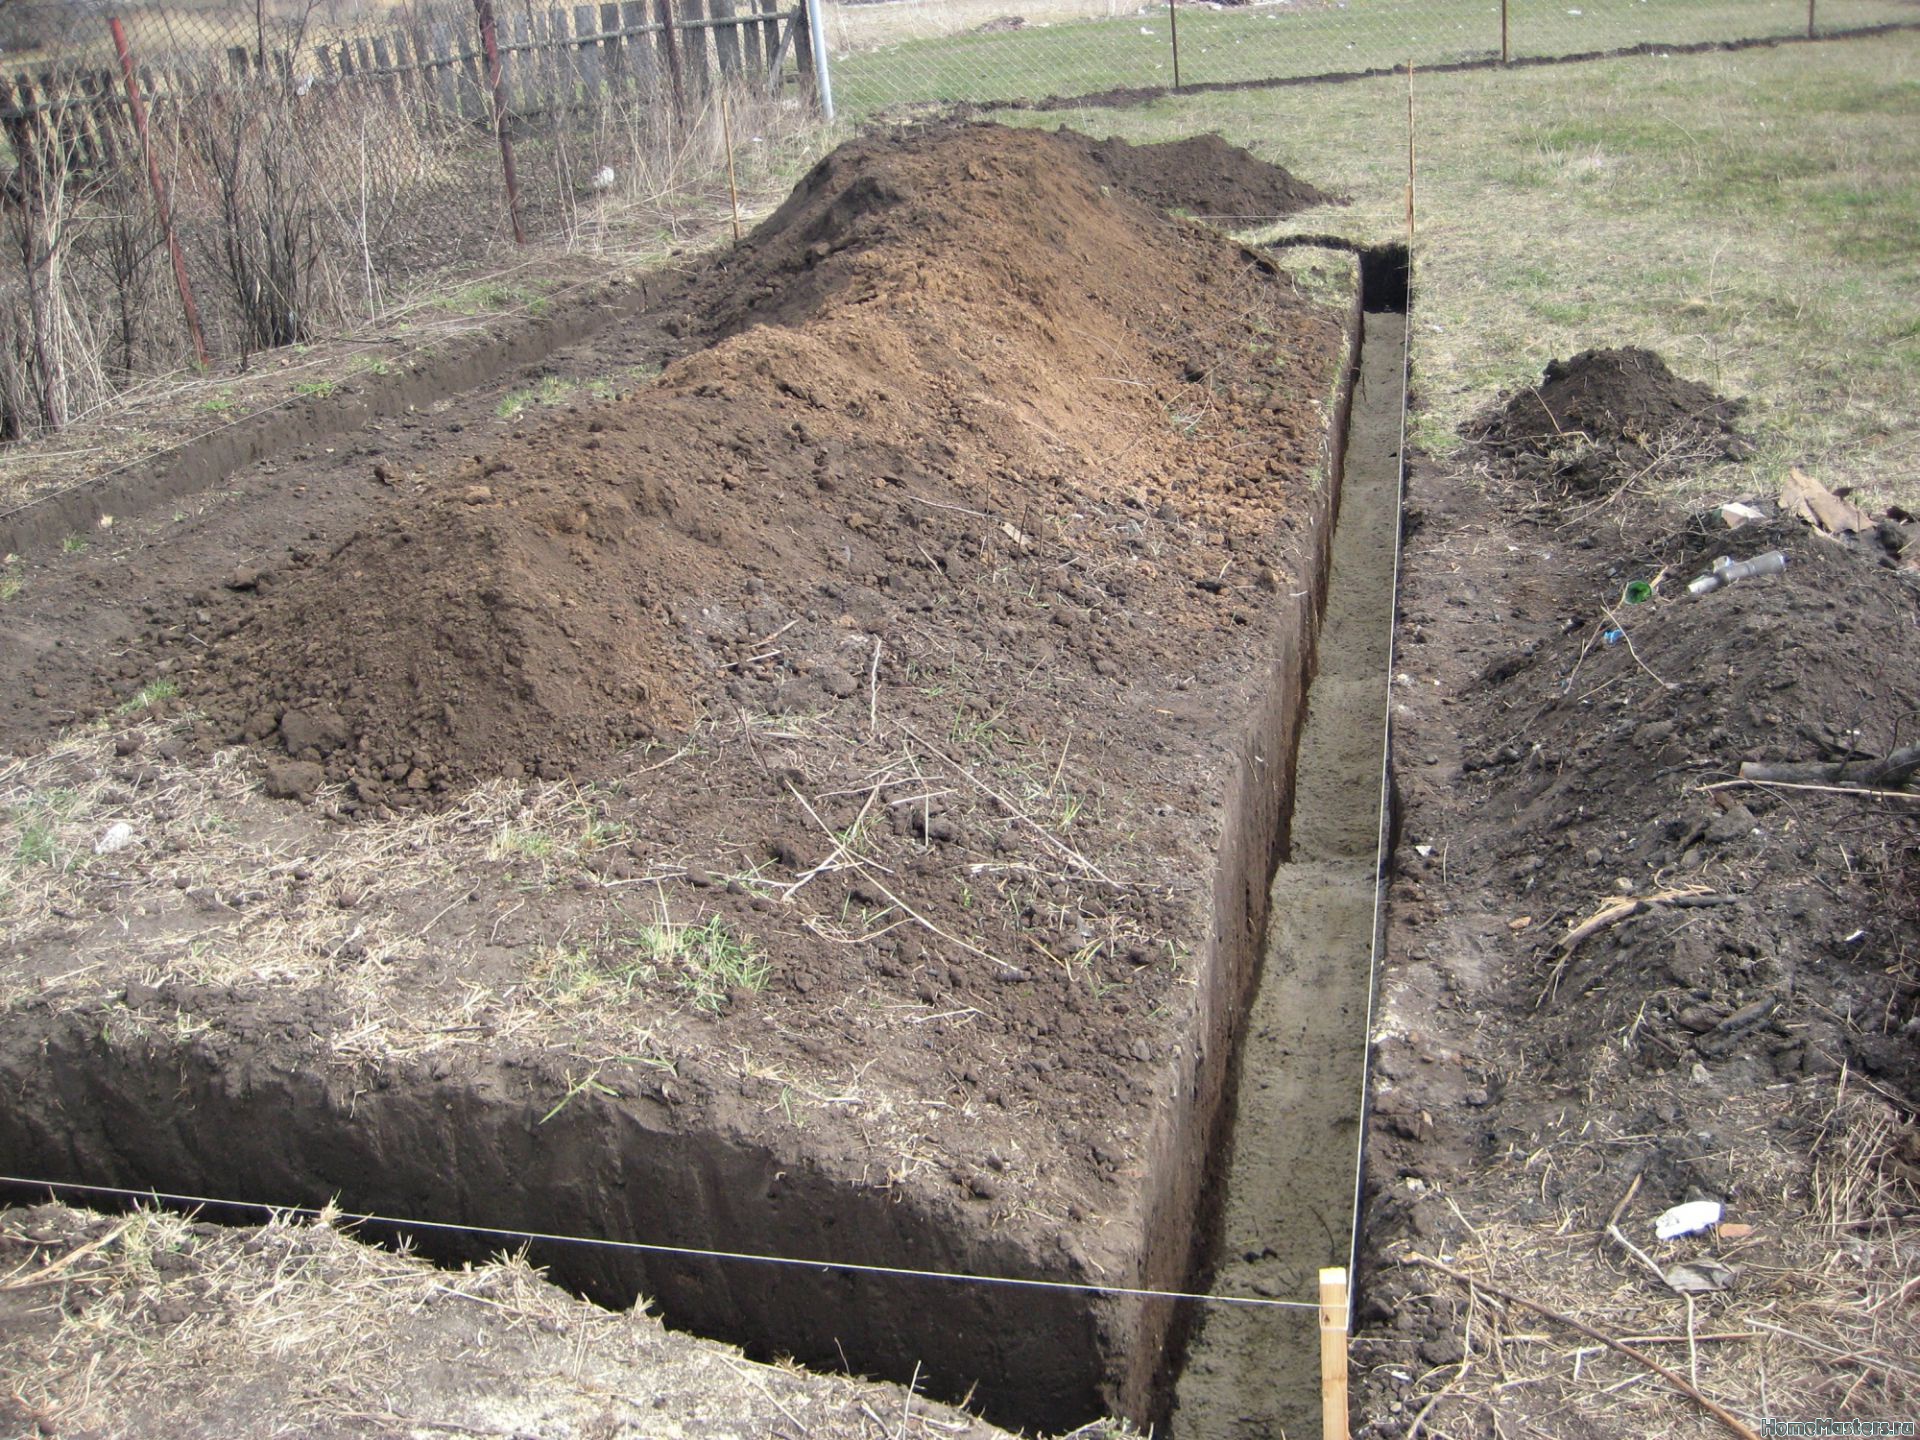
- At the beginning, as usual, a trench of the required depth and width is dug.
- Then the formwork is installed and a sand cushion with a thickness of 10 ... 15 cm is laid (we wrote more about this here).
- Used reinforced concrete sleepers are installed according to the following rules:
- first, it is recommended to lay a layer of concrete mixture 10 ... 20 cm thick at the bottom of the trench, and then install the sleepers;
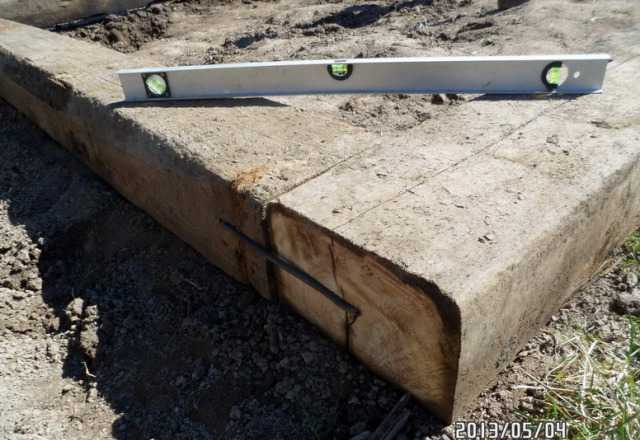
- sleepers should be laid in the same way as with brickwork, i.e. with dressing (staggered);
- to ensure the strength of the entire foundation, sleepers should be laid at a distance of 50 ... 70 cm from each other horizontally and vertically (in height) - 40 ... 50 cm;
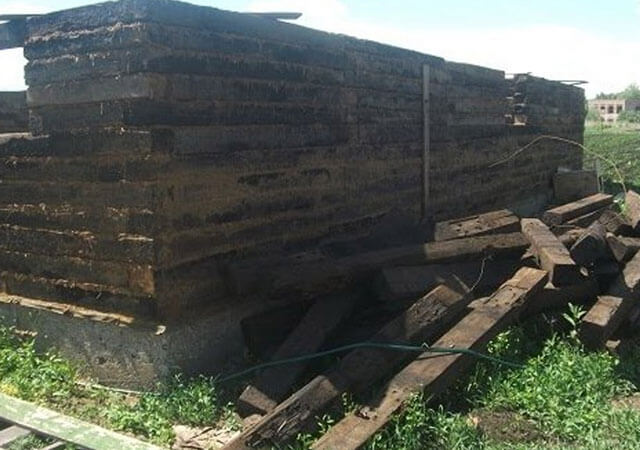
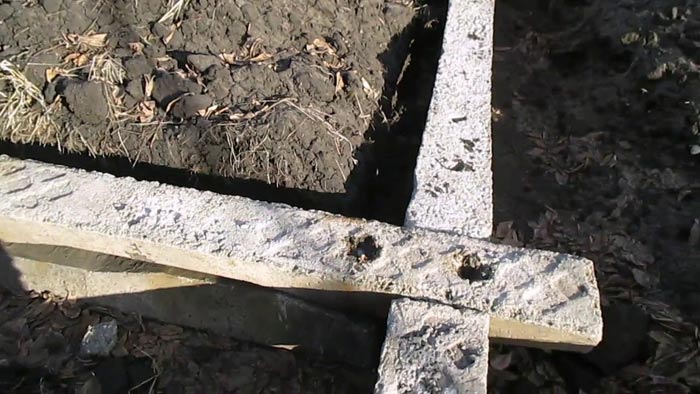
- to ensure the strength and solidity of the foundation, together with used reinforced concrete sleepers, a spatial reinforcement cage is used, photo 2.
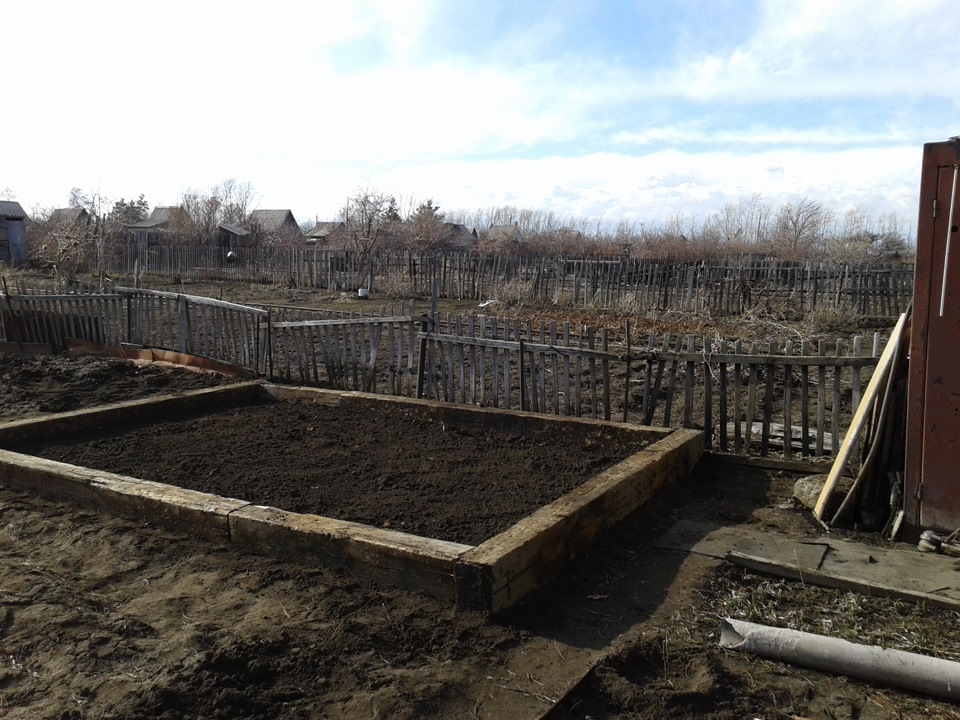
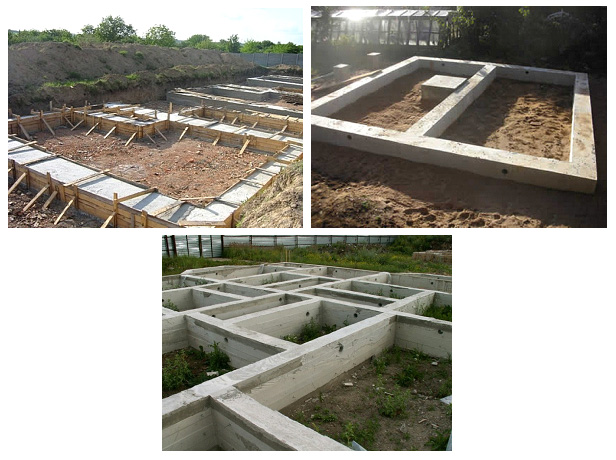
- A concrete mixture is prepared (or brought to the construction site), which is placed in the formwork, photo 3.
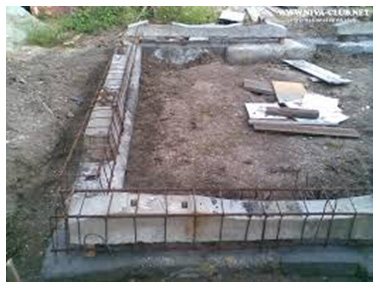
Photo 2. Construction of the foundation using used reinforced concrete sleepers and reinforcing cage
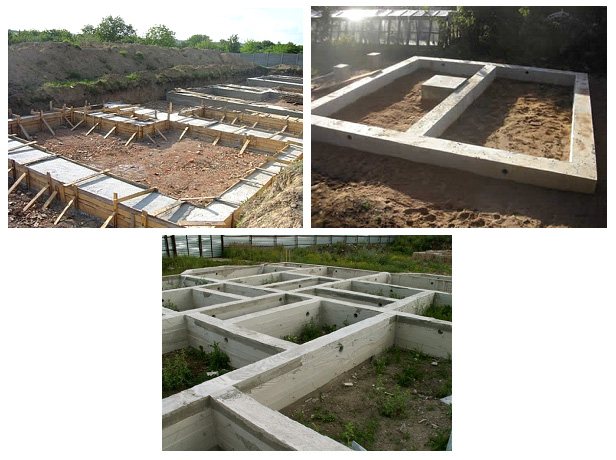
Photo 3. Ready strip foundation using used reinforced concrete sleepers
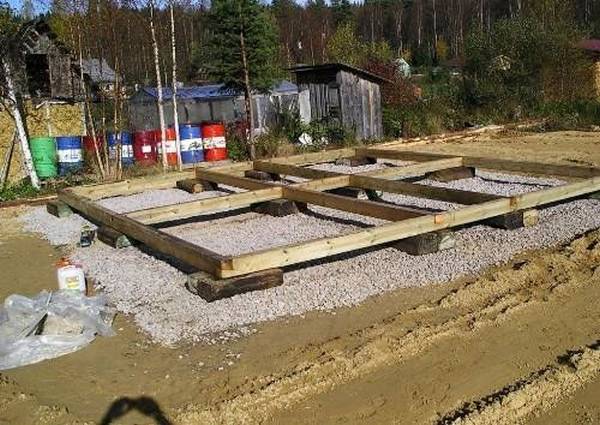
For lightweight structures of one-story wooden frame houses, you can make a columnar foundation using used reinforced concrete sleepers.
The essence of the columnar foundation is the construction of vertical pillars made of sleepers. To do this, you need to dig holes with a depth of 1.5 ... 2 m with a step of 1.3 ... 2 m, into which a layer of sand or concrete 10 ... 20 cm thick is poured, and then sleepers are installed and poured with concrete mortar. After the concrete has hardened, work is carried out on the installation of the grillage, after which you can proceed to the construction of the building itself.


The main advantages of using used reinforced concrete sleepers
- Very low cost of used reinforced concrete sleepers.
- Long service life of reinforced concrete sleepers.
- High strength of sleepers.
- Significant savings on building materials when installing the foundation.
Disadvantages of used reinforced concrete sleepers
- Large dead weight of sleepers (over 200 kg).
- When purchasing reinforced concrete sleepers, you should carefully look at their condition and refuse sleepers with deep longitudinal or through transverse cracks, because in the body of the foundation, such a tie will weaken it.
The author of the article is an expert of GIDproekt
Alexander A. Konev
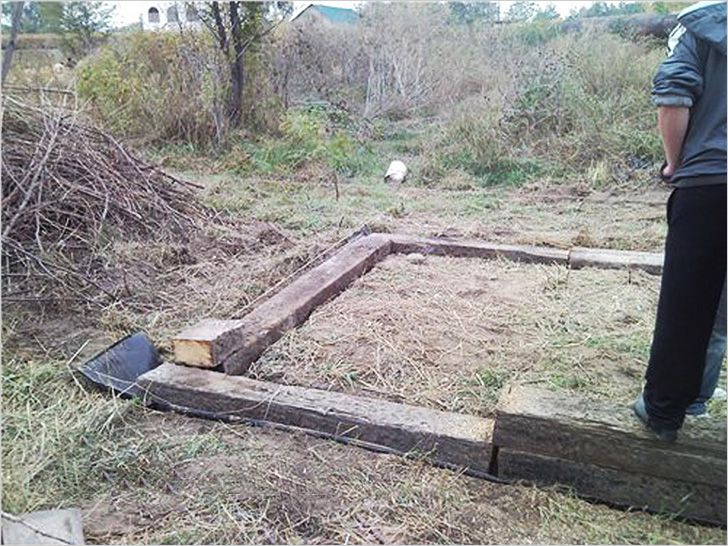
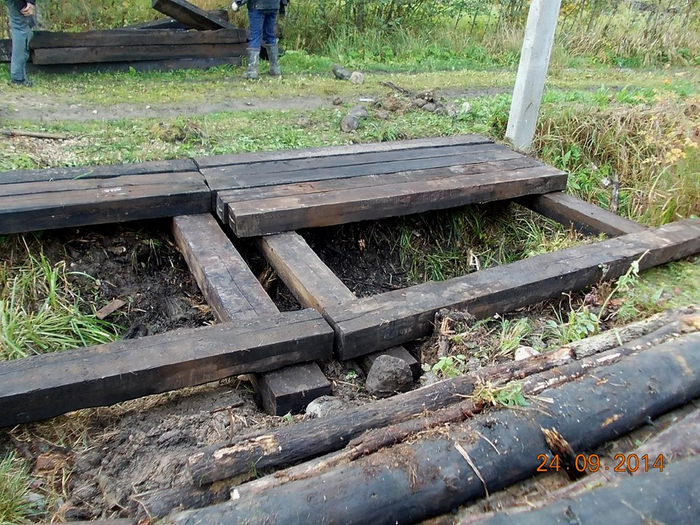
How a bathhouse is built from black sleepers
First of all, the material purchased for the construction of a bathhouse must be sorted and the cleanest and smoothest sleepers selected. They will be used for laying the walls on the facade. Part of the sleeper bar will be dismantled into facing material - a homemade tongue-and-groove board, ordinary beams are used to lay the walls, the most phenol-impregnated ones will be used to equip the basement and basement of the bath.
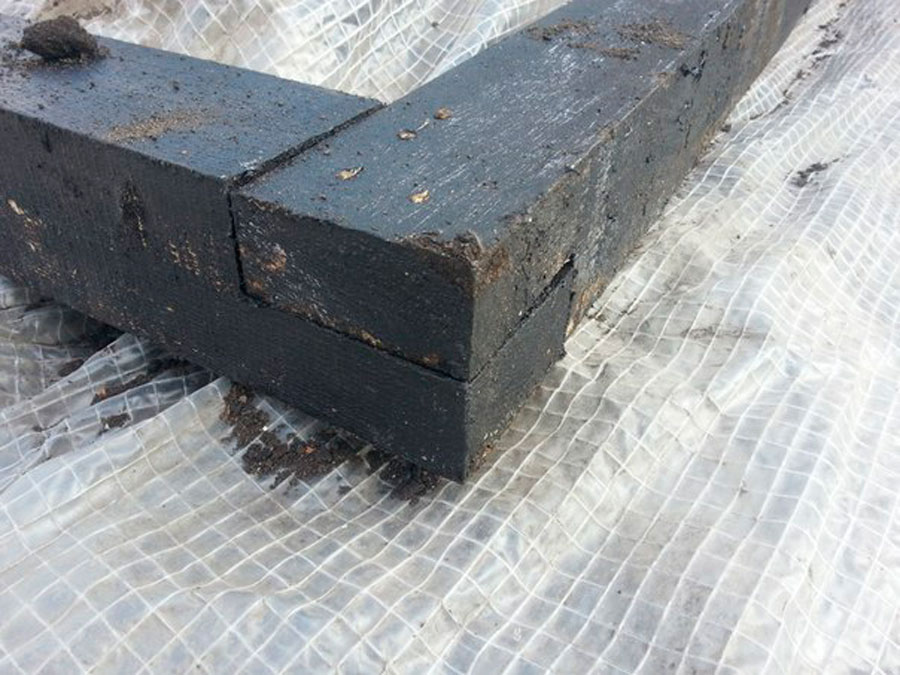
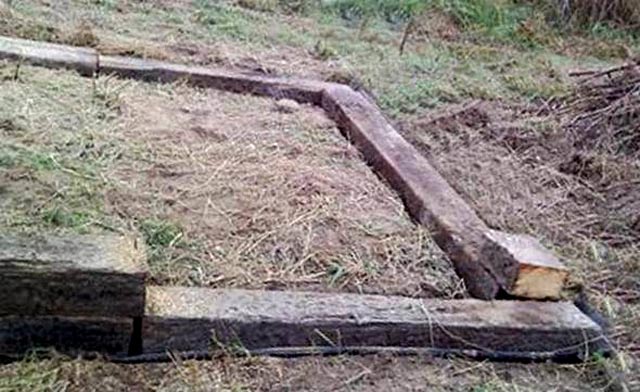
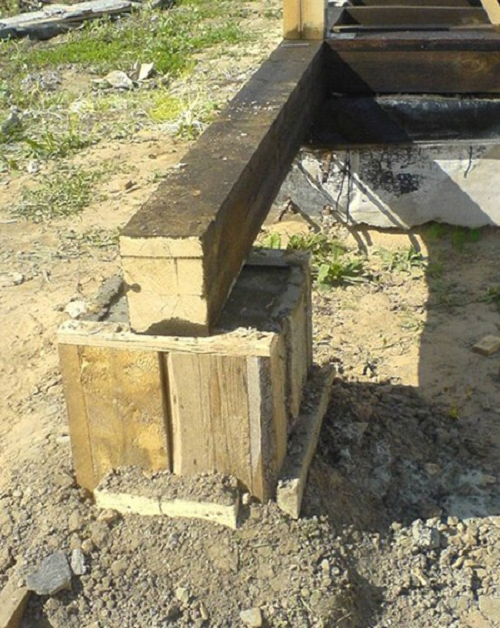
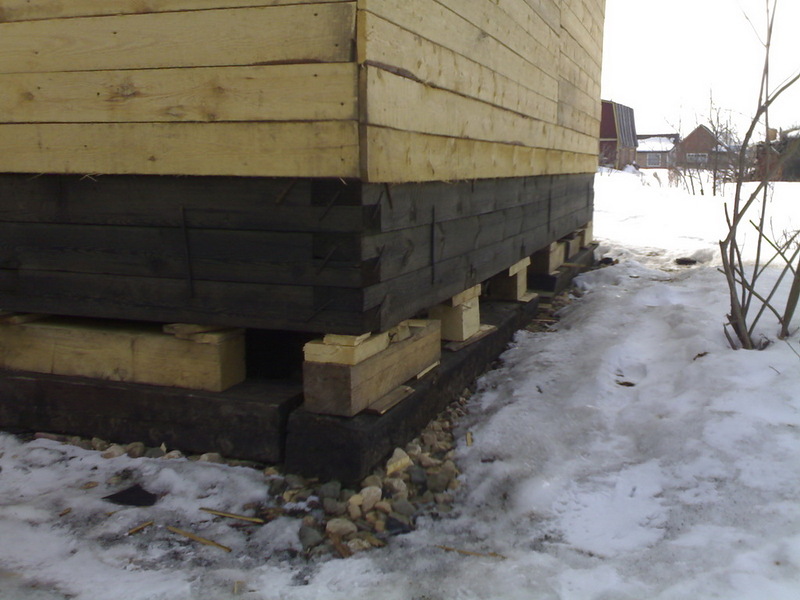
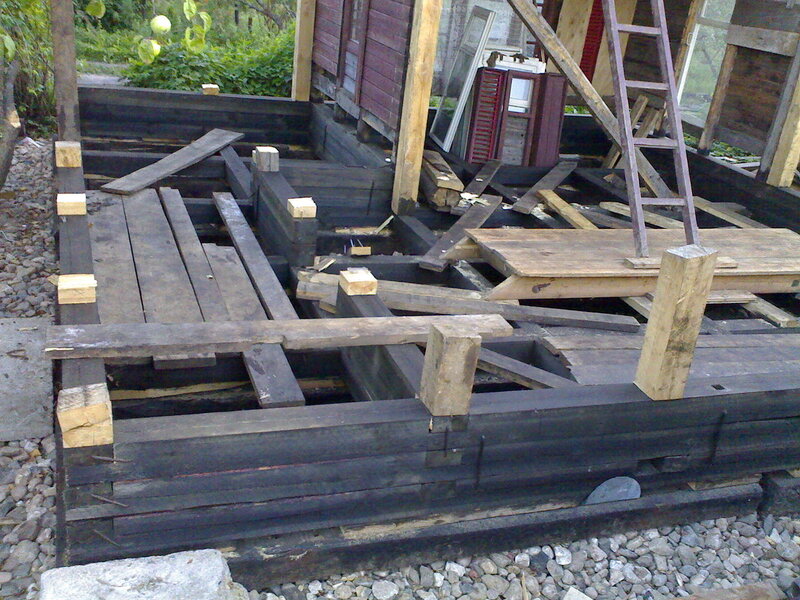
If in the area allocated for the arrangement of the bath, the soil is too saturated with water, or the area is periodically heated by melt or rainwater, it is best to put the room on a pile foundation. One of these options is shown in the photo.
The main difference is the use of sleepers for making piles. The sleeper bath box weighs at least 8000 kg, it is much heavier than in the case of a frame or panel building, therefore the pile support is made from one or two sleepers, sawn in half.
A pit is dug under the future support, into which a layer of rubble with sand is poured. The halves strapped with wire are re-treated with resin or bitumen, installed in a pit and covered with the same mixture of sand with screening.
The technology for assembling the walls of a bath from sleepers practically does not differ from laying a bar, with the only difference that the crowns every 3-4 rows knock together with steel brackets from thick reinforcement. In the process of laying the next crown, the surfaces are laid with jute, flax, but more often with dried moss.
The corners of the bath are cut from two sleepers with a "half-tree" lock, while the direction of the cut changes to the opposite with each subsequent crown.
For a small bath, the last two crowns are laid simultaneously with the ceiling beams. The best sleepers from the available remainder are used as material. The resulting pairs are spliced into a long bar, which is used to cover the ceiling. At the same time, the overlap is clogged with a board.
The rafters for the roof of the bath are cut and joined on the ground, then raised in pairs to the ceiling and cut into the last crown of the walls. Immediately, the crate is stuffed, which is tightened with roofing material. In this state, the bath must spend the winter, the walls will gain weight, and the structure will shrink.
At the stage of finishing work, jute tow crowns are packed and chased, the floors are cut and laid inside the steam room of the dressing room and the rest room. It remains to cut out the window and doorway, put the frames, hang the doors and move on to finishing work inside the room.
The ceiling is hemmed from the inside of the steam room and the dressing room, a waterproofing film is laid and filled with expanded clay backfill. All elements inside the bath are assembled according to their final dimensions, without gaps for shrinkage and squinting.
Therefore, the outer surface of the walls is thoroughly cleaned, processed and dried before the crate and lining are stuffed.
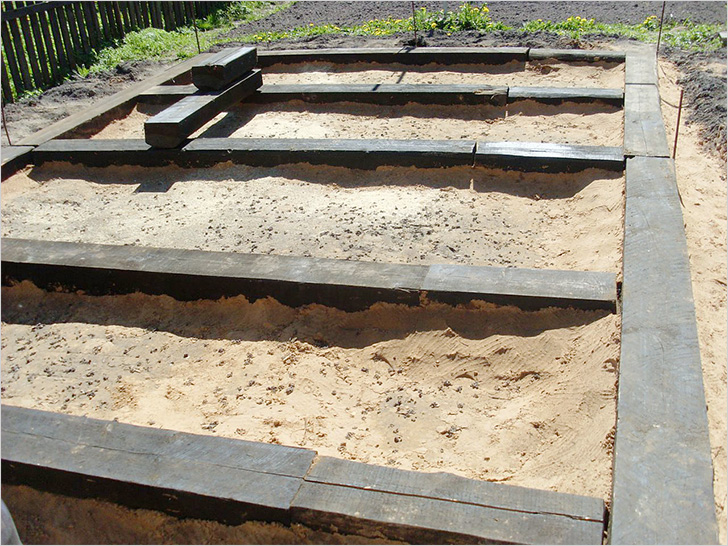
Base construction procedure
The construction of the base must be treated with great responsibility. It is necessary to carefully analyze the condition of the products that will be used for such work. If they are damaged, the foundation being created may turn out to be of poor quality and after a certain time, restoration procedures will have to be carried out.
It is best to create such foundations on soil with high hardness in order to prevent the possibility of settlement under load from the house. The foundation made of reinforced concrete sleepers can be of different types:
- Columnar;
- tape;
- pile;
- slab.
The optimal solution for using such material is tape and columnar varieties. For a strip base, logs should be laid around the entire perimeter. A layer of sand and gravel is preliminarily laid under the foundation, which will need to be carefully tamped and moistened. After that, sleepers are placed on top, which are placed with overlapping joints. For fastening, you need to use metal staples and pins.
If it was decided to use a columnar basis, the logs should be placed vertically at a certain distance from each other. During preparation, it is imperative to treat the sleepers with a special antiseptic and bitumen. This type of foundation has a fairly long service life, which can last up to 50 years. The sleepers are laid on a concrete base and gradually sprinkled. Then they are connected to other sleepers installed in a similar pattern.
The following video will help you learn in more detail about the procedure for creating a foundation from sleepers with your own hands.
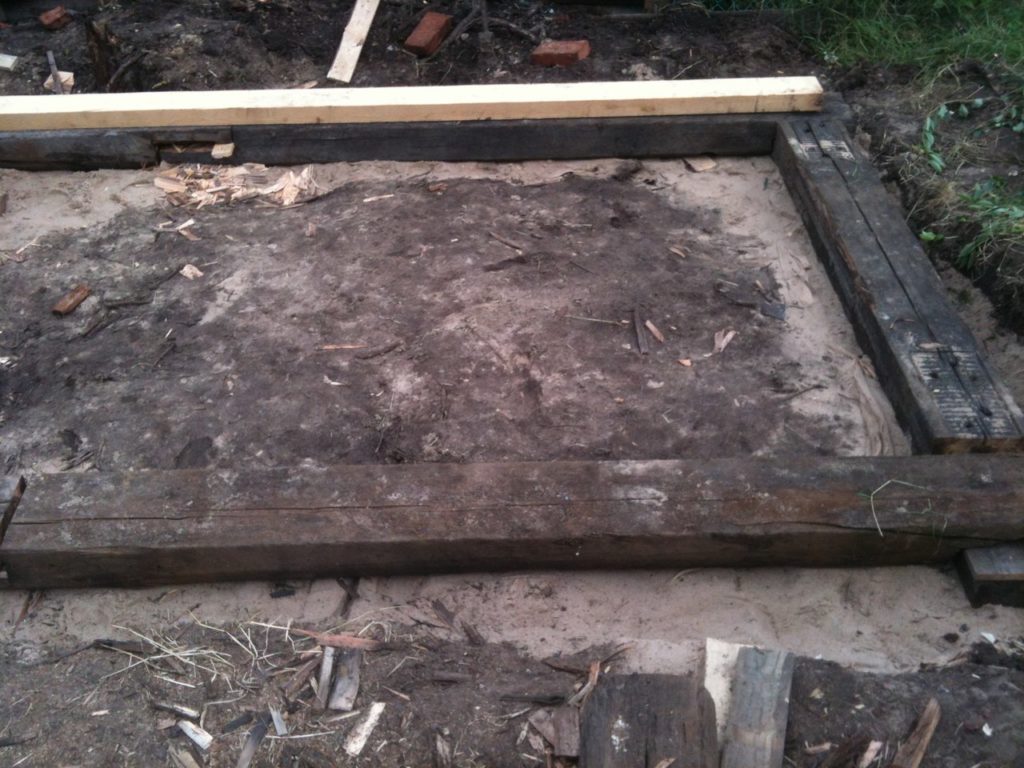
Belt base made of sleepers
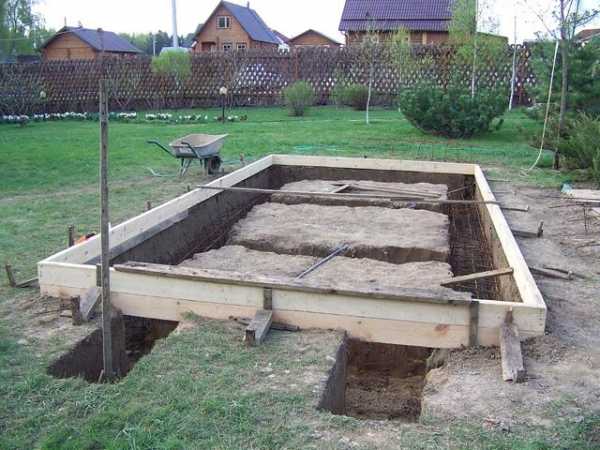
For two-story wooden houses, it is best to create a strip base. In this case, concrete sleepers are laid in a special formwork made of wood, which allows you to save a lot on cement filling. The whole procedure consists of the following steps:
- To begin with, a trench is dug. Its depth should exceed the level of soil freezing.
- Formwork is created. Planks are often used for manufacturing. It must be securely anchored from the bottom of the pit to the top of the basement.
- A layer of sand is filled up with a height of up to 20 cm. This will help prevent damage to the foundation.
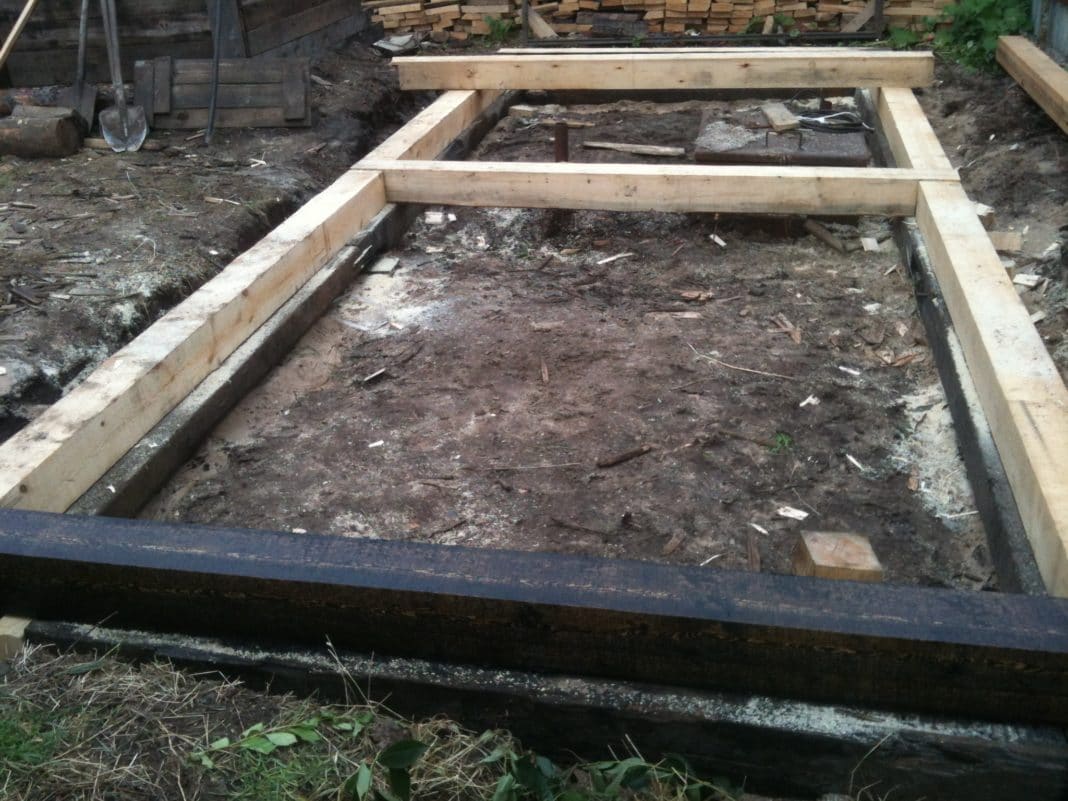
- A cement mixture or concrete is prepared.
- Concrete is poured to the required height along the entire perimeter of the pit, after which the sleepers are installed. They will be used as a boot. Then a new layer of concrete is poured and the sleepers are laid again. They need to be installed not on top of each other, but in a checkerboard pattern. According to this scheme, the base is poured to the top of the formwork. This will avoid cracking the tape. The interval in height between the sleepers should be about 50 cm.The distance between the edges can vary from 50 to 70 cm.
Columnar base made of sleepers
 For the installation of such material, you will need to use special equipment.
This kind of basis is the most economical. It can be used for frame or timber buildings, as well as buildings made of foam concrete blocks.
The foundation made of reinforced concrete sleepers allows you to save a lot, but it must be borne in mind that such material has a fairly large mass. Not every master will be able to lay it in the formwork or pit with his own hand. For these purposes, you will need to use special equipment, which will greatly simplify the work. The creation of a columnar foundation consists of the following steps:
- The first step is to pull out a hole for each pillar. The installation interval depends on the structure of the building. The depth of the pit can vary from 1.5 to 2 m. The width should allow the material to be installed and the cement mortar to be poured around.
- At the bottom of each pit, you will need to create a pillow based on sand and fine crushed stone.
- After that, the installation of reinforced concrete products is carried out.
- Each pit is filled with cement mortar.
It is not so difficult to create a columnar basis from non-standard materials, the main thing is to carefully observe the technology of work.
The use of sleepers for the bases is a good solution. Thanks to this material, you can save a lot on building a house. The main thing is to carefully select products in order to ensure a long service life.
Do-it-yourself shed made of wood
A do-it-yourself shed using frame technology is a simple and economical construction option. Initially, you need to decide on a place on the site where the future barn will stand. Then we decide on the choice of the foundation. All actions can be broken down into several stages.
Here are the main stages of building a barn with your own hands:
- Do-it-yourself preparation of the territory during the construction of a barn. This stage includes clearing shrubs, trees, stumps and large rocks from the site;
- Preparatory work before erecting the foundation when building a barn with your own hands. If piles or support beams are selected, no additional ground handling is required. When pouring a block, strip foundation or foundation slab, it is necessary to dig a pit, the depth of which is at least half a meter;
- The bottom rail, floor joists, sub-floor, bottom timber must be covered with a compound that prevents wood from rotting, keeps it dry and prevents the entry of insects;
- Mounting piles or laying timber on roofing felt during the construction of a shed with your own hands. If a monolithic foundation is chosen, then it is necessary first to lay geotextiles, which prevents the washing out of sand, to fill and tamp the sand cushion (at least 300 mm thick), crushed stone cushion (at least 200 mm thick), and then proceed to the installation of the formwork. As a rule, the formwork is made of a 50x100 board, with stops every meter, spacers along the inner perimeter and with fixing beams on top of the formwork perpendicular to the length of the boards. Reinforcement is made of corrugated rods, the thickness used is 12 mm, 10 mm, 8 mm. Next, a cement-sand mixture is poured. Cover the top with technical film until the concrete mixture hardens completely. If the weather is hot. Then the surface must be watered with water, not allowing it to dry out too quickly. Under the influence of the sun, water evaporates from the surface layer of the poured foundation, which leads to a change in the composition. Consequently. Cracking appears, the foundation is not suitable for use.
- Mounting the bottom harness and floor log when building a barn with your own hands. Floor joists are laid with a step of 600 mm. This allows you to avoid sagging floors, and, if necessary, the insulation can be comfortably laid in the interlag space;
- Next, the rack of the wall frame is attached from 50x100, 40x100 bars. In the window and door openings, crossbars are additionally installed to distribute the loads. Jibs are cut into the corners of the walls on each side, making the shed more stable and stronger. The lower and upper strapping of the frame racks is being carried out;
- The overlap of the first floor is being mounted. This will be the future ceiling;
- Next, a rafter system is installed according to a single-slope or gable system. The step between the rafters is 600 mm;
- Roof lathing and roofing are being carried out;
- External and internal finishing is mounted. Materials can be very diverse, depending on the future use of the barn;
- Before installing the interior decoration, when building a barn with your own hands, insulation is laid, if necessary. It is imperative to lay a wind and vapor barrier.
How to build a foundation from reinforced concrete sleepers correctly?
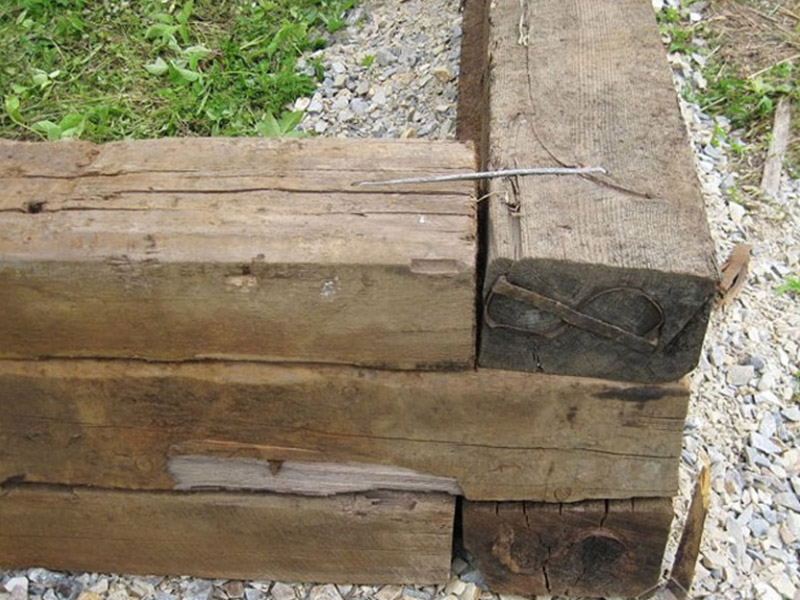
Corner notch and other fastening methods
The log for replacing a worn-out window sill was carved in the traditional way with a wide ax. The corner superstructure is another characteristic feature of the log structure. Most notch techniques provide structural integrity by locking the magazine ends in place and impart stiffness and stability to the nib
As with the floor plan, the type of corner lettering can sometimes be a clue to the origins of the ethnic craft of the log building, but it is important not to draw conclusions based solely on the notch details. Numerous angular notch techniques have been identified throughout the country
Tape foundation from sleepers for capital buildings.
Most of the opponents of the use of sleepers as a material for the manufacture of the foundation come forward with accusations against the impregnation, which is used in the production of creosot railway tracks.
It is known that the composition of this substance with a characteristic odor, which is difficult to tolerate, includes components that are toxic to humans. Some people express apprehension when they are advised to build the foundation for a private home from sleepers impregnated with creosote.
The notch method in some of the earliest eastern cabins and most western cabins of the 19th century, especially the saddle notch, left an extended log end or "crown". Crowns are especially pronounced or exaggerated in rustic-style structures, and sometimes they cut when the wall is lifted, creating a buttress effect in the corners of the building.
Another method of securing logs consists of securing logs that are stowed without cuts with tenons in vertical corner posts or using tenons or pins to attach them to vertical corner planks. Vertically positioned logs were anchored at their upper and lower ends, usually on rooftops and window sills.
You should know that this is actually the case. New sleepers that have just been manufactured are not recommended for construction purposes. However, this does not apply to sleepers whose operational period as a railroad bed has come to an end.
Such sleepers spent quite a long time in the open air, therefore, the sun's rays and numerous precipitations managed to remove most of the harmful impregnation from their surface. Therefore, a foundation made of sleepers with a long service life is absolutely safe to use as a basis for the construction of private houses, which are made using frame technology. Such houses are much lighter than analogues, which are built from materials such as blocks or bricks.
Selecting magazines and assembling the building
While the choice of wood was most likely determined by availability, chestnut, white oak, cedar, and fir were preferred because these trees could provide long, straight, rot-resistant logs. Pine, which also provided long, straight logs, was also used in areas where it was abundant. The woods were often blended using harder, heavier, rot-resistant woods such as white oak for the foundation, "sill" and lighter, more easily hewn woods such as yellow poplar for the top logs.
To work, you will need the following elements:
- reinforced concrete sleepers;
- cement;
- crushed stone;
- sand;
- special equipment for lifting reinforced concrete sleepers;
- metal staples;
- metal pins;
- bitumen;
- composition with antiseptic properties.
We evaluate negative and positive qualities
A competent owner, before building a bath from sleepers, will try to get as much information as possible from the available sources. First of all, find out how seriously the bath from sleepers affects the health, is it harmful or not.
The positive aspects of the option of building a bath from sleepers with your own hands include the following:
- An extremely low price for material, used sleepers can be purchased for 12-15% of the cost of a new product. On average, the price for the A-1 model, with a section of 25x18 cm, is from $ 2 per piece;
- Long service life, a ten-year sleeper in a bath box can easily withstand another 15-20 years. They practically do not rot, they are not affected by microorganisms and pathogenic microflora, insects, rodents.
The durability of the bath box largely depends on how to make a bath out of sleepers, what construction of the foundation and finishing is planned to be used when arranging the premises.
The second condition is the quality of the material. Therefore, the project of a bath from sleepers, the method of construction of any sleeper structures is chosen based on the real conditions on the ground and the quality of the purchased material.
Advice! You should not completely trust the reviews about the sleeper baths published by the owners of the buildings. Only a few percent of the respondents give an objective assessment of the emerging problems.
Negative constructions of a sleeper bath from ten-year sleepers:
- Possibility of poisoning with vapors of creosote, phenol. Under the influence of heat, volatile sleeper structures intensively emit carcinogenic substances that provoke the development of oncology;
- High flammability of the sleeper box of the bath. It will no longer be possible to saturate the sleeper with fire retardants, the surface layer of combustible creosote interferes. Sleeper baths burn several times more often.
How to build a garage from sleepers yourself step-by-step instructions
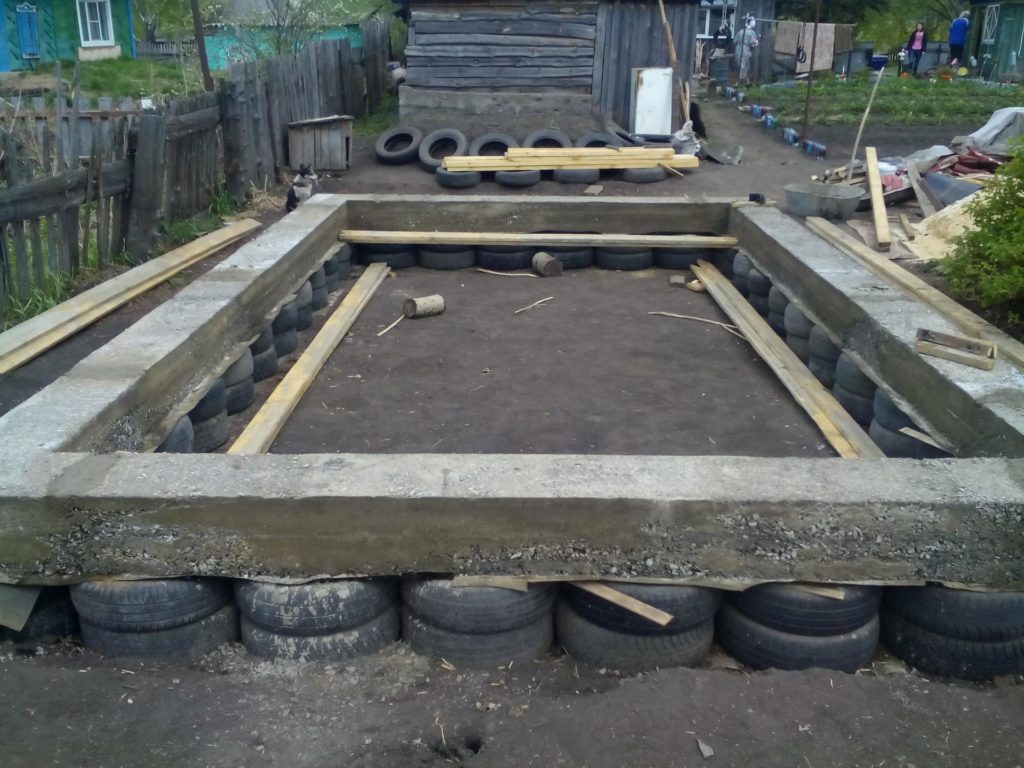
A garage made of sleepers is a light construction, so you can install the simplest shallow strip foundation under it (depth 30 - 40 cm, for soft soils - 50 cm, width 3 cm more than the width of the sleepers).
Stage one - foundation
We dig a trench according to the size of the garage and arrange a sand and gravel pillow, 10 cm thick. On wet soils, you can add expanded clay or broken red brick to the pillow for better waterproofing.


Now we lay out the first row of sleepers in the foundation.
An important rule - the ends should not touch - you need a gap of 2 - 3 mm. We fasten the sleepers with metal staples. We fill in the standard tape of a shallowly recessed foundation, but there is one caveat
You will need to fix the fastening bolts (40 mm diameter) in the foundation, they are cemented directly into the screed in one meter increments along the entire perimeter, excluding the door opening
We fill in a standard tape of a shallowly buried foundation, but there is one caveat. You will need to fix the fastening bolts (40 mm diameter) in the foundation, they are cemented directly into the screed in one meter increments along the entire perimeter, excluding the door opening.
We install columnar supports, which are also embedded in the foundation. The supports are installed at the corners of the structure, in the garage door frame and in the center of each long side of the structure.
Stage two - preparing sleepers for installation
The first row of sleepers is attached to the foundation strip with bolts embedded in it. Therefore, it is necessary to drill holes in each sleeper so that they coincide with the pitch of the already installed bolted connections.
The lower row of sleepers must be treated with bitumen for waterproofing, and on top of the first row, roll roofing material should be laid in two layers. This will protect the walls from high humidity.
Stage three - installation of the first row
We install the first row of sleepers and for the reliability of the structure we fasten them with metal brackets at the junction of two sleepers and in the corners
It is important for each row to select sleepers of equal length so that the building looks neat
An important rule. Sleepers should be laid flat, this will give stability to the structure, although it will increase material consumption
Stage four - wall installation
Building a garage from sleepers is not difficult, but it is important to follow a certain technology:
- we connect adjacent sleepers in a row into a spike, but for this it is necessary to cut out the desired shape of the ends, therefore it is easier to fasten the ends together with metal brackets;
- the rows are also fastened together with staples or metal plates, which are attached to self-tapping screws. The step between the staples is 50 cm.
Important. The vertical fastening from the end of the sleeper should be at a distance of 50 cm, not less
- every three rows, it is necessary to fix the structure in the corners with metal corners - this will give rigidity to the entire structure of such a garage;
- for window openings, it is necessary to install a box made of timber - we mount it on self-tapping screws, strictly according to the level. The slots can then be sealed with polyurethane foam or silicone putty.
To give the structure rigidity, you can additionally fix the sleepers diagonally with a metal strip - 10 cm wide, 3 - 4 mm thick.