A skylight with a staircase is almost an integral part of a modern attic. Of course, you can use an attached structure or a stepladder, but in this case, you should forget about the active operation of the under-roof space.
If you correctly organize the lifting part, then the attic can be converted into a full-fledged living space. The main thing is to provide thermal insulation for the roof and make a convenient entrance. This is what our article is about.
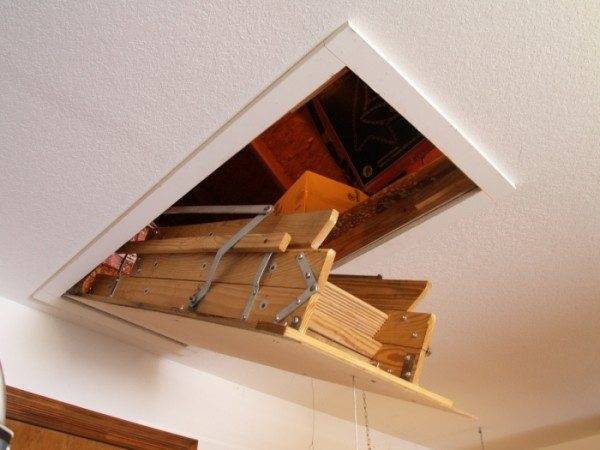
Ceiling hatches
Design features
To provide direct access from the living quarters to the attic or to the attic, a hatch is made in the ceiling. As a rule, the dimensions of such a hatch are sufficient for a person to pass through it without hindrance.
However, simply making a hole in the ceiling is clearly not enough, since there are several nuances here:
- At first, an open opening will significantly increase heat loss. As a rule, the thermal insulation of the roof is significantly inferior in the quality of the thermal insulation of the walls, and therefore the room with an open hatch will cool down much faster.
- Secondlyif the opening in the ceiling slab is located in an inconvenient place, then there is always a certain risk of falling. Therefore, it is better to cover this hole with a special design.
- Thirdly, the open opening can only be operated with ladders. And this, as you know, is inconvenient.
All these arguments lead to the fact that most owners of private houses mount ceiling hatches with stairs:
- The roof hatch is a hinged lid that can be opened using a handle or lever.
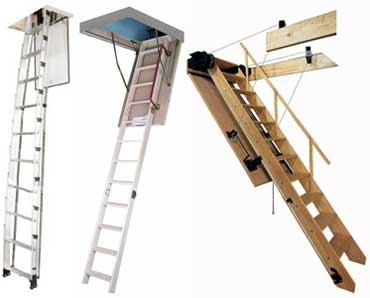
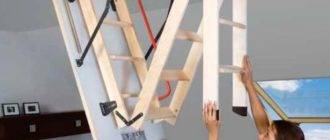
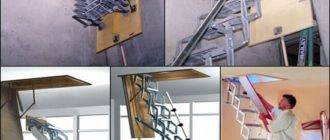
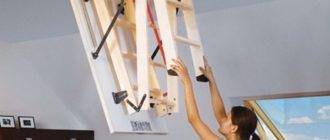
- As a rule, a sliding or folding ceiling ladder is placed on the cover (see also article Folding attic stairs: a compact solution). When the hatch is opened, the segments unfold, and a fairly comfortable lift is obtained.
- In the closed position, the hatch is fixed with a latch. Complex models of industrial production are equipped with a special locking mechanism that allows you to open the hatch while standing on the floor - for this, a durable cord with a handle is used.
- Simpler models that can be made by hand, most often assume that to open the hatch and unfold the stairs, you need to climb onto a stool and turn the latch handle.
Note! This design, which is not very convenient at first glance, has one indisputable advantage. The high-positioned locking mechanism is reliably protected from children.
Advantages and disadvantages
Ceiling hatches with installed stairs are quite understandable in popularity:
- At first, unlike stepladders and ladders, the folding design provides a fairly comfortable climb. Of course, it all depends on the shape and location of the steps, but if you try, you can make a very convenient product.
- Secondly, when folded, the hatch with a ladder practically does not take up space in the living room.

Note! Since the folding segments themselves are mounted on the hatch cover, there must be free space inside the attic. However, in the vast majority of cases, this is not a problem.
- Thirdly, subject to correct installation and a rational choice of the installation site, the device is very quickly brought into working position and just as quickly assembled back.
As for the shortcomings, they also exist, although they cannot be called significant:
- Even a hatch sealed around the perimeter is one of the sources of heat loss. To avoid this, it is worth taking care of additional thermal insulation of the roof.
- If you use heavy wood for the manufacture of the staircase itself, then certain efforts will be required to assemble and disassemble it.
- The price of factory hatches with built-in steps is quite high, and the process of making homemade ones is rather complicated.
However, we will try to fix the last drawback: in the next section, detailed instructions will be given that will help you in the course of your work.
Self-made ceiling hatch
Opening decoration
The first stage of our work is the design of the hatch itself. It is important to consider the following points here:
- If the opening in the ceiling is laid during the construction phase, then the issue of choosing a location is not relevant. If we can choose ourselves, then the hatch should be placed so that the ceiling above the stairs is at the maximum height. This will provide us with a comfortable climb and will save us from hitting our heads on the rafters.
- The opening itself must be reinforced around the perimeter with wooden beams. If the ceiling overlap is made of concrete slabs, then the edges of the opening should be additionally reinforced with steel corners.
Note! The opening must be large enough to accommodate the longest segment of the ladder on the roof.
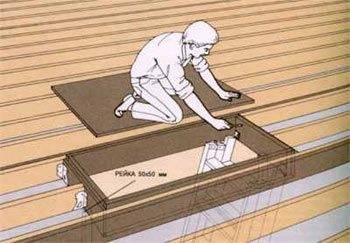
- For the manufacture of the manhole cover, you can use thick (10 mm or more) plywood or a wooden board. The lid should be reinforced with wooden beams around the perimeter.
- You can mount the lid on factory hinges, but finding suitable ones is quite difficult. Alternatively, it is worth making the brackets from sheet steel, connecting them with bolts with a diameter of at least 10 mm.
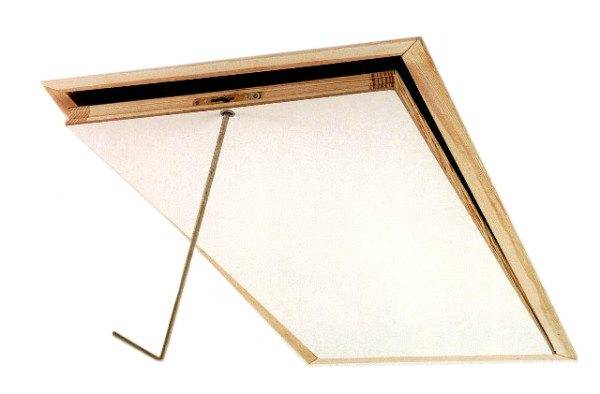
We attach the hatch cover to the beams or corners along the perimeter of the opening. On the far side of the cover, we install the latch in such a way that the handle is directed towards the living area.
Assembling segments
After the hatch itself is secured, you can start making ladder segments:
- Most designs involve the assembly of the lifting part from three segments: in this way, the length of each part is relatively small, and there are not many hinges to be made.
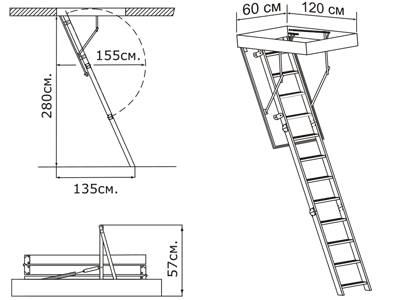
- The easiest way is to buy a ready-made metal (steel or aluminum) ladder. But if you want to save money, then it is quite possible to make a wooden structure.
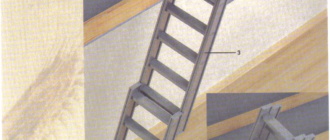
- Cut out side bowstrings from a 40x100 mm bar for each segment. We cut the corners of the timber in such a way that the structure can be folded.
- We saw the edged board with a section of 40x80 mm into step blanks. We form thorns at the ends of the blanks.
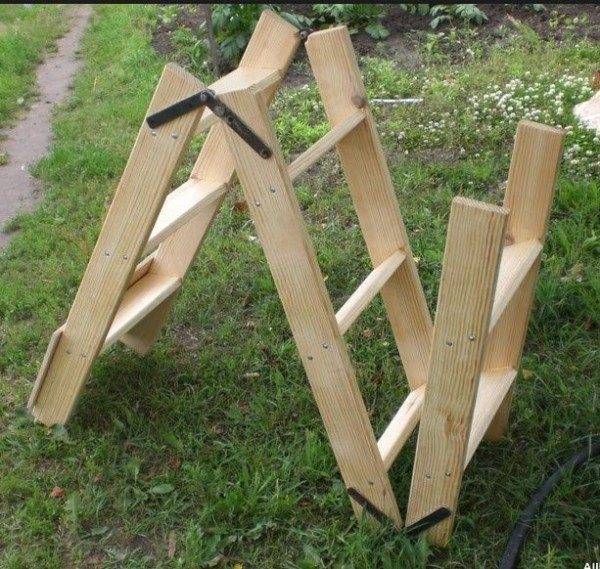
Advice! For ease of movement, the edges of the boards can be rounded.
- On the inner surfaces of the bowstrings, using a router or chisel, select the grooves for installing the steps.
- We grease the spikes on the steps with glue and drive them into the grooves. We reinforce the structure with self-tapping screws.
- We grind all wooden parts with sandpaper, after which we process them with varnish for interior work. Instead of varnish, you can paint the steps and bowstrings with interior wood paint - the main thing is that it is sufficiently resistant to abrasion.
- We assemble individual segments into a single structure using folding hinges.
Note! Hinges should be selected equipped with a stopper, i.e. they should only open in one direction.
Installation of the structure
Next, we proceed to the most important part of our work - assembling a hatch with a ladder:
- We attach the first segment of the lifting part to the inner side of the hatch cover. Fastening should be done at several points, since it is this node that will experience the maximum load.
- We connect the side beams along the edges of the opening to the fixed ladder with metal brackets. These brackets will make it easier for us to open and close the hatch, in addition, they will not allow it to swing open too wide.
- To facilitate assembly and disassembly of the folding structure, springs can be installed that connect the brackets to the hatch frame. These springs will take on some of the load.
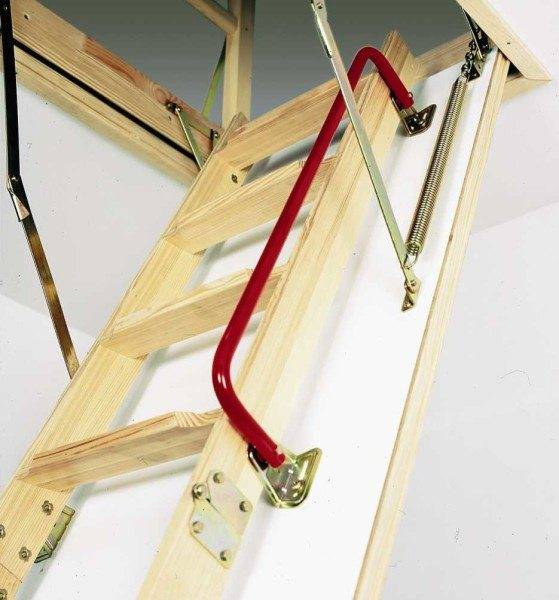
At the same time, the design features that make it possible to bring the ladder into working position in just a few seconds make it practically indispensable in everyday life.
In the video presented in this article, you will find additional information on this topic.


What amazes me most about this construction is that it actually does not exist !! that is, it is, but the entire space (including the floor) under the hatch to the attic is clean and free))
also the sunroof is thermally insulated.
we have such a ladder hatch in our house. it is convenient to use it. there is nothing super complicated in the setting. my father-in-law and I installed one in a couple of hours. the most convenient in my opinion is the 2 photos on the right.