Closed kitchen
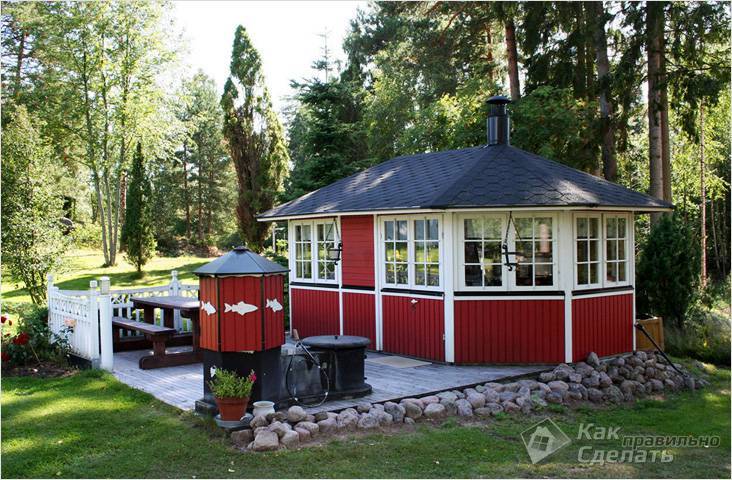 Closed frame summer kitchen
At the design stage, it may have been decided to erect walls from a foam block or brick, then this can be done according to the principle with the installation of vertical landmarks, which was mentioned above. The walls may not be too thick. In some cases, laying in half a brick is allowed. But always consider the weight of the future roof. In the future, the outside of the building can be sheathed with siding or a block house. For interior decoration, a house block, lining or other material that will be frost-resistant is also suitable, because it is unlikely that someone will constantly heat the room on purpose in winter.
A timber is laid on the walls, which will act as a Mauerlat. Its size can be 10 × 15 cm. It is fixed with anchor bolts or studs, which must be bricked up during the construction of the walls. Under it, it is imperative to lay waterproofing in the form of roofing material or bikrost. A rafter system is installed on the logs. It can be for both a gable and a pitched roof (for this option, it will be enough to make one wall higher than the other, then beams are simply installed between them). The lathing is mounted on the beams and the roofing is laid. The ceiling is hemmed from the inside.
 An example of a closed kitchen
You can go simpler and stop at the wireframe version. For him, we need beams of the same size as for the vertical columns from the instructions for an open kitchen. We make the foundation out of them. We lay them along the perimeter of our foundation on two layers of roofing material or bikrost, which will serve as waterproofing. We make a bandage between them. To do this, at the edge of each log, there is a depression half the depth and width equal to the width of the log. Checking the diagonals. We fix them together with self-tapping screws and internal metal corners. Next, we fix it to pre-prepared plates or anchors to the foundation.
We mount corner support posts from the same timber. With a step of 60 cm, we install additional vertical supports from a board measuring 10 × 5 cm.For greater rigidity, we fasten the jibs for each main support. We carry out the top strapping and install the rafter system for the future roof. We do this by analogy with the open kitchen option.
Summer kitchen project: choosing materials
Summer kitchen frame:
Fake diamond. Why: excellent finishing material, fits well on wood, concrete and drywall surfaces. It looks and functions like a natural stone, but it is lighter, easier to cut and easier to work with.

Brick. Why: an affordable and reliable material for the construction of the frame. Requires minimal masonry skills.
Plaster. Why: Fits well on wood, concrete and drywall surfaces. It is a durable and fireproof type of finish that can be painted in any color with paints for outdoor use.
Cabinets:
Stainless steel. Long service life, tolerates any weather conditions well, matches well in style with other kitchen appliances.

Wood. Creates a cozy classic country style. Requires annual renewal with weather protection agents (varnishes, paints).

Plastic. PVC panels for external decoration resemble traditional materials (wood, brick, stone). They are frost-resistant, fireproof, resistant to both sudden temperature changes and moisture. Installed on a wooden frame.
Countertops:
Granite / Artificial Stone - weather resistant, durable, easy to maintain and clean. Resistance to mechanical stress. Resistant to corrosion, rotting, mildew, fungus formation. Huge selection of textures and colors.

Concrete - gives a laconic modern look to the summer kitchen. Must be properly installed and treated annually with protective impregnation.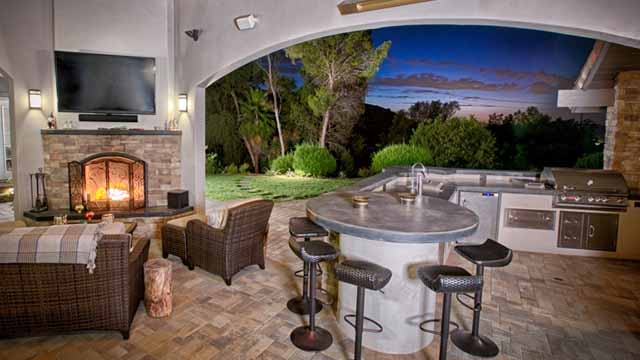
Tiles are an economical option, tiles from sales or used can be used. Good for DIY installation, available in a variety of colors, styles, sizes. It is most suitable for warm regions, where the temperature drop will not harm either the tile joints or the tile itself.
The roof of the summer kitchen.
Canopy. A wooden canopy covered with transparent polycarbonate or other roofing material protects you from the elements.

Umbrella. Convenient for a mobile kitchen, you just need to worry about a solid foundation for it. For the built-in kitchen, there is a place for an umbrella in the table itself.
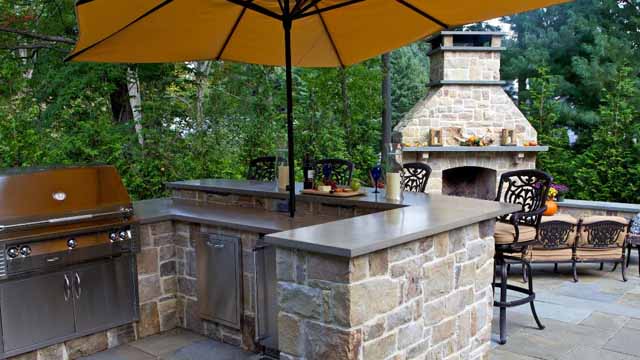
Lighting
Cooking area lighting - use LED floor lights or overhead lights.
Lighting for the dining area - lamps in the form of LED garlands or strip LEDs are suitable here, they will create a special festive mood.

Lighting paths - solar lights are optimal for this.

Terrace and staircase lighting - use recessed lights.

Lighting of the entrance to the house - the lamp above the front door will never be superfluous.

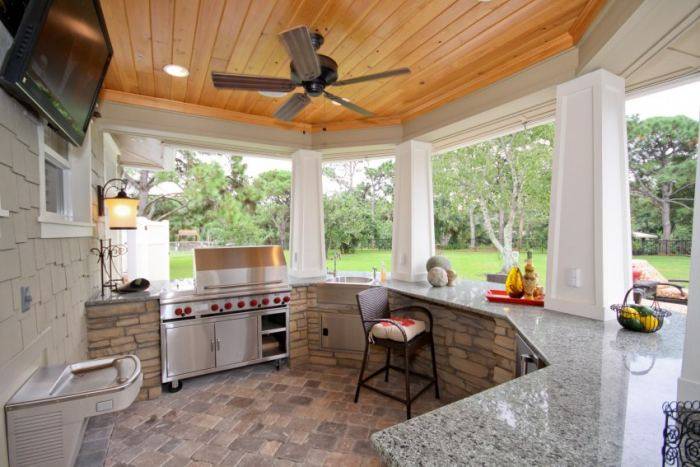
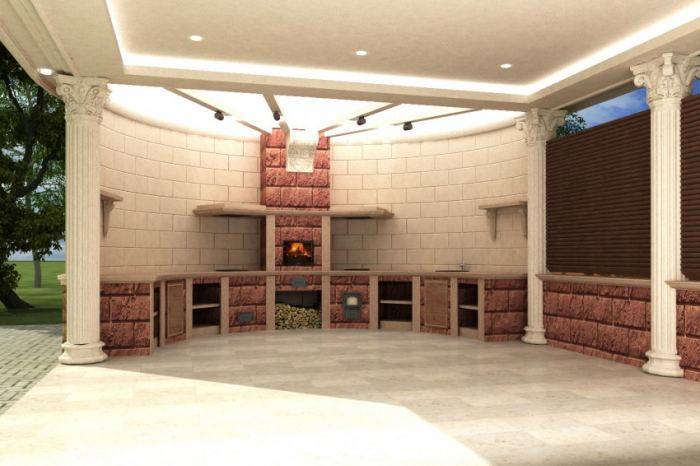
Photo of a summer kitchen in the country






We also recommend viewing:
- Brick tandoor
- Construction of a cellar for a summer residence
- How to make a gazebo roof
- House extension options
- What is cheaper to build a house from
- Hozblok for giving
- Construction of a bath from a bar
- How to make a dog enclosure
- Do-it-yourself canopy
- Examples of country cabins
- How to build a porch with your own hands
- Brick brazier
- Summer shower
- Toilet for a summer residence
- How to attach a terrace to the house
- DIY gazebo construction
- How to make a polycarbonate greenhouse with your own hands
- How to build a chicken coop with your own hands
- Do-it-yourself shed
- DIY pergola
- DIY barbecue construction
- Do-it-yourself rabbitry
- Reliable visor over the porch
- The best forged gazebos for summer cottages
- How to make a hanging chair
- Bath in the country
- DIY veranda construction
- How to build a garage with your own hands
- Construction of a patio in the country
- Construction of a gazebo made of wood
- How to make a winter garden
- How to make a greenhouse with your own hands
- How to build a gazebo with barbecue
- Modern polycarbonate awnings for a private house
- How to make a brick barbecue
- Instructions on how to make a dog kennel with your own hands
Choosing the type of summer kitchen
Mobile mini summer kitchen
A mobile summer kitchen is a smart choice for small spaces, today it is a picnic center, tomorrow it is a family dinner in a quiet corner of the garden. Start with a portable barbecue grill. It is practical to add a mobile table with shelves for storing a minimum of kitchen utensils and a convenient work surface. To light up your summer kitchen in the evening, consider a rechargeable lamp.
This is the most economical option for a summer kitchen.

Frame summer kitchen
A frame summer kitchen for those who have more land and a budget. The basic design includes kitchen tables, worktop, grill and sink. This summer kitchen is assembled on a frame made of wooden bars or metal profiles, sheathed with plasterboard, decorated with plaster or tiles. It is usually installed on a ready-made site - a terrace, patio, and therefore does not require its own foundation. Often equipped with a refrigerator, LED lighting and a serving trolley.
This is a summer kitchen option for an average budget.
Built-in summer kitchen
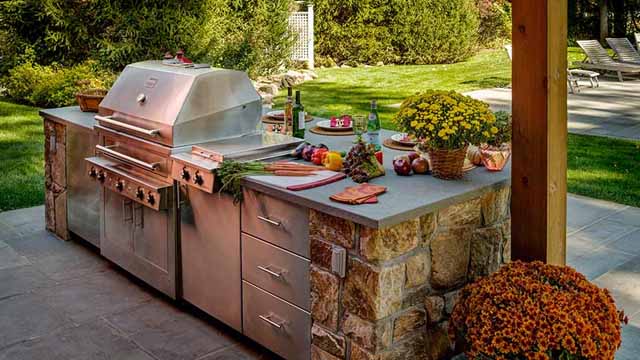
The built-in summer kitchen offers a variety of cooking options (grill, smokehouse, pizza oven, etc.), large work surfaces, storage space, and more options for combining the summer kitchen design with the overall design of the site.Large area, comfortable lighting, a full range of amenities - cold / hot water, sewerage; a canopy or covered veranda / gazebo add convenience to the kitchen, but also raise the cost.
The most functional and costly option.

Closed summer kitchen
In many ways, it is similar in structure to an ordinary house, with doors, windows, walls and a roof. The room can be combined with a bathroom, shower or bath, or workshop.

Insulation of the premises is most often not puzzled, because in winter it is not used.


The advantages of a closed kitchen:
- protection from wind, rain, annoying insects, dust.
- the ability to equip the premises as temporary accommodation for guests;
- the ability to store food and kitchen utensils.

The disadvantages of this approach are as follows:
- the relative high cost and material costs compared to an open kitchen;
- the need for preliminary calculations and drawings;
- the duration and complexity of the process.

A closed kitchen is relevant in cases where the owners of the dacha live on it all year round. If the dacha is not used in the winter, then the construction of a closed kitchen does not justify itself.
Walls and oven
If the kitchen is being built using wooden elements, they are fastened with screws and self-tapping screws. Beam structures are best made from metal corners. The walls of the future kitchen are finished with a 20mm thick board from the outside, and from the inside with plasterboard, clapboard or the same board.
If during the construction of walls you decide to use brick, stone or foam blocks, then stock up on the knowledge of how to lay the wall. As a rule, when building a summer kitchen, use masonry in one brick, and sometimes in half a brick.
When laying walls, take into account the location of the stove or barbecue and lay out the adjacent walls with bricks
When erecting walls, it is important to consider where the stove or stove will be located. This area should be laid out with bricks, and this can be done precisely at the stage of wall construction
The same applies to the construction of the barbecue. When building a roof, you will also need to consider the location of the fire source in order to properly position the chimney.
When building a furnace, fireclay bricks are used - it is resistant to high temperatures, its drops and, moreover, is an excellent conductor of heat, quickly supplying heat to the room.
Of course, do not forget that a closed type of kitchen provides for at least one window. This should also be considered when building walls. A very effective solution would be the construction of large, full-wall windows. More sunlight will penetrate into the kitchen, and the space will visually become wider. The seams in the window openings are sealed with silicone overlays.
Open summer kitchen
 Open-type summer kitchens are built in the same way as gazebos. In fact, these are the same gazebos, but appropriately equipped. These structures consist of a concrete base, solid perimeter support pillars and a hinged roof. An oven, a table, benches, and something else necessary for the owners are placed on the base and under the canopy.
Often, a summer kitchen is equipped right in the open air, without any roof. But it is obvious that such a structure can be operated exclusively on fine warm days. And we have not every summer rich in them.
Any summer kitchen, especially an open one, can be equipped very nicely. Moreover, to create such buildings, natural materials are most often used - stone or wood. And bricks or blocks make excellent structures.
The advantages of open summer kitchens include:
- their availability in terms of construction costs;
- minimum preliminary calculations;
- the simplicity of the building technologies used;
- construction speed.
As for the disadvantages, they also exist:
- it is impossible to use the premises during the cold season;
- there is no effective protection against bad weather, wind, insects;
- you cannot leave food, dishes, other more or less valuable things there for a while;
- furniture in such a kitchen needs cleaning for the winter, since it is likely to become unusable even after one season of being in the cold for a long time.
Materials (edit)
Summer open-air kitchens are usually constructed from lighter materials and are not insulated.
- The foundation can be made of concrete or sand concrete, cinder block.
- On the base, you can lay boards or lay out tiles. After that, either pillars are installed from a profile pipe made of metal or other material chosen by the owner, or two walls are erected from brick or timber.
- Free space can be decorated with a lattice of boards, or you can leave it open.


The easiest way to build a closed kitchen will be a frame-type timber structure installed on a columnar foundation. You can sheathe it with clapboard or OSB plates. Mini-bar cladding is also good. Despite the ease of erecting the frame, finishing can be done of almost any kind: under a bar, plaster, siding. If brick or concrete walls are to be erected, as well as walls made of foam blocks, stone or aerated concrete, it will be necessary to build an additional frame made of metal profiles or wooden slats.


Wooden structures are built from a bar, log or solid wood, but it is important to remember about the weak fire resistance of the material. The tree needs to be impregnated with special compounds from rotting and burning
Brick structures are more durable, fireproof. But they require significant financial and time costs for construction.

Another inexpensive and lightweight construction material is SIP panels. It is extremely popular among the owners of summer cottages. Consists of chipboard or wooden board outside and polystyrene foam inside. To choose a material for construction, first of all, you need to decide what type of kitchen will be built, how functional it will be, whether the family lives permanently outside the city or comes from time to time. Once all the questions are answered, the choice will be easy.

External finishing can be made of the following materials:
- false panels;
- decorative plaster;
- brick;
- wooden boards or slats;
- tile;
- fake diamond.



When choosing a material for interior decoration, you need to proceed from the purpose of the room. In addition to beauty, it should, if possible, resist the ingestion of odors and the formation of fatty deposits; it is good if it can be easily washed and cleaned. Ceramic tiles are most suitable and are ideal for decorating the work area.
If for some reason it is not possible to lay the tiles, there are many more options:
- wallpaper;
- drywall;
- painting walls is the easiest and most affordable way to refresh the kitchen;
- wood;
- plastic panels.


If the summer kitchen is built like a gazebo, that is, it has no walls, part of the space can be filled with a crate. It will be very decorated with climbing or creeping plants - grapes, bindweed. You can also hang thread or voile curtains in the openings - they add air and at the same time block the path of dust. During periods of insect activity, special hermetically sealed curtains will save from their invasion.

Closed summer kitchen in the country
Summer kitchen constructions are separate buildings with appropriate conditions for preparing, storing and receiving food. Avoid clutter in your home kitchen with a space like this. Currently, the summer kitchen is chosen by many Projects of these buildings - decoration of any property. Most of the buildings are decorated in a modern style with large glazing, a terrace or veranda. The summer kitchen often has a convenient utility room.For those who do not want to be satisfied with a grill, smokehouse or garden gazebo, it is worth considering summer kitchen projects that can perform all these functions at the same time.
Summer kitchen with stone facade
A project like this is extremely functional and aesthetic that blends with the rustic style. The utility room has a large, practical, square kitchen. The architect has planned inside, besides the hearth, also a smokehouse and a place for a bread oven. The outdoor part of the terrace has a barbecue and a large enough space for socializing. The building is completely under the roof, which will significantly affect the comfort of using the facility. For many people, such a project is the best in terms of design. The stone façade adds cozy accents that always look good in neat and spacious gardens. Due to the simplicity of the project, the construction of such a summer kitchen will be one of the cheapest.
Summer kitchen with relaxation room
This project is even more functional than the previous one. In addition to the spacious kitchen inside the building, where a place for cooking and eating is planned, there is also a dressing room and a sitting area. In such a designed facility, you can spend the whole day without returning home. In the kitchen, the architect planned a place for baking, roasting and smoking. On the spacious terrace you can organize a mini-living room with a dining area. The project itself is quite simple, so its implementation will also not require large financial costs.
Summer kitchen with modern living room
This project is an ideal proposal for modern summer cottages. The interior of the building has been designed to be very functional. You can enter the summer kitchen from both sides - from the terrace or from the side. In addition, the architect planned a washroom and a practical utility area in the middle that could be used as a seating area. On the other hand, a large terrace would be ideal. The advantage is the roof of the extension, on which canopies can be installed to protect from wind, rain or sun.
A furnished summer kitchen will certainly be good for the hosts and their guests during the warm season. This is an ideal place to relax, so you just have to choose the most suitable project from the presented photo gallery.


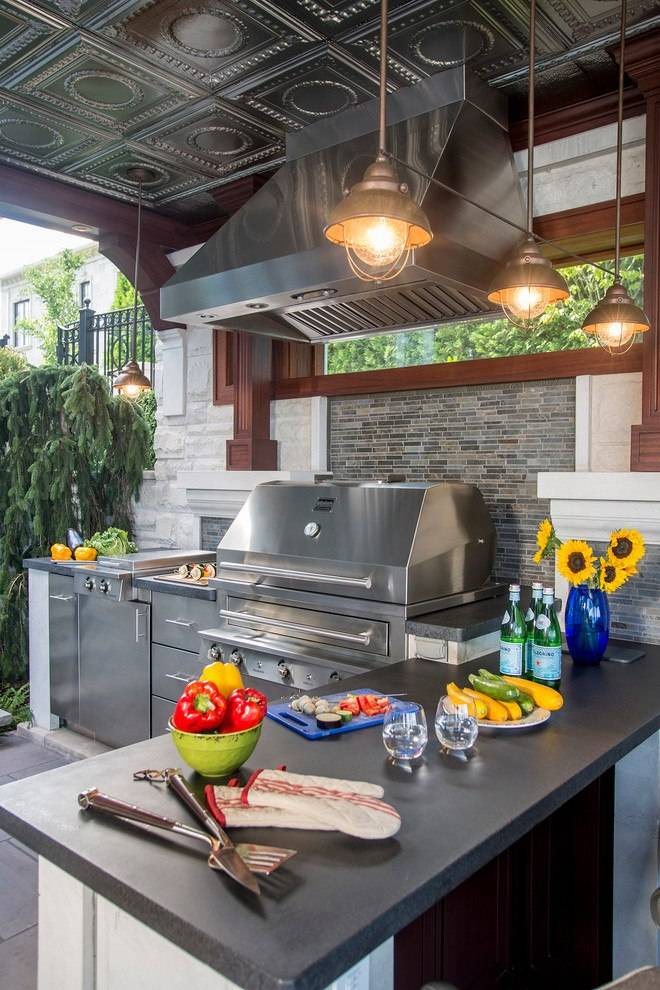


Creating an individual summer kitchen in the country with your own hands
There are many algorithms for creating a summer kitchen with your own hands, but the main stages of construction remain unchanged: preparatory work, clear markings, foundation arrangement, installation of supports, roof installation and interior decoration.

The summer kitchen has a fireplace that can be used for heating in the winter season
The foundation for the future summer kitchen
If you settled on an option for a light design for a summer kitchen, then you can start arranging the building with your own hands. First of all, you need to make a markup and start from the foundation. Since the structure is light, there is no need for a capital foundation. You can dig a pit around the perimeter with a depth of about 15 cm with your own hands. Fill up with rubble or sand, tamp and start laying paving slabs or boards for the floor of the planned pavilion.

The tree trunk in the interior of the country kitchen performs a load-bearing and decorative function

The closed and open parts of the country kitchen are separated by a sliding metal-plastic window
In the case of building a closed-type kitchen with full-fledged walls in the country house, you need a do-it-yourself device of a strip or columnar type of foundation. For such a foundation, a pit is arranged up to 50 cm deep. The foundation is reinforced and poured with mortar. Inside the perimeter, the soil is selected, covered with sand, then crushed stone and mortar.

The project of a country house with the arrangement of a garage, utility room and summer kitchen
Walls and roof for a summer kitchen
In order to erect the walls for the summer open kitchen, the frame of the future room is first built. Usually it is made from a wooden bar (15x15). At the corners of the perimeter, wooden supports are installed in previously dug holes up to half a meter deep at the corners of the perimeter, which are subsequently poured with concrete. Beams are attached to metal corners between them. After that, the frame is sewn up with the material chosen for finishing. It is recommended to choose durable materials that do not require additional processing (siding, plastic, corrugated board).

For the construction of a full-fledged kitchen room, it is necessary to arrange the foundation
If the building provides for a foundation, then a wooden frame structure is attached to it, the beams of which are connected to each other with corners. Further actions repeat the steps described above.

Frame house-kitchen decorated with wooden finishing materials
Walls for closed rooms are erected from brick, stone or foam block. The thickness of the walls is usually taken in half a brick. Interior decoration also depends on personal preference: paneling or wall plastering will do. It all depends on whether heating will be used in the room or not.

The glass wall of the summer kitchen allows the enclosed space to keep in touch with nature
The roof for the summer kitchen is usually pitched. For this, the construction of beams with different heights of opposite sides is being arranged. For the roof of open light structures, tiles, slate or corrugated board of the appropriate weight are used. For closed buildings, where a more durable frame is used, the selection of the roof has almost no restrictions.

The project of arranging a bathhouse with a summer kitchen and a terrace
A cozy and functional summer kitchen in the country will become a favorite place for your vacation, where you can always successfully combine business with pleasure.
Preparatory work
Before erecting a gazebo with a summer kitchen, it is necessary to perform serious preparatory work, which will be the key to a long and high-quality service of the structure. Before starting construction, a place for the future structure and materials are chosen. You also need to carry out design work at least in a minimal form - make a drawing indicating all the required dimensions.
Important! In accordance with fire safety rules, the installation of a building with any kind of stove or barbecue should be carried out no closer than 7 meters from other buildings on the site or neighboring buildings.
Choice of location and material
The choice of location is determined by the need for communications - gas, electricity, water supply, sewerage. In indoor projects, heating is also carried out - from a boiler or electricity.
 For reasons of aesthetics and climatic conditions, it is worth installing the gazebo in a shady place on the site, away from the toilet and shower stalls, as well as cesspools and compost pits.
The choice of material is made depending on the climatic and relief features of the area, financial capabilities and personal preferences
The purpose of the building is also important - if a long-term long-term use is planned, then it makes sense to build a capital building, which can even go out into the street with its back wall. Otherwise, from simple and inexpensive materials, you can quickly build a kind of "bungalow" of a seasonal type with the possibility of its restoration or redevelopment next year.
Important! It is better to enter the gazebo from the south side. In this case, the rays of the sun will hit the entrance of the building and warm it up at any time of the year.
Dimensioned drawing
It is better to entrust the design stage to professionals who will take into account all the customer's preferences and make full-fledged drawings with verified dimensions. However, if the owner has sufficient knowledge to independently draw up a project, it will be extremely interesting for him to measure the site, draw up drawings and build a gazebo with his own hands exactly as he sees it. For such work, it is necessary to have a personal computer with profile graphic editors for design.

