The choice of wood for the construction of the gazebo

- If you decide to build a gazebo out of wood, choose wood material, guided by the following criteria:
- the presence of primary processing of wood;
- wood species;
- quality of the board.
Initial preparation assumes that the wood must be properly dried. The ease of replacing individual parts of the gazebo structure allows you to make not so categorical requirements for consumables, dryness is one of the most important factors in any type of construction
The lack of antiseptic treatment, for example, would be a small omission, due to the small volume of material, such treatment can always be done independently.
We draw your attention to the fact that with an increase in the size of the gazebo to a more impressive one, the requirements for the choice of wood become more stringent, since a different, more significant load will be placed on this kind of structure.
For an ordinary gazebo, this is not important. It seems to us that the cost of the resulting material for work plays a big role here.
Therefore, when purchasing wood, make sure that the quality and price match each other. Pay special attention to the quality of processing and the original raw materials, since not all suppliers can provide the proper quality and processing on professional equipment.
Since the gazebo is a type of outbuilding, choose a wood species that is highly resistant to weather conditions. For example, oak is famous for its strong crown, but a special tool is required to work with such material. The most common building instruments cannot always cope with the oak parts of the structure. High-strength characteristics justify the expensive cost of this wood.
Ash is not inferior to oak in strength, and its color palette is soft. Yew is good for everything, except for the cost. These types of wood are more often used for more capital buildings, but for a gazebo, you can not be too picky, use everything that is at hand, even the remains of linden and aspen. The main thing is that the quality of the board is not in doubt.
It is preferable to choose wood of the "Extra" class, this material often does not have knots, and it has a great appearance.
Wood of the same class "A" quality assumes the presence of roughness - an acceptable norm is 1 - 2 knots per 1.5 m of the length of the board. Otherwise, it has an almost identical appearance with the higher cost class.
Wood of class "B" can contain up to 4 knots for every 1.5 m, the color of such material has flaws, veins, spots and even small cracks.
The material of class "C" has a rather low quality, cracks, chips and no guarantees of a presentable appearance are provided for this kind of material.
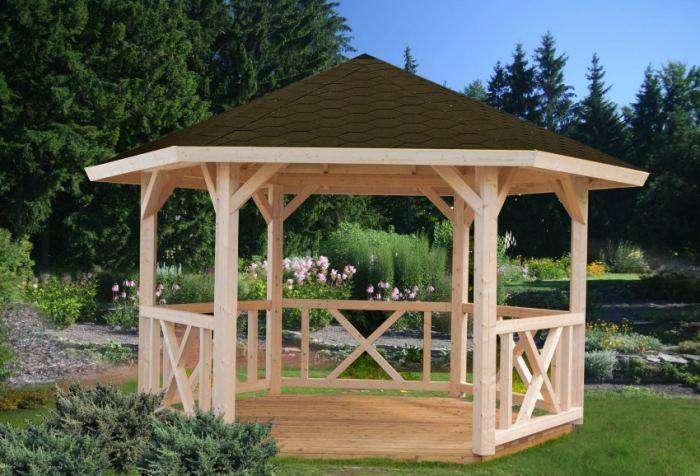
50 drawings of octagonal gazebos
From these dimensional drawings, you will understand how to make an octagonal (octahedral) garden gazebo for a summer residence with your own hands. Among the layouts and sketches, you will find blueprints for the roof, base, table, bench and porch.
Do-it-yourself wooden gazebos 300 photos, drawings, diagrams
Here is a small gallery of handmade wooden arbors. Of course, you can collect more photos, because there are millions of options. Each gazebo, made not according to a template, but with your own hands, even according to standard drawings, is still a work of art. Here are collected relatively simple designs that are within the power of any master who does not have much experience. There are, of course, examples of industrial products, which may come in handy.
Square gazebo drawings
Square gazebos 150 photos
Drawings of hexagonal arbors
DIY hexagonal gazebo 50 photos
Drawings of octagonal arbors
Do-it-yourself octagonal gazebo 100 photos
Installation of polycarbonate
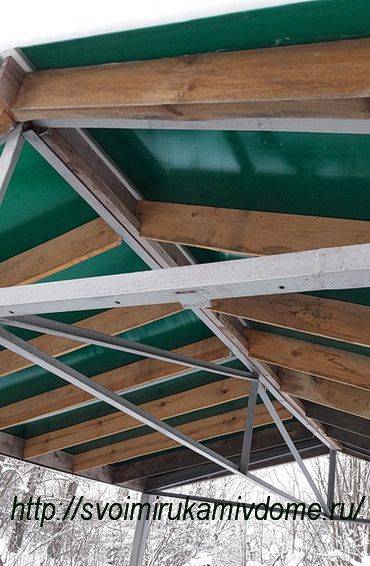
Gazebo, bottom view
Installing polycarbonate on the roof of the gazebo is not an easy task. It would be easier to lay it along the ridge so as not to cut. But the honeycomb channels must be located from top to bottom in order for the condensate to drain. I had to cut it into 4 pieces, calculating the size.
The first sheet was attached along the ridge - no problem. We used self-tapping screws and thermal washers for attaching polycarbonate. Easily inserted the roof sheet into the ridge profile. On the other side of the ridge, a second sheet was inserted into the ridge profile and attached with self-tapping screws with thermal washers. The first sheet on the roof of the gazebo was pushed into the connecting profile, and the third sheet into it easily enough, then inserted into the ridge profile. They looked on the Internet for ways to insert a polycarbonate sheet into the connecting profile, tried it, but in the end they installed it with the help of a screwdriver and strong male hands.
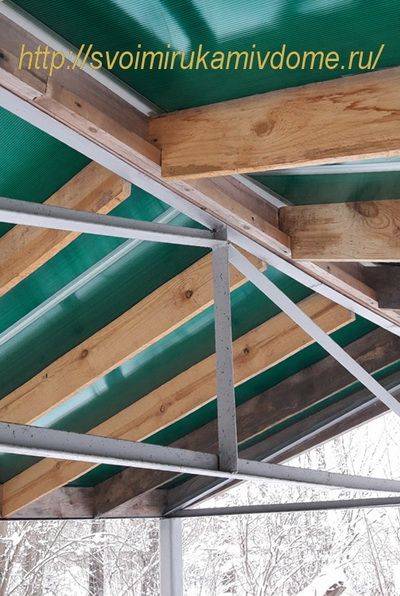
Fastening the rafters of the gazebo
The fourth sheet turned out to be a problem. We fiddled with him for a long time, there was no time to notice. After all, it had to be inserted simultaneously into the ridge profile and into the connecting one. Since I am lighter than my husband, I crawled upstairs, laying plywood on the polycarbonate. And the husband pushed the sheet from below. But the strength of my hands was not enough, no matter how hard I tried in various ways, including from the Internet. The sheet all the time jumped out from the connecting profile, then from the ridge.
My husband had to climb onto the roof of the gazebo. And I pushed the sheet from below. He nevertheless, with the help of a screwdriver, inserted the last sheet into the connecting profile - his hands are very strong. All the same, the husband would have to climb onto the roof of the gazebo in order to fasten the polycarbonate to the rafters in places inaccessible from the stairs. Cellular polycarbonate has not suffered, although the material is quite delicate.
Then we already thought that we were using the connecting profile in vain. It was necessary to overlap the sheets, it would be no worse, but much easier. Only the connection should fall on the rafter and screw onto it. And we placed the rafters so that the connection of polycarbonate sheets was between them. With this arrangement, it is necessary to make jumpers at the junction of the polycarbonate sheets between the rafters so that the snow does not push through. We have not reached this point, we will have to repair it in the spring.
Simple gazebos: design options
Metal lattice structure
- The lattice gazebo is built using wooden and metal rods. They are fastened with non-continuous sheets, and at the same distance.
- A lattice gazebo looks more refined than what is built of metal.
- The rods can be given various unusual shapes, this will provide the gazebo with an original look.
- You can easily build a gazebo of this type within a month.
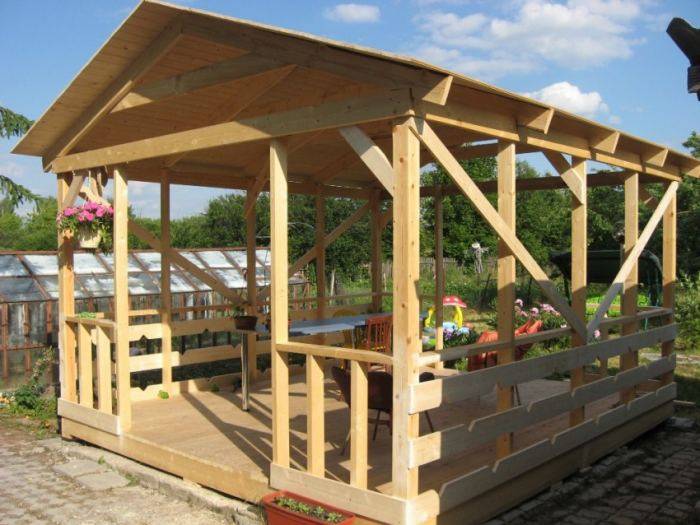
Wooden solid building
The most affordable option for building a gazebo is its solid construction. In this case, the sheets of material are attached tightly to each other, without gaps and other wall patterns.
The appearance of a solid gazebo presents a more sophisticated appearance if it is constructed of wood. The construction work on the construction of such a structure will take a minimum of time, and the appearance will be no worse than that of a metal counterpart. Such a summer house will not be blown by the wind and it will be easy to hide in it from bad weather.
The durability of your gazebo will directly depend on the quality of the wood.
Pay special attention to the timber, it should not have pricks, rotted areas, darkening and accumulation of insects.
Before work, it is advisable to treat the wood with an antiseptic. The invasion of bark beetles will sooner or later harm the material and gradually lead to the destruction of the gazebo, and can also spread to other wooden structures in this summer cottage.
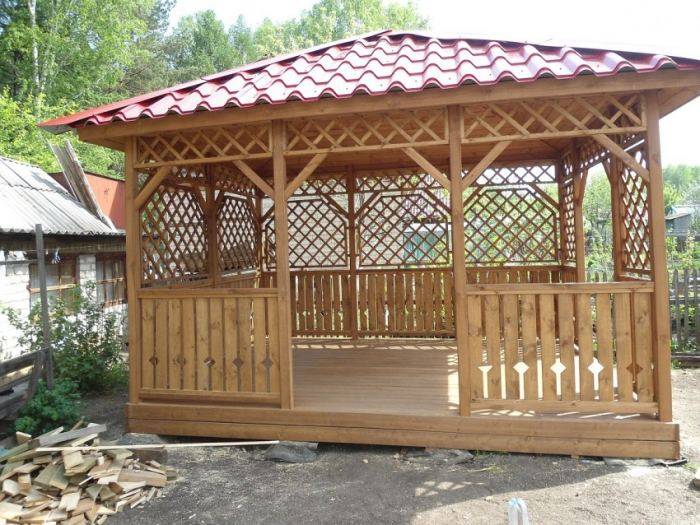
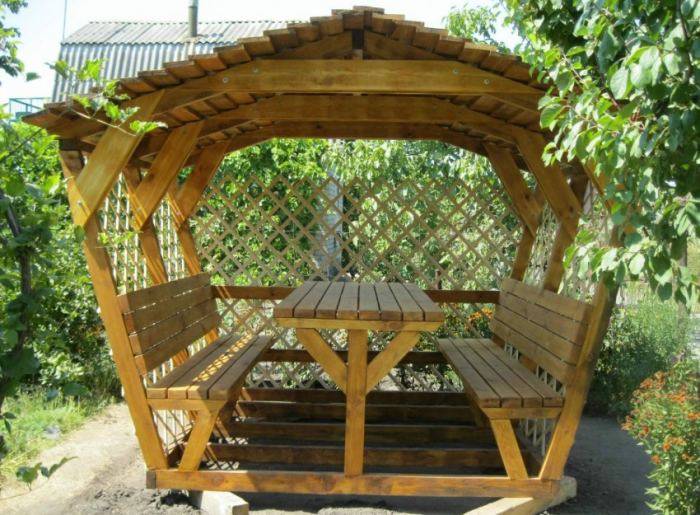
Wooden lattice structure

- Lattice wooden gazebos are usually called semi-open.
- Craftsmen from a gazebo of this design can make an amazingly beautiful structure due to hand-carved wood. The patterns will decorate and give the gazebo an exquisite, original and special lace look.
- In addition, wooden parts can be varnished, and you can also add decorations in the form of ampel flowers and other elements that we will draw your imagination to the interior of the gazebo. Let the inspiration overwhelm you, and this gazebo will become your family's favorite vacation spot.
- It is better to place an open gazebo in a place that is not blown through, since a draft will cause you a lot of trouble. Better that it was a secluded, tree-protected place.
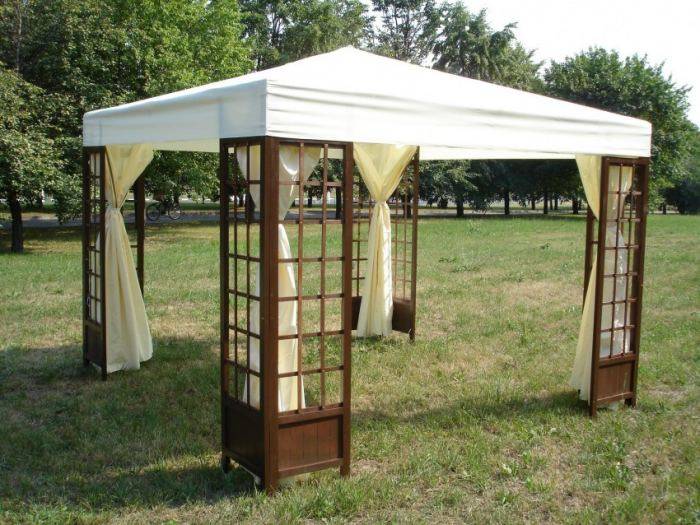
Polycarbonate structure

- Thanks to the simple installation of such a frame, you can quickly and easily build an unusual polycarbonate gazebo. Such a structure will not require significant financial investments, and its construction will take very little time, just a few days for a skilled builder.
- If we are building a polycarbonate garden gazebo, the following building materials must be prepared:
- metal posts;
- frame for the gazebo;
- crushed stone;
- metal pipe;
- cement;
- roof;
- polycarbonate sheets.
- Polycarbonate has a special, unique appearance. A summer gazebo made of this material looks airy, and direct sunlight creates an extraordinary atmosphere inside the building.
- This material can be easily combined with other building materials. The installation and construction of such a summer house is so simple that even an unprepared person can do it, without construction skills and experience in such manipulations.
Peculiarities
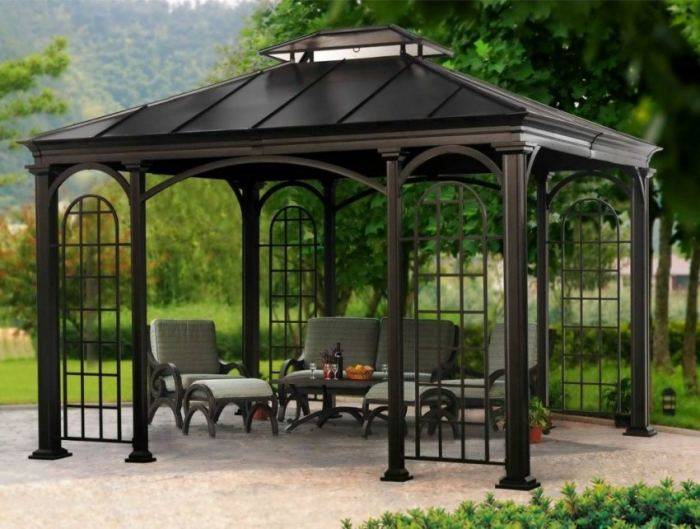
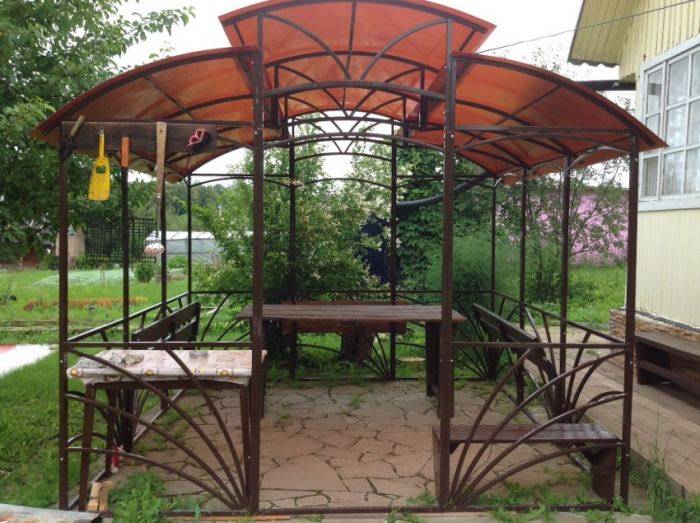
Now gazebos are made from a variety of materials, from wood to plastic bottles. But the classics still remain relevant. The same can be said about metal gazebos. The main advantage of this design is, of course, its appearance. A metal building is usually complemented by decorations or wrought iron elements, which looks very sophisticated. This gazebo will appeal to both fans of the classic style and those who like to experiment and look for something new.

A metal product can meet all the requirements of the site owner. It will organically fit into the landscape design and will be combined with all buildings in the yard. When building a metal gazebo, you can experiment with shape and design. There are designs that are square, round, and multifaceted.
In addition to the visual appeal of such gazebos, their strength is also pleasantly pleasing. They are durable and resistant to adverse weather conditions or high humidity. Such a gazebo may well stand for more than one year. The rigid frame is very strong, and, accordingly, the building does not deform over time, and the base of the building does not sag.


Such buildings are mainly divided into two types.
- The first is classic stationary buildings, which are durable and stand in one place. Usually, a good foundation is poured before their construction, and the gazebo is made as reliable as possible.
- Another option is a portable building. These are temporary gazebos that can be removed when moving or when severe frosts come.


Guaranteed strength and durability
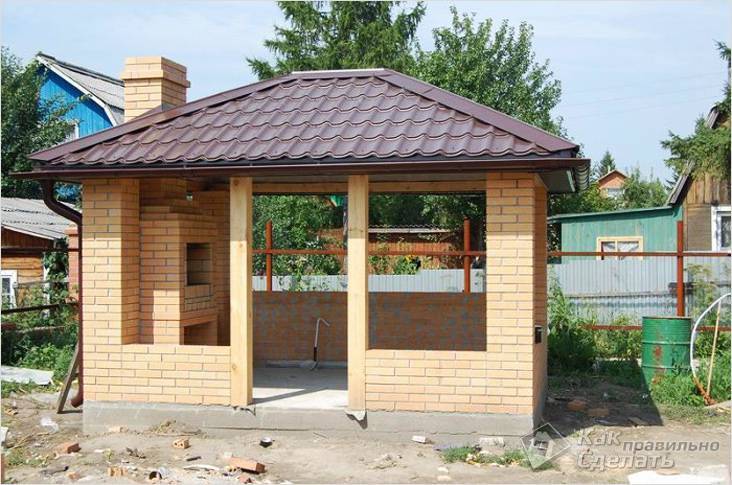
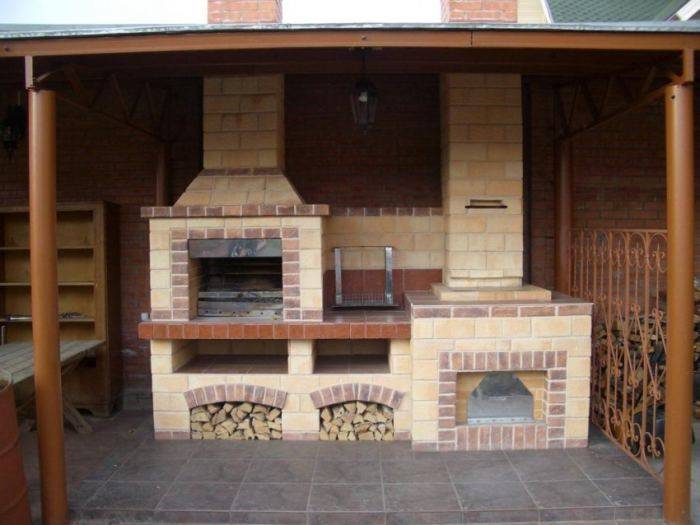
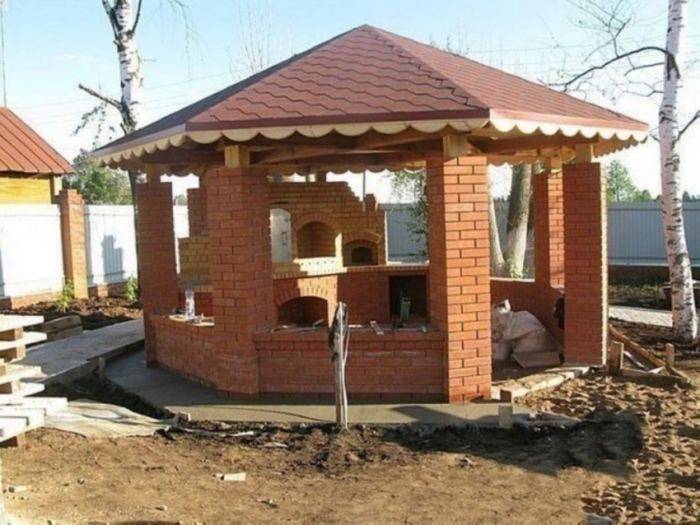
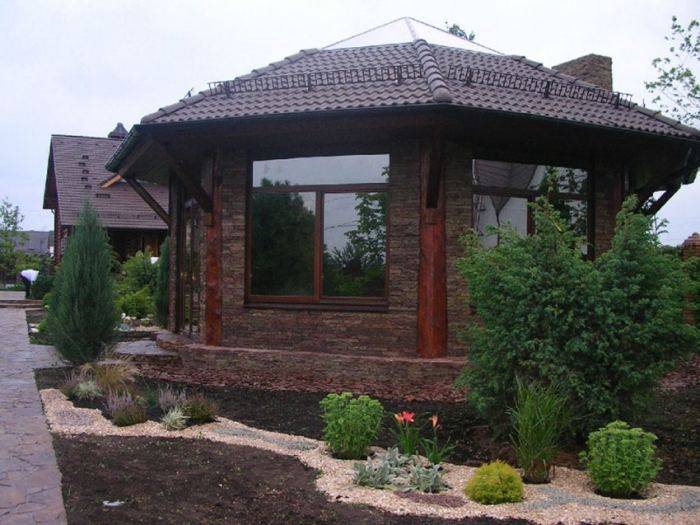
 Closed brick gazebo
Brick is a classic and traditional material that has been used for centuries. Architectural styles such as Rococo, Baroque, Gothic or Empire style, which were widespread in the eighteenth and nineteenth centuries, involve the use of solid, solid and durable brick structures. If the walls of your closed gazebo are made of bricks, then they will stand for a very long time.
 Brick building
Depending on the overall landscape design of your estate, you can use regular red brick or silicate brick, which have different colors.But keep in mind that silicate materials will retain heat inside much less than natural red brick.
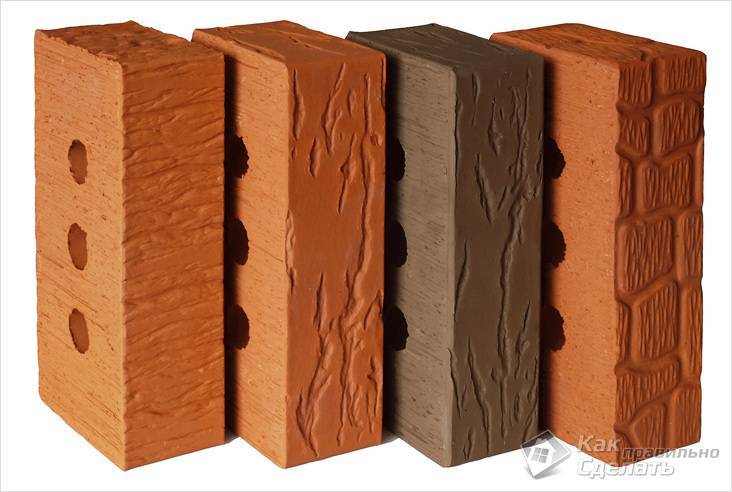 Decorative brick
If we talk about the advantages of this material over the rest, then the following advantages can be noted:
durability and strength;
low thermal conductivity, which makes the room warm;
the ability to build various architectural forms, depending on the design;
many options for interior and exterior decoration of the premises;
the ability to combine various materials, for example, brick with wood, brick with stone;
high resistance to moisture and other adverse natural influences such as snow, wind, rain and ice;
environmental friendliness of the future building, since sand is made from natural materials such as sand, clay and water;
bricks do not rot, and due to the structure of the material, it can "breathe", letting in air;
high frost resistance - the ability of the material to withstand freezing and thawing in a water-saturated state;
high fire resistance, which is very important, especially when it is planned to build a brazier or a barbecue oven in the gazebo;
good sound insulation, thanks to which it will be quiet and calm in the gazebo;
versatility of use and aesthetics of the material, allowing you to make any designs.
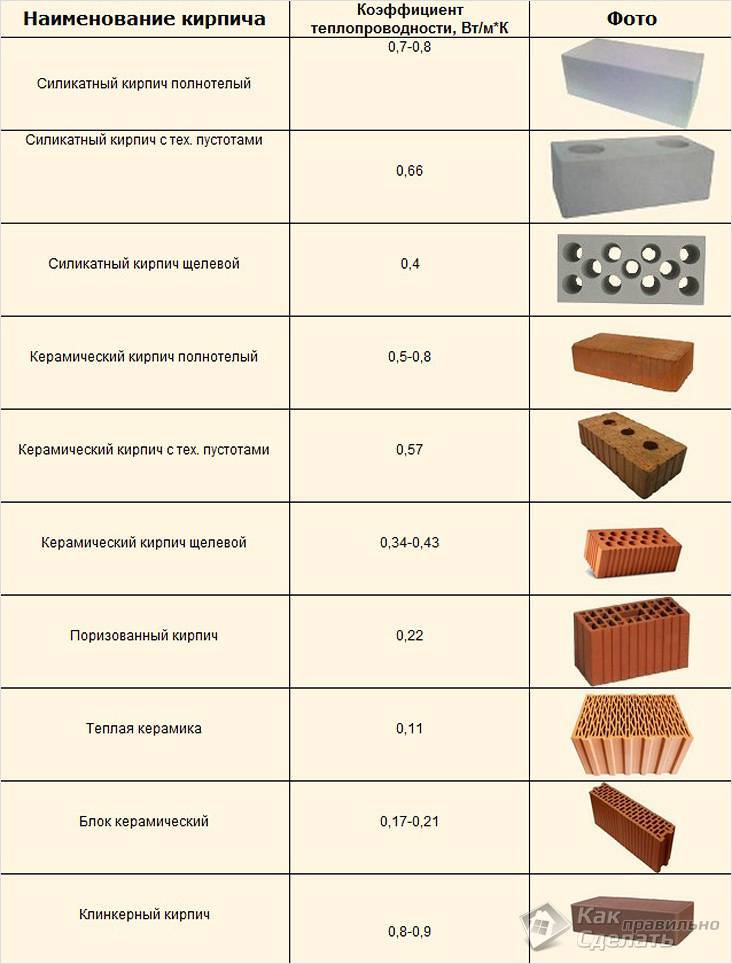 Brick types
Depending on the desire, the architecture and the form of the building can be varied. The most common options are square, hexagon, and rhombus.
But, like any material, brick has its drawbacks. Of the minuses, it can be noted:
- the high cost of the entire building, as they say, you have to pay for the quality. Yet, despite the high price, this is offset by strength, reliability and durability;
- since a brick building has a large mass, a brick gazebo requires a reliable and powerful monolithic or strip foundation, which will also affect the cost of the project;
- the complexity of the job. If you compare, it will be much easier to make the same gazebo made of wood, because not everyone can perform brickwork. However, if you follow the instructions, then all the work can be done without even having the skills to work.
 Decorative brick gazebo
If everything is done correctly - to build walls, adhering to the technology, then such a gazebo can be used not just as a place to relax with family and friends, but even as a full-fledged place to live or receive guests.
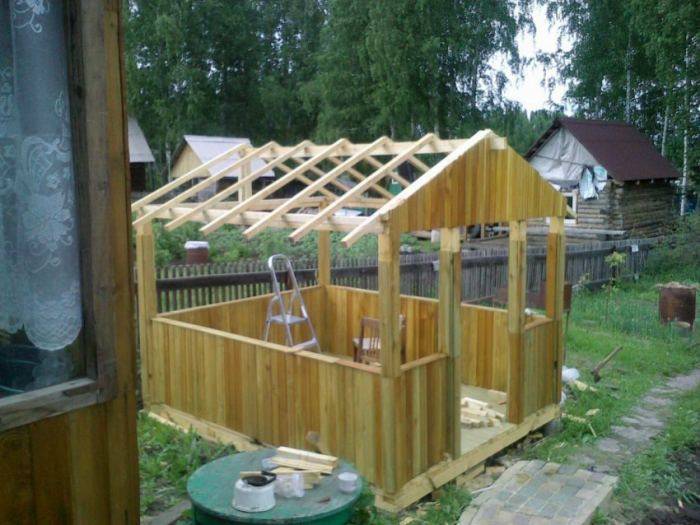
How to make a roof on a gazebo
Installing the roof is the next stage in the construction of an octagonal gazebo with your own hands. The step-by-step construction diagrams presented will give you a better understanding of the process. If you plan each aspect in as much detail as possible, you can, firstly, prevent possible mistakes, and secondly, make a roof even with minimal experience. You already know how to install pillars and cover the flooring; building a roof, of course, requires more skills, so if possible, contact your friends who may have more experience in this matter.
At first glance, the construction of a roof for an octagonal gazebo seems difficult, but everything is not so scary, the main thing is attention and accurate calculation
- Start with the rafters and cut both ends 63.5 degrees with a miter saw. Attach one end to the posts, and the other should be fixed in the center of the rafters. Make sure you line up everything perfectly, otherwise the roof won't be symmetrical.
- In general, fastening rafters and fastening roof rails, but do not forget that it is better to fix everything with galvanized screws. Alternatively, you can cut the triangles out of plywood and nail them in place.
- Regardless of the choice, accurate measurements and making appropriate cuts with a circular saw are essential.
- Then cover the entire roof surface with tar paper, starting from the bottom to the top. Make sure the roofing strips overlap by at least 5 cm to create a waterproof cover for the roof framing.
- After covering the entire surface, close the edges with strips of roofing felt and fix them with staples.
- One of the last steps is the installation of the shingles. To do this, it is better to read the instructions if there is no experience in this area.
Project development
Any builder knows that the main task before starting all work is to plan everything carefully. Preparation is an important part, so it cannot be neglected. If you think over all the details in advance, then you can not only significantly reduce all costs, but also simplify your task during construction, as well as speed it up.
First, you need to make drawings of your future gazebo in order to know how it will look and what structure it will have. Transfer all your fantasies to paper, taking into account all the sizes you want. If design is not your forte, or you cannot decide on the design, use the help of the world wide web, where everything has been done for you for a long time. There you can find many ready-made drawings and choose the one that you like the most.
 Design
Also at the design stage, you need to decide on the following questions:
Selection and preparation of material from which the gazebo will be built.
The type of foundation that needs to be arranged
Heavy closed gazebos must be built on a solid, monolithic, strip or slab foundation.
What type of roof is ideal for your chosen gazebo.
The choice of building architecture, since it can be different, it is better to choose one that would harmoniously combine with the overall picture of the design of a summer cottage or house.
If the construction of a barbecue or barbecue is envisaged, it is necessary to plan in advance the type, placement and design.
Each closed gazebo with a barbecue or barbecue must be equipped with a good ventilation system and a chimney, as this is clearly spelled out in the fire safety rules.
In order to eliminate various misunderstandings in the future when installing lighting fixtures and installing a washbasin, it is important to design the electrical and water supply if you want to have communications in the gazebo.
At the design stage, it is important to think over the glazing option and the design of the windows .. In advance, choose a place on the site where your resting place will be located
You should not build a gazebo in the immediate vicinity of your home, but also do not place it on the border with your neighbors' plot, especially if they are unfriendly, so as not to annoy them and spoil your mood.
Choose in advance a place on the site where your resting place will be located. You should not build a gazebo in the immediate vicinity of your home, but do not place it on the border with your neighbors' plot, especially if they are unfriendly, so as not to annoy them and spoil your mood.
Adhering to all these points, you will think over and plan everything in advance, then your further work will only bring pleasure, and it will be possible to complete it quickly and efficiently. Next, we will look at how you can build the two most popular options for closed gazebos. Using these instructions, you can build any other gazebo, as the principle of operation will be the same.
Varieties of summer cottages
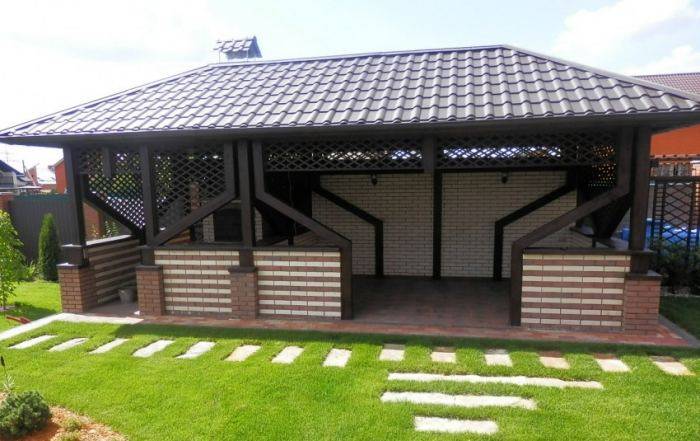
There are many gazebos that are designed for country cottages: small and spacious, open and closed, roofs with one or many sides. There are quite a few designs of such structures and it is very difficult to make a certain classification. The choice of materials is also varied. For one building, you can use raw materials of the same type (for example, concrete or wood) or combined building materials (wood and plastic). It all depends on the desired result and the imagination of the master.
Wooden alcoves for rest
To build a gazebo made of wood, you will need to spend a little effort and energy. Its advantage is the ability to install both on a concrete foundation and on improvised means, for example, small bars. Thanks to this, wooden gazebos are one of the most popular among private house owners.
Moreover, such a structure can be made both stationary and mobile. Make the arbor even better disassembled. This will allow it to be installed only in a certain season, and at the same time to avoid the negative impact of precipitation. You can also install it in a new location every year. Such a structure can be made from solid and glued, rounded logs.
But besides a large number of advantages, the tree also has significant disadvantages:
- Risk of fire. Therefore, the installation of a barbecue or barbecue in such a design is not the best option.
- Requires care. The tree can soon rot, so you need to constantly treat it with an antiseptic.
Reliable brick structures
If you build a brick structure, you must first of all take care of a strong and reliable foundation. For this, a monolithic or tape base is often used. Therefore, you need to carefully choose a place for the foundation, study the properties of the soil in order to avoid its shift in the future.
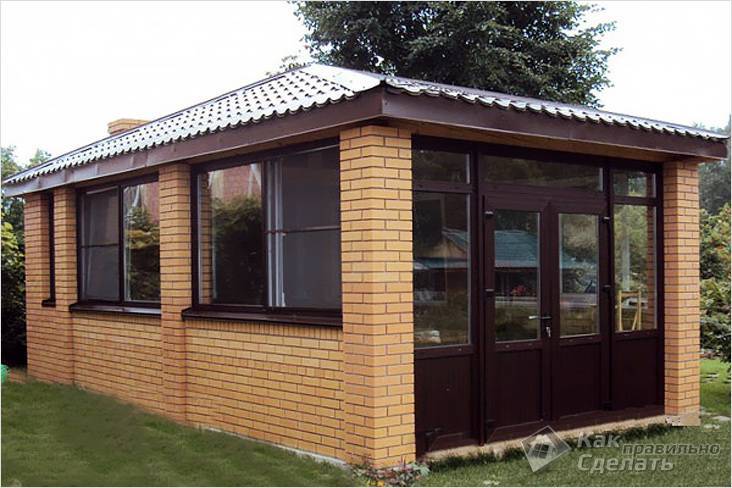
Brick structures are built by the owners of summer cottages not only as a canopy, but also used as a summer kitchen or veranda. You can put a fireplace in them, make a place for a barbecue and install a brazier. If you also put windows with doors, then you can make a real living room out of such a structure. Its only drawback is high labor costs.
Combination with polycarbonate
You can use this material in combination with others, such as wood, metal, brick, stone. The main advantage of polycarbonate is its unpretentiousness to the product frame, since it is very lightweight and elastic, bends well. Therefore, the building can be made from any materials at hand. The polycarbonate gazebo looks stylish and fashionable, and the space is always filled with plenty of light.
But this material also has its drawbacks:
- The raw materials are expensive. Even the savings on the frame will not offset all the costs of polycarbonate.
- In such a design, it will always be noisy during the rain. The material does not absorb noise well and it will be difficult to hear what the interlocutor is saying.
- Polycarbonate, although strong, can crack from hail, for example.
According to statistics, the most popular materials for summer cottages are metal and wood. The process can be simplified by pouring a concrete screed instead of a wooden floor. If you still save on the roof, then any owner of a country cottage can put up such an exterior object.
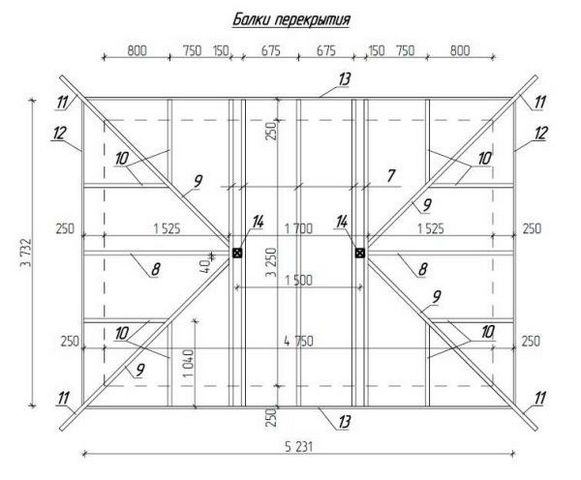
Chinese style gazebo (with drawings and dimensions)
Recently, it is considered fashionable to build gazebos in any national style. The most popular is the Chinese style.
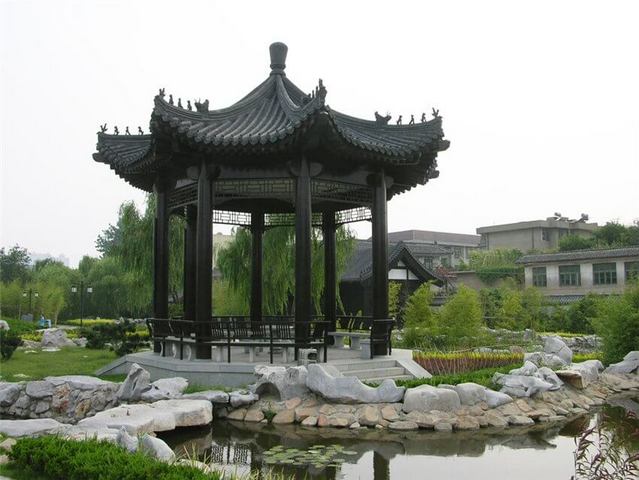
Here are the diagrams and drawings for building in the Chinese style.
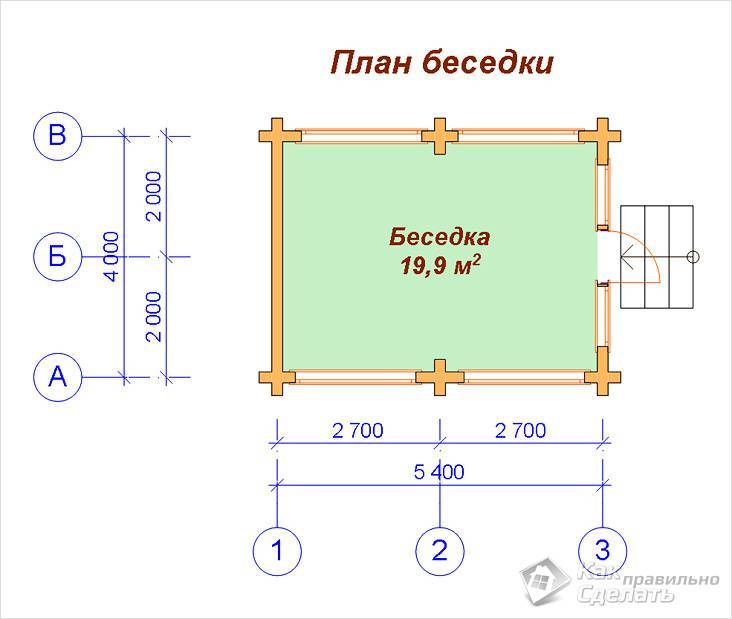
The size of the gazebo is 3.5x5 m. Drawings of the side facade and roof:
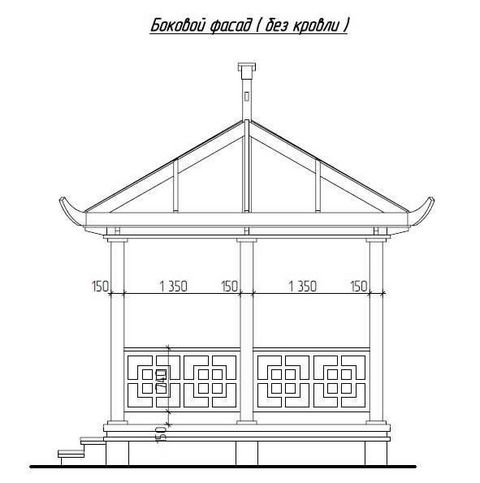
As you can see from the diagrams, the columns are the foundation. At the beginning, a concrete slab is placed, on which brick posts are laid out. Ten go directly under the frame and two under the steps. The diagram shows the location of such columns.
Roofing material is placed on the finished posts for waterproofing. After that, the lower strapping is made, the racks and the upper strapping are installed. The top and bottom piping is shown below.
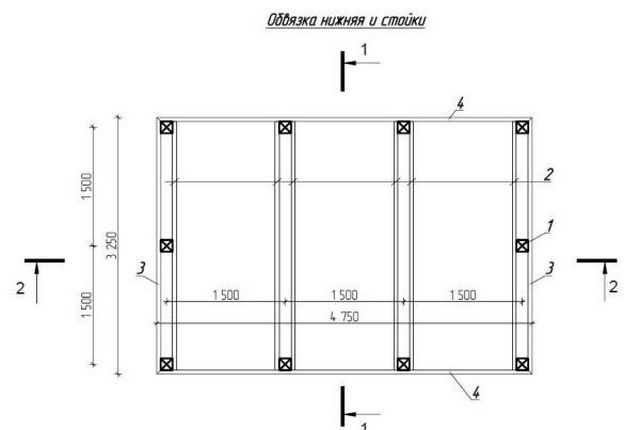
A grooved floorboard is placed on the lower harness. After that, support posts are placed. According to their scheme 10. The following drawings show the installation of the racks and the roof diagram.
Next, a middle strapping is made at about a height of 80 cm. For this, 50x150 mm bars are used.They are attached to the uprights with corners.
The following diagrams show the installation of steps and railings.
To give the gazebo a Chinese style, curved wooden plates are attached to the rafters at the corners of the roof.
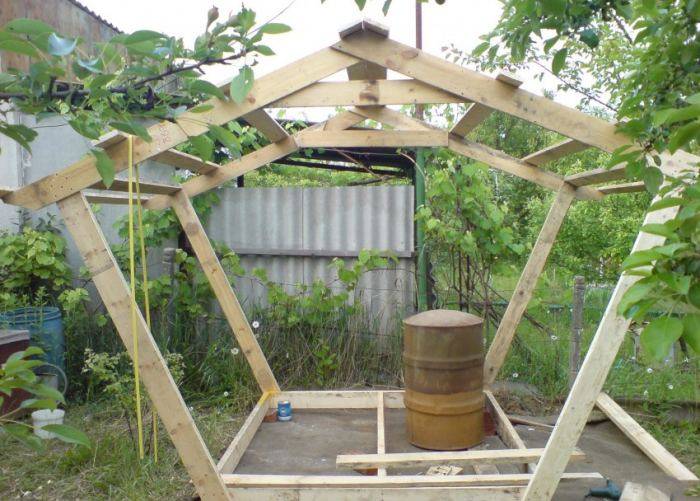
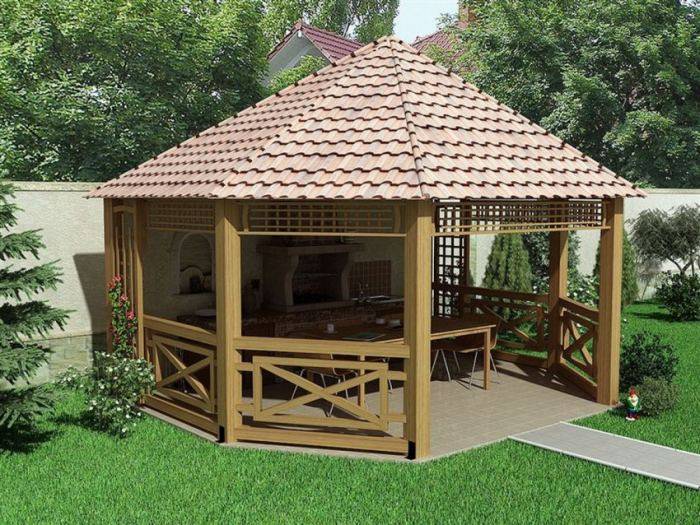
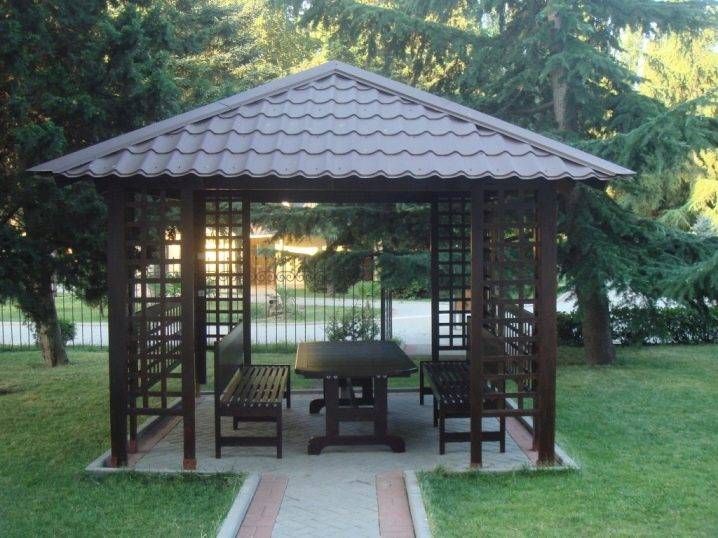
Diy gazebo with a hipped roof
Building a square gazebo with your own hands is not an easy task, you need to take into account the skills that you must master, as well as the tools and materials needed to complete the work. However, if you make the right plan that suits your tastes and needs, and of course your budget, and use the right woodworking techniques, you can build a pretty decent gazebo. Buying a ready-made kit or hiring a professional is also an option, but if the budget is limited, perhaps making a gazebo with your own hands will be the best solution. Choosing the right plans and designs is a real challenge, as there are so many alternatives. Therefore, you should write down the required features and budget on paper from the very beginning. Then you need to develop a plan, taking into account the necessary materials and tools. Buy the right materials for outdoor structures so that the gazebo does not fall apart in a month. In general, there are step-by-step diagrams in the gallery, you can read a description of each step on the website.
Another example of how to make a square gazebo with a hipped roof. In principle, this is the same as the previous one, only it is shown in more detail how to make a roof for a gazebo and a railing. You need to properly design an open gazebo. You need to decide what the dimensions will be and if, for example, you want to add a barbecue or barbecue, this must be taken into account when planning. The options are almost limitless, but you must remember that each additional feature comes with additional costs, so a balance must be struck between benefits and costs. Choosing the right gazebo design is a tough decision as there are many potential alternatives: on the one hand, you can build an octagonal gazebo, a rectangular structure, or just a square one. This article shows you how to build a square gazebo in a couple of weekends, while saving a lot. All this is not so difficult, provided that you know how to hold a hammer in your hands and use a hand saw.
Diy photo gazebo


We also recommend viewing:
- Brick tandoor
- Construction of a cellar for a summer residence
- How to make a gazebo roof
- House extension options
- What is cheaper to build a house from
- Hozblok for giving
- Construction of a bath from a bar
- How to make a dog enclosure
- Do-it-yourself canopy
- Examples of country cabins
- How to build a porch with your own hands
- Brick brazier
- Summer shower
- Toilet for a summer residence
- Construction of a summer kitchen in the country
- How to attach a terrace to the house
- How to make a polycarbonate greenhouse with your own hands
- How to build a chicken coop with your own hands
- Do-it-yourself shed
- DIY pergola
- DIY barbecue construction
- Do-it-yourself rabbitry
- Reliable visor over the porch
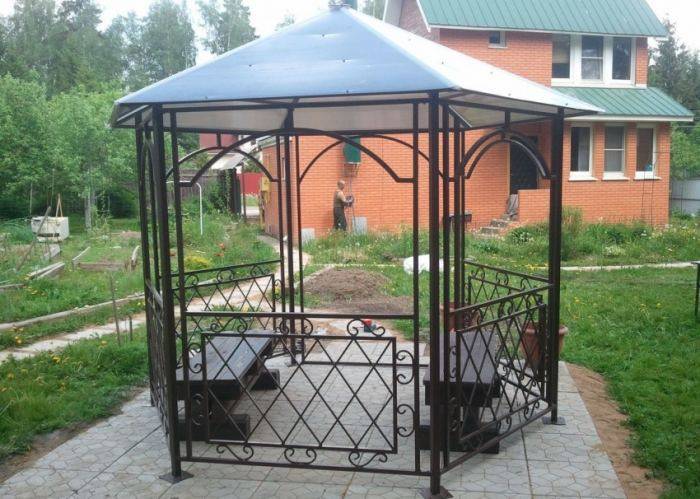
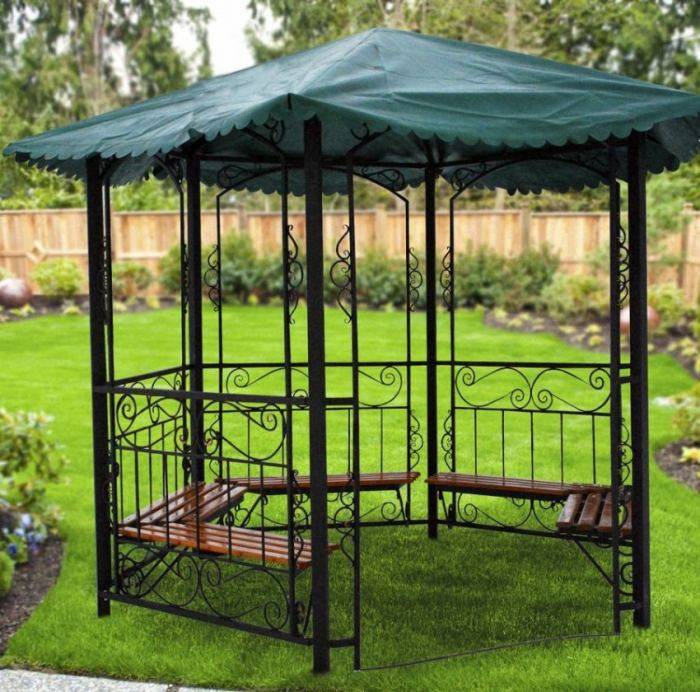
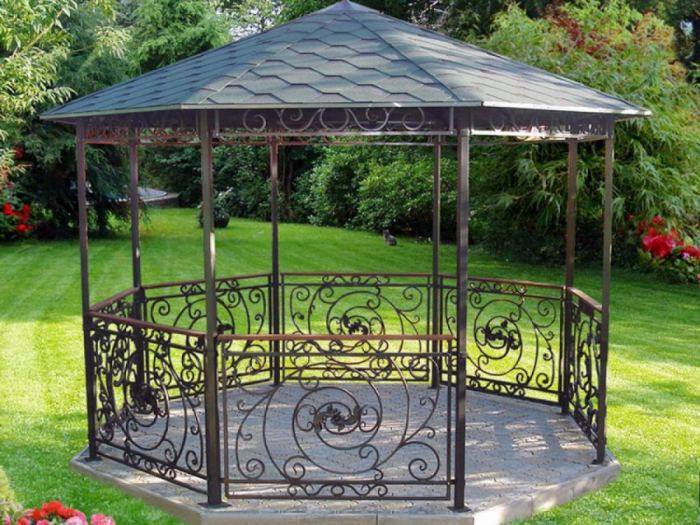
- The best forged gazebos for summer cottages
- How to make a hanging chair
- Bath in the country
- DIY veranda construction
- How to build a garage with your own hands
- Construction of a patio in the country
- Construction of a gazebo made of wood
- How to make a winter garden
- How to make a greenhouse with your own hands
- How to build a gazebo with barbecue
- Modern polycarbonate awnings for a private house
- How to make a brick barbecue
- Instructions on how to make a dog kennel with your own hands
Site selection and preparation
When choosing a place to build a beautiful garden gazebo, you should consider some aspects:
- Dimensions of the future structure. If it is planned to build an ordinary small gazebo, then you can choose almost any place on the site. If the building is large, then you need to choose a zone for it, taking into account all the available buildings in the garden.Also, a wooden gazebo cannot be erected in a lowland if the site is embossed, since thawed and rainwater will drain there.
- The relief of the site. It is necessary to choose a flat place for convenient construction.
- Green spaces. Since it is logical that the gazebo is intended for relaxation and pleasant pastime, it should be located among the greenery. Therefore, during its construction, care should be taken to ensure that it fits into the existing landscape, and during its construction, the plantings on the site were not damaged.
- Purpose. If the gazebo is built specifically for a secluded holiday among the natural beauty, then the site can be picked up far from home, among trees and flowers. If it is intended for eating and relaxing with friends, then it should be located not far from home.
- Electricity supply. It is necessary to take into account the ways in which the electrical wiring will be connected to the gazebo. It is worth taking care of this even at the stage of drawing up the drawing.
- Location depending on wind and sun. It is natural that being in this type of structure should be comfortable, so you need to make sure that the structure does not stand in a draft or in direct sunlight.
- If it is assumed that children will be frequent guests in the gazebo, then it should be located in the visibility zone.
- You need to retreat from the residential building by at least 3 m, in the case of installing a barbecue - 10 m.

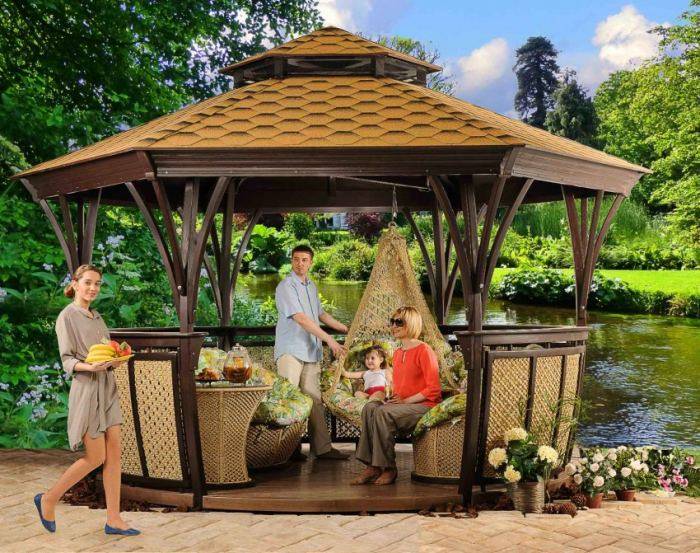
Beautiful examples
There are many beautiful examples of gazebos, suitable for both huge lots and compact courtyards.
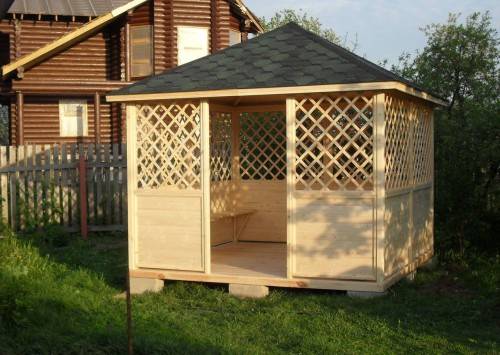
The first example is a small gazebo that can decorate almost any site. It looks simple enough and doesn't take up much space. Inside there is a table and benches where the family can gather for barbecue or just spend summer evenings.
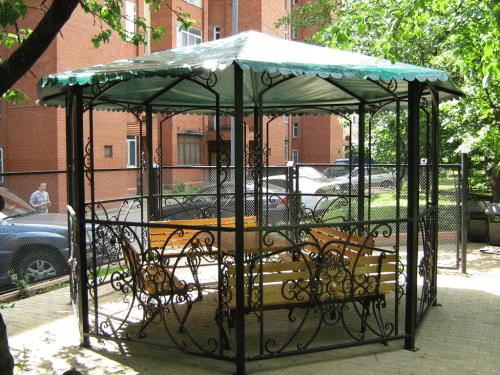
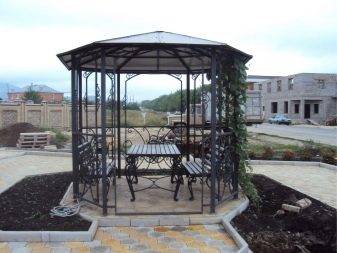
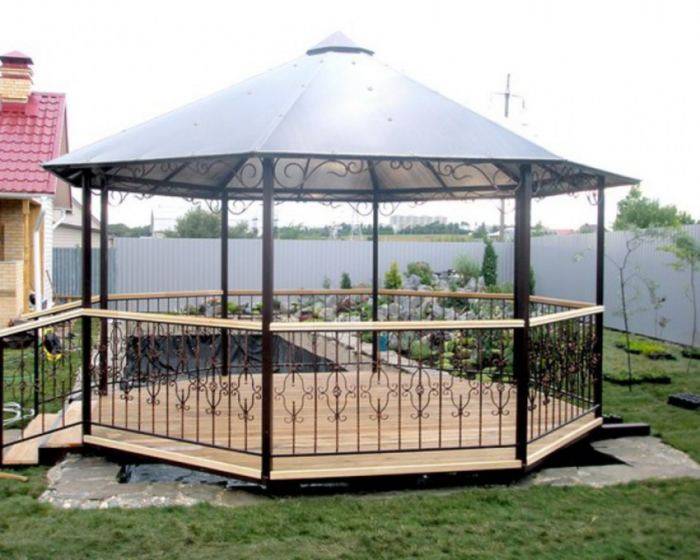
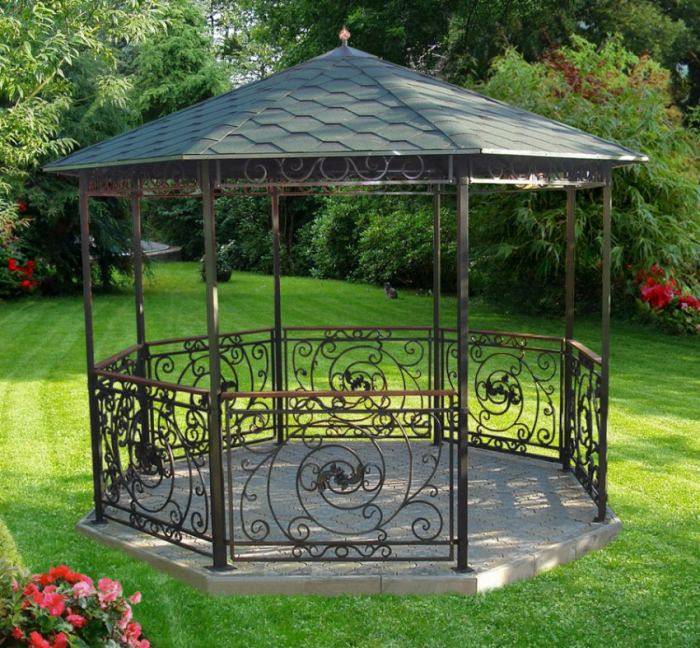
Another option, on the contrary, is distinguished by special luxury. This is a beautiful building in which the metal base is elegantly decorated with textiles. Inside the round gazebo there is a table with chairs to match the metal base. Along the entire perimeter, the gazebo is fenced with a low ornate metal fence, and the round roof makes the structure really look like an oriental tent. Such a gazebo will decorate the site in a classic or oriental style. It looks great both surrounded by a huge number of green spaces and on a deserted courtyard.

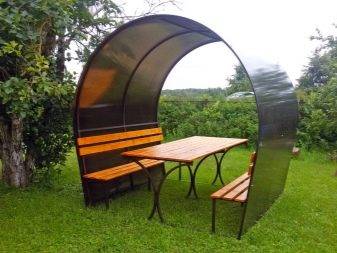
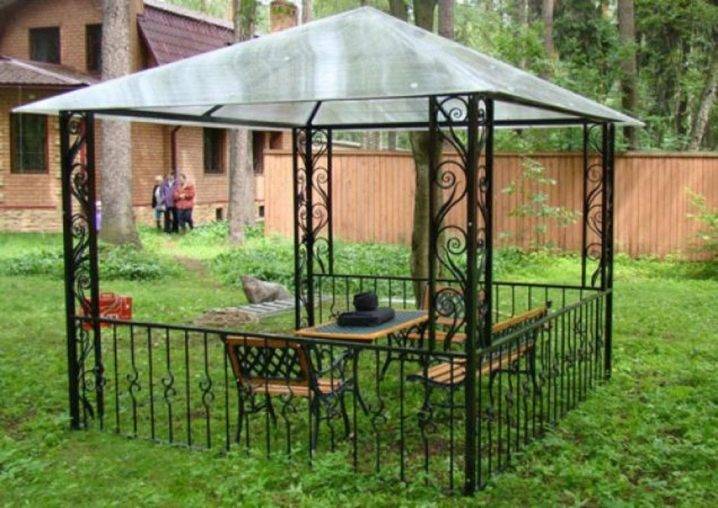
The last gazebo is very simple and cheap. The metal base is complemented by a light transparent roof. There is no need to waste time and money on pouring the foundation or finishing the walls and doorway. At the same time, the design looks very elegant due to the forged elements on the fence and pillars.
A metal gazebo with your own hands is always something original and beautiful. Knowing the basic rules and taking into account all the recommendations, you can easily create such a structure even on your own, decorating a site of any size and shape in just a couple of days.
For information on how to properly make a metal gazebo with your own hands, see the next video.
Arbor made of wood 3m by 4m with your own hands, drawings and dimensions
The gazebo shown above was 3x3 square. Another option is if you are making a rectangular shape that is 3x4 in size.
The drawing will look like this.
Another drawing of the same gazebo only already hipped.
Or such a drawing of a gable gazebo.
For the construction of such a gazebo, it is best to use a foundation with 9 or 12 supports. Concrete blocks are well suited as supports. You can also dig holes about 30 cm deep. Level the bottom of the holes, tamp and lay a brick pillar in five rows in the hole. The last row should be above the ground. Instead of bricks, you can take all the same concrete blocks. From above they are covered with roofing material.
The lower harness is installed on these supports. Vertical supports Are selected with a length of 2 m, the size of the bar is 100x100. The supports are leveled with a plumb line, and reinforced with jibs.
The rectangular gazebo implies three roof options: one, two and four-pitched.The simplest in execution is a pitched roof. If you decide to make a shed roof, then at the stage of installing the racks, the front ones, you need to do a little higher than the rear ones.
Rafters are attached to the beam of the upper harness, while metal corners, screws or nails are used.
The distance between the rafters is 80 cm. The lower edge of the rafters should protrude beyond the frame of the gazebo by at least 30-40 centimeters.
After that, the crate is attached to the rafters. A 50x50 bar is used for it. The distance between the battens depends on the roofing material. When covered with metal tiles, this distance is less than when covered with slate. Before covering with roofing material, a waterproofing material, such as roofing felt, is placed on the crate.
Having finished with the roof, we move on to the floor. A floorboard is attached to the lags, which are located between the beams of the lower harness. Self-tapping screws serve as fasteners.
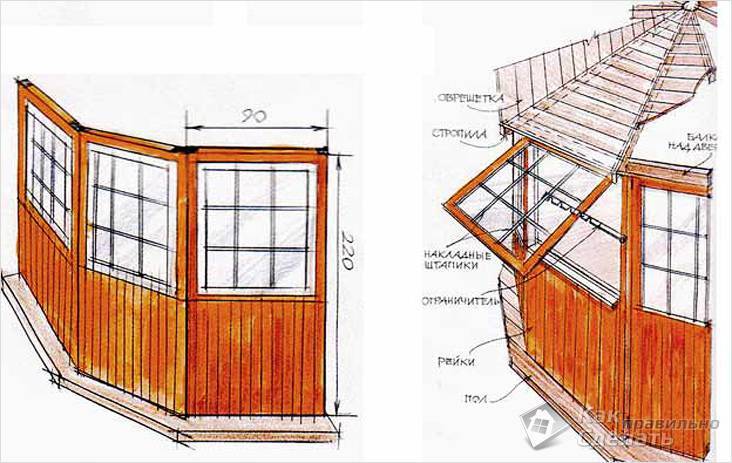
And finally, finishing. Traditionally, it is considered a clapboard covering half a gazebo. The upper part can be glazed, you can leave it open, or you can close it up with a patterned strip.
Do-it-yourself beautiful gazebo made of wood
Simple rectangular structure with a gable roof and beautifully designed side walls. The gazebo is assembled from ready-made forms, all the details of the project were made to order according to the personal drawings of the author. The third photo shows the modules made in the workshop. The structure is installed on a red brick point foundation. See the step-by-step photos for the assembly procedure. Due to the unevenness of the terrain, the gazebo is slightly raised, the stairs apparently were not included in the author's plans, so a temporary version was made.