Sheathing the gazebo with boards
If you get to this part of the work, then you can slowly start celebrating, most of the work is behind. Thanks to the convenient design of the gazebo, all you need is to cut the planks of the same size and nail them to the bottom rail and railings.
 Sewing on sheathing
In 99% of cases, there is a problem with the last board when it does not fit into the last slot. To do this, it will be necessary to measure the dimensions and cut out the desired element from the board so that the wood goes into this very gap.
This is also where the principle “take a lot is better than a little,” so don't be afraid to cut off a millimeter more. The main thing is that it is even.
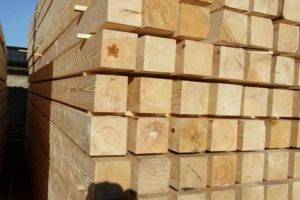
Required materials and tools
To make a wooden gazebo, you will need the following approximate set of materials:
- wooden beams of different diameters;
- edged and cladding boards;
- tile or slate;
- fasteners;
- cement-sand mixture;
- brick;
- antiseptic impregnation.
You also need a certain set of construction tools: a drill, a screwdriver, a hammer, a tape measure, a jigsaw, a drill, a shovel, a building level, containers for concrete and water, a ladder.
Did you know? In London, architect Patrick Mitchell created an exclusive curl-shaped study gazebo. It has no corners and fits perfectly into the natural landscape.
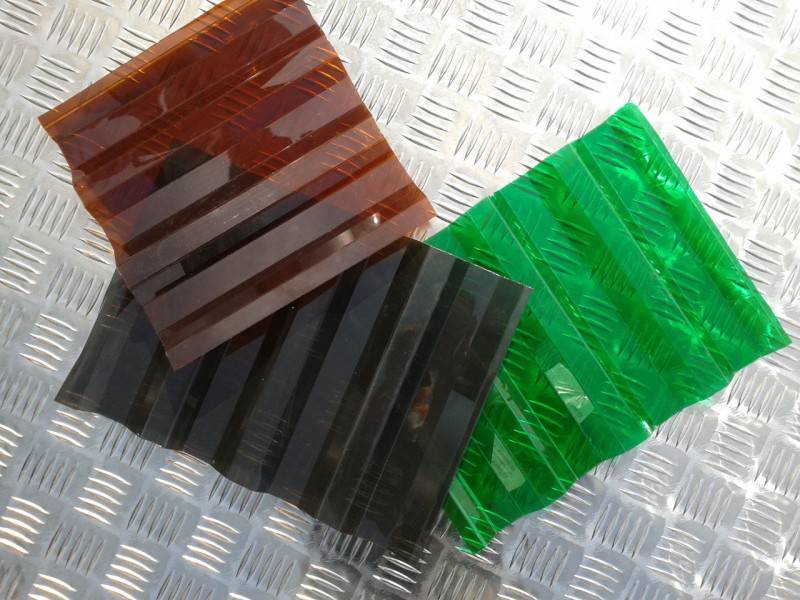
To build a gazebo made of polycarbonate and metal, you will need a different set of materials, namely:
- shaped pipes of different diameters;
- cement-sand mixture;
- polycarbonate.
 You will need tools such as a grinder with a disc for metal, a drill, a screwdriver, a welding machine, self-tapping screws, containers for concrete and water.
Gazebo railing
Railings, this is the final stage. There are many plans for an octagonal gazebo railing, so make sure the appearance matches the style of the gazebo and your tastes. The first step is to create the bottom and top guides. Use a router to make a wide and deep channel in the battens as shown in the diagram. These channels will hold the balusters tightly. Then there is the installation of the lower cross members, check with a level that they lie strictly horizontally. Repeat the process on the remaining 6 sides of the gazebo. And the last step is the installation of the railing. Make sure the pilot holes are evenly spaced before drilling the pilot holes and tightening the screws. Place a block of wood between the planks to create consistent spaces
It is very important to secure the bar with the screws before installing the top bar. Check that all parts fit snugly and that the screws are flush with the wood surface
Recommendations from the pros!
Bath accessories
DIY gazebo
Concrete fence
Diy potbelly stove
Do-it-yourself veranda
Screw foundation
Country toilet do it yourself
Decorative brick
Stone fence
Pouring the foundation
How to make a fence
Wicket from corrugated board
DIY fireplace
Brick fence
DIY flower beds
Forged gates
Do-it-yourself porch
Bath tub
DIY chicken coop
DIY ladder
Metal gates
Installation of lining
Installation of polycarbonate
Pump for giving
Garage arrangement
Fences for flower beds
Do-it-yourself blind area
Steam room in the bath
Railing for stairs
DIY cellar
Painting the walls
DIY press
Lattices on windows
Rolling gates
Do-it-yourself shed
Alarm for summer cottages
Benches for giving
Fence posts
Floor screed
Solid fuel boilers
DIY greenhouse
Fence installation
House insulation
Attic insulation
Insulation of the foundation
Window
Windows are made in advance, before installation in the window openings of the gazebo. You should have an ordinary wooden structure using glass and glazing beads.
 Setting up the first window
The windows are installed inside and are not fixed in any way, that is, they are simply inserted and pulled out as needed.
Such windows are very common in villages in summer kitchens: when the cooking process is in progress, it is not enough just to open the window, it is more expedient to pull out the window, and put it back after cooking. The same principle works here.
 All windows are installed
With a strong desire, windows can be planted on glue or foam, hammered into nails or something else, but this will not give any tangible results. But you can ventilate the gazebo at any time, in hot summer time this is especially important.
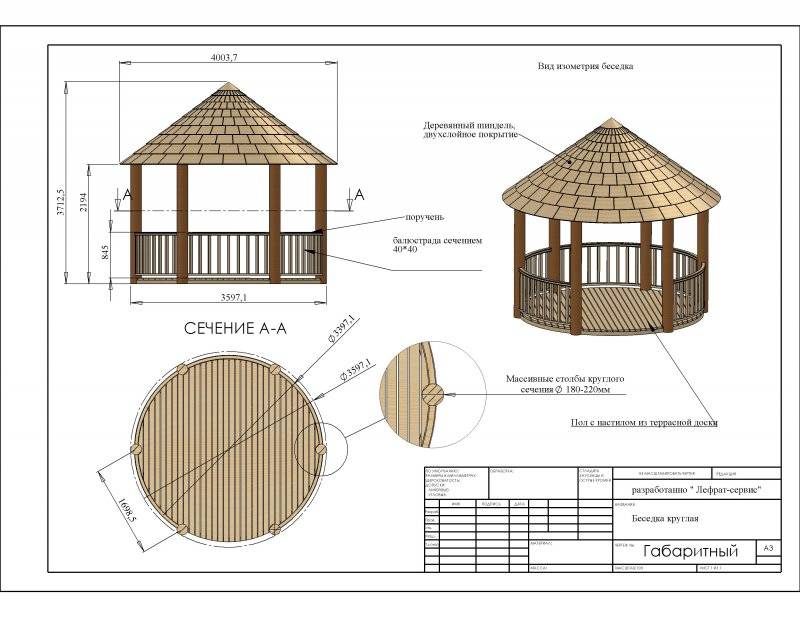
Which shape should you choose?
The shape of the gazebo also plays a huge role, so its choice should be approached responsibly.
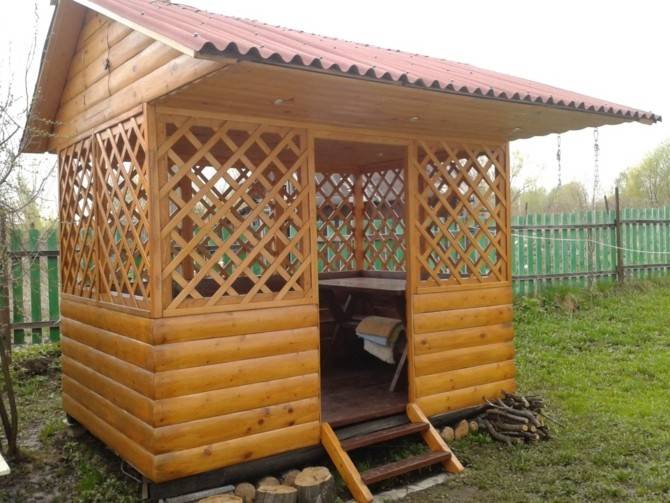
Rectangular
This form of a gazebo is very common. Buildings can be made of wood or metal. Also, rectangular buildings can be built from bricks.
Round
Such a gazebo is made of wood, polycarbonate with a small area for rest. Walls can be made using willow weaving technology. Such a structure will be a real decoration of any suburban area.
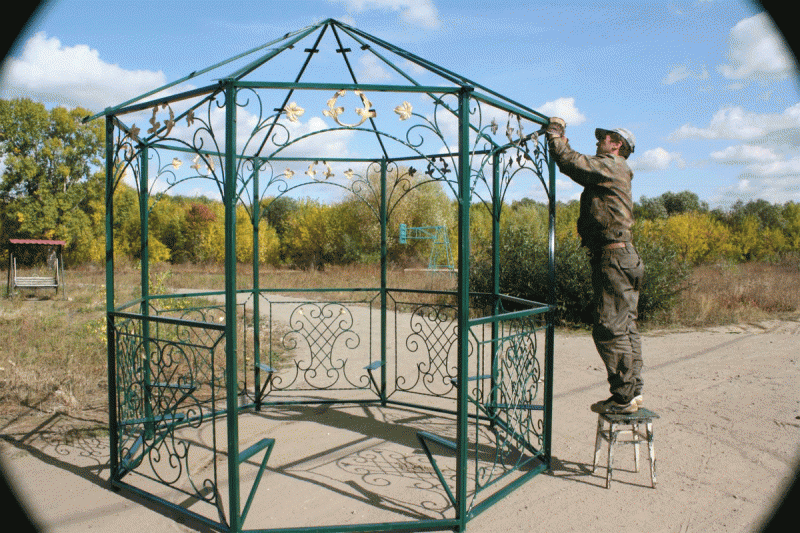
Polygonal
This is a complex form of a gazebo. For its construction, it is necessary to think over the diagrams and drawings. Typically, these gazebos have six or eight corners. Such a complex construction will add solidity to the personal plot.
The variety of forms of the gazebo
Modern buildings are rich in a variety of designs, but despite this, there are traditional forms:

- Round is a classic canopy, with pillar bases that support a lightweight roof. Designers suggest making them from polycarbonate, plastic, but the most interesting option is a cozy gazebo, woven from willow twigs.
- A simple rectangular is a structure erected from a metal frame, polycarbonate, wood, or brick.
- Polygonal - a hexagonal semi-enclosed structure made of wood or wrought iron.
- A structure of several different shapes. More often, these are closed houses with an attached open area for an active recreation area (barbecue).

Practical use of the utility block in the gazebo
The construction of a combined recreation room with an existing separate section for storing various unnecessary things is a winning solution in all respects. Such a project allows you to take advantage of several advantages at once:
 In beautiful color
- Territorial savings are reaching their maximum level. Placing buildings of various functionality under one roof frees up the site.
- An equipped toilet in the utility area will not spoil the visual appeal of the suburban area.
- Inside the utility block, you can create a summer-type shower cabin, and after hygienic procedures, you can have a pleasant time in the gazebo.
- The combined building is suitable for those wishing to invest the vast majority of funds in the main house. Thanks to one canopy, you can save a lot.
- If it is planned to install a brazier in the gazebo, then the auxiliary utility block will provide dry firewood even in the rain.
Choosing the location of the outbuilding, you should focus on the north side. This placement will create additional shelter from strong gusts of wind, which reduce the comfort of being in the gazebo.
Roof
We have already considered on our website the construction of a roof on our own, as well as the construction of a four-pitched roof, however, in this article I will still focus on this topic.
This is due to the fact that in addition to the rafter system, it will be necessary to lay waterproofing and a soft roof. Therefore, I will explain some important details separately in each paragraph.
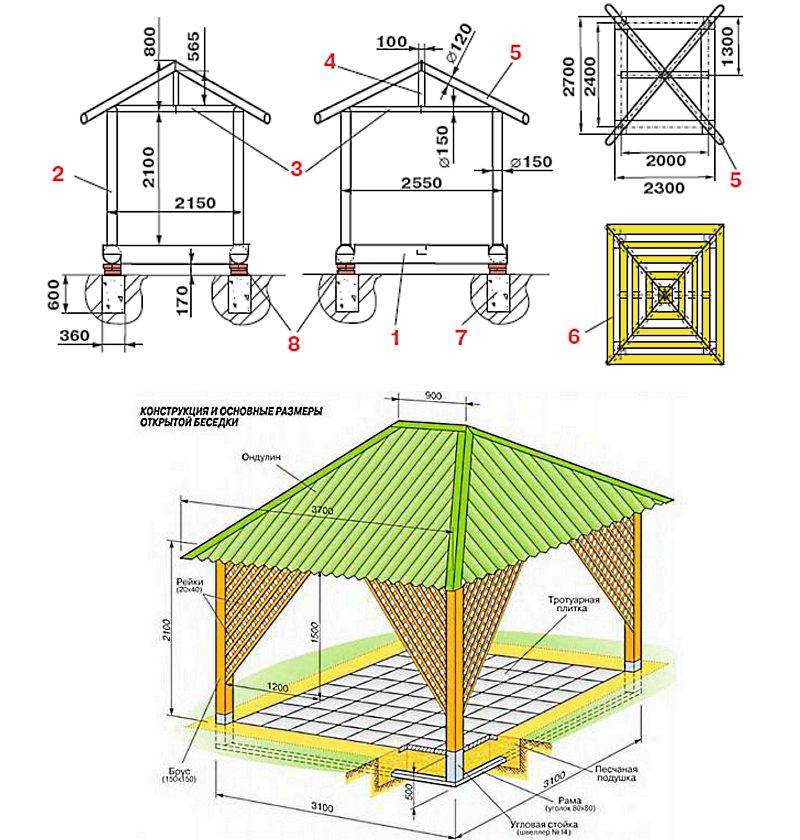
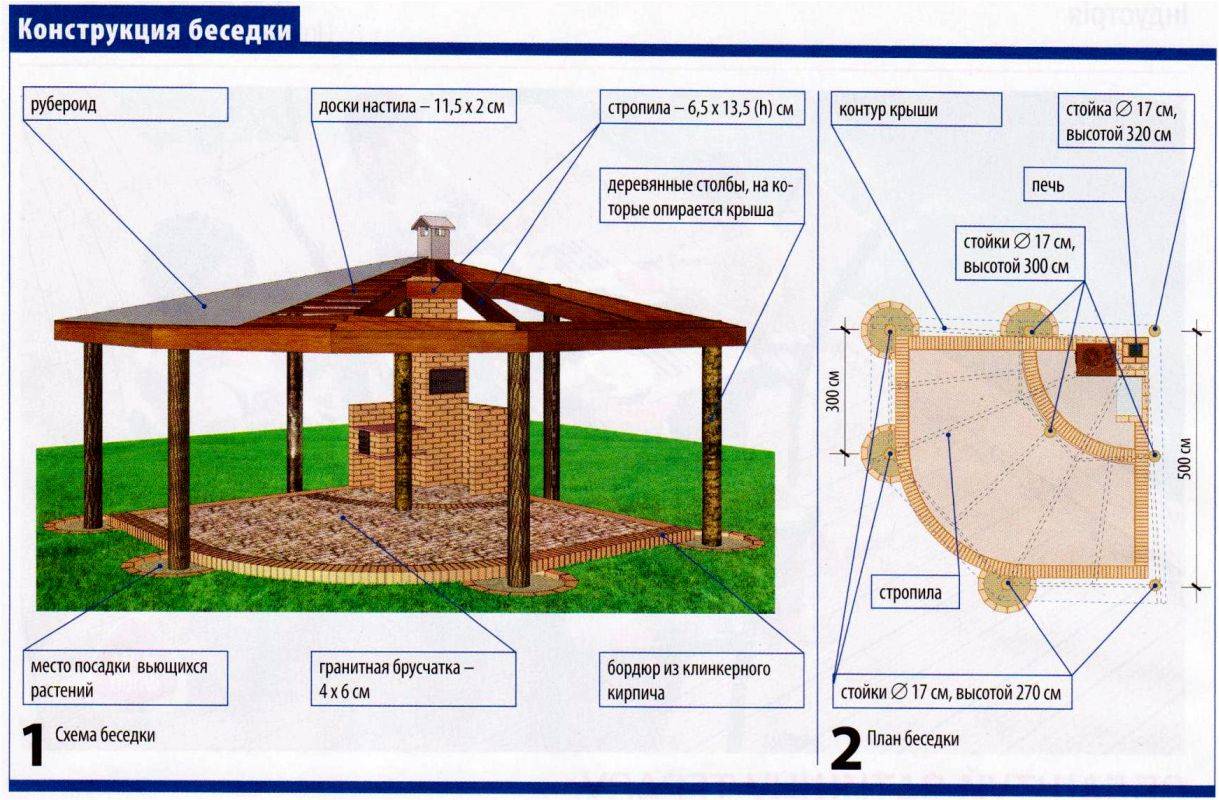
 Drawing of the rafter system for the gazebo
It seems to me that for a gazebo in the country it is worth paying special attention to the construction of a roof, because usually it is the first that catches the eye of the guests
Rafter system
Since the roof is hipped, it is necessary to additionally install a bar in the center of the gazebo, on which the rafters will be attached. Depending on the height of this post, you can adjust the angle of the roof slopes.
 Fastening the rafters to the upper post
Roof boarding
After fixing all the rafters, you can begin to cover the roof with boards. To do this, you need to measure the dimensions of each board so that each of them lies flat on the rafters, then cut it off and nail it down.
Despite the fact that the roof will be covered with a soft roof, try to do everything without cracks and gaps so that the final result is beautiful and aesthetic.
 Laying boards on the roof
Fastening waterproofing
Waterproofing must be installed before roofing. It is attached either to staples or nails. Better on staples - the process will go faster and the fastening will be more reliable.
In the process of roof insulation, it is necessary to observe safety precautions, since the boards will be covered with a film, there will be nothing to hold on to.
 Fixing waterproofing and fixing bars
Fastening of bars and sheathing with oriented strand board (OSB)
After waterproofing, we attach several bars to the roof, onto which the OSB will then be attached. The more bars there are, the more reliable the roof will be. Then oriented strand boards are placed on these bars and nailed.
All these "maneuvers" are needed in order to create an air gap on the roof, protect the roof from water and then lay the tiles on a flat surface.
 OSB sheathed roof
Laying a soft roof
The penultimate stage associated with the roof will be the installation of a soft roof. In our case, we will be using soft tiles. Its fastening is carried out according to the instructions, you should not have any difficulties (provided that the roof is evenly built).
 Roof shingles
Installation of skates
The final work will be the installation of the skates along the edges of the roof. Thanks to them, you will completely close any cracks in the roof to the gazebo, and the water will definitely not pass in the next few years.
 Installation of skates
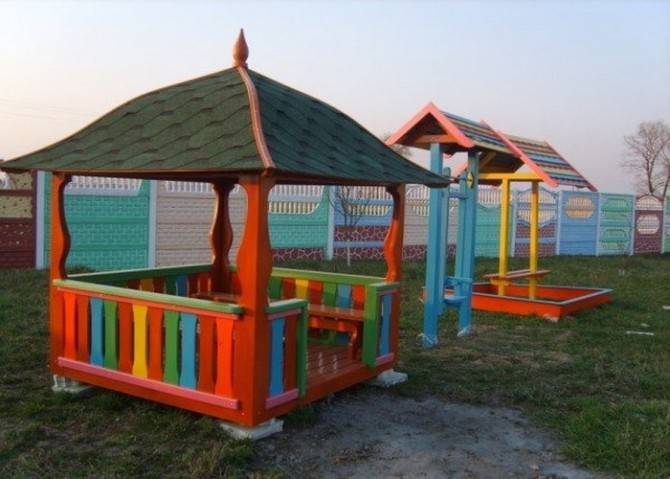
Actual types of gazebos
So what can be a gazebo to the country? The materials for this building and the style of its design must be chosen taking into account the surrounding landscape.

It should harmoniously complement the design of the country house and the design of the entire garden area, and not stand out against the background of the main ensemble.

But we must not forget about the functionality of the model, beauty and livability at the same time!
Basically, there are three types of covered buildings:

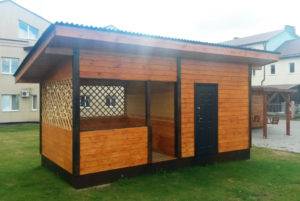
Closed type, usually small houses (brick or wooden), with doors and window openings. Such a structure is insulated for a useful pastime both in hot summer and frosty winter days. Inside, it is reasonable to provide for a stove, fireplace, or barbecue to keep the warmth in the room;

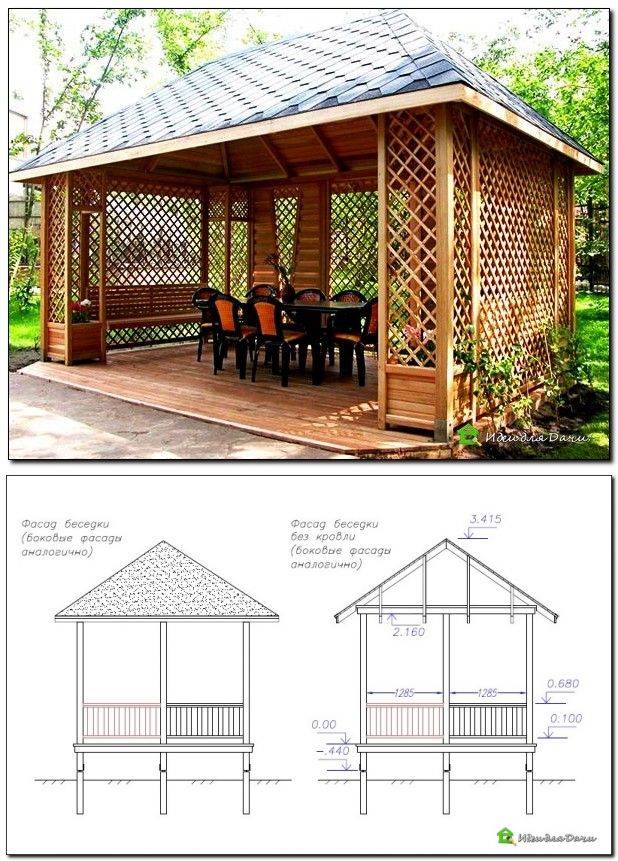
Semi-open type. This common variety of classic gazebos is the most popular for a comfortable setting of a personal plot. More often, wood is used for creation, or forged structures, with the use of curtains to curtain window openings;

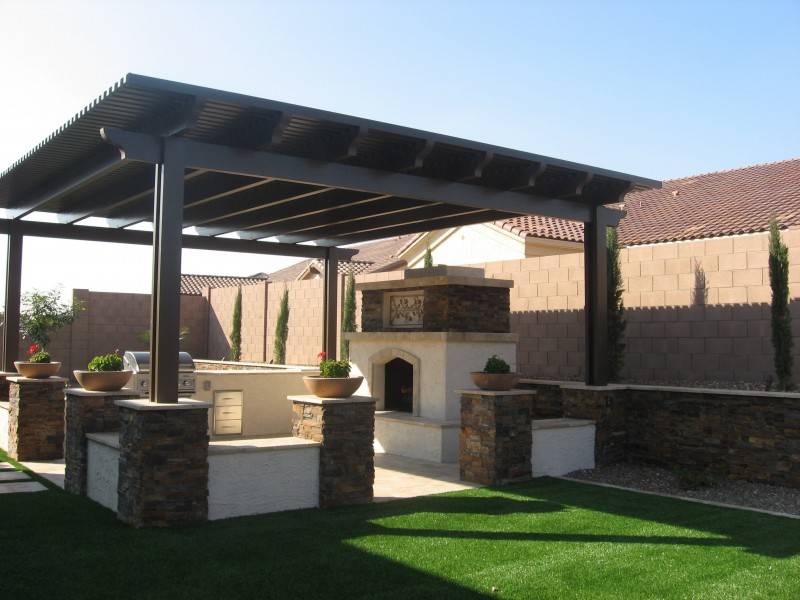
Open type. This includes awnings and rotundas. Typically, the frame of such a structure includes wooden (iron) supports and a light top coating.

They are very convenient in small, cramped areas, taking up a minimum of free space, but beneficially create shadow barriers, which are simply necessary for summer vacations.


Construction material
For the construction of a summer cottage, the most classic material you can imagine is used. The construction budget will turn out to be small, depending on the region, it will vary between 25-35 thousand rubles.
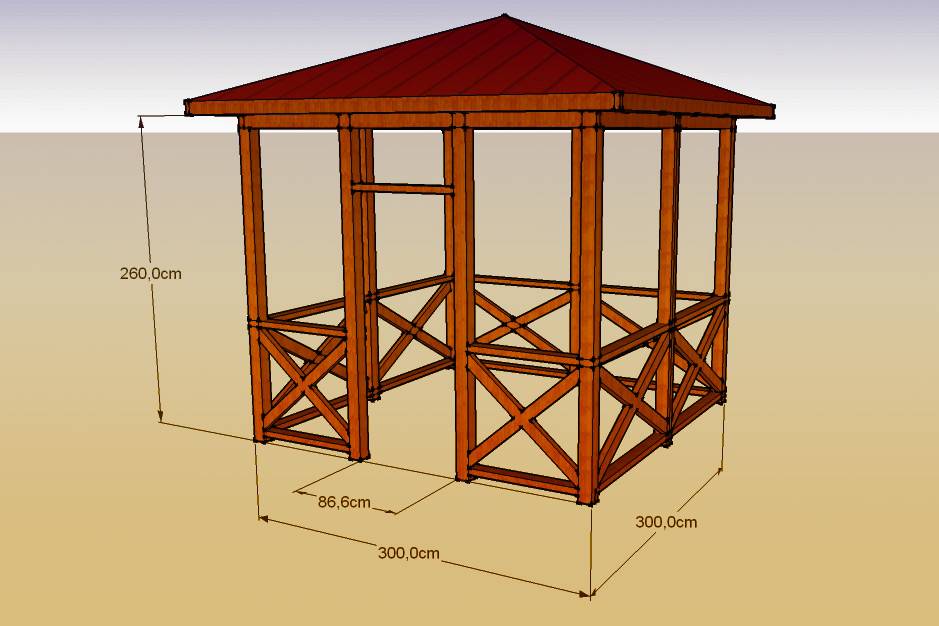
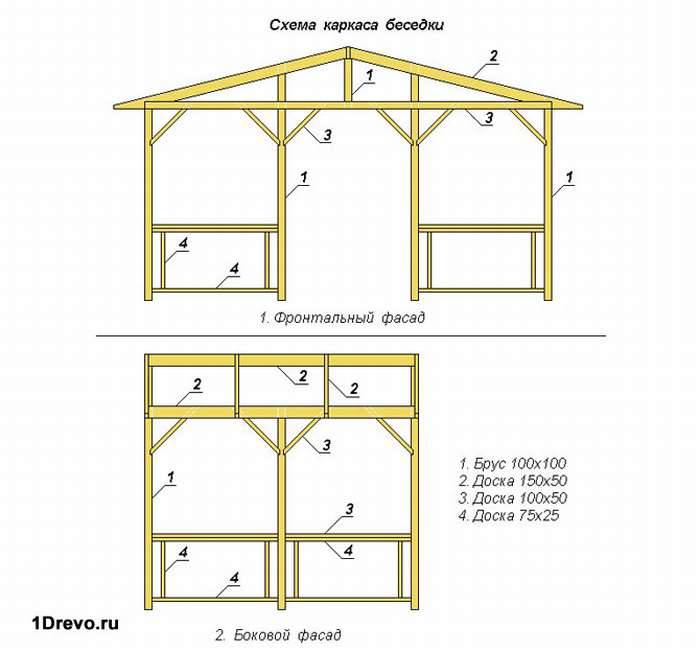
 Beam 100 × 100 - the basis of the gazebo
- Beam 100x100x3000.
- Beam 50x100x3000.
- Board 25x100x4000.
- Waterproofing.
- Oriented strand board.
- Soft roof - flexible shingles.
- Pipes 150 mm.
- Window.
- Foundation mortar.
- Nails, screws.
- Staples.
- Corners for fixing the timber.
- Impregnation, paint.
For the foundation you will need a drill - this will be the most serious tool in the work. Otherwise, apart from basic tools such as a screwdriver, stapler, hammer, brushes, shovel and bucket, you may not need anything. If your wood is of poor quality and requires processing, then you will need to polish it.
Foundation
Metal pipes with diameters of 150 mm will be used as the foundation. This option is considered the cheapest, but quite reliable. The foundation is installed in several stages:
- The marking of the suburban area is being made;
- Digging 11 holes (about 1 m);
- Installation of pillars;
- Concreting of pillars and leveling;
- After drying, pieces of roofing material are stacked on top.
 Foundation
To tell the truth, I still do not understand why it was necessary to be so driven with the foundation. In this case, an ordinary curb tile or aerated blocks would be enough.
During the construction process on your site, I recommend that you study this issue in more depth, most likely, you will not need to steam with concrete and the installation of pillars.
Surface finishing
When the gazebo is ready, it is very important to protect it from atmospheric influences, solar ultraviolet radiation and temperature extremes. This is especially true for wooden parts, which, moreover, can become an "object of attention" from insects and mold.
Therefore, all wooden parts should be treated with one of the protective compounds that are available in abundance on the market.
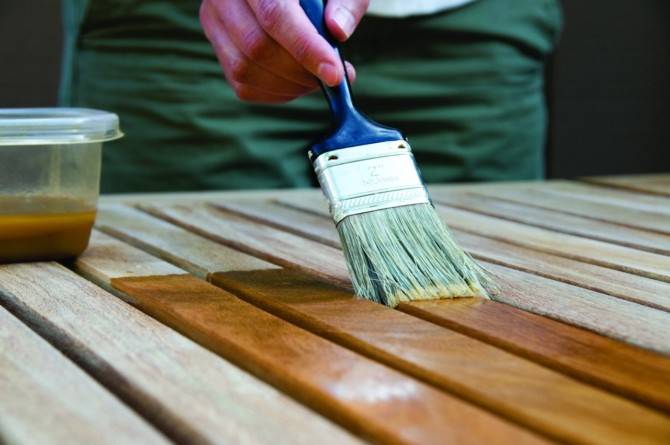
Impregnation can also be carried out at the stage of preparing materials, before their installation - many specialists do this, finding their advantages in this.
After the impregnation has completely dried, all wooden surfaces are either painted,
or they are covered with protective varnish, if the aesthetics of the wood structure is part of the intended decor (for example, an imitation of a traditional log house, a gazebo in the form of a terem, etc.).
The metal gazebo is all the more in need of painting. Previously, all surfaces are thoroughly cleaned from possible rust and primed. Then they are painted. It is better to paint before the cladding elements are attached to the metal frame. Both a brush and a spray gun are suitable as a tool for applying paint - it depends only on your preferences.


You can generally use spray paint.
Stages of the construction of metal
To get started, use the step-by-step instructions for making a simple metal gazebo:
We are preparing the site. We use the building level. We concretize the pillars of the gazebo in the foundation, or put the existing concrete blocks.

We install the supports and set them to the level. The distance between metal profile pipes should not exceed 2 m. If the pipe is more than 60 mm, the distance is reduced to 1.5 m.
Installation of waterproofing.
Installation of racks. They are mounted strictly in the corners, vertically. We do the alignment along a plumb line, since it has more accuracy than the building level.
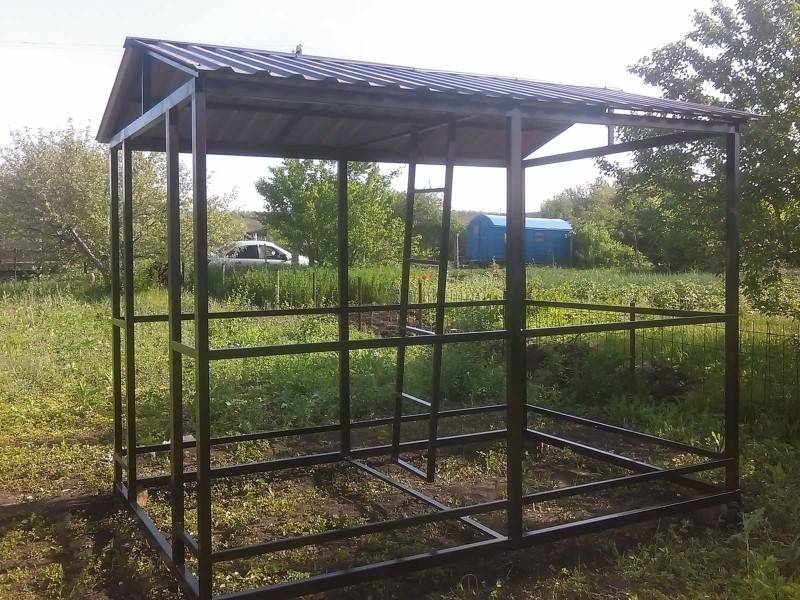
Fixing the racks and mounting the upper harness. Installation of a belt for the corners, which will serve as a support for the roof.

To fasten the sheet, metal (usually steel) strips 50 mm wide are welded to the support posts. Holes are drilled into them for attaching polycarbonate.
Floors
Before laying the floor, it is necessary to reinforce the lower strapping with additional bars. Since the size of the gazebo is small, and there are few foundation pillars, three additional bars will be enough. They fit along the level of the entire lower strapping, boards will be laid on top of them.
 Fastening additional bars to the lower harness
The above tip describes very well the process of laying planks on the floor.By cutting off a little more, you can leave a gap in the floor, which will look ugly. Therefore, when measuring and carving wood, take either perfectly accurately or a little more. Less - no way!
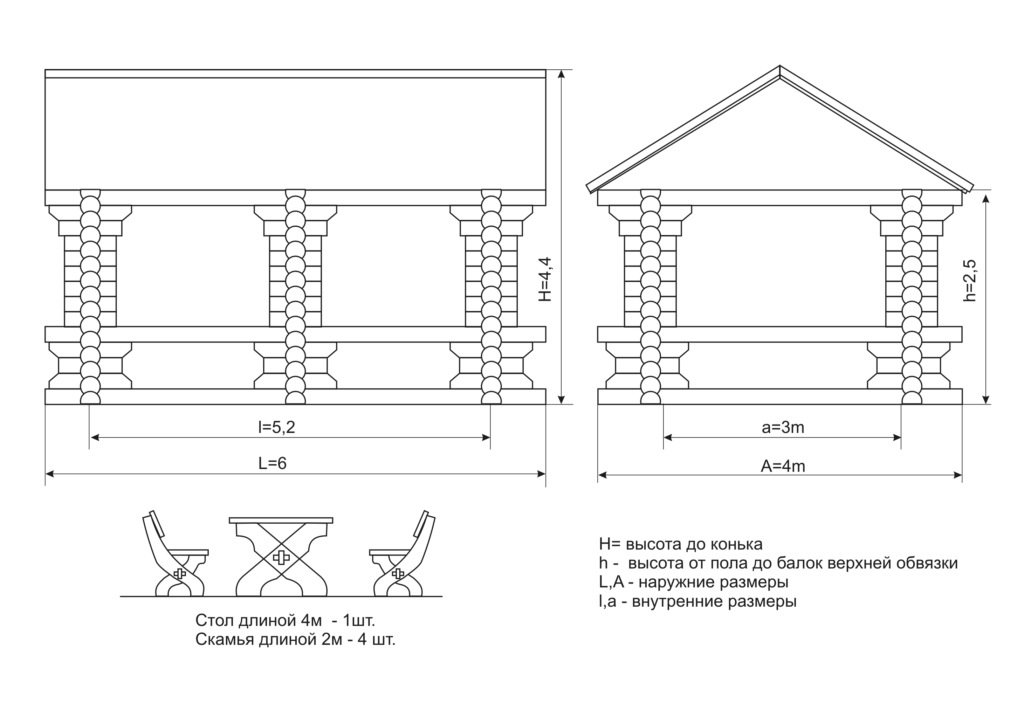
Gazebo characteristics
- Dimensions: 3 by 3 meters;
- Foundation: columnar (on cinder blocks);
- Frame material: 100 x 100 mm timber in the corners;
- Sheathing material: block house
- Floor: edged board 30 x 150 x 6000;
- Roof: hipped;
- Roof: bituminous shingles;
- Additionally: decorating the well next to the gazebo.
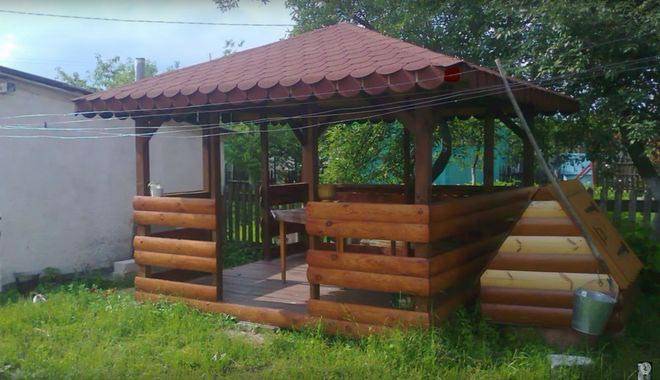 Finished building
The building itself fits very nicely into the garden, which completely surrounds this gazebo. The term "garden" is not always applicable specifically to the garden, usually a simple area next to the dacha is enough, but in this case it really is in the garden.
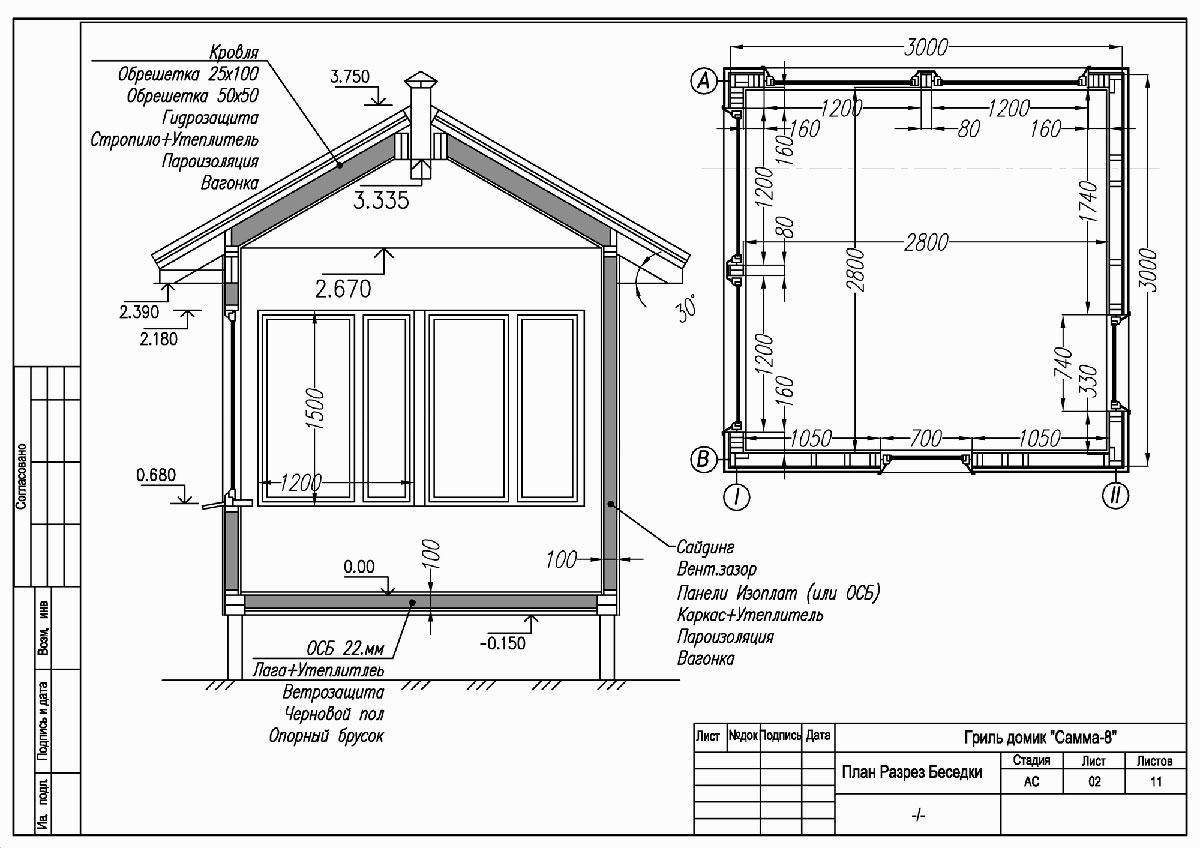
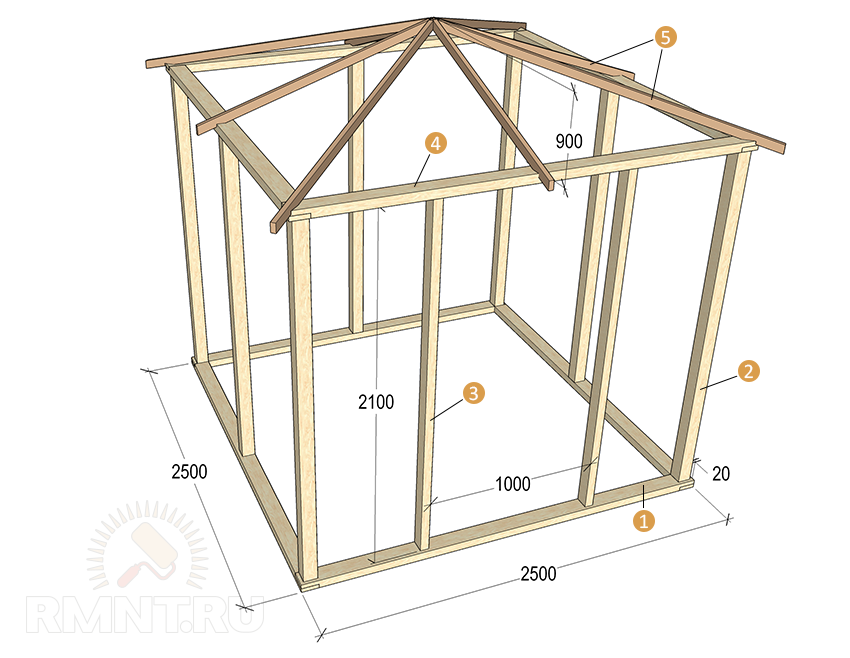
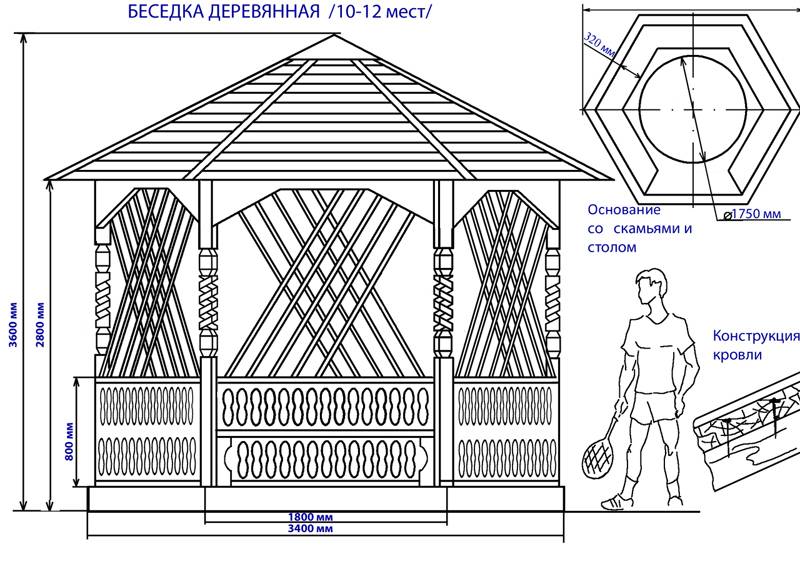
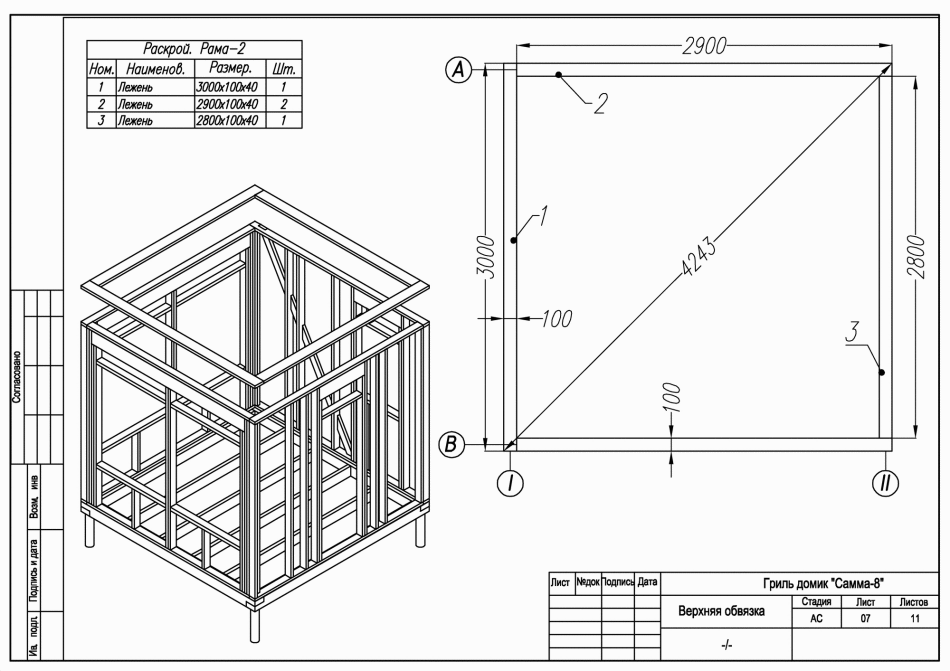
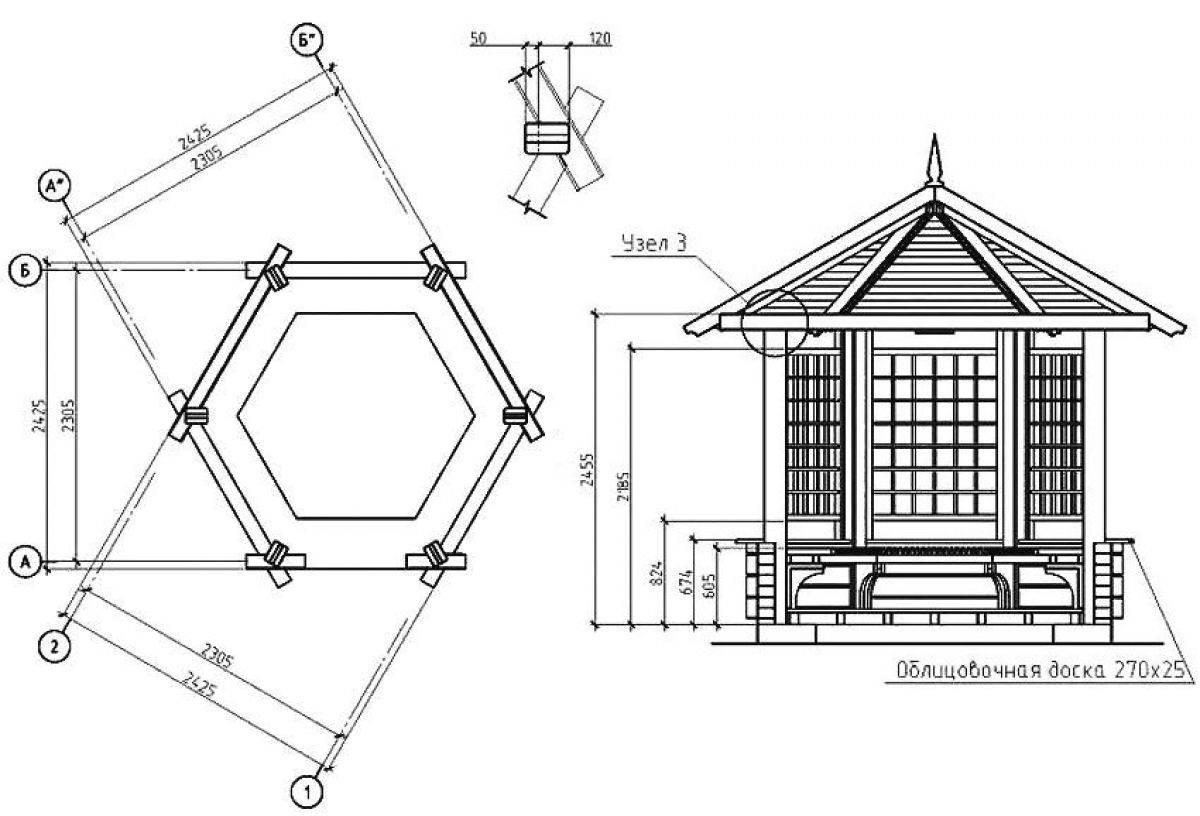
Dimensional drawing
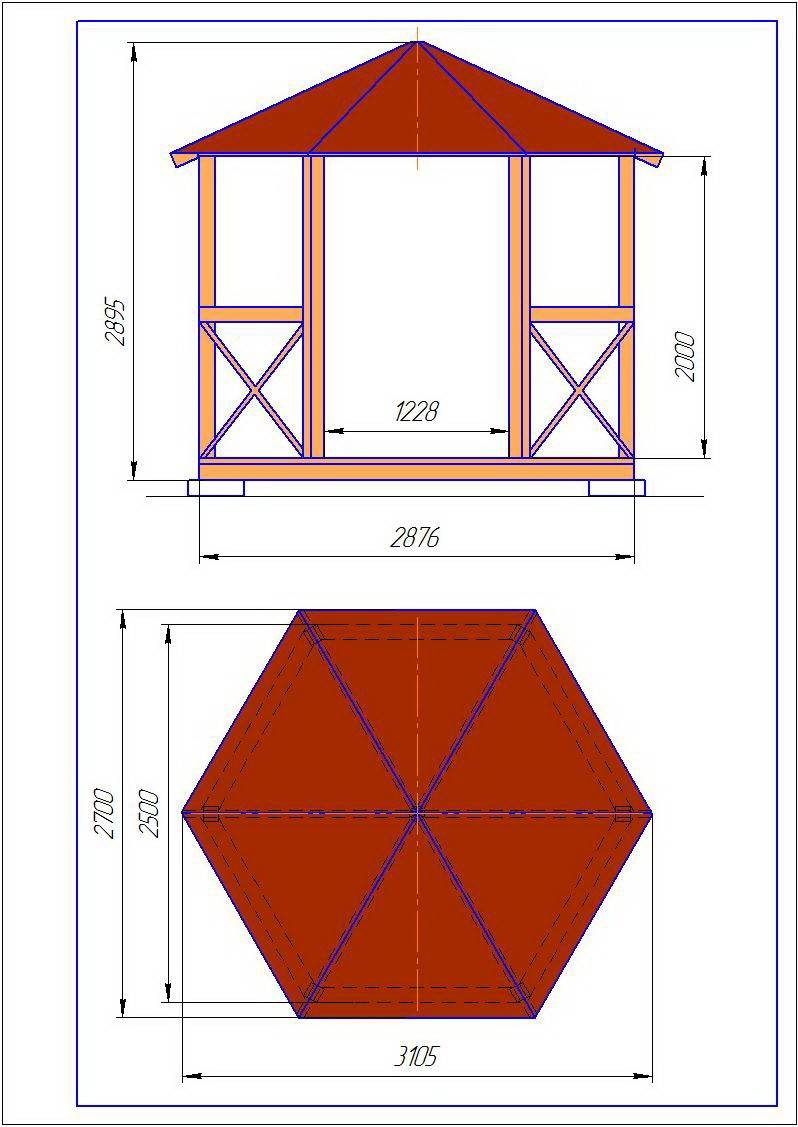
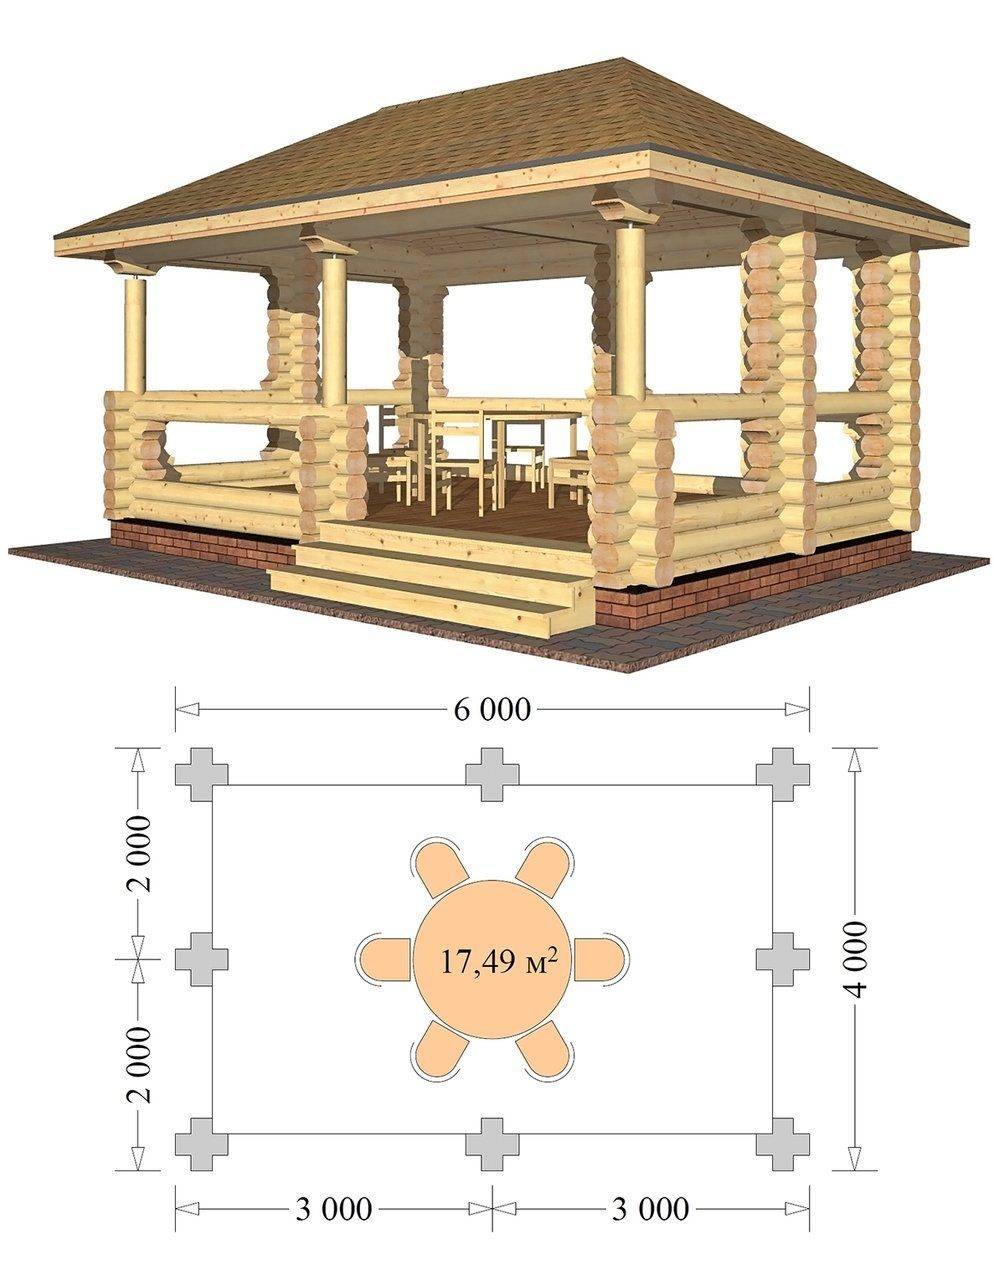
For a visual representation of the building on paper, a ready-made construction drawing of 3.3 by 3.3 meters was chosen.
 Scheme drawing of a gazebo 3.3 by 3.3 meters made of wood
This project is not directly the gazebo that we will build. It is presented for a more visual representation of the structure that we will build, since they are almost identical.