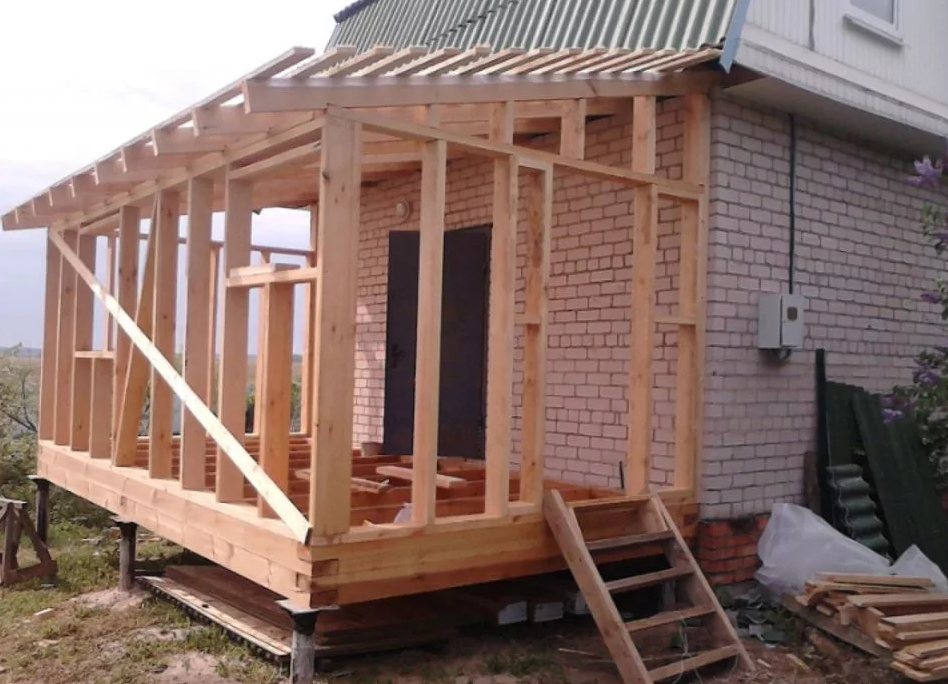
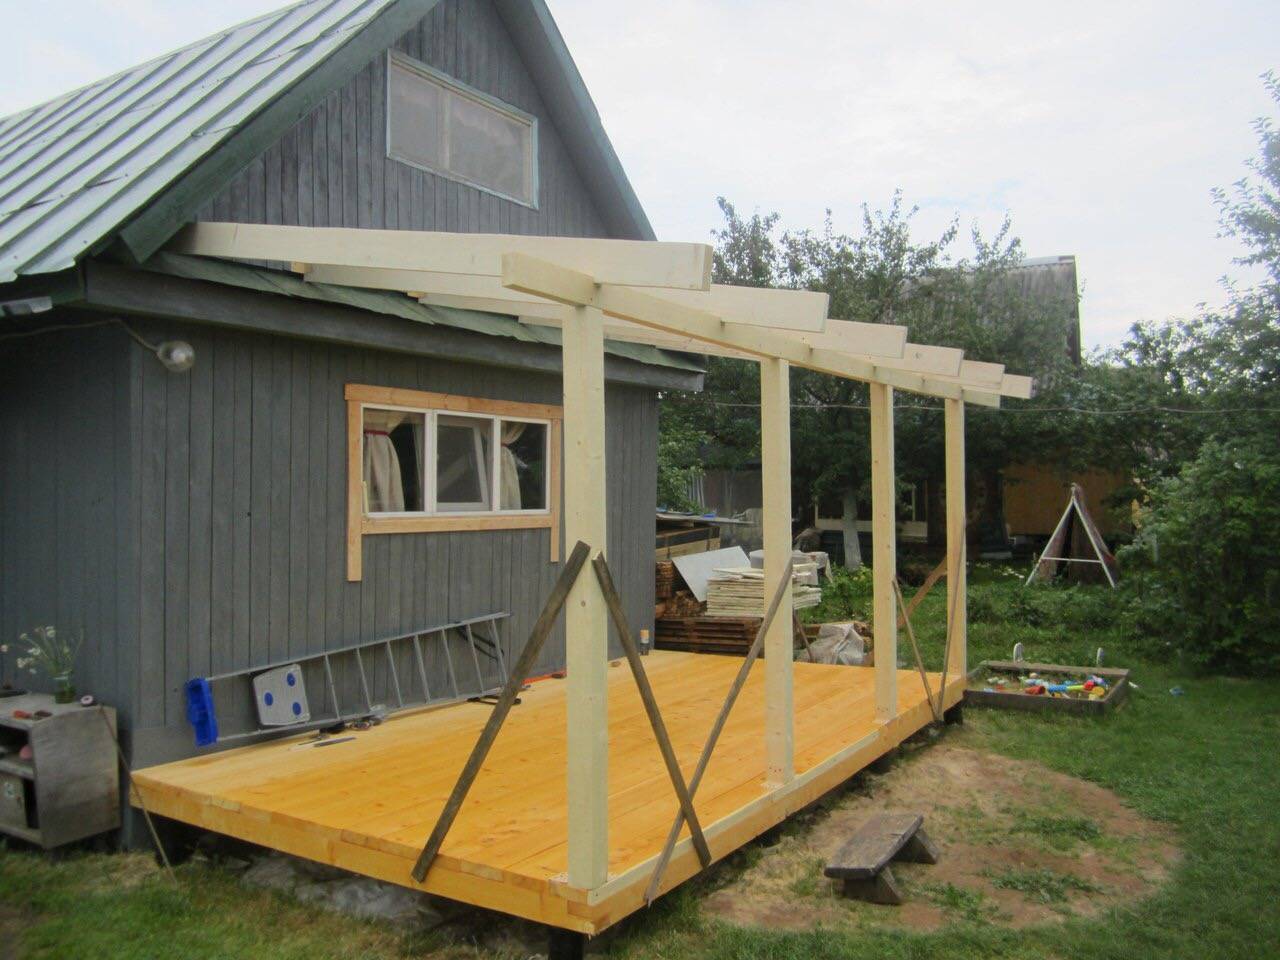
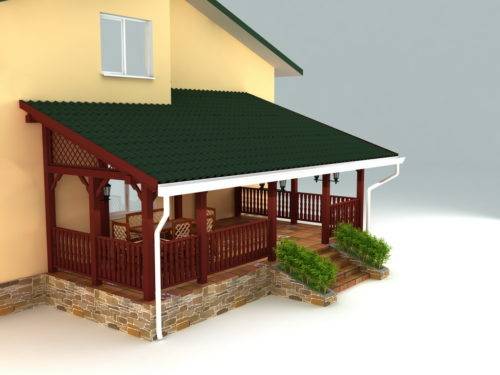
Veranda roof
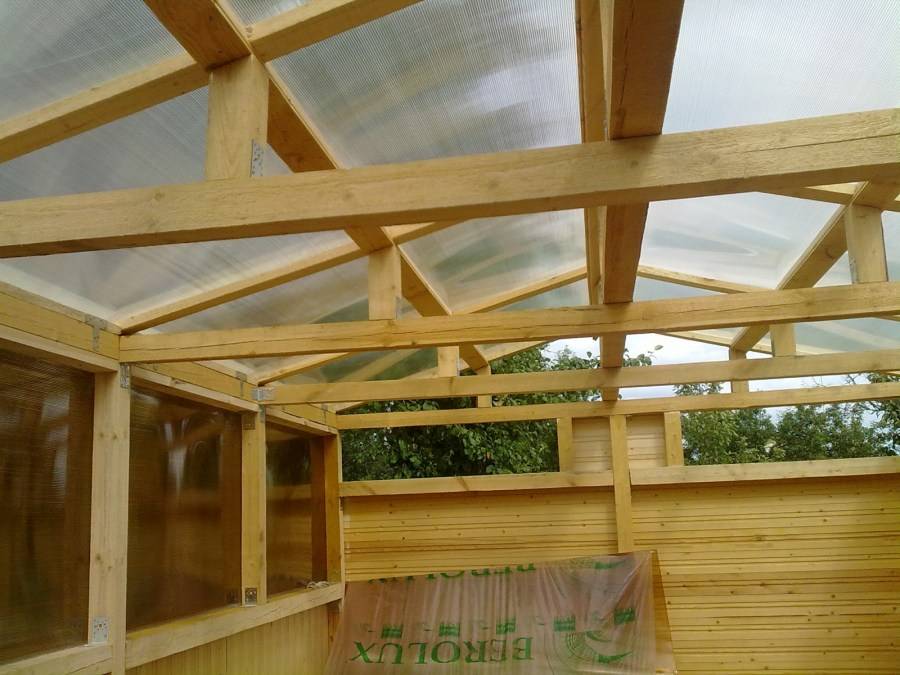
Part of the frame is the veranda rafter system. The installation of rafters and lathing depends on what kind of roofing material the veranda roof will be covered with.
From the point of view of construction, the following types of roofs for the veranda are distinguished:
Scheme of a gable roof of a veranda
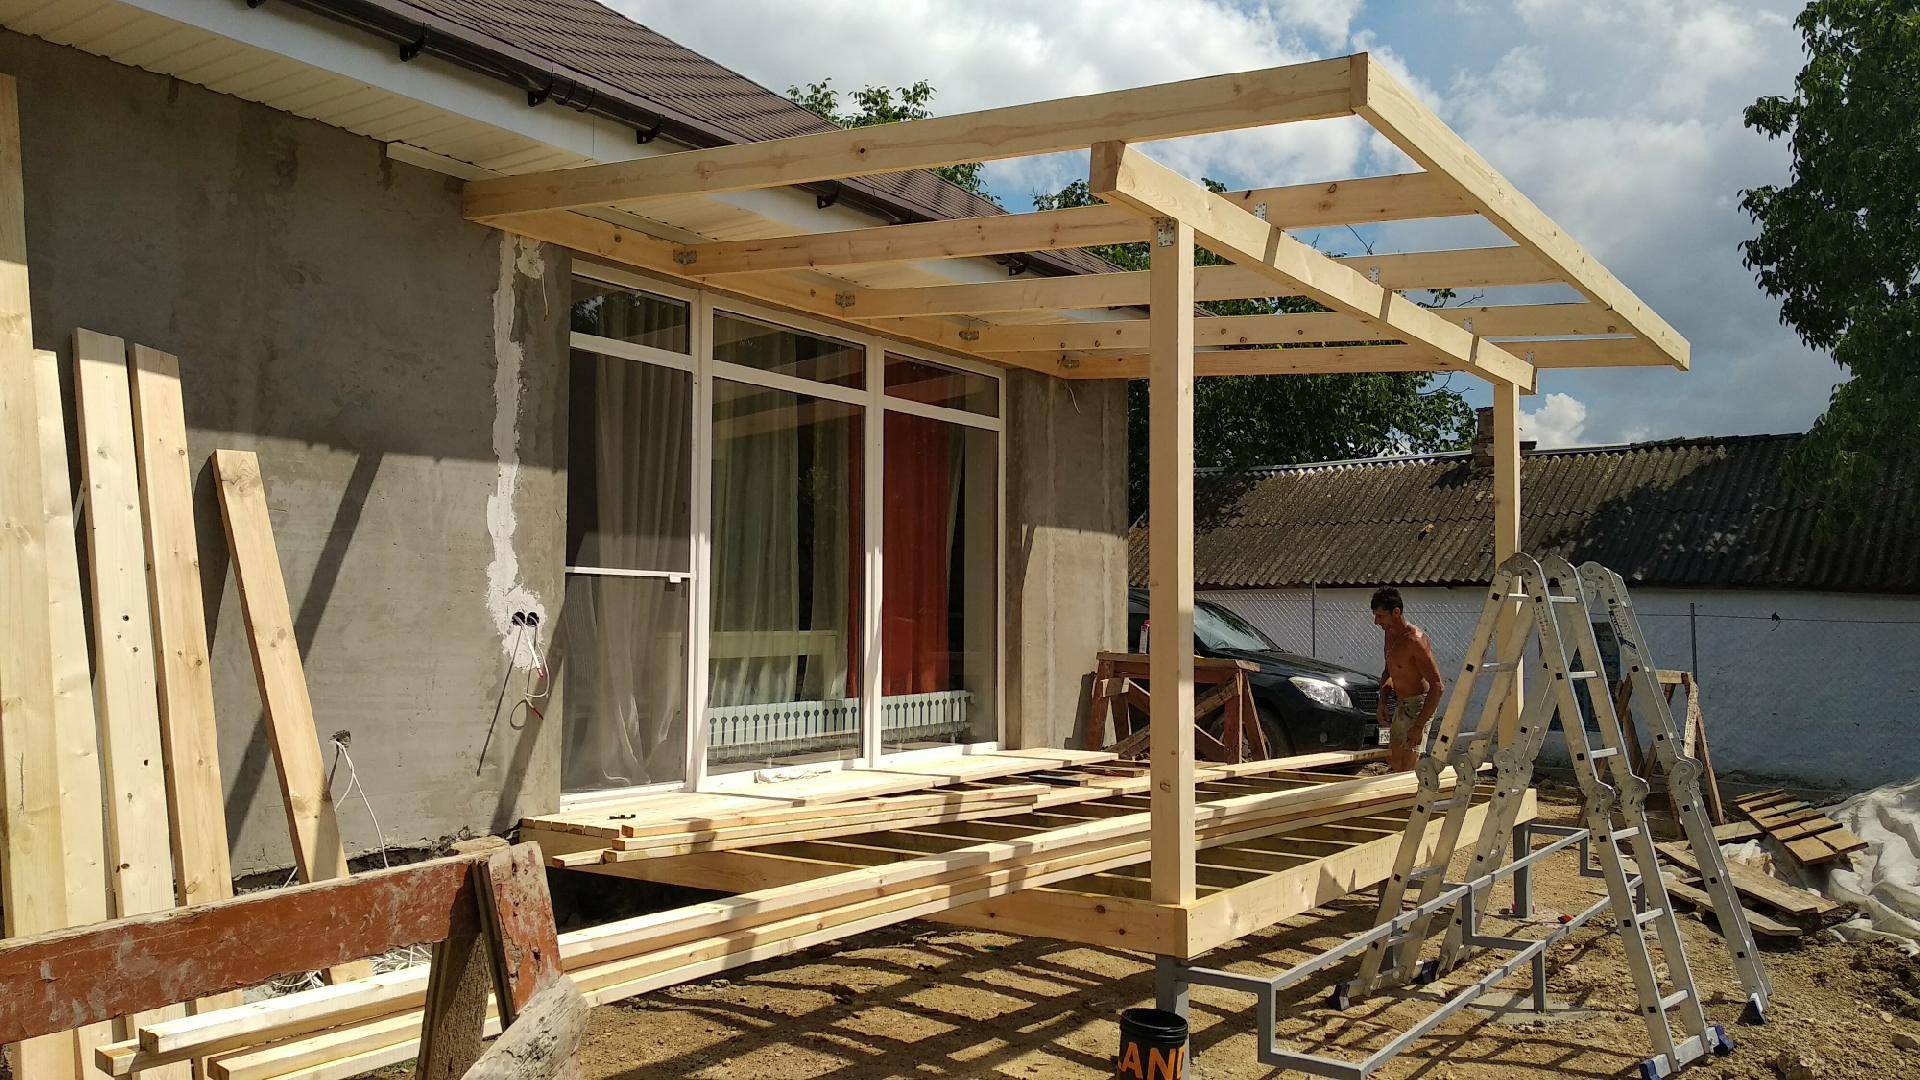
Shed roof of the veranda.
The easiest and best option. In this case, the rafter system is mounted at an angle from the wall of the house, which makes it possible for rainwater or snow to flow down unhindered without damaging the building.
Note. A pitched roof is more convenient from the point of view of the organization of drainage and, accordingly, the device of the drainage system.
The scheme of the gable roof of the veranda
The gable roof of the veranda.
In this case, the veranda is attached to the house with a narrow part. It becomes, as it were, a checkpoint. This method has not found proper distribution. More often, such a roof is erected over the terrace.
The polygonal roof for the veranda is built in such a way that the angle of inclination is maintained for draining water.
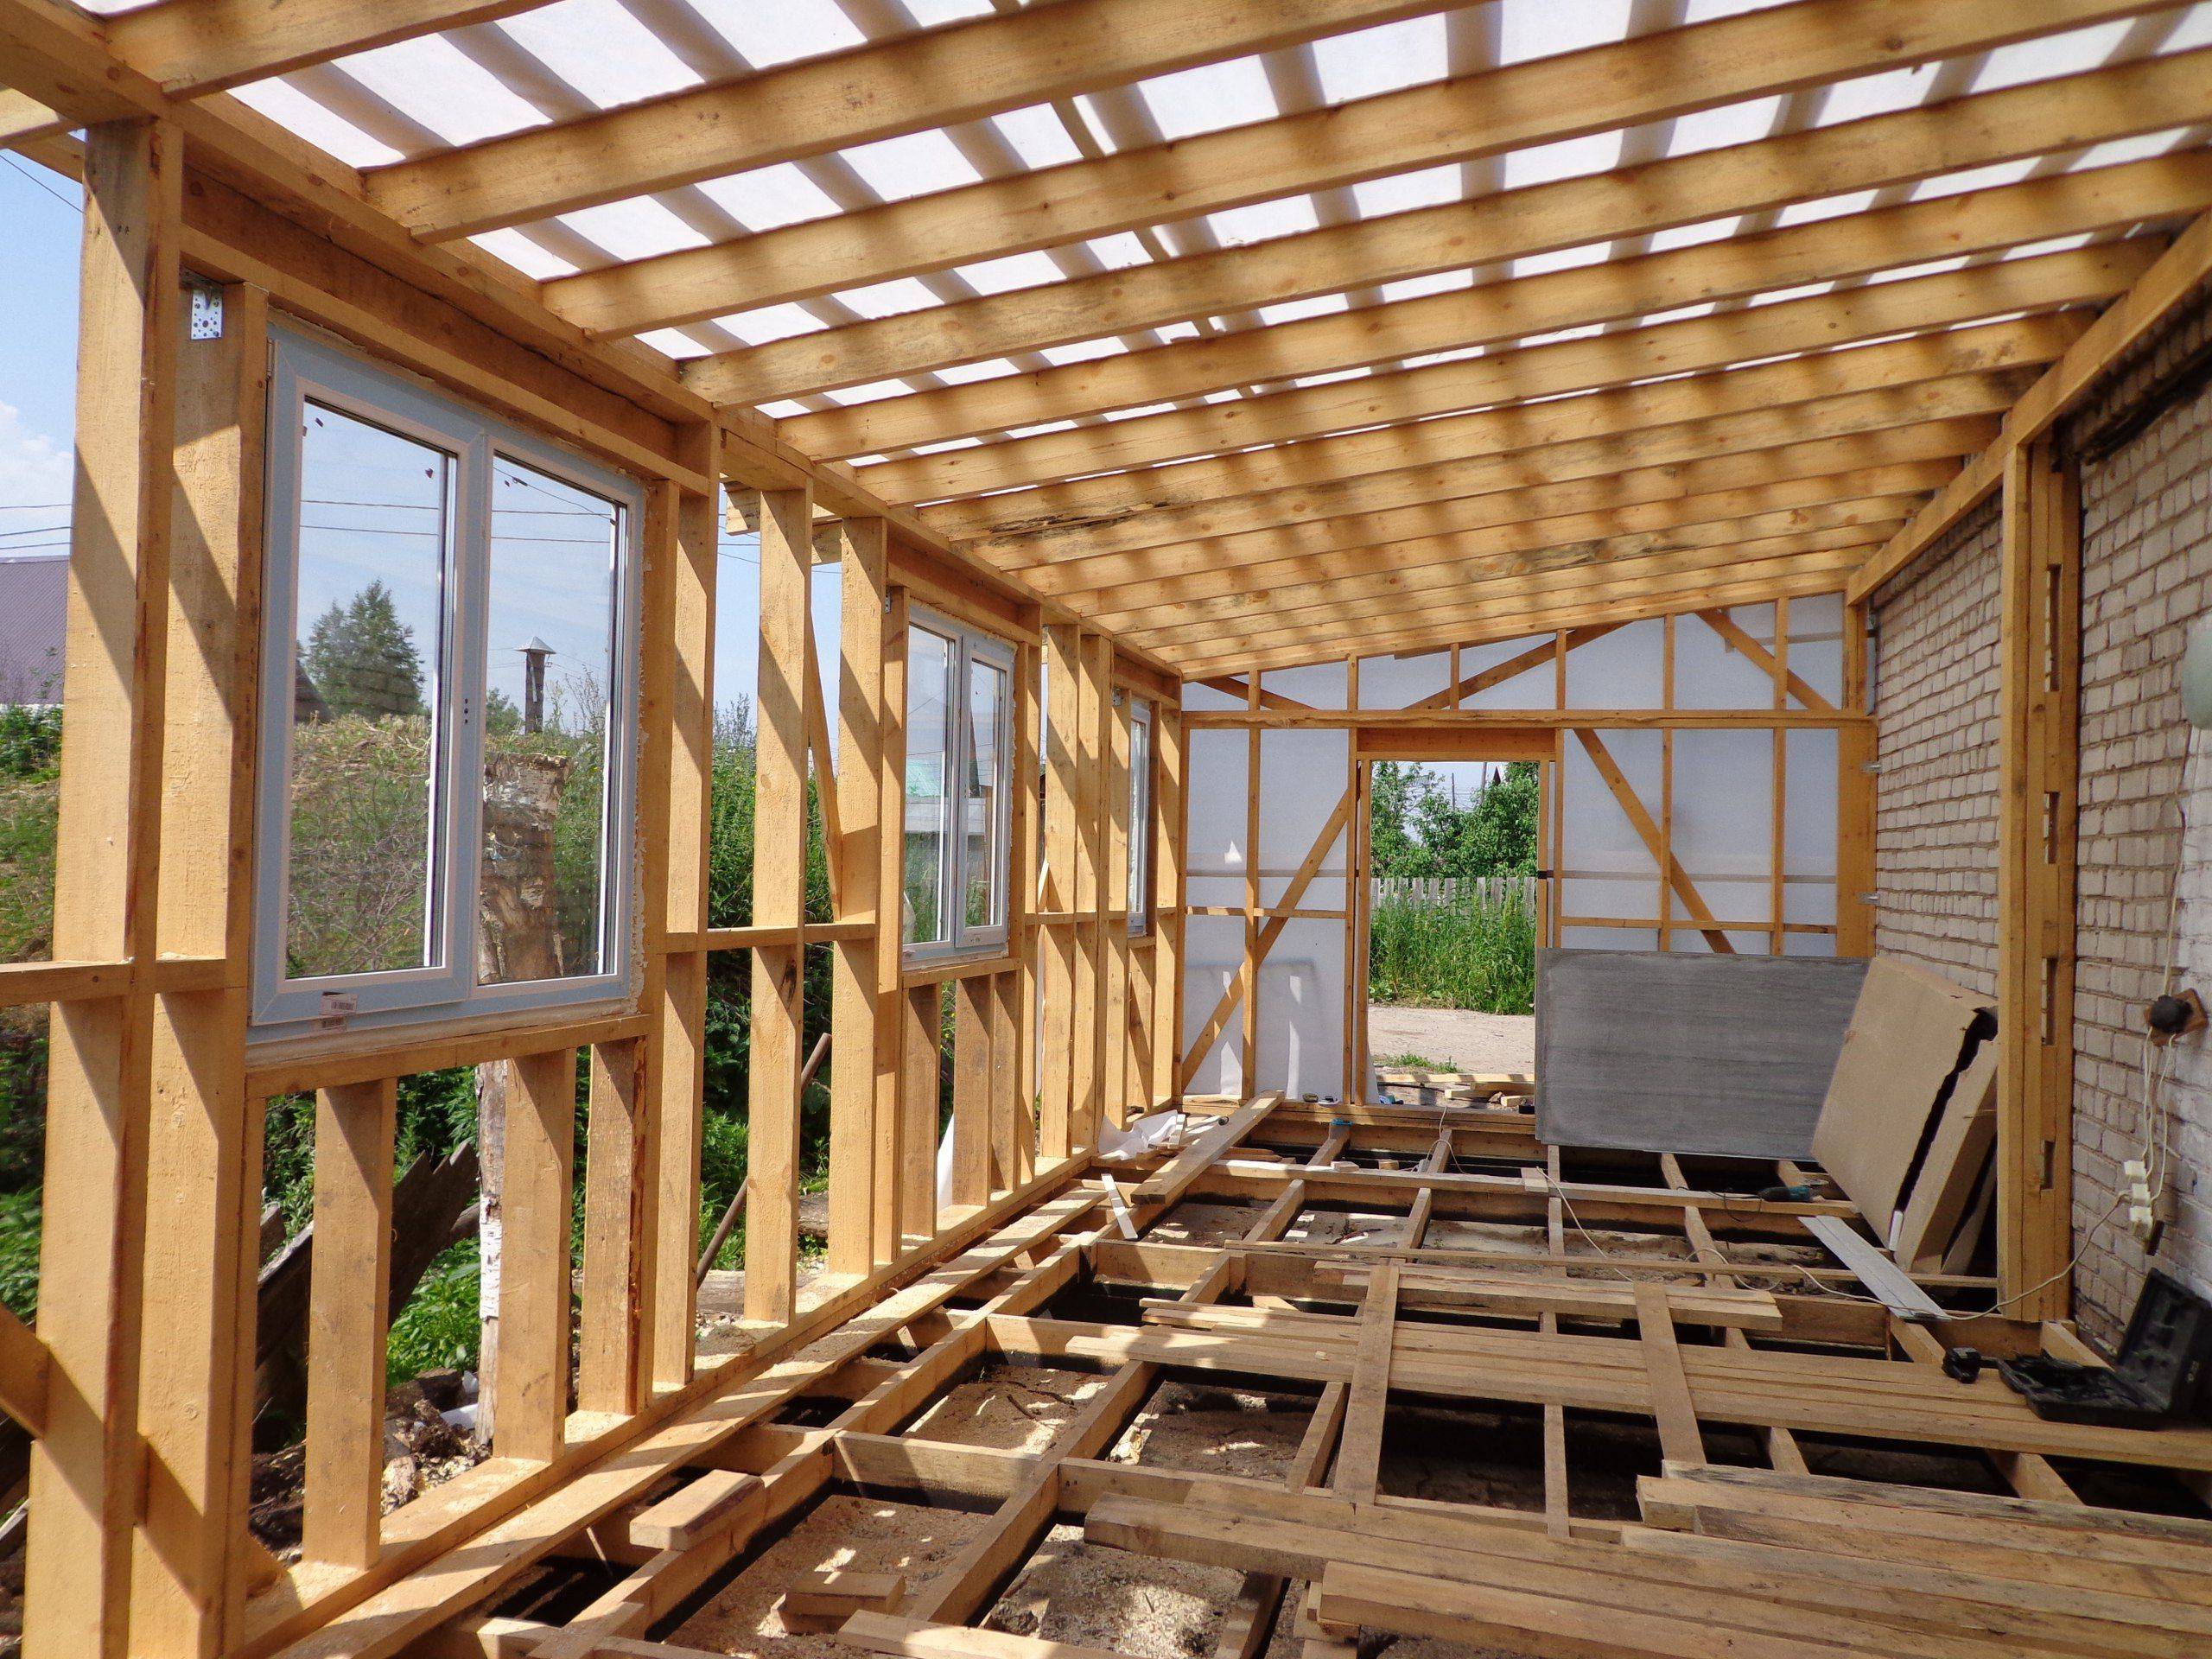
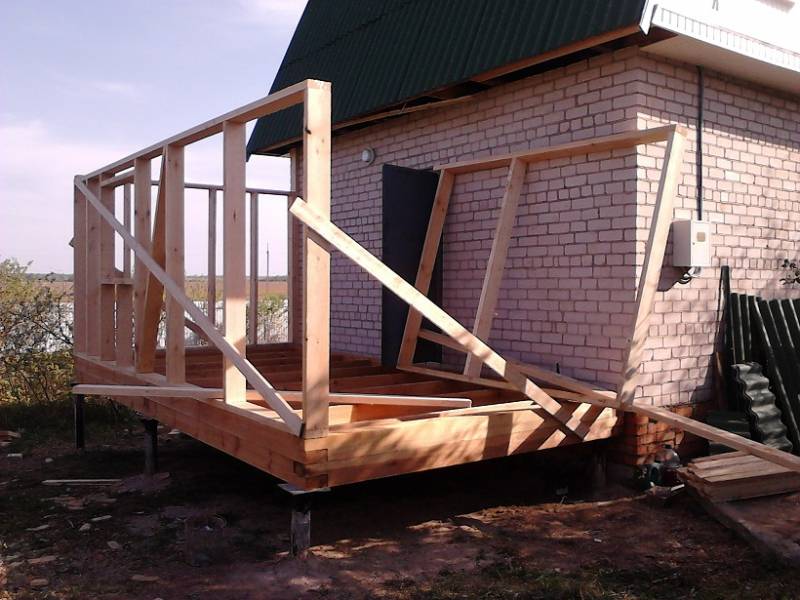
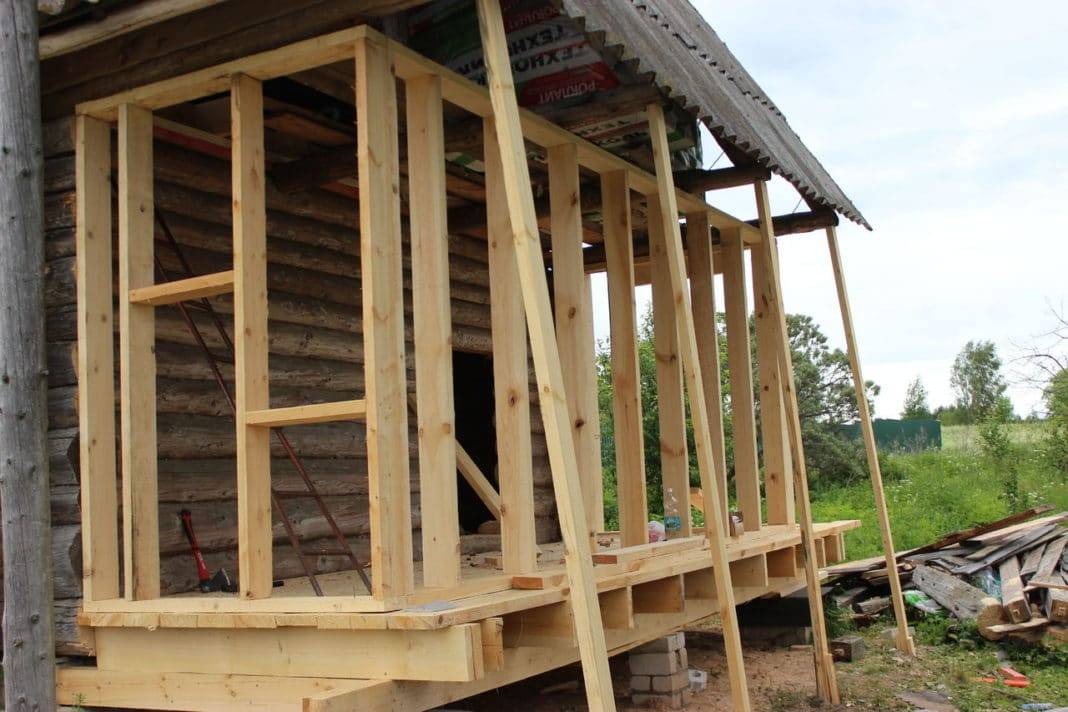
Installation of the veranda rafter system
Installation of the veranda rafter system - girder board The bar is fastened with anchor bolts. The upper parts of the rafter legs are mounted on it.
Installation of the veranda rafter system - Mauerdat Mauerlat is installed along the perimeter of the frame. In small wooden outbuildings, this function is performed by the boards of the upper strapping. The lower parts of the rafter legs are installed on them.
Installation of rafters The lower part of the rafters is mounted so that it is possible to provide overhang (removal) of the roofing material, which means that the veranda is protected from the ingress of flowing water.
Note. The distance between the rafter legs depends on the slope of the roof, the width of the veranda, and the weight of the roofing material.
Installation of veranda raftersWhen installing the roofing system of a polygonal veranda, a girder board is additionally installed.
Installation of the veranda rafter system Depending on the material chosen, the crate is stuffed (for metal tiles, ondulin, slate) or a continuous crate is made (for flexible roofing materials).
Layout of the veranda, the choice of the type of building
First you need to decide on the type of veranda and the material that will be used in construction work. You can build a veranda made of wood, brick or polycarbonate - the specific choice of material is made on an individual basis
What you need to pay attention to in this matter:
- in what capacity the veranda will be used - only for recreation in the summer season or for year-round use;
- whether it is planned to arrange a stove, fireplace or barbecue area in the annex;
- from which side of the world the veranda is located - if from the north, then you will need to think over large windows for sufficient supply of light, if from the south, then the builder will have other tasks;
- what material the house itself is built from - it will be appropriate to attach a brick veranda to a brick one, to a wooden one - from wood, but it is in this issue that one can improvise.
In addition, you need to take into account your own financial capabilities - there are projects that are inexpensive, but there are also those that involve serious cash injections.
Please note: after the choice has been made, it is worth inviting a professional designer - only with the help of the project drawn up by him, the extension can be officially issued in specialized supervisory authorities
Brief description of the process
Let's try to briefly and clearly present to your attention the step-by-step instructions for making an open veranda.
The subsequent algorithm will be as follows:
- install the bottom trim for the terrace;
- lay the floor on the logs using grooved boards;
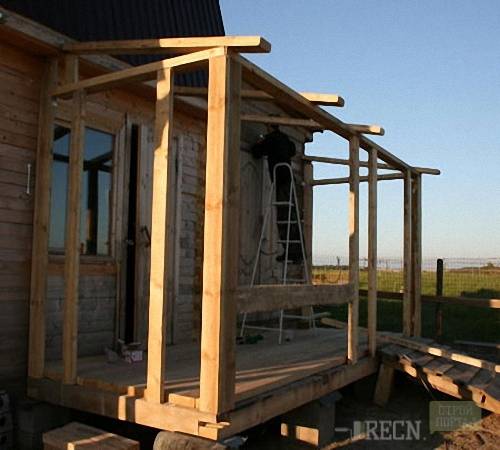
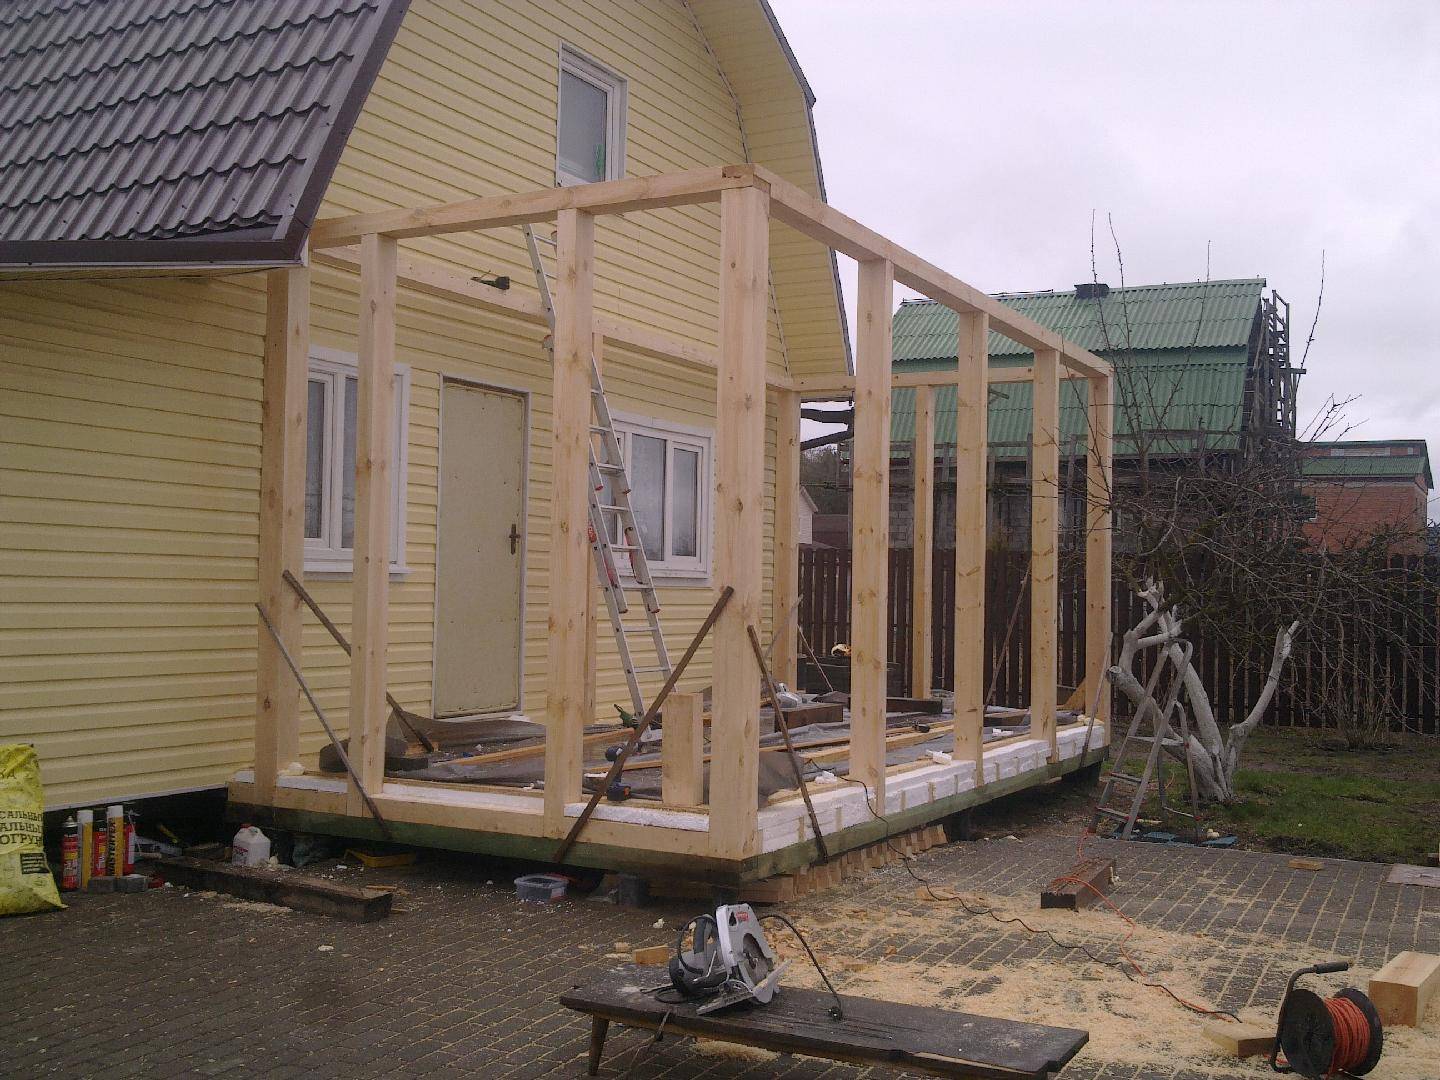
- install vertical supports of the structure, those that are in contact with the house, fasten to it with anchors and self-tapping screws;
- mount the upper terrace rail;
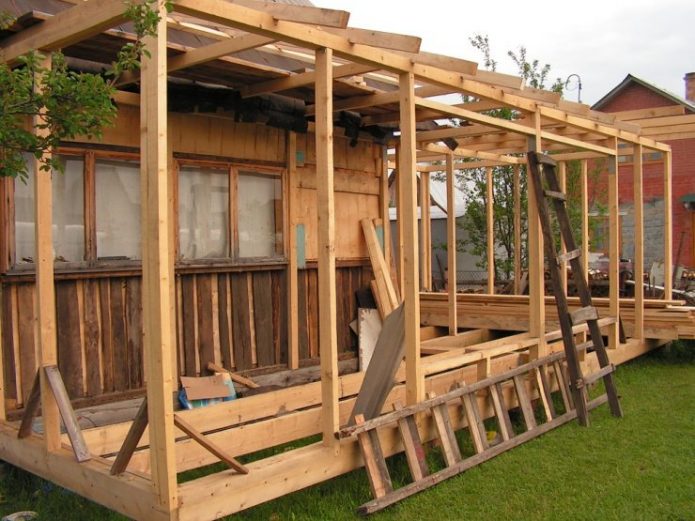
- build a rafter system;
- fasten the frame of the rafter system to the elements of the upper strapping using metal corners;
- build side fences of the building;
- start creating a roof - lay a waterproofing material on the rafters, then make a crate and attach it to
- her OSB boards;
- lay the roofing material;
- finish the veranda.

The terrace can become an additional room in your home, serve as a room for outdoor games (if you make a children's veranda), become a favorite place for reading books or intimate conversations over a mug of tea.
It is possible to make an extension with your own hands, for this you just need to delve a little into the process of creating a terrace and find out as much information as possible about the upcoming work.
Installation of the veranda floor
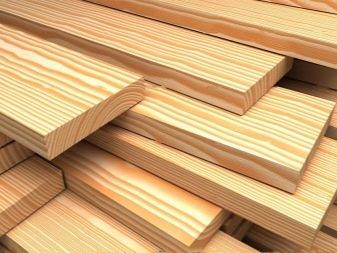
Special attention is paid to the selection of the necessary material, namely, its operational properties associated with the influence of humidity and sudden temperature fluctuations on it. In this case, larch is most suitable.
The advantages of this material:
- resistance to moisture, fungus, mold and insect pests;
- beautiful woody texture;
- ease of protective and decorative processing.

The floor on the veranda is laid out from the boards in one row. The boards are placed on the logs located in the middle of the two crowns of the lower harness. Lags and boards are sequentially treated with antiseptic agents. Next, paint or varnish is applied on top. The upper step of the porch visually continues the floor. For decorativeness, floorboards are not laid directly in a row, but at a slight angle. With this method of flooring, a little more is required. Another original way is considered to be stacking from the center diagonally. This view requires error-free installation, which can be done with a miter saw.
Pine and spruce floorboards are not the best option for a veranda. When deciding to use these types of floorboards, treat the lumber with an antiseptic compound several times, which will protect the wood structure from rotting and damage by pests.
The upper step is being built on the same level as the veranda floor. Then, fragments of a straight ladder are attached to two bowstrings at an angle. It is necessary that the lower step is flush with the ground, and its ends fit snugly against the previously stretched bowstring, after which they are fixed with nails. Next, you need to install the inserts. They are cut in a pattern that resembles the outline of the side planks and are also attached to the string. The riser and support board should be positioned between the inserts.
Documents for the construction of a veranda (permit)
The veranda extension refers to the remodeling of the house. Therefore, it needs permission documentation.
To obtain a permit for the construction of a veranda (for an extension, reconstruction), you need to submit to the architecture department:
- a document confirming the right to own the site;
- project of a house with a veranda;
- the consent of all residents registered in the house;
- application for registration.
Note. You need to start the paperwork 2-3 months before the planned construction work. According to user reviews, this procedure takes quite a long time.
In principle, it is possible to finish building a veranda without documents, however, when selling, renting or inheriting this property, problems may arise with this property. The veranda is included in the total area of the residential building, BTI can regard this as "Unauthorized increase in living space." Especially if the veranda is heated (warm veranda).
When building a veranda, you should not deviate from the dimensions indicated in the registered project.Any adjustment will entail a change in the project documentation and the payment of a fine. The consequences of unauthorized construction are spelled out in the Law of the Russian Federation "On Architectural Activity in the Russian Federation" and the Civil Code, an excerpt from which is given below.
Excerpt from the Law "On Architectural Activity in the Russian Federation"
The consequences for unauthorized construction are listed below.
What will be for the unauthorized construction of a veranda - an extract from the law
The last thing that needs to be done after the construction of the veranda is to legalize the building with the changes and obtain new documents.
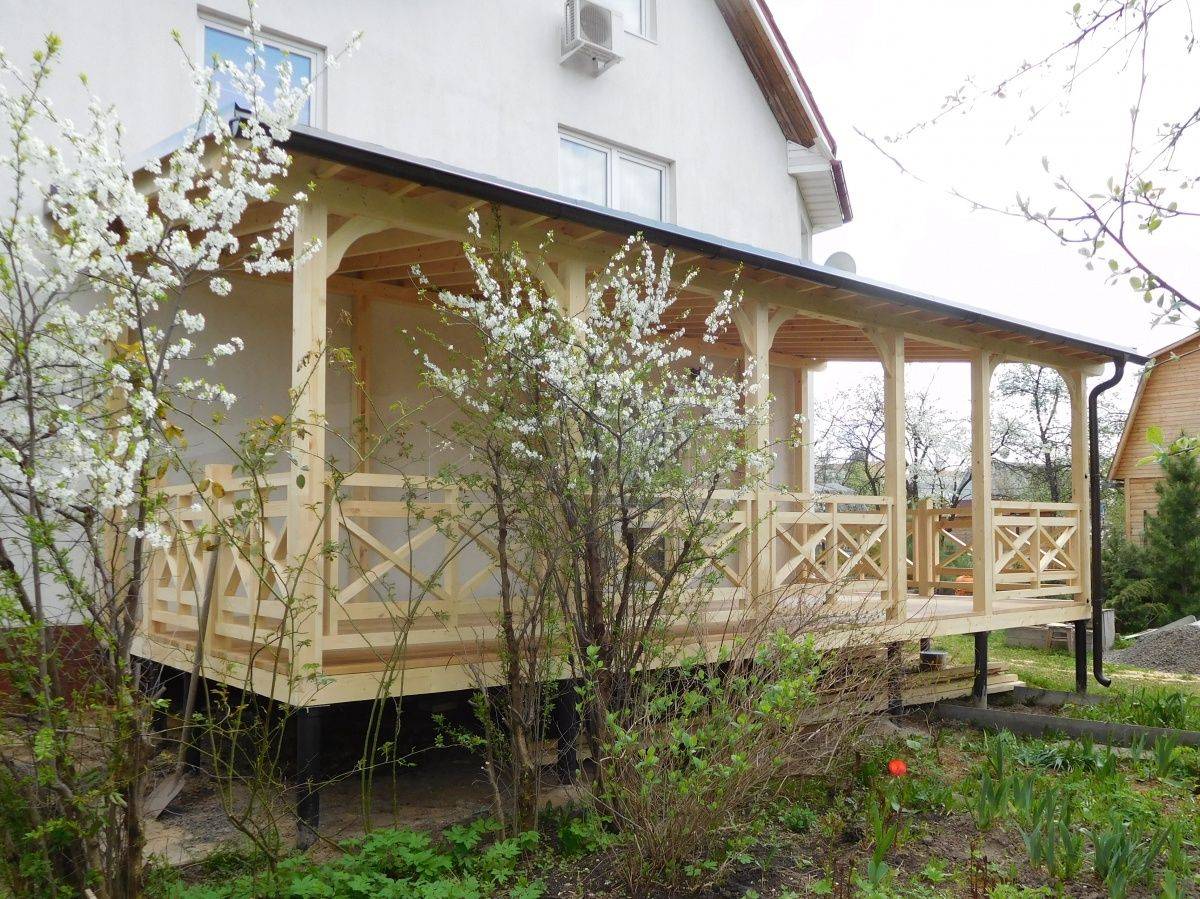
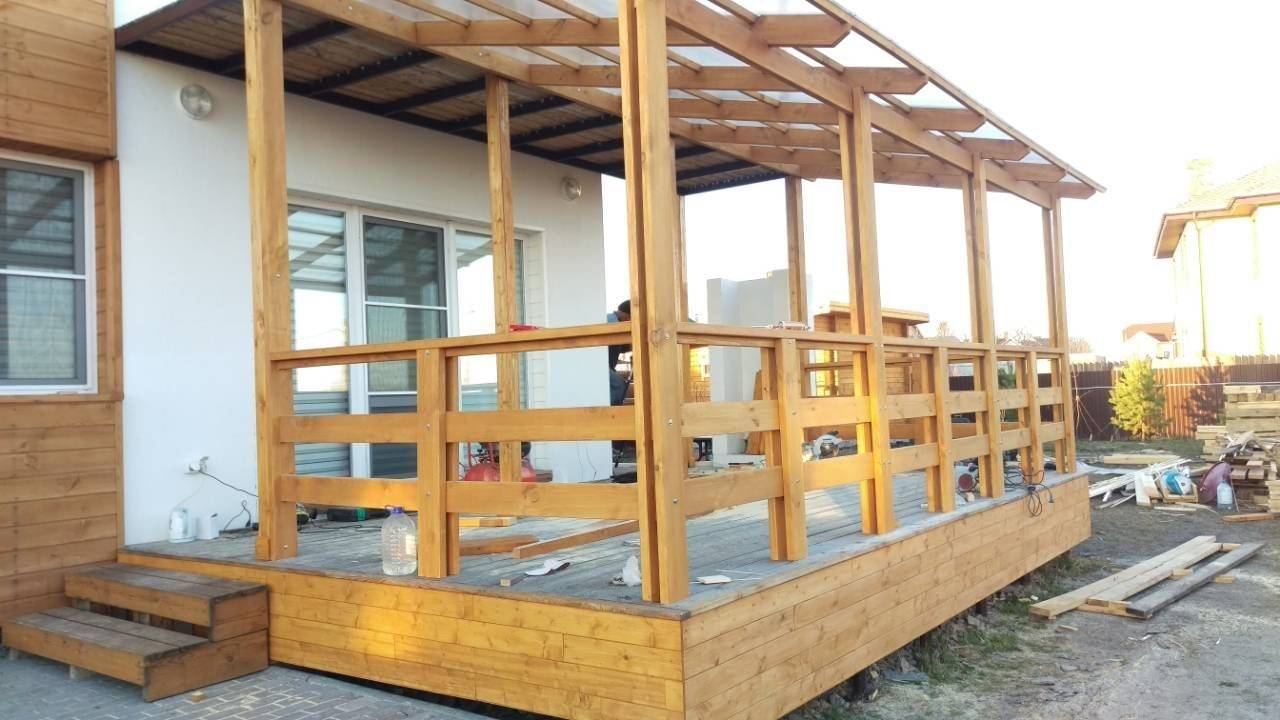
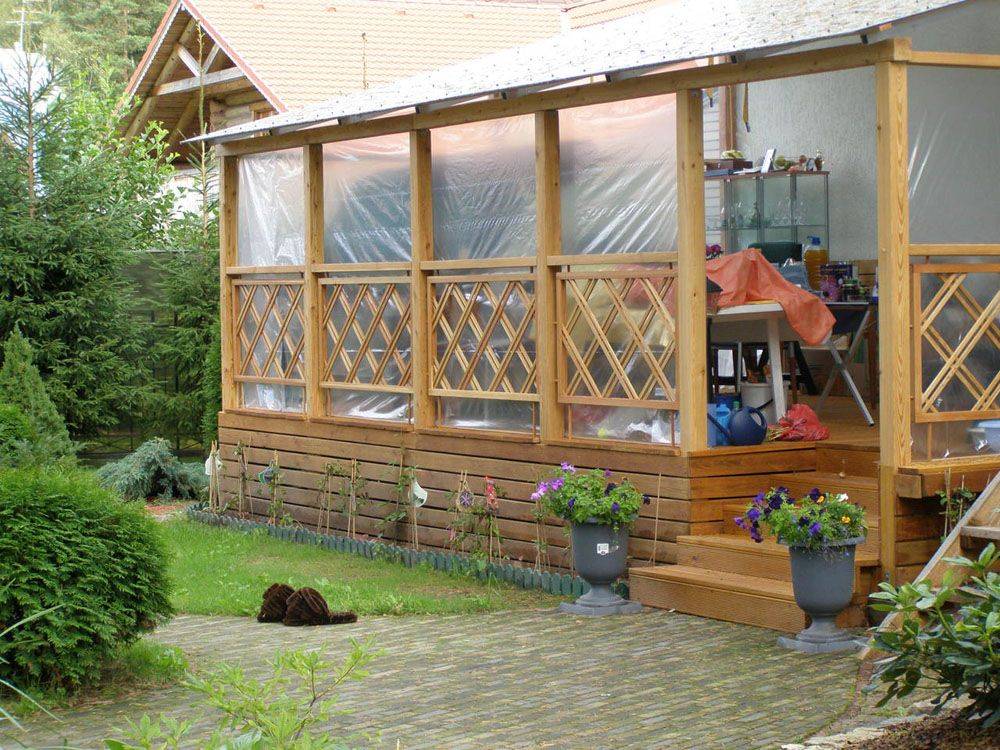
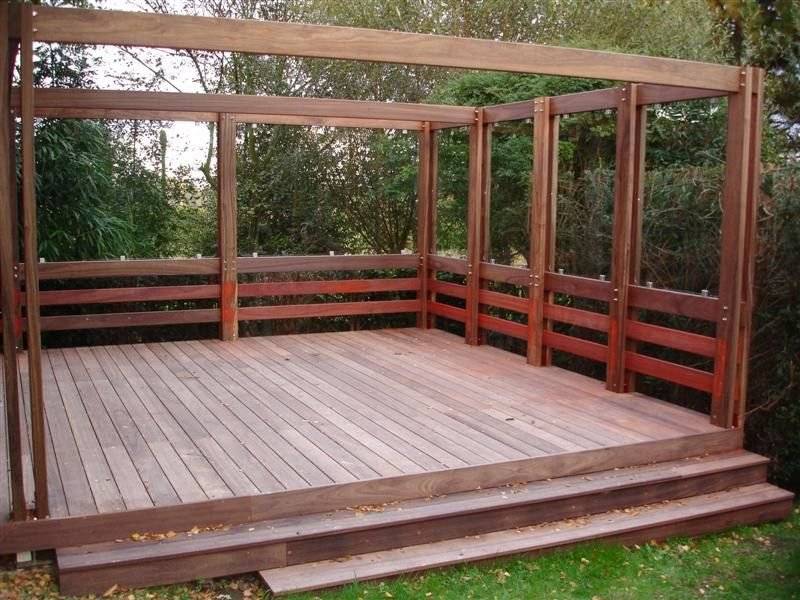
Open type
The open veranda is a frame building without walls, and the roof is installed on beams. This design has a number of advantages and disadvantages.
Advantages and disadvantages
Of the undeniable advantages of an open veranda, it is worth noting the following:
- Easy to install. Its construction takes a minimum of materials and time. It is not difficult to build it.
- Easy care. Such a veranda is more of a part of the street than a house. Therefore, to keep it clean, it is sufficient to regularly sweep the floor.
- An open veranda will allow you to enjoy the opening landscape and breathe clean air when you are on it.
Open terrace
Like all hand-made works, an open-type building also has disadvantages:
- Not suitable for use in the cold season.
- It is impossible to install upholstered furniture on an open veranda, since it will be impossible to take care of it, which means that your stay here will be deprived of a certain home comfort.
- Difficulties may arise with the choice of finishing materials, as they will be exposed to the negative influence of the environment.
Tools and materials
For construction you will need:
- Concrete foundation posts.
- A bar for a frame with a section of 150 × 150 mm.
- Cement and sand.
- A bar for strengthening the frame with a section of 120 × 120 mm.
- Bracket for joining the timber.
- Lathing for the bottom of the veranda. It can be OSB, forging or slats in the form of slabs or balusters.
- Self-tapping screws for wood 100 mm and 25 mm for fixing OSB or wooden lining.
- Wooden lining.
- Roof beams 150 × 150 mm.
- Anchors 150-200 mm.
- Croquettes 60 × 120 mm.
- Roofing material, for example, metal or ondulin.
- Boards for the manufacture of roof lathing.
- Lags 100 × 100 mm.
- Wind board.
- Floor boards 30–40 mm.
- Paints and varnishes for wood processing.
- Roll waterproofing for the foundation.
- Drill and saw.
- Level.
You have already familiarized yourself with the method of making the foundation, so we will omit this point in our description of the construction of an open type of building. Let's go straight to the features of the flooring.
Features of the device floors
To carry out a high-quality installation of the floor, you must first prepare the base. To do this, first of all, the earth is leveled and compacted. Adjustable supports can serve as supports for the logs. Moreover, their number will directly depend on the planned loads on the floor. This idea is great for open-type verandas.
Then install the logs on the adjustable feet and fasten them. Thanks to these supports, the slope of the floor can be adjusted and leveled. Installation of boards begins from the edge of the veranda parallel to the joists. The boards must be flat and dry. They should be stacked back to back. Fastening the boards to the joists is carried out with nails or wood screws.
The device of the frame and roof does not differ from the technology described in this article.
Finishing features
In order for the wooden elements of the open veranda to last longer, they should be impregnated with special antiseptics and covered with paints and varnishes. Among other things, these actions will highlight the structure of the tree and help make the extension more attractive.
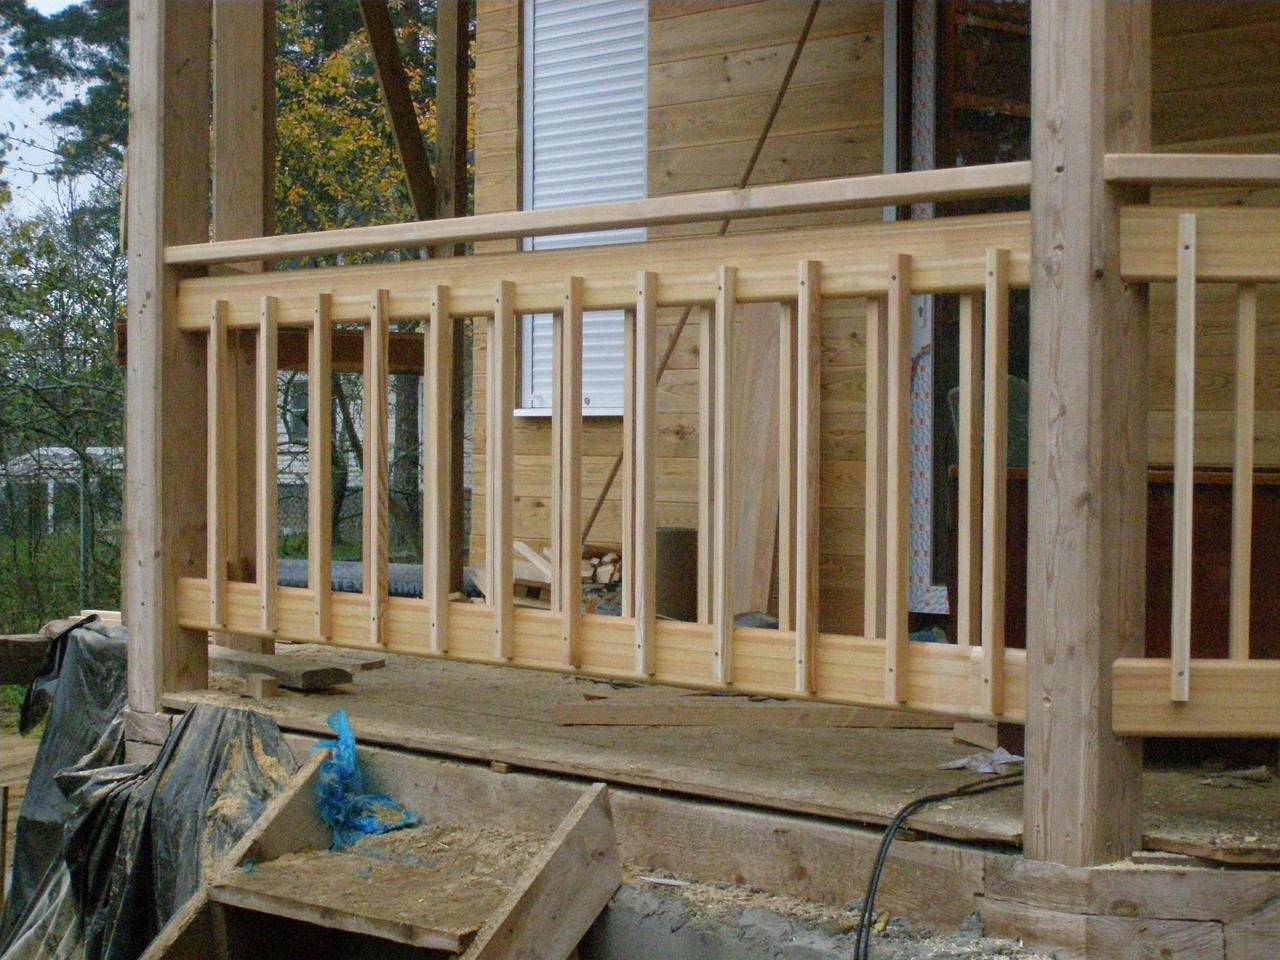
The lower part of the veranda also needs some finishing. To do this, you can use rails that are fixed at an angle of 45º, forged elements or balusters. If you use a wooden or plastic lining for this, then under it you will need to make a frame of beams.
For finishing the ceiling and gable, you need to use the same material. It can be wooden lining or OSB slabs.
At this stage, it is important to run the electrical cables for the veranda lighting and make the appropriate holes in the ceiling sheathing
Editorial advice:
- how to build a brazier out of bricks with your own hands;
- how to build a winter greenhouse with your own hands;
- how to build a gazebo with your own hands from wood.
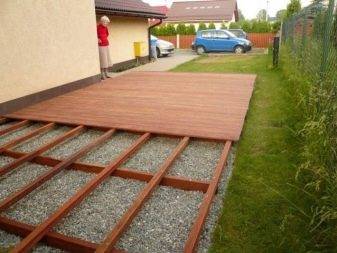
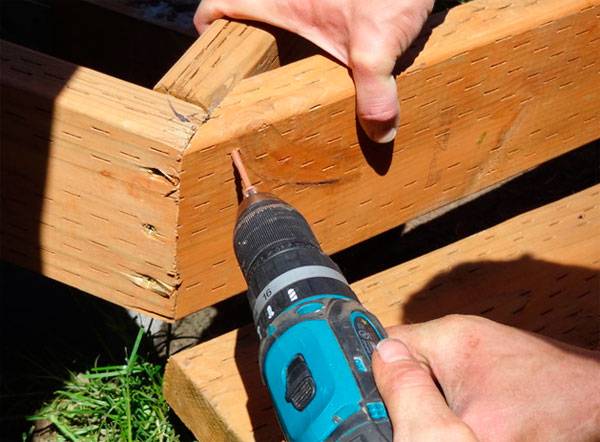
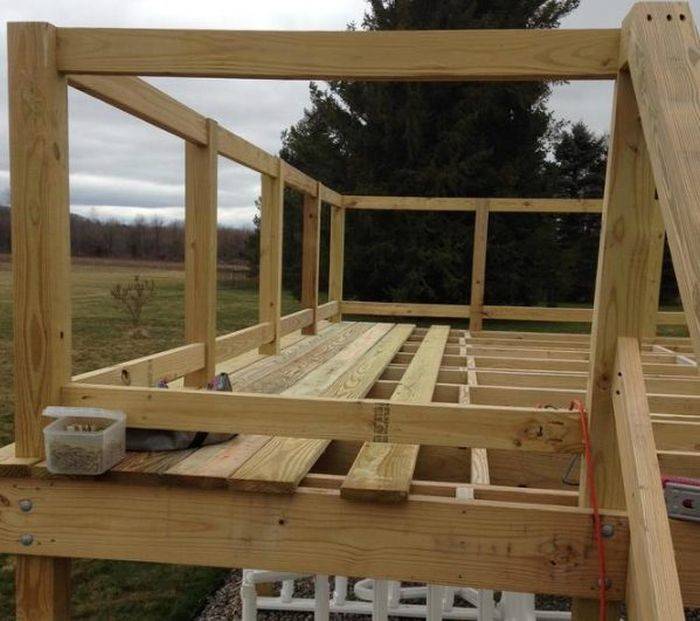
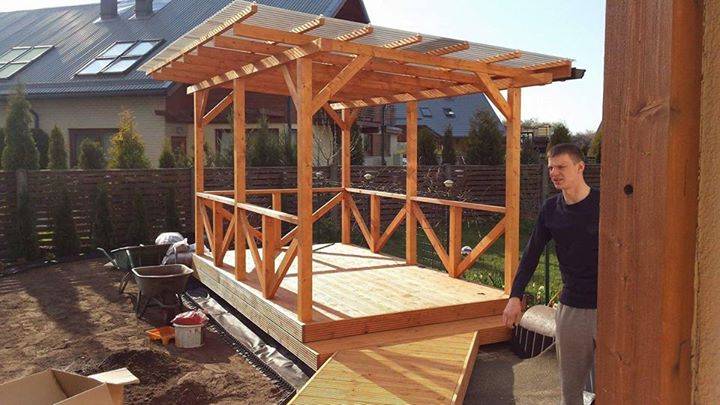
Construction of a wooden terrace: step by step photos.
Initial stage: preparing the site for construction, clearing the site of debris and vegetation, marking the dimensions of the future building.
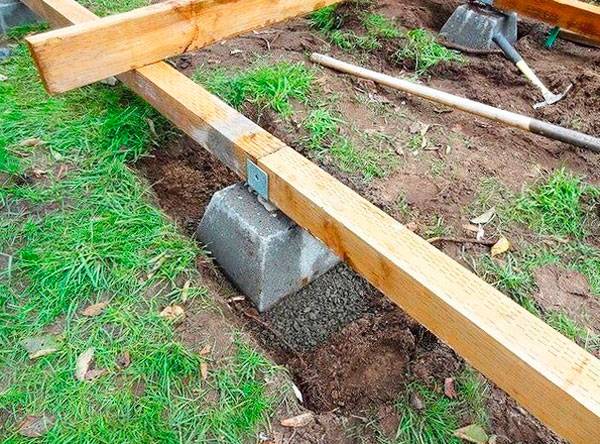
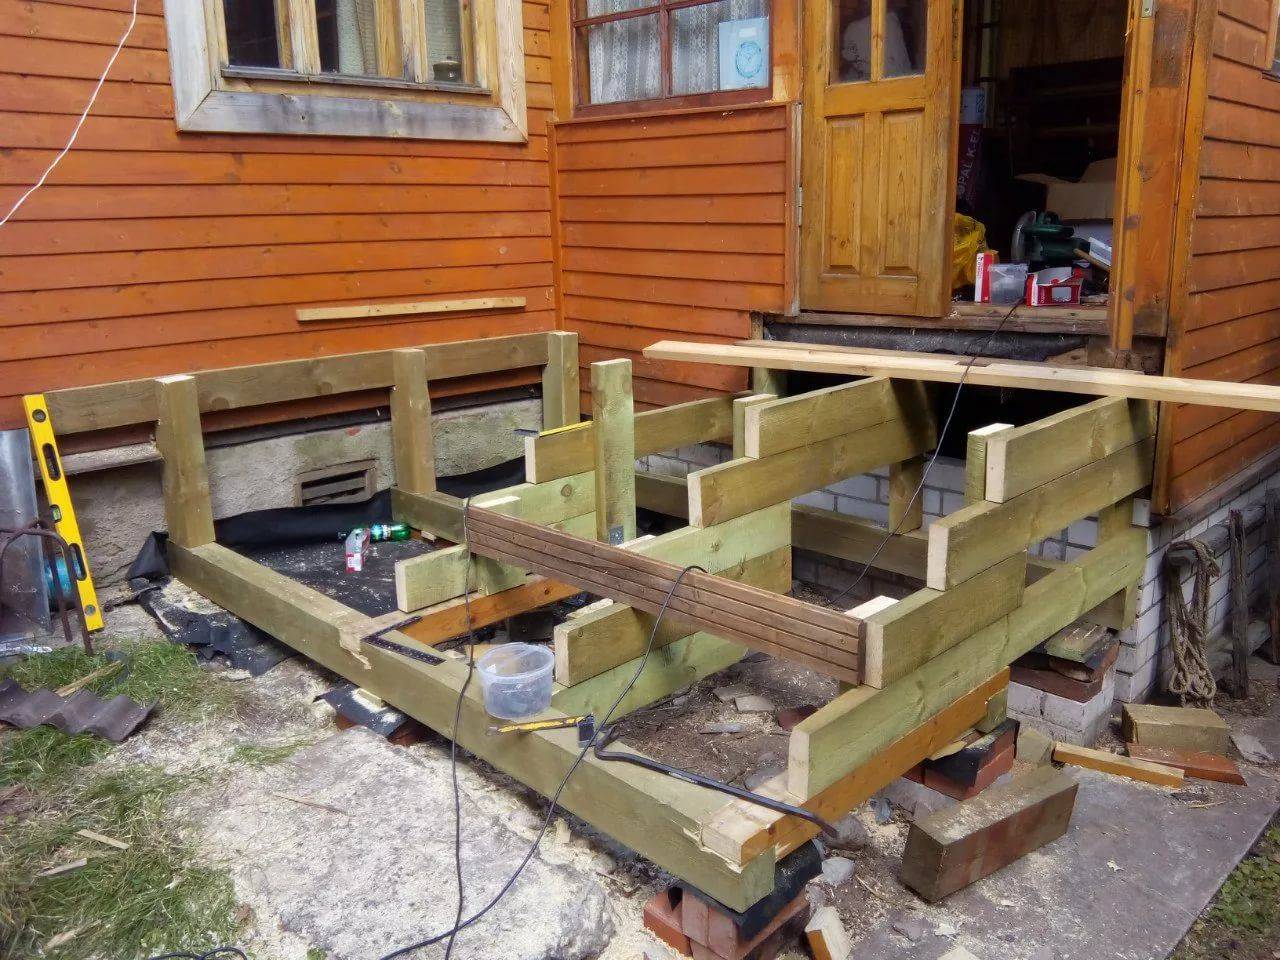
The next stage is the installation of the foundation, in this case, a columnar foundation was made, concrete blocks were used. Small holes were dug under the blocks, and a crushed stone pillow was made in each hole.
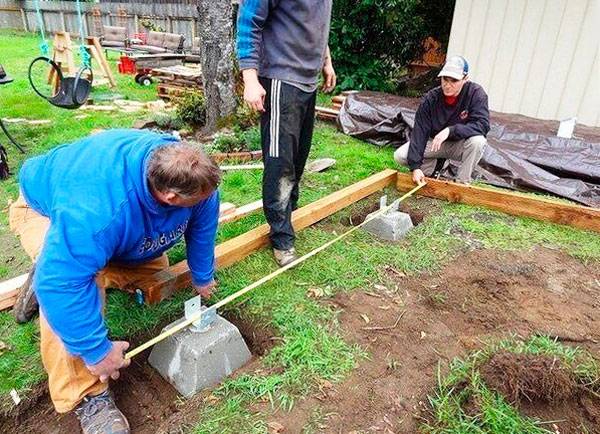
The concrete blocks are level in one horizontal plane. During the casting, reinforcement embedments were installed in the blocks, which will be used to fasten the strapping from the bar.
We will make a strapping from a bar with a section of 100 x 100 mm. We fasten the beam to the mortgage with long bolts.
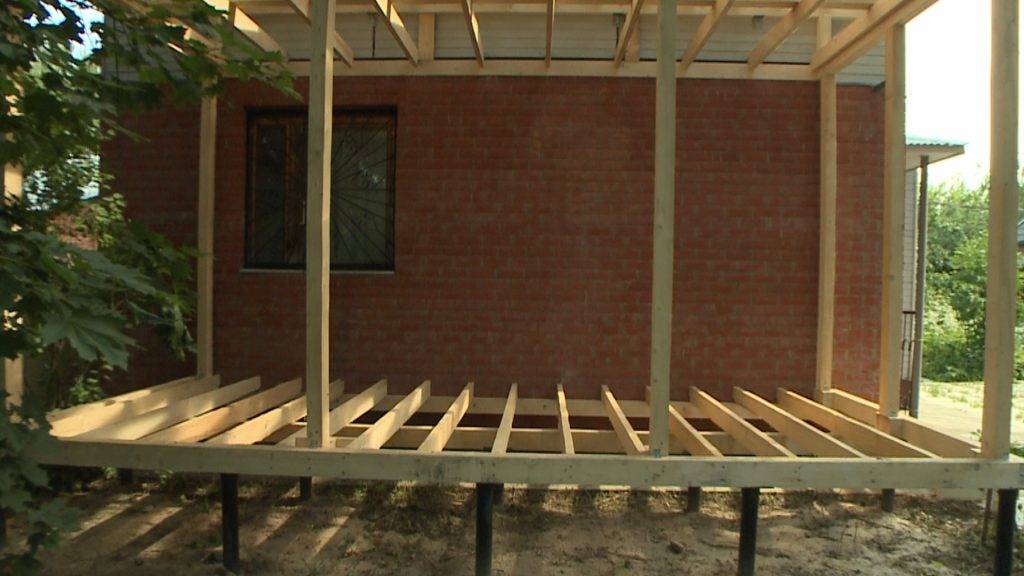
We lay logs for the floor, as a log, you can use a bar or a board laid on the edge, the option with a board is preferable, since the board will cost less than a bar, if you have a sawmill, you can dissolve the bar into boards and less materials will be needed.
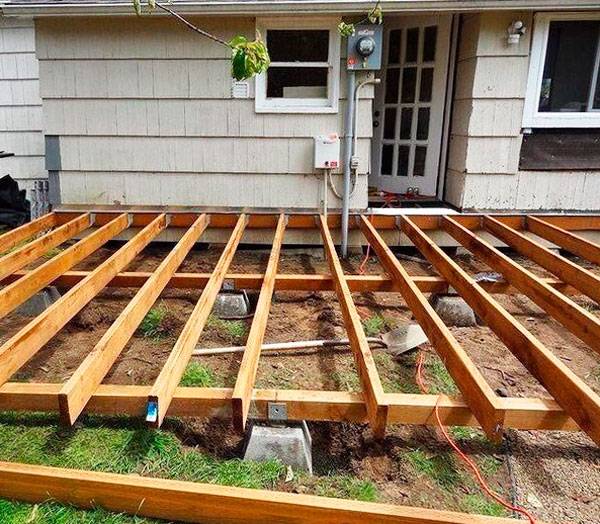
We attach the logs to the harness made of timber, check with a building level and level them so that all the logs are at the same level. From the side of the house, we attach the logs with their ends to metal corners to the support board fixed on the wall of the house. We attach sidewalls from the same board to the back ends of the lag.
The logs must be treated with an antifungal impregnation, as an option, you can use the old proven method, cover the logs with used engine oil.
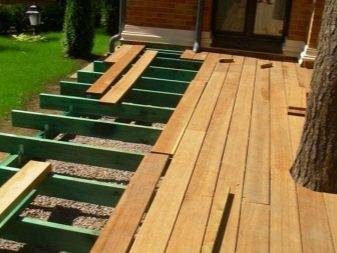
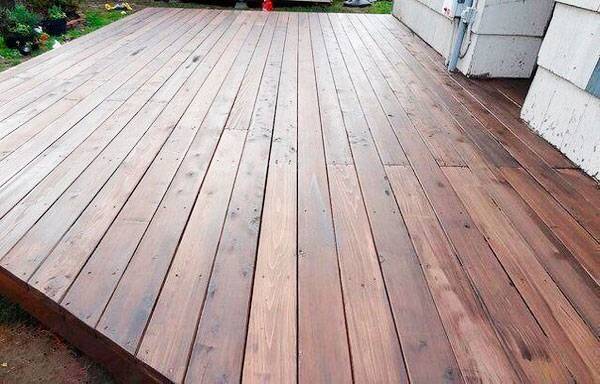
We lay floors from boards, since this is an open terrace, then the wood will be affected by atmospheric precipitation, if the wood becomes damp, it begins to swell, therefore the floorboards should not be laid end-to-end, but with a small uniform gap of 3 - 5 mm, which compensates for the expansion of the wood. We fasten the boards to the logs with nails or screws.

We process the entire surface of the floor with a grinder using medium-grain sandpaper.
The wooden terrace must be treated with an antifungal impregnation, which will protect the wood from rotting, then covered with paint or varnish for outdoor use.
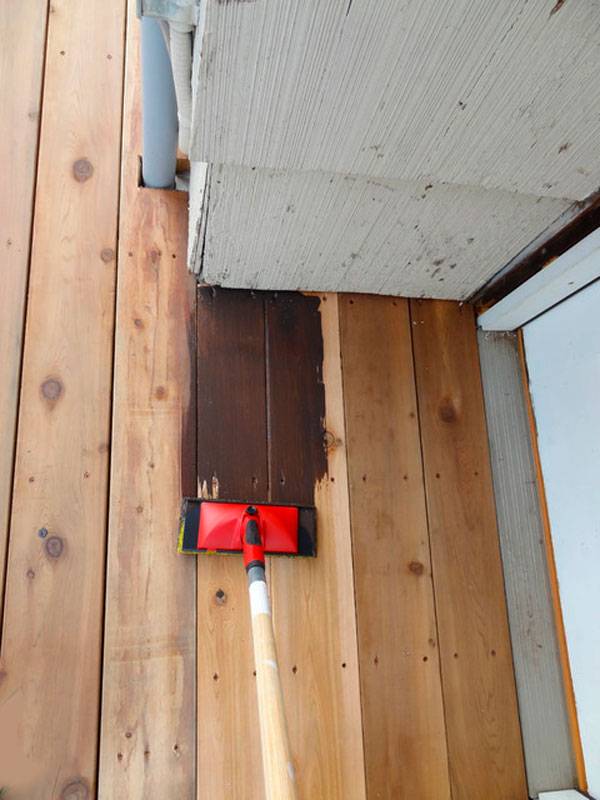
It is very important not to save on high-quality varnish or paint, otherwise in a couple of years the coating will swell and you will have to sand and repaint everything, the cost of materials will be even higher, so it is better to immediately process the wood with high-quality materials
Now our terrace is ready, you can put comfortable chairs and a table on it, place a variety of decor items.
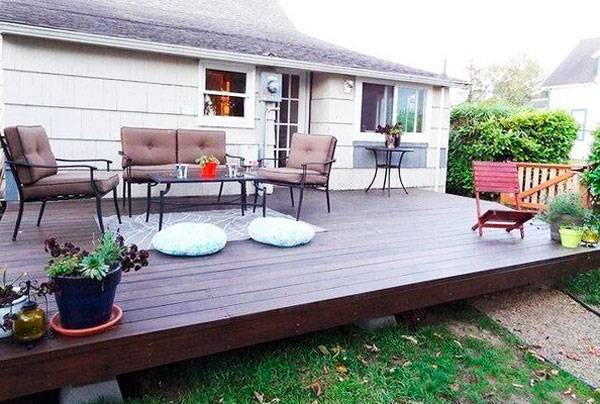
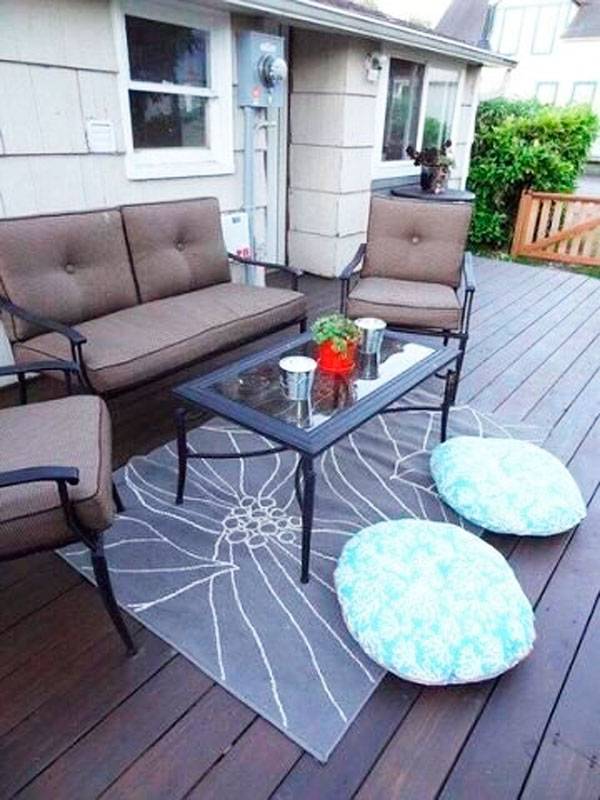
As a result, you will get an excellent place for outdoor recreation in your favorite summer cottage.
Installing the base
The veranda can be made in any shape, often choosing a standard shape or in the form of a hexagon. The veranda can be placed close to the house, as well as make a warm transition.

We would recommend building buildings tightly to each other, because the soil under the base will shrink in different ways.

Often in such transitions, the doorway begins to warp, cracks appear, which will undoubtedly lead to a large loss of heat.

You can make a simple base as follows:
Clear the area where the veranda will be located, then excavate the site 1.5-2 meters deep. The easiest way to do this is with an excavator, but you can also do it yourself by simply calling your partners for help.


If you chose the shape of a hexagon, then you will need 6 pillars for the base. They need to be deepened a little into the ground, then we fill in a pillow of sand and gravel, then a waterproofing layer is laid.

The soil is poured on top, remove the excess soil from the site so that it does not interfere with further work.

Location
First of all, it is necessary to develop a construction project, and for this you need to clearly understand why you need it, what kind of veranda you want, what kind of view you will observe from it. The veranda can be used as a hall, dining room, children's playroom, make a winter garden, a living room out of it.
Next, you should decide where you want to place it:
- on the corner;
- from the end;
- from the facade of the house.
gazebo
Important! Do not place the entrance to the veranda opposite the entrance to the house - because of this, there will always be a draft on the veranda.
The recommended width is 2.5 to 3 m, it will be difficult to place furniture on a smaller veranda. It is advisable to design wider extensions near large two-story houses.
The most common shape for such an extension is rectangular, but it can also be in the form of a polygon or a circle.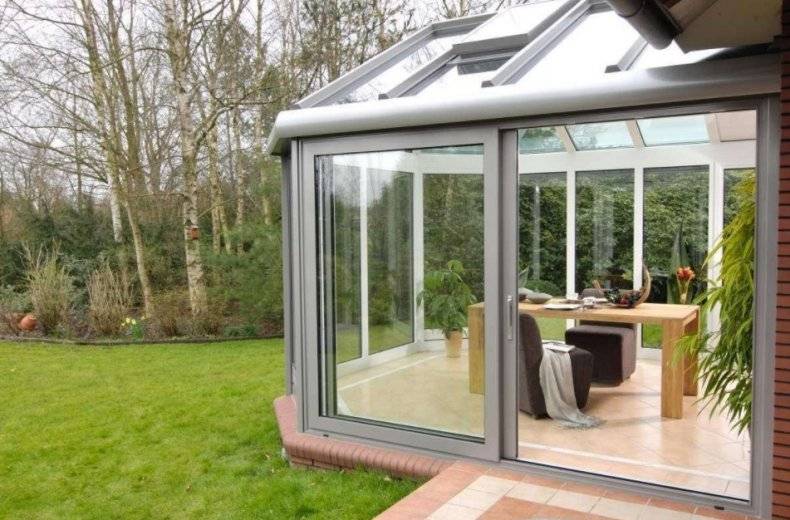
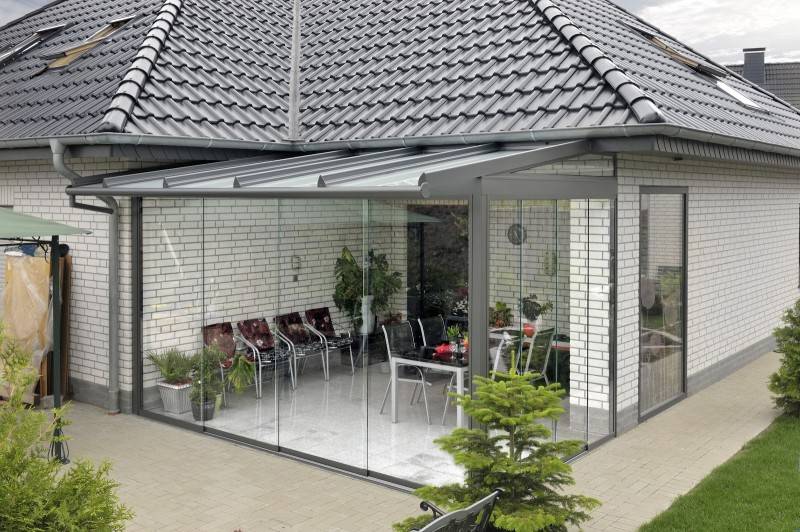
The veranda can be open (no walls) and closed. If you put sliding panels, then a closed building can easily turn into an open one if necessary.
The construction and operation of a greenhouse or a greenhouse can significantly save money and enrich the table with fresh vegetables, it remains only to decide on the construction option - Breadbasket, Butterfly, Snowdrop, Nurse, simple design, greenhouse according to Mitlider, made of polypropylene or plastic pipes, with a thermal drive, made of polycarbonate, wood.
The foundation for the veranda to the house
Before you start pouring the foundation, you need to determine its appearance. The most widespread is the columnar foundation for the veranda, since it makes it possible to attach the veranda without reference to the main foundation of the house. However, a heavier veranda needs a strip foundation.
An important point is the analysis of the soil, which makes it possible to reasonably choose the foundation for the veranda to the house. The following factors are taken into account: the ability of the soil to absorb moisture, the homogeneity and composition of the soil, the level of freezing, the height of the groundwater, the stability of the soil.
In addition, the choice of the basis for the extension will be influenced by the construction of the foundation of the house and the condition of the walls (wall material).
Having decided what foundation for the veranda is better to do, they make markings for the strip or indicate the place of installation of the pillars (supports) under the pile.
Note. For a small wooden veranda, it is enough to install pillars at the corners of the structure. For long and wide, provide additional posts along the length / width of the base. The recommended installation pitch of the supports is 500-600 mm.
How to make a columnar foundation for a veranda
dig holes for posts about 1 m deep
It is important to know that the depth of the foundation for the veranda depends on the depth of the foundation of the house (should be the same) and the level of soil freezing; at the bottom of the pit, a pillow is made from a mixture of rubble and sand
They can be covered in layers, first sand, then crushed stone or gravel;
at the bottom of the pit, a pillow is made from a mixture of rubble and sand. They can be covered with layers, first sand, then crushed stone or gravel;
a concrete base is poured;
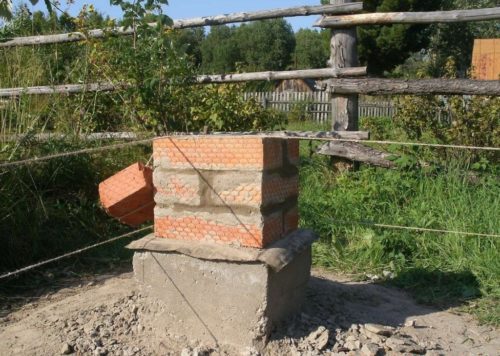
the support pillars for the columnar foundation are laid out / inserted:
Veranda at the level of the 2nd floor of the house The ground part of the pillars is brought to the height of the main foundation of the house. If the basement is high, you need to bring the extension to the level of the house.
An example in the photo (the first floor is used as a garage, the veranda is at the level of the second floor).
Supports for the construction of the veranda The installation site is covered with sand to eliminate and strengthen the gap between the post and the soil.
Strip foundation for the veranda The construction of a veranda with a large mass requires pouring the strip foundation. To do this, you need to dig a trench, set up the formwork (just above the required foundation height), pour concrete. The process of complete hardening of concrete must be accompanied by periodic wetting with water for uniform hardening of the concrete mixture.
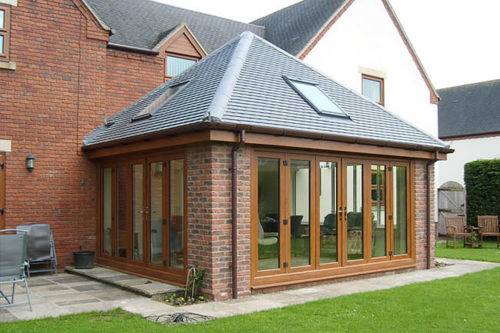
Brick veranda attached to the house
If a metal or wooden structure is considered universal and can be used for almost any type of private house (frame, log house, capital), then a brick veranda with plastic windows is suitable only for capital construction.
Here, unfortunately, there is no way to give a diagram or a sketch with a layout according to materials - the construction of a brick or block is too individual. However, the main stages and nuances can be distinguished:
- for such a structure, columnar and pile foundations are not suitable; a serious strip base with good waterproofing is required. It can be made monolithic or block, the depth is calculated depending on the depth of soil freezing in a given region. Read more about the structure and waterproofing of foundations in the article;
- the structure can be solid - with full-fledged walls that take the load from the roof - or with columnar supports. The second option is more economical in terms of material and time costs. Columns with 4 or more bricks in a row of masonry are necessarily arranged at the corners of the veranda and, if its area is large, additionally in intervals. The photo above shows just such an option, with columns, the space between which is filled partly with metal-plastic windows, partly with single-row brickwork;
- the overlap of a brick veranda can be arranged on wooden beams or on metal trusses, depending on the weight of the roofing material;
- the installation of metal-plastic windows in this case is carried out after the initial finishing of the walls and the installation of the roof. Otherwise, there is a high risk of damage to frames and sashes under the influence of a suddenly increased load or during construction work;
- The best finishing option for a brick veranda is considered to be facing bricks and tiles, including imitating wild stone, plaster, painting.
To build a veranda that is most successfully combined with the house, you will have to use embedded metal parts that will connect the main wall of the house with the new extension.
The main connection goes at the level of the foundation, the strip base reinforcement for the veranda is connected to the foundation of the house.
The connection between the walls / columns of the veranda and the wall of the building is carried out in the same way.
If possible, roof trusses / rafters are also driven into the main wall of the house. This will allow better waterproofing of the seam between the wall and the canopy, and will increase the stability and strength of the structure as a whole.
How to attach brick or foam blocks
Beautiful brick veranda
This is already a capital structure. If you do the work according to the rules, then it will be comfortable in such a building at any time of the year. In the summer heat it will be cool there, and in the winter cold it will be warm. A brick veranda is distinguished by its durability, fire safety and ease of maintenance.
But it also has a drawback. Namely, heaviness. Therefore, a strong foundation is required for its construction.
When the foundation and sub-floor are ready, you can start laying. Spoon masonry is distinguished, in which the total thickness of the walls is 12 cm; bonded masonry, with walls 25 cm and chain masonry, with walls 38 cm.
- Attach a mooring cord to the opposite ends of the base. Corner bricks are being installed along it.
-
Once the corner bricks have been exposed, fill in the spaces between them using your preferred masonry method. The bricks are held together using a standard cement mortar. Check the evenness of the masonry with a building level. Perform work to the height you need, remembering to leave openings for windows and doors.
- To build a pitched roof, you need to make a wall 1 row lower, which will fall on the lower part of the roof slope.
- After you have laid out the last row, you need to install an armored belt. On top of the walls, set the formwork, the height of which is 7 cm, set the anchor bolts in the corners, lay the reinforcement and pour concrete.
- After the concrete has hardened, attach the strapping to the bolts using wooden beams with a section of 100 * 100 mm. And then the order of the rafters is the same as in a wooden roof.
Calculation of the number of bricks for the terrace (table)
| Masonry size | Length | Width | Height | Number of bricks without taking into account the thickness of the mortar joint, pcs. | Number of bricks, taking into account the thickness of the mortar joint 10 mm, pcs. |
| 1 m3 of single brickwork | 250 | 120 | 65 | 512 | 394 |
| 1 m3 thick brickwork | 250 | 120 | 88 | 378 | 372 |
| 1 m2 of masonry in half a brick (masonry thickness 12 cm) | 250 | 120 | 65 | 61 | 51 |
| 1 m2 of masonry in half a brick (masonry thickness 12 cm) | 250 | 120 | 88 | 45 | 39 |
| 1 m2 of masonry in 1 brick (masonry thickness 25 cm) | 250 | 120 | 65 | 128 | 102 |
| 1 m2 of masonry in one and a half bricks (masonry thickness 38 cm) | 250 | 120 | 65 | 189 | 153 |
| 1 m2 of masonry in one and a half bricks (masonry thickness 38 cm) | 250 | 120 | 88 | 140 | 117 |
| 1 m2 of masonry in 2 bricks (masonry thickness 51 cm) | 250 | 120 | 65 | 256 | 204 |
| 1 m2 of masonry in 2 bricks (masonry thickness 51 cm) | 250 | 120 | 88 | 190 | 156 |
| 1 m2 of masonry in 2.5 bricks (masonry thickness 64 cm) | 250 | 250 | 65 | 317 | 255 |
| 1 m2 of masonry in 2.5 bricks (masonry thickness 64 cm) | 250 | 250 | 88 | 235 | 195 |
Recommendations for design and construction in the house
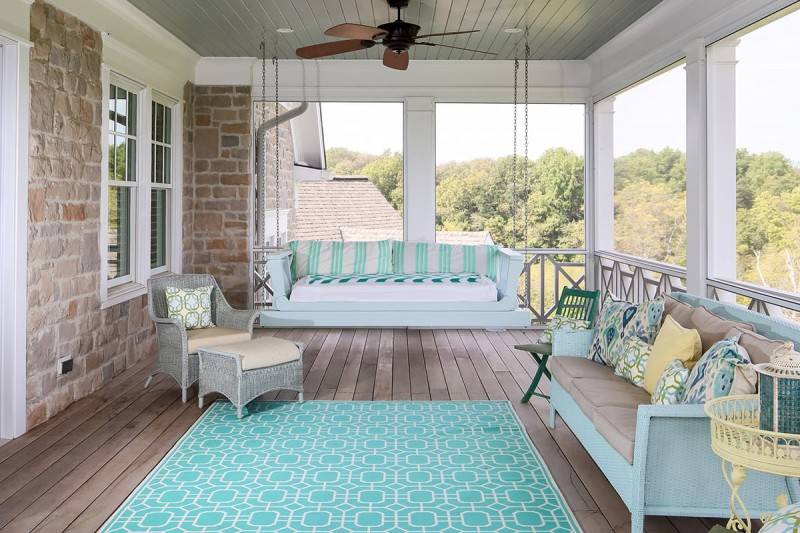
Modern verandas are rooms that have not been cluttered with work clothes and household utensils for a long time. Now these are full-fledged premises and extensions of a residential building, the arrangement of which is approached with all seriousness and responsibility.
Design is the most important stage in the construction of any structure, including a veranda. At this stage, you need to create a sketch on which a general view of the structure will be drawn by hand, and a detailed design drawing, indicating all measurements and the necessary materials for construction. The more detailed the project is, the easier it will be to build later. After all, you will know in advance how long, for example, a board you need for this or that element, as well as how many such boards are needed. The project will help you calculate the amount of material and the approximate cost of building a veranda.
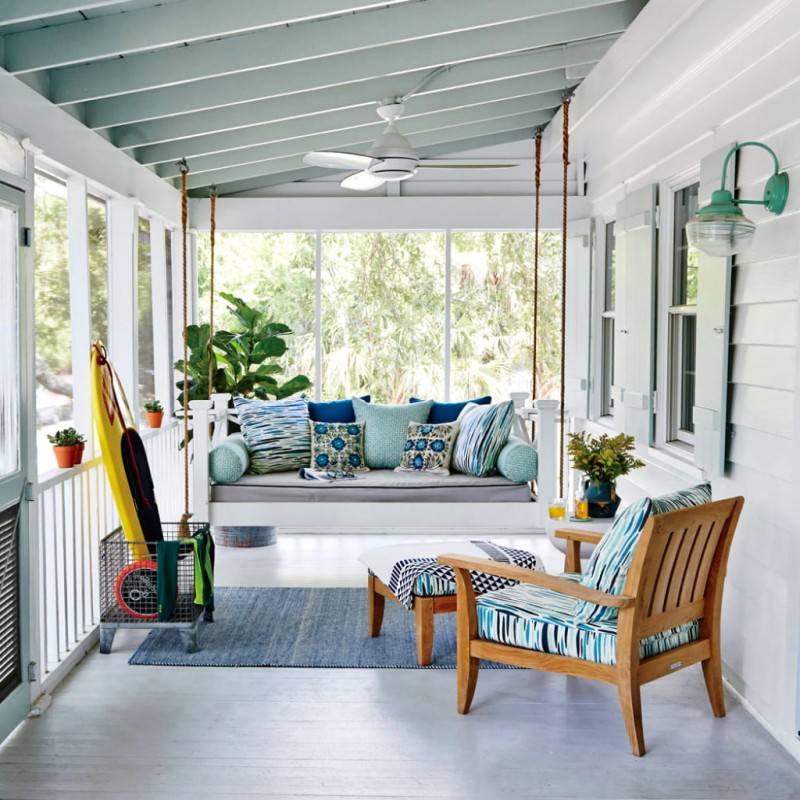
There are many projects for the construction of an open veranda
- Decide on the purposes for which the veranda will be built and at what time of the year you will use it. If in the cold season you are going to actively spend time there, then it should be glazed and insulated. If only in the summer, then you can build a terrace.
- The next step is to determine the location and size of the building. The size is selected individually for each. For example, for a family of 5 people, a veranda of 12 m2 will be enough. Usually it is located along one of the walls of the main building and is hidden from the eyes of strangers. There should be an entrance to the common house from the veranda. The ideal location of the veranda is a place away from the eyes of neighbors and the view from it should be maximally conducive to relaxation: to the garden, flower beds, playground. But not for outbuildings and a vegetable garden.
- Always consider the street side view of the veranda. It should not only be comfortable and cozy from the inside, but also look attractive and harmonious from the outside.
- It is not just necessary to legalize the extension, but it is done without fail! To do this, you need to make a design and come with it to the architecture department at your place of residence. The specialists of this department will take your project for study, if necessary, changes will be made to it and you will be issued a building permit. This will take about 2-3 months, so it is best to submit your documents for consideration in advance, before the construction season begins.
- For greater harmony and aesthetics, experts recommend choosing the same material for the construction from which the main building is made.
- The foundation of the house and the veranda should be at the same height. If the veranda is being erected to an already finished house, then a columnar foundation is made. Floor insulation takes place during the construction phase.
- The veranda with the house should become, as it were, one whole and fit tightly to each other so that precipitation does not seep into the extension.
-
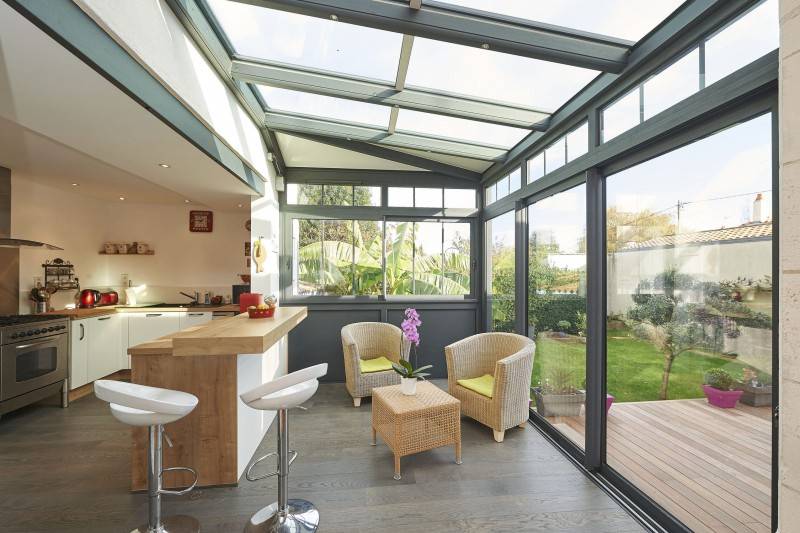
The veranda is by definition a very bright room, which means that it should have as many windows as possible. It can even be made fully panoramic. To use such a building in the cold, you can make windows from heat-insulated double-glazed windows.
- Some people heat the veranda, if necessary, using a conventional heater. And there are those who put a fireplace there.
- Blinds or curtains will be an escape from the sun's rays in the heat.
How to make the foundation correctly
To build a veranda, it is enough to erect a columnar or strip base, the depth of which will be equal to the depth of the base of the house. Experts do not recommend associating the main foundation with the base of the extension due to the differences in weight. They will not shrink equally and this can lead to deformations of the extension. Leave a gap of 30–40 mm between these two substrates.
The choice of the correct type of foundation depends on what material the extension will be made of and on the characteristics of the soil. For example, for the construction of heavy brick extensions, it is better to make a strip foundation, and for wooden lungs, a columnar base is enough.
Tape base: step-by-step construction instructions
The dimensions of the foundation for the extension must be the same as the dimensions of the base of the house.
-
Dig a trench along the entire perimeter of the future walls of the veranda.
- Align the bottom and sides of the pit, tamp the bottom.
- Install timber or panel formwork.
- The next stage is sand and crushed stone pillow. Each of the materials is poured in a layer of 100 mm. Everything compresses well.
- Lay a reinforcing net, the rods of which are 10–12 mm, and the cells are 100x100 mm.
- Pour in a concrete mixture, which is made from 3 parts of sand and 4 parts of rubble and water.
-
Smooth out the concrete and leave to dry completely. It takes about one month.
Columnar base
For light timber or polycarbonate verandas, the construction of a columnar foundation is ideal. The recommended depth of the pits for the posts is 800–1100 mm. For a small veranda (3x4 meters), it will be enough to install support structures only in the corners. But for greater reliability, it is better to insure yourself and make intermediate pillars. The distance between the supports should ideally be 80-100 centimeters.
The parameters of the pillars must be carefully calculated
- Dig holes for the supporting structures. Using a drill will greatly facilitate the task.
- Make a cave-crushed stone pillow for the posts. Sand with a layer of 150-200 mm, and crushed stone 100 mm. Tamp each layer well.
- Make timber formwork and lay the reinforcement net.
- Pour concrete to the full depth of the hole and let it harden.
- After hardening, coat the concrete structures with bitumen.
- Remove the formwork and cover all gaps with sand.
- The ground part of the foundation is made of bricks. The height of their construction should be equal to the height of the base of the house.