How to choose material for a garden path
 The use of natural stone for a country path
The optimal materials for garden paths should be selected in accordance with the terrain and climate, and the intensity of use. Helpful hints:
If there are strong temperature changes in your area, then choose strong and durable coatings: natural stone, brick or concrete. Tracks made of similar materials are ideal for intensive use, increased load. True, laying such coatings requires serious surface preparation, and they will become slippery in the cold season.
In addition, natural stone is expensive.
If you're looking for a simpler option, look at gravel or tennis. The main thing is to make curbs that will not allow the resulting track to creep.
It won't take long to lay both coatings, but they are short-lived, so you will need to add new material from time to time. Gravel or tennisite tracks are not suitable for heavy use.
The original choice will be wood or plastic, but both options are inferior in strength to stone counterparts. The tree will rot without proper processing, and the plastic will fade under the influence of the sun. True, building garden paths from plastic products is quick and easy.
The grass path looks aesthetically pleasing and original, but it requires serious maintenance. In summer, such a path does not heat up, absorbs dust. As seeds, white bent, bluegrass and other plants that are resistant to trampling are used. It may be inconvenient after rain, as the soil will get wet and the grass path will become wet.
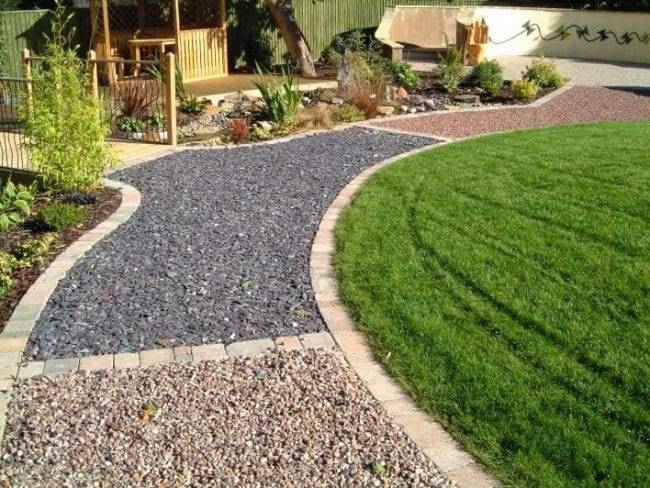 Gravel and crushed stone paths
Choose material depending on the intended configuration, style of landscape design. Recommendations:
- Wooden cuts are laid in different ways: in a chaotic manner, from large cuts to small cuts, etc. Fill the gaps with shredded tiles.
- Concrete slabs are suitable for creating a mosaic. With their help, you can make decor from an uncomplicated pattern and simple ornament to a complex mosaic in the form of waves, wriggling lines.
- The brick path looks beautiful in a stepped or checkerboard pattern.
- Dark stones are well suited for decoration. Colored pebbles can be poured on the sides.
Wooden paths
Recently, environmentally friendly natural materials are gaining great popularity. One of the most environmentally friendly paving stones is wood. The choice of materials is incredibly wide: from expensive decking with various special mounts to simple cuts. And the quality of wood can be anything. Such a garden path can become a real highlight of your suburban area, because it carries naturalness, which fits perfectly into the landscape and is combined with plants.
What types of wooden paths are there?
- Paths from wood cuts. After construction, at the beginning of the development of the site, and in many other cases, you may be the owner of short logs, fallen tree trunks and other wooden illiquid items, from which you can build beautiful paths. They look very picturesque, can carry a heavy load, and, if properly laid, will serve for quite a long time.
-
Tracks made of boards are rather a temporary option, which also has a right to exist. And in the first year after construction, when landscape work has just begun, and in general - an irreplaceable option. Of course, there is little beauty in them, but they are cheap and functional.
-
Paths from wooden pallets. In recent years, pallets have become a very fashionable design element. What is not made of them - and furniture, and small architectural forms, and even a patio. The good thing about such tracks is the speed of manufacture, mobility and price.Oddly enough, such paths can also be decorative - you can use various styling options, toning and other tricks. As a rule, do-it-yourself country paths from pallets are temporary. Before and after construction, they are irreplaceable.
However, there is one important exception when the pallet path becomes a permanent feature of the garden: we are talking about forest areas. Traditional paving of garden paths has a very traumatic effect on the existing undergrowth: excavation, forced pruning of roots - all this can destroy the biodiversity that has developed over centuries
In this case, wooden pallets are just a lifesaver. They are easily installed, dismantled and repaired, do not require special maintenance, and most importantly, they take care of the forest. And, if you're lucky, this track will become almost free for you.
You can also disassemble the pallets into planks and use them to equip the walkway.
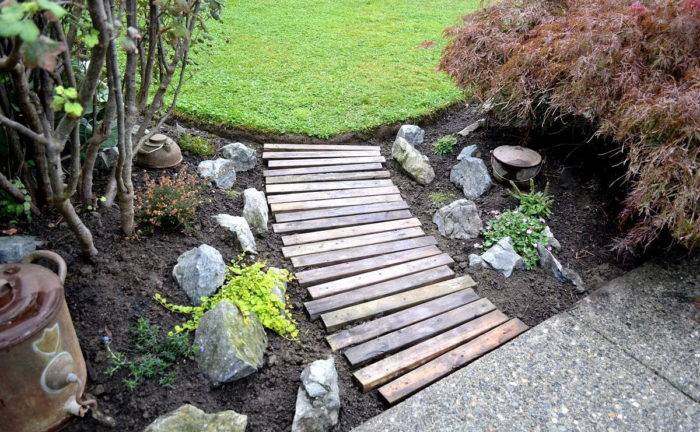 Pallet tracks
The fourth type of wooden paths is decking, or decking. This is a material already prepared for laying, which can be smooth and rough, have the color you need and combine with the decoration of the house, it can be in the form of a board or modular parquet. Of course, country paths made of such material look luxurious and well-groomed, are easy to use, do not slip due to the treated surface, are not susceptible to decay, and all this splendor has a significant disadvantage - they are quite expensive.
Decking
Basic rules of care
The rubber road surface does not need any special maintenance. It is enough to clean it from dirt, sand and dry leaves in time with a broom or a construction vacuum cleaner. Stubborn dirt can be cleaned with detergent using a stiff bristled brush. It is recommended to clean snow only with a plastic or wooden shovel. A metal shovel can damage the coating surface. You can quickly clean the lanes by simply washing them with a jet of water. The hose must be kept at least 40 cm from the surface of the flooring, as there is a risk that the jet can wash out the adhesive and damage the strength of the coating.
We carry out the laying of tiles with our own hands
Consider installing decking and modules to create an alley in the garden.
In the first case, the material consists of a substrate - it is responsible for air exchange, drainage of the upper part.
It is allowed to lay garden parquet on:
- compacted soil;
- concrete;
- a layer of gravel or crushed stone;
- boards.
The exception is sand. It does not fit due to the fact that it gives a drawdown.
The detailed procedure is as follows:
- The site is marked. Rope and pegs can be used.
- A 20 cm layer of soil is removed along the entire length of the future track.
- The bottom is cleared of vegetation. It is rammed.
- On the sides, pipes are laid for drainage.
- For the strength of the fastening, it is recommended to fill in 5 cm of gravel, and then prepare and pour out the cement-sand mortar. The screed height should not exceed 3 cm.
- The decking is being laid. The plates are interconnected with locks. Excess pieces are removed with a saw.
- The conformity of the surface to the horizontal plane is checked using a level.
Photo: building level or spirit level
- The lining of the path is made with curbs. They should be 5 cm higher than the path.
In the case when the site is located at a slope, start mounting from the highest point.
Stacking the modules is even easier. Any coating can serve as a base. 10 cm of sand is poured into the prepared trench, compacted. The tile legs are inserted into the slots until they click into place. The connection is made in sections. The edges are adjusted with a jigsaw. The finished structure is compacted into the base and cleaned of debris.
Rubber crumb tile
This category is represented by a variety of color palette and tile shapes. Its many-sided colors and textures allow introducing interesting design ideas.
Some samples of rubber tiles have docking cuts at the edges, allowing you to connect the modules to each other without the use of glue. Combining tiles with other interior elements, you can make an unusual accent on certain sections of the street area.
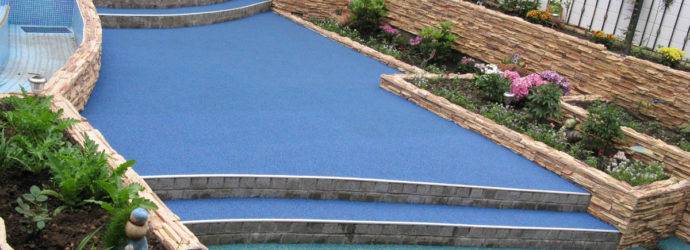
The installation of rubber tile tracks on a solid base is similar to roll material.
Rubber crumb as a street covering will perfectly cope with its task, save you unnecessary hassle and embellish the estate in a wonderful way.
Advantages of rubber coatings
Decorating an outdoor space requires attention to detail.
This applies both to your own site and to the community courtyard.
The first step is to pay attention to the arrangement of paths near the house and recreation areas. It can be rubber, concrete, plastic coating
DIY rubber coating for paths in the garden
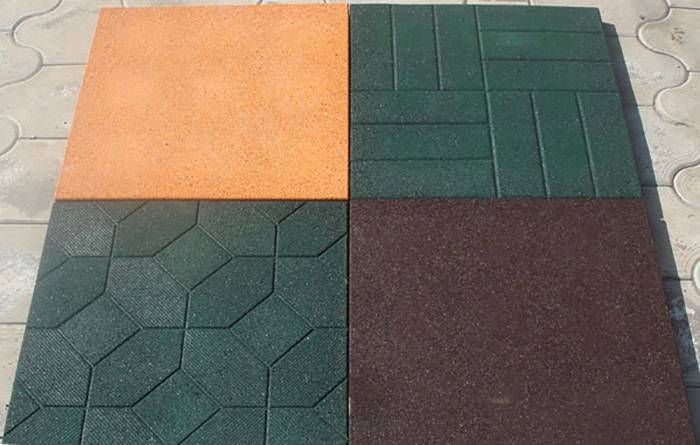
For tracks, rubber tiles are most often used.
There are two ways to install rubber tiles:
- On the ground;
- On a solid foundation.
Laying on the ground
This method is often used for the garden. For laying on the ground, tiles with a thickness are used:
- 3 cm;
- 4 cm;
- 5 cm;
- 8 cm.
Of course, the foundation needs to be prepared.
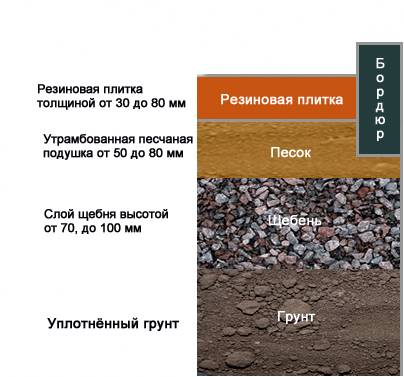
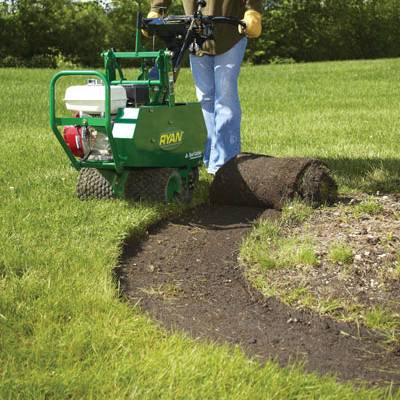
We remove the top layer of soil (8 - 10 cm), why pour from 7 to 10 cm of crushed stone, then cover it with sand (and tamp it well). Tiles are already being laid on top.
On the sides, you can make a rubber border, it will give the structure of the fortress.
Often, bushings are also used for connections, which are inserted between the tiles.
On a solid foundation
For this, thinner tiles (for example, 2 cm thick) are often used.
For example, you have good quality asphalt or concrete base (no cracks, chips).
- We prime the surface with turpentine impregnation with polyurethane glue (1: 1).
- Leave it to dry for an hour.
- We apply a rubber-bitumen mastic to the surface (If the glue comes out on the front part, remove it immediately, after drying, the glue will be much more difficult to remove).
- Lay the tiles on top with a minimum gap between them.
- A rubber hammer is tapped from above.
- You can walk on such a tile after 2 days.
Rubber coating for sites in the country
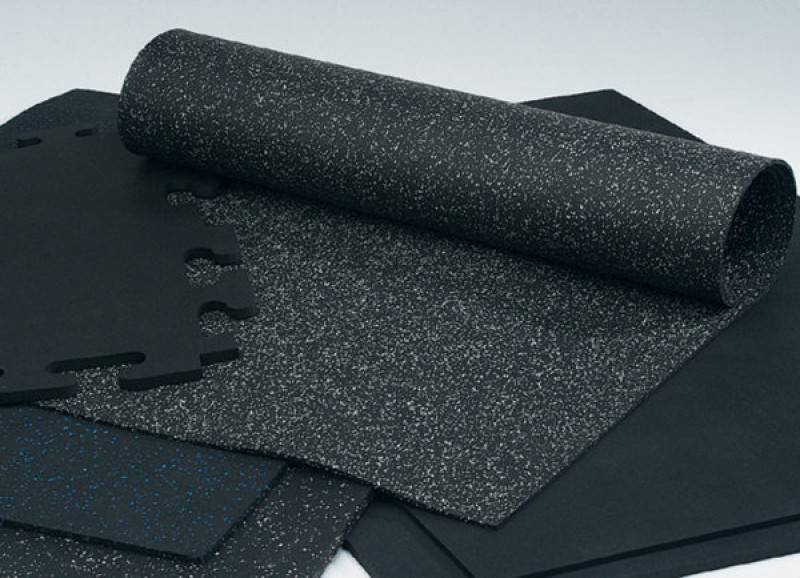
The choice of rubber coating directly depends on the purpose of the site for the summer cottage. If this is a common platform for chairs and a table (for example), then you can use both rubber tiles and rubber rolls (they are also called roll grass).
But, if, however, this playground is intended for children and there are already many play simulators (slides, horizontal bars, swings), then a crumb of rubber.
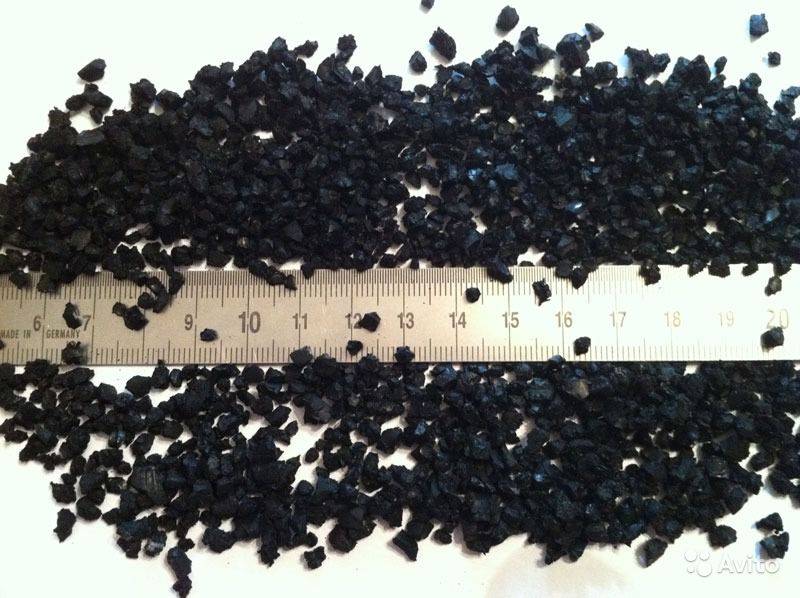
As you can imagine, cutting and sawing out all the contours of this site will take a lot of time and effort (by the way, then this puzzle will still need to be laid and secured). Therefore, rubber crumb is used for such sites.
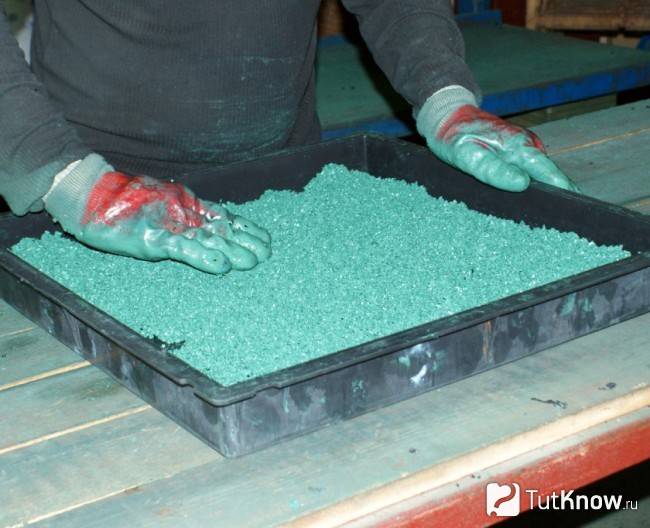
Crumb rubber is made from old tires or other rubber-containing materials. There are different sizes of granules, depending on the purpose.
Crumbs are dyed during the production process, so you can collect crumbs of different colors and make bright drawings, ornaments on the site.
As for the installation methods, there are actually two ways:
- Spraying;
- Styling.
But more often they use the second method, since it can be done independently without the involvement of specialists. And the first method requires a spraying machine.
So below we will consider the sequence of laying the crumb rubber.
DIY rubber coating for sites in the country

For styling you will need:
- Rubber crumb of the selected color;
- Polyurethane-based binder (this is glue);
- Solvent;
- Plastic buckets - 2 pieces;
- Hand mixer;
- Measuring bucket;
- Roller for laying.
Please note that you can lay the crumb at temperatures above 10 degrees.
Sequence of work:
- We prepare the surface for laying (if there are metal structures, then we clean off the rust from them; remove oil stains; grass) and seal cracks in the asphalt (if asphalt is chosen as the base).
- We remove dust and degrease the surface with a solvent.
- We take polyurethane glue and spread it over the entire surface (this is our primer)
- For convenience, you can install beacons to obtain a flat surface.
- We prepare the mixture (7 liters of crumbs to 1 liter of glue), well outweigh the mixture with a mixer.
- We lay the mixture over the surface (with a layer of 1 cm, although a little more).
- We level it with a spatula (or with a lighthouse rule).
- After that, we take the roller and re-level it (but do not press hard, a heavily rolled carpet will be hard and tough).
- We are waiting from 12 hours to a day and then you can use the surface.
Rubber plates and crumb rubber is a relatively new material that is just beginning to gain popularity, but has already become an indispensable attribute of playgrounds and sports grounds.
Self-laying on different types of substrates
Rubber tracks and platforms can be arranged both on a solid foundation, most often on concrete, and on the ground. The principle of stacking the material in both options is similar, but there are technological differences.
Priming
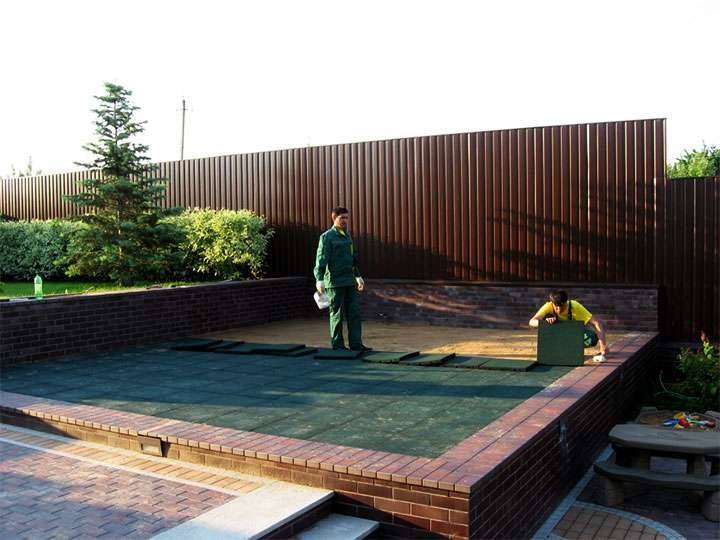
Garden paths can be made by laying rubber flooring directly on the ground. For this, tiles with a thickness of 30-50 mm or paving stones - 80 mm are used. It is necessary to select a tile with bushings included.
The subgrade requires the following preparation:
- All weeds and roots are removed from the site.
- The top layer of soil is removed and tamped.
- A layer of crushed stone with a thickness of 80-100 mm is laid on the compacted soil.
- The crushed stone layer is poured with a solution of cement and sand, prepared in a ratio of 1: 3.
- After the base has dried, the rubber tiles can be laid.
Installing a curb will add not only aesthetics and completeness to the rubber flooring, but also strength.
Since the drainage of rainwater when laying rubber pavement on the ground is natural, there is no need to make a slope.
Solid surface
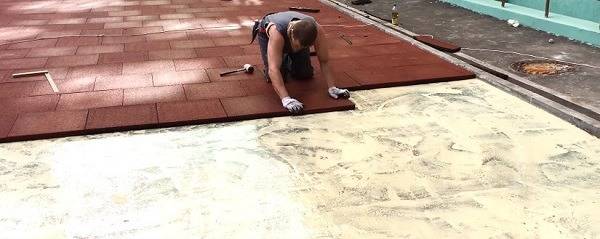
Laying the rubber coating on a solid base is used to create urban pedestrian areas and playgrounds. The most reliable is a concrete base, but asphalt and wood are also allowed. The main requirement for it is the absence of large deformations and cracks. Minor flaws are acceptable.
All types of rubber flooring can be laid on a solid base. First, it is primed either with a special primer for concrete, or with polyurethane glue mixed with acetone, after which the same glue is applied under each tile with a notched trowel or roller. The tile must be pressed to the surface as tightly as possible and tamped.
Another option for the device of rubber tracks is crumb stacking. A flooring made from a mixture of crumb rubber and polyurethane glue is also called a self-leveling floor. Working with it includes the following stages:
- Preparation of the concrete surface. Cleaning from dirt and dust, applying a primer on concrete.
- Preparing a mixture of crumb and glue. Approximate material consumption: per 1 sq. m of coating 10 mm thick, you need 7 kg of crumbs and 1.5 kg of glue. To dye black crumbs, you can add a colored pigment to the mixture: the mixture in this amount will need 150-300 g of pigment, depending on the required color intensity. The coating material is mixed in a concrete mixer or in a container using a mixer.
- Laying the mixture on the base. The mixture is smoothed with squeegees and a rolling roller treated with an agent that prevents it from sticking to the coating surface.
After a day, you can walk along such a path, and for heavy loads you need to withstand a week.
Clinker brick garden paths
Brick is often used as a covering. It is easy to install, presented in a wide range of warm colors, and fits well into modern-style gardens.

It is worth emphasizing that we are talking about clinker brick - a specialized coating.The use of building bricks makes the coating short-lived.
Design idea: a brick path looks complete with a curb, which can be created from the same brick, placing it on the edge, or using stone blocks of various shapes. The border may not protrude in height, but serve as a visual border in a different location relative to the main picture.
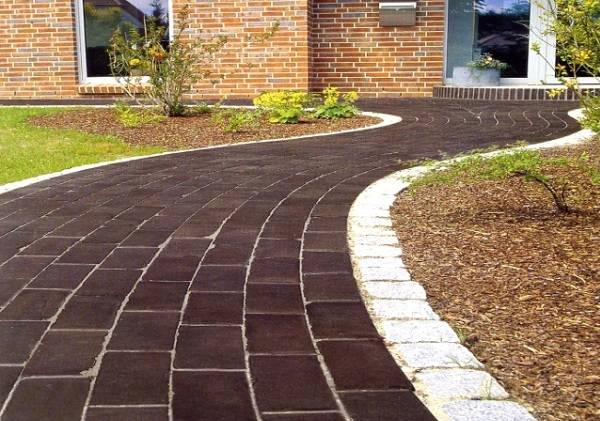
Advantages: a sufficiently strong coating with a long service life at an affordable price relative to the cost of natural stone.
Disadvantages: brick laying should be carried out on a concrete solution, since sand does not provide reliable fixation of the material.
The cost of installation services in companies in Moscow and St. Petersburg
In order not to waste time on self-assembly of the material, you can invite the masters to help.
Average prices in Moscow and St. Petersburg are as follows:
- rolling lawn flooring - 220 rubles / m2;
- preparation of a gravel base - 1100 rubles / m2;
- laying a modular coating - 500 rubles / m2;
- installation of garden parquet (depending on the type of wood, manufacturer) from thermoel - 3200 rubles / m2.
If the owners want to buy and manually lay roll tracks, then their cost will range from 1,500 to 2,000 rubles per roll.
Prices for certain types of plastic coatings differ significantly, since different raw materials and production technologies are used. For laying a beautiful, durable track, we recommend choosing a decking, as a seasonal track - modular slabs.
Rubber crumb tile
The rubber tiles are separate pieces. Most often these are squares with a side of 50o mm. Available with straight edges, or with formed cuts / locks. The thickness of the material can be from 20 mm to 50 mm. With a tile thickness of 20-30 mm, the coating turns out to be tough, with low shock-absorbing ability. If you want the rubber covering for playgrounds to have a springy effect when dropped, you need slabs from 35 mm to 50 mm thick.
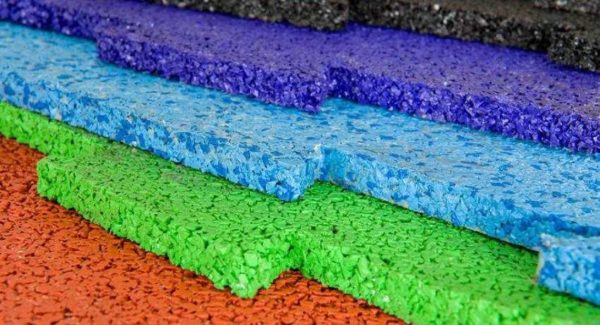
The smaller the granule size, the more uniform but also the harder the coating
Which one is better to choose
From the point of view of reliability, options with locks are more attractive. But in any case, everything fits on a platform limited by borders (curbs), the tiles are laid close - even if you want to take out one fragment with smooth edges, it is very difficult. So you don't have to worry about this, and laying flat tiles is easier.
Better to attend to the quality of the tiles. It is made from compressed crumb rubber. Colored, as a rule, is made multi-layered. At the bottom - a cheaper black crumb, at the top - a colored layer. In any case, it is better to touch and crumple it. Literally. It is clear that a plate with a thickness of 35 mm or more cannot be bent into a bagel, but some elasticity must be present. Having turned it in different directions, you should not see any changes. No cracks or creases should appear on the front or on the wrong side. Edges and edges must not peel off. They must be durable, not subject to mechanical stress.
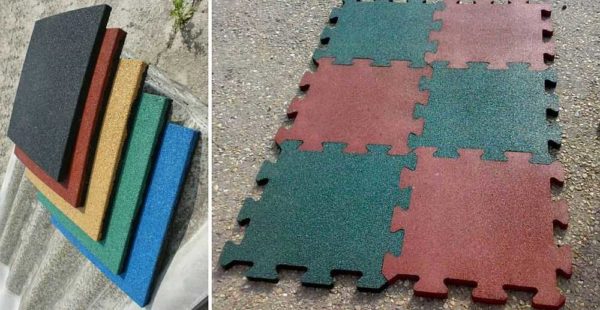
Tile from crumb rubber for playgrounds
In tiles with smooth edges, some manufacturers make bevels - this is such a small bevel around the edge of the tile. Perhaps this is how the tiles themselves look better. But it is better to have a rubber covering for a playground absolutely even. So that nothing is poured into these grooves and does not fall asleep. It will definitely be easier to clean this way. In general, you have to choose, but a flat surface seems more preferable from the point of view of practicality.
Styling features
Lay the rubber crumb tile on a flat base. It can be concrete, dry screed, asphalt. There is a special type for laying on a compacted gravel bed, on top of which a layer of sand is laid and leveled. Special tiles are thicker and have a layer of denser backing. The laying technology itself is similar to the order of laying paving slabs - level the sand into a level, lay out the tiles, and precipitate it with a rubber mallet.To make the coating more stable and the seams do not rise, screeds are driven into the ends of the tile (into the already laid tile, then the next one is placed on it).
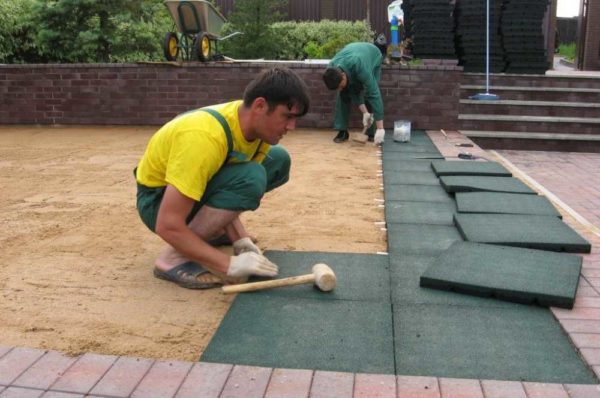
Rubber flooring for playgrounds: Laying crumb rubber tiles on a sandy base is similar to laying paving slabs
There is another technology that makes it possible to obtain an almost monolithic coating of rubber tiles. When laying, we coat the end with polyurethane glue, butt it tightly with the previously laid row. The joint is fixed with several staples from a construction stapler (steel staple 10 mm long). There are 3-4 staples for each seam. When laying the first row, we coat only the right or only the left end, in the second and all subsequent ones - two adjoining ones. After the glue dries (about 24 hours, but you need to look at the package), we take out the staples with a stationery staple remover (it is also a stapler, a staple remover, a staple remover, a dragon) or prying it off with a screwdriver. As a result, we get an almost monolithic rubber coating for playgrounds.
Also, rubber tiles for playgrounds can be laid on a concrete screed. In this case, polyurethane glue is required. Consumption - 1-2 kg per square meter.
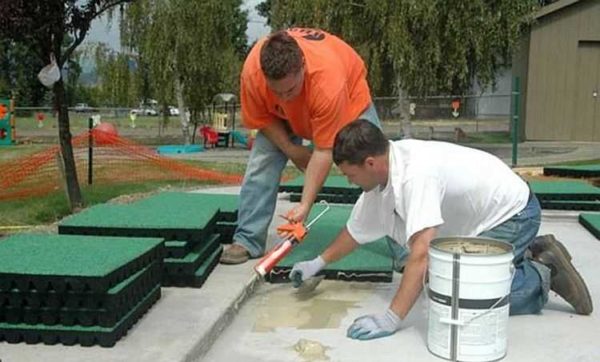
When laying on concrete, use glue
First, the screed is cleaned, dried, then covered with a layer of primer (60% glue + 40% white spirit). There is no need to wait until the primer is dry or absorbed, so you can prime in small pieces to make it easier to work with. Then each tile is coated with glue, laid on the base and pressed well. For high-quality gluing, each laid 1-2 square meters is rolled with a heavy (at least 20 kg) roller.
In both cases, when laying the rubber covering for the playground, try not to stain the front surface with glue. It doesn't rub off. The trace still remains. Yes, this is not so noticeable after a couple of weeks, but it still spoils the mood.
Bulk garden paths
Gravel, crushed stone and pebbles of different fractions and colors are used to create fill paths - ideal materials for winding, winding paths. Filled paths are easy to install: just draw the boundaries, remove the top soil, set the curbs and fill in the material.

To preserve decorativeness for a long time, the soil must be shed with herbicides before laying to destroy weeds. Such a coating dries quickly after rain and does not require water drainage.

Design idea: gravel and pebbles go well with natural stone and wood. Bulk paths look good between trees and flower beds in the recreation area.
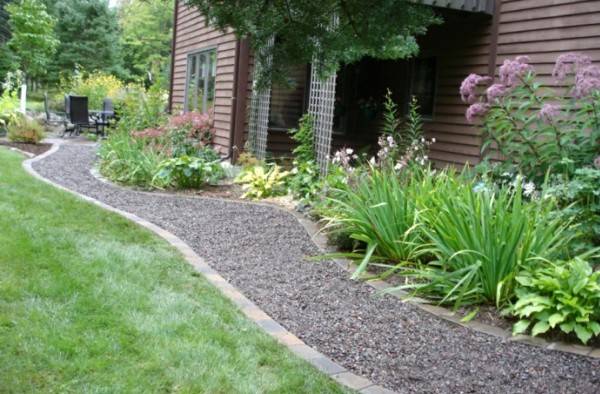
Advantages: low cost, ease of installation, decorative effect.
Disadvantages: it is inconvenient to walk in some shoes, it becomes overgrown with grass rather quickly and requires maintenance. It is difficult to sweep such paths, which leads to their clogging.
What to make paths in the country cheap and beautiful from?
Garden paths, in addition to their direct practical purpose, play an important role in landscape design. The presence of well-groomed graceful alleys gives the garden elegance and creates a pleasant impression of the owner of the site.
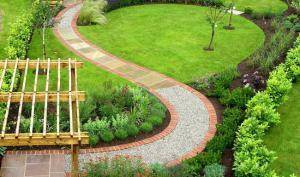
For example, for a rustic style, paths made of paving stones or decking are appropriate, and paths are suitable for a majestic representative garden with a wrought-iron fence on a brick foundation. made of stone or paving slabs.
Recently widespread metal profile fences are in good harmony with concreted and crushed stone paths and plastic flooring. In addition to being consistent with style, the material of the tracks must meet expectations in terms of practicality, durability, ease of installation and cost.
When drafting a network of garden paths, you can plan a wide path to the main entrance from more expensive material, and secondary narrow passages in the garden from a combination of cheap materials. If there is a backyard with a wicket for removing household waste and plant debris, then a wide path is also needed there, but from a more practical and durable material.
When the design of the tracks is drawn up and the dimensions are calculated, it is time to start choosing the material and calculating the estimated costs.
A little about designing tracks
To begin with, I want to remind you that a garden path is an indispensable element of all gardens, no matter how large they are and wherever they are.
This is an important connecting link that will say a lot about your garden, about the feeling of beauty, about comfort, about hospitality and about yourself. Therefore, I ask you to approach the design with all care, because redoing an unsuccessful option is long, expensive and labor-intensive.
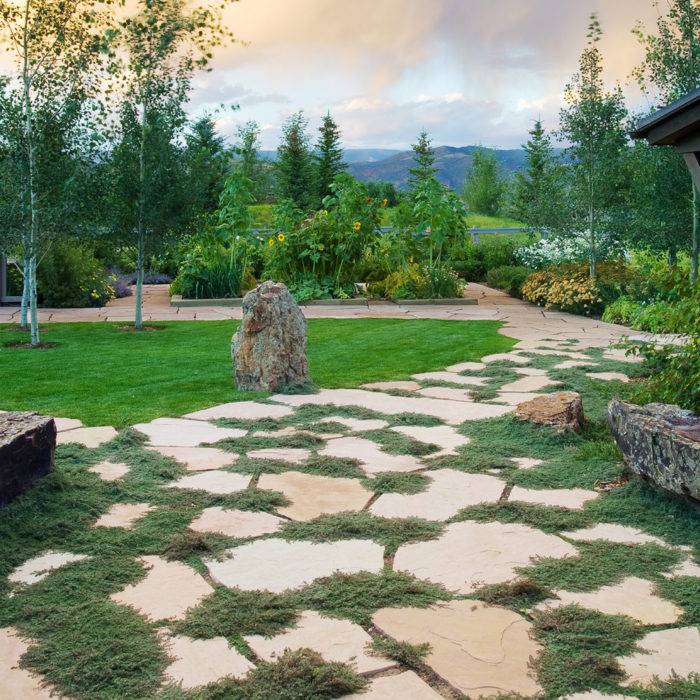 Garden paths
Usually, it is convenient to lay the paths along the already trodden paths: as a rule, this is the most optimal route for movement on the site. Do not forget that the tracks have a transit function. If the path meets guests̆, then its width varies from 0.8 to 1.2 m, as the area and budget allows. And when the path leads through the quiet corners of the garden, then it is not worth making it more than 0.6 - 0.8 m.
From the point of view of construction, there are two types of paths - capital and non-capital. A capital path is desirable in a parking lot, on an area with active traffic - from the gate to the house, to frequently used areas of the garden, someone has a bathhouse, someone has a vegetable garden, look according to your needs. The capital walkway provides active transit, transfer / transportation of goods, cleanliness in the autumn thaw and has a decorative function in the front area. All other paths will be more comfortable in a non-capital design - in the form of narrow paths or walking paths for rarely used areas of the garden. Plus, treadmills are more economical.
In the ideal world of magazine landscapes, the material of the walkway should match the material of the facade, porch or terrace. If the foundation is decorated with stone, then the paths should be of the same stone; if there is a decking on the terrace, then the paths should also be made of decking or wood, matching in tone and size to the decking. As a rule, all of this is quite expensive. In the real world, there are other options that will make your garden look good and save you a lot of money.
Variants of paths using wood
Garden paths from wood can hardly be called durable, but additional treatments and impregnations increase the resistance of this material to moisture and mold. To extend the life of such a coating, it is recommended to use it only on dry hills. Of all the tree species, larch and oak are the most ideal for creating paths, the rest of the conifers also have good characteristics. The budget options are wood bars and cuts, while the more expensive ones include decking.
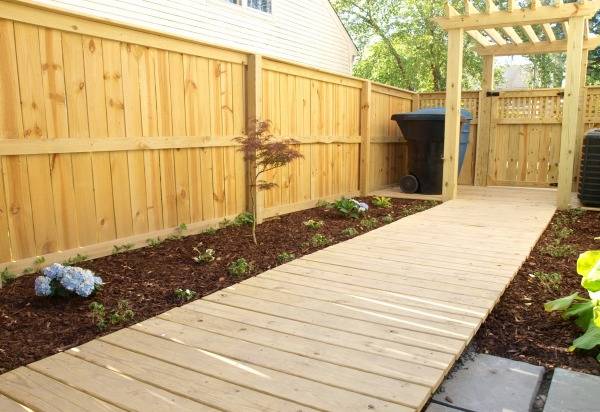
Bars can be used in different widths and thicknesses, but you need to understand that the thicker the bar, the longer it will last. The optimal thickness is 10 - 15 cm. The bars treated with a waterproofing agent and pinotex are laid on a foundation of sand covered with gravel on top. This masonry technique accelerates the drainage of water, which extends the life of the coating.
Wood cuts are very aesthetic and more durable. With such a covering, the garden can be turned into a fairy forest. And it is not at all necessary to specially purchase this material, you can use the trunks and skeletal branches of old trees from your site. As a result, it will turn out to be cheap and beautiful to arrange garden paths.
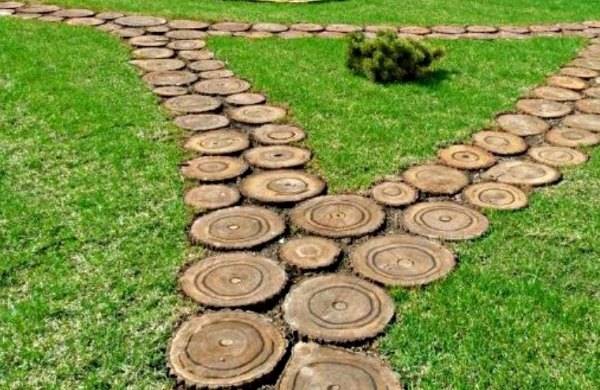
For the paths, cuts 15 cm thick cleared of bark are harvested, which must be treated with heated linseed oil. At the site of the future path, about 40 cm of soil is removed, the bottom is lined with geotextile and covered with sand. The cuts are driven into the compacted wet sand, trying to leave minimal gaps.It is recommended to have cuts of a larger diameter along the edge of the track in order to increase its strength.
Decking is made of natural wood, wood-polymer profiles or thermowood. It has a special coating that protects against moisture and insects. Installation of such material is carried out on a leveled concrete surface, on which logs are laid. Fastening of the terrace board is possible with self-tapping screws or hidden clips. It is a rather expensive coating.
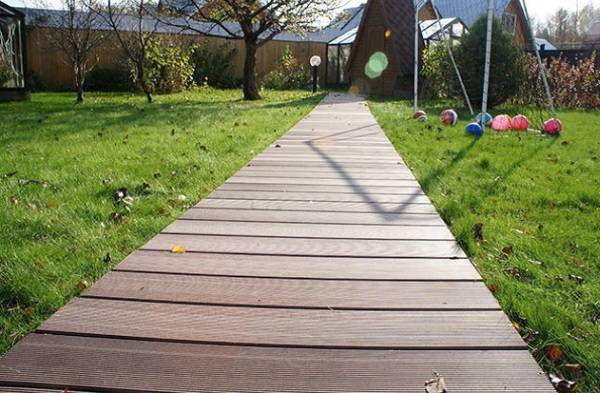
Design idea: Wooden garden paths can be combined with gravel or pebbles. Wood flooring is used in a rustic and retro style, giving the garden a natural, pristine look.
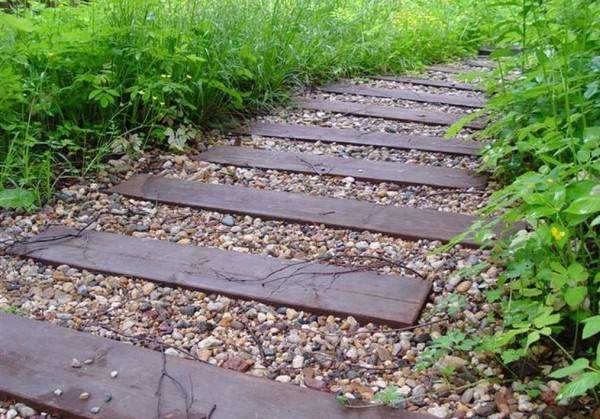
Advantages: availability, originality.
Disadvantages: fragility, instability to mechanical stress.
Seamless crumb rubber pavement (rubber asphalt)
Another form of release is the rubber coating for playgrounds, made from crumb mixed with polyurethane glue. Crumb rubber comes in two categories:
- From recycled tires. It is black, cheaper. Using this crumb, it is advisable to first sift it, remove sand, extract (using magnets) metal fragments that may be found there.
- Made of EPDM synthetic rubber. This type of crumb comes from factories, it is produced on purpose. More expensive, but it is used even in the food industry, so it is definitely not harmful.

Any drawing can be made from crumbs.
In order for the crumb to acquire a certain color, pigment is added to it. It wraps around every piece, so it should be of good quality. The pigment can be almost any color, but crumb rubber was originally developed for stadiums and other sports facilities, so the most common colors are red, blue and green. They are available in any company, and often there are several manufacturers to choose from.
Styling features
There are no special styling secrets. If you've ever worked with concrete, this is something very similar. It can be laid on compacted fine gravel, sand, dumping. Concrete and asphalt are excellent in any condition. The good thing is that they don't even need to be aligned. In general, a large number of irregularities increases the consumption of crumbs, and this is costly. Therefore, many people prefer to pre-patch the intended application site.
Before applying the composition, the base is coated with a primer (polyurethane glue diluted with white spirit). Can be primed in parts - it is difficult to walk on glue. It is not necessary to wait for the primer to dry.
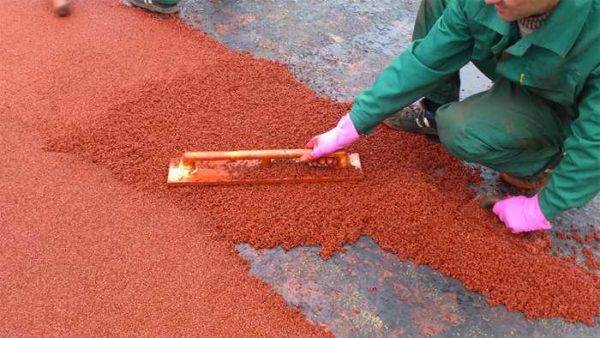
We level the composition
The crumb is mixed in a container with glue (the percentage is indicated by the manufacturer), the finished viscous mass is spread on the base and leveled with a large spatula or trowel. To prevent the composition from sticking to the spatula, it can be sprayed with WD aerosol grease or any other silicone oils. But not plant or animal. EPDM rubber reacts poorly to them - it dissolves.
The minimum layer when applying crumb rubber to the coating is 1 cm. To avoid peeling problems, try not to do less. The time until the glue sets may vary, but on average, plasticity is maintained for 30-40 minutes. Therefore, do not seal too large volumes. After a piece has been laid out, it is advisable to compact it with a roller. To make the surface more dense, the skating rink can be dipped in turpentine.
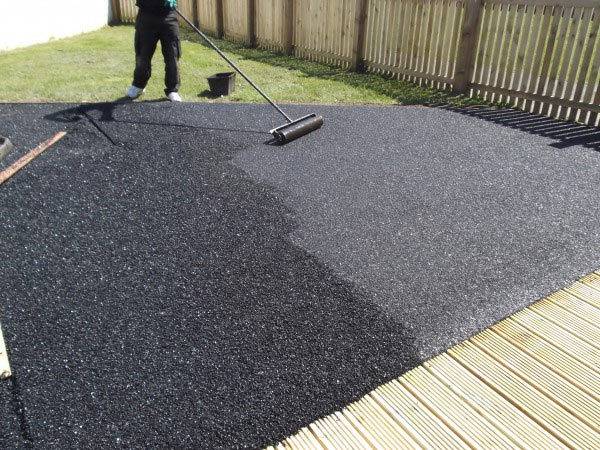
Rolling with a roller makes the surface more dense
The rubber crumb coating for playgrounds is seamless. Although it is laid in parts, the transitions are almost imperceptible.Unless if you take a long break, during which the edges of the laid fragment will completely dry out. But for a playground, usually small volumes are needed, so this is not common. And over time, the difference is erased. Not literally. It just becomes invisible.
Stone and slate
Flattened boulders or stones with at least one flattened surface are suitable for laying "from bump to bump". However, they look just as good on the runway, especially in traditional country-style courtyards. Real masonry stone, quarried and properly hewn, is a rarity due to its considerable price.
But there is no substitute for him when there is money. Excellent steps are obtained from this stone, and a wonderful blind area can be laid out under the walls of the house. Slate is another type of stone. It can be either irregular in shape or rectangular (processed). Naturally, untreated slate is better suited for ragged and bump-to-bump coatings.
An imitation of this layered stone can be an artificial slate; these tiles in black and gray are sometimes on sale. In general, artificial stone is increasingly replacing natural (it is cast and pressed in more or less regular shapes). In garden construction, this stone is quite popular because it is both beautiful and cheap.
Features of installation of roll coating
If you decide to install a rubber floor, first you need to prepare the surface. For this, a leveling mixture is usually used, which will achieve an excellent result. At the next stage, a thin layer of glue is applied to the surface, only after that you can proceed to rolling the material.
If you decide to use modules, then it is better to apply the composition to their back surface.
For rolled rubber, a dense roller is used with which you can remove excess air from under the coating.
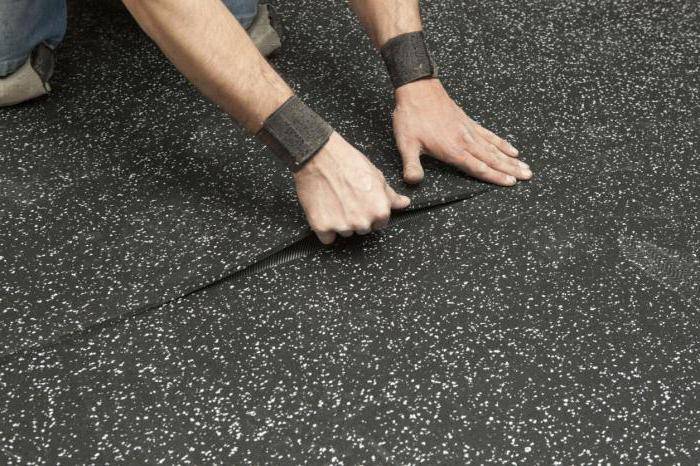
They try to make such surfaces without seams, however, if necessary, they can be sealed with a special compound made of raw rubber and fixed with a heater. Usually a vulcanizer or a soldering iron is used for this.
Rolled rubber
Rubber tracks in rolls are a great alternative to boring gray concrete and paving slabs... With their help, you can arrange garden paths, tennis courts, playgrounds, an entrance to the garage. This material can easily withstand significant loads, does not deform from the wheels of a car, and has high resistance to abrasion and the effects of various aggressive substances.
Walkways in rolls for a summer residence or a personal plot have a thickness of 6 to 13 mm. A prerequisite for their use is a solid base. This coating is not suitable for laying on the ground. To keep the track surface always dry, you need to provide for a slight slope or special drainage holes made in the base under the rubber.
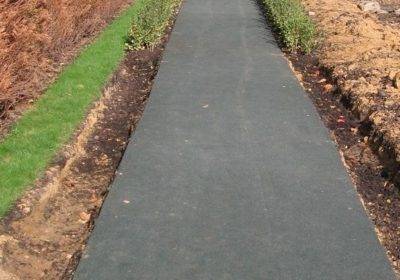
Externally, the material resembles a carpet. When walking, it springs slightly underfoot, dampens noise and vibration well. There is no need to be afraid of slipping on the rubber track, since its surface does not slip at all. Roll material is ideal for use in a country house or a backyard if small children live there. Parents will stop worrying that little fidgets will fall and break their knees in blood - the soft coating will reliably protect them from bruises and scratches.
