What is a pergola
Simple garden arches, or pergolas, designed to support climbing vines have been known for a long time. Even Roman emperors rested in their shadow. Such designs are very practical, easy to install, and add nobility and sophistication to the overall picture of the garden.
Fresh articles about garden and vegetable garden
How to feed potatoes during flowering
Nettle juice medicinal properties
30 interesting facts about apples
Nowadays, garden pergolas are widely used in landscaping and garden design. Usually, the pergola for supporting the grapes is an arch with lintels about 1m wide. The height of the structure depends on how much the plant planted under it is able to braid the arch completely. For vigorous plants, a pergola up to 4m high is a common occurrence. By installing a series of such arches, interconnected by transverse beams, a whole corridor of climbing vines or vines is obtained. This is a classic pergola.
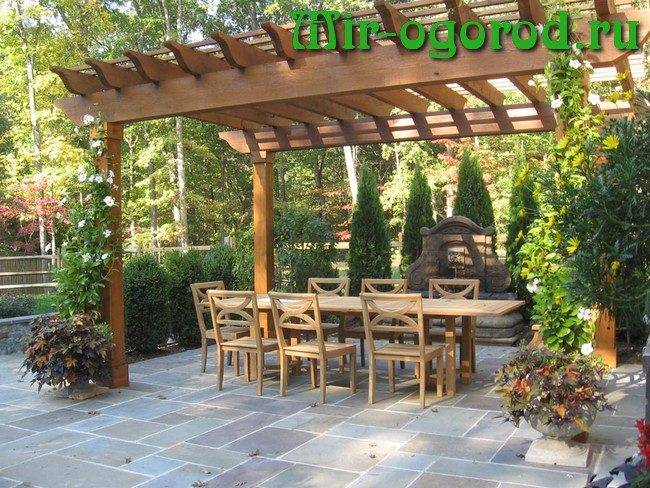
To build cozy garden gazebos, pergolas are created from several supporting arches, making gaps between them in order to create several entrances. In this case, arches made of wooden slats will be especially cozy, because the combination of the structure of a tree with green leaves gives a feeling of special warmth and comfort.
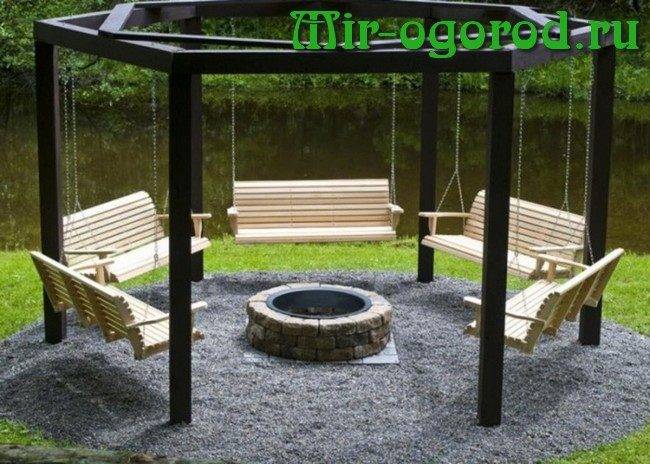
No less attractive are the canopies braided with vine, which, like the pergolas of the gazebo, turn the space of the summer cottage into a cozy courtyard from the times of Ancient Rome.
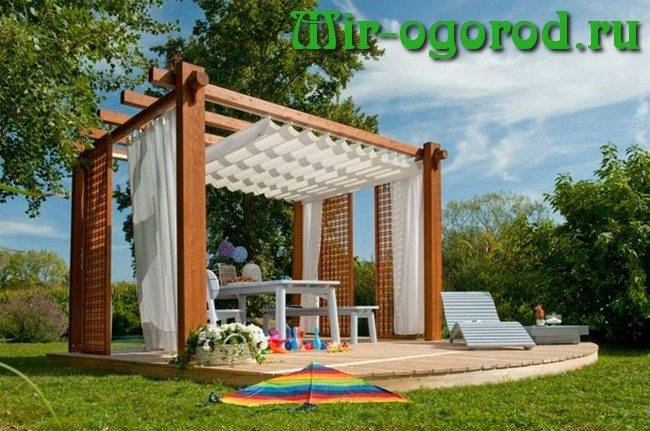
If you think that pergolas are intended to perform only a decorative role, then you are deeply mistaken. With the help of pergolas, you can divide the entire territory of the site into different zones - economic, recreation area, front entrance and others. In addition, the installed metal pergola for grapes will create additional conveniences in the cultivation of this culture beloved by summer residents, by the fall having delighted you with a beautiful picture of fragrant bunches against the background of a dense carpet of green vines. If you want to plant decorative grapes, then even in winter you will admire the densely braided pergola made of amazing red leaves. Wood is an excellent material for building a pergola. The frame of the structure will consist of wooden beams and slats.

Pergola erection
Mark the area using a tape measure, pegs and a cord, determine the locations for the pergola supports. Don't forget to check the perpendicularity of the markings!
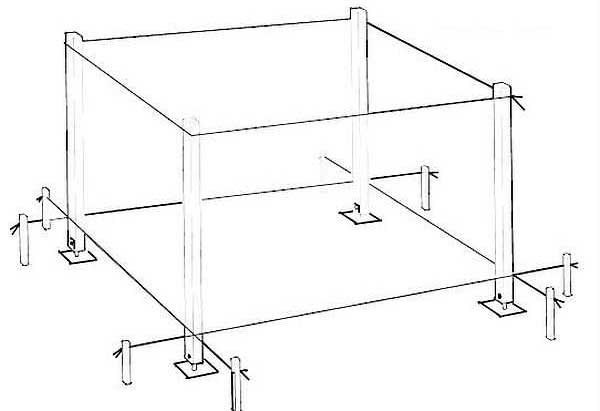
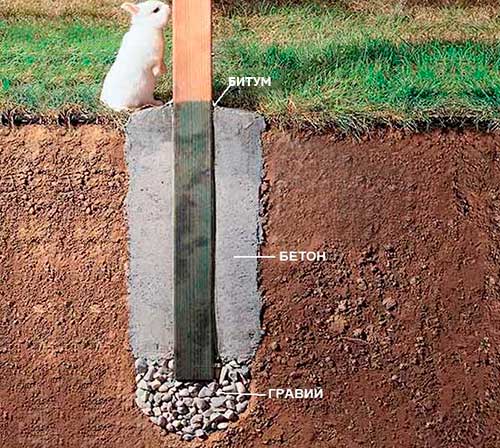
Using a drill or a shovel, prepare the holes for the supports, their depth should be 70 - 90 cm. Pour a layer of gravel on the bottom and tamp it down. As a formwork, you can use trimming boards or trimming pipes of a suitable diameter. Install the pillars, pre-treating them with an antiseptic and covering the bottom with a layer of hot bitumen. Check the vertical position of the pillars and the distance between them - it is necessary to observe the exact geometry of the structure. Then pour the prepared mortar into the formwork. After 48 hours, you can add and compact the soil around the supports and proceed with the installation of the upper grill.
Using a jigsaw, cut the wooden elements - their number and length must correspond to the drawings.
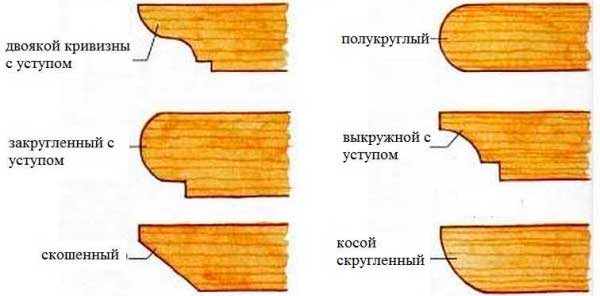
To make the pergola look more spectacular, the protruding ends of the support and transverse beams can be decorated with curly saws. Use a stencil to keep the cuts even and uniform. Treat all elements with a fire retardant compound.
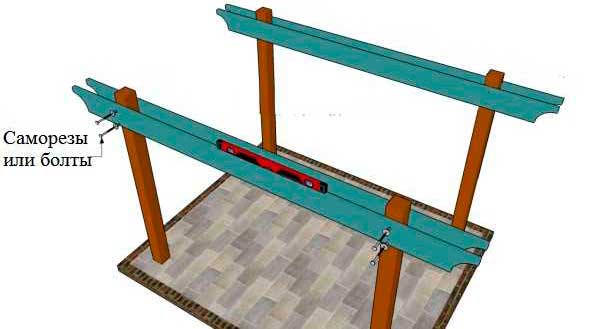
Assembling the grille. A pair of beams is attached to a pair of support pillars (or to three, if the pergola is long) - they are located on the outside and inside, parallel to each other, flush with the upper ends of the supports. To simplify installation, "bait" the first beam on the nails and level it. Install a second beam parallel to it. Make sure that the length of the protrusions is the same on both sides.Then make two vertically spaced through holes through both beams and a pillar on each of the supports, fasten the structure with bolts, washers and nuts. Using the same scheme, install the beams on the second side of the future pergola.
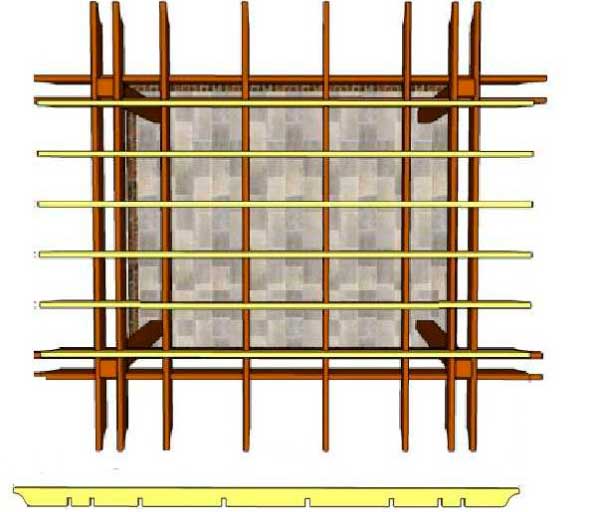
To secure the cross beams, grooves with a depth of 2 cm should be made in their lower part - the location and width of the grooves depend on the distance between the support beams and their width. Once you fit one plank into place, use it as a template for making grooves on the remaining crossbeams. By the same principle, with gaps, the crossbars are installed. All elements of the lattice are fastened with self-tapping screws.

The finished structure can be stained. Be sure to cover the wood with several coats of waterproof varnish and regularly renew the protective covering to prolong the life of the pergola.
To make it easier for climbing plants to reach the roof, you can stretch a coarse mesh or fasten cords from one, two or three sides of the pergola-awning. The pergola supports are suitable for placing ampelous flowering plants.
Video on the topic "Step-by-step instructions for building a pergola with your own hands":
The choice of material for construction
All kinds of material combinations are used to create attractive decorative designs. Among the main trendsetters of pergolas fashion trends are:
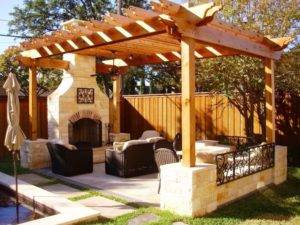 Using stone
- Regular wood, as well as elite expensive species.
- Quite attractive designs are obtained from metal elements.
- Pergolas for luxury connoisseurs are made of stone.
- Some high-tech adherents like technological materials - plastic or metal-plastic panels.
- Combined projects are often spread, where each element is assigned a certain place in the overall decor.
Natural features, natural flexibility and relative cheapness make wooden structures the most common model of pergolas.
With a complex protective coating, wooden elements acquire sufficient durability. Together with other types of decorative materials, they fit into any unique style of the gazebo.
What are
In ancient times, pergolas were not only in the vineyards. Similar structures, only on a large scale, were made in courtyards to protect them from the scorching sun. The hottest midday hours were spent under them. These were, rather, sheds, one part of which rested on the wall. Their design has remained the same, the materials have changed: now the pergola can be not only wooden, but also metal, concrete and even plastic.

Pergola canopy near the vine house - dense shade even at noon
Aside from being a useful structure - supporting vines and shading - it's beautiful too. This was appreciated by the architects. Gradually, pergolas migrated to the gardens of the nobility. Only there they had a more refined shape, expensive materials were used up to marble columns, beams were made of pretentious shapes. It twisted not only and not so much grapes as ornamental plants, roses, bindweed and lianas.

This is also a pergola, but the look and design is completely different, although the principle of construction is the same
They also make it in the form of a gallery, covering from the sun all the way from one building to another. These arcades serve as a support for perennial vines, climbing species of roses. Where they do not survive due to the harsh climate, annual bindweed can be used, they are no less decorative, the flowering period can be chosen so that the flowering continues throughout the warm season.
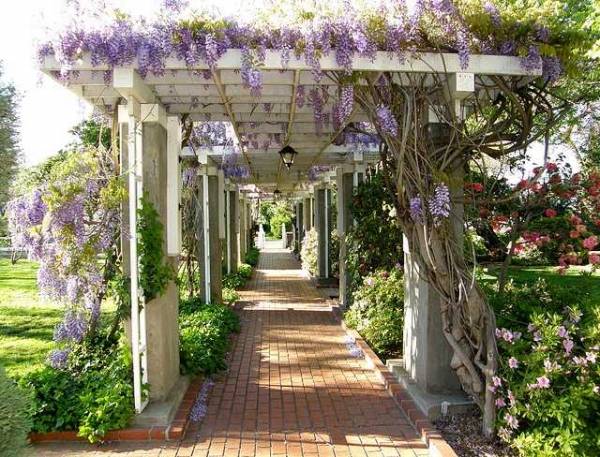
A whole gallery of arches can close the path from one building to another or to a resting place
In the modern sense, it is rather a canopy or an open summer gazebo, which instead of a roof has a network of beams along which plants climb.
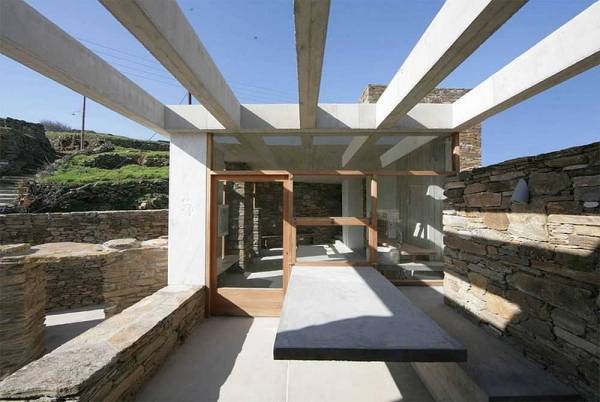
Concrete pergolas require careful design

And this too.This is more like a summer gazebo for a pleasant pastime

Custom design. However, this is also a kind of pergola.

So with the help of a pergola, you can arrange the entrance to the house - this is a canopy that looks good even without plants, and when they grow it will be even more comfortable
The altered pergola is the arch on which the flowers or grapes rest. If we say "arch", then most often we mean a metal product with a rounded top.

The arch for grapes is also a pergola, only with a modified shape of the upper part
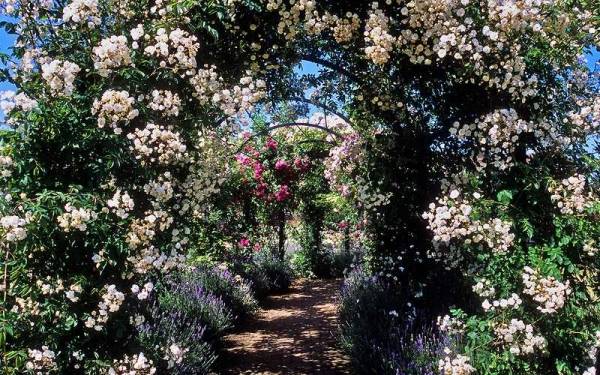
The arch under the climbing rose is the same pergola. But the mass of a rose is less than that of a grapevine and wooden structures are still made for it.
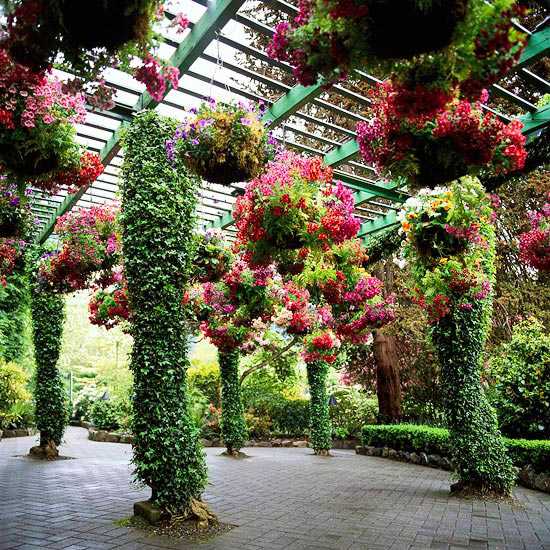
Hang flowerpots with ampelous plants on top - and the arch will become even more elegant

Powerful columns wrapped around lianas - nature reserve garden

Blooming honeysuckle on a pergola arch
Read about the basics and rules of landscape design here.
DIY step-by-step instructions for building a pergola
A beautiful pergola with your own hands is not difficult. Where to start if you decide to build a pergola yourself:
- decide what functional role it will perform on your site and where it will be located. For example, will it be able to protect from the scorching sun or serve as an element of landscape design when zoning. This can be an extension to a house or a gazebo, a shed over a swing or barbecue, framing garden paths, a small arch at the entrance, or maybe it will be a free-standing open gazebo.
- decide on the size of the pergola. It depends on the size of your site and on what functions the structure will perform. For example, a too large pergola in a small area will look cumbersome, and if you want the pergola to hide a parked car from the scorching sun, then you need to take into account its maximum dimensions.
- choose material. The two most popular are metal and wood. The metal pergola is more durable and requires less maintenance. With a high-quality coating of a metal structure, you can not renew the paint for several years. But for the construction you have to find a welding machine and its construction will require more time and effort. Also, keep in mind that the metal can get very hot in the sun, which can harm the plants. The advantage of a wooden pergola is that it will fit into almost any style of garden, and it is easier to do it yourself because no welding or bolting is required.
Consider the stages of building a simple wooden pergola with your own hands.
1) Installation of support pillars.
There are several options for installing support pillars. The easiest is to just bury them in the ground. However, this method can only be selected if you are using larch, which is resistant to decay processes. If you prefer any other wood, then this method is undesirable.
Let's take a look at a more reliable and versatile way to install support pillars in steps:
- dig 4 holes 0.8-1 m deep at previously marked points;
- tamp and level the surface of the bottom of each pit;
- insert concrete formwork into each pit;
- pour concrete into the formwork and level the surface;
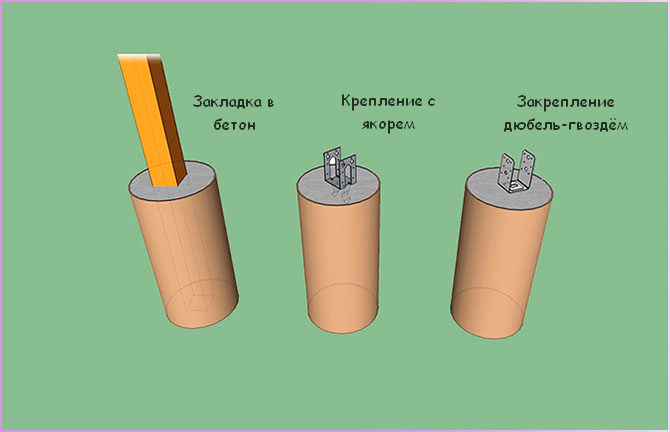
- insert the lower part of the U-shaped thrust bearing into the concrete;
- wait a few days until the concrete hardens;
- attach the support bar with screws to each thrust bearing.
 Pole heel options
2) Installation of support beams.
The easiest way to secure the support beams to the support posts is to use several long screws (one fastened vertically and the other two at a 45 degree angle). A safer option is to use T-brackets.
A fundamentally different method without screws and nails, which was used by our ancestors: grooves for the support beams are cut in the support posts. This method is reliable, but horizontal screws can be added to strengthen the structure if desired.
If the budget is limited, then you can save on support beams and use edged boards instead. They need to be fixed in pairs with screws.
3) Reinforcement of the support beams.
Strengthening the support beams is not always necessary, however, if the crate is heavy or a large number of climbing plants are planned, then it is better not to skip this stage, especially since it is not difficult. You just need to make short diagonal beams with 45 degree saws and screw them between the support posts and support beams.
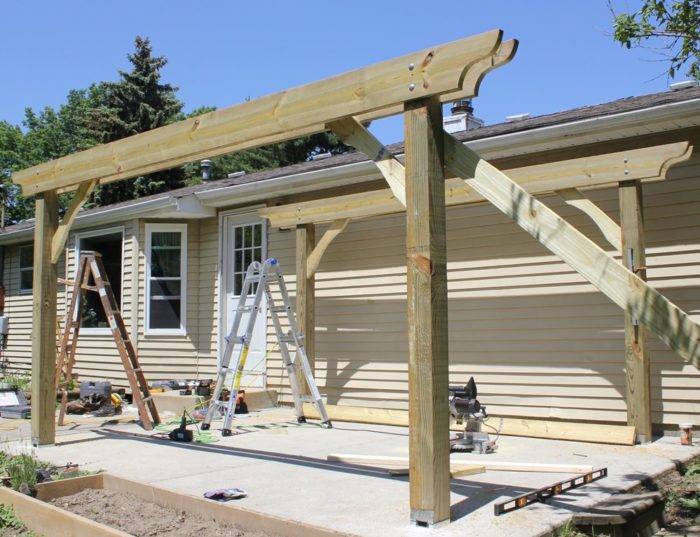 Reinforcement of support beams
4) Securing the lathing.
You can also fix the crate in different ways: just attach the beams with screws obliquely, use metal corners, holding brackets, or fix using the groove method. The choice of the method at this stage is largely determined by the desired type of design.
Plastic or metal mesh can be used instead of a wooden roof. However, if in the summer this element is not striking, then in the cold season, when there is no greenery, the pergola will not look very beautiful.
5) Supplement with decorative elements.
An additional lattice can be used to create the pergola walls. On the roof, the grille is created as desired using crossbars or battens over the standard battens.
 Additional lattice for creating the walls of the pergola
Thermowood
One of the best design options is a thermowood pergola. This material has recently gained wide popularity, as it is distinguished by its 100% naturalness and safety for human health. This is a modified wood that has been heat treated with hot steam. No chemicals are used in its production. Its advantages:
- resistance to mechanical damage;
- no deformation during operation (the structure will last a very long time);
- high resistance to biological effects: fungus, mold, pests, decay;
- environmental Safety;
- excellent decorative properties;
- moisture resistance.
If you spent money on a thermal tree, it makes sense to make the pergola more durable. Therefore, we bring to your attention a diagram of a simple design (as at the very beginning), but already put on the foundation.
Step-by-step instruction
1. Foundation:
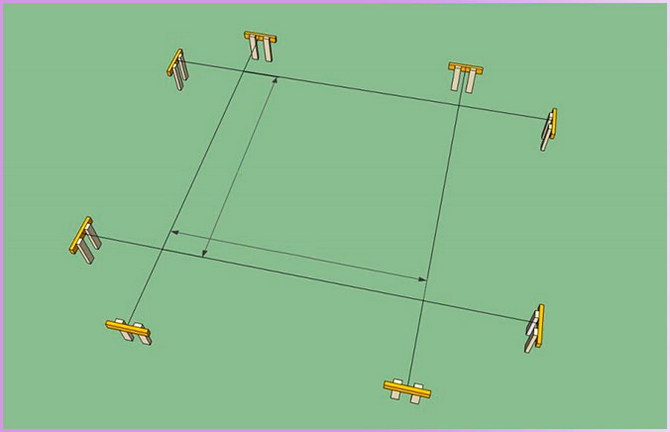
- mark the area;
- dig holes in the corners (diameter - 40 cm, depth - 15 cm below the level of soil freezing);
- cover with gravel (thickness - at least 10 cm), tamp thoroughly;
- insert the formwork;
- fill the molds with concrete, install adjustable anchors in it, leave for 48 hours.
2. Aligning the supports:
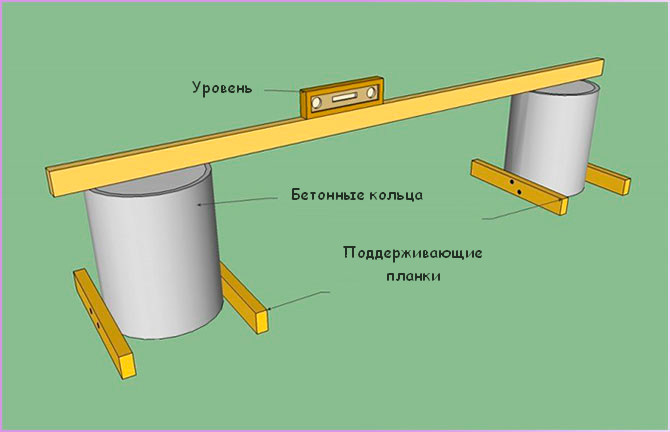
- install wooden racks in a perfectly vertical state;
- fix in two directions;
- fix in anchors with wood grouses.
3. Fix the posts with metal anchors:

4. Use one of the rack mounting options:
5. Install the support beams:
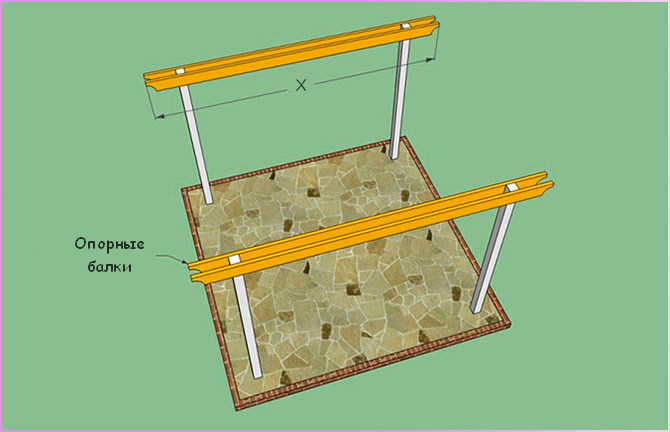
- align horizontally;
- fix with clamps;
- drill through holes through the beams and the rack;
- insert the bolts, tighten the nuts;
- the beams should protrude slightly beyond the perimeter of the building;
- to improve the decorative properties, give the ends of the beams a rounded shape with a jigsaw.
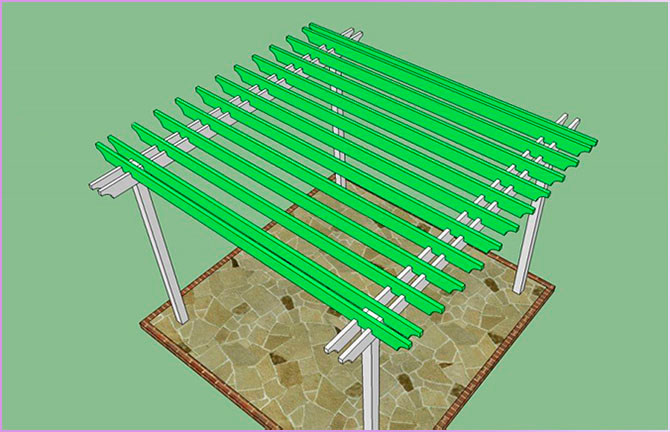
6. Fasten the beams and install the crossbars:

- align the beams so that the structure looks smooth and neat;
- make 2 cutouts at the ends of each crossbeam;
- drill pilot holes;
- fix the beams with self-tapping screws.
7. Make sure the beams are level:
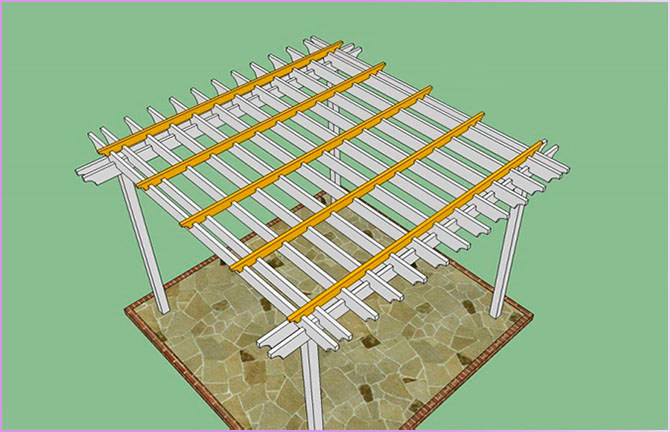
8. Fasten the crossbeams:

- apply markings;
- make cuts in the board;
- remove wood between the cuts with a chisel.
9. Install perpendicular (fixing) rungs every 60 cm:

- make notches;
- drill pilot holes;
- fix the crossbars with self-tapping screws.
10. Completion of work:
- fill holes and cracks with wood putty;
- sand the surfaces with medium grit sandpaper;
- apply 2 coats of varnish.
