Lighting types for different areas
First of all, you need to decide what type of lighting you need - to have more light, to be beautiful, or both?
- Is it enough for you to hang a light bulb over the center of the table in the room, or want something more interesting?
- Are you ready to tackle decorative lighting wiring?
- Do I need to light the path to the gazebo? Is it possible to hang a lantern in the country house, which will illuminate the entire recreation area?
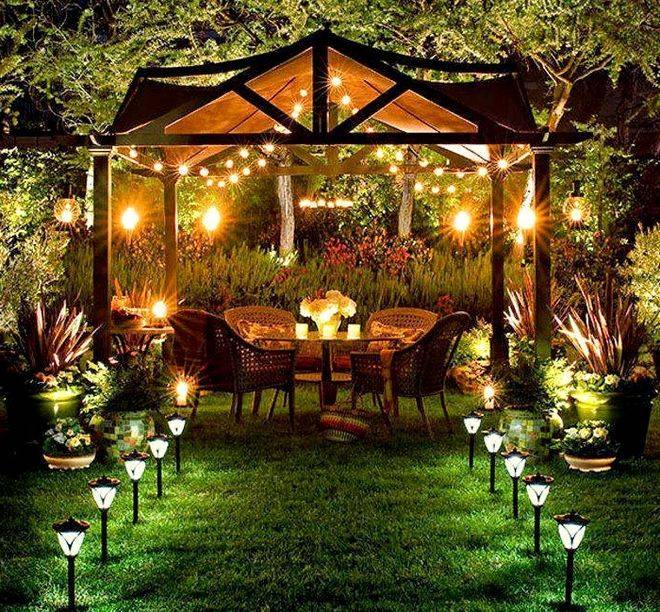 Combination of lamps, solar powered lanterns, candles and table lamp
Answering these questions, you can choose the best option for yourself.
Listed below are the lighting areas to look out for
Indoors
The recreation area itself - the space inside the gazebo, table, benches and chairs should be lit in 100% of cases. Your rest should not end at nightfall. Therefore, first you need to hold at least a banal light bulb, which will fully cope with its task.
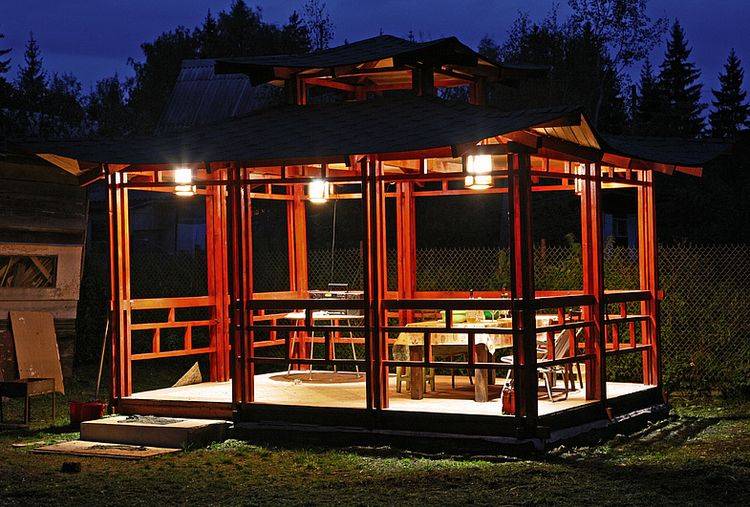
An alternative to a light bulb can be a more beautiful and high-quality light from a chandelier, lanterns or LED lamps. Installing one of the proposed options will completely solve the problem with the light in the gazebo.

If you want to add decorative lighting elements, then the interior lighting of the ceiling and wall sconces will help you with this (we will talk about them later). They all work best in tandem with the main light. To create a romantic atmosphere and comfort, it can be turned off.
Territory near the gazebo
This moment is often overlooked, although it is also extremely important for a comfortable stay. The space around the gazebo, which can be a porch or path, can be illuminated in several ways:
- Installation of a lamp in the country or on a gazebo, which will illuminate the entire territory of the summer cottage.
- Installation of lanterns near the track, which will point-to-point illuminate sections of the path. Even solar-powered street lights can help here. In most cases, they are enough for comfortable movement of people on the site.
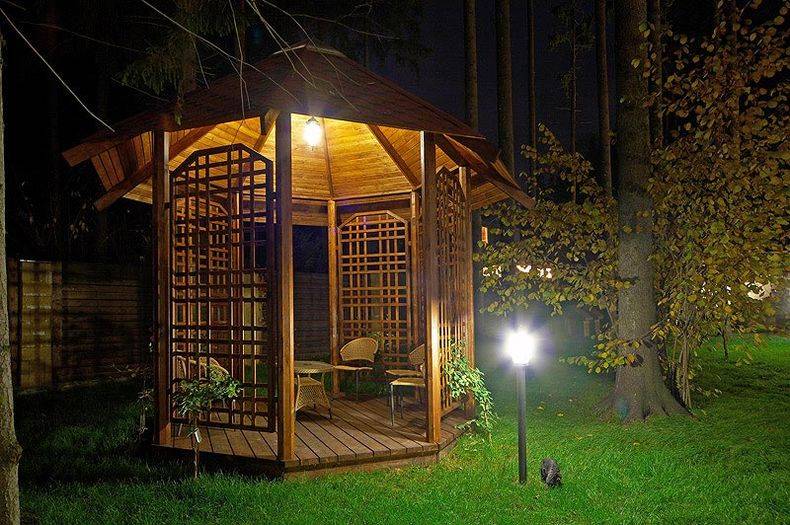
Decorative lighting
This category includes all artificial light, which is used exclusively as a decorative element. It is not enough to create a bright room or space, but it is enough to create a beautiful color effect.
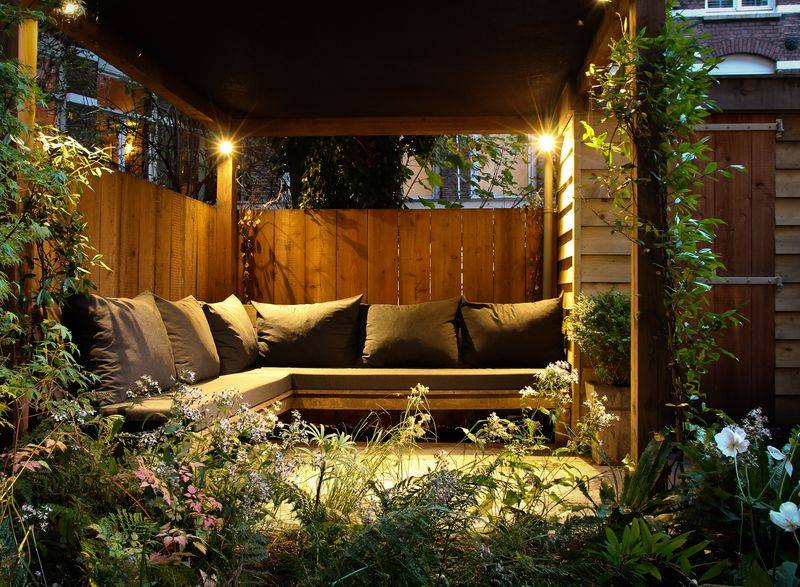
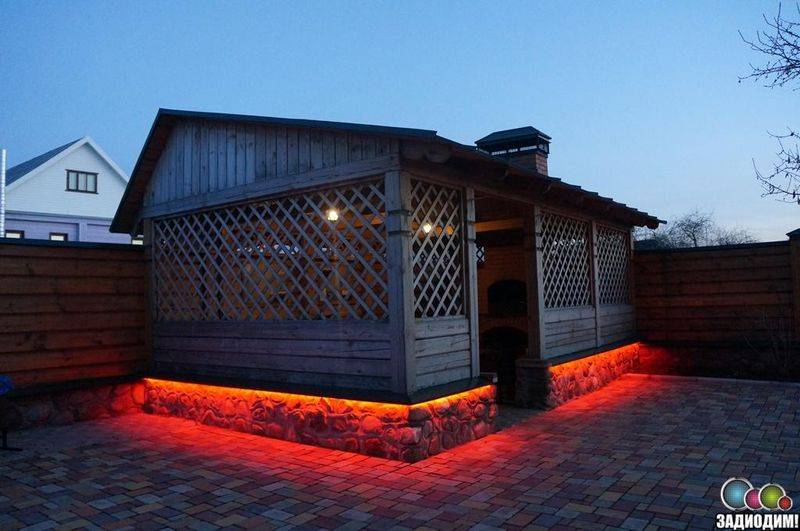
One of the options is the illumination of the gazebo along the perimeter from the bottom (photo is presented below). An interesting effect is created that will surely impress the guests.
Using glass to create lighting fixtures
You can hang a composition of several empty liquor bottles on the ceiling. Three-liter cans can be suspended by metal chains. Glassware will also work as a shade. A lamp made of many glass fragments can imitate a crystal chandelier. Broken glass objects find a new purpose in the form of an original lighting fixture. Glasses and wine glasses are used to create wonderful table lamps. Various glass boxes, glass from old wall sconces, headlights, interior doors can be useful. A homemade glass chandelier can be painted with watercolors or stained glass paints. You will get beautiful stained-glass windows. To create pendant lamps, craftsmen use a variety of decorative containers for oils and perfumes. Unlike wood and paper, glass has a high fire safety.

Wine and wood lighting fixtures
The list of necessary accessories includes wire cutters, screwdrivers, screws, glass cutter, silicone, rag or brush, stain, pine boards, hooks, chain, ten bulbs, wiring, wine bottles. The containers are processed first. Labels and glue residues are removed from the bottles.Using a glass cutter, you need to remove the bottom of each bottle: it rests at a height of 1-2 cm, and the bottle rotates around its axis. Cracks must be tapped with a hammer until the bottom falls off. After that, the electric wires are placed in bottles and connected to the cartridges. Bulbs are screwed into them. Now you need to prepare the boards. In the lower, larger one, holes are drilled for necks and wires. The upper one will collect them into one bunch. Hooks for chains are screwed into the lower board, which will hold the structure. For the kitchen, you can make a table lamp with a bottle base and a wooden shade.

Using old cans to create lamps
Old jars can find a new purpose. Lamps can be created using threads, electrical wires, jar handles. Containers must be equipped with handles. They will need to be tied with threads attached to the iron frame prepared in advance. Electric wires with sockets and bulbs are lowered into the banks - the chandelier is ready. You can make an option for a summer residence - threads are tied around the branches of a tree, and candles or small lanterns are placed inside the cans. Containers wrapped in multi-colored threads or decorated with patterned napkins look beautiful. The inside of the cans can be painted white, and while it is still wet, apply a pattern in the form of chaotic lines. Some people paint the container on the outside with different colors, and on top they draw an image using glitter shadows. Banks can also be pasted over with small cullet.

Varieties of lamps
Once you have decided what type of lighting you will use or combine with another, you can move on to the choice of lighting fixtures. There are many types of them, but each fulfills its role. The main thing is to combine them correctly with interior items and with each other.
Did you know? After some scientific experiments, it turned out that electric lamps are very inefficient: only 10% of all their energy is spent on lighting. Everything else goes away in the form of heat.
Outdoor pendant light
A pendant chandelier or lamp can fully illuminate the entire room and the area around it. The main thing is to choose a street lamp that comes with a shade that protects from rain and strong winds.

The choice of the appearance of the lamp is yours: you can take both simple and nondescript, and vice versa. It is recommended to choose a luminaire that has a height adjuster. Thanks to this, you can change its position, and the gazebo will look different every time.
Pay attention to the information on how to build a gazebo with your own hands in one day.
LED lamp
Previously, such a light source was considered purely decorative. Now it can replace full lighting and add individual style to your space.
You can use two types of these lamps:
- Point To do this, you will need to cut holes of the required size in the room, lead wires into all of them and install the lamps themselves. This option is more complicated and delicate.
- Tape. When choosing this type of light, you don't have to drill anything. The tape on the back is adhesive, and therefore it is enough just to correctly position it around the perimeter of the gazebo. It is glued simply and reliably, and if the kit comes with a remote control that allows you to change the colors that the tape gives out, then you are guaranteed an incredible setting.
Hidden ceiling lighting
Such light can add romance and intimacy to the setting, but it will not cope with full-fledged lighting. To apply this type of lighting, they use the same LED strips or lamps, only their light is directed upwards. Thus, the ceiling of the gazebo receives the maximum amount of light, and the furniture and floor - a minimum.
Here you can learn how to make a gazebo without a foundation with your own hands.
Wall sconces
This type of lighting allows you to place lamps on the walls, as opposed to a chandelier or lantern. It is recommended to combine it with a ceiling light. The sconce itself can be chosen in any shape, since these devices are now sold in the public domain.
It is important to understand that such lighting for the whole gazebo will not be enough, moreover, the rays of light from the sconce will block the seated people, interfering with the normal view.
Solar Powered Lanterns
This option is very economical and unusual. Lanterns of this kind are best placed on the way from the house to the gazebo, so that they illuminate the path in the dark. You can put them on both sides of the track, alternating sides, or in some other way.
Important! Do not forget about the ground loop. Due to its absence, a wooden gazebo can burn out, and a metal one will be shocked.
Outdoor lamps made from natural materials.
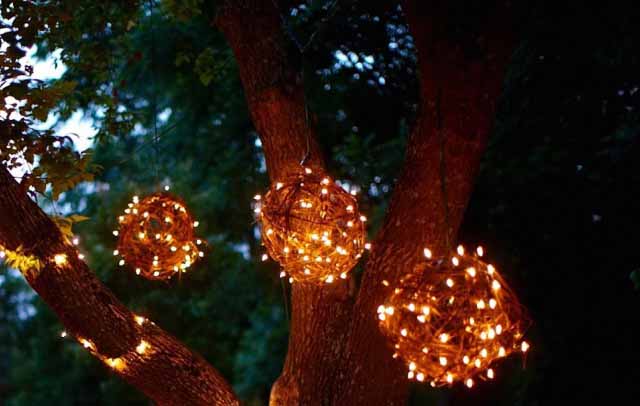
An unusual and stylish street lamp can be made from grapevine in the fall. We will need an inflatable beach ball as a template. We wrap the vine around the ball, securing the intersections with wire for structural rigidity.

After our improvised vine ball is ready, we deflate the ball and carefully pull it out.

Inside such a ball, you can place it as a solar lamp, and wrap it with LED strip for outdoor lighting. Such tapes often have a color switch, then using the remote control you can change the color of your street lighting.
American style summerhouse lighting
When a lot of light is not needed, we advise you to do with simple solutions. This is the best option so as not to fiddle with wiring and do not place light sources under the roof for a long time. The garland comes to the rescue, which is incredibly convenient to hang and just as easy to remove. All you need is an electrical outlet. The bulbs are specially designed for possible contact with other surfaces, so do not worry about hanging the garland directly from wooden beams, metal structures or tree branches.
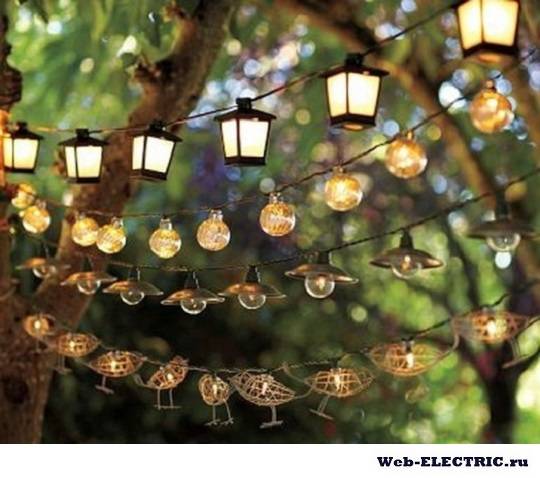
If you plan to connect such bulbs to the network every day, it is wiser to choose LED options: they are the most economical. At the same time, standard incandescent lamps, despite their apparent simplicity, look stylish and cozy. The whole environment is illuminated with a soft yellow light. Of course, such lighting is energetically very expensive.
When there is no suitable garland at hand, you can make it with your own hands. So, many people make beautiful shades for ordinary incandescent bulbs, cutting them out of old glass bottles. The neck is used for wires, and the bulb itself is placed inside the bottle. It turns out cheap and original!
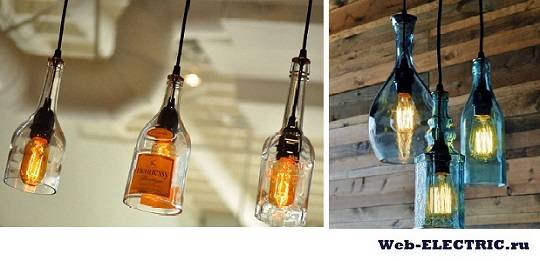
For a more festive exterior, to give the gazebo a cheerful look, pull the garland in two rows - and you will get the effect of solemnity. The main thing here is to control the brightness of the light. If you choose too powerful bulbs, you will not achieve the very atmosphere, because the light will dazzle and hurt your eyes.
Focus on bulbs no more than 20 watts
This option for lighting the area under the roof of the gazebo is suitable for a small suburban area and a compact area under a canopy. You don't need to spend fabulous funds on full-fledged illumination: just one garland is enough for cozy lighting of a small living room.
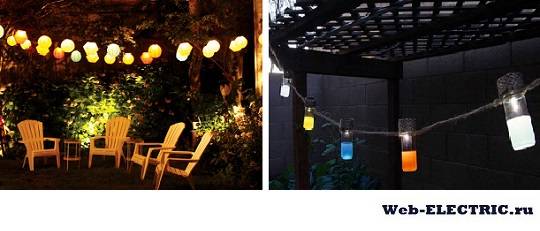
Electric lamps in the gazebo
The easiest way to create a special environment under the roof of the gazebo is if electricity has already been installed there.All that remains is to find suitable shades, lamps or wall sconces. You also need to decide on the warmth of the lighting. Any light source can be described as cold, neutral, or warm.
- It is customary to call cold one that has a bright light and casts a bluish, greenish or blue tone. Most often, such lamps are found among halogen fluorescent lamps. Alas, for a gazebo in the garden, such an idea will not be very successful, unless you specifically seek to turn to such a design technique.
- White light is neutral. It is most pleasing to the eye, does not cause fatigue. And yet, in the decor of a country gazebo, it is precisely lamps of warm lighting that are common. Finding them is very simple: they are lamps that give a pleasant and cozy yellowish or orange glow. Such devices add beauty and comfort to the exterior, make the atmosphere romantic, secluded.
Lighting types
Usually, the gazebo is located away from the main housing, since the installation sites of such structures are distinguished by isolation and solitude. At dusk, such a place needs lighting fixtures to be installed. For full and correct lighting, you need to know that it happens:
- outdoor;
- internal;
- decorative.
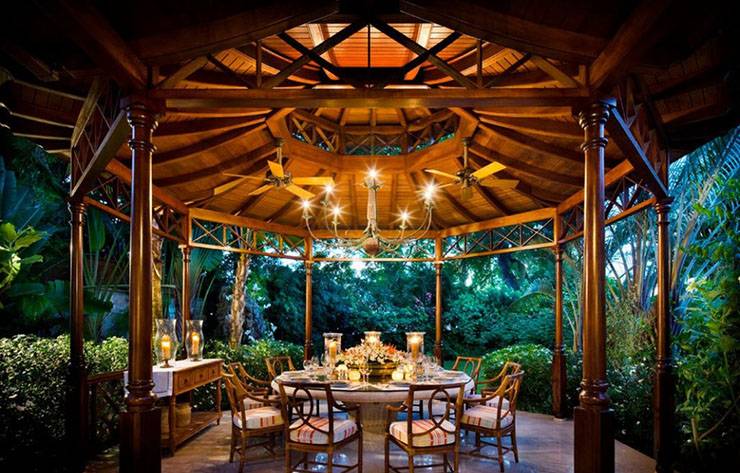 There are several types of lighting.
The farther your gazebo is from the main home, the more lighting fixtures you will need for outdoor lighting. Usually, the paths leading to the resting place and the entrance to the gazebo are illuminated. For the autonomous operation of outdoor lighting, it has become very popular to use all kinds of sound or motion sensors. Their use saves energy.
It is important that the light does not irritate you. For this, it will be correct to place the lighting fixtures above the level of the head with the direction of the rays of light downward.
An example of an indoor lighting solution is the installation of a centrally suspended chandelier.
If desired, you can install decorative lamps on the walls, on the table or in other separate places to emphasize the aesthetic forms of the structure: ceiling, columns.
How to make a chandelier with your own hands from thread brushes and a hoop

What do you need
- Yarn;
- small photo frame;
- scissors;
- 3 sets of wooden hoops of different diameters;
- 3 identical short and 1 long metal chains;
- pliers;
- bulb;
- suspension for the lamp.
How to do
1. Wrap the yarn around the photo frame many times and cut. Take a small piece of thread and tie it on top of the yarn so that the ends remain. Cut the threads on one side where the hole in the frame is.
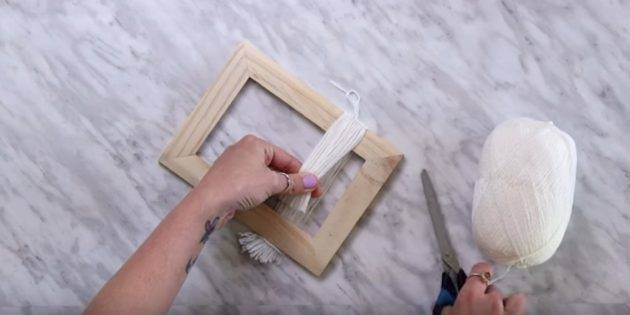
2. Remove the yarn from the frame and fold in half. In the middle, place the knotted thread so that its ends are at the bottom, and a loop at the top. See the video below for details. Cut off another piece of thread and tie it to the tassel just below the loop.
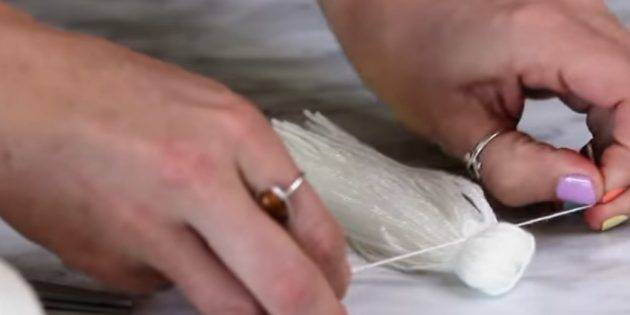
3. Make the rest of the brushes in the same way. The quantity depends on the hoop diameter. The threads should frame them tightly.
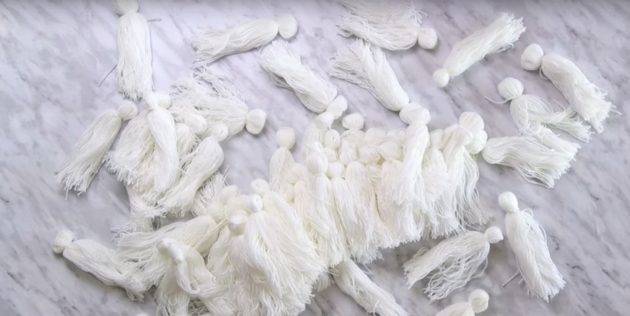
4. Remove the center hoops from all hoops — you will not need them. Open the large embroidery hoop and place some of the tassels over the loop.
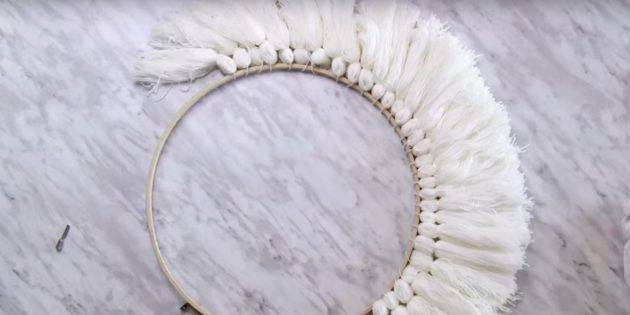
5. Close the large embroidery frame. Slip the tassels over the others in the same way.

6. Cut nine pieces of thread. Place the middle hoop in the large one and tie them in three places, equidistant from each other.

7. Place a small hoop inside and tie it to the middle one in three places. These threads should be located approximately halfway between those that tie the large and medium.
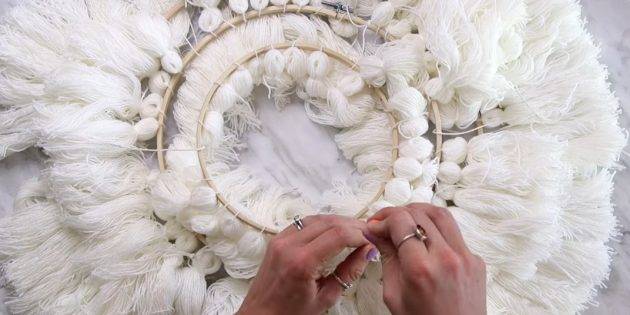
8. Turn the structure over and spread the tassels. Tie short chains to a large hoop at an equal distance from each other.
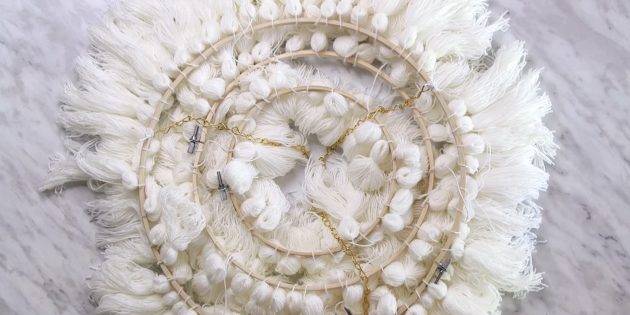
nine.Use pliers to open the outermost link of the long chain. Put the attached chains on it and close.
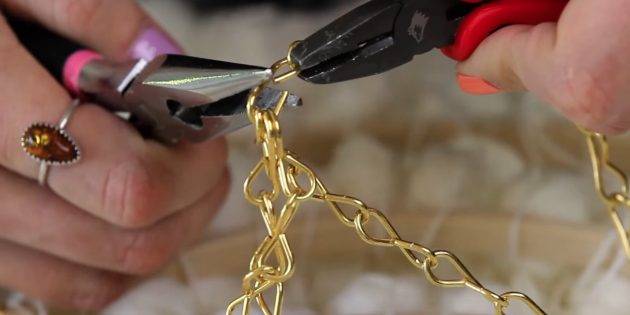
10. Attach the hanger to the ceiling, screw in the light bulb and thread the lampshade from below. The long chain can be hung, for example, from a hook attached to the ceiling next to the base of the chandelier.
What other options are there
There is another way to attach the chandelier. Place a metal ring on the lamp pendant and attach the chains tied to the hoop to it. The detailed process is shown in the video below. By the way, the technology of making brushes in it is slightly different. And the author also uses not a hoop, but metal hoops.
The tips of the brushes can be painted in a contrasting color:
> Or make a gradient chandelier out of colored threads, like here:
Types of lamps for the gazebo
If you have to solve the problem of lighting a summer cottage, check out the classification of street lamps. Country lamps differ in the type of light source and power supply.
Classification of luminaires by type of light source
Depending on the light source used, lighting devices for the suburban area are divided into:
- equipped with an incandescent lamp;
- halogen;
- luminescent;
- LED.
The most popular are incandescent lamps (as in conventional apartments). This is the cheapest option to buy, while also the most expensive in terms of paying for electricity. To save costs, we recommend installing a motion sensor that automatically turns on and off the light in the gazebo when people approach it.
Halogen luminaires are more cost effective, but for good performance, an additional transformer is needed to reduce the mains voltage. The transformer will protect against possible short circuits and extend the life of the lamps. If you use a transformer in a chain of several lamps, when one burns out, the rest continue to work and do not turn off the entire chain.
Fluorescent lamps allow you to illuminate the gazebo as brightly as possible, and LED lamps are best suited for outdoor conditions
This is especially important if you are relaxing at the dacha not only in warm weather, but also in the autumn-winter season.
Food classification
By the type of power supply, modern lighting devices are divided into:
- powered by the mains;
- powered by rechargeable batteries;
- solar powered.
To install a mains-powered luminaire, you will need electrical wiring for the gazebo and the installation of sockets in it, which is often associated with significant time and financial costs. A more convenient option is a battery-powered lamp: you do not need to pull additional wires, such lighting can be carried out without electrification at all.
Solar-powered lamps have appeared relatively recently, but have already proven themselves well among the owners of country houses. They are completely self-contained and no special knowledge is required to install them. The service life is long enough, they do not heat up and do not harm your eyes. Disadvantages of solar-powered lighting fixtures include:
- the impossibility of location inside the gazebo (in order for them to be charged, they must be placed on the street, near the building);
- the dependence of the brightness of the light on weather conditions (in bad weather, they shine dimmer);
- risk of breakage at subzero temperatures.
Materials (edit)
The chosen concept should help you decide on the choice of material for the luminaire. What is your room, what kind of lamps will fit here, where will they be located (on the wall, ceiling, floor)? At the same time, completely different things can act as the material for the shade: threads and veneer, bottles and twigs, paper and a basin, a cup and lace, wire and disposable spoons, fabric and beads. Real beauty can be made from the frame and materials at hand.
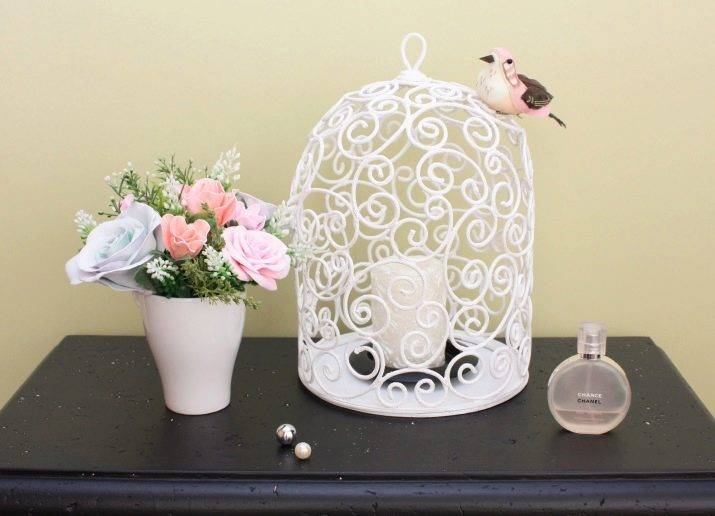
Lace shade
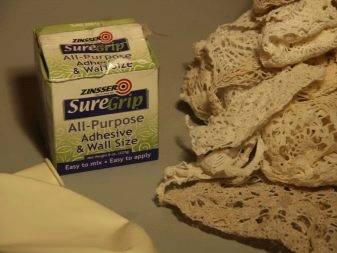
To make it, you will need about 10 knitted identical or different napkins of one or more colors (optional), a balloon, wallpaper glue and a container for it, a brush, threads, a bulb holder, a light bulb, oilcloth or newspaper for bedding. The exact number of napkins depends on their size and the size of the ball.
The sequence of our actions:
- Dilute the wallpaper glue (one pack should be enough).
- Inflate the balloon, tie it up.
- Tie it in such a way that it is approximately in front of your eyes or below. For example, on a clothesline or a ladder.
- Spread one napkin on a mat and coat it liberally with glue.
- Glue the napkin onto the ball.
- Spread on the next napkin and glue it so that one napkin just overlaps the other.
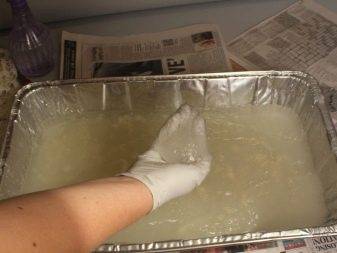
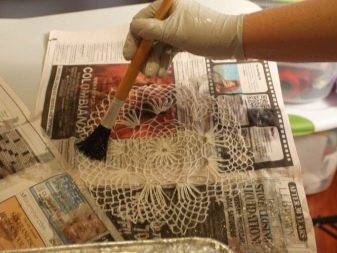
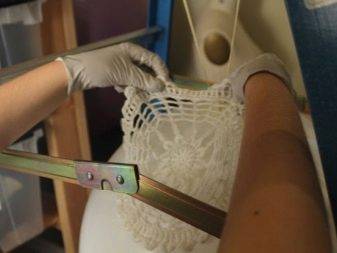
Glue all the napkins, lightly joining together.
Leave a small hole at the bottom without a napkin so that you can later install the socket and light bulb.
Your ball should dry for about a day.
After a day, making sure that the glue is completely dry, pierce the ball and remove it from the shade.
If you want to give the lamp a different color, before piercing the ball, paint the napkins with acrylic paints and leave to dry again.
Pull the electrical wire through the center of the napkin at the upper point of the plafond, to which the cartridge will later be connected
Attention! Do not forget to disconnect the power supply from the wires!
Install the cartridge.
Screw in the bulb.

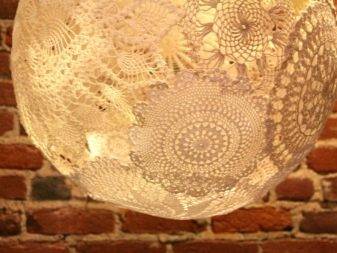
If you install such a shade on an already hanging cartridge, then you can proceed as follows:
- at the top of the plafond, leave a circle with a diameter of about 10 cm;
- hang a circle made of cardboard to match the napkins with a diameter of about 15 cm on the cartridge;
- carefully pass the cardboard inside the shade and fasten them together with a stapler or double-sided tape.
Plafond made of plastic bottles
Most likely, no one will name how many options for shades from plastic bottles exist. But there are two principles of use: the bottle is decorated with other materials, or elements for decoration are cut out of the bottle.
To implement the first principle, we need a three- or five-liter bottle. Its neck will be put on the cartridge, and the bottom must be cut off. If the bottle is made of colored plastic, then the simplest chandelier for a simple country house is already ready. But plastic can be painted with drawings, small elements such as buttons, pieces of a mirror, shells can be glued with liquid nails. Or cover with acrylic paint of one color, and on top apply an uneven layer of paint of a different color with a comb. In a more complex version, plastic disposable spoons without cuttings in the form of scales are glued all over the bottle.
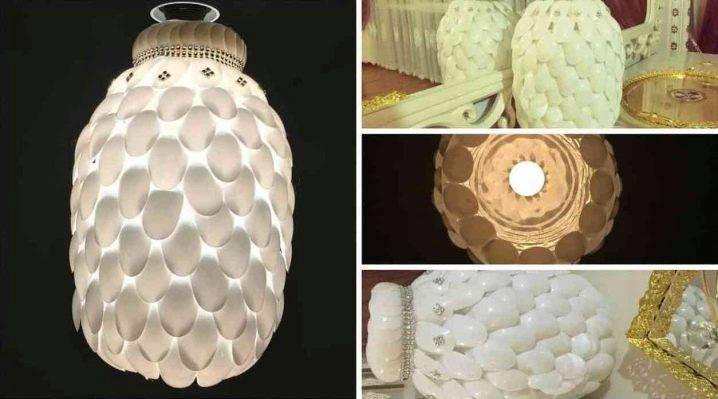
To implement the idea of the second principle, you need bottles of any size, but in different colors. Cut out any figures from them: leaves, flowers, geometry. The main thing is that there are a lot of them. The plafond will need a frame in the form of wire rings. Connect different levels of the frame to each other with a vertically located wire. Using a fishing line or thin wire, attach a huge number of cut figures to the frame. They can fit snugly against the frame or hang freely from it.

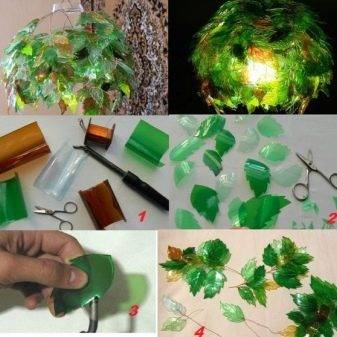
Plafond made of paper
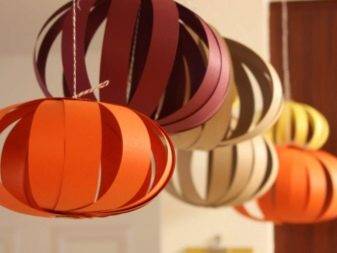
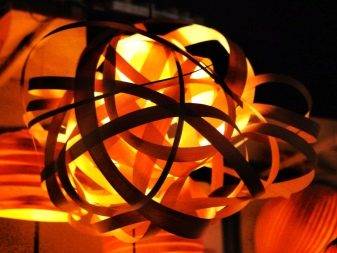
Cardboard, rice paper, self-adhesive, corrugated - what kind of paper is not used for homemade shades. For the Art Nouveau style, we suggest you make a shade from multi-colored cardboard ribbons. Match colors. Prepare strips 2-4 cm wide, stapler or good glue. Arbitrarily, threading strips into each other, fasten them in such a way as if you have a lump of remnants of different threads in your hands. It should not be tight so as not to interfere with the light bulb.
The size is at your discretion.By spreading the strips slightly apart, you can easily hang the ball on the chuck.
Grapevine ceiling
To make a plafond from a tree, you need to pick up a suitable snag or branches and process them properly. In the case of a vine, almost any will do, with stepsons and even dry leaves. Such a plafond can be wall, floor or ceiling. It needs a metal frame of any shape, through which the branches will be passed. When the plafond is ready, cover it with furniture varnish - it will be very beautiful.
Spot lighting of the gazebo
Spot lighting is considered one of the best solutions for a beautiful recreation area on the site. If the gazebo is not used for work processes, you should not place bulky structures, large shades and complex chandeliers under its roof.
It is important to remember the main task of such a place - to create a comfortable environment. Here you can relax, have a glass of wine or have a confidential conversation
If there is too much light, the atmosphere can be destroyed.
Small to medium sized lanterns and shades for local lighting are perfect. Carved metal lanterns, fabric lampshades, custom glass solutions with holes are good choices. Such lighting fixtures give a soft and unusual light, visually add mystery and magic to your garden.
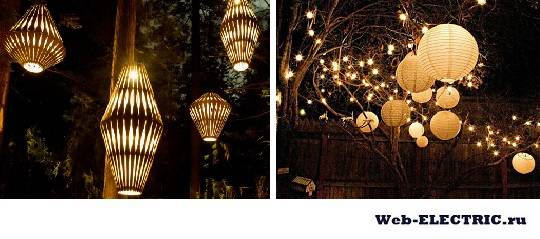
We have a few tricks in stock to help make the gazebo a truly fabulous place that can delight your friends and loved ones:
hang large plafonds of the same type on the sides of the gazebo (or in the corners) (it is important that they do not give too bright light);
in the central part under the ceiling, install several very small bulbs (you can even just hang dim incandescent bulbs on a long cord);
separately illuminate the area in front of the gazebo with ground-based light sources, for example, energy-saving white-toned lanterns that are recharged from sunlight.
Lamps made of textiles and threads
To create a lampshade, you can use old clothes: jeans, knee-highs, ruined dresses, etc. Products are decorated with bows, pockets, threads with beads. In almost all cases, the fabric must be worn on some kind of frame. You can also do it yourself. It is better to choose metal as a material, sometimes wood. The basis for a homemade chandelier made of fabric can be factory lamps, both new and old. The fabric of an ordinary old lampshade can be removed, and instead of it, a modern one with stylish patterns can be fixed. To create and design homemade chandeliers, threads of different thicknesses are used. They wrap various jars and frames, connect parts of the lamp and hang the structure. Lampshades made of hardened threads look interesting. In addition to them, twine or ropes are also used. They work well with different fabrics and paper.
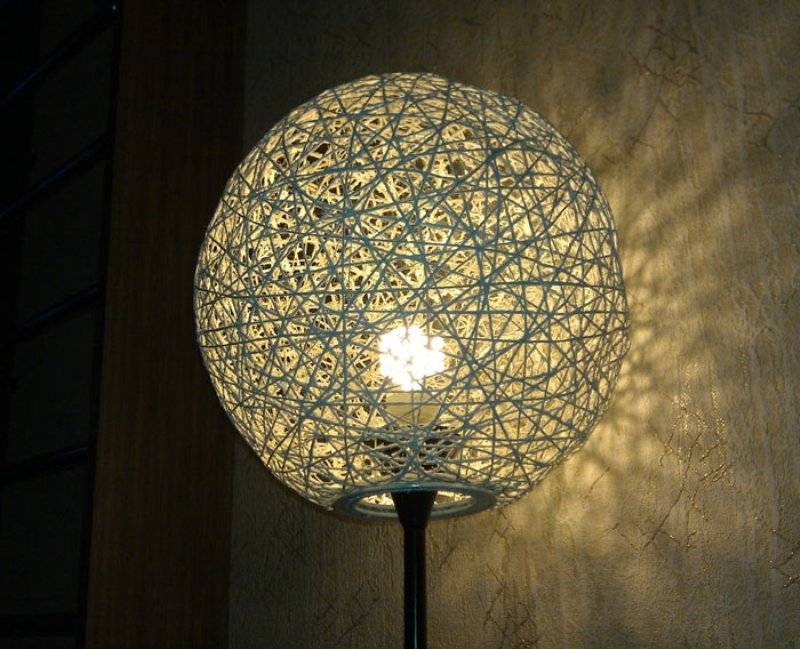
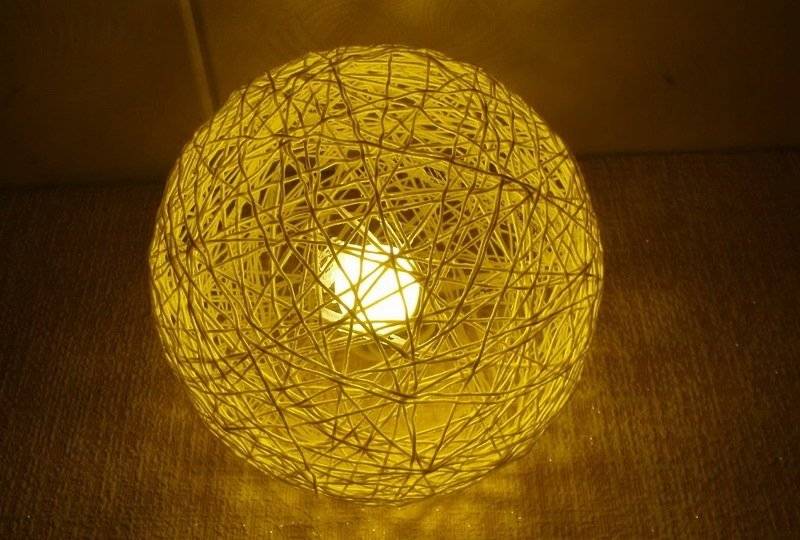
Master class: ball-shaped lamp made of threads
To create this product you will need:
- Base from a table lamp.
- Glue.
- Thick threads (up to 4 balls).
- Air balloons.
The balloons are inflated first. A few are better, because they can burst. Their shape should be perfectly round. A ten-centimeter circle is drawn on each of them with a felt-tip pen. A stand with a light bulb will be inserted through a hole of this size. The ball is placed on the oilcloth. An adhesive solution is being prepared. You need to put on rubber gloves on your hands to dip threads into it. When they are saturated with the solution, they are taken out; then the glue clots are removed. The end of the string is tied to a balloon knot. After that, it is wrapped around the entire ball, this must be done evenly over the entire surface, but chaotically. It is advisable to use several threads of different colors. Then the ball is suspended until the structure is dry. Then they burst it, and the knot is cut off. The ball is removed through a large hole, into which you will then need to insert a socket with a light bulb.
DIY fabric lampshade
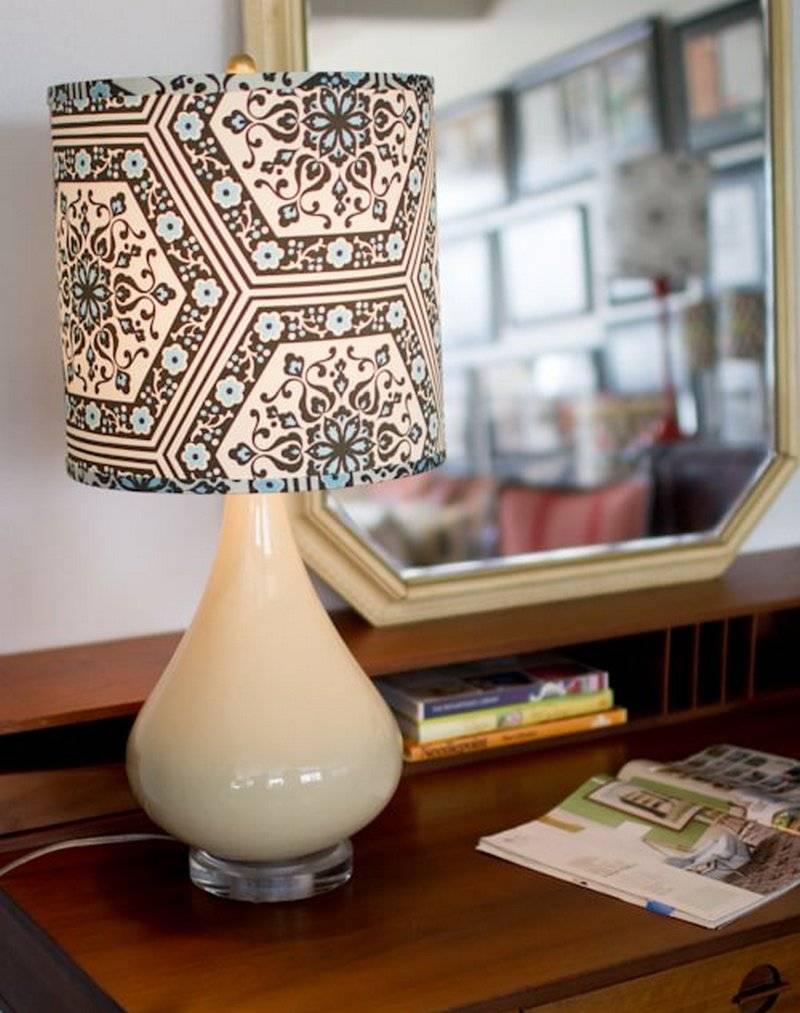
You will need thick paper, glue, fabric, threads to match the color of the fabric, pins, a ruler, a pencil, an iron. You will need to make a template to calculate the required amount of fabric. If the frame for the lampshade should have a cylindrical shape, then measure the circumference and height and alternately draw the corresponding lines, creating a right angle. Opposite sides of the rectangle are drawn. The desired shape is cut out of the paper. She is applied to the tissue. From it you need to get a larger rectangle. It is cut out after the desired fragment is selected. Then the fabric is fixed on the template with pins (its edges must be folded). After that, you need to use a sewing machine. The processed fabric is ironed. After that, it is glued to the base. Raw slices are hidden. The seam is made so that the base is covered with a stitched edge.
Step by step instructions
Regardless of the do-it-yourself craft option, the wood needs to be prepared. For this, they are used: fungicidal impregnations, which protect against the development of mold, impregnations to protect against moisture absorption. After treatment with impregnations, the workpieces are well dried.
Simple wood chandelier
To create a pendant ceiling lamp with your own hands, you can use straight, thick sticks. The main requirement: the diameter must be sufficient for pulling the cord. For a wooden chandelier with our own hands, we need:
- thick sticks;
- LED Strip Light;
- water-repellent impregnation.
Sequencing:
- drill each stick in the middle;
- cover with impregnation and dry for 24 hours;
- insert the LED strip into the holes;
- connect the contacts of each tape to the cable and insulate;
- Hang it from the ceiling with brackets or a hook.
Interesting video on the topic:
Board lamp
To create a lamp from boards you will need:
- Four planks to form a rectangular frame;
- Rectangular mirror as reflector;
- Varnish, glue;
- Drill.
Sequencing:
- On the edge of each plank we make a groove for installing a mirror element.
- We make a rectangular blank out of four boards, into which we insert a reflector on one side. We fix it with glue.
- We make a hole with a drill in one bar, insert a cable with a plinth.
- We varnish or paint.
Another option is to insert tinted or multi-colored glass on both sides instead of a mirror. Then the lamp will give a multi-colored light or a muffled diffused glow.
We make sconces
For a wall lamp with your own hands, it is better to choose geometrically correct shapes in the form of a rectangle or square. To create a wooden sconce, we need:
- flat rectangular blanks 2 pcs;
- corner bar;
- self-tapping screws;
- drill;
- varnish, glue gun.
What to do:
- We treat the blanks with fungicidal and water-repellent impregnation. After drying for two days, varnish or paint.
- We connect two blanks in the form of the letter "G" with self-tapping screws.
- Between them, we set a corner on the glue to give rigidity.
- We drill a hole for the wire in the upper part and draw the base.
A sconce made of wood is attached to the wall with self-tapping screws or on a bracket.
You can additionally install a plafond in the L-shaped wall lamp. The color and texture of the wood will accentuate the warm, amber shade of the plafond, while the silver-coated glass will add contrast to the texture and color.
Features of the manufacture of a floor lamp
You can make a wooden floor lamp with your own hands. For a floor lamp, wooden elements will serve as a stand. If you have a lathe, then the rack can be made from edged timber.If there is no processing tool, a small tree trunk can serve as the basis for the floor lamp.
In this case, dry the workpiece, remove the bark from the trunk, grind the surface with sandpaper. Treat with impregnations against fungus and moisture. On the back, make a groove for the wires.
Place the barrel on a stable base. On top of the wire, make a frame for installing the base. On top, you can put a lampshade made of fabric, paper or make a wooden one.
Wooden lampshade
You can do it yourself from thin branches. Due to their small diameter, they dry faster. Small branches are more suitable for a ceiling chandelier because they are lighter than timber or solid wood. With a combination of subtle elements, the luminaire has an airy silhouette, which does not weigh down the interior and makes the light diffused, giving it a sense of intimacy.
Useful for a lampshade:
- branches;
- thick wire;
- glue gun;
- secateurs.
What do we do:
- We sort out the sticks. Depending on the shape, we select either the same and even ones, or, conversely, with a large number of bends.
- We treat the branches with an antiseptic. If there are no special impregnations, soak for a day in a solution of potassium permanganate, dry at room temperature for a week.
- We make a frame from thick stainless wire. The shape can be any: classic trapezoid, ball, rectangle.
- We fix the sticks to the frame with glue. Do not forget to leave a gap for installing the base.
- We cover the wooden lamp with varnish. It will protect against moisture and fungus.
- We insert the cartridge with the lamp, fix it with wire.
Conclusion
The chandelier is the only important element in the upper part of the room, it can create symmetry and other geometric accents. To hang a beautiful, stylish, designer lamp in your room, you don't have to buy it in a store. Each home has enough items and tools to do it all on its own. In most cases, a blank, scissors, paper, glue, thread, frame, varnish and paints are enough. Occasionally you may need the help of an electrician. Most handmade fixtures are made of wood, plastic, paper, glass, textiles or metals. There are also more exotic options using different designs, small parts, molds. A homemade chandelier should not only fulfill an aesthetic function, but also provide high-quality lighting to the room. It should be designed wisely.
