DIY wood brushing: how the process is carried out
In this case, the wood is processed using special brushes that have strong (most often metal) bristles. The meaning of the actions performed is to make the annual rings on the tree noticeable. This makes the surface visually embossed.
The origin of the term is associated with the English word brush - brush. Many people know such a tool as a cord brush. It is she who is suitable for brushing wood.
Nowadays, completely manual brushing of wood is less and less common. Automatic devices are more commonly used. Moreover, there are even special large-sized machines equipped with appropriate fleecy parts. With their help, you can quickly process a large surface.


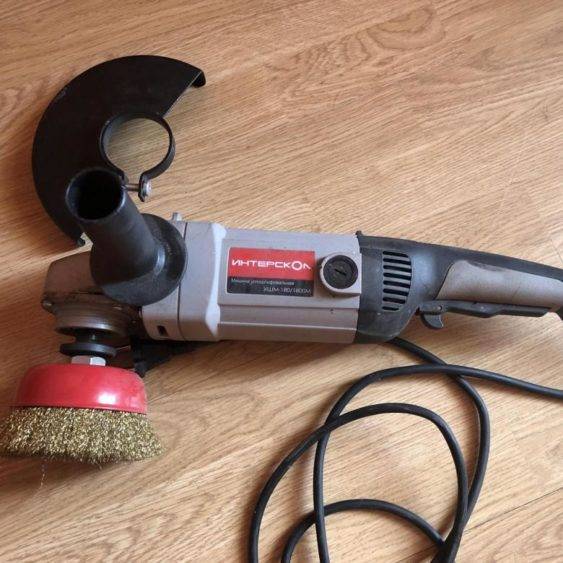
Brushing is ideal for working with larch, pine, spruce, alder and oak. In other words, we are talking about hard types of wood.
We do not recommend stitching wood for species such as pear, maple, teak, beech and cherry.
It is not so difficult to master the process of brushing wood with your own hands. To get started, you need a set of necessary tools:
- Brush (with metal or other dense bristles)
- Paint (one or more shades)
- Solvent
- Surface to check (a kind of “palette”)
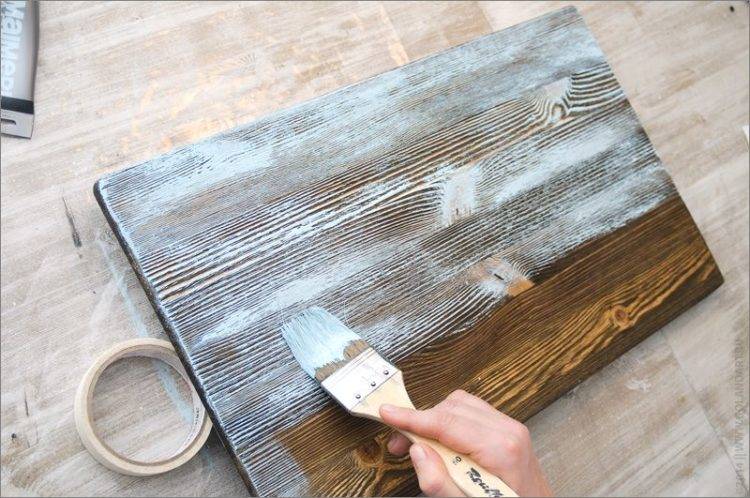

When everything is ready, it's time to feel like an artist and do some brushwork!
- Degrease wood
- Use a sufficient amount of a carefully selected shade of paint, the excess can be removed with a rag.
- Check the color and visual effect on the “palette”. If all is well, you can continue.
- Start with a brush to apply paint on a wooden surface, making movements strictly along the grain of the wood. At the same time, it is recommended to go in one direction, without reverse movements and repetitions, but this is not so necessary. During work, do not put pressure on the brush - the bristles should not curl or wrinkle.
- When you're done, just let the piece dry.
DIY tree brushing is complete!
Direct your maximum effort into processing the protruding parts of the product - carefully go over the edges, corners, etc. This will create the illusion of a 3d effect and accentuate the bump, which always looks good.
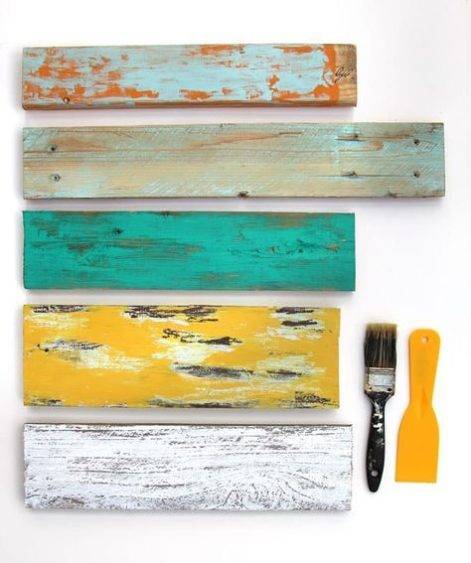
How to age wood

Things from the distant past are quite popular in our time. This has not bypassed the design sphere either. The design of the house, in which there are notes from the past in the form of old wooden furniture, floor beams, various old wooden decor elements, make it chic and expensive. You might even think that the owners inherited from their great-grandfathers a chic house, which is more than one century old.
In fact, everything is much simpler. The fact is that with the fashion for everything old, the concept of imitation under the old came. The same thing happened with wood, because in any building or furniture store you can find decorative elements made in accordance with the old style. Of course, the prices for such items are rather big, so rarely anyone can afford them.
Semi-antique wood processing is carried out using 3 common methods, namely:
- brushing;
- burning;
- alkali.
At home, great preference is given to exactly 1 option.

The first step is to choose the wood to be processed. If you want to artificially age boards or beams for the further creation of various objects and furniture from them, then you can choose materials with various defects (chips, small cracks, potholes, knots). After proper treatment, such defects will only improve the result. If ready-made furniture is chosen for aging, then you need to use specimens that have an appearance like those made by hand in past centuries.Before processing, the furniture must be completely disassembled in order to be able to get to hard-to-reach places.
You also need to prepare the necessary materials, such as:
- hard metal brush;
- softer metal brush;
- paint brushes;
- acrylic paint, varnish, wax or stain;
- sandpaper.
It does not interfere with practicing a little on unnecessary, small pieces of wood before working with the prepared material.
Some operations can be harmful to health (when firing or using chemicals), therefore it is better to carry out them in the fresh air and in compliance with safety rules.
Wood patina
A brown or greenish surface patina is more characteristic of metal. First of all, it concerns copper and bronze objects affected by oxidation.
However, patina can also appear on non-metallic objects. In this case, patina is understood as any plaque that eventually appears on the surface, regardless of shade and origin.
The aging of the tree by the patina technique makes it unevenly dark, as if it has been repeatedly in human hands, which has been exposed to high humidity and time.


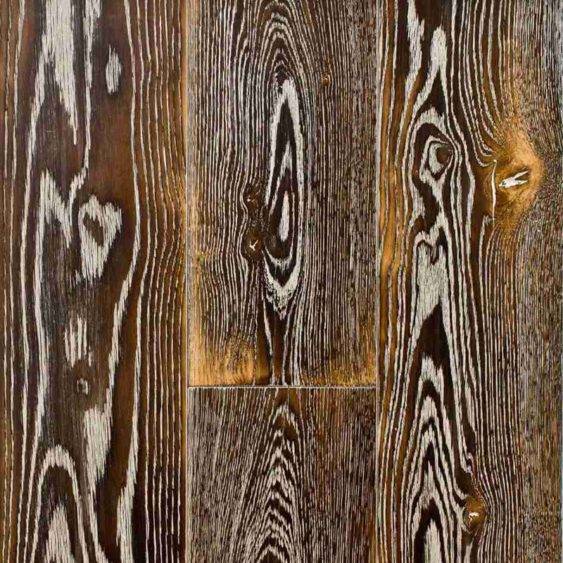
Depending on the purpose, you can artificially achieve a more or less dark patina on wood, make the surface look like metal, and even give it a very specific color. For example, it is very common to age wood with a white patina (a process known as lining) or to give it a noble bronze appearance.
The types of wood with which the patination technique works best are cherry, maple, beech and others that do not have an obvious texture.
The instructions and tips below will help you figure out how to age wood with paint and how to achieve a patina on your own.
The process of processing a wooden product and the necessary tools depend on which type of patination to choose. Let's consider the main ones.


In this case, bitumen varnish and shellac varnish are used. The first is applied to clean, dry wood with a soft brush or sponge. With the second, the product is covered entirely to consolidate the patina effect.
This is the simplest and most understandable way, so it is ideal for those who are trying to age a tree with their own hands for the first time. All you need is acrylic paint of the desired color, a brush or roller, and a cloth to soak excess paint.
The process is simple: we apply acrylic paint in the places of the recesses with a loose layer, apply a dry rag to remove excess. Then it remains only to wait until it is completely dry.

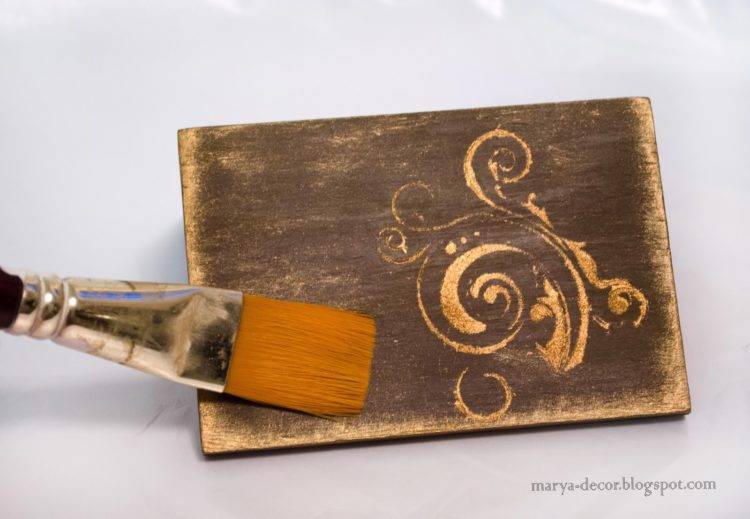
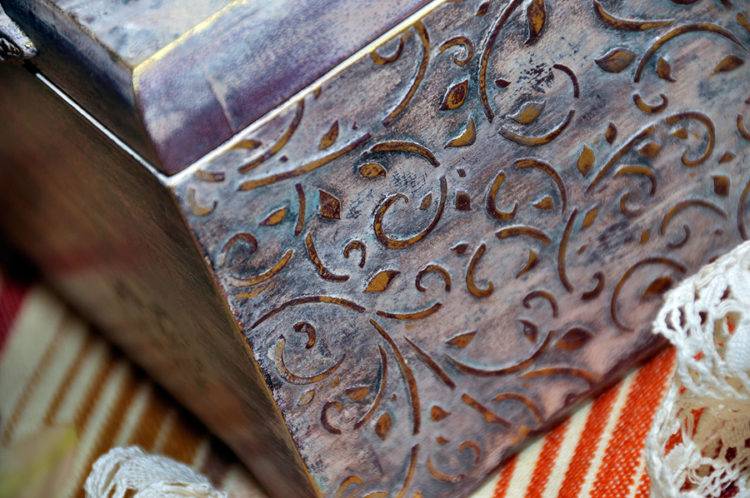
It is necessary to apply a small amount of an oxidizing agent (alkali, ammonia) to the painted and cleaned wooden surface. Within a few minutes, the surface will begin to oxidize, which will change its color and appearance.
To fix the result, after using alkali, you need to wipe the tree with vinegar solution. This is not required for ammonia.


In addition to these agents, in the process of chemical patination, you can pickle a tree with iron or zinc sulfate, calcium chloride or potassium chromium peak. It is necessary to create a solution based on any of these substances and place a tree in it. The longer the wood is kept in the solution, the more pronounced the surface erosion effect will be.
With chemical patinating, you need to be as careful as possible so as not to spoil the product and not achieve an excessive effect. In addition, you cannot do without safety precautions - be sure to use gloves, work in a well-ventilated room.

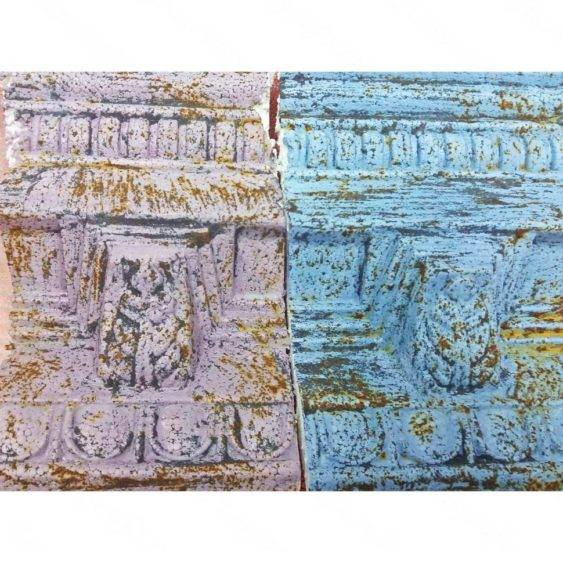
You will need a wax polish that needs to be rubbed over the wood. In general, the wood will instantly become smoother and shinier.And over time, an additional result will be added - in the depressions and places of accumulation of wax, toning will become noticeable, glare and reflections will become softer.
Wax on wood dries out for a long time, so you will have to be patient when using this method.
The general sequence of actions for color patinating of wood with your own hands is as follows:
Degrease and clean the wood
We make soft grinding
Apply the primer, paying close attention to the grooves and grooves
We begin to carefully apply the paint in a thin layer (before giving the color to the tree finally, you need to make sure that the shade is chosen correctly)
We finish painting the tree
Walk briefly on the painted surface with emery
We make patination using one of the methods described above.
Rubbing wood with a dry cloth
If desired, cover the treated item with varnish from a spray bottle or with a brush


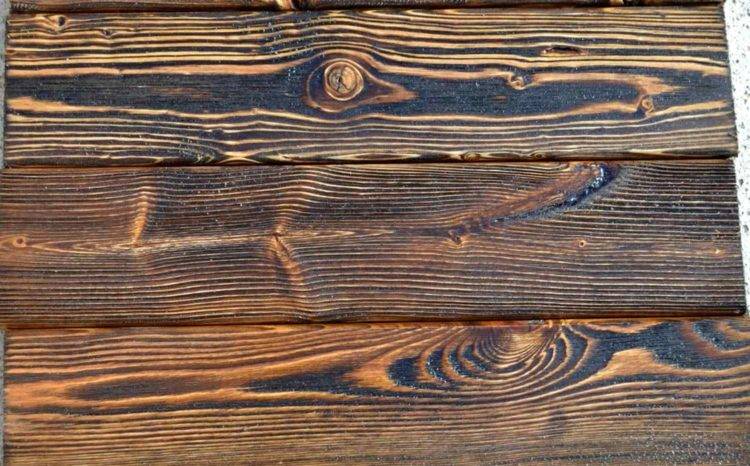
Thermal and chemical treatment of wood
Heat treatment of wood.
These methods can be called related, since the destruction of the top layer of the tree occurs almost without mechanical stress. These are more dangerous methods than the previous ones, therefore, processing should be carried out in the air and in compliance with safety measures.
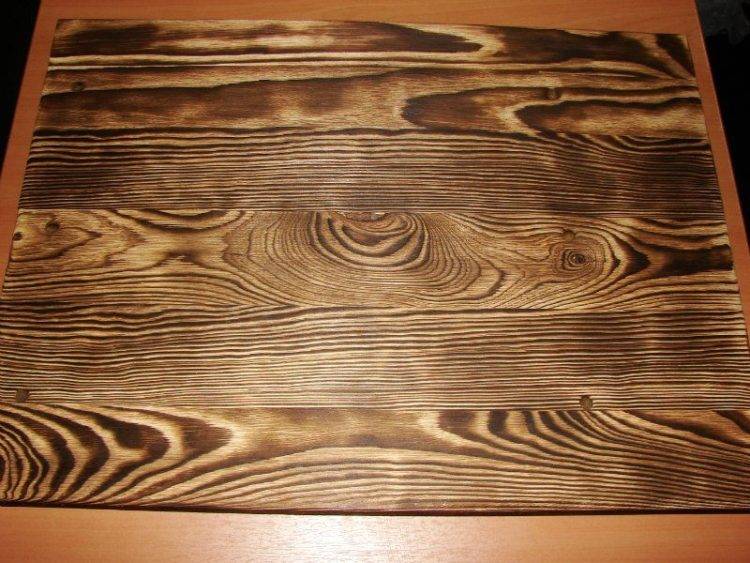
The essence of firing lies in the fact that soft fibers are destroyed when exposed to open fire. For this, the surfaces of the workpiece are fired with a blowtorch flame or a special gas burner to a depth of 3 mm. With superficial firing, the aging effect will be negligible, with deeper firing it will be more pronounced. At the same time, the master adjusts the process depending on his taste and needs.
After charring the top layer, a metal brush or a drill bit is used, scraping off the carbon deposits until the desired color and texture is obtained. Such wood need not be dyed, because it will already have dark and light areas. The final treatment consists in sanding and varnishing the product.
With the chemical method, antique wood decoration occurs in the process of exposure to alkalis or ammonia. To do this, you can use sprays for cleaning stoves or a drainage agent. Before use, it is necessary to familiarize yourself with the composition of the product, it must contain alkali
Particular attention should be paid to precautions when working with it
Once on the surface of the wood, these chemicals "burn out" some of the soft fibers, at the same time staining the wood gray. After processing, all surfaces are washed with water and covered with a weak solution of table vinegar or citric acid (1 tsp per 200 ml of water), removing alkali residues.
The dried products are subjected to brushing and staining, if necessary.
Wood processing by the listed methods will help the owner himself decorate the interior of the apartment semi-antique, without investing a lot of money and not spending a lot of time on it. The availability of materials and tools for processing allows to engage in this type of creativity and a sophisticated master carpenter, and a beginner, and even a woman with imagination and skillful hands.
Preparation for work
Different types of wood can be aged using different methods. A number of methods are not suitable for certain varieties.
Table 1. Methods of aging and types of rocks that can be subjected to the techniques.
| Technology | What breeds are recommended to use |
|---|---|
| Aging through chemical action | Oak, willow, walnut, maple, beech, mahogany, linden, aspen. |
| Surface machining techniques | Everything except teak, maple, cherry, beech and pear. Particularly suitable: pine, larch, oak and ash. |
The result of aging a pine board using brushing and a solution of vinegar and steel wool
Effects on the surface with the help of special compounds can be divided according to the techniques:
- using a dry brush;
- patination;
- glaze;
- splashing;
- crackle;
- method of creating abrasions (Shabby Chic);
- etching (using compounds such as wood stains).
Bark beetle - a technique of drawing a pattern that imitates the movement of a bark beetle larva on a tree (you can use a denture drill with a large nozzle)
Processing with physical impact on wooden surfaces is also possible:
- brushing - a technique using brushes with metal bristles (cord brushes);
- firing - the use of fire or metal heated to a high temperature;
- in the hot sand.
Other methods are also possible - for example, imitation of natural damage, which is achieved using an awl, sandpaper and other tools.
Master Class. How to age a tree?
A couple of recipes for "antique" wood
You can find many recipes for aging wood using improvised means, but they are all derivatives of the processing methods already described. Let's take a look at some of them.
Using wax
With ordinary wax, you can achieve a good effect, you only need 2 types of wax (colored and regular), as well as a machine for grinding wood. This method is convenient in that you do not need additional steps like brushing wood or using acid to remove soft parts of wood.
You can buy any color of wax
The technology for performing the work will look like this:
- first, the board is sanded, and the direction is strictly along the fibers;
- then colored wax is applied, at the previous stage the pores of the wood opened, so it will be nice to penetrate inside. It takes about a day to cure the coating;
- then you will have to apply colorless wax on top of the colored one, while part of the colored wax will inevitably be removed.
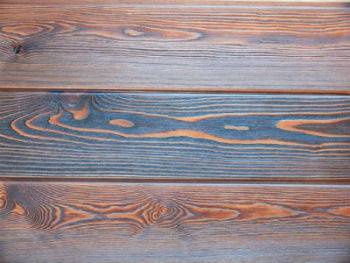
An example of wood processing with colored wax
Bleached wood
Bleached wood will look unusual in any interior. It costs a lot, but you can achieve the same effect with your own hands when painting a tree. The main task in this case is to ensure that the white color does not completely "hammer" the texture of the wood, ideally the wood should have a slightly grayish tint and the wood pattern should be visible through the layer of white paint.

Bleached wood
You can get the desired effect using the brushing technology, and the key point will be how to paint an antique board so that the tree pattern remains visible after painting.
To do this, you can use tinted and transparent varnishes, and painting will be performed in several stages:
- if the wood is dense and does not absorb varnish well, then the prepared surface can be immediately treated with tinted varnish in a couple of layers;
- then a colorless varnish is applied over it to protect the tinting.
Tinted varnish from a renowned manufacturer
The same effect can be achieved using white paint, but here you need to take into account that it is easy to paint over a tree drawing 100%. Therefore, after applying the paint, you can gently blot it with a sponge so that the texture of the board becomes visible.
How to age a tree? We prepare the material
To begin with, before aging the tree, it must first be prepared. First of all, for brushing, it is better to focus on soft wood, or medium-hard wood, which has a pronounced woody texture. This can be, for example, a spruce, or a pine. These species are distinguished by the fact that their soft fibers are often formed in spring and summer, and during this period the annual rings of the tree grow most rapidly, therefore the fibers are more "friable". Woods with a homogeneous and almost unexpressed texture, such as beech and maple, are not suitable for aging.
Before starting work, the surface of the tree must be carefully prepared.All dirt and possible defects are removed, it can be a trace of grease, sweat, other stains - the fact is that they can appear when applying a tint solution. Any wooden products must be processed disassembled, regardless of their size - this way you will reduce time costs and reach with a brush in all places, thereby ensuring a uniform aging effect.
DIY wood staining
With a strong desire, artificially aged wood can be made independently:
- The selected workpiece needs to be slightly moistened, this will eliminate the release of wood dust during operation. First, the workpiece is processed with a hard metal brush. Its rigidity is selected empirically. It is necessary that the brush is good at removing soft surface fibers, but at the same time does not disturb the structure of hard fibers. The movement of the machine or grinder fixed on the grinder is carried out in the direction of the fibers. The rotation speed is also pre-selected on the sample; for each wood, the speed can differ significantly. When working manually, there are no problems with the selection of the brush rotation speed, but at the same time the process of wood preparation is significantly complicated and lengthened.
- After use with a wire brush, use with abrasive bristles. With this attachment or brush, all loose fibers and roughness are removed. At this stage, with the help of a chisel, you can additionally add various grooves and grooves. They can be made to look like natural cracks in wood.
- In the future, final polishing is necessary, it is usually carried out with a sisal bristled brush. You can use sandpaper by hand. At this stage, it is necessary to achieve perfect polishing of the entire surface.
- The detail acquires a special decorative appearance if at the last stages it is tinted, painted, gilded. Stain is often used. Impregnation with stain and its quick removal allows you to paint over areas with the softest fibers, while hard ones practically do not stain.
- The original look of the tree is given by the color of golden or silver paint. Particles of the coloring pigment are clogged into microcracks when the dye is applied, which ensures the appearance of glare in sunny weather. You can use different dyes for painting, but they must necessarily be designed for working with wood. After painting, it is recommended to polish the surface again, this will relieve the product from roughness.
- At the last stage, you need to apply several layers of varnish. Before applying a layer of varnish, the previous one must dry well and must also be polished.
With sufficient experience, the process of brushing wood and the use of special devices is not particularly difficult. At the same time, you can make the most exclusive products, from wall shelves to cabinets and kitchen sets.
How you can age wood yourself, the video will tell:
Brushing
This way of aging wood with your own hands is called so from the concept of brush, which translates as a brush. The second name is tree structuring.
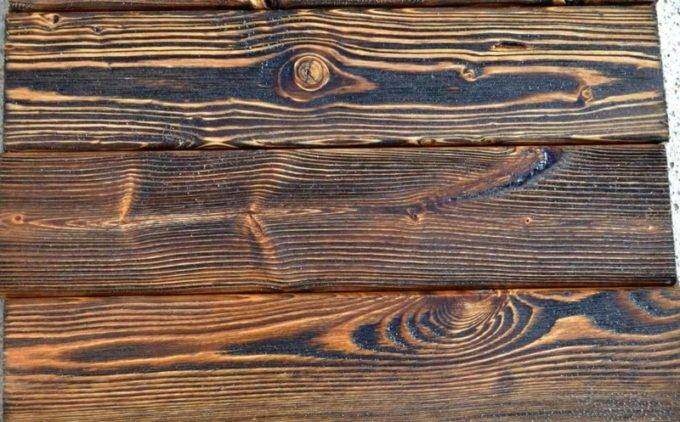
The degree to which it is necessary to age is determined by its purpose. If necessary, to create the appearance of deep antiquity, cutouts are made up to 3 mm. Such aging is not suitable for floor coverings, since it will collect a lot of dirt, and it is difficult to wash it. On average, a depth of about 0.7 mm is left. Only hard woods can be aged by this method. Brushing wood improves its quality characteristics. It becomes stronger, lasts longer, is not susceptible to attack by fungi and parasites.
Tools and materials for processing
The basis of the method of aging by brushing is cleaning with a stiff metal brush. Cleaning of soft fibers is done manually. With this tool, a relief is formed. The shorter the nap of the brush, the more it will age after the procedure. A chisel is used to apply straight deep stripes, changing their curvature.Use sandpaper to emphasize the resulting effect.
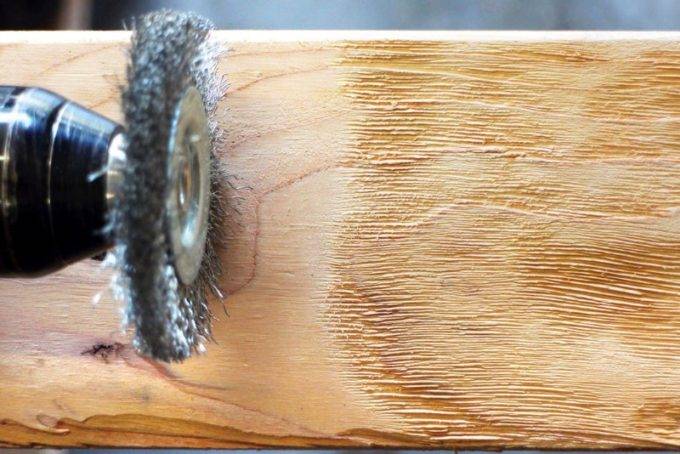
After the end of the first stage, the wood is covered with a paint that has its own natural wood shades. The coloring composition is applied unevenly deliberately. This is how the upper layers age, they acquire a dark shade, while the lower ones remain lighter. The relief after such staining stands out even more. The ideal texture of wood aging is created by gray-white paint. Before it is completely dry, the top layer is wiped off the surface. The result is the appearance of a tree that is at least 10 years old.
Processing technology
Before starting structuring aging, the tree must be prepared. Lumber is selected without defects with a moisture content of 10-15%. Otherwise, the fibers will not lend themselves to processing, they will break. How to age wood properly with your own hands:
- Moisten the surface so that there is not a lot of dust during work.
- The brush should move in the direction of the grain. Remove only soft wood grain.
- The speed should be moderate so that the wood does not heat up.
- Primary grinding is done with a polymer brush with an abrasive. Remove the torn remnants of fibers, you can use sandpaper. After removing the roughness, it will become clear how well the aging is made.
- If necessary, make the deepenings of higher quality by brushing again.
- Decorating is done with a chisel. The appearance of cracks is created.
- Polishing. It is carried out with a sisal or hair brush, if aging is carried out with a grinder or grinder. The final look is given to the workpiece. For the same purposes, fine-grain sandpaper is used for manual processing.
- Next, a piece of lumber must be dried, then completely cleaned of dust.
- A layer of wood stain creates a contrasting pattern. An abundant layer without rubbing with a quick removal of excess will paint over soft fibers, and leave hard ones light. Gold and silver colors look especially advantageous when the wood is aged.
- Patination - darkening of deep furrows. Gives nobility during aging.
- Finally, they are polished again, erasing any irregularities after painting.
- Varnishing is done with parquet varnish.
If the workpiece is aged in this way, it will preserve the characteristics of the rock for a long time.
2 What to age in the interior - we understand the issue in more detail
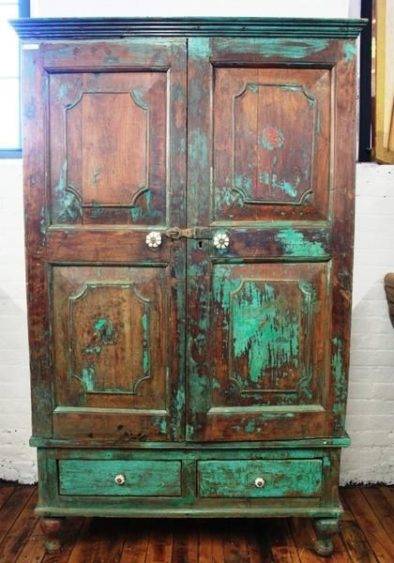
Aged wood in the interior is the main attribute of country and Provence style. It creates a rustic, suburban atmosphere in the house, close to nature. To emphasize this style, the brushing technique can be applied to the following interior elements:
- "Pot-bellied" or regular chest of drawers;
- window sills and doors made of natural wood;
- solid wood for flooring and wall cladding;
- floor beams;
- backyard benches;
- shelves, tables, chairs;
- log cabins for wells;
- fences made of wood.

The brushing technique can be used when aging antique dressers.
Natural wood with aging effect goes well with other natural materials (stone, leather, metal). Brushing is often used by craftsmen who create handicrafts. Here are some more ideas from this series: designer lamp, notebook with rough leather and wood trim, wrought iron garden furniture
With a candle
This is a versatile technique that can help give wood or wood furniture an antique look. It can be used on untreated wood as well as on already painted wood and furniture. Suitable for painting in one or more layers.
Let's take a closer look at how to paint a tree using this method, making three layers (brown, white and yellow).
Necessary materials:
- paint (brown, white and yellow)
- brush, candle, rag.
Step 1: First coat of paint
- Decide on the color of the paint that you will take as a basis. This will be the first, bottom layer of paint that we will apply directly to the wood. In this case, we use a dark brown color.
- Paint the wood with slightly random strokes, without painting the surface completely and evenly.
- Leave to dry completely.
Step 2: using a candle

Take a candle and rub the surface of the tree with it in several randomly selected places (while pressing the candle quite hard so that a clear trace of wax or paraffin remains on the tree).
- Step 3: Second coat of paint Choose a color for the next coat and paint over (we use white here). At this stage, the paint can be applied evenly over the entire surface, and not with strokes, as with the first coat. Leave to dry completely.
- Step 4: After that, take a rag and wipe the surface with some pressure. In places where wax has been applied, the paint will lag behind the surface. If two layers are enough for you, then you can stop at this, and if not, follow on.
- Step 5: Third coat of paint Repeat steps 2 and 3, but the last one using a different paint color (here it will be yellow). After the paint is dry, a protective varnish can be applied. The latter is not necessary due to the fact that we deliberately gave an antique look, so if the paint starts to lag a little over time, this will not be noticeable.
Antiquity effect: what is it
Paradoxically, the more technologically advanced a society is, the more it appreciates antique products. It would seem that with the appearance on the market of a huge assortment of innovative building materials with which you can build and decorate your home in an ultra-modern style, many are giving preference to old things.

By the appearance of the front door, you can determine the status, level of well-being and personal preferences of the owners of the house.

Wright's (prairie) style is easily recognizable by its well-defined lines, flat or hipped roofs with wide eaves and maximum integration of houses into the surrounding landscape.
What styles is the antiquity effect suitable for?
-
French, Swedish or German;
-
Victorian, Medieval and Gothic;
-
country, baroque, rococo, classicism;
-
modern or alpine;
-
the style of the Russian estate.

Thanks to the wooden design elements, the trendy industrial style of the loft does not seem lifeless and gray, but on the contrary - cozy and stylish
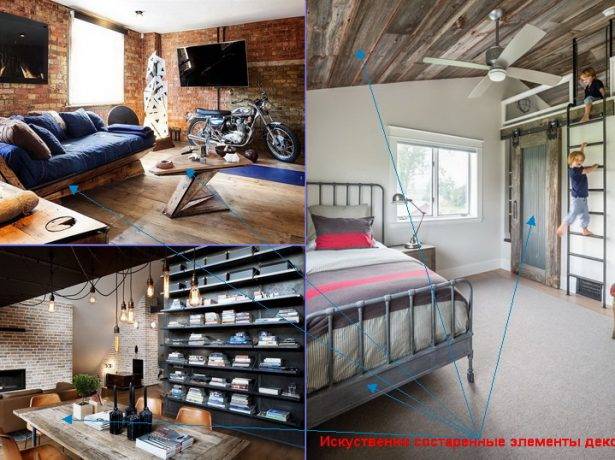
If initially loft-style premises were rough and sometimes brutal, then recently such living rooms have become more and more sophisticated and fashionable.
Although this trendy trend is considered bohemian and the most expensive, it is still possible to bring the characteristic elements of such an attic style to any room without special costs. Perhaps this is due to the existence of techniques for aging materials.
5 Method number 3 - an electric drill with a nozzle and paint-varnish
The mechanical method with a manual brush is reliable but time-consuming. To age a tree with your own hands quickly, use an electric drill or grinder with a nozzle made of hard nylon fibers. We start work with the preparation of wood. Take a hand planer and cut notches around the edges of the material. We do not recommend using the electric version of the tool, the result will look unnatural. Before proceeding to the next step, put on goggles and a respirator to protect the mucous membrane of the eyes and nasopharynx from wood chips. Thick gloves won't hurt either. Take a drill or grinder, put on a stiff-brush attachment, and practice on a small area of the tree. Move strictly in the direction of the fibers, do not press the nozzle too tightly against the surface. If you are sure you are ready, skip to the main part. Move along the wood with light movements, remove soft fibers.
If you do not use fire to process the wood, then after using the power tools, moisten the board with a brush and let it dry for 2-3 minutes. Next, sand the surface with fine-grained sandpaper, collect wood dust. It is better to do this with a vacuum cleaner in order to completely exclude drifts from getting under the skin, or thoroughly walk over the surface with a soft bristled brush. Holes 1–2 mm deep with a blunt nail can be drilled into the board before finishing.

Electric drill with attachment simplifies mechanical aging of wood
The last stage is coating with paints and varnishes. Use paint and varnish of your choice. Advice, so that the artificially aged tree looks as realistic as possible, we paint the recesses in light shades, and the convex parts in darker ones. If you decide to paint the board in one light shade, sand the surface after drying to reveal the dark details. After finishing the work, we fix the finish with varnish. To enhance the result, instead of the usual varnish, you can use craquelure. After drying, it cracks, the bottom layer of paint is visible in the voids.
If it is expensive for you to age wood with your own hands using paint or wax, and you do not have a drill or grinder with a nozzle at hand, use a metal scraper for washing dishes. Wood processing will be delayed, but it will save finances. Instead of wax, use a shoe polish of the right shade. It also contains wax, the main thing after processing is to open the tree with varnish.
Wood brushing
There are several ways to create a semi-antique board, no special equipment is needed for this, the maximum is a metal brush, a couple of types of paint, varnish, etc. Of course, you can buy wood already processed in the right way, but there is no guarantee that it will exactly match the plan, and its price is much higher than that of ordinary wood.
The density of wood is uneven, denser and harder areas alternate with soft fibers. It is because of this that, after some time, the surface of the tree becomes embossed, soft fragments simply collapse over time, but hard ones remain.
This process can be accelerated and simply brushed with a wire brush. Thin steel wire removes soft pieces of wood to create the desired surface relief. After that, it remains only with the help of paint or stain to process the board and varnish it on top.
The work is done in this order:
first, the surface of the board is roughly processed, in order to speed up the process, you can use special attachments for the drill
When processing wood, it is important that the brush moves not across, but along the fibers, otherwise the desired effect cannot be achieved;
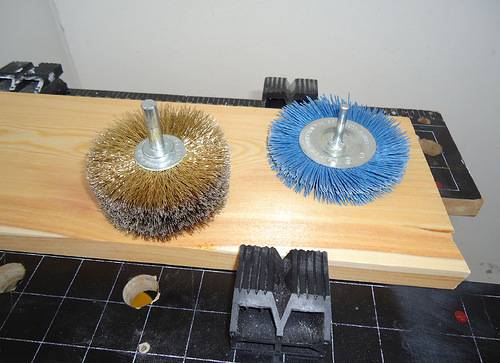
In the photo - the main tools for brushing
- then you can walk on the wood with a brush to remove sawdust and small chips;
- the next stage involves sanding the wooden surface in order to finally remove roughness and unevenness. At this stage, you need to use fine-grained emery and not press hard on it, so as not to remove the entire created relief;
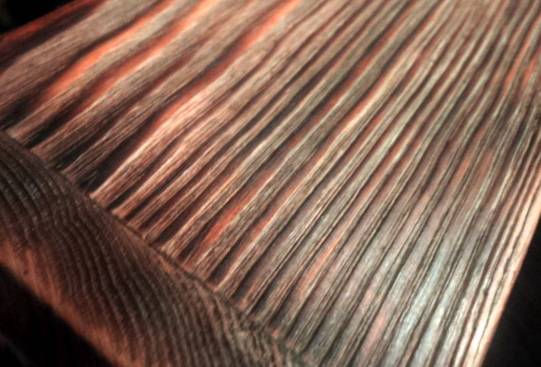
Such a relief should have a board after processing.
further, the instruction provides for the application of stain or paint, as well as surface treatment with varnish.
The stain will be absorbed into the soft areas of wood in seconds, but it will be removed almost completely from the protruding hard fibers. After that, several layers of varnish are applied to the surface of the product to protect the coating from fading.
This method of processing in a domestic environment is practically not used due to the fact that it is quite laborious, moreover, aggressive liquids will be needed for application to wood. Usually, solutions of hydrochloric and sulfuric acids of medium strength are used, as well as various alkalis, ammonia.
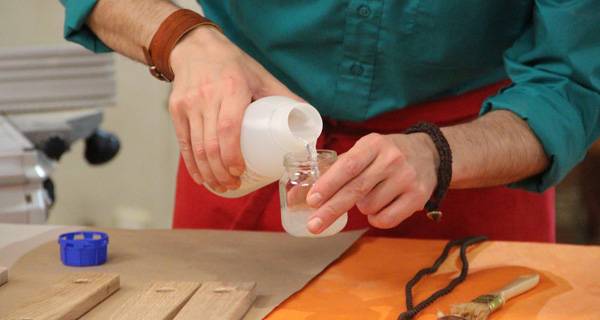
It is enough just to apply the liquid to the wood
The essence of this method is that the liquid is applied to the wood and literally dissolves the soft areas of the wood.When processing hard rocks, multiple applications of liquid will be required, which is rather inconvenient. In addition, before the subsequent application of paintwork materials, the surface will have to be thoroughly cleaned mechanically.
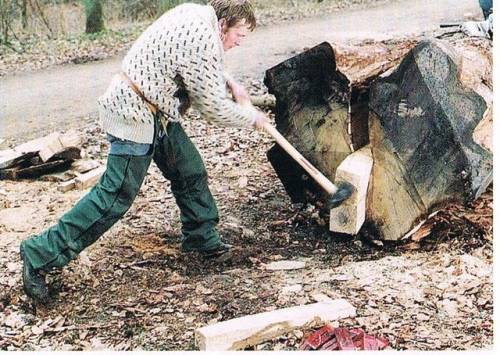
Something like this did the boards in the old days

Artificial aging is easily performed on coniferous wood. It is distinguished by the presence of soft fibers in the surface layer. The texture can be developed by removing some of the soft fibers using a brush with a hard metal bristle (Fig. 1). After repeatedly moving along the fiber, it is easy to remove the soft component. Only structural rigid fragments will remain.
Rice. 1 Metal brush for brushing wood
One or two boards are easy to handle with a similar brush. If you need to harvest a certain amount of timber, you will have to use the means of labor mechanization. An electric drill or an angle grinder (grinder) will help here. A mechanical radial brush is installed on them (Fig. 2).
Rice. 2 Mechanical brushes: a - for an electric drill; b - for an angle grinder (grinder)
The process is carried out in the following sequence:
- The board (block) is fixed on the working table (workbench). It is convenient to use a comb or a locking wedge here;
- Turn on the power tool and brush along the fiber, the direction of movement to the stop.
- When working, they try not to press hard from above, the brush itself will choose what it can remove from the surface.
After three to four passes, the result is examined. There is no need to overdo it here. Having received a depth of only 0.4 ... 0.6 mm, you should stop. The process has begun. After a couple of days, the grooves themselves will deepen, as there was a destruction in the structure of the wood. The visible effect can only be enhanced by subsequent treatment with varnishes or oils.

The aging process of wood in natural conditions is very long. Therefore, professionals resort to an artificial, fast method. For this, several procedures are usually performed: brushing the wood, sanding and - the final stage - fixing the result with a special substance (wax, paint, stain or other means). After that, an unusual wood grain with the desired shade is obtained.
