How to fasten polycarbonate to metal with a connecting profile
Characteristics of connections
Scheme of a typical connection unit.
This method is quite convenient. So, when using detachable joints, greenhouse sheets can be bent without much effort in the right places. But such work will require you to be especially careful and accurate.
First of all, you need to purchase profiles. They are of two types: detachable and one-piece. One-piece profiles are cheaper and come in a wide variety of colors, so you can easily match the mount to your overall greenhouse style if that matters to you. This is ideal for small areas. But still, it will be quite difficult to work with such a profile if you have a slope length of more than 3 meters in your greenhouse. In addition, when using a one-piece profile, it will not be very convenient to bend monolithic sheets where it is required. That is, you risk damaging the material, which may entail additional costs.
Therefore, if your greenhouse is quite large or has its own specific shape, it is advisable to purchase split profiles for fastening. They consist of a cover and a base (base). Installation consists in attaching the base to the frame at the joints of the sheets. This option is more expensive, but it is much easier and easier to work with such material. you can bend and rotate it with ease without fear of damage. This type of attachment is ideal for greenhouses with wide roofs. After all, here the probability of jumping out of the sheet is reduced to almost zero.
Installation of polycarbonate
Thermal washer use diagram.
How is the sheet installation process going? To begin with, using a drill or a punch, you need to drill holes in the mount the same as on the frame (as a rule, holes on the frame are provided in advance). If the connection is detachable, then you need to drill on the base, but not on the lid. Then the profile is attached to the longitudinal support of the greenhouse frame. The most convenient way to do this is with a screwdriver.
We check the fastening for reliability and move on to the next step. It consists in applying a special sealant to the base of the fastener, on which the sheet is immediately planted. The sealant must be applied immediately on all substrates where this sheet will fit, and this must be done as quickly as possible so that it does not have time to dry out. When mounting this entire structure, do not forget that it is necessary to make a mandatory gap of about 4 mm. We seal the sheets with our hands, after which you can install the cover of the fastening profile from above, snap it in and fix it with a rubber hammer. It is unacceptable to use an ordinary metal or wooden hammer! This can damage the greenhouse very much.
The last step is to fix the greenhouse fixing structure by closing the joints with the metal frame with a specially provided plug. In the same way, we attach monolithic greenhouse sheets around the entire perimeter of the greenhouse.
Installation of cellular polycarbonate
Correct installation diagram of polycarbonate for arched roofs.
The installation of sheets differs depending on the type of material. Cellular polycarbonate is successfully used for the manufacture of pitched structures with a slope angle of at least 11%. The good thing about honeycomb material is that it can be cut without much difficulty. With a thickness of 4 to 10 mm, it is perfectly cut with a knife. Thicker material can be cut with a saw or electric jigsaw.
In the event that it is planned to close the roof with polycarbonate, then the technology of work is as follows: firstly, using a conventional drill, holes are made at a distance of at least 4 cm from the edge. Make them between the ribs.
Scheme of attaching polycarbonate sheets to a metal frame.
Remember to remove the chips after cutting.It is recommended to cover the ends with metal profiles. They are needed for the tightness of the structure. Profiles can be perforated, that is, with small holes, and not perforated. In the latter case, it is advisable to make small holes to ensure the outflow of liquid. The upper ends of the panels will need to be covered with aluminum tape. Perforated tape is used for the bottom end.
If the ends are not sealed, the service life of the polycarbonate is reduced. In the honeycomb material, the stiffeners are located in the longitudinal direction, therefore, it is required to fix the sheets in the direction so that the condensate flows down
It is also important to remember the fact that cellular polycarbonate has two sides, one of which is protected from ultraviolet rays. Fastening is carried out in such a way that it is outward
Fastening polycarbonate
Almost any instruction includes the use of fasteners. The sheets are fastened using self-tapping screws and washers. When carrying out installation, it must be borne in mind that the axis of the hole is located at least 36 mm from the edge of the plate.
A method of fastening a connecting jumper with an arc.
This is of great importance in the thermal expansion of the material, ensuring the original properties of the material. Otherwise, if this rule is not followed, the polycarbonate sheets may bend. The distance between the screws depends on the thickness of the board. If the latter is 8-10 mm, then the distance between the fasteners is 400-500 mm. When the thickness of the sheets is 2 times greater, the distance is recommended to be 600-800 mm.
If the slab is long, for example, 7 meters, then it is optimal to make the holes for the screws oval so that the longitudinal axis is directed along the length of the slab. It is recommended to make the hole only in the middle of the air channel of the polycarbonate sheet.
Simple drills are suitable for drilling. This stage of work is carried out between the stiffeners. Cellular polycarbonate sheets are fixed in a pointwise manner using self-tapping screws and thermal washers. The latter are washers on a leg with a snap-on cover. Their main function is to ensure the tightness and strength of the fastening of the sheets.
The length of the leg must strictly correspond to the thickness of the panel. In this case, the leg is adjacent to the frame itself. The step of fixing the thermal washers is on average 30-40 mm. It is not recommended to fix the polycarbonate rigidly, without a gap in order to avoid its distortion. In order to prevent or reduce thermal expansion, it is recommended to use transparent or white sheets because they heat up less.
Benefits of using polycarbonate
Polycarbonate is deservedly considered one of the most popular materials of our time. In individual construction, they use mainly the honeycomb variety, while when organizing decorative partitions and dividing walls indoors, builders often use monolithic polycarbonate.
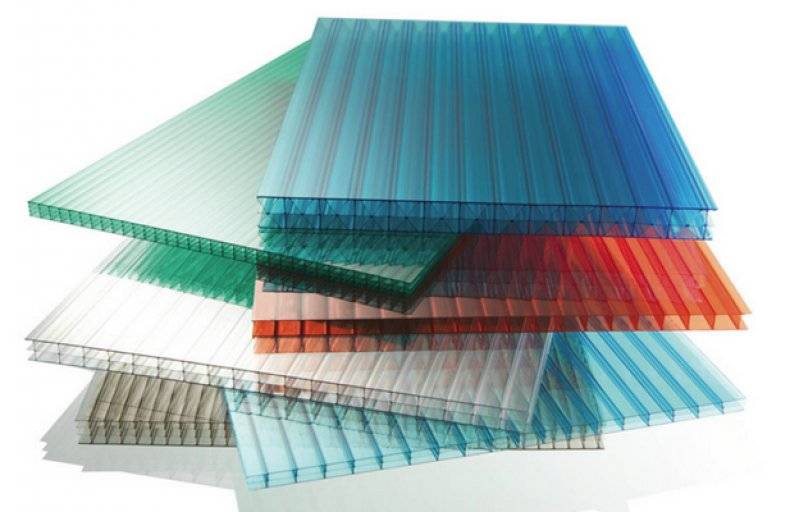
Among the main advantages of this particular material, the following are distinguished:
- Light weight. It is the lightest roofing material on the market today, which does not affect its strength in any way. A polycarbonate panel with a thickness of 2.5 cm and a size of 750x1500 mm can withstand loads of 200 kg / m², and it itself weighs no more than 3.4 kg / m².
- Low rates of thermal conductivity. In this regard, polycarbonate outperforms glass, since there is an air gap between the walls of the material, which poorly conducts both heat and cold. As a result, it is easier to maintain a specific temperature in the greenhouse.
- Optical properties. In terms of light transmission, the described material is in no way inferior to glass, and the light transmittance varies between 11-85%.That is, if you wish, you can both organize good illumination of the space, and achieve almost complete shading. Unlike glass, polycarbonate sheets are additionally equipped with a special film that can protect your plants from UV radiation harmful to them.
- High level of durability and reliability. The resistance of polycarbonate material to mechanical stress is much higher than that of glass, therefore it is often used in armored and protective glazing.
- Application safety. Even if any damage appears during operation, both people and plants will be protected from fragments, and if we also take into account the high fire resistance and low weight, then we have an almost ideal solution to any problem of building materials.
- Dimensions and overall dimensions. Today, a wide variety of polycarbonate panels are produced, which can also have different sizes (for example, 1050x12000 mm). Moreover, their weight will be only 44 kg, and one person is enough to install the structure (polycarbonate sheets are easily connected to each other).
- Excellent panel processing capabilities. You don't need any special equipment to cut or drill the material, because all work is done using standard tools. In addition, the polycarbonate panels flex perfectly while remaining intact and unharmed.
- Good savings. In any construction, the material side of the issue is far from the last criterion for choosing a roofing material, so it is worth noting the profitability of polycarbonate in this regard. Its sheets are usually much cheaper than ordinary double-glazed windows, and if you take into account the fact that you need less material to create a frame, then the profitability of such a solution is more than obvious.
Video: what to look for when choosing polycarbonate
As additional advantages of polycarbonate, we can note the simplicity of working with it, because the fastening technology is easy to master in the shortest possible time. This is a great option for sheltering awnings, greenhouses, garages, light buildings and sloped roofs, and the honeycomb variety also allows you to create arched structures.
Did you know? Cellular polycarbonate was originally developed as a material for the construction of greenhouses. The first sheet was produced in 1976, and the equipment of the company "Polygal" was used for its production.
Types of fasteners
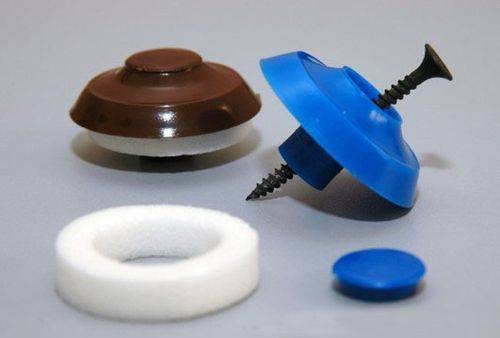
The range of products on the market for assembling polycarbonate structures allows you to make almost any structure. Elements for joining bleached parts of plastic blanks, end profile and fasteners for the polymer itself. The best option is considered to be a connection using a thermal washer. The kit includes:
- Sealing gasket. It comes into direct contact with the polycarbonate surface and evenly distributes the pressing force;
- Steel or plastic washer. By increasing the pressure area, it protects transparent plastic from damage;
- Self-tapping screw for metal. Supplied in a set or purchased separately;
- Lid. It has a dual purpose - decorative and protective.
It is allowed to use roofing screws with an elastic seal and fasteners with a hex head. Original fasteners are preferable because they are designed for this grade of polycarbonate and have decorative covers in the same colors as the base material. The protective layer is resistant to sun and moisture.
All elements for fixing sheets are selected from products intended for metal. For a thin-walled profile, the best option would be a self-tapping screw with a drill at the end. In this case, it is not necessary to make a mandatory hole in the polycarbonate. The connection is made in one step. The best tool for the job is a screw with a torque limiting mechanism. When the limit value is reached, the safety gear block is triggered. A characteristic sound is heard, for which the mechanism is sometimes called a "ratchet".
What material do you like the most about the house?
Log house
25.47%
Brick house
19.38%
Log house
15.3%
House of aerated concrete blocks
13.93%
Canadian technology house
12.26%
Rounded log house
4.45%
Monolithic house
3.92%
House of foam blocks
2.63%
House of vulture panels
2.66%
Votes: 2627
Mounting methods
There are several ways to fix polycarbonate sheets, so that each master can choose the most convenient option for himself. Let's take a look at some of them.
Using thermal washers
The thermal washer is one of the most common fasteners when working with polycarbonate. It consists of several important parts: a plastic washer (for convenience it has a wide base), a sealing elastic ring, and a plug.
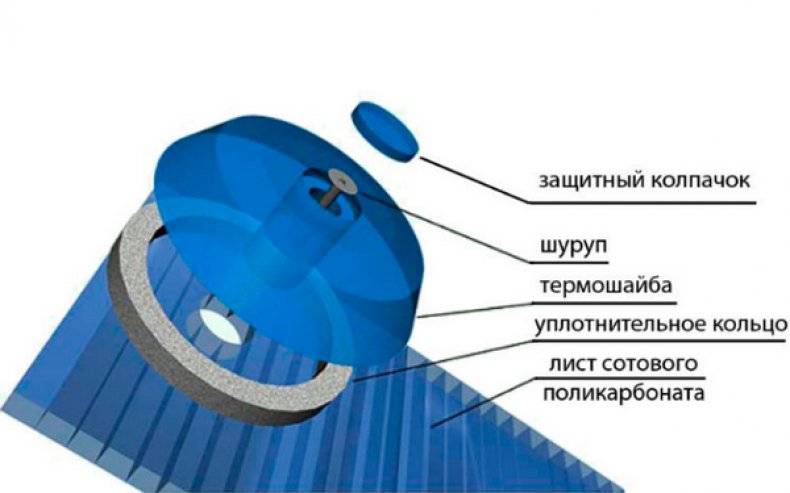 Thermal washer for mounting cellular polycarbonate
A self-tapping screw is usually not included in this set, and you will have to purchase it separately. With the help of such a retainer, you can gently but reliably press the sheet to the frame base and prevent moisture from entering the material, and in addition to this, you will also get a beautiful decorative element.
If you like to do everything with your own hands, we advise you to read about how to glue a plinth correctly, how to put a plastic window sill, how to make a warm floor, how to properly sheathe a door, sheathe a wall with plasterboard, make a plasterboard partition with a doorway, how to lay tiles correctly, how to install blinds on plastic windows and how to insulate window frames for the winter.
There are three types of thermal washers:
- polycarbonate;
- polypropylene;
- made of stainless steel.
Of course, the most reliable and durable option would be a steel element, but it does not have the necessary decorative properties, which is why consumers increasingly prefer polycarbonate products, which are only slightly inferior in strength to stainless steel.
Installation of sheets using thermal washers is performed in the following sequence:
- Holes are drilled in the places where the polycarbonate sheet is attached to the frame base.
- Then self-tapping screws are inserted into the holes of the thermal washers.
- Place the canvas on a metal frame and fasten it in the required position (if possible, it is better to perform this action with an assistant).
At the end of the installation, the thermal washers are closed with protective caps (included in the kit) to protect the product from precipitation
When working, you should be careful only at the stage of drilling holes, and in the future, all actions for installing thermal washers are very simple and easy
Video: attaching polycarbonate to a metal profile using thermal washers
Did you know? Polycarbonate has excellent optical properties, thanks to which it has been used for a long time in the manufacture of spectacle lenses. Compared to glass, which is much thinner, this material provides longer product life.
With profile attachment
Profile fastening provides for the use of special fasteners, which are produced today both in detachable and non-detachable forms. The latter are more materially available and come in different color variations, which allows you to choose the shade that is most suitable for the selected polycarbonate.
However, working with them is not as easy as with detachable models, especially if the length of the parts to be connected exceeds 3 meters. As an alternative solution, you can consider the option of fastening using docking, corner or wall profiles, but in any case, the polycarbonate sheets should go into the profile by no more than 20 mm.
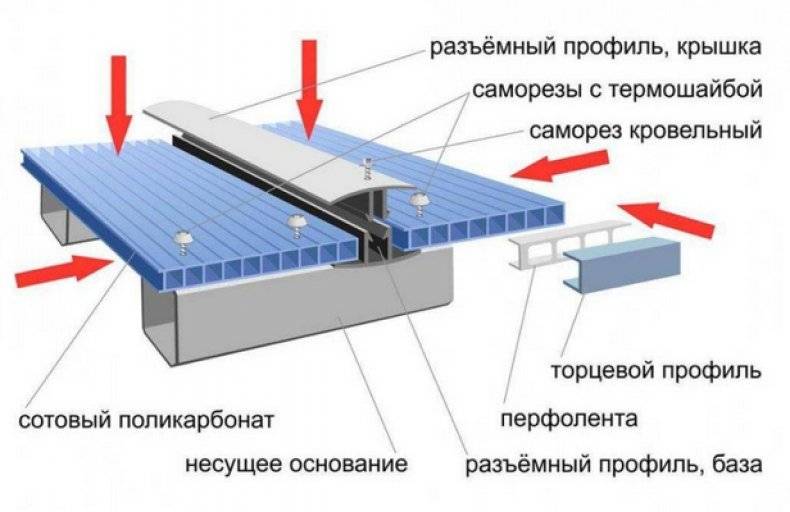
The process of installing polycarbonate using profiles is as follows:
- First, the canvases themselves are fixed in the grooves of the metal profile.
- Then the structure is attached to the lathing and to the longitudinal beams using self-tapping screws. It is better to fix the edges of the panel sheets with self-tapping screws or the same thermal washers, and the middle can be installed using a point fixing.
This method of fixing polycarbonate is considered the most convenient, since the joining of the canvases occurs immediately on the frame.
Important! When installing monolithic products, it is advisable to choose fasteners that come complete with rubber seals. If your design is distinguished by complex shapes, then you will have to use only split profile fasteners .. Split profiles consist of two parts - the main part and the cover-caps, and, in principle, they are easy to assemble: first, the base is fixed in the places of their installation, then polycarbonate sheets are laid , and the upper part of the profile is installed on top
Split profiles consist of two parts - the main part and the cover caps, and, in principle, are easy to install: first, the base is fixed in the places of their installation, then polycarbonate sheets are laid, and the upper part of the profile is installed on top.
Greenhouse polycarbonate
The material is produced in the form of sheets of various sizes and properties.
When choosing panels to cover a greenhouse, there are a number of factors to consider.
- Thickness - sheets with a parameter below 8 mm are not structural, and cannot be used for outdoor work. The thickness of 8-10 mm allows you to use the material for the device of horizontal surfaces - roofs and awnings. If the construction is carried out in regions with heavy snowfalls or strong sustained winds, then a product with a greater thickness should be preferred.
- On the market, panels are offered with a special coating that does not allow condensation to accumulate on the inside of the sheet, which helps to significantly increase the degree of lighting in the greenhouse.
The polymer is characterized by a rather high coefficient of thermal expansion, which should be noted during installation. The manufacturer's instruction recommends not to remove the protective PVC coatings from the surface of the panels until the end of all work
In the photo - honeycomb polymer panels.
Wooden bar - what kind of material
In our case, the greenhouse frame is assembled from a wooden bar - an oblong lumber with a rectangular or square section. Most often it is made from coniferous trees, but we will consider larch and pine. For the construction of a greenhouse frame, lumber with a cross section of 50x50, 100x50, 100x100 and 150x150 mm is suitable. A thicker bar in this case will be redundant and will only increase the cost of construction, and a thinner one may not cope with the snow load.
 Wooden beams
When buying material for the greenhouse frame, it is very important not to miscalculate with the quality. The following recommendations will help you choose a quality timber
- The lumber should be as flat as possible, without significant bends or defects. When buying a bar, take a tape measure with you to check its geometry and linear dimensions.
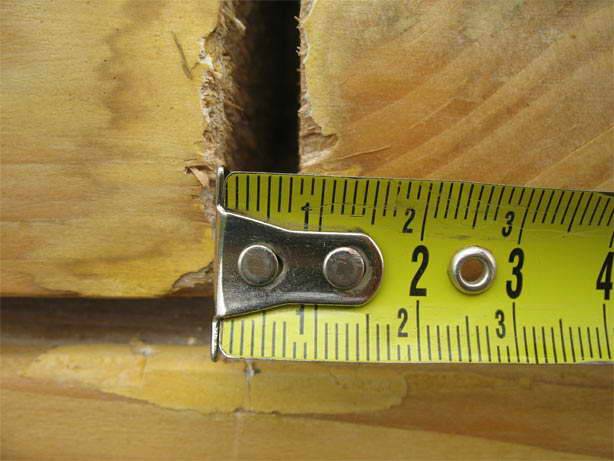 Take a tape measure with you to choose a quality bar
Examine the ends of the beams you choose - the distance between the annual rings should be approximately the same. The presence of defects in the shape of the annual rings can lead to subsequent distortion of the product.
There should be no through or too deep cracks on the timber.
It is desirable that the lumber is uniform in color. A large number of dark spots indicates a violation of the storage technology and the low quality of the timber - it will be especially vulnerable to mold.
Choose only dried timber. Lumber with moisture values of more than 20% after the construction of the greenhouse will shrink strongly, which is undesirable.
 Examples of wood defects
As mentioned above, timber is harvested mainly from either pine or larch. Both types of wood have their own characteristics.
Let's look at larch first:
- dense wood, comparable in strength to oak;
- high resistance to microorganisms and mold;
- larch practically does not collapse upon contact with water or humid air;
- larch wood is not an attractive environment for insects and mice;
- high rates of thermal insulation relative to other types of wood;
- sawing and other work with larch is more difficult than with other types of wood, due to its high hardness, density and mass;
- the cost of larch timber is higher than the average among this lumber.
 Larch beams
As you can see, larch is suitable for those summer residents and owners of private households who value durability and reliability most of all, regardless of the price and possible difficulties in the construction of the greenhouse frame.
Now let's consider the features of a pine timber:
- relatively low cost, which makes this type of wood more affordable;
- ease of processing due to the low density of pine;
- long service life (subject to construction technology and material care);
- when the pine shrinks, it releases phytoncides - substances that inhibit and kill fungus and microorganisms.
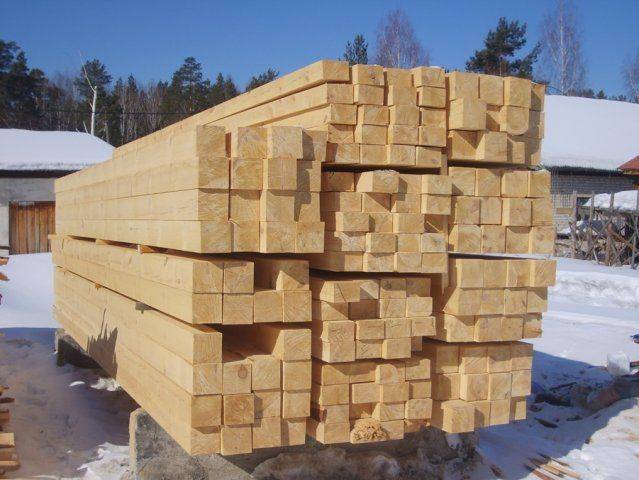 Pine timber
Before starting the installation of cellular polycarbonate on a wooden frame, the latter needs to be coated to protect the timber from moisture, decay and bacteria. Consider what types of antiseptics are used now and how to process the basis of the future greenhouse with them.
DIY tools and materials for installing cellular polycarbonate
Considering that different methods of joining polycarbonate sheets can be used, and the fact that the sheets can be attached to a frame constructed from different materials, different tools and consumables may be needed to work. We list a standard set for a particular type of work with polycarbonate panels.

When we install sheets of cellular polycarbonate with protection from ultraviolet rays in bulk, we place the sheet with either side to the sun.
- First of all, you need to purchase the sheets themselves, the standard size of which is 2.1x1.2 m. The amount of material is purchased based on the area of the surface to be created.
- For cutting to the required size and shape, you can use a hacksaw for wood or metal, circular. Sheets are cut quite simply in any direction.
- For profile connection of panels, detachable and one-piece linear profiles can be used. In addition, it is often necessary to use an angular, curly, ridge profile.
- To work with profiles, you will need a drill, a screwdriver, a screwdriver, self-tapping screws, nails, a hammer, a nail puller.
- For gluing cellular polycarbonate, a special glue or silicone adhesive mass is used. You can also glue the panels together using solvents that contain ethyl chloride, methylene chloride and their derivatives.
- Glue gun.
- When forming a frame for a canopy, roof, partition, greenhouse or other polycarbonate structure, you can use wooden blocks or rolled metal pipes.
- In order to mount the panel on the frame, self-tapping screws or bolts with special thermal washers are usually used.
Installation methods for monolithic polycarbonate
Scheme of point fixing of polycarbonate sheets.
Before carrying out the basic work, you need to know the rules for installing polycarbonate. In the construction of pitched, flat roofs, polycarbonate can be installed in 2 ways: wet and dry. The first is distinguished by the fact that a special polymer putty is first applied to the surface of the frame along the entire perimeter. A sheet is laid on top of it, pressing it tightly to the surface.
It is important to remember that you will need to leave a small gap of 2 mm, it is necessary for the temperature difference. Excess putty is removed
Instead of putty, you can use special rubber pads. Fastening of sheets is carried out either in four corners or along the long sides. A layer of sealant is applied from the sides.
To give the structure an attractive appearance, wooden boards or corners are laid on the silicone sealant. This method of laying polycarbonate is suitable for both wood and metal structures. The second method (dry) is the most common. Its difference is that the installation is carried out without the use of adhesive solutions. Instead, screws with nuts and bolts are used. It is great for large structures.
The technology includes the use of profiles and covers along with rubber gaskets. The dimensions of the polycarbonate are very important. The most optimal option is to use square sheets, because as the length of the sheet increases, its strength decreases. It is also necessary to remember the fact that monolithic polycarbonate is capable of expanding, including when heated, as a result of which its installation and fastening must include large gaps.
A wooden greenhouse made of polycarbonate is the most common and demanded type ↑
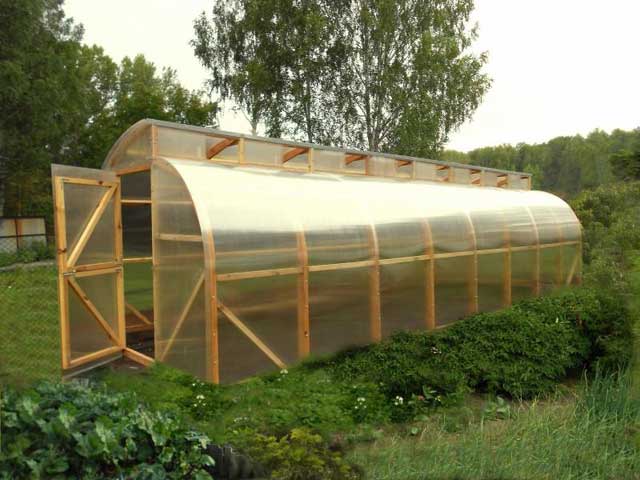
Currently, in the manufacture of polycarbonate greenhouses, galvanized steel, aluminum, and plastic are increasingly used as a frame material. But we can say that the "classic" and still in demand today option is a wooden frame.
This is due to the fact that:
- wood is an environmentally friendly material;
- he / it has a low thermal conductivity, and the heat accumulated during the day gradually "gives off" at night - in contrast to the metal profile, which in the cold season can lead to cooling of the air in the greenhouse;
- for the manufacture of a wooden greenhouse, mainly a circular saw or a hacksaw and a screwdriver are used as the main tools, and to work with a frame made of metal (steel, aluminum), you will need welding and pipe bending machines, metal cutting tools
- the frame made of wooden beams is more stable and will not fly away in strong gusts of wind, as is sometimes the case with greenhouses built on the basis of a PVC frame.
- lumber is inexpensive - compared, for example, with aluminum and metal profiles.
The main disadvantage of a wooden frame is considered to be a relatively low service life, since under the influence of moisture, wind, insects, the wood begins to rot and crumble. This drawback can be overcome by treating it with antiseptic and other special compounds. Professionals recommend using deciduous (hornbeam, teak, oak) and pine species (spruce, pine) wood - they are durable and resistant to decay.
 teplica-1
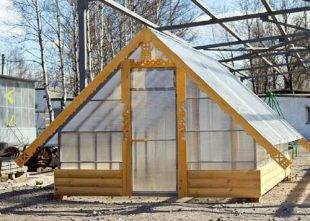 teplica-2
 teplica-3
 teplica-4
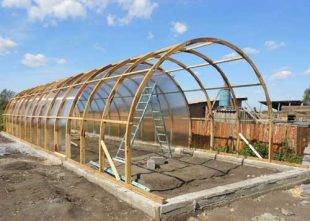
Thanks to modern technologies, greenhouse structures based on a wooden frame are distinguished by a great variety. So, for example, such forms of greenhouses as:
- lean-to - one of the walls of which "adjoins" the wall of the house;
- gable - the base of which has a rectangular shape, and the roof slopes on both sides of the greenhouse
- arched - the lathing of the roof of which is a series of arched ceilings.
The most common and popular option among Russian summer residents is a rectangular-type wooden greenhouse (with or without a foundation - screw, tape, brick, wooden, or without it - wooden base beams of which simply burst into the ground to a certain depth), with a gable roof and "Skate" upstairs - located on a plot of land not far from the house.
Attention!
The standard and optimal for the growth of vegetable crops in the climatic conditions of Russia are the dimensions of greenhouses (length-width-height) 6000 * 3000 * 2100 mm, with a cellular polycarbonate thickness of 4-6 mm.
Accordingly, for a greenhouse measuring 3x6 meters, you will need to purchase 4 sheets of polycarbonate 6 meters each: to cover the roof on both sides - 2 sheets 6 meters long + 2 sheets for the end parts.
Currently, many companies offer services for the sale of ready-made or custom-made greenhouses and polycarbonate greenhouses. Accordingly, the cost of such structures will be much more expensive (taking into account salaries, transportation costs, tax deductions, etc.). However, if you have the necessary wood material, tools, and follow the installation rules, then taking into account the light weight and flexibility of polycarbonate sheets, you can make a new greenhouse with a wood frame both independently and with less financial costs.
Further in our article, we will not dwell on the process of erecting a wooden frame for greenhouses / greenhouses (information about this can be found on the Internet) and will move on to questions about how and in what sequence polycarbonate should be attached to the frame of a greenhouse with a 2-pitched roof ...
Solid polycarbonate: mounting tips
Profiles or thermo washers become the main elements during fastening. Profiles facilitate the formation of detachable, one-piece joints.
The one-piece version of the profile will look good in a small area. This is a cheap option with many colors. The size of the slope is one of the main parameters when working with this material. The maximum indicator is three meters. But a solid sheet also has the disadvantage of poor flexibility. Because of this, the structure can be easily damaged during operation.
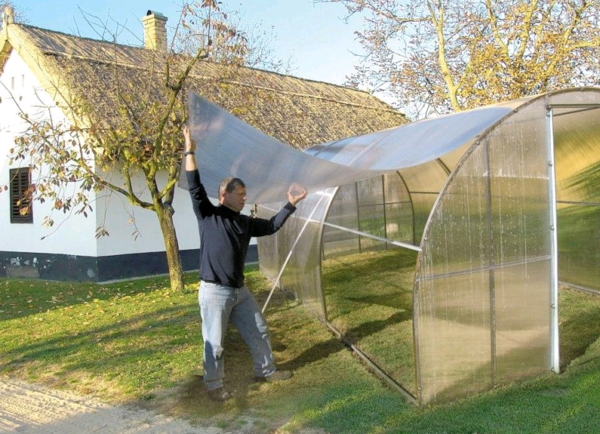
Polycarbonate is bonded using one of two methods - wet and dry.
- Wet involves the use of putty;
- The use of the dry method involves mechanical fastening to the parts; For example, a thermowell is used for polycarbonate; any home craftsman will understand how to fix it.
When it comes to the wet version, the sheet around the perimeter is treated with a polymer putty. The sheet itself then fits into the groove of the frame. It is necessary to observe the necessary gaps, and then press one part to the other. At the last stage, it remains to remove excess putty, use a sealant to process the junction. Rubber acts as an excellent sealant when it is necessary to connect the material to the metal.

It is acceptable to combine both methods to provide the best results. Then the processing of the rubber gasket is carried out:
- Polymer materials;
- Scotch tape;
- Sealing tape;
- Silicone compounds.
For dry installation, other methods and materials are used.
Threaded holes and grooves are used when connecting polycarbonate to the base. Plastic sealants or rubber bands will help seal the product.
The main feature of the method is that the sheet is positioned along the arc allowed by the manufacturers. The use of grooves with tolerances is assumed, initially assuming the appearance of deformations from heat.
The use of the point method is relevant for monolithic products. Self-tapping screws and bolts with nuts are basic tools, although more expensive thermal washers can be selected. During the design, several stages are passed, it is assumed that a 50-centimeter gap between the holes is maintained.
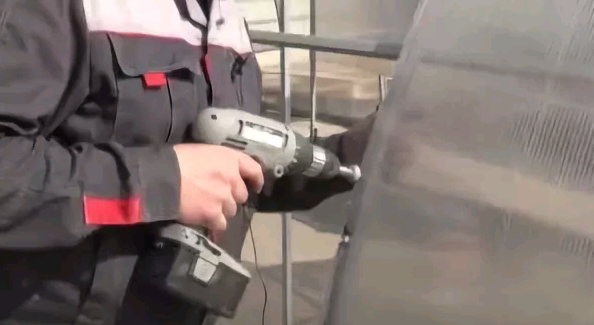
The first step is to create a hole in the edge of the sheet. The hole diameter in comparison with the parameter of the connecting hardware is set larger, by 2-3 centimeters. A self-tapping screw or bolt will help hold the materials together, you just need to use a screwdriver or screwdriver. Polycarbonate needs to create reliable fasteners.
Greenhouse installation instructions
We choose the most favorable place for installing a greenhouse made of cellular polycarbonate on the site.
Laying the foundation.You can choose a simple one from a wooden bar, but it will last a maximum of 5 years. It is preferable to stay on a concrete strip foundation.
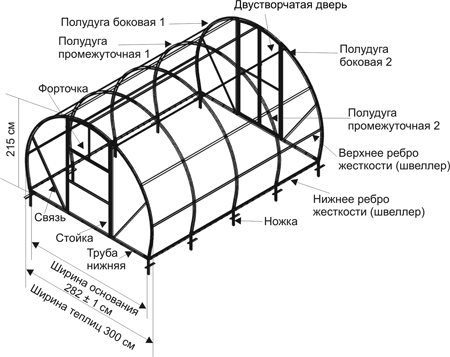
After laying the foundation, the greenhouse frame is built. When choosing an arched one, it is more advisable to use metal pipes or a profile.
Many people who build a greenhouse with their own hands make the mistake of choosing aluminum for the base.
It is better to opt for metal pipes with a cross-sectional diameter of no more than 25 mm.
To bend such pipes, you will need a pipe bender, which is not a problem, since many construction organizations rent tools. You can watch the installation of the frame in the video.
Video:
Priming and painting of the installed framework. To ensure durability and reliability, you can galvanize it, then you do not have to tint and track chips.
Now it is the turn of installing cellular polycarbonate sheets. With a pitched frame - the stiffeners are located along the slope, and with an arc - along an arc.
The sheets are connected to each other in different ways, for example, by means of special profiles - one-piece and detachable.
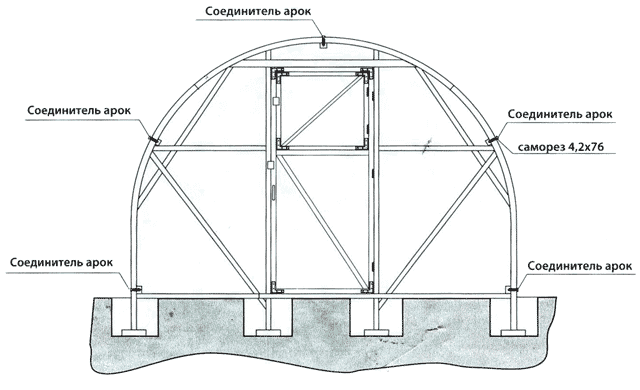
When using the former, first, the profile bar is attached with self-tapping screws and thermal washers, and then polycarbonate sheets are installed.
The base of the profile is attached to the metal frame of the greenhouse with self-tapping screws with a thermal washer, and polycarbonate sheets are placed in the base of the profile.
A cover is put on top, which snaps into place with light pressure along the perimeter. Do not forget to leave a thermal deformation gap of up to 5 mm.
Video:
If the profile does not provide holes for condensate drainage, then they must be drilled 1.5-3 mm at a distance of 2.5-3.5 cm from each other.
The edges of the sheet are pre-pasted with perforated tape.
It is important to choose the right thermo washers and self-tapping screws for the width of the polycarbonate sheet, since if the size is incorrect, the sheet itself can be damaged by twisting the self-tapping screw. In the video presented, everything is clearly presented and, with proper calculations, installing the greenhouse with your own hands does not present any particular difficulties.
In the video presented, everything is clearly presented and, with proper calculations, installing the greenhouse with your own hands does not present any particular difficulties.
Pros and cons of a polycarbonate fence
Before starting work on the construction of a polycarbonate fence with your own hands, you need to clarify the positive and negative characteristics of such a structure.
Positive qualities include:
- low weight of cellular polycarbonate, which allows you to save on the construction of the frame;
- polycarbonate with UV protection does not change its characteristics under the influence of precipitation and sunlight;
- the structure of the material allows it to resist shock loads without losing its original state;
- the material provides reliable protection of the fenced area from street noise, absorbing sounds;
- transparent material transmits sunlight, cutting off no more than 10% of the luminous flux;
- polycarbonate has low thermal conductivity;
- resistant to chemicals;
- polycarbonate sheets are designed to operate in a temperature range from –50 to + 120 ° С;
- to keep the polycarbonate clean, it is enough to treat it with warm water and soap.
Negative qualities include:
- the material does not tolerate long-term exposure to ultraviolet radiation and begins to crumble. To get rid of this drawback, it is recommended to purchase polycarbonate with a protective coating;
- despite the fact that polycarbonate is strong enough and resists shock loads well, when exposed to its surface with thin sharp objects (the tip of a shovel, a knife), chips and cracks appear.
Having considered the pros and cons of the material, we proceed to study the general design of polycarbonate fences.
