We calculate MZLF
To make a shallow strip foundation with your own hands, you need to decide on the type of foundation and its dimensions. Let's say we plan to build a base with an area of 15 m2, with a width of 5.5 m and a length of 6.5 m, with 4 horizontal rows of reinforcement and 2 vertical ones.
Based on this, we get the following rough drawing, the future fundamental foundation.
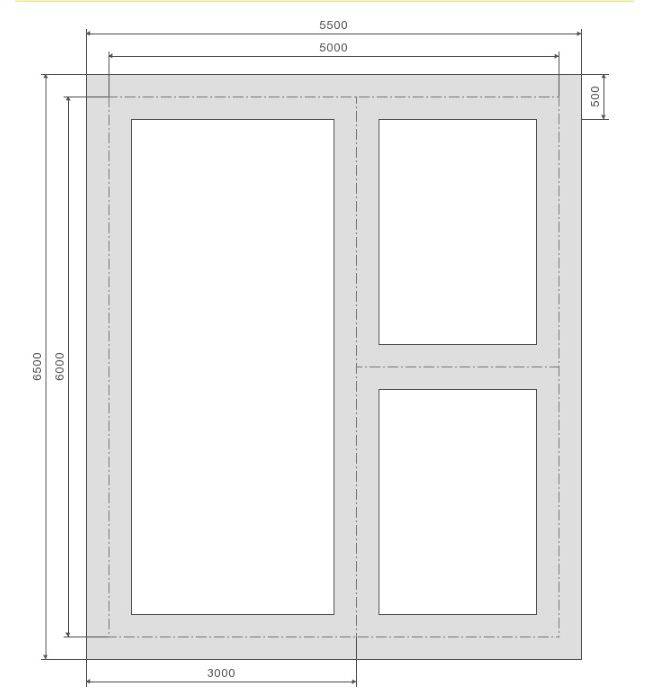

For such a building you will need:
- 402 m of reinforcement (120 m for horizontal rows, 192 m for vertical rows and 90 m for connecting rods);
- 2.02 "cubes" of timber for formwork;
- 153 bags of cement (50 kg each);
- 19,100 kg of sand;
- 27 550 kg of crushed stone.
This is an example of a standard MZLF construction with a height of 1,600 mm. The depth is calculated according to the following parameters:
- 0.4 m, if the base is protected from heaving soils;
- 0.45 m for sandy soil with a low level of groundwater;
- 0.5 m if clay soil prevails with a freezing level of 1 m;
- 0.75 if the freezing mark reaches 1.5 m;
- 1 m for soils with a freezing depth of 2.5 m.
In addition, pay attention to other types of foundations.
Strip foundation marking
Work must be done carefully and slowly. It is better to lose an extra hour or two during the marking than later to have problems with the already finished foundation tape.
Marking the foundation for the bath
Step 1. Drive wooden pegs along the perimeter of the foundation. In order to align the dimensions and angles of the tape, you need to prepare an elementary device in the form of small benches. Drive two pegs into the ground at a short distance from the corners of the foundation and fix the horizontal boards to them.
Step 2. In the boards, strengthen the nails, tie the ropes to them. Try to check the angle between the ropes first with an ordinary large square. This will help you find the approximate foundation lines.
Step 3. Align the corners of the tape, they should be exactly 90 °. This should be done by checking the diagonals. The dimensions of the two diagonals cannot differ by more than two centimeters. This spread can be easily removed during the construction of the building box.
Scrapbook for marking the foundation
Castoff
Strip foundation marking
Step 4. Do not remove the ropes, use them with a shovel to carefully mark the position of the tape, it is advisable to dig a trench deep into the bayonet of the shovel (about 20 centimeters).
Step 5. Now you can remove the ropes and continue digging the trench. Decide immediately where you will put the land. It can be taken outside the perimeter of the building or leveled under it. In any case, the fertile layer must be completely removed.
Step 6. The width of the trench is equal to the width of the walls of the building. If the land on the site is dense, then it is not necessary to do the formwork in the trench, if the walls are crumbling, then you will have to deal with the formwork along the entire height of the foundation.
The depth of the trench is within 60 ÷ 80 cm, taking into account the sand cushion up to twenty centimeters thick.
Video - Layout for the foundation
| Foundation marking schemes | Description |
|---|---|
| We beat off the front axis of the foundation | |
| We beat off the front line along axis 1 | |
| We install leg poles on the site - 3 m | |
| Making a callout of a right angle | |
| We build a right angle along the A axis (leg 4 m) | |
| Installing callouts along the A axis | |
| Install leaders for axes B, C, D | |
| We mark on the leaders the position of the axes B, C, D | |
| We stretch the markings of the axes B, C and D | |
| Set up callouts on the left for axes 2, 3, 4, and 5 |
Features of the construction of a shallow base
When choosing a shallow foundation for a house, you should take into account some of the features of its construction:
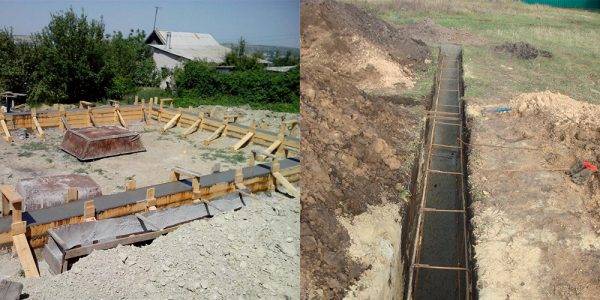
The nuances of a shallow foundation
Such a foundation requires mandatory protection from precipitation.
Therefore, it is very important to provide for the organization of the drainage and drainage system. This will move more water away from the foundation line.
Our previous articles have detailed information on how to drain your foundation.
One of the ways to protect a shallow foundation from precipitation and surface water is a blind area. Most professional builders insist on furnishing it. Find out more from our article: what is a blind area for and how to equip it.
When making such a foundation on your own, it is best to involve a large number of people for work in order to ensure quick preparation of concrete and its one-time pouring.
When building a shallow foundation, only high quality concrete should be used. Read on for a detailed article on which cement is best to use for quality concrete.
The main feature of this type of foundation is the need to complete the main construction before the onset of frost, since such a foundation cannot be left for the winter.
Varieties of shallow foundations
The shallow base is of different types. Usually they are used as a foundation for a house made of timber, a bathhouse, a frame house, buildings with brick walls or from expanded clay blocks. That is, mainly for the construction of light buildings. The shallow basis differs in its structure. Here are brief characteristics of each of the types:
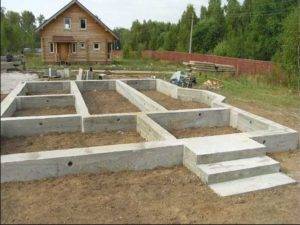
- Monolithic grillages. The principle of the device is similar to a monolithic strip base, with one difference, the foundation is not buried, but equipped on the surface of the earth. Its dimensions are: 200 × 300 mm, 300 × 400 mm, 400 × 500 mm. This is an excellent foundation for a log house, for frame structures, for arranging gazebos, baths, outbuildings, garages. Such a grillage must be arranged when laying the foundations on piles or pillars;
- strip prefabricated monolithic structures. These are shallow foundations, with a depth of no more than 40 cm. A grillage above ground level usually has a height of 20 cm. It should be noted that the depth of the foundation can be varied. This is a reliable foundation for a house made of foam blocks; it is good to arrange brick structures on them. If you are planning a two-story brick house, then the depth can be increased. Moreover, one should not abuse the width of the brickwork;
- MZLF from FBS blocks. These are special foundation blocks that are designed to equip bases. The blocks have different markings. Shallow foundations are provided with block structures 40 cm high. The foundation blocks are equipped with special U-shaped locks, which increase the rigidity of the structure. The block foundation is reliable, suitable for heavier buildings. On such a tape, you can continue to lay wall blocks or erect walls from expanded clay block.
- shallow monolithic slabs. This option is great for heaving soils. For example, a strip foundation on clay is less stable than a slab foundation. The slab is a good solution when building brick cottages. In addition, this type of construction can be carried out by means of a monolithic floor slab. After the prepared area is covered with ceilings, in order to obtain a monolithic slab, the surface is poured with concrete.
Execution technology
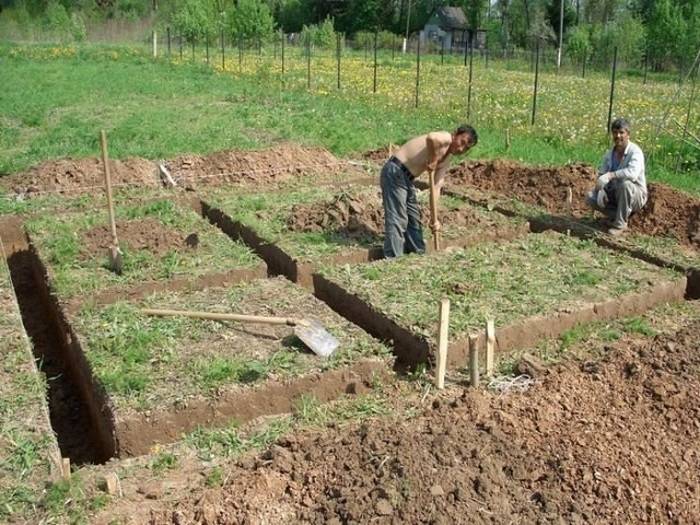 Before correctly pouring the strip foundation, it is necessary to prepare a land plot and perform a breakdown of the future structure on the ground
Before correctly pouring the strip foundation, it is necessary to prepare a land plot and perform a breakdown of the future structure on the ground. For this, the construction site is cleared of debris and unnecessary green spaces. Next, a breakdown of the axes of the future structure is carried out and their binding from the boundaries of the site. After determining the location of one of the corners of the house, a cord is pulled at a right angle to it. From it, the following corners of the building are marked and pegs are hammered. A cord is pulled over the pegs. The width of the foundation is measured from it and the second cord is pulled.
How the further construction of a shallow foundation is carried out, our step-by-step instructions and video at the end of the article will tell:
- We dig a trench with a shovel or construction equipment.We align the bottom of the trench to the level. At the bottom, it is necessary to make a sand cushion with a height of 200 mm. After laying, the sand is filled with water and rammed.
- Then a layer of insulation is laid. To do this, you can use a dense film, a concrete layer 10 cm high or roofing material. It is not worth using geotextiles in this case, since it will only reduce the strength of the base.
- Now we proceed to the construction of the formwork. To do this, you can use boards, moisture-resistant plywood, OSB or special boards. It is better to cover the inner surface of the wooden formwork with a foil. This will make it easier for you to remove the boards after the concrete has set, and they will become less dirty and can be used later.
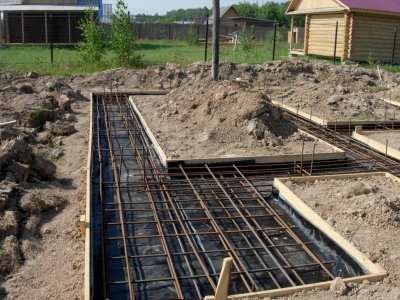
- The reinforcement cage is now being installed. For these purposes, we make a spatial frame from reinforcement with a diameter of 1-1.2 cm. The pitch of the transverse rods is 20 cm. The frame is installed in the formwork so that after pouring concrete from the edge of the concrete surface to the reinforcement there is at least 50 mm of the foundation body. This will reliably protect the frame from corrosion.
- Do not forget to install and tie pipes (sleeves) to the frame through which engineering communications will enter the house. It is also worth laying pipes for ventilation of the space under the house. To prevent concrete from getting into them when pouring, sand is poured there.
 After preparing or buying concrete mix you can start filling
- 6.After preparation or purchase of concrete mix, you can start pouring. As a rule, pouring is done in layers. Air bubbles are removed in each layer using a deep vibrator. This will make the structure more durable. When pouring concrete, do not pour it from a height of more than 1.5 m, so as not to cause a decrease in the strength of the structure.
- 7.After pouring, the concrete tape is covered with plastic wrap for uniform evaporation of moisture. In addition, in the summer, it is necessary to wet the concrete for the first week to protect it from drying out. After a week, the film can be removed.
- 8. The formwork can be removed when the concrete has regained its original strength. This usually happens after two weeks. Complete solidification occurs after 28 days.
- 9. The walls of the foundation are protected from moisture using bitumen mastic, which is applied in two layers.
- 10. The base is insulated. For this, it is best to use extruded polystyrene foam. It is attached to the outer surface up to the freezing point of the soil. Thermal insulation of the basement in a house with a basement is especially important.
- 11. The foundation pit or trench can now be backfilled. For this, it is better to use a mixture of sand, clay and gravel, which is carefully rammed.
- 12. A blind area is made to protect the foundation from atmospheric precipitation.
You can find another option for performing a strip foundation in the proposed video:
Stage 2: Formwork arrangement
The next step is to work with the formwork. To build it, you will need a large number of boards. Keep in mind that when pouring concrete onto the formwork, serious mechanical influences will be carried out, so stock up on a solid board - its thickness should be at least 5 cm.
Boards need to be knocked down in the form of shields. The optimal joint pitch is 80 cm. If the pitch is wider, the structure will not be strong enough. Finished wooden boards can be fixed to the base using supports or support beams. The latter must be installed every 60-70 cm. The recommended cross-section of the beams is 50x50 mm. The shields must be tightly fixed between the installed beams or props. After the installation of the formwork, cover the boards with dense polyethylene or glassine.
From the outside, it is also advisable to strengthen the formwork structure with special props so that it does not deform in the process of subsequent installation work.
Types of strip foundations by device method
Depending on the design features, strip foundations are monolithic and prefabricated. They, in turn, can be subdivided into monolithic foundations with vertical supports and prefabricated strips made of bricks or foam blocks.
Monolithic strip foundation
When installing a monolithic strip base, the reinforcement and pouring of the foundation are carried out directly at the construction site. The result is the overall integrity and continuity of the carrier tape.
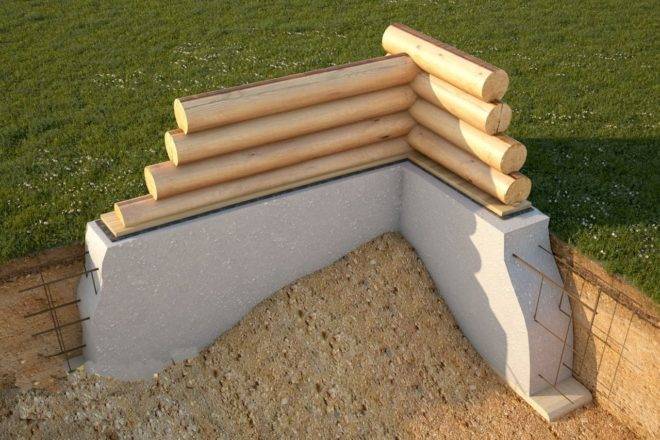
Monolithic strip foundation is an unbreakable reinforced concrete strip along the entire perimeter of the structure
Monolithic types of foundations, regardless of technology, are used to build objects for various purposes on heaving and mobile types of soil. The solidity of the structure ensures high strength and reliability of the supporting base.
Pile and columnar-strip foundation
Pile-tape and columnar-tape types of foundations are a monolithic tape made of reinforced concrete, located on supports buried in the ground. In fact, these types of foundations are nothing more than a modernized version of pile or columnar foundations with a grillage.
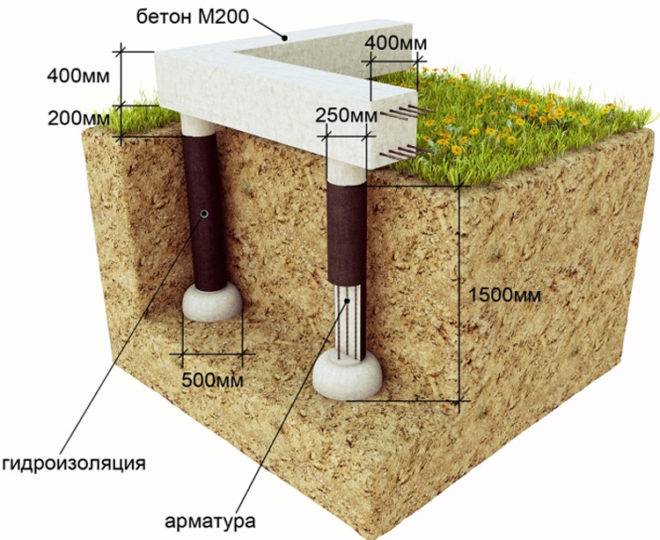
Pillars or piles are located along the perimeter of the foundation with a step of 2 m
In the first case, steel products in the form of piles of various lengths are used as supports, which are screwed into the ground manually or automatically. In the second, the supports are made from the same concrete mixture that is used to pour the carrier tape.
Arrangement of pile and columnar foundations of the strip type is justified only during the construction of facilities in areas with a large depth of soil freezing. Steel piles or reinforced concrete pillars buried below the freezing level of the soil will distribute the load that is transmitted from the reinforced concrete belt.
Precast strip foundation
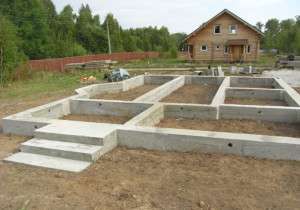
The main material for the construction of a prefabricated strip foundation is reinforced concrete foundation blocks (FBS) made of heavy grades of concrete. A carrier tape of the foundation is formed from the blocks, which is located along the perimeter and area of the future structure. To connect the blocks to each other, concrete of the M350 brand and steel reinforcement Ø15 mm are used.
After assembling the foundation, the outer surface of the supporting base is treated with waterproofing materials. The most commonly used bitumen mastic and special bitumen membranes, which have a self-adhesive base.
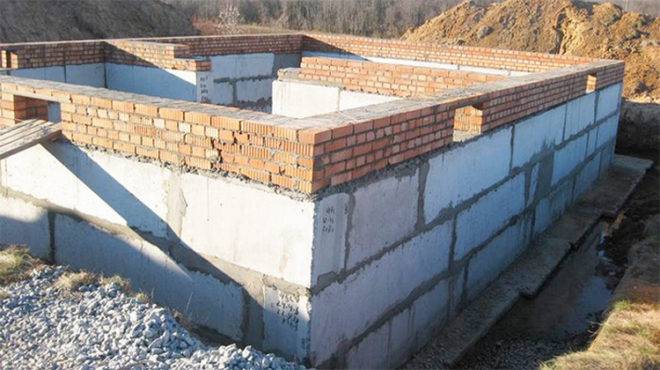
The precast strip foundation consists of reinforced concrete foundation blocks connected by concrete
The main advantage of the prefabricated strip foundation is the short construction time. Unlike a monolithic base, you do not have to wait for the minimum strength of the concrete mixture. You can start building a house in a few days after assembling the tape.
Despite this advantage, prefabricated strip foundations are used for the construction of private houses a little less often than a monolithic concrete base. This is largely due to the fact that the prefabricated structure is not suitable for use on moving types of soil. With the same thickness, the strength indicators of the prefabricated structure are 20–30% lower than the monolithic structure.
Brick strip foundation
Brick strip foundations are a prefabricated structure and are often used for the construction of one-story houses using frame technology. Fired solid brick is used to make the tape. Laying depth - 40-50 cm.
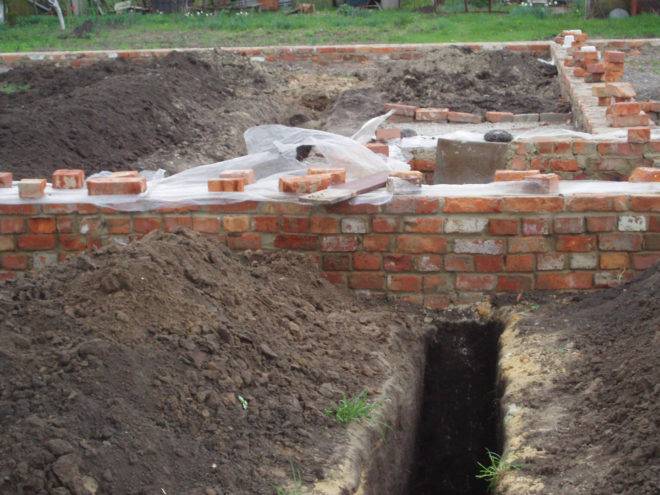
Brick strip foundation is highly maintainable, but requires the arrangement of high-quality waterproofing
After assembly, as in the case of blocks, it is necessary to arrange a full-fledged waterproofing layer. The advantages of this foundation include:
- rigidity of the structure;
- high maintainability;
- ease of arrangement.
If we make a more detailed comparison of bricks with reinforced concrete blocks, then the foundations of the blocks are less hygroscopic and have higher strength. Brick is more fragile, which affects not only the frequency of repairs carried out, but also the service life of the structure as a whole. Taking this into account, it is recommended to erect a strip foundation made of bricks in areas with dry and hard soil, as well as with a low occurrence of groundwater.
Construction stages
Diagram of the strip foundation device.
- Marking on the site: the parameters of the future building are measured with the obligatory fixation of the corners of the structure on the ground using pegs. The inner corners are fixed at the same time. The pegs are connected with a construction cord. When digging a trench, you should not retreat from the specified dimensions. It is not recommended to go deeper than 60 cm. In the width of the trench, 20 cm is dug. The purpose of building such a foundation with your own hands is to save money.
- After the trench is ready, a crushed stone and sand cushion is lined. The height of crushed stone and sand is 10 cm each.
- For high-quality and gradual hardening of concrete mortar, formwork is used. It can be purchased at a hardware store (made of plastic or metal) or made independently. The material for making with your own hands is wood. On one side, the wood planks should be smooth. After assembly, the formwork is lowered into the trench and placed in the center. Before pouring the concrete, the formwork should be moistened with water to prevent excessive drying of the concrete.
- Installation of the reinforcement cage: collect two belts (upper and lower). Two belts are needed to compensate for the effects of heaving forces and gravity of the entire building. For the longitudinal parts of the frame, reinforcement of at least 10-12 mm is used, for transverse connection 6-8 mm are also suitable. For vertical posts, the same reinforcement diameter is suitable as for transverse rods. The upper and lower belts are fixed on it. A prerequisite for the construction of the frame is the placement of metal rods at a distance of at least 5 cm from the upper and lower edges of the concrete, sides. This distance is optimal for protecting the metal from moisture and corrosion. During the assembly of the metal frame for the strip foundation, ventilation holes should be provided, for this you need to install metal or asbestos-cement pipes, placing them perpendicular to the frame and formwork. In order to prevent concrete from flowing into the interior of these pipes, they are filled with sand.
- Any foundation needs hydro and thermal insulation. The lower part of the strip foundation with their own hands is treated with resin or waterproofing mastic (on a bitumen basis) and backfill and compaction of new soil is performed. The upper part can be protected with roofing felt or any other waterproofing compound. If you plan to carry out work on, then a layer of waterproofing is applied to the insulation. For such work, plates of extruded insulation are used, but more reliable and high-quality fixation is made at the corners and protrusions of the foundation.
Features of the use of a strip shallow foundation
The creation of a shallow foundation is used only on an area of dense soil, not sand. If there is muddy or peaty soil at the construction site, then it must be replaced. A pit is being dug, corresponding to the size of the future structure, and backfilling is performed with denser and more high-quality soil. These types of foundations are installed in places where the surface water level is low.
Foundation erection: strip, shallow foundation
The device of the fundamental foundation described by us, as well as of its other types, also begins with preliminary preparation of the soil and carrying out earthworks. First of all, the necessary construction site should be leveled, this is necessary so that the soil is even and there is no difference in size in the depth of the dug ditch, which will be made for the foundation. To level the building site, you need to remove the topsoil, while taking into account the margin - about two meters on each side of the site.To carry out these works, you can use the water level, this is an excellent toolkit for displaying the differences in ground heights on different plots of land intended for the construction of a building.
Next, you need to make the markup, according to your project, the construction of the building. First of all, the main elements should be noted, for this you can use pre-prepared marking pegs and ropes. For example, if the future building will have the shape of a rectangle, in this case, the pegs should be driven in at the corners. But if the future structure has a more complex shape, in this case, pegs will be needed at all joints and turning points of the building.
Please note that this procedure must be carried out with particular care.
The next step will be to prepare a trench for the base, the depth of which should be at least half a meter. The width of the foundation trench should be slightly larger than the width of the planned walls of the building. This stage is quite laborious, so if possible, it is better to use the services of special equipment, for example, an excavator, since it is much faster and after digging a trench you simply have to trim its walls.
In the event that access to the construction site is difficult for the passage of special equipment, on the Internet you can find the services of mini-special equipment and mobile excavators, which you can also use, since their main advantage is effective work even in the most cramped conditions.
After the trench for the foundation is ready, it must be carefully covered with waterproofing material. For these purposes, an excellent option would be such material as roofing material. This operation is carried out so that the strength of the sand cushion does not decrease.
The next step is to lay the same sand cushion, the layer of coarse sand should be at least 20 cm. Further, this layer is soaked and compacted tightly, it is better to do this with the help of special technical devices.
Shallow tape base technology
How to make a shallow strip foundation? Like all types of foundations, shallow foundations are performed in several stages, the sequence of which must be followed in order to obtain a high-quality solid foundation.
Preparatory work
First of all, at the construction site, they prepare the site for the construction of the foundation. To do this, all construction waste is removed from the site, and in some cases the upper part of the soil is removed (about 10-15 cm). Then they begin to mark the territory. To do this, pegs are installed at the corners of the future foundation and a fishing line or rope is pulled between them. The inner corners of the tape are marked in the same way. The correctness of the markings is checked by diagonals.

When the marking is completely finished, you need to start digging a trench. Its depth usually does not exceed about 50 cm and a width of about 60-80 cm. They usually dig it on their own, since the involvement of equipment for this is impractical.
Pillow bookmark
Upon completion of the arrangement of the trench for the foundation, it is necessary to start laying a cushion under it, which will reduce the impact of the soil on the foundation. To do this, first of all, you need to compact the soil at the bottom of the trench, and then fill up a layer of sand. This is usually about 15 cm.
It is also better to compact the sand well, then pour a layer of gravel about 10 cm on it, on top of which a layer of geotextile or roofing material is laid.
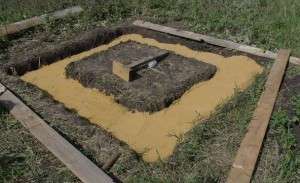
If it is necessary to insulate the base of the foundation, it is recommended to use a fixed formwork made of expanded polystyrene.
Formwork installation
After laying the cushion at the bottom of the trench, they begin to install the formwork.It can be made of a variety of materials, and the most practical and popular is wooden formwork made from planed boards, which are knocked down into shields of the desired size.
It is important that the heads of nails or screws, with the help of which the boards are fastened into shields, are on the inside to ensure maximum smoothness of the inner walls of the base
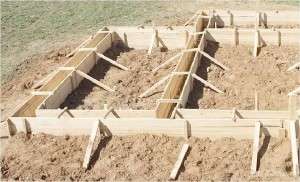
Formwork is installed around the entire perimeter of the tape from the inside and outside. Shields are fixed with spacers and stakes, which are also driven along the entire contour.
When installing the formwork, it is recommended to check the horizontality and verticality of the installed panels, since the geometric correctness of the foundation depends on this.
It is recommended to insulate all formwork elements with tar paper or some other method from moisture present in the concrete solution.
Ribbon reinforcement
After the installation of the formwork, the foundation is usually reinforced, since this stage simply cannot be dispensed with, since the use of reinforcement significantly increases the strength of the structure as a whole.
As a rule, reinforcement occurs as follows:
- Longitudinal reinforcement is laid at the bottom of the trench in several rows (usually it is enough to lay 2-3 reinforcement).
- Vertical and perpendicular rods are tied to it along the entire perimeter with a distance of about 50-100 cm between them.
- Next, the upper reinforcement belt is performed in the same way as the lower one. Longitudinal perpendicular rods are tied in vertical reinforcement.
A photo of the correct reinforcement can be seen below.
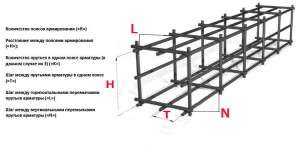
It is highly discouraged to use welding for reinforcement, since in the place of welding the reinforcement loses its properties and can become unusable much faster. In addition, it is recommended to retreat from all sides by 5 cm from the walls when laying the reinforcement. This will allow the reinforcement to be completely embedded in the concrete.
Pouring concrete
As a rule, it is recommended to pour the foundation at a time, however, if the concrete is made independently, then it can be poured in several layers, while it is important:
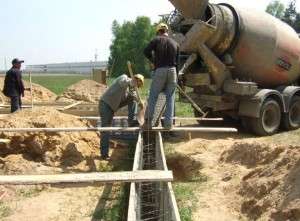
- Spread the first layer of concrete around the entire perimeter of the foundation.
- Pierce it in several places with a rod to eliminate the formation of air voids.
- Pour each subsequent layer of concrete before the setting of the previous one.
- The last poured concrete layer must be leveled and smoothed using a rule and sprinkled with dry cement using a sieve. This will avoid surface cracking.
After pouring the concrete, it is left for a month, since full maturation occurs within 28 days.
