Advantages of synthetic material
Polycarbonate is a special type of thermoplastic plastic with a base of bisphenol and carbonic acid. It is used as a roof covering for the construction of various structures. It has an impressive number of positive characteristics:
- the roof, made of polycarbonate, is highly resistant to mechanical damage;
- the percentage of light transmission is 92%;
- does not emit toxic substances, is safe for health;
- has a low weight and reasonable cost;
- not flammable, has heat resistance;
- lends itself to processing, simply cut, easily bends into the desired shape;
- characterized by a wide range of decorative possibilities.
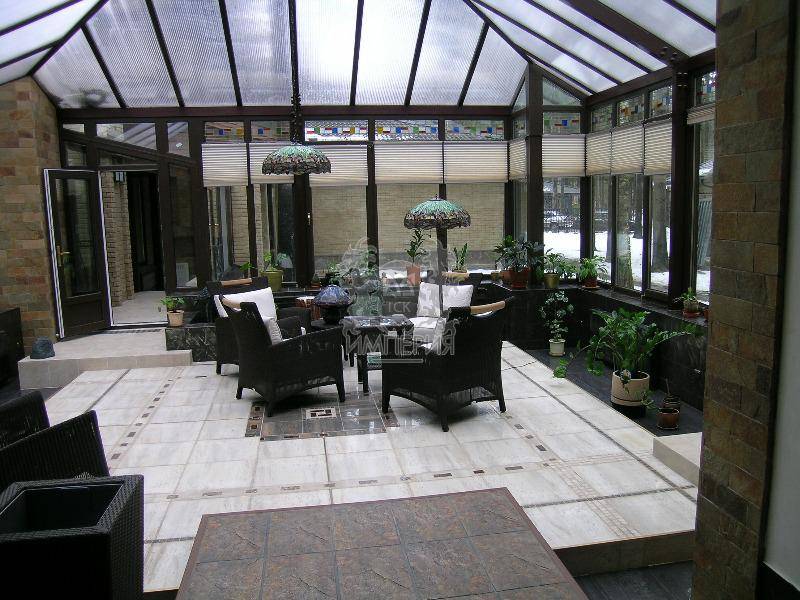 Manufacturers cover polycarbonate for the roof with special films:
- UV-film, which protects from ultraviolet radiation, prevents yellowing and clouding;
- A pitched roof with an antioxidant coating is protected from moisture collection on the inside.
When working with the material, it is necessary to take into account its load and do not install structures in the zone of possible ignition.
Do-it-yourself shed attached to the house (photo report)
It was decided to attach a shed to the house, under which to hide your favorite equipment - a car and a boat. First, with the help of a motor-drill, they dug holes 1.5 m deep - below the freezing depth.

It's easier to dig with a motor-drill))
We inserted sleeves made of waterproofing, a frame made of a 10 mm bar with welded inserts, and poured concrete.

Base for pillars
The pitch of the posts is 2 meters.

It looks like a flooded row of supports for a car canopy
When the concrete grabbed, the posts and the top harness were installed. They are sanded and treated with protective impregnation. So that the frame does not lead, they fixed it with what it was - aluminum corners. The joint of the racks and strapping was reinforced with metal plates.
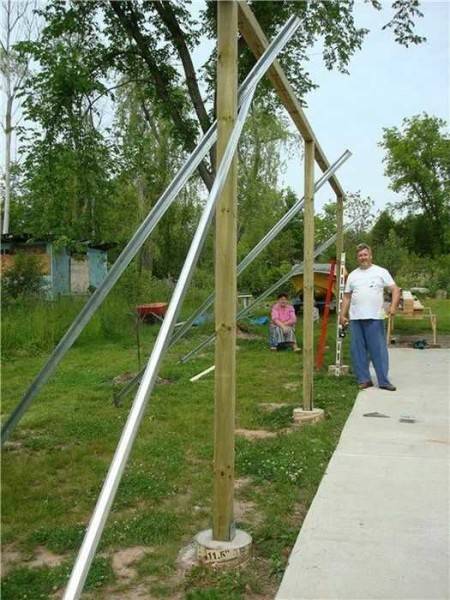
The pillars are bolted to the "heels"
A support board was nailed to the wall of the house. Roof beams were attached to it (board 50-200 cm). The slope turned out to be small, about 9 °, but it is enough. Small cuts are made in the beams for the size of the timber - for an emphasis, the edges are cut off to get an even overhang.
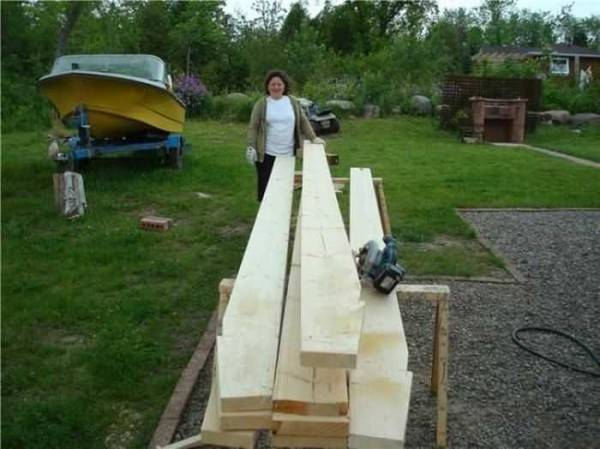
Notches on the beams
The beams were fastened to the strapping with nails obliquely, 2 pcs on each side.
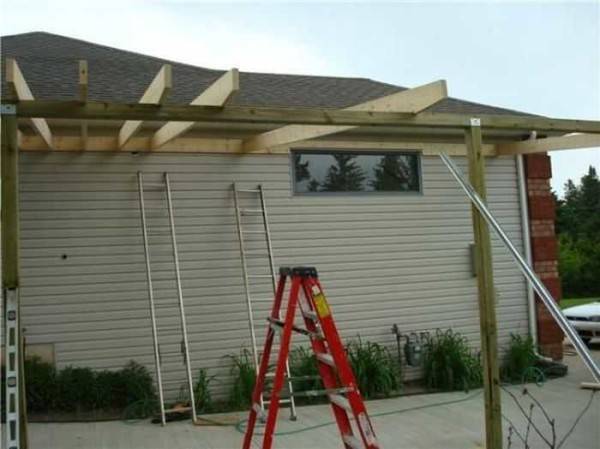
A board was nailed to the wall, beams were attached to it
The wall beams are fixed to U-shaped metal plates.
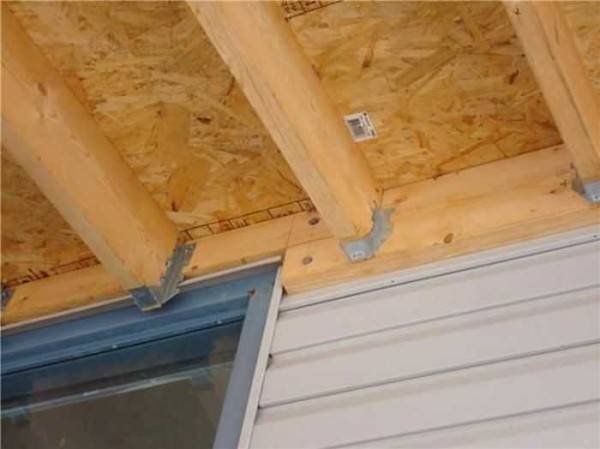
Plates that attach the beams to the wall
The rafter system is assembled - the beams were installed with a small step - 40 cm, they were made from a board of 50 * 200 mm.
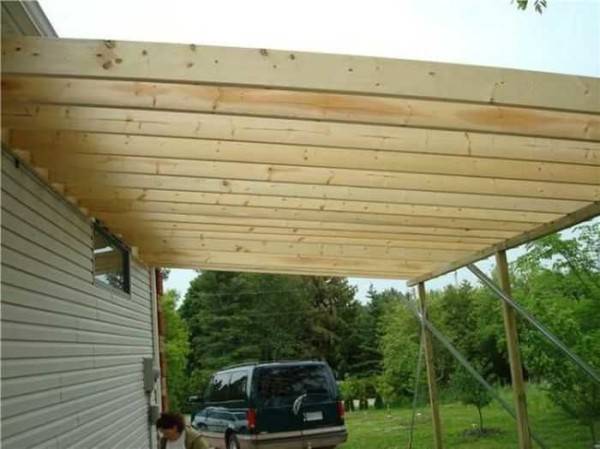
Rafter system of a lean-to canopy from below
OSB was attached to the rafters on top. Roofing material - soft tiles. A solid crate is needed under it.

OSB is installed on the roof
A board was nailed on the side between the posts: for greater rigidity and so that the rain would wet the site less.
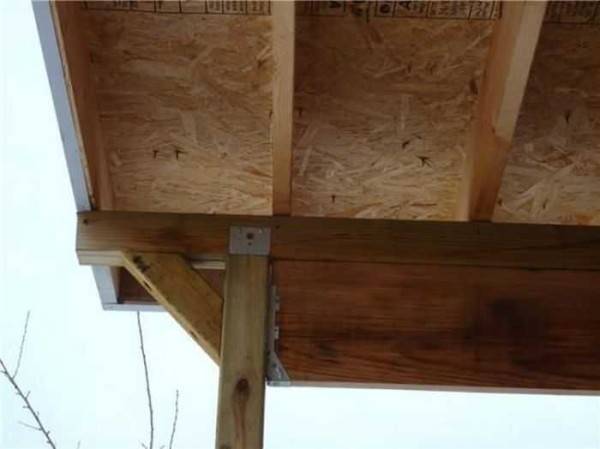
The sidewall was sewn up with a board - so that the rain gets less
We laid soft tiles. It turned out - at least dance.
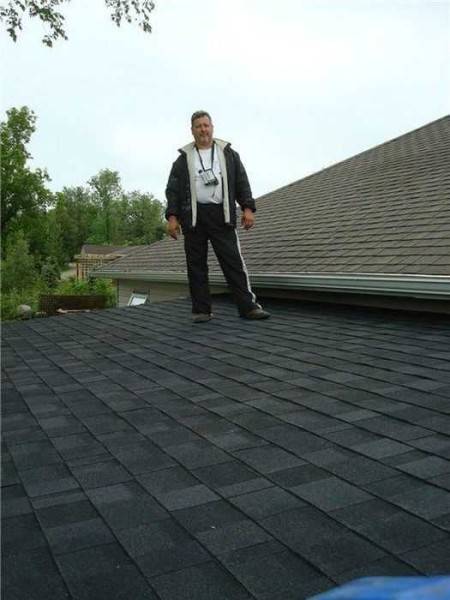
You can dance on the canopy
Now there is competition in the parking lot.
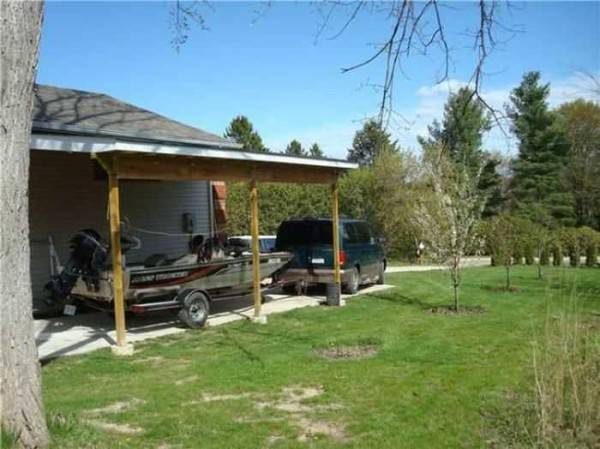
Ready carport
Choosing standard sizes of roofing
The wide variety of PC sheets in various thicknesses complicates the selection. What thickness polycarbonate is best for awnings, gazebos, terraces and other structures is the main question.
When choosing a specific size and type of material, you should consider what you want to build and how to cover the roof.
- The best option for greenhouses and greenhouses is a sheet from 4 to 6 mm.
- The thickness of polycarbonate for the canopy, utility block, glazing of the roof ends should be 6-8 mm.
- The 10 mm version is used for vertical glazing, creating a noise barrier.
- PC sheets (16-32 mm) are used in buildings with increased load: for covering a private house, for a garage, industrial premises and for other structures.
Before choosing polycarbonate for a canopy or deciding on what thickness polycarbonate is best used for a canopy, gazebo and other structures, you need to familiarize yourself with the installation technology. To perfectly match the roof with the general landscape, you can choose any color palette of polycarbonate for covering awnings, gazebos and other structures.
Construction of a polycarbonate gazebo with barbecue
Of course, this is not an obligatory stage, but after all, it is with the barbecue
or a barbecue and is, most often, a summer house.
Immediately, we note that it is better not to use a portable brazier under
polycarbonate. Because the smoke from the coals will accumulate in the gazebo.
Our task is to build such a gazebo in which there will be
cozy and safe.
Therefore, if you are planning a barbecue, you need to equip it
before installing polycarbonate. As a material for its construction, you can
use:
Brazier for a gazebo made of stone
The most common, as it gives the gazebo a respectable look and has a long service life;
Brazier for a gazebo made of brick
Plastered concrete.
Easily smudged with soot, but also easy to tidy up.
Brazier for a gazebo made of metal
Brazier stationary for a gazebo
Polycarbonate gazebo roof
The roof can be single-pitched, gable or complex shape -
tent. A polycarbonate roof finish should be straightforward if
do sequentially:
- preparation of the material. To complete this part of the work, you need
put the sheet on a flat surface; - apply markings on the sheet in accordance with the drawing;
- cut the material according to the marking;
- make holes for the screws.
Cellular polycarbonate is best mounted in parts. So you
more precisely, put the fragment in place and you will need fewer helpers.
Helpful advice.
Do not use nails or screws when
installation of sheets, it may cause cracks.
It is optimal to use special screws that provide for the presence of rubber
washers on both sides of the sheet (thermal washers that prevent leaks). A hole is pre-drilled for each mount.
Glue the joints between the polycarbonate and the frame with a transparent sealant. This will ensure the roof is tight.
Wall decoration with polycarbonate and / or other material
Position of polycarbonate during installation This type of work is performed after you have covered the roof with polycarbonate.
The fastening principle is identical to the previous one.
Advice.
In the process of installing cellular polycarbonate, you need
make sure that the stiffeners are located vertically, this will exclude
accumulation of moisture inside the sheet.
Gazebo interior design
The decoration stage includes the installation of all elements and the design of the gazebo inside.
It can be a table, chairs, benches, shelves, vases, a bar and other attributes.
The main rule here is the high quality of the materials used. Since, summer
polycarbonate gazebo is not heated - temperature drop or high humidity
may damage furniture.
Exterior arrangement
This stage includes outdoor work, to which you can
attribute:
- painting or varnishing wooden wall elements;
- arrangement of garden paths;
- breaking flower beds;
- installation of flashlights.
That is, everything that seems necessary to you.
What you need to remember when carrying out work
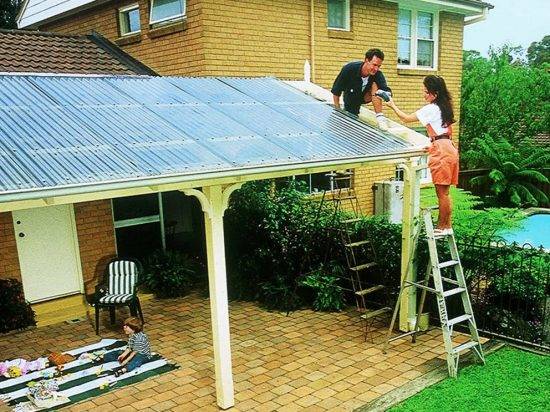 You cannot make a polycarbonate roof from a photo with your own hands, you need drawings, a detailed design and knowledge of all the nuances of technology. Reliability and durability can be ensured subject to the following tips:
- Make a solid foundation for the roof. The material itself weighs little, but snow and wind exert a load on it. It is necessary to exclude any problems and make the structure with a margin of safety. You cannot put the supports too far, the polycarbonate will sag between them, and when overloaded, cracks will appear, you will have to change the roof.
- Cut polycarbonate with a jigsaw, circular saw or hand saw. Choose a tool for sawing plastic, change the blades if they have lost their sharpness and damage the ends during cutting. Set the electric tool to minimum speed, otherwise the polymer material may overheat and begin to melt.
- Remove the protective film after attaching. You do not need to do this in advance, during installation it is easy to damage and scratch the surface. First, carefully separate the polyethylene on the sides so that it does not fall under the sealing strips and can be quickly removed after finishing work. Do not leave the oilcloth on the roof; under the influence of the sun, the glue loses its elasticity and it will be difficult to tear off the material later.
- Drill the surface before fastening. Do not wrap self-tapping screws directly into polycarbonate, so as not to damage it. Ensure that the sheet is stationary during operation to minimize vibration. Remove shavings, it can damage the protective coating.
- Remove the protective tape from the ends of the polycarbonate. In production, ordinary tape is glued to protect the cavities from dust and water. If you leave it, condensation will form inside. Instead of the transport one, it is worth sticking a special tape that releases vapors or putting a profile.
- Move on the surface only on platforms. It is best to make them half a meter wide, you can even more, in order to evenly distribute the pressure on the surface. Cling on to the skate or laying along the height of the roof and moving along the pre-filled slats.
- Remove the film after installation. If there are scratches or abrasions, sand with 600 grit or finer sandpaper. When working, constantly water the surface with water.
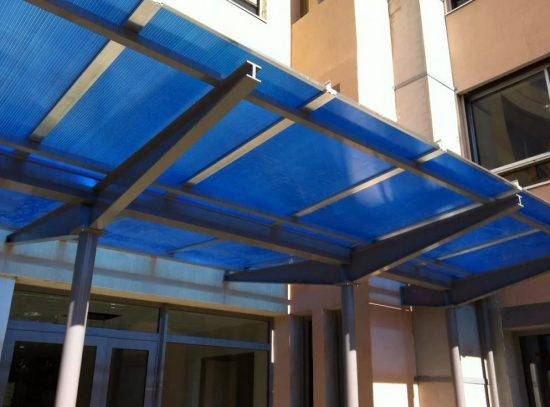
Important: Do not store rolled material in direct sunlight. Because of this, the protective film is baked to the surface, then it is difficult to remove it .. Do not lay a polycarbonate roof at temperatures below -5 degrees
Therefore, no work is carried out in winter, the material becomes fragile and easily damaged. It is also undesirable to work at temperatures above +35 degrees, when drilling and cutting, overheating of the material is possible
You cannot install a polycarbonate roof at temperatures below -5 degrees. Therefore, no work is carried out in winter, the material becomes fragile and easily damaged. It is also undesirable to work at temperatures above +35 degrees; when drilling and cutting, overheating of the material is possible.
Pros and cons of polycarbonate as a roofing material
It will be interesting for you to know that such a popular and familiar to us polycarbonate was born by accident! Once a German scientist mixed the ingredients necessary for the experiment in a new way, and a dense transparent precipitate settled on the bottom of the flask. It was with him that they began to make new translucent structures. They differed in that they weighed 6 times less than glass, but at the same time were stronger.
And modern roofing polycarbonate is valuable for its such qualities:
- Does not emit toxic substances.
- Does not support combustion, hardly flammable.
- It is lightweight.
- It is simply cut and processed.
- Easily bends into the desired shape.
- Flexible and easy to carry the weight of the snow.
- It is heat-resistant and does not change its properties in heat and severe frost.
- Available in a wide variety of colors.
And as a material for a pitched roof, it also has such additional advantages:
- Excellent sound absorption. That is why today it is actively used as an acoustic screen along busy highways - to reduce harmful noise for residential buildings.Those. under such a roof it will be not only warm, but also quiet.
- It has one side with a protective layer against ultraviolet radiation, and the other with reflective particles. Moreover, the material reflects up to 60% of sunlight, which significantly reduces the heat load of the entire building in the heat. This means that you do not have to purchase air conditioners.
- Practically indestructible: extreme impact resistance ranges from 900 to 1100 kJ / m2, while the strongest polystyrene has this figure of only 10 kJ / m2.
Here's a great example of how polycarbonate behaves as a roof covering:
And in order to give the roofing polycarbonate the necessary qualities, modern manufacturers cover the sheets with special films:
- Anti-condensation film. With such a coating, a shed roof under polycarbonate will not collect moisture on the inner surface.
- UV film. This UV protective coating protects the sheet from haze and yellowing.
UV protection is applied to polycarbonate by the method of co-extrusion in the factory. And a new stage of technical progress in this area is polycarbonate roofing sheets with double UV protection. They have the highest wear resistance - only 4 delta units in yellowing index, in comparison with 10 ordinary sheets.
Of course, roofing polycarbonate has its drawbacks, some of which are quite serious:
- Collects static electricity.
- Not always designed for the point pressure of the weight of the person who makes the repair.
- In the event of a fire, it melts and drips hot drops onto everything in the room.
But with regard to the last point, we note that in the event of a fire, very little remains unharmed. Therefore, it is not worth giving up the fashionable polycarbonate roof because of this.
And note that the quality and properties of roofing polycarbonate are getting better day by day. New shades of toning appear and new additives are introduced that block the amount of glare, and as a result, the sunlight that passes through the sheet is cleaner. And what else is ahead!
The main stages of installation of summer showers and commonly used materials
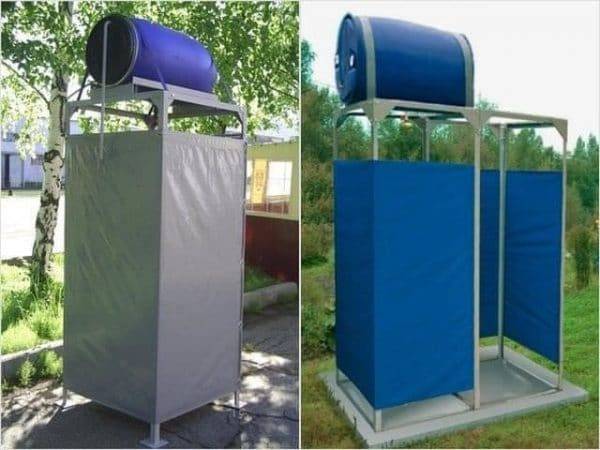
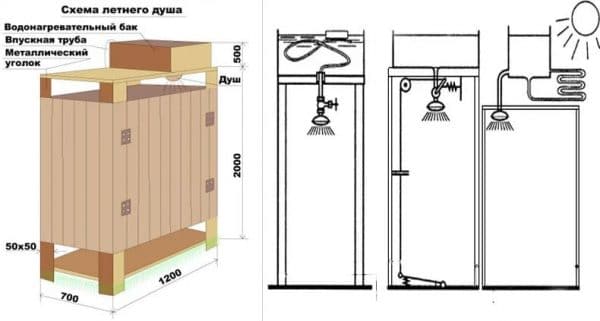
You can build an outdoor shower in the country with your own hands using various improvised materials left over from the construction of a house, shed, fence or greenhouse. Everyone can determine the size of the shower stall based on the height of the tallest member of the family, and make it as wide as the area or amount of material allows. You should first draw a drawing indicating all dimensions.
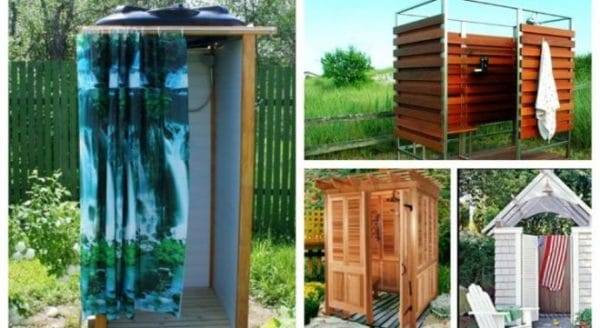
Then it is important to prepare the area, clear it of debris and plants, mark the perimeter of the future structure. Main steps:
Main steps:
- If, according to the idea, a drain pit is required, then it must be dug out in width slightly less than the area of the shower room, and 80 cm deep will be enough.To prevent the pit from crumbling, you can make a frame, drive in bars in the corners and make a screed from slats.
- Then the floor is laid.
- The next stage is the installation of the frame. It can be made from metal or wood. This is followed by sheathing and installation of the frame.
- After that, a water tank is mounted on top of the structure and a hose with a watering can is brought in.
- If you have the opportunity and desire, you can equip the shower room inside with a bench, shelves.
Also read: How to make a summer chicken coop for laying hens with your own hands
The general principle of operation usually includes all these stages, but there may be different nuances, depending on the design option. Detailed descriptions of the work and photos of different showers are presented below.
Shower room made of metal pipe with 2 sections
An outdoor shower with an additional changing room can be built in the country house with your own hands from scrap materials in a few days. This booth has overall dimensions of 1m by 2m.

To work on it you will need:
- metal profile pipes 15 by 15 mm in length 6 m and 20 by 40 mm for the frame;
- metal pan;
- water tank;
- any finishing material (cellular polycarbonate, polyethylene, rail).
For convenience, you can first make a drawing and specify all dimensions. You need to start with the frame:
- Cut 6 blanks into vertical posts of 210 cm from a pipe 15 by 15 mm. They will need to be cooked.
- Cut crossbeams from profile 20 by 40 and corners. The crossbars must be screwed to the uprights at the corners.
- The frame should be coated with waterproof acrylic paint.
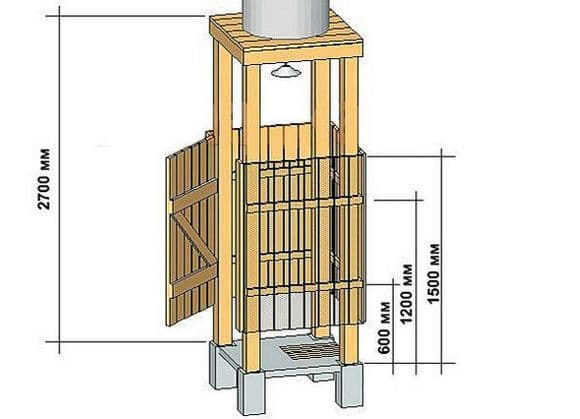
When the frame is ready, and a place for installation has been chosen, a drain hole should be dug and a structure with a pallet at the bottom and a tank at the top should be installed.
After that, only finishing work follows. The floor can be laid out with a slat. The walls and roof can be decorated with any material that is at hand:
- rail;
- cellular polycarbonate;
- corrugated board;
- dense polyethylene awning.
In the dressing room, you can fix several hooks for towels and clothes, and in the shower room itself, you can make small shelves for soap.
