The main stages of the construction of a polycarbonate veranda
Since there is simply no point in considering the construction of a built-in veranda, further we will talk about how to make a polycarbonate veranda with your own hands of an attached type.
A place
If the owner wants the maximum amount of light to enter the room, then, of course, you will have to use the south side of the building. But, if for some reason this cannot be done - the wall is located near the slope, on bad and soft soil, or is occupied by other buildings, then other options are quite acceptable. The main thing is a sufficient amount of space and the absence of destruction and damage on the wall of the house.
Priming
Although a polycarbonate veranda is light enough, it should still stand on solid, normal soil - if such a structure is installed on soft soil that is prone to subsidence, it can "float" and tilt - no good.
Foundation - to be or not to be?
Advice to all builders - even with a limited budget, you should not rush and save up the amount of money necessary for laying the foundation. After all, if a polycarbonate veranda is installed on the ground or on a bad, hastily simple base, it will "walk", that is, it will shift in a direction different from the house.
Among other things, the bases must be connected to each other in the most reliable way - this will increase the "life" of the gazebo at times.
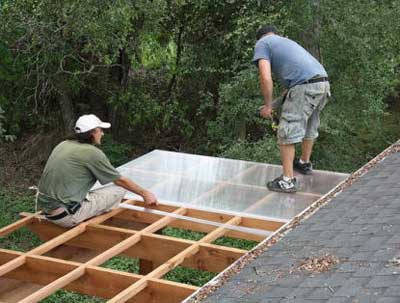 Roof
Roof
Earlier it was said that the roof should have a small angle of inclination (about 28-35 degrees), while its shape can be absolutely any.
Frame
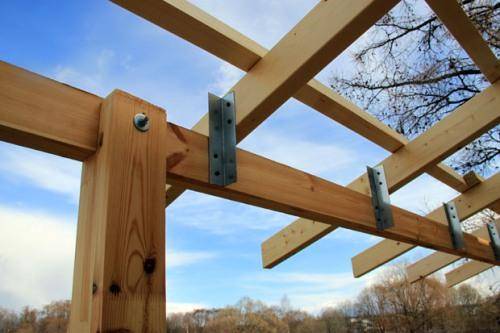
Most often, profile pipes are used for the veranda frame - the cheapest and easiest building product to use.
However, it is important to choose high-quality material so that later the veranda does not sag.
 Polycarbonate
Finally: if the consumer builds a summer, that is to say, an open gazebo with many free edges, then the ends of the polymer canvases should be drowned out - "sealed" with the help of special plastic profiles.
Foundation construction
The type of the base of the extension depends on the mass of the building and its size.
- Slab - is a solid concrete base. Typically used for heavy brick terraces and verandas, sometimes built with a porch.
- Ribbon is more common. Here the concrete base is fragmented and serves as a support for the walls of the future structure.
- Columnar or support - the foundation looks like separate support pillars. This method is used for lightweight open structures, including a polycarbonate house.
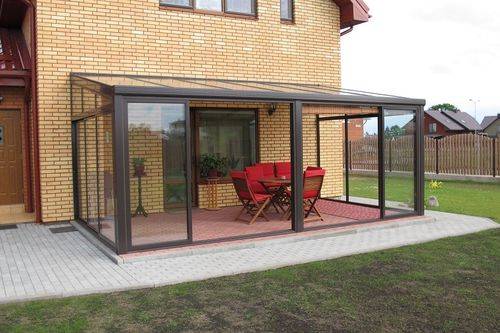
Pile - the principle of construction is the same, but screw-in piles are used as pillars. This method has not received proper distribution, since special equipment is traditionally required to screw in the supports. In fact, piles for a light veranda can be installed with your own hands. The photo shows the moment of screwing in the pile support.
For the supporting foundation, you can use a lot of materials: bricks, logs, pipes, concrete .. Its great convenience is that it is independent of the foundation of the main building.
- Before installation, the support pillars should be pre-treated: the pipes should be covered with an anti-corrosion compound, the logs - with an antiseptic. The tree must be additionally waterproofed with coating or bitumen.
- Pits are dug along the perimeter of the future site - their number is determined by its area. The depth of the pit should ideally be equal to the depth of the building foundation.
- At the bottom, 20 cm of sand is placed and compacted.
- Supports are installed in pits and covered with earth and gravel or filled with concrete. If we are talking about a concrete base, then first the formwork for the post is built and poured with concrete.
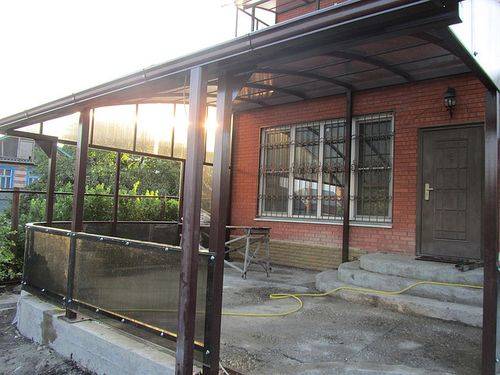
Screw piles are interesting in that they allow you to adjust the height of the structure without any difficulty.If the site on which the construction of the veranda is proposed is uneven, with a large slope, then the pile foundation is an excellent solution, since it does not require leveling the site.
The installation principle is quite simple: the places are marked - in increments of 1 to 3 m, and then using a special lever device, the piles are screwed into the ground to the required depth. The quality of the soil does not matter.
Polycarbonate sheathing
The material can be used for mounting both on vertical and horizontal planes, depending on which option is being implemented - an open or closed veranda. This requires the construction of a frame made of wooden beams or a metal profile.
- In the case of an open extension, only the roof lathing is mounted, which is installed on the support pillars. If a closed veranda is being erected, then the lathing is made for both the walls and the ceiling.
- The distance between the beams of the lathing is 60-80 cm, between the support posts - from 1 to 3 m.
Monolithic polycarbonate is attached directly to the beams - "wet" or "dry" method. Holes for fastening are pre-made in honeycomb panels - if installation on self-tapping screws is provided. The holes are made in increments of 30–40 cm, their diameter must be greater than the diameter of the bolt leg. Polycarbonate changes in volume under the influence of temperature, so the fastening must be made loose.
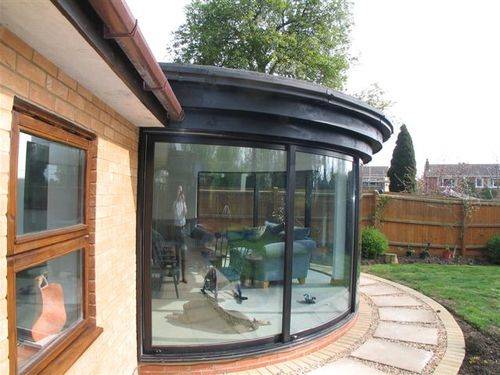
- Laying the panels starts from the left edge of the wall or roof. In this case, the sheets should be joined together, leaving a gap of 3-5 mm. The honeycomb panels are stacked in a specific order - the cavities must be oriented vertically so that the accumulated condensate can be easily removed.
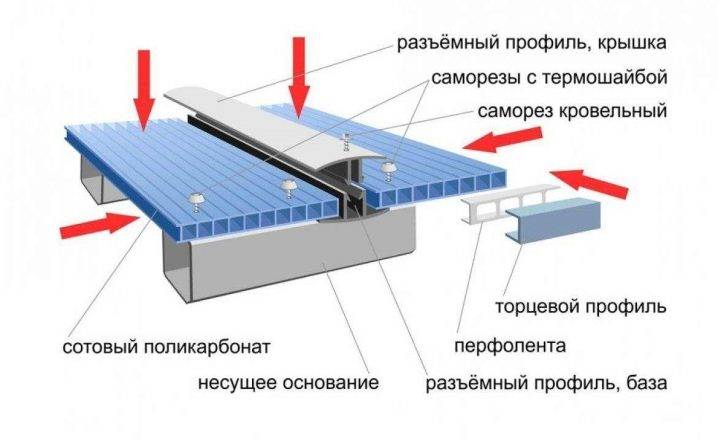
- Each sheet is insulated before installation. The upper end part is sealed with a continuous tape or strip to prevent debris and moisture from entering the inside of the sheet, and the lower end - with perforated tape to ensure the drainage of condensation.
- If the material used has a protective film, then the sheet should be positioned so that the coating is on the outside of the wall or roof. The photo shows the fastening of the sheet.
- The honeycomb panels are fixed to the wood with stainless steel screws with ordinary washers. In the case of a metal frame, thermal washers should be used - transparent or in a suitable color. Monolithic slabs can be simply glued to the frame, or mounted using a profile.
- The joints between the sheets should be sealed. If desired, the joints are closed with decorative strips.
In the video, the process of installing a polycarbonate veranda is presented in more detail.
The advantages and disadvantages of this choice
The advantages of choosing polycarbonate are:
- Affordable cost to everyone. Polycarbonate is much cheaper than any other modern material.
- Light weight, so you can easily deliver polycarbonate sheets to your site and do the construction yourself. You don't need much help from others. Also, this property makes it possible to save on materials for the foundation, because due to the low weight, you can simply put a road slab on the ground, which will serve as your foundation.
- Polycarbonate sheets have very good noise and sound insulation, and also perfectly retain heat. A polycarbonate veranda in summer can be cooled with just one air conditioner, and in winter you can heat it with an infrared lamp. By closing the veranda, you can remain in silence at any time and enjoy reading a book or watching a movie.
- This material has very good flexibility, which makes it possible to construct any kind of structure from it. You can make both arches and configurations of a round or oval shape.Now everything that you dreamed of is easy to realize in reality.
- This material is completely safe and environmentally friendly. If you accidentally break such a sheet, then it will not crumble into small particles and will not have sharp chips. This property of this material will be appreciated by those who have small children in the house.
But still, this material is not ideal and it also has some disadvantages:
- Polycarbonate structures are not resistant to mechanical damage. But, if you compare it with glass, then, of course, it is ten times stronger. If you use sheets that are 12 millimeters thick, your porch can even withstand a shot. Therefore, with such a building, you will not even be afraid of hail.
- This material is prone to scratches, which subsequently affects its transparency. This can be avoided by not using metal tools to clear the snow.
- The dimensions of the structure under the influence of different weather conditions may vary. Therefore, in order to prevent a break, it is necessary to fasten the structure not tightly, but with a margin of three or four millimeters so that there is a possibility of backlash.
Comparing all the advantages and disadvantages of this material, we can conclude that polycarbonate has much more advantages than other materials than disadvantages. Therefore, many people choose this particular material.
Brick verandas
Basic information about the building material
Brick is great for the construction of capital verandas. In a building made of this material, it will be cool in the summer and, provided that the insulation is done correctly, it will be warm in the winter. Brickwork is durable, fireproof and unpretentious to maintain.
The main disadvantage of a brick building is its heavy weight. Such structures are erected exclusively on monolithic foundations, which does not have the best effect on the total cost of construction.
The procedure for erecting a veranda
The foundation is ready and waterproofed, the screed is poured, the base is flat and does not require any additional preparatory measures. Let's start laying out the walls.
Option for building a brick veranda
Pre-select the appropriate type of masonry. The simplest options, perfect for self-erecting a veranda, are as follows:
- spoon masonry. The final wall thickness will be 120 mm;
- bonded masonry. Wall thickness - 250 mm;
- chain masonry. Allows to obtain walls with a thickness of 380 mm.
First step. We attach a docking cord at two opposite ends of the foundation with a tie. It should run along the edge of the base.
Second step. We expose the corner bricks along the cord, and then fill the space between them in accordance with the chosen masonry method. We use standard cement mortar to bond the building elements together.
Option for building a brick veranda
Third step. We check the evenness of the first row and in the same way we lay out the walls to the desired height, not forgetting to leave openings for doors and windows.
Having laid out the last row of walls, we equip the armopoyas. To do this, we fix a formwork with a height of about 70 mm on each wall along the upper surface of the walls, set anchor bolts in the corners, lay reinforcing bars and pour concrete.
We let the concrete harden, and then we attach a strapping made of a wooden beam with a section of 10x10 cm to the anchor bolts.The further procedure for arranging the rafter system remains similar to the situation with
If the veranda is planned to be used throughout the year, the walls can be laid in two rows, filling the gap between the rows with thermal insulation material. For single masonry, we carry out insulation, moisture insulation and interior decoration by analogy with a wooden veranda.The exterior finish is at your discretion. You can just gently sew up the seams and be done with it.
Construction of a brick veranda
| Masonry size | Length, L | Width, B | Height, Н | Number of bricks excluding thickness mortar joint, PCS. |
Number of bricks taking into account the thickness mortar joint 10 mm, PCS. |
|---|---|---|---|---|---|
| 1 cubic meter single brick masonry | 250 | 120 | 65 | 512 | 394 |
| 1 cubic meter thick brick masonry | 250 | 120 | 88 | 378 | 302 |
| 1 sq. m masonry in half a brick (masonry thickness 120 mm) | 250 | 120 | 65 | 61 | 51 |
| 1 sq. m masonry in half a brick (masonry thickness 120 mm) | 250 | 120 | 88 | 45 | 39 |
| 1 sq. m of masonry in one brick (masonry thickness 250 mm) | 250 | 120 | 65 | 128 | 102 |
| 1 sq. m of masonry in one and a half bricks (masonry thickness 380 mm) | 250 | 120 | 65 | 189 | 153 |
| 1 sq. m of masonry in one and a half bricks (masonry thickness 380 mm) | 250 | 120 | 88 | 140 | 117 |
| 1 sq. m masonry in two bricks (masonry thickness 510 mm) | 250 | 120 | 65 | 256 | 204 |
| 1 sq. m masonry in two bricks (masonry thickness 510 mm) | 250 | 120 | 88 | 190 | 156 |
| 1 sq. m masonry in two and a half bricks (masonry thickness 640 mm) | 250 | 250 | 65 | 317 | 255 |
| 1 sq. m masonry in two and a half bricks (masonry thickness 640 mm) | 250 | 250 | 88 | 235 | 195 |
Preparing the strip base
A strip foundation is both simpler and more difficult than a pile foundation. The volume of earthworks is increasing. A trench up to 80 cm deep is being dug along the entire perimeter. Some advantage over the pile option is that you can hire a mini excavator and complete the operation in an hour and a half, and not waste time drilling each separate well.
If the construction of the veranda was not provided for by the initial design of the building, it is recommended to leave at least 20-30 mm between the foundations for natural expansion. A rigid bond is not made due to the different shrinkage rates.
The bottom of the trench is covered with sand and gravel. A formwork with external stops is being installed, and a reinforcing mesh is being prepared. Since a veranda is a lighter structure than a house, you can do without buying thick reinforcement and use rods up to 8-10 mm thick.
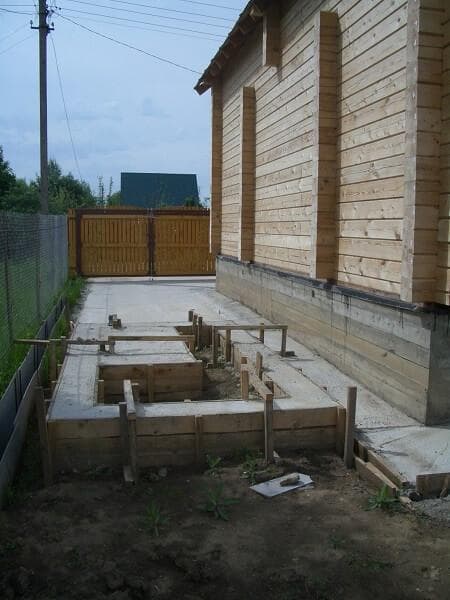
The reinforcement mesh should not come out to the surface, touch the ground. It is recommended to lay fragments of brick and concrete at the bottom. Metal is prohibited. Next, the concrete mixture is poured. To avoid distortions and uneven shrinkage, the operation is carried out simultaneously along the entire perimeter. Full cure takes up to 28 days. Do not allow the surface to dry out in order to avoid the appearance of cracks and breaks.
Important: the height of the piles or strip foundation depends on what is being built: a veranda or a terrace. The terrace in most cases rises above the ground by a maximum of 10-15 cm
No porch or stairs required. The floor of the veranda is on the same level as the house.
Verandas and their variety
Suburban and personal plots, as a rule, have the following types of verandas:
- built-in;
- attached.
The former are often built together with the house itself and have a common foundation with it. In this case, the roof is also common. But there are cases of building a veranda on a wide porch.
An attached veranda is a structure that is being completed to a previously erected cottage. At the same time, the veranda has its own foundation.
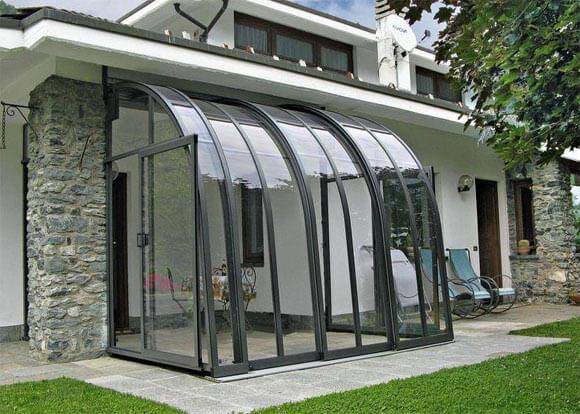
Such buildings have different types and forms of structures. For example, standard square or rectangular verandas turn into beveled or rounded corner objects. There are structures with one wall. You can also see verandas with six and eight corners.
Very often you can find a veranda - a "belt" for the house. They copy the shape of the whole balcony or smoothly transition into it on the second and third floors.
Open veranda
An open veranda, or as it is also called - a terrace, translated from Latin means "land".
The terrace is a slight elevation above the ground. In other words, this is a platform that is slightly raised. The terrace has a roof. The structure is located next to the house, or is completely attached to it. Usually in the summer, the terrace becomes a living or dining room, that is, a place where you can relax in the fresh air.If you live in a southern climate, then building a polycarbonate veranda with your own hands will be an excellent solution. When installing sheets, polycarbonate glue is used, which is specially designed for this.
Veranda with a sloping roof
This type of veranda is very similar in shape to an iron.
A veranda with a sloping roof adjoins the country house. The function of such a structure is to create a buffer between the street and the house. The veranda is tightly adjacent to the building. Builders see this as a big plus, since a rigid support is being created. The construction of two entrances from the polycarbonate veranda is considered very convenient. The first entrance is outside and the second is indoors.
Semicircular veranda
The most successful location is a semicircular veranda. Its windows overlook the garden, so you can admire the flower beds or the beautiful lawn.
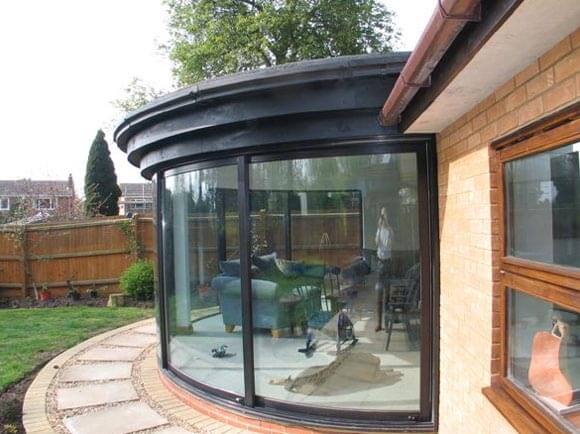
You will need concrete blocks to lay the foundation. Thus, in construction language, the veranda turns into a monolithic tape. It is recommended to use wooden beams to install the frames for the frame. Moreover, they must necessarily have a rectangular section. It is also necessary to increase the rigidity, reliability and stability of the structure. Therefore, use the top and bottom harness bars.
Fast and inexpensive construction:
- When building a foundation, do not forget about the frame. It must be built at the first stage of work. To assemble the frame, use squares, channels, metal pipes of a small diameter, provide for reliable fastening of polycarbonate to metal.
It is worth saying that the frame of the attached veranda can be made independently. To do this, you need wooden blocks or plastic parts. -
A polycarbonate roof for a veranda can be of various shapes, however, most often it is constructed in the form of a slope. In this case, the angle of inclination is from 30 to 40 degrees.
Small summer verandas usually have arched roofs. For this it is necessary to use polycarbonate sheets. Thanks to their flexibility, the roof can be shaped according to your taste.
For the manufacture of the roof of a semicircular veranda, two halves should be used. The upper part is usually covered with a corrugated sheet with insulation material. Cellular polycarbonate is used for the lower part. - It is best to use screws and washers to secure the material to the frame. When doing this, remember to be sure to install rubber pads under each of the washers.
The diameter of the holes for the fasteners must be larger than the size of the screws themselves. This is necessary so that the mount does not "wobble". In other words, polycarbonate has the ability to expand and contract depending on the weather. Therefore, in order to prevent the weakening of the fasteners, all the nuances should be taken into account. - For the construction of a summer structure, sheets of cellular polycarbonate with a thickness of 10 millimeters should be used. The most durable veranda will require the use of 16 mm thick polycarbonate.
What is polycarbonate? Its advantages and disadvantages
Polycarbonate is a translucent polymer material. A variety of additives are used to impart special properties. The user receives the following benefits:
- strength, resistance to mechanical shock, wind, ultraviolet light, snow. If the sheet can still be broken, shards with sharp edges are not formed;
- the sheets are lighter than standard glass. There is no need to build a solid foundation. A light belt or pile is enough;
- fire resistance. Carbonate does not burn, does not smolder, does not support the flame, does not emit harmful volatile substances when heated;
- the composition does not contain components that cause allergies;
- resistance to temperature extremes. Polycarbonate can withstand both winter frosts and summer heat. The only requirement is that there should be gaps of 3-5 mm between the sheets to compensate for thermal expansion;
- excellent sound insulation. Raindrops will not echo like a drumbeat;
- good insolation. If the veranda or terrace is planned on the sunny side, it is better to choose tinted options to avoid the effect of a steam room;
- the ability to bend in a large arc. No heating or special equipment is required. But the effect obtained is not preserved, the sheets must be immediately attached to the guides;
- a polycarbonate veranda is appropriate next to a brick mansion, it will decorate a high-tech building or an imitation of an old wooden hut in the country. The main thing is to choose the right style solution and materials for construction.
What material do you like the most about the house?
Log house
25.47%
Brick house
19.38%
Log house
15.3%
House of aerated concrete blocks
13.93%
Canadian technology house
12.26%
Rounded log house
4.45%
Monolithic house
3.92%
House of foam blocks
2.63%
House of vulture panels
2.66%
Votes: 2627
Design features of roofs ↑
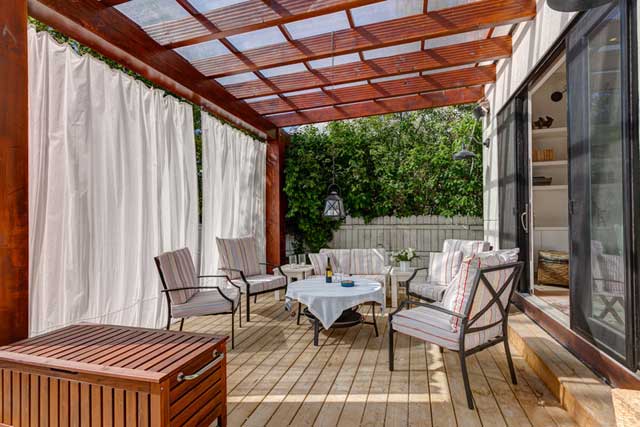
Terraces are an extension of the house, and the main requirement for their design will be full architectural compliance with the style of the building. With this in mind, there are two types of roofs for covered areas: straight and arched.
In the first version, a veranda with a polycarbonate roof rests on various structures: walls, pillars, columns, and others. But the roof itself is made in the form of a conventional rafter system. It is made by laying load-bearing beams with a cross-section of 50 × 100 mm, and counter-gratings for mounting panels. At the same time, the distance between the elements of the roof can be made quite wide, because the material does not have significant weight, as well as for normal light transmission.
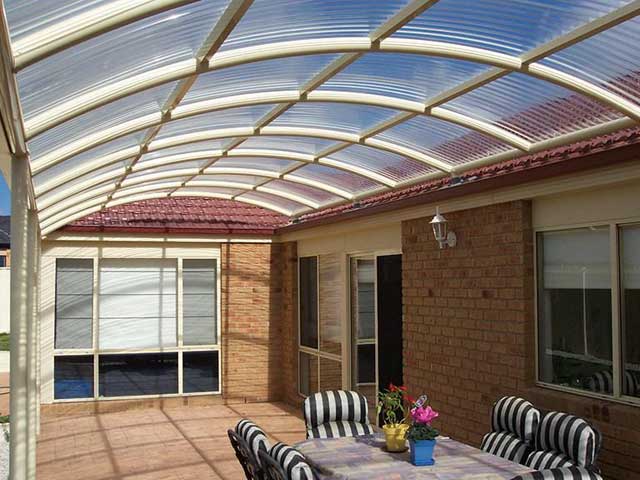
Arched types of terraces have semicircular and oval shapes. For the manufacture of supporting structures, you will need, for example, an aluminum or steel profile, depending on the strength requirements.
If you use a honeycomb view, then you can make arches from aluminum elements, but subject to little snow winters.
Read: Fastening polycarbonate to a metal frame.
Stronger steel structures are used when needed polycarbonate roof for terraces in areas with snowy winters, while monolithic panels are best suited as roofing material.
Important
When assembling arched roof types, do not forget about various additional supports, a sufficient number of load-bearing parts, as well as the mandatory use of transverse lintels for the rigidity of the entire building.
Also, do not forget that the canopy over the polycarbonate terrace should have a slope of at least 5 degrees, or better 8.
When assembling the roof, regardless of its design and material, fasteners are provided with self-tapping screws intended for this.
Read: How and how to attach polycarbonate to wood.
Installation of vertical supports
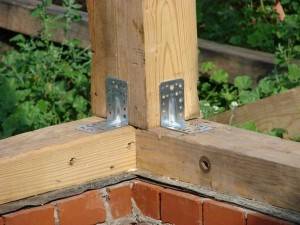
Any wooden element, if possible, should be treated with an antiseptic and antifungal solution and dried
Metal pipes can act as vertical supports. It is advantageous to use this material as a frame, since metal pipes or corners are light enough in weight and do not create a load on the foundation.
It is used like this:
- A trim from a bar is installed on top of the foundation. Before installing any wooden element, it should, if possible, be treated with an antiseptic and antifungal solution and dried. Next, lay roofing material or other waterproofing material over the foundation.
- Lay the frame of the base from a bar.
- Install vertical support posts at the corners of the foundation base, fixing them with metal brackets on self-tapping screws. These racks will at the same time be supports for wall cladding with polycarbonate, on which you will also attach the roof. If a door and windows are planned, vertical racks should also be provided for them. At the same moment, it is necessary to think over the location of the ventilation holes, if the windows are not provided for by the project and the veranda is planned to be deaf.
- Mount the upper trim from the timber on the racks.
- Depending on the sketch of the veranda, you can make several intermediate posts. If the veranda is open, then the racks are made at a convenient height in order to then sheathe them with polycarbonate and decorate them with a railing on top. If the extension is completely closed, then the racks are brought to the upper strapping, fixed, and polycarbonate is mounted on them.
In the same way, the assembly and installation of the metal frame is carried out, which is mounted with bolts.
Verandas and their variety
Suburban and personal plots, as a rule, have the following types of verandas:
- built-in;
- attached.
The former are often built together with the house itself and have a common foundation with it. In this case, the roof is also common. But there are cases of building a veranda on a wide porch.
An attached veranda is a structure that is being completed to a previously erected cottage. At the same time, the veranda has its own foundation.

Such buildings have different types and forms of structures. For example, standard square or rectangular verandas turn into beveled or rounded corner objects. There are structures with one wall. You can also see verandas with six and eight corners.
Very often you can find a veranda - a "belt" for the house. They copy the shape of the whole balcony or smoothly transition into it on the second and third floors.
Advice
Recommendations of masters for working with polycarbonate plastic.
- To protect the structure in the cold season from the formation of ice and prevent the avalanche-like convergence of snow, gutters and snow catchers are installed.
- It is better not to risk it and not to use arched modules, since it is extremely difficult to mount the domed veranda yourself. Due to minimal errors, the design begins to "lead".
- Avoid overlapping sheets, which leads to accelerated depressurization of the structure and, as a result, leaks. For this purpose, connecting profiles are necessarily used.


- Correct fastening of the connecting profiles implies a depth of entry into the profile body of at least 1.5 cm, and the profiles themselves must be exclusively made of aluminum.
- It is advisable to install the roof at an inclination of 25-40 °, so water, dust and foliage will not linger on the surface, forming puddles and heaps of debris.
- It is strictly forbidden to use PVC profiles. Polyvinyl chloride is sensitive to UF rays and is chemically incompatible with polycarbonate plastic.
- To protect cellular polycarbonate from damage, the sheets are sealed with a special tape, and ends are put on the corners. The protective film is removed upon completion of all installation operations.
Selection of design and preparation of materials
Before starting construction, it is necessary to decide for what and how the veranda will be used. Because polycarbonate can be cellular and monolithic. Cellular retains heat very well and has good sound insulation, and monolithic is very durable. Therefore, each summer resident chooses for himself which material to choose based on the functional requirements of the veranda.
It is better that you have the opportunity to make a large part of the veranda transparent. This way, you can provide natural light and a good supply of fresh air. You can even make not only the walls transparent, but also the ceiling, which will be even better.
Try to keep your veranda at least twelve square meters, so that it is spacious there, and no one interferes with each other.
Then you can choose the materials from which you will make the base for your veranda. It can be:
- corner;
- channel;
- wooden beams;
- steel tubes;
- aluminum pipes.
Preparatory work
Before proceeding with the completion, you need to collect all the permits, because such structures make changes to the layout of the house. For this, it is also necessary to make a veranda project. Before the construction itself, it is necessary to prepare a place for an extension.
Project creation
The project can be ordered at any architectural bureau.
Did you know? The first rectangular bricks were made in England in the 16th century. After their active production, the process of building buildings and structures became much faster.
When compiling it, you need to take into account the following points:
- Location. In this case, the extension should be a continuation of the house.
- Entrance. It can be from the street or from some room in the room.
- Door attachment point. Entrance doors to the veranda and to the house should not be placed opposite each other, so as not to create strong drafts in the room.
- Options. Usually the length of the structure corresponds to the size of the adjoining wall. In width, it usually reaches 2.5–7 m. Here it is necessary to maintain proportions with the parameters of the house.

Which brick to choose
For the construction of a veranda, the following types of bricks are usually used:
- Ceramic. This material consists of clay, which is fired, therefore it has high strength, durability and resistance to external factors. It is usually red in color.
- Silicate. The most inexpensive in terms of cost, since the firing process does not go through. It is white. Consists of quartz sand with the addition of lime (7%). It should be noted that this material does not hold heat well.
- Clinker. It is made from refractory types of clay, which is processed at a temperature of + 1100 ° C. It is a very durable, environmentally friendly material that is highly durable. But its cost is quite high.
Required materials and tools
For construction, you will need to take the following tools:
- trowel;
- hammer pickaxe;
- jointing;
- mooring cord;
- order;
- plumb line and building level;
- mortar shovel;
- grinder;
- electric drill;
- electric screwdriver;
- electric saw;
- hammer and sledgehammer;
- bucket.

As for the materials, you will need to purchase:
- brick;
- gravel;
- concrete;
- bitumen;
- roof slate;
- crushed stone;
- slats;
- roof beams;
- nails;
- screws;
- boards for roof lathing and flooring;
- sand.
You may be interested in learning how to decorate a chalet-style gazebo.
For window openings you will need:
- wooden wedges;
- gypsum solution;
- dry tow.

Site preparation
If there was a porch at the construction site, then it must be dismantled. It is necessary to remove the visor and remove all elements that are no longer needed and will interfere with construction, as well as debris. If there is vegetation in the place of the future veranda, then you need to get rid of it. You should also allocate a site for the storage of building materials. The area for the veranda is leveled and the perimeter is marked on it according to the size of the project.
