How to make a contour of stones for a pond
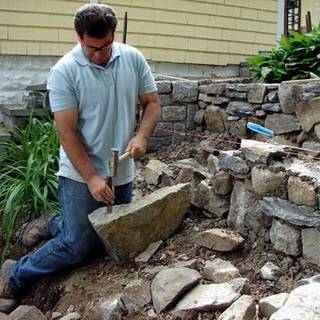
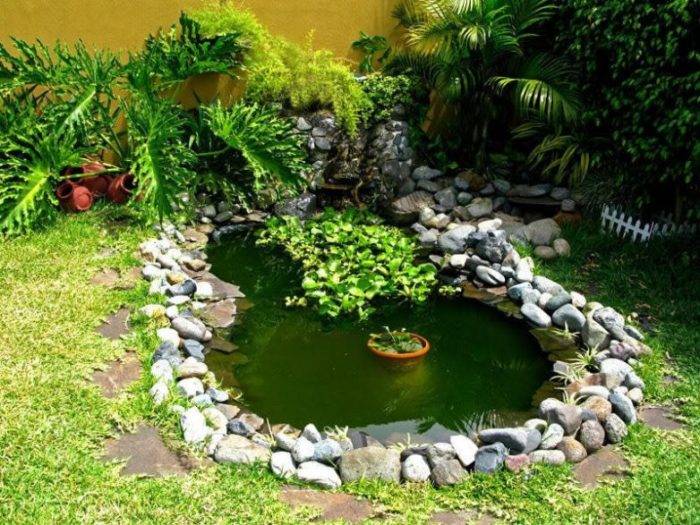
After the shore of the pond has been fortified, a butyl rubber film is usually visible along the edges of the pond. To hide its presence, you can use sand, pebbles and larger stones. A drainage pipe is laid out there, filling it with rubble.
Selection of stones by size
Before starting work on lining the pond, you should select the material in size:
- Along the edge, it is worth spreading crushed stone or pebbles, sand and several large stones. Visually, these materials will emphasize the shape and border of the reservoir.
- In the area of shallow water, small pebbles are usually scattered, and on top of it several large boulders can be placed, going under the water.
- If the reservoir is deeper than 1 m, then the bottom is usually not visible and does not require decor. However, if a very large boulder is installed at the bottom, it will be visible through the water column and will add mystery to the pond.
- On the shore and on the island (if any), you can place 2-3 large boulders.
Laying stones on the pond
Different shapes, sizes and functionality of artificial reservoirs suggest different options for laying decorative stone.
Important! When decorating an artificial reservoir with stones, you should take material that is the same in color and texture, but different in size. Shapes of the same size and shape will deprive the composition of individuality .. To make the pond look aesthetically pleasing and not inconvenient when using it, you should study the main options for laying the material:
To make the pond look aesthetically pleasing and not inconvenient when using it, you should study the main options for laying the material:
- If there is a gentle bank, it is recommended to place a non-woven material on top of the rubber film and place large stones and boulders on top in random order. After that, add sand, gravel or pebbles to the composition. The advantage of the dump is its simplicity and environmental friendliness. Among the disadvantages, one can single out the inconvenient washing of the reservoir, if pebbles and stones are laid directly on a non-woven base. If you wish to avoid the difficulties of flushing after a few years, you should create a solid base under the stones, for example, of concrete.
- If a steep bank is created in the pond, only a professional will be able to lay it. In this case, pebbles and flat stones up to 20 cm in diameter are used. The materials are laid out with their end in relation to the plane of the coast, using a solution. Such masonry is applicable at great depths and small widths of the reservoir.
- If the pond is intended not only for decorating the site, but also for swimming, its banks are trimmed with large pebbles or large rounded stones.
- If there is an adjoining place for a beach rest around the pond, the edge can be laid out with the same material as the platform itself. The masonry should be 7 cm higher than the water in order to prevent constant overflow and hide the film. At the same time, it is necessary to take care of the drainage system in case of rain or floods.

Cement fixation
The decoration of reservoirs with blocks and pebbles is carried out both with the use of a solution and without it. The use of a solution is necessary when the owners want to strengthen the coastline: in the presence of sheer walls (slope more than 30 °), as well as where it is supposed to use a facility for active bathing. The cement should be of the M300 brand, its proportion in the mixture with sand is 1: 3. The composition is diluted with water to a thick sour cream. Liquid glass (10%) is added there and everything is mixed intensively.
Did you know? There are salt ponds not far from San Francisco. They are artificially created for the extraction of sea salt. If you fly over these ponds, then from above they seem bright coral due to the growing algae and microorganisms in them.
After applying the mixture to the plane, the stone is laid. In this case, the material must be wetted with water.If it is round in shape, then it must be immersed in the solution by 2/3 of the value, otherwise there is a risk of material falling out during operation. You can fill the pond with water three days after laying. It should be remembered that such decoration is a complex and time-consuming process. Before planting boulders and pebbles on a cement mortar, you should first collect the entire composition "roughly".

This will allow you to identify and eliminate aesthetic imperfections. The artificial pond on the site is a matter of special pride for the owners. It is pleasant to spend time next to the pond reading a book or a cup of tea. In addition, the presence of such a "zest" can surprise guests. Knowing and observing the rules for decorating a reservoir, you can achieve excellent results even with your own hands.
How to make a do-it-yourself landscape pond with a waterfall in the country (with photo)
The following is a step-by-step instruction on how to create a do-it-yourself pond with a waterfall and a homemade cleaning filter.


This version of a small artificial pond is very easy to perform and inexpensive, because, firstly, the reservoir will not take up much space on the site. Secondly, it will use a homemade water filter. Thirdly, the bowl of this reservoir with a waterfall with your own hands is made on the basis of a ready-made plastic container. With all this, the pond will be perfectly equipped for fish living in it, as well as decorated with lighting.
To create a pond with a waterfall in the country with your own hands, you will need the following materials:
- plastic container for 500 liters;
- a pump (with such a capacity to raise the water column by 3 m, but less is possible) and hoses;
- basin (for filter) for 20-30 liters;
- construction waste (broken brick, crushed stone, rubble and pieces of concrete);
- river sand;
- fittings for the base of the slide (old gratings can be used);
- adhesive mixture Ceresit CM 117;
- lighting (for example, a street lamp in the form of a ball with an energy-saving pink or blue lamp);
- wires, outdoor double switch and socket;
- lugansk stone;
- pebbles (for dumping);
- containers for underwater planting and the plants themselves.
DIY tools for making an artificial reservoir with a waterfall will require the following:
- pick;
- shovels;
- Master OK;
- putty knife;
- shoe level;
- pliers;
- knife;
- screwdriver;
- screwdriver;
- puncher.
The work on creating a pond for the dacha begins with the installation of a plastic container. After choosing a place for the pond, you need to make a markup and dig a pit. It is necessary to pour sand at the bottom of the pit, level it and install a container. The cavities between the walls of the pit and the tank should be covered with wet sand, while filling the pond with water.
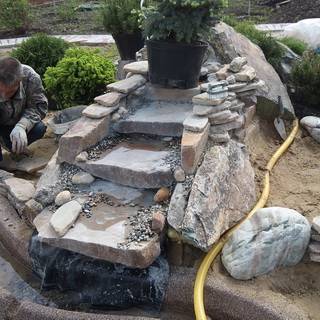
Before making a pond with a waterfall with your own hands, you need to build the base of the slide. To do this, you need to tamp the earth, lay the reinforcement on top, and then lay out broken brick, crushed stone, rubble and pieces of concrete on it, forming the steps of a slide under a waterfall of Luhansk stone.
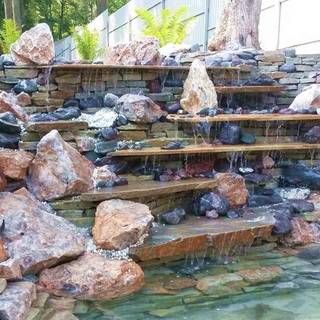
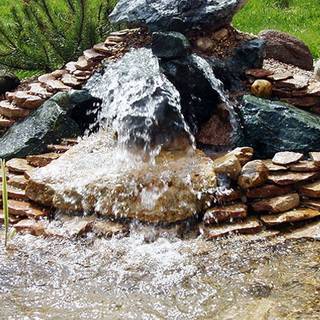
When arranging such a pond in the country with your own hands, remember that the steps of the cascade must be horizontal, otherwise the water will drain along one edge. A slight slope of 3 ° is made from the top step to the bottom.
How to make a filter for a pond in the country with your own hands using a basin? To do this, in the lower part of the container (without touching the bottom itself), you need to make a horizontal hole about 15-20 cm long and 12 cm wide. Insert the edge of the first cascade into this opening. The remaining space should then be filled with a solution and smoothed out so that a drain on the first step is obtained. Next, you need to coat the surface with a waterproofing solution, and when it dries, you should put 3-4 stones 5 cm high, cover it with a flat stone, a piece of iron or plastic on top. It is necessary to pour crushed stone on the lower part of the filter, and put a synthetic winterizer on top. Then you can run the hose from the pump. The visible upper part must then be decorated with pebbles.

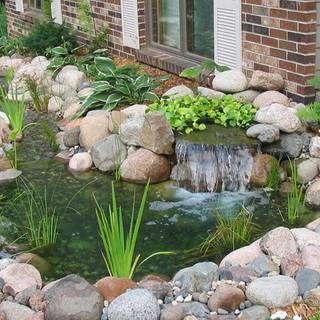
As a result, a small geyser should turn out: water from a pump located at the bottom of the pond will pump through a hose, then go outside and filter through the drainage, and then flow back into the pond through cascades.
When arranging such a pond with your own hands on the site, it is better to put the pump on the bottom on a brick. You can put a stone on the solution in the basin. Next, you need to connect the pump through a double street switch, and make lighting next to it. The lamp base can be installed on a flat stone, secured with silicone and inserted into it an energy-saving lamp. It is also better to "siliconize" the holes for the power cord and fasteners.
It remains only to decorate everything with stone, sea pebbles, plant decorative vegetation and launch fish into the pond.
We build a pond from an old tank
To equip a summer cottage mini-lake from an unnecessary bath or other container you will need:
- a piece of netting;
- some rubble;
- decorative stones;
- a coil of aluminum or steel wire;
- cement, sand or ready-mixed concrete.
After the pit has been dug and a bath is installed in it (30 centimeters below ground level), they begin to arrange the coastline. To do this, around the entire perimeter of the future pond, the top layer of soil at least 40 cm wide is removed and a trench is dug, the depth of which reaches the upper edge of the installed container.
To give naturalness to the man-made lake, tile adhesive is applied to the bottom and walls of the bathtub. After processing, the container is allowed to dry well - usually this requires at least two days.
How to make a pond in the country with your own hands: step by step instructions

Step-by-step instructions on how to make a simple artificial pond in the country with your own hands from film:
- Choose a shade of PVC film. Black creates the effect of a mirror, light highlights the color of plants and fish, and brown looks like natural soil.
- Determine the type of film, thickness. For ponds more than 1.5 m deep, buy butyl rubber rolls, as they are more durable. The thickness of PVC products is from 0.5 mm. Take into account resistance to mechanical damage, UV rays, temperature fluctuations.
- Determine the dimensions of the film. The dimensions are considered as follows: the width of the reservoir + double depth, add a margin of up to 0.6 m. The total amount is not final, they take the film, taking into account possible errors, excesses. The adhesive composition is bought special for films, for example, Titanite or Quick Seam 3 adhesive tape.
- Draw a diagram. First, the plan is drawn on paper, then drawn on the ground. A life-size scheme is transferred with bends, "shelves" for plants, and recessed areas.

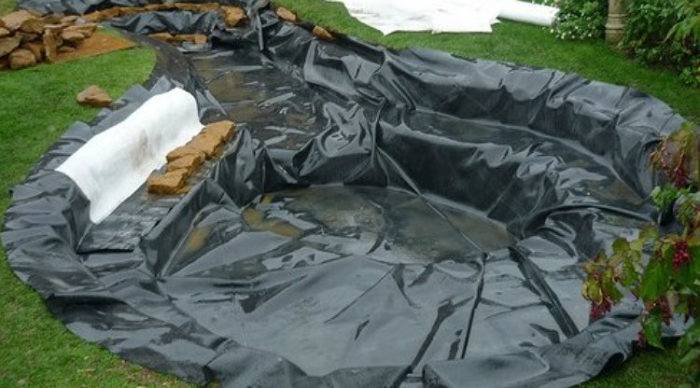
- Remove the top layer of sod, dig a pit, starting from the edge. Dig to the center, make indentations in accordance with the scheme. For the construction of a decorative border, a ledge is equipped to a depth of 0.7 m. Roots, stones, all sharp and other objects that can pierce or deform the film are removed.
- Lay a sand substrate. Sealed and covered with geotextile or PVC foil (it is stronger). The sheet is laid out without tension. In the process of filling with water, the film should not be very stretched or deformed.
- Strengthen the shores. The slope depends on the type of soil - on sandy soils, the slope away from the center of the pond is up to 55 degrees, and for clay soils, vertical banks are made. For strengthening, they take a polymer geogrid, geomats, a mesh netting. They are fixed on pegs or the ends are wrapped on the surface of the ground, then decorated with decor.
Concrete pond
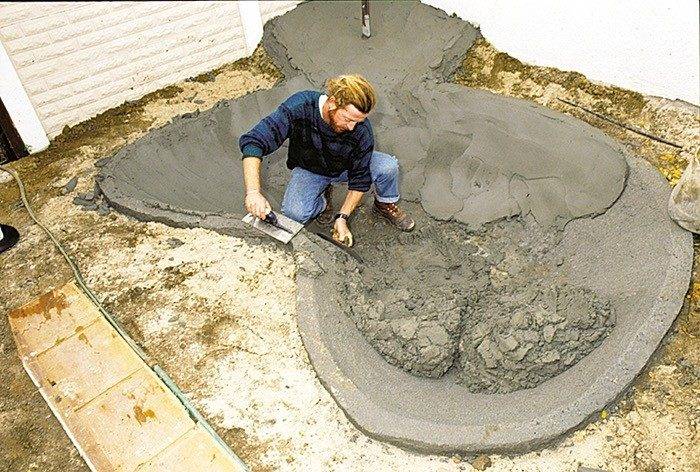
This is one of the most expensive options for a reservoir. To make a small structure, you need:
- 10 bags of cement;
- 30 bags of fine and coarse sand;
- 5 bags of hydrophobic additives to make concrete water-repellent;
- reinforcing mesh;
- waterproof plaster;
- acrylic paint.
They dig a hole, make a pillow of stone and sand, formwork from a bar, pour the first layer of concrete mixture. A reinforcing mesh is pressed into wet concrete, all planes are plastered, and allowed to dry.After drying, cover the pond with acrylic paint. Finishing is carried out after testing the reservoir - if there are no leaks after filling with water, the zone is refined, fish are allowed into the water, plants are planted.
Tire pond
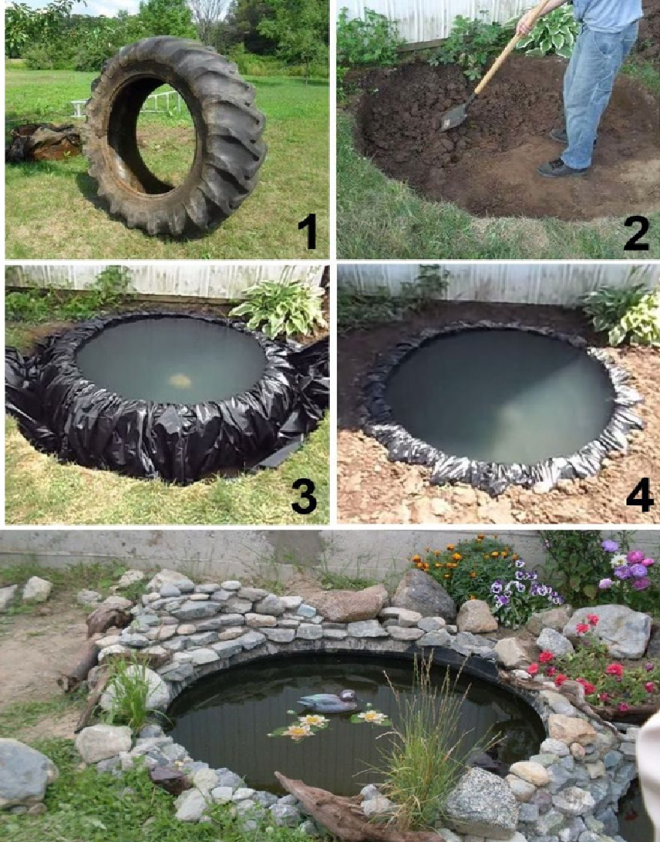
A mini pond in the country from an old wheel is the fastest and easiest option. They take a big tire from BELAZ or the one they find. Choose an installation site, do this:
- Cut off the side part along the selected border. The rubber is sanded around the edges with emery.
- Dig a hole with a depth of half the height of the tire. Deepen at the request of the owner. Sometimes the wheel is completely sunk into the ground.
- A tire is lowered into the pit, soil or sand is poured on the sides, on the bottom and compacted.
- The inner planes of the frame are covered with a dense film folded in two. Pour in water. The film is not straightened especially, the water itself will fill the entire space, the cellophane will lie tightly in shape.
The ends of the film are folded around the walls. The finished tire pond is decorated.
A pond from a finished plastic container
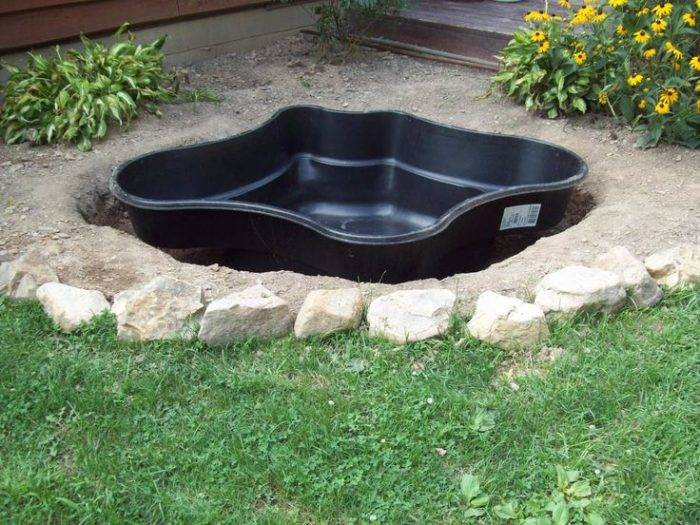
Fiberglass or PVC form can be of any size, design features. The choice depends on the wishes and capabilities of the owner. The construction is done in 4 stages:
- digging a pit;
- establish the form;
- sprinkle all voids with sand or soil;
- plants are planted.
After that, the pond is filled with water and put into operation.
Old bath pond
An old cast iron or plastic container is ideal for building a pond. First, they dig a hole for the size of the bath, then make a pond from the bath:
- Plug both holes in the bowl. Sand is poured at the bottom of the pit, compacted. More sand for acrylic bowls is poured so as not to deform the walls of the structure.
- The bath is lowered into a pit, painted from the inside with waterproof paint, and water is poured.

Film pond

Algorithm of work:
- mark out the form;
- digging a hole of the required depth;
- clean the bottom from sharp stones, roots;
- align the banks;
- line the form with a film;
- press the edges of the film over the banks with stones;
- pour water, test the pond.
Decorate the reservoir in any chosen way. Knowing how to dig a hole for an artificial reservoir, they cover it with any material at hand - old banners are ideal as a substrate.
How to make an artificial pond with a bowl (no film)
The easiest and fastest way to make an artificial reservoir in the country is to bury the finished bowl in the ground, decorating and decorating its edges. There are plastic bowls - ready-made in various shapes, sizes and colors (mostly blue, green and black).
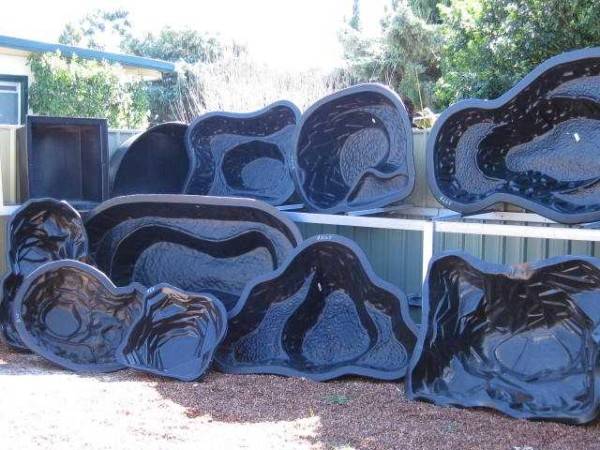
The shape of the bowls for small ponds on the site may be different
The device of a plastic garden or country pond is a simple matter. Here's a step-by-step guide:
- It is necessary to dig a pit in the shape of a bowl. If the shape is very non-standard, you can turn it upside down at the installation site, outline something with a contour (at least dig it with a shovel). The bowl is taken to the side, a foundation pit is being dug. It should be slightly larger in size - slightly wider, but not deeper. The edges should either be flush with the ground, or protrude slightly. If you manage to raise the edge a little, it will be even better: when it rains, dirty water will not flow.
- After the desired depth is reached, the bottom is leveled into the horizon: it is leveled first with a shovel, then compacted and the excess is removed with an even bar. The surface must be flat and hard: the plastic must have good support. If the ground is badly leveled (clay), you can pour 5-10 cm of sand, wet it and tamp it.
- The next step is to install the bowl in the pit. If the bottom has been flattened, the edges of the bowl will be level with the horizon. Now the space that remains between the wall of the bowl and the pit needs to be covered with soil or sand and tamped well.
- Now it's up to the design: the installation is complete, you can fill in the water.
How to build a pond in the courtyard with illumination using this technology, see this photo report (you can flip through the photo gallery yourself by clicking on the thumbnails below).
But it is not always and not everywhere it is possible to constantly add and drain water into the pond. Then you will have to either plant such plants that will cleanse it, or periodically change it.
The pond from the old bathroom
You don't have to buy a bowl. Any container can be used. Even an old bathtub. It turns out very well. All actions are the same, the foundation pit is dug first, a bath is placed in it, what goes on, look at the series of the following photos. On them, the pond from an old bathtub is transformed into a truly delightful corner.
A pond from a car tire (with a film)
A mini pond can be made from an old car tire, or rather from a tire. The larger it is, the larger the reservoir. The hardest part in this business is to cut off one side part. If the resulting edges are sharp, sandpaper them. The second most difficult task is to dig a hole of a suitable size. The difficulties ended there. The rest is quite easy.
A trimmed tire is installed in the pit, covered with earth on the sides, and compacted well. Also, earth or sand is poured inside, the bottom is leveled. Take a piece of thick plastic wrap, which can be folded in half, and cover the resulting tank. Do not try too hard: pour water, it will straighten the film itself.
Instead of polyethylene, you can take a banner film (available in advertising companies that produce outdoor advertising) or a piece of special for pools and ponds. They are much stronger (but more expensive).
The protruding ends of the film are tucked around the walls of your pond and decorated with stones. The pond is finished, then - decorating and planting plants. See how to make a pond from a tire in the photo report.
There is certainly nothing complicated in such a device. Anyone can build such a reservoir in the country with their own hands, and the investment is minimal.
In general, mini-ponds are made from tanks, barrels, pots, even flower pots. The main thing is that there is a corps, but it is not very difficult to arrange it: experience gradually comes. They put them in the garden, in the country, near the house. There is an opportunity to bring water, make a trickle, it can be planted under trees, for example, or shrubs. And beauty and benefit at the same time.
Dimensions and depth
The size of the pond depends on the size of your plot. A large-scale pond will not look harmonious in a small area and, in addition, will take up a significant part of the functional area, on which other elements of landscape design could be located: a gazebo or alpine slides. Calculate the size of the pond in a ratio of 1:30 relative to the area of the site, then the pond will look aesthetically pleasing and will not require unnecessary labor.
As for the depth - determining with it, it is also important to reach the golden mean. Digging a very deep pit is one of the common mistakes when creating a pond, as a result of which the pond has sheer walls, which looks unnatural and complicates the care of the pond.
If you plan to have fish in the pond, it shouldn't be too shallow, but you don't need to make it too deep either. The soil freezes up to one and a half meters deep: so that the fish can winter in the pond, it will be enough to make a winter hole for them below this mark. The area of such a "house" should be about ¼ of the area of your artificial reservoir.
Other ideas for arranging such a pond
If you think that a pond made of a single tire is all that the imagination of domestic craftsmen-gardeners could give rise to, then you are deeply mistaken. There are a lot of options for using tires to create reservoirs. And now we will tell you about the most popular of them.
If you take not one, but two tires of equal or even different sizes, you can make not one, but two reservoirs, which will be in contact with each other with the protectors. The most interesting thing about this building will be its decorative design.For example, at the junction of two rubber bases, you can build a beam bridge from birch logs. It can be either decorative or a continuation of the garden path.
By varying the depth of the tires, you can create overflow ponds. To do this, one tire is fixed on the surface of the site, and the other is buried. With the help of such an overflow, by the way, it is possible to organize the drainage of rainwater flowing from the roof.
On the basis of ponds with overflow, you can make a homemade waterfall. To do this, you need to lead a hose to the upper container, from which water is supplied under low pressure. It can be neatly camouflaged with stones located along the banks. Water, overflowing the upper part of the structure, will effectively run into its lower half, imitating a waterfall.
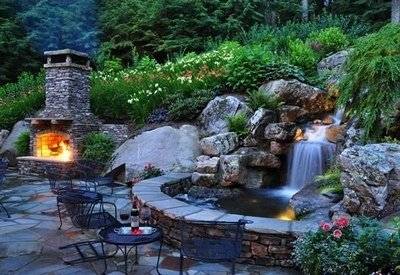
If the landscape of your site allows, then why not build such a magnificent waterfall, the basis of which is all the same tires
Swimming in the summer is something that no child can leave indifferent. A large tire will make it easy and simple to make. Kids will have something to dabble in under the supervision of adults. It is best to surround the paddling pool with a coastal area made of tiles, so that you can safely step on it with bare feet. To protect the children, the water in such a pool needs to be filtered. A pump can be used for this purpose. Or you can just change the water more often.
A good idea to liven up your pond is to use a fountain in it. To do this, you can adapt a turbine with a nozzle for an aquarium or a small pump. For the fountain to work, it needs to be supplied with power. Do not forget to protect yourself: the electrical wire must be insulated with a corrugated pipe and buried.
See how the construction of a tire fountain looks like:
Even if there is absolutely no meta for a pond in the garden, using a tire, it can be done on a balcony, on a terrace or in a loggia. Artificial stones will help to give the structure an attractive look, which can be glued with a water-based compound to the side surface of the tire.
Of course, this list of ideas cannot be exhausted, because human fantasy knows no boundaries. Watch this video - we are not fooling you:
Excerpt from the pit - determining the required depth or how to dig a pond in the country.
It doesn't matter with what devices the foundation pit will be dug. The main thing to consider is the size of the terraces: depth about 30-40 cm, width 20-30 cm
If a deep reservoir is planned, then its total depth can be calculated by the number of terraces. Take into account the slope of the banks of 45 degrees. The smallest depth is 60 cm. If you make the reservoir smaller, then in winter it will freeze to the bottom, in this case the plants and together with them all the fauna die.
The photo below shows a pit for a large water area. It is very labor intensive, but in the end, a real pond will amaze with its natural beauty.

Dug pit
As you can see from the ladder, this pond is planned to be used in the future as a reservoir for swimming and diving.
The video below provides tips on how to make a good pond pit:
Seventh stage. Create an artificial reservoir
There are plenty of materials that can be used to create a reservoir, but we will focus on PVC film. The fact is that it is cheaper, it takes the desired shape better, it can be repaired, and it does not require specific knowledge or skills to work.
Step 1. First, select the color of the film. There are several possible options here.
- Black film - it will turn the bottom into a mirror (plants, clouds, etc. will be reflected).
- Creamy, blue - this way the pond will look more like a pool, and fish against a light background will be more clearly visible.
- Brown - will imitate the soil of natural reservoirs. A great option for a landscape pond.

Pond films
Also, when choosing a film, we pay attention to the composition (PVC is more durable than PE) and thickness (for a pond, you will need material thicker than 0.5 mm). Moreover, the greater the depth of the reservoir, the greater the thickness of the film should be.
Equally important is resistance to UV radiation and mechanical damage.
Step 2. Next, we calculate the dimensions of the film, for which we use the following formulas:
- pond width + (depth x 2) + stock (55-60 cm) = material width;
- pond length + (depth x 2) + stock (55-60 cm) = material length.
For gluing, we will use a special glue (for example, "Tagnit") or adhesive tape (Quick Seam 3).
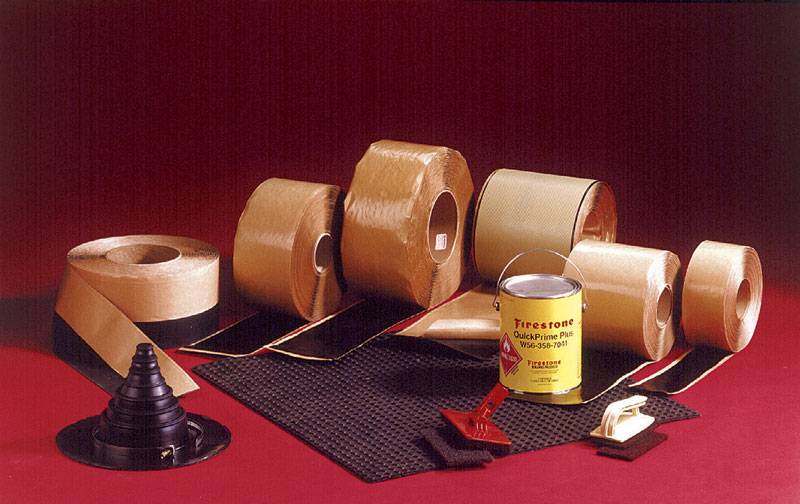
Quick seam
Step 3. The next step is to create a schema.
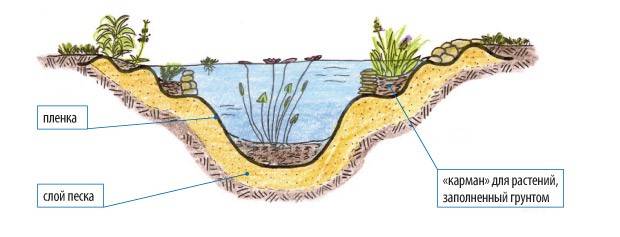
Pond scheme
First, we draw it on paper, and then we transfer it to the ground. We indicate the sizes of steps or "shelves" for plants - this will avoid possible problems. For marking we use sand or a flexible garden hose (preferably a bright color).
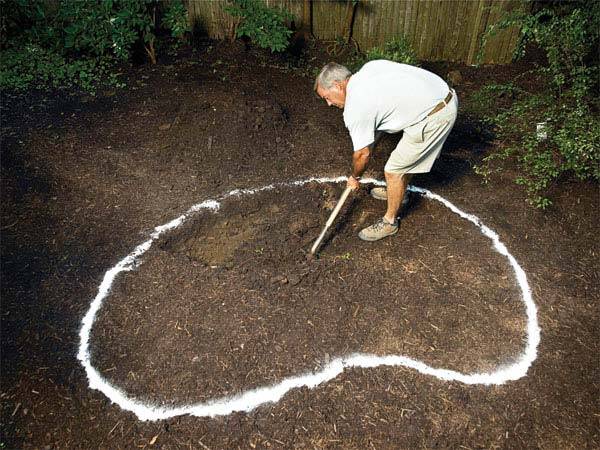
Markup
After that, we cover the marked area with a piece of light film and examine it from different angles. We make adjustments if necessary.
Step 4. We dig a foundation pit. To do this, we perform the following actions.
- First, remove the sod.
- Then we dig the foundation pit itself. At the same time, we move from the edges to the center, going deeper in the required places - this is more convenient. For laying out the stone and decorating, we equip a ledge with a depth of 60-70 cm.
- We remove the soil, and with it roots, stones, debris and everything that can damage the film. By the way, you can make an alpine slide from the excavated soil.
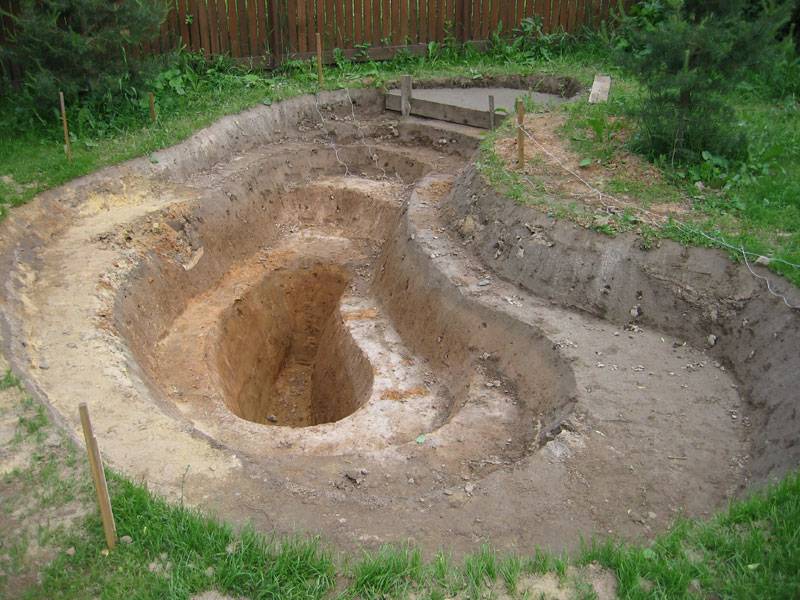
Pit under the reservoir
When carrying out earthworks, we pay attention to the fact that the shores of the future pond are located on the same line. If a waterfall is created, then we maintain the required height difference
Step 5. Laying the substrate. We carefully tamp the bottom of the finished pit, after which we proceed to the waterproofing layer, which will prevent the penetration of water into the ground.
The underlay can be done in several ways:
- we cover the bottom with stones and fill it with sand (this kind of waterproofing will lose its properties after a few years);
- we lay a layer of geotextile, which we fill with sand (it will cost a lot);
- we lay PVC film (the most reliable way, so we will dwell on it).
Step 6. Next, lay the film, preferably on a sandy "pillow" (the latter will prevent damage from stones and other dangerous objects). It is advisable to do styling on a hot day - as it warms up, the film becomes more pliable.
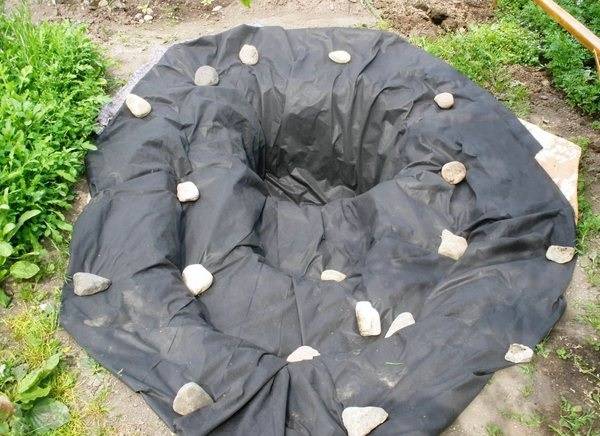
Laying the film
In this case, it may be difficult to form folds. We try to make one large fold, and not a large number of small ones, and then glue it or press it down with stones. The film should be loose, loose.
To secure it, we dig an additional trench along the perimeter. We put the film there, after which we fill in the crushed stone. Next, fill the trench with large stones with a flat bottom (so that the film does not break). We lay the walls with round stones (flat ones will slide). At the end, we fill the pond with water - we serve it without pressure, directing it to the center of the pit. After two days, we cut off the excess film.
Step 7. Strengthening the banks. Their slope depends on the type of soil: if it is sandy, then the walls should be sloped, if we are talking about clay or black soil, then vertical. The optimum slope angle should be approximately 45 °.
The fortification itself depends on the type of coast.
If they are shallow, then you can use:
- geomat;
- geogrid;
- polymer geogrid.

Geomats and geogrids
You can also use a regular mesh netting, clogging its cells with soil with seeds of perennial grass (for example, clover).There is another option - to strengthen the banks with shrubs or plants.
If the coast is steep, then we can use:
- piles;
- gabions;
- retaining walls.

Retaining walls, piles and gabions
It can be effectively strengthened using biological methods (planting of plants). Ideally, biological enhancement methods should be combined with engineering ones.
DIY pond technology
To create a pond in the garden with your own hands, you need to follow the step-by-step instructions. To begin with, a recess of a certain size is pulled out, depending on the size of the tire. After that, waterproofing is created.
It is important to strengthen and decorate the reservoir to make it more attractive to your eyes. You can use for this not only colorful and bright plants, but also various fish.
Recess preparation
Level the area first so that there are no differences in height. Otherwise, it will be difficult to install the tire.
Important! It is not necessary to fully deepen the rubber into the pit. So you will be able to avoid flooding the tank with precipitation.
After that, determine how much you will deepen the main material:
- full tread width;
- 1/3;
- leave on the surface of the pad.
After that, you need to dig a recess. In shape, it should correspond to the outer diameter of the wheel. Line the indentation and add a 15 cm layer of sand to the bottom. Thanks to such actions, you can prevent deformation of the gasket, which is installed inside the pit, and also avoid water leaks.

Use the level to check how well you performed the actions. Then tamp the bottom and place the tire inside. Again, use a spirit level to check the correct operation so that the horizontal position of the wheel is free of differences from different sides.
Tire waterproofing
Particular attention must be paid to waterproofing the wheel to prevent high water consumption. It is best to use plastic wrap for these purposes.
Try to lay it out in several layers, since it tends to tear from a heavy load.
Important! Remove all unnecessary items (nails, debris, stones, etc.) before laying the film.
This will prevent deformation of the shelter.
If you want to forget about the repair of the reservoir for a long time, then it is better to use other, more reliable materials:
- liquid glass;
- polyurethane mastic;
- liquid rubber.
Waterproofing installation technology is as follows:
- Place a layer of the selected material inside the tire.
- Distribute it so that it extends 30–40 cm beyond the edge of the wheel.
- Remove excess film after the product has taken shape.

Strengthening
During the installation of a decorative reservoir, all materials must be properly strengthened. For these purposes, it is better to use sand or crushed stone (fraction 0-5). Fill the frame with the selected material to prevent vibrations and slipping of the wheel along with the film. The reinforcement also creates a buffer zone between the plants and the reservoir. If you don't have sand or gravel, you can use regular garden soil.
Decorating
Decorating is necessary to make your home decorative pond more presentable.

There are several ways to do it:
- plant at the bottom of the plant;
- plant flowers in pots or tubs on the shore. Considering that plants can be swapped or transferred to other areas, you can create an unusual design in the garden;
- place bright fish that will differ in color and size;
- create compositions from stones.
Learn how to make a bath pond with your own hands.
Fish and plants for the pond
The following types of fish are often launched into an impromptu pond made by hand:
- Comet;
- Gold fish;
- Minnow;
- Shubunkin, etc.
If you have equipped a large reservoir from a car tire, then you can use Koi carp. Thanks to their large size, the artificial lake will become natural. Ornamental plants can also be planted next to or inside the pond.Popular are lotus, wolfia, pemphigus, aquamarine, brazenia and azole. You can also plant water paint, which will color the water in different shades.

Stage 3 - Place (location) for the pond
To create a pond on the site for the sake of a pond is illogical.
It is much more pleasant if the pond brings a zest, a decorative accent to the color of the landscape
plot. So, you need to place it in a good place. Exactly
the location will allow you to admire the artificial lake from anywhere.
How to choose the right place for a pond in the country?
To do this, you need to take into account a number of factors:
the size of the plot. Directly affects the size of the pond itself and
its configuration;
relief. Also determines the shape of the pond and provides
the ability to simplify the creation of fountains, waterfalls or vice versa achievement
perfectly smooth water mirror;
soil composition and groundwater level. Render
direct impact on the depth of the pond, the complexity of the work and
the need for additional materials;
illumination. It is desirable that the pond is located in
shaded place. The exposure time to direct sunlight should not exceed
5-6 hours. Otherwise, some of the water from the pond runs the risk of evaporating, and
biological activity will negate all the beauty of the reservoir. Recommendation: when choosing a place for a pond, watch the sun
regime for several days.
Tip: The deeper the body of water, the more illuminated it is
can be located.
A fish pond all the more needs
thoughtful placement, because in very hot water the level decreases
oxygen.
visibility. It is better to place the pond so that it can be seen
from the window of the house or from the gazebo. Good visibility is especially important for families with
children.
reflection. The pond will only benefit if on its surface
only clouds or beautiful buildings will be reflected, not a toilet or greenhouse.
the degree of landscaping. Trees and bushes growing around the pond
it is definitely a very organic addition. But, it is also fallen leaves and
branches that, falling into the water, will pollute its surface and, ultimately
account, settle to the bottom in the form of silt. In addition, tree roots can damage
pond waterproofing.
Tip: provide enough greenery near the pond
it is possible by decorating it with plants in tubs (barrels).
power supply. For those owners who are planning
equip a fountain on a pond, lighting, etc. have to think in advance
the possibility of electrification of this site and yard.
Advice: it is better to supply electricity during the development phase and
lay the wires in a protected and strong corrugation under the ground, and equip the joints with
a hatch for free access.
the possibility of expanding the reservoir or the device of a recreation area.
You need to plan for the future
In both cases, it is important that, by
there was enough room on at least one side of the pond for a possible
redevelopment, adding a gazebo, barbecue area, installing sun loungers or
small waterfall
compatibility of the pond with other buildings and general appearance
plot.
Tip: start building a pond in the country with your own hands
better at the beginning of the warm season - in the spring. Thus, there will be a margin of time for
the device and the reservoir will have time to fit into the design ("take root").
