Soil types and their characteristics
Construction of a gazebo made of wood
The first place in terms of reliability and prevalence is occupied by rocky and sandy soils. If the groundwater is lower than the lower point of the buried foundation, the position of the object on such soils will be the most stable, a 500 mm depth of foundation is sufficient. Otherwise, i.e. with water-saturated silty soils, the creation of a gazebo, as well as any other structure, is extremely difficult - to analyze the condition of the soil, it is necessary to involve specialists. Such soils will require a number of additional measures to protect the foundation from wear, in addition, in the conditions of floating soils, the creation of a solid casting foundation is not recommended. The best solution would be pillar foundations.
The construction of a gazebo on foundation pillars will be a particularly good solution on clayey soils - a high moisture content in clay causes uneven swelling of the soil, raising the foundation and skewing the building
With clayey soils, it is important to observe several rules:
- the maximum number of foundation racks is 6;
- they need to be placed around the perimeter of the gazebo, tk. the soil under it freezes more slowly, and in the presence of internal foundation pillars, the skew will only increase.
The foundation needs to be insulated from the heaving of the soil, it must be wrapped outside with PVC film - so the soil will not freeze to the racks and, when swelling, will slide along them.
Installation of the roof of the gazebo made of wood
For a square gazebo, the most attractive will be a roof consisting of four slopes. Roof construction begins with the construction of the frame. Inclined rafter legs are cut out of the timber, they are fixed in pairs with nails at an angle. Auxiliary struts are symmetrically attached to each of the main inclined legs. They are fixed with one edge to the strapping bar, the other to the main rafters.
On a note! To work on the roof, invite an assistant, since it is impossible to cope with the installation alone.
 For arranging the roof of the gazebo, you can use sheets of moisture-resistant plywood.
Next, proceed to covering the roof. For this, you can use both a board and a plywood sheet. Fastening of plywood panels is carried out on the surface of the rafters with a pitch of 20-25 cm using self-tapping screws. The surface of plywood sheets is covered with roofing insulating material - roofing felt, and then soft (bituminous) tiles.
We build a wooden gazebo
Of all the additional buildings on the site, the most common and beautiful are gazebos. They can be wooden, stone, metal, with forging elements. Having chosen the right place for the gazebo, it will not only decorate your site, but also become a favorite place for the whole family. If you decide to make a gazebo with your own hands, then wood will be the best material for this. Wooden gazebos are always cozy, original and environmentally friendly. In the article we will analyze the stages of work from the installation of the foundation, the structure with detailed diagrams to the installation of the roof.
Stages of work
As a rule, a columnar foundation is built for wooden arbors, after which the frame is assembled, the roof, the floor and, if there is a rail, are installed.
The final stage of work is the obligatory processing of wood with an antiseptic and coating with varnish or paint.
Foundation
So, for a gazebo, like any building, a solid foundation is needed, thanks to which the tree will not rot. Otherwise, after one or two seasons, if you just put the boards on the ground, they will rot. At the very beginning, you need to calculate the foundation for the weight of the building. Since in our case we build wooden gazebos with our own hands, the option of creating a foundation will be one of the simplest. For such a building, it is enough to use a columnar foundation. You can also choose a strip foundation, but for construction from wood, this is unnecessary.
- Level the surface of the earth and remove the fertile soil layer, thereby reducing the dampness under the future gazebo.
- Having made the marking of the gazebo on the site, pits are dug under the foundation pillars. The depth of the pit depends on the degree of freezing of the soil. On sandy soil, holes are usually dug with a depth of 30-60 cm.If the soil is mobile, the depth is 40-120 cm, on forest soil - 50-100 cm.
- The material for the posts can be bricks, including used ones, asbestos-cement pipes or ordinary wooden posts. In this case, it is necessary to think as much as possible about the protection against moisture of the pillars, then the tree can last up to 13-15 years.
- When installing a columnar foundation, be sure to use a level. So that the gazebo does not tilt if the base of our building is not installed along the horizon. Then you cannot do without repairs, both the foundation and the building itself.
- In addition to the pillars around the perimeter of our building, supports are installed, which are placed directly under the building itself. This is necessary so that the floor does not bend.
Preparatory activities
Diy brick gazebo
Choose a place to place the gazebo
It is more convenient if the gazebo is located near the house. It is desirable that a beautiful view opens from the gazebo. Think about the size of the gazebo, its shape and design features. Choose the dimensions and configuration of the building at your discretion.
Try to make the finished building fit well with the surrounding space and in harmony with the nearby objects.
Choose a place to place the gazebo
Draw up a drawing of the future brick gazebo
Indicate in it all the significant dimensions and the main features of the structure being erected. The drawing will help you determine the required amount of building materials and quickly cope with all the upcoming work.
Gazebo project
Start preparing the site
Transfer the markup from the drawing to the construction site
It is important that all measurements are carried out strictly from one (zero) level.
Make reference marks for the height. They should be as accurate as possible. The maximum permissible error is 0.5 mm.
Any stable pegs of suitable length and strong rope will help you to conveniently mark the territory.
After marking, remove the top fertile soil layer from the site, clean the site of any kind of interfering objects and proceed to the main stage of work - the construction of a brick gazebo.
Markup
Construction of a frame gazebo with a pitched roof
To avoid serious mistakes and minimize construction costs, you need to start with the simplest. For example, a rectangular gazebo with a pitched roof and on a slab foundation is taken.
Construction of a frame gazebo with a pitched roof
Necessary materials:
- large stone or rubble;
- sand;
- concrete solution;
- formwork boards;
- timber 100x100 mm and 50x50 mm;
- boards with a section of 30x150 mm;
- primer for wood;
- dye;
- slate or corrugated board for the roof;
- screws and bolts;
- reinforcing bars.
You will also need tools:
- shovel;
- building level;
- rule;
- hacksaw;
- jigsaw or circular;
- screwdriver;
- hammer;
- paint brushes;
-
Bulgarian.
Marking the base of the gazebo
Marking the future gazebo
Choose a flat, open area of the garden and make markings. To do this, determine the location of one of the corners of the gazebo and mark it with a peg. They measure the distance to the remaining corners, put beacons, pull a string between them. The diagonals are measured in the resulting rectangle: if they are of the same length, the markings are made correctly.
Pit preparation
Sand filling and ramming
The soil is selected with a shovel to a depth of about 25-30 cm, the bottom is leveled, it is carefully tamped.The pit walls must be strictly vertical. Then coarse sand is poured with a layer of 10 cm, it is well leveled and abundantly moistened for compaction. Formwork from boards up to 10 cm high is placed along the perimeter, reinforced with a bar.
Pouring the foundation
The pit is laid out with large flat stones or covered almost to the top with large rubble. At the corners of the perimeter between the stones, pieces of reinforcing rods are driven in; the rods should rise above the finished foundation by at least 10 cm. A concrete solution is prepared and the foundation pit is poured. The surface is leveled with a rule or smoothed with a trowel.
Foundation
Installing the frame
For the frame, 4 beams of 100x100 mm are taken and cut to the height of the arbor. The front beams are left 15-20 cm longer than the rear ones to make the roof slope. After that, the supports are well treated with a primer and dried. In the lower end of each support, a small hole is drilled along the diameter of the reinforcing rods, which protrude from the concrete at the corners of the base. They put the bars on the rods, set them vertically using a level and additionally strengthen them with metal plates and anchor bolts.
Frame made of timber
After installation, the side supports are interconnected with boards of 50x150 mm, and then the braces for the rafters are mounted. At a height of 10 cm and 0.5 m from the floor, the racks are connected with horizontal jumpers from a bar of 50x50 mm. Vertical bars are fixed between the lintels with a pitch of 40 cm. The doorway is left free. All fastenings are carried out using bolts and steel corners, which are screwed to the tree with self-tapping screws.
All fastenings are carried out using bolts and steel corners, which are screwed to the tree with self-tapping screws.
Prices for various types of timber
Beams
Roof installation
Roof layout
On the boards connecting the support beams, logs are stuffed with a step of 30 cm. From above, the logs are sheathed with an edged board of 30x150 mm. Gaps with a width of 5 to 15 cm are left between the boards. Of course, all roof elements must be treated with an antiseptic primer and well dried. You can cover the top of the board with glassine and fix it with staple staples. Thin strips are stuffed over the film so that there is a ventilation gap between the roofing and the film. Slate is laid on the slats and fixed with 120 mm nails with galvanized heads.
Arrangement of the gazebo
Painting the gazebo
After installing the frame and roof, all wooden surfaces must be painted. When the paint dries, a wooden table and benches along the walls are placed inside the gazebo. Electricity is connected from the house to the gazebo, they hang a light bulb or lamp. To add coziness to the room, you can hang the walls with a dense light-colored fabric. The interior decoration completely depends on the taste and capabilities of the home owners.
This version of the gazebo is basic. If you wish, you can improve the design: install wooden gratings between the supporting beams, sheathe the walls with clapboard or waterproof plywood, lay logs on the concrete base and make a wooden floor. Instead of beams for the frame, you can take metal pipes, and replace the slate with polycarbonate or soft tiles.
Types of wooden arbors
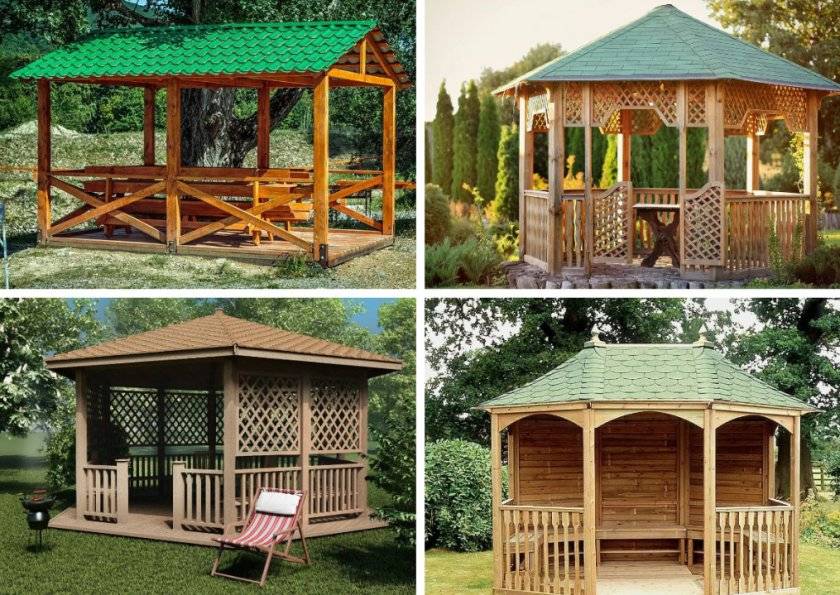
Modern gazebos can differ from each other in many aspects. Some people prefer to install simple square closed-type buildings on their site, which serve as a platform for rest and meeting with guests. Such designs are hidden from strangers, which is very convenient if you want to communicate face to face. Others turn the gazebos into real works of art, highlighting the decorativeness, rather than the practicality of the design.The end result depends primarily on the drawing as well as the materials chosen.
By form and design
In modern landscape design, of which garden gazebos are a part, various types and forms of this structure are distinguished. It can be open or closed (depending on the amount of wood covering), and also often differs in the number of corners
Increasingly, summer residents are paying attention to the original hexagonal or octagonal options, moving away from the usual square gazebos. Round designs are also popular.
With the right blueprint and materials, creating each of them won't be a problem.
Separately, there is a belvedere, which is a summer-type building, necessarily installed on a hill or hill. The view of such a gazebo is always circular. Pergolas are mounted next to pools and other reservoirs - open-type multi-tiered frame structures.
Did you know? The first gazebos began to be made back in Ancient Egypt in 2000 BC. NS. At that time, this was the advantage of the pharaohs, who decorated them with marble, gold and various precious stones.
By material
The main advantages of wooden buildings in the country are their strength, durability, as well as environmental friendliness, which is extremely important in the conditions of modern life. Since the installation does not imply anything complicated, structures of various shapes and sizes can be produced.
Wood also has its drawbacks, for example, it is not resistant to fire, moisture, and insects. You can eliminate these disadvantages by treating the board with special means. You can use various types of wood to create a gazebo: oak, cedar, beech, etc.
The main types of materials used should be considered:
- Profiled timber - this material has a high strength, which makes it possible to use it in the construction of baths, arbors and other outbuildings. The second advantage is that over time it does not change in appearance (does not rot, does not warp). The shrinkage percentage after the completion of the construction process is very low. Due to the high rate of heat preservation, it is recommended to use a profiled beam when building closed-type gazebos. For the manufacture of profiled timber, mainly such species as oak, pine, linden, eucalyptus are used. The latter material has a rather pleasant specific smell.
- A block house is a lumber that is used primarily for sheathing a finished frame. It has a semicircular shape, therefore, in its finished form, such a structure is somewhat reminiscent of a real rural log house. Such a structure is assembled quite simply, and also has excellent thermal insulation characteristics, so it will be possible to gather for tea in such a room even in cold windy weather.
- Grooved board - this material is no different from a block house in terms of technical indicators, but it has a different appearance. Such wood does not have a semicircular cut, but is absolutely flat. The material is fastened to the frame using spikes and grooves located on the sides of the board.
- Carved board - ordinary wood can be easily turned into a real work of art if it falls into the hands of a master. Gazebos with various patterns look very beautiful and even fabulous, especially if they are then painted or opened with a dark varnish. Carved railings or shutters look very original. But you should not waste your time on this, since beautiful and intricate patterns are beyond the power of beginners. Better to order individual items from a professional.
Whatever material you choose to create a homemade wooden gazebo, you should definitely complete the processing of raw materials. This guarantees the durability of the structure and its resistance to water or insects. For this, parts of the holiday cottage are impregnated with a wood preservative, then primed and the next day covered with persistent facade paint or varnished.Some experts recommend simply waxing the surface, which will take longer, but will also create a thick, protective layer.
How to make a gazebo with your own hands: step by step instructions
It is always pleasant to relax in the fresh air after a hard day, surrounded by loved ones. A small or massive structure will help you in this matter, a self-assembled gazebo for a summer residence will be an ideal addition to any country house. Now let's take a closer look at the question of how to make a gazebo with your own hands?
Preparing the foundation. The most suitable solution would be a strip foundation. It consists of a reinforced concrete frame, which is installed in dug trenches 20-30 cm "under it, you can add sand and coarse gravel." After its installation, there is a pouring and installation of horizontal logs. To save money, you can use a tiled or columnar foundation, the first option can be used as a floor for a gazebo. See the image below for more details.
Installing the base of the gazebo. In most cases, the base is made of rounded or square timber, which can be sewn using long screws or nails. After fixing, you can start installing the supporting elements. It is desirable to make them from the hardest types of wood, since they will serve as a support for the entire structure and roof.
Floor installation. If you plan to install a small gazebo, you do not need to install the flooring. For other cases, you can fill the floor with fine gravel. You can also mount a concrete floor and decorate it with ceramic tiles or parquet boards, this option is suitable for closed and semi-open gazebos. The main thing to remember is that the floor covering should be in perfect harmony with the general appearance of a small "house".
Installation of walls. Light materials are suitable for installing walls, because the main purpose of the walls of the gazebo is decorative design, the only exceptions are closed-type houses.
Roof installation. It is better to decide on the element of the roof at the stage of drawing up the drawing of the gazebo. For wooden and light "houses", roofs made of polycarbonate or wood are suitable. Large and reinforced gazebos can be equipped with a metal roof, it will withstand huge loads, this option is ideal for northern regions with a lot of rainfall in winter.
Internal and external decoration. Upon completion of all installation activities, you can proceed to the interior and exterior decoration. A wooden gazebo can simply be varnished to protect it from premature corrosion and give it an elegant look. Remember, microporous and heat resistant paints are ideal for outdoor wall finishing.
Where is the best place to build a gazebo
This is a crucial moment on which all future events in the summer cottage depend. By placing it in the sun, you will acquire a natural oven, which will not be convenient to be in - and this is at least. The place for the gazebo should not only correspond to the general design and layout of the summer cottage, but also be sufficiently shaded, for example, by the crowns of garden trees.
The location of the gazebo near a natural or artificial reservoir, which gives natural coolness and freshness, will be correct. In addition, contemplating the water landscape has a calming effect, bringing a sense of peace. And, of course, there should not be any active sources of noise near the future gazebo.
What design of a summer cottage is preferable
In general, gazebos are divided into two types of construction - temporary and permanent.Summer cottages belonging to the first type are mounted at the beginning of the warm season and before the onset of cold weather they are dismantled, storing them in a room protected from the weather.
The second type of gazebos remains in place all year round, therefore, in their creation, a stable base is mandatory, which can be a hard surface of asphalt, concrete stone or support on piles. The connection to the ground is provided by a light foundation or buried pipe sections made of concrete or metal.
The advantage of a temporary gazebo is the ability to move it from place to place, but installation / dismantling work has to be done twice a year.
The permanent gazebo is more solid, it is a permanent element of the estate landscape.
With any choice, all structural elements of a summer cottage and its interior items need reliable protection from climatic influences: impregnation with antiseptic compounds, reliable waterproofing, application of several protective layers of enamel or varnish.
If you have already decided on the place to place the gazebo, its size and type of construction, you need to prepare a drawing of the gazebo. Then proceed to the foundation work and the main supporting structures - the optimal solution will be wooden, concrete or stone pillars, reinforced in the foundation (now and further we are talking about permanent gazebos).
But before proceeding with the marking and foundation work, you need to find out what the condition of the soil is at your summer cottage - the main reason for the partial or complete deformation of the object is associated with ignoring the characteristics of local soils.
Internal work on the arrangement
Internal work consists in the fact that you need to make a roof cladding using lining. After that, install benches around the entire perimeter of the room using high-quality, dense wood.
Seal the gaps between the floor and the bottom base of the arbor. For this, it is recommended to use polyurethane foam. You need to decorate the inside of the grill house based on your own preferences, but adhering to the Scandinavian style.

Setting up a grill, barbecue or fireplace
Try to buy a ready-made grill, barbecue, or other fireplace equipment. They are designed in accordance with all fire safety rules. Also, in addition to them there is a tabletop and the necessary fixtures.
It is recommended to install the lower pedestal in the center of the gazebo above the knee of the draft pipe. The chimney is led out through a through element in the roof. The upper pipe is attached to a special hood bell.
We recommend reading how to properly plan the landscape design of a small courtyard.
Decor
Quite often, Finnish gazebos are decorated with potted flowers or climbing plants.
Textiles can also be used as decor:
- light curtains on the windows create color accents in the interior;
- heavy curtains or blinds are hung from the sunny side;
- numerous pillows on the benches contribute to the embodiment of comfort and home atmosphere;
- Carpets in soothing shades bring a Scandinavian touch to the setting.

It is quite possible to build a Finnish gazebo with your own hands. In it you can spend time with your friends interestingly. Some summer residents equip the outbuilding in such a way as to sometimes be alone while reading an interesting book. The main thing is that during the installation of the gazebo, observe safety precautions and follow the step-by-step instructions.
Arbor foundation device made of wood
As an example, we will use a small square wooden gazebo with a hipped roof.
Having chosen a suitable place for the gazebo, they begin to prepare the site. It is necessary to remove all debris, remove shrubs and tree roots there.If there are bumps or depressions, they are leveled.
On a note! If possible, do not install the gazebo near the roadway or a neighbor's fence, try to place the gazebo in such a place so that a beautiful view of the garden, alpine slide or pond opens up from it.
 Arrangement diagram of a columnar foundation for a wooden arbor measuring 2.77x2.77 m.
Next, markup is made for the future structure. To do this, the first wedge is driven in and the entire perimeter of the structure is marked from it, fixing the corners with wedges. A construction cord is pulled between them. At this stage, it is very important to maintain the correct angle, as this will subsequently affect the strength of the entire structure. To verify this, you need to check the diagonals of the resulting square. If they are the same, then the marking is done correctly and the angle of 90 degrees is observed.
Basically, for small wooden structures, a strip or columnar foundation is used. Since the construction of a wooden square gazebo is quite light, a columnar foundation is chosen as its base. To do this, pits up to 80 cm deep are made, a layer of sand (5-6 cm) is laid on their bottom and poured with a layer of concrete of approximately 8-10 cm.
When the concrete mixture hardens a little, the racks are lowered into it. They must be installed vertically. After the vertical alignment of the supports is made by the level, their position is fixed with temporary jibs.
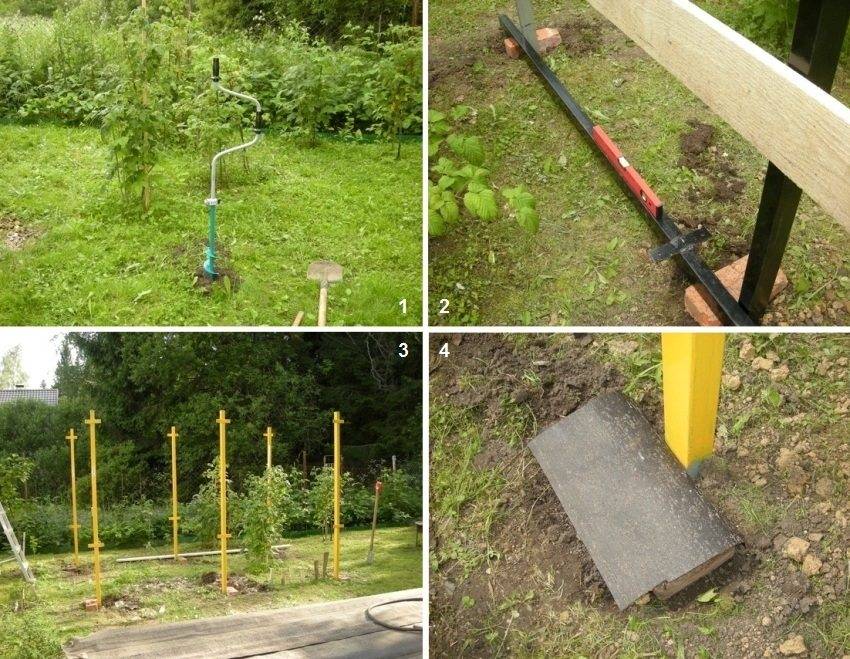 An example of building a gazebo foundation using a metal profile.
It is possible to fasten the support rails using the adjustable anchors. For this, pieces of metal pipes of suitable size are placed in the pits, the solution is poured into the cavity of the pipe, and after a slight setting of the solution, fasteners (anchors) are installed. When the concrete has finally set (at least 48 hours), the vertical posts can be anchored. After installing all the supports, it is necessary to make sure that their position is correct: the distance between adjacent supports must be strictly the same along the entire height of the supports (bottom, middle and top).
Options for garden gazebos and their specifics
Before making a gazebo, the developer determines its functional purpose. This can be a place for relaxation and recreation in the open air, an area for receiving guests in the summer season, or a barbecue area on the fire, which involves further tasting in the beautifully decorated interior of the gazebo. Based on the purpose, they choose materials for construction. The most common, due to their availability and practicality, are the following materials:
- wood;
- stone;
- polycarbonate;
- other materials.
The next step is to choose the ideal site for the construction site. Traditionally, the gazebo is placed next to the house, as this simplifies the process of bringing communications to the building. However, in private construction, other alternatives are also possible, because nothing restricts the owner of the site. Guided by his imagination and architectural ambitions, he can place a gazebo near an artificial pond, near garden plants planted in flower beds, near rockeries and alpine hills, the main thing is that the landscape design as a whole benefits from the appearance of a new structure and looks attractive and effective.
Thus, skillfully choosing a place and building gazebos with his own hands on the site, the owner will not only receive a useful and functional space, protected from heat, wind and precipitation, but will also be able to create a cozy and comfortable atmosphere in the yard.
What should a Japanese-style gazebo look like?
The main reason for the failure of developers who decided to independently design a Japanese-style gazebo is that they copy the ideas of Asian architects using popular identifiers - oriental-style lanterns.hipped roofs, small latticed windows, but they forget about the main message of the cultural traditions of Japan. It lies in the fact that in the process of the builder, the master strove to create the most harmonious space, which, in accordance with the postulates of Taoist, Buddhist and Shinto philosophy, will become a real spiritual refuge for visitors and a favorable place for contemplation.
We advise you to read an article on how to build a high-tech gazebo.
Therefore, in the process of designing a Japanese-style gazebo, it is important to focus on naturalness and closeness to nature. Geometric shapes, clean lines and man-made materials are not common in Asian garden architecture.
Instead, the following solutions are used:
- construction of a gazebo from simple materials of natural origin;
- the choice in favor of interesting asymmetric shapes;
- emphasis on minimalism;
- the predominance of shades of white, black, red in the color scheme.
Light Japanese gazebo
The cost of finished buildings
Cozy house 3 by 6 (89,000 rubles)
 89 thousand rubles
- Foundation: foundation blocks (15 pieces).
- Floor: 38 mm pine board.
- Frame: timber 100 x 100 mm.
- Sheathing: lining.
- Roof: gable.
- Roof: ondulin.
- Decor: wooden lathing.
- Cost with installation: 89,000 rubles.
Glazed 3 by 6 (99,000 rubles)
 99 thousand rubles
- Foundation: foundation blocks (12 pieces).
- Floor: 38 mm pine board.
- Frame: timber 100 x 100 mm.
- Sheathing: Euro lining.
- Roof: gable.
- Roof: ondulin.
- Cost with installation: 99,000 rubles.
Japanese 3 for 6 (155,000 rubles)
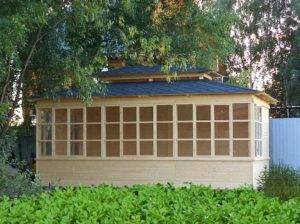 155 thousand rubles
- Foundation: foundation blocks (18 pieces).
- Floor: 38 mm pine board.
- Frame: timber 50 x 100 mm.
- Sheathing: lining.
- Roof: bunk with four slopes.
- Roof: soft tiles.
- Cost with installation: 155,000 rubles.
Glazed 3 by 6 (165,000 rubles)
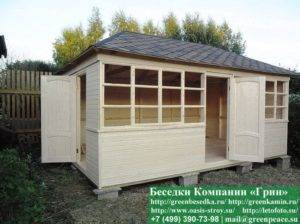 165 thousand rubles
- Foundation: foundation blocks.
- Floor: 38 mm pine board.
- Frame: timber 100 x 100 mm.
- Sheathing: Euro lining.
- Roof: Japanese hipped roof.
- Roofing: Soft tiles.
- Cost with installation: 165,000 rubles.
Calculation of building materials
Effective construction means clear planning of both material and financial costs. Therefore, it is strongly recommended, before starting the construction of the gazebo, to calculate the construction materials. Its results will become the starting point for construction and installation work.
The amount of material, its quality, the type of finishing and decorative wall cladding, the final cost of the entire structure will depend on all this.
Particular attention should be paid to the calculation of the foundation, walls and roof, the use of a heat-insulating and waterproof layer, which may be needed during the construction of a "closed gazebo", can increase the starting budget several times
How to make a roof on a gazebo
Installing the roof is the next stage in the construction of an octagonal gazebo with your own hands. The step-by-step construction diagrams presented will give you a better understanding of the process. If you plan each aspect in as much detail as possible, you can, firstly, prevent possible mistakes, and secondly, make a roof even with minimal experience. You already know how to install pillars and cover the flooring; building a roof, of course, requires more skills, so if possible, contact your friends who may have more experience in this matter.
At first glance, the construction of a roof for an octagonal gazebo seems difficult, but everything is not so scary, the main thing is attention and accurate calculation
- Start with the rafters and cut both ends 63.5 degrees with a miter saw. Attach one end to the posts, and the other should be fixed in the center of the rafters.Make sure you line up everything perfectly, otherwise the roof won't be symmetrical.
- In general, fastening rafters and fastening roof rails, but do not forget that it is better to fix everything with galvanized screws. Alternatively, you can cut the triangles out of plywood and nail them in place.
- Regardless of the choice, accurate measurements and making appropriate cuts with a circular saw are essential.
- Then cover the entire roof surface with tar paper, starting from the bottom to the top. Make sure the roofing strips overlap by at least 5 cm to create a waterproof cover for the roof framing.
- After covering the entire surface, close the edges with strips of roofing felt and fix them with staples.
- One of the last steps is the installation of the shingles. To do this, it is better to read the instructions if there is no experience in this area.
