DIY landscaping
In our rainy climate, paving is a must. They prevent the spread of dirt into the living space, save shoes from dirt and look much more aesthetically pleasing than earthen paths.

You can make and build garden paths with your own hands. They can be bulk from gravel, pebbles, wood chips and other small fragments.

And you can build paths using natural and artificial stone, wood cuts, concrete, car tires and even plastic bottles.

To create tracks using any materials, you first need to prepare the base, for which they create several layers in the dug trench.
The bottom of the trench is covered with rubble or broken brick, tamped, covered with geotextiles, covered with sand and tamped again. The selected material is placed on this pillow.

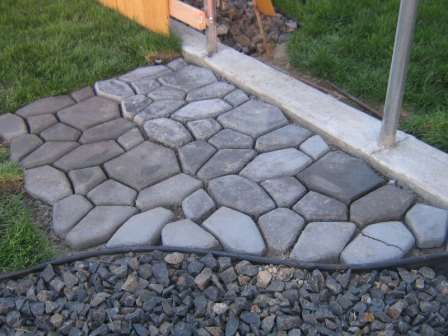
Laying a garden path with your own hands using a mold
First you need to make a cement mortar for pouring. It is made from 1 part of cement grade M500 (or higher), 3 parts of pure sand and 1 part of crushed stone (not necessary). Concrete pigments can be used if desired. A multi-colored track will look impressive. Small garden tiles can be made without rubble. First, mix the sand with cement, and then gradually add water to them, kneading the mixture with a construction mixer. The finished mortar should be plastic and not slip off the trowel. The amount of concrete mix should be equal to one mold fill.

The mixture should be used soon after production. It is spread over the template with a spatula and compacted with a vibrating screed so that there are no voids.
An interesting idea for creating non-trivial tiles would be if you put a relief plant leaf smeared with petroleum jelly on the bottom of the mold, or an uneven wood board. Some people lubricate their hands or the soles of their feet with it and leave their imprints on the surface of the solidified slabs. Thus, you can capture the handprints and feet of the whole family. Reinforcement should be pre-laid in templates for slabs that will carry the load from cars.
The form with the tiles is placed in the shade until it dries and covered with a film. Drying usually takes about a day after low tide. Laying garden paths with homemade tiles is carried out in the same way as purchased.
Did you know? Concrete was popular for construction back in ancient Rome, but after its fall it was forgotten for a long time. The most famous of the concrete buildings that have survived to our time is the Pantheon, built in 126 AD.
In this case, the following work is performed:
- The place of the future path is being cleared.
- With the help of pegs and a rope, outline its contours, taking into account the size of the homemade tiles.
- Then, with a shovel, remove the top layer of soil 10 cm.
- The bottom of the trench is rammed and covered with crushed stone or gravel, and a layer of sand is poured on top.
- The sand pillow is well moistened with water from a watering can and compacted.
- Install guides or pull the rope-order. Focusing on them, lay the tiles, hammering it into the installation site with a rubber hammer. Special crosses can be used between the slabs for smoother seams.
- The evenness and slope of each row is checked by level. If any tile is uneven, then it is taken out and sand is added, or, conversely, part of the sand cushion is removed.
- At the end, the seams are covered with sand or cement mortar from 3 parts of sand and 1 part of cement. Then the seams are rubbed with a special brush for evenness.
- The finished track is watered with a sand cleaning hose.

A bottomless shape is good to use in the following way:
After compaction and wetting of the sand cushion, a template lubricated with grease is installed on it.
The concrete mixture is prepared and poured into the formwork. It is leveled on top with a spatula and sprinkled with cement. On top, you can decorate with pebbles, shells, mosaics, pigments or various interesting prints.
After 20-30 minutes. the cement slurry will harden a little and will already keep its shape
Then the template is carefully removed and placed side by side. Then repeat the fill
After the slabs have solidified, grout the joints with sand or mortar.
Important! When laying paths, it is optimal if a slight slope (5 mm / 1 l.m.) is provided so that rainwater flows down the tiles
Preparing the base for the walkway
In order for the path to please the eye for a long time and not overgrow with grass, you should approach the preparatory work with special care and responsibility.
Further conditions and the performance of the following work largely depend on the preparation of the foundation for the track.
The first step is to remove the fertile layer 15-20 cm deep. If there is a natural slope of the relief, then it is worthwhile to provide for a water drain and make a drainage trench into which water will drain after rain.
So that the edges of the trench do not crumble, we recommend installing boards that will limit the crumbling of the soil. If you have provided for the installation of concrete curbs, then they should be installed on the compacted sand using a level, fixing the curbs with iron bars, driving them to a depth of at least 20-30 cm.
After installing the curbs, a layer should be poured onto the bottom of the trench gravel or crushed stone, mixed with sand or cement, 5-10 cm thick. The layer should be tamped thoroughly.
Garden path - where to start?
Before you start building a garden path, you need to take care of creating the tiles. In order to speed up this process and spend as little money as possible, you should heed our advice. For example, it is better not to purchase ready-made forms, but to accumulate them throughout the year, leaving, for example, used plastic food containers. If you plan to make large elements, you can knock down wooden frames with a bottom for this purpose. And if you need a round shape, you can trim old pots or basins.

Molds can be cast as follows:
1. Mix sand and cement, gradually adding liquid.
2. To make sure that the structure of the contents has reached the required condition, you need to draw the mixture on a trowel and make sure that it does not drip from it.
3. It is not necessary to fill in the form completely, one third must necessarily remain empty, but after you have made sure that there are no voids left, you can fill the form completely.
4. It is recommended to cover the molds that are filled with the mixture and leave them in a dark, draft-free place.
5. If the temperature in the room is above twenty degrees, then the next day, future tiles can be opened.
6. After two days, the tiles can be removed by folding them in even rows to dry completely.
7. In order for the mortar to gain the required strength, the tile must lie for at least three weeks.

So, the tile is ready, now you can start laying it. Best to split this process into successive stages.
Stage 1. First, you need to find a place for the path, it is desirable that the soil is already densely packed here and has not been dug for several years. There should be no possibility of water flooding in the selected area. The entire surface of the future track must be sprinkled with sand, at the rate of seven buckets per track half a meter wide and two meters long. At the edges of the path, you need to remove the weeds, and dig in the pegs, to which the string is then tied, which will determine the boundary of the path and its necessary slope.

Stage 2. After the sand is poured on the surface of the path, it must be poured with water through a watering can, and so much water must be poured so that the sand stops absorbing it. Now you can fill the future track with specially prepared screenings, which are also filled with water.Now you can start laying the tiles, precisely focusing on the stretched string. In order for the tile to become even and at the desired height, it needs to be tapped a little with a special rubber-based hammer.

Stage 3. After all the tiles have been laid out, the joints between them must be filled with sand by scattering it along the finished path. Do not step on the tiles until all joints are filled with sand. Now you need to spill the entire surface of the track again with water from the watering can.
How to make a garden path out of wood
This path will look organic in any garden, because wood is a natural material. And in order for it to last longer, it is worth pre-treating it with special protective impregnations.
Garden paths made of boards or beams
They can be laid directly on the ground, buried in full or half. The track will look more original if you put the parts a little unevenly or at a short distance from each other. The gaps can be covered with earth or gravel.
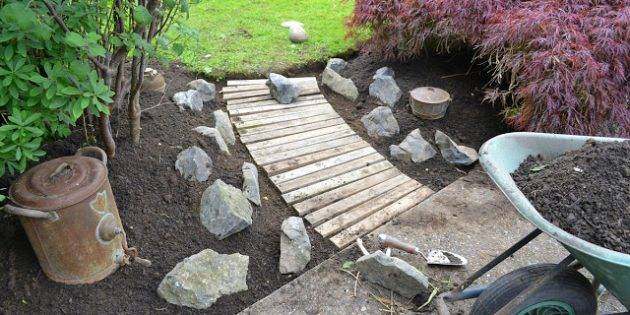
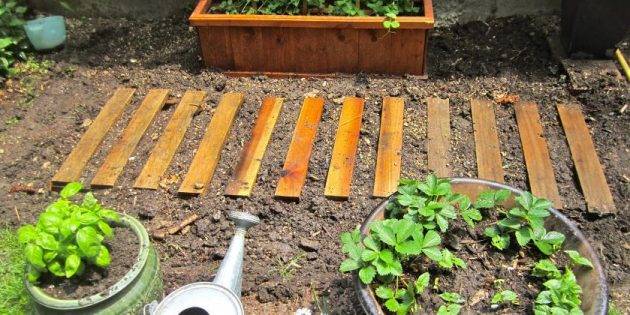
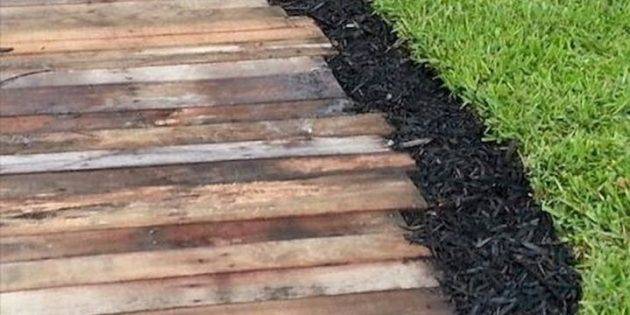

Such paths can become overgrown with grass. If this is not to your taste, it is better to do some preparatory work. This will also allow the track to keep its appearance longer.
Dig a trench along the length and width of the future path. Lay geotextiles at the bottom, then compactly tamp the sand, gravel and another layer of sand. Lay out the wooden parts on top. You can also fill in the gaps between them with sand or gravel.
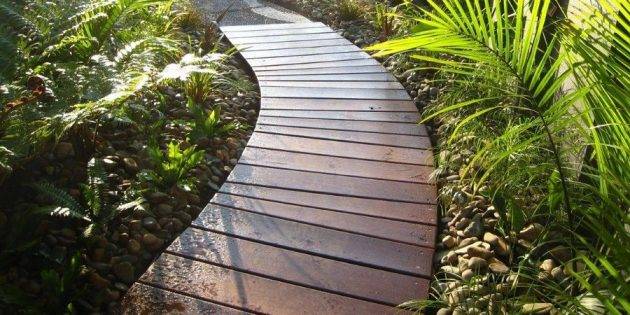
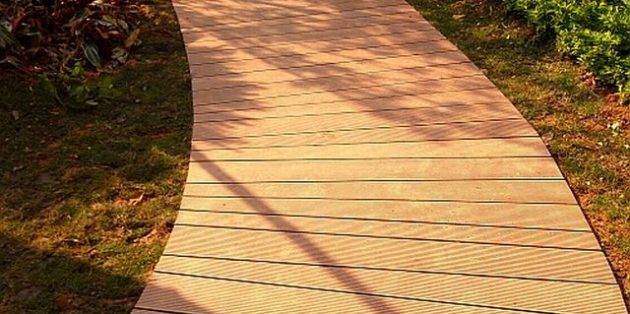

The planks can be attached to a prepared concrete block and timber base. In this case, the walkway will be raised above the ground, which will provide the tree with additional ventilation and extend its life. And such a track will look very solid.
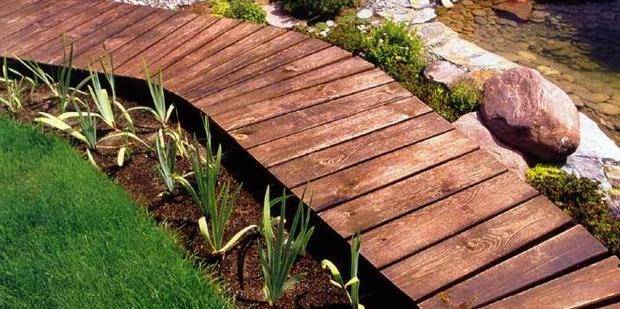


How to make such a flooring is described in this video:
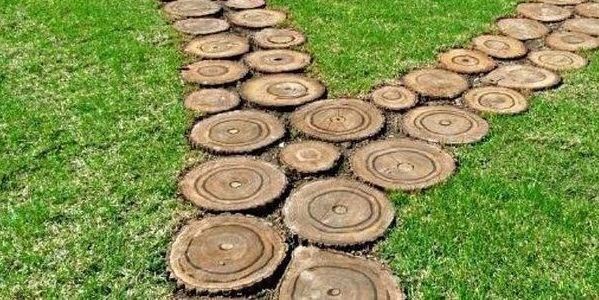
Garden paths from wooden saw cuts
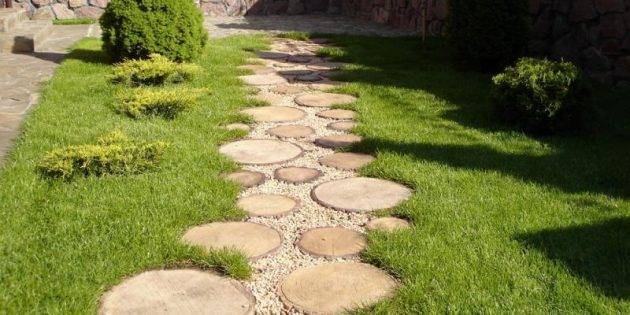
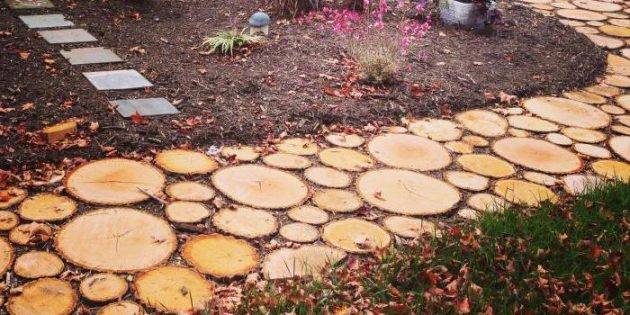
These tracks look very original. You need to dig a trench, lay it out with geotextiles and tamp sand on it. Then the cuts of the tree are laid, and the space between them is covered with gravel, sand or ordinary stones.


Garden paths made of wood chips
This is the easiest way to decorate a wooden walkway. Its plus is that it is almost impossible for weeds to germinate through it. However, the chips will have to be added periodically, because over time they will sag.
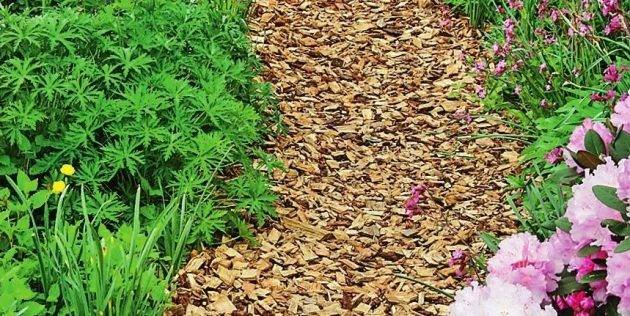


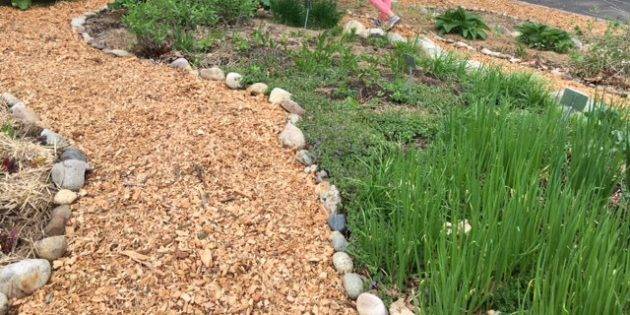
To make such a path, it is enough to dig a trench, tamp its bottom with sand, and pour wood waste on top. Before backfilling the chips, you can install a curb such as stone or brick.
Concrete path in the garden
Each method of laying a garden path has pros and cons. A concrete path is no exception. Thousands of individual home owners choose just this method of decorating the local area. Concrete is a durable material that can last for more than a dozen years if properly used. The design is easy enough to create without the help of professionals. And besides, a concrete path is a great way to save money, the material is relatively inexpensive. Concrete can withstand significant mechanical loads without any problems, and installation does not take much time. But, as elsewhere, there are also disadvantages here. In the off-season, the material often cracks. This is due to the movement of the ground in rainy weather. It will hardly be possible to change the location of the track in the future, the construction is capital. Therefore, it is better to take your time and think carefully about the direction of the paths and their width.
The process of laying the track with your own hands from concrete must begin with the installation of the formwork. It is better to use boards for this. If you plan to add some bends to the structure, use any plastic materials. Plywood is a great option
Please note that in any case, concrete must be poured in parts.This is done to compensate for expansion or contraction of the material from temperature changes.
Therefore, there is no point in making continuous formwork for the entire site. You can lay it partially, thus significantly saving materials for the construction. Professionals recommend forming a pillow from a mixture of compacted rubble and sand. It makes sense to think about waterproofing. For these purposes, geotextiles or roofing felt will serve. The next step is pouring concrete. The mortar is mixed from cement and sand in a ratio of 1 to 3. The preferred thickness of concrete should be at least 5 cm. The resulting layer is leveled with a spatula. After the appearance of moisture on the surface, all surface irregularities can be removed and the concrete is wetted with water.

Concrete walkway is the cheapest and easiest option

You can create such a track without resorting to the help of professionals.

Concrete is a very durable material, and can serve for more than a dozen years.
Concrete walkways: strengths and weaknesses
The choice in favor of concrete paths poured with their own hands on the territory of the garden should be considered through the prism of the advantages and disadvantages of the main material used for their construction. It is the characteristics of the concrete mixture that determine how the track will manifest itself during operation. For example, its strengths include the following factors:
- low capital costs for the purchase of raw materials and tools for construction;
- durability of the built garden path;
- the possibility of reinforcing concrete with metal elements to achieve greater rigidity and stability of the track;
- the prevalence and availability of materials for the personal implementation of the project - all the necessary purchases can be made in any building supermarket;
- the possibility of safe construction of paths in areas with a high level of groundwater, since concrete poured to a sufficient depth is optimal for use on problem soils;
- unlimited possibilities for design: the owner of the site can fill in the garden paths of any shape and width, guided by his own taste or inspired by the projects of famous landscape architects presented on thematic construction sites;
- the use of special additives makes it possible to improve the properties of concrete - to increase its resistance to moisture, frost, temperature drops and premature destruction due to high loads.

The disadvantages that a constructed concrete garden path will have should also not be overlooked. These include the following factors:
- the risk of cracks appearing on the trail, provoked by soil movement or flooding as a result of floods and rains;
- the construction of capital paths from dry concrete does not provide for a simple dismantling process, therefore, if the need arises, the owner of the hacienda will not be able to move them from place to place or remove them without the use of special equipment;
- for pouring concrete, certain weather conditions are required - no rain, positive air temperature, and the mixture must also dry well before the path is ready for use;
- the process of mixing the components of the mixture - concrete, sand, gravel and additives - is very laborious, it will be difficult to carry out it with a shovel, therefore the construction project may provide for the use of a special machine - a concrete mixer;
- in order to achieve the ideal look and high strength characteristics of ready-made concrete tracks in the country, in the process of their construction, the installation of formwork is required.For this, the individual developer will need to allocate additional time and money to purchase formwork boards.
Where can you buy a mold for garden paths
This question is often asked by those who want to make a garden path on their own. The easiest answer is to buy. As a rule, forms are almost always on sale in construction markets or in construction markets in large and small cities.
For example, in Samara, uniforms can be purchased at the Samodelkin construction market, in the Leroy Merlin hypermarket of construction and finishing materials, at the Intekhplast-Samara wholesale and retail company, in the Stroyformat chain of finishing materials stores, in many other large and small shops selling construction and finishing materials or household goods. Moreover, most of the trading organizations can have a preliminary order, and some of them, for example, Elit-Stroy LLC, arrange delivery.
In Rostov-on-Don, forms can be purchased at StroyMarket on the street. Dumenko, or in the construction markets "Leader", "Atlant", "Donskoy". Also in Rostov there is a hypermarket of building and finishing materials Leroy Merlin, however, in the store's catalog this item is called "formwork", which must be taken into account if the goods are ordered by phone or via the Internet.
In Irkutsk there is a network building market "Stroygrad", which offers forms for garden paths in an assortment. Also, the form can be purchased at LLC Trading House "StroyMarket" or at LLC Trading Firm "Alliance". These are the largest sellers of building and finishing materials, but you can also turn to smaller sellers.
To buy a form for a garden path in Pyatigorsk, the easiest way is to go to Ermolova Street. It is in the area of this street, closer to the hippodrome, and a little further along the Cherkesskoye and Kislovodskoye highways, where large stores are concentrated selling building and finishing materials and goods for a garden and a summer residence - the Green City Garden Center, the Sadovod regional center, Trading House "Russian Field", other shopping centers of a similar direction.
The cost of a mold for casting depends on several factors: material, size and ambition of the manufacturer and seller. On average, it ranges from 650 rubles apiece to 1,300. On sales you can buy what you want at a lower price, often complete with related materials or accessories.
Forms for tracks can also be purchased via the Internet, in this case, you can really save a lot of time and money, but the latter only if you receive an order not by mail, but at a specialized point of issue of goods.
Forms for the track: how to make them yourself?
Special forms for the manufacture of garden paths today can be found in retail or bought over the Internet. Despite the low cost, many make them on their own, especially since it is not difficult to make such forms.
For the manufacture of the form, a wide variety of materials at hand are used - wooden bars, hoops removed from barrels, metal sheets and more. Some craftsmen even make them from the right size non-stick baking tins.
One of the most common options for making a mold frame is wooden blocks. To create a framing frame, it is convenient to use bars with a section of 50 by 50 mm. After fixing the joints of the bars inside the frame, jumpers are installed. For them, it is better to take bars with a cross section of 30 by 30 mm. The internal jumpers themselves are arranged chaotically.
 Any shape can be adapted to make the track
Those who prefer the irregular shape of the tiles for the garden path can use metal sheets or hoops taken from an old wooden barrel to make the frame. If this option is chosen and it is decided to make a form from a flexible material, then the iron sheet must be cut into strips, giving them the preferred shape, securing the joints by welding.In the case of the hoops removed from the barrel, they are first straightened and then bent, giving the desired shape.
Creating a track with your own hands using a form that was also made independently is an exciting activity that allows you to realize your fantasies. In addition, the cost of such a track will be minimal, which is also important when decorating your suburban area.
Simple do-it-yourself concrete garden path
A do-it-yourself concrete path is a great option for a country house or a personal plot. Craftsmen are very fond of concrete for the mass of its indisputable advantages, which include durability and an affordable price. In addition, concrete gives a lot of room for imagination - anything can be made of this material, even an imitation of natural stone or a colorful mosaic.
A garden path made of concrete with your own hands can be made in various variations, and first we will tell you how to fill a simple concrete path without any frills and complex shapes. Such paths are very popular in summer cottages, because you can run along them and carry a garden wheelbarrow. But complex paths with stones and mosaics can no longer boast of such strength.
The author of this master class made a simple garden path from concrete with his own hands quickly and easily, but not without some subtleties of the workflow.
- First you need to prepare a place for a garden path - determine where the path will pass, clear this place of debris and obstructing obstacles - large stones, stumps and bushes.
- Then we prepare the base for the garden path - we remove the sod with a shovel to a depth of about 15 centimeters.
- Formwork needs to be made along the entire length of the track - the author used boards 150 * 20.
- Next, fill our base with a sand-gravel mixture, which we thoroughly tamp and spill with water.
- After all the manipulations, you can start pouring concrete. The proportions of the solution depend on what functions the track will have.
- When the concrete is poured, it must be moistened to avoid cracks. The author advises to water the resulting path from a watering can for a couple of days so that the concrete dries more evenly.
- The “curing” time of the concrete depends on the weather conditions, the density of the mortar and the thickness of the path. After drying, the formwork can be removed.
So, with the help of simple materials and a day of free time, you can make a simple concrete walkway with your own hands.
